Downloaden Sie, um offline zu lesen

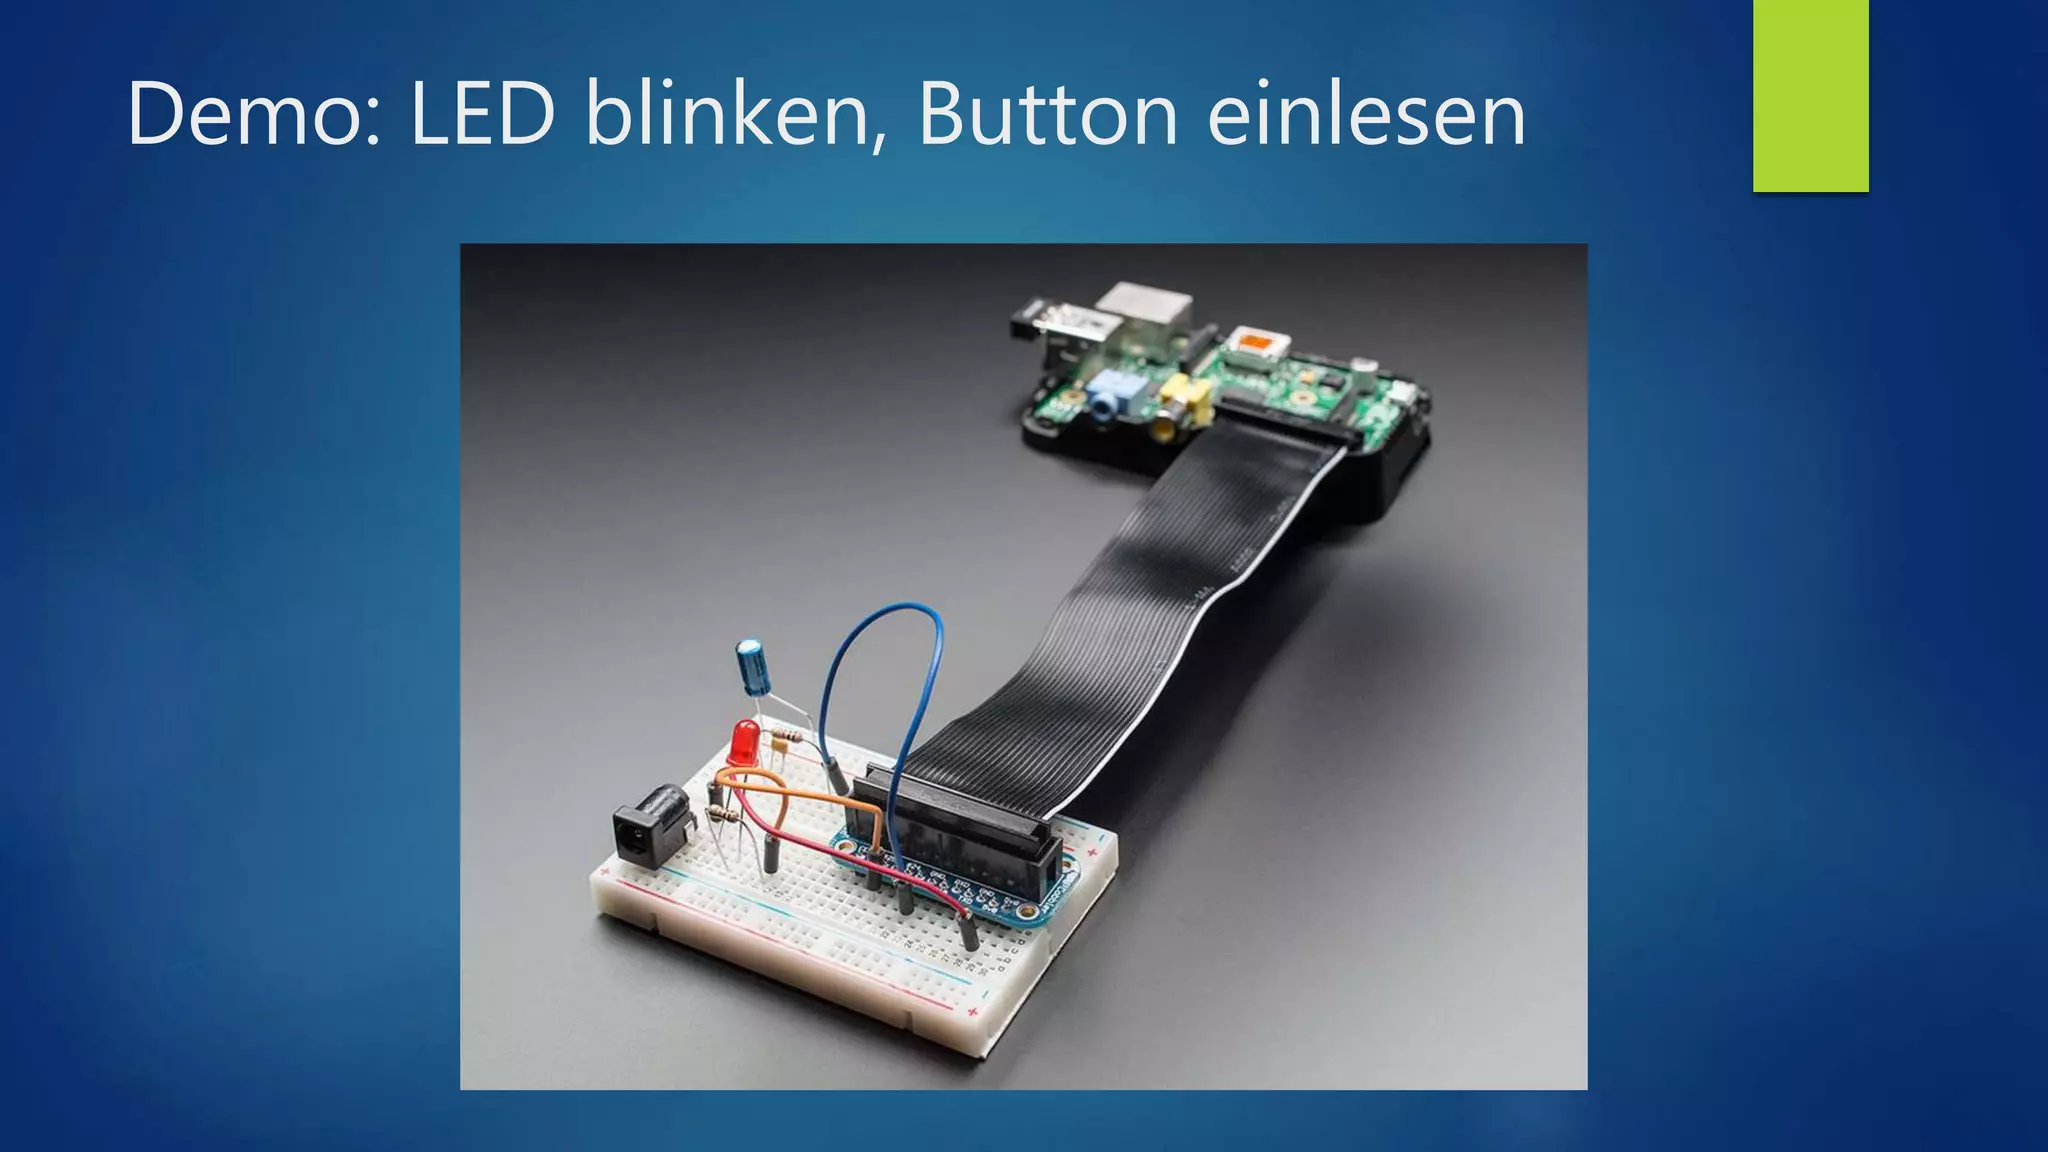
![GPIO-Pins nutzen
using Windows.Devices.Gpio;
[…]
// Hole Referenz auf GPIO Controller Objekt
var gpio = GpioController.GetDefault();
// Prüfe ob GPIO Controller vorhanden ist
if (gpio != null)
{
// Verbindung zum GPIO-Pin Nr. 5 öffnen
var pin = gpio.OpenPin(5);
// GPIO-Pin als Ausgabe-Pin konfigurieren
pin.SetDriveMode(GpioPinDriveMode.Output);
// GPIO Pin auf Wert «High» setzen
pin.Write(GpioPinValue.High);
}](https://image.slidesharecdn.com/windows10iotcorednugpb-161017210807/75/Windows-10-IoT-Core-12-2048.jpg)
![I2C-Bus nutzen
using Windows.Devices.I2c;
[…]
// Hole Referenz auf I2C Controller Objekt
var controller = await I2cController.GetDefaultAsync();
// Prüfe ob I2C Controller vorhanden ist
if (controller != null)
{
// Verbindung zum Sensor mit der Adresse 0x77 herstellen
var connectionSettings = new I2cConnectionSettings(0x77);
device = controller.GetDevice(connectionSettings);
// Wert aus Sensor-Register mit Adresse 0xAA auslesen
var registerData = new byte[2];
device.WriteRead(new byte[] { 0xAA }, registerData);
}](https://image.slidesharecdn.com/windows10iotcorednugpb-161017210807/75/Windows-10-IoT-Core-14-2048.jpg)
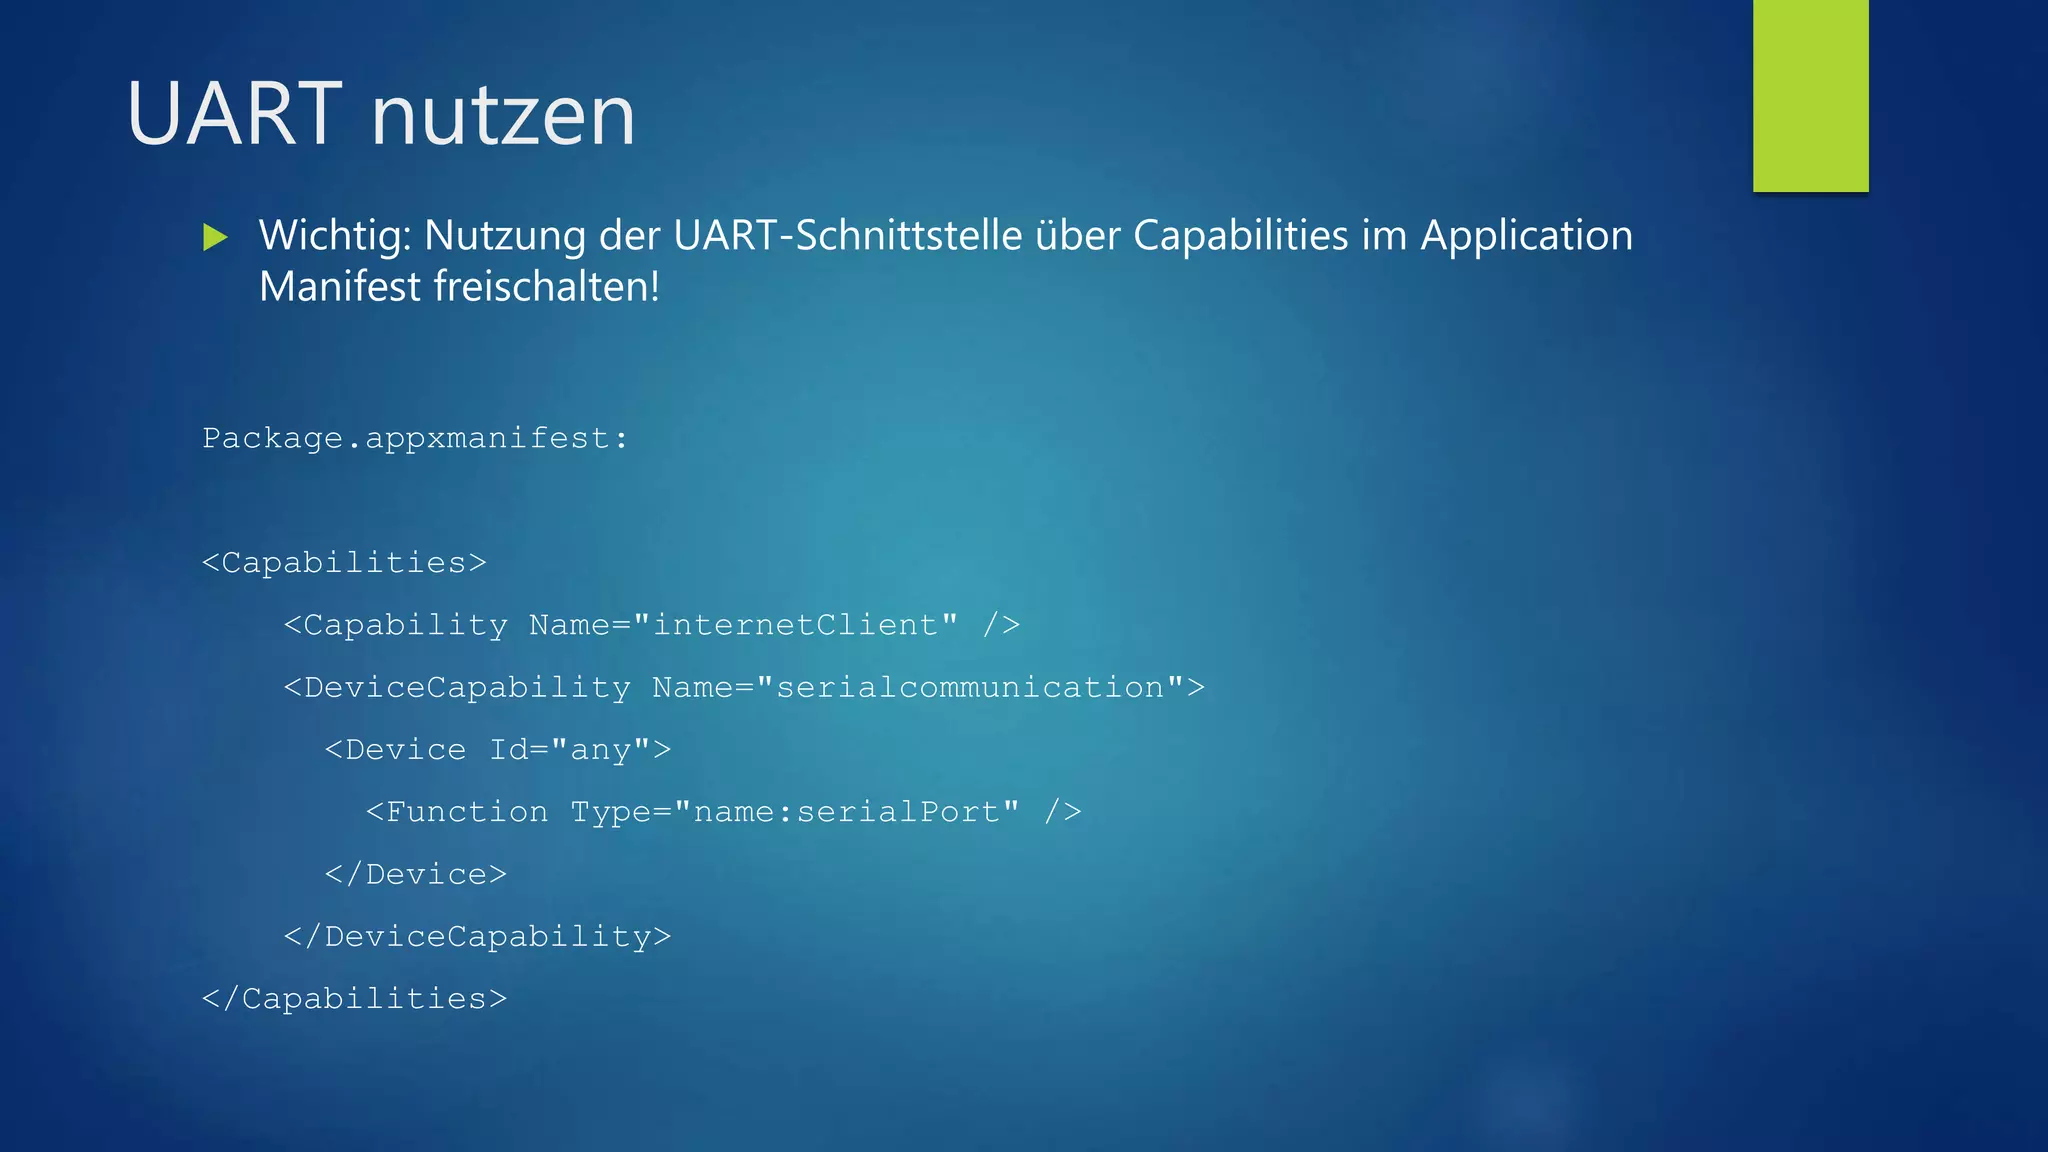
![UART nutzen
using Windows.Devices.SerialCommunication;
[…]
// Hole Referenz auf UART Objekt
var aqs = SerialDevice.GetDeviceSelector();
var dis = await DeviceInformation.FindAllAsync(aqs);
device = await SerialDevice.FromIdAsync(dis[0].Id);
// Prüfe ob UART Objekt vorhanden ist
if (device != null)
{
// UART Baud-Rate setzen
device.BaudRate = 9600;
// Wert über InputStream auslesen
var dataReader = new DataReader(device.InputStream);
var bytesRead = await dataReader.LoadAsync(1024);
var data = dataReader.ReadString(bytesRead);
}](https://image.slidesharecdn.com/windows10iotcorednugpb-161017210807/75/Windows-10-IoT-Core-16-2048.jpg)
![Nachrichten an IoT Hub senden
using Microsoft.Azure.Devices.Client;
[…]
var deviceClient =
DeviceClient.CreateFromConnectionString(azureIotHubConnectionString);
[…]
var message = new Message(Encoding.UTF8.GetBytes(data));
await deviceClient.SendEventAsync(message);](https://image.slidesharecdn.com/windows10iotcorednugpb-161017210807/75/Windows-10-IoT-Core-27-2048.jpg)
![Nachrichten vom IoT Hub empfangen
using Microsoft.ServiceBus.Messaging;
[…]
var eventHubClient = EventHubClient.CreateFromConnectionString(
connectionString,
"messages/events"
);
[…]
var eventData = await eventHubReceiver.ReceiveAsync();
var data = Encoding.UTF8.GetString(eventData.GetBytes());](https://image.slidesharecdn.com/windows10iotcorednugpb-161017210807/75/Windows-10-IoT-Core-30-2048.jpg)
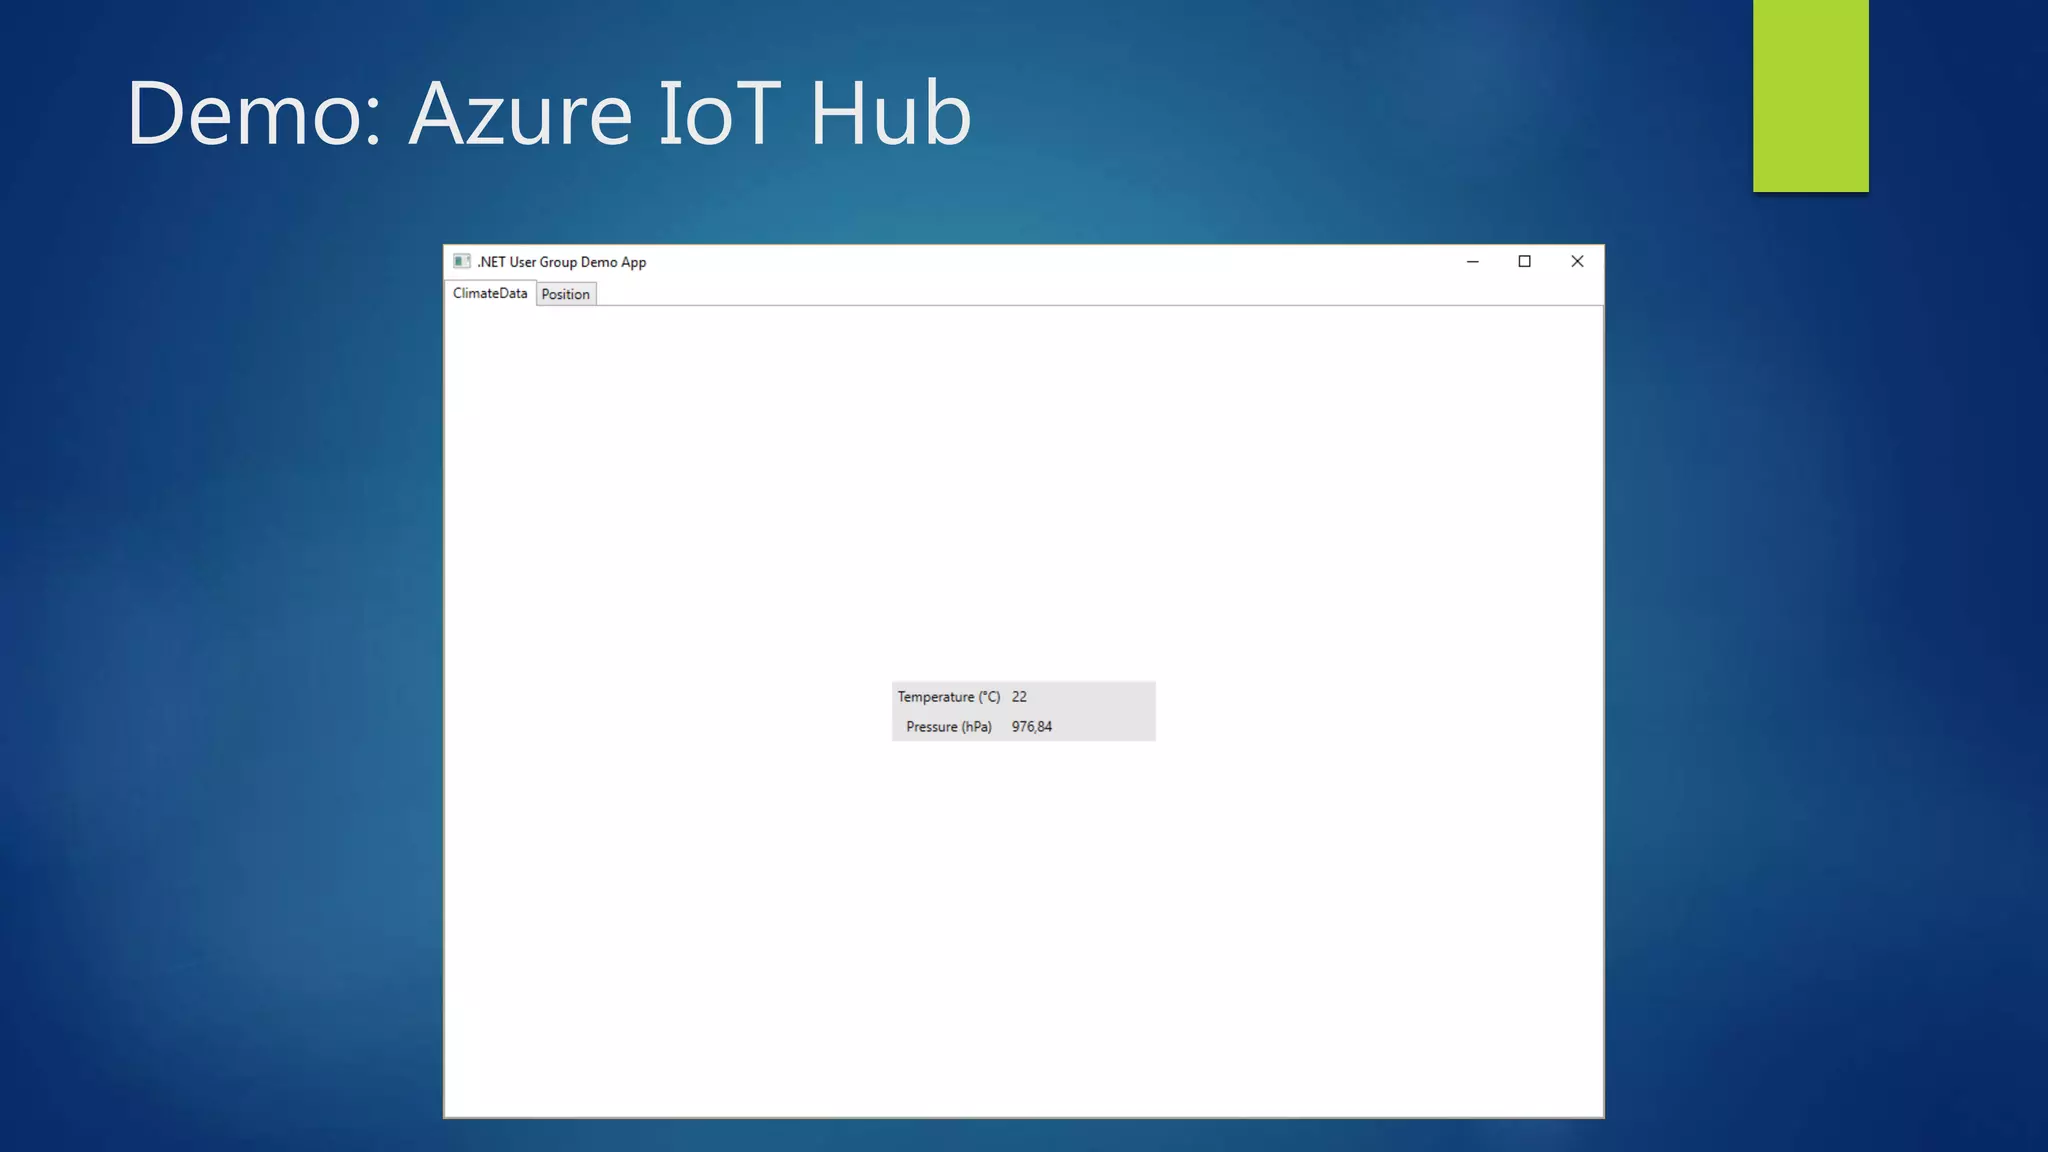
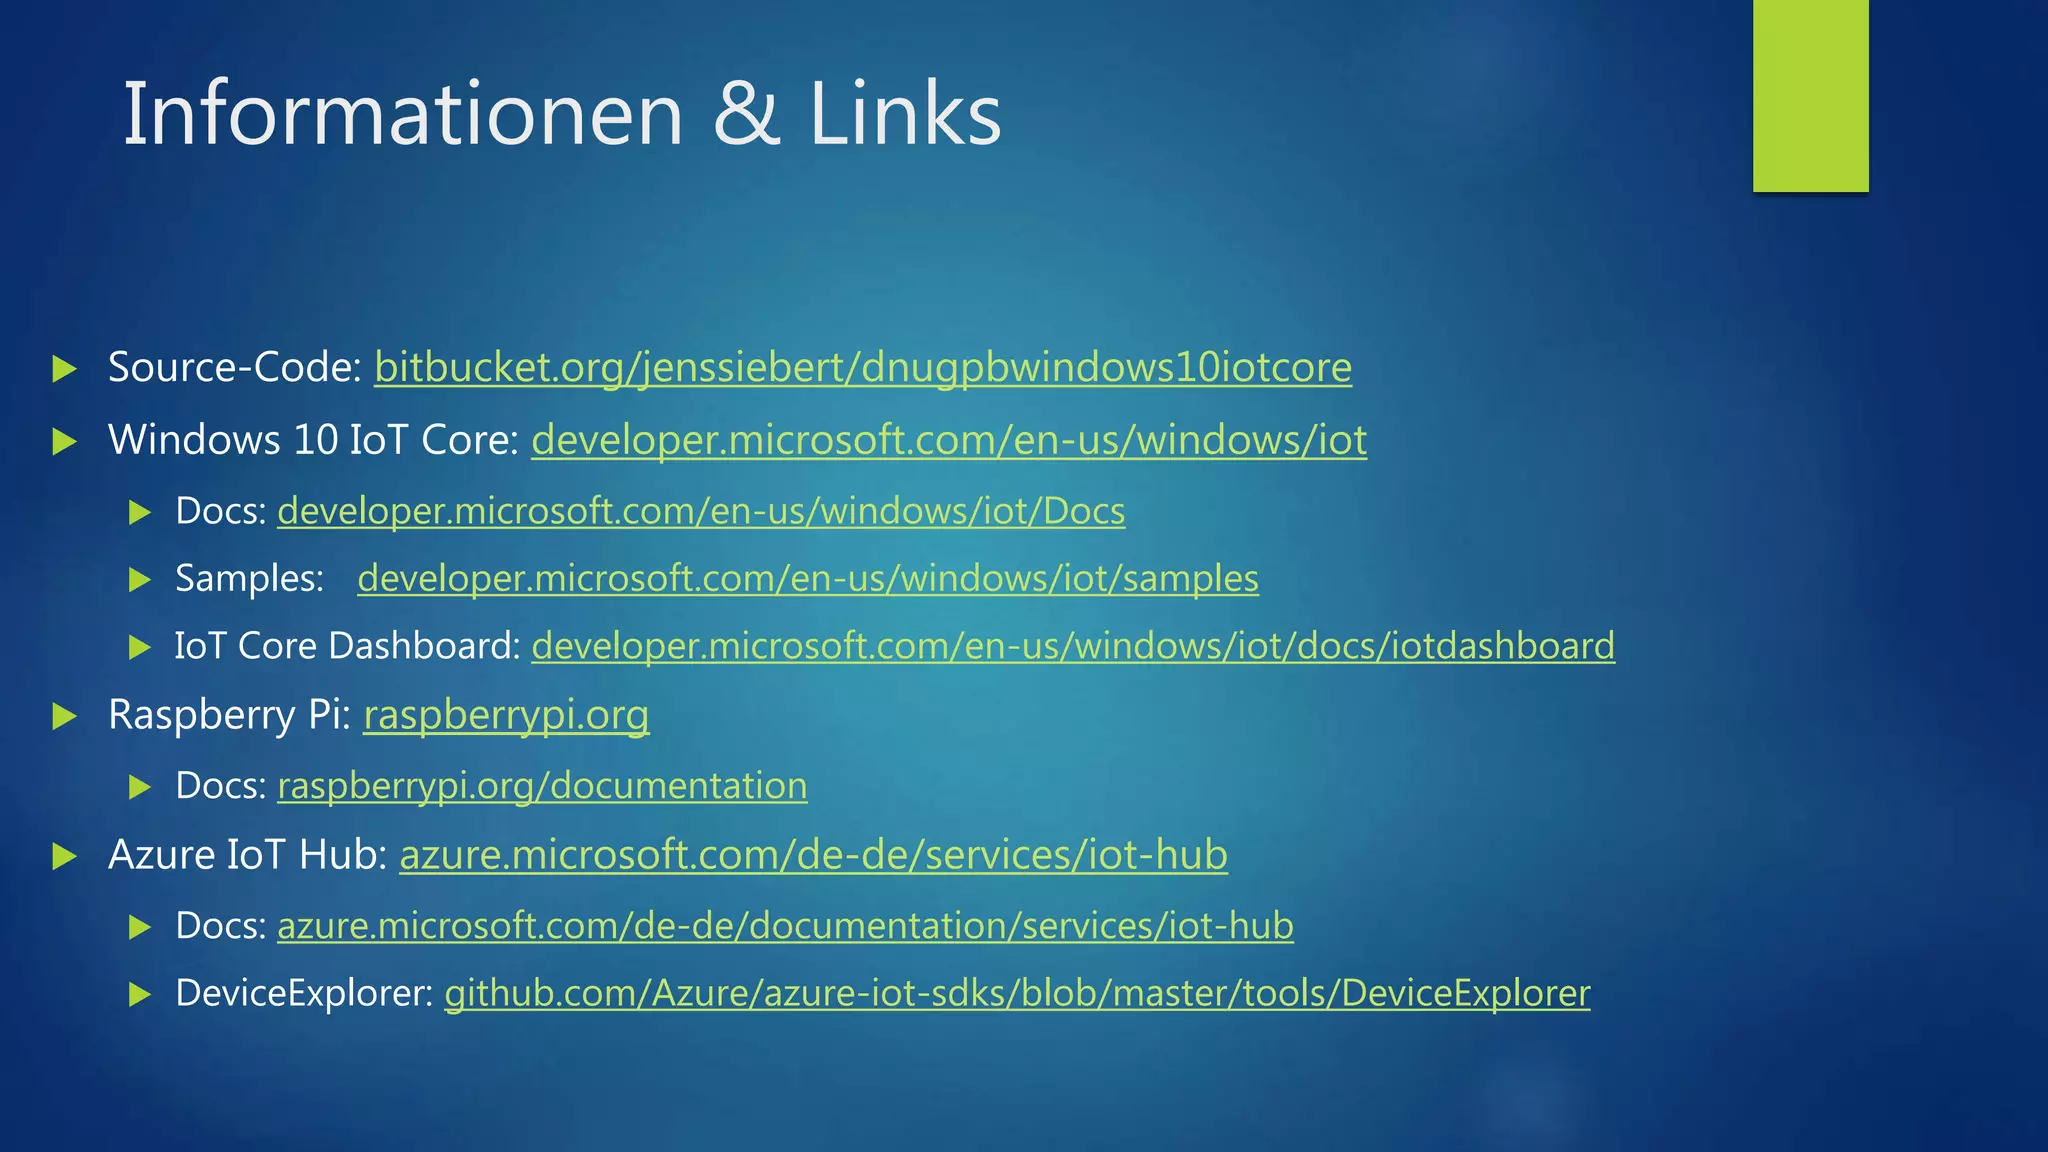


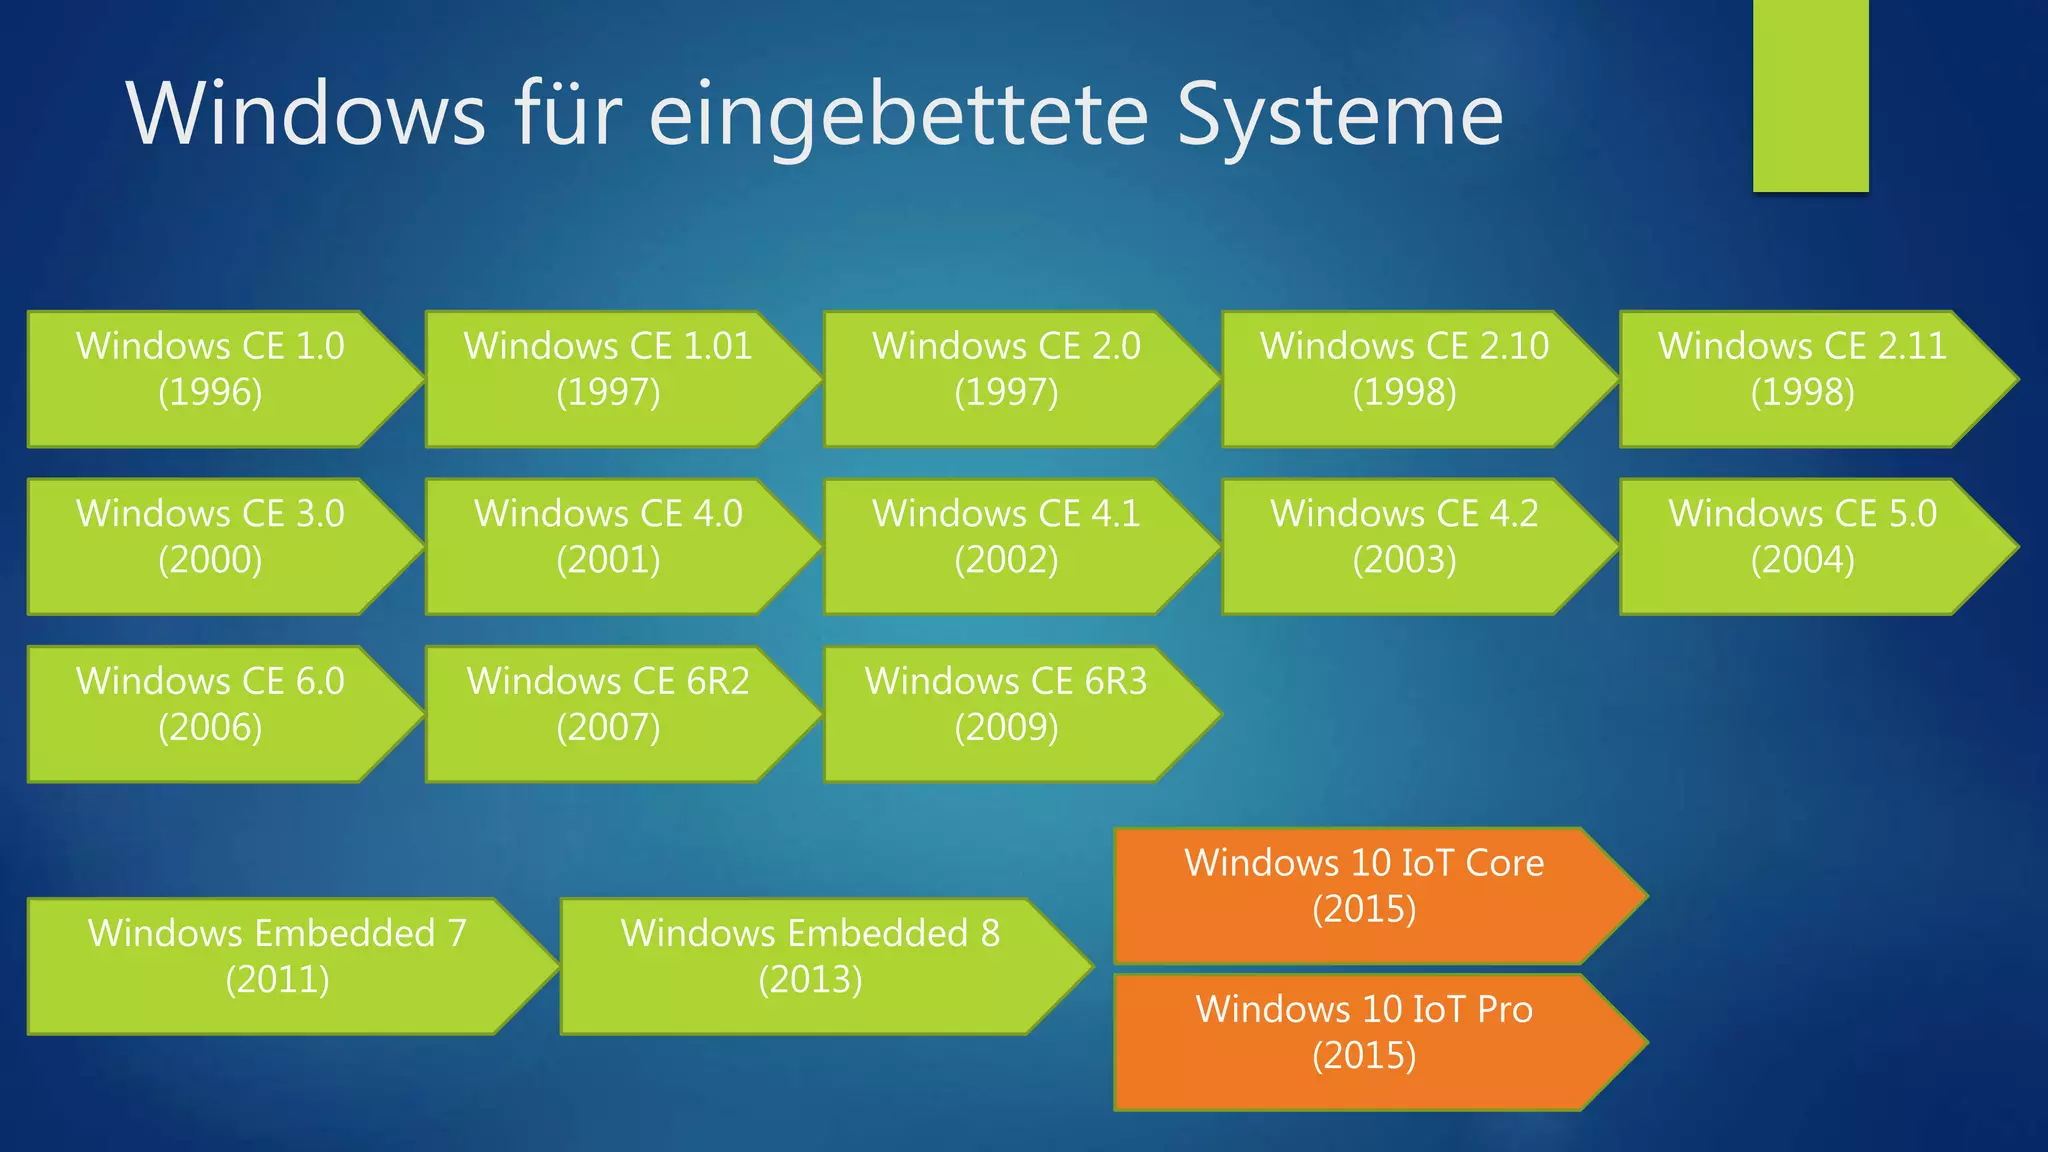
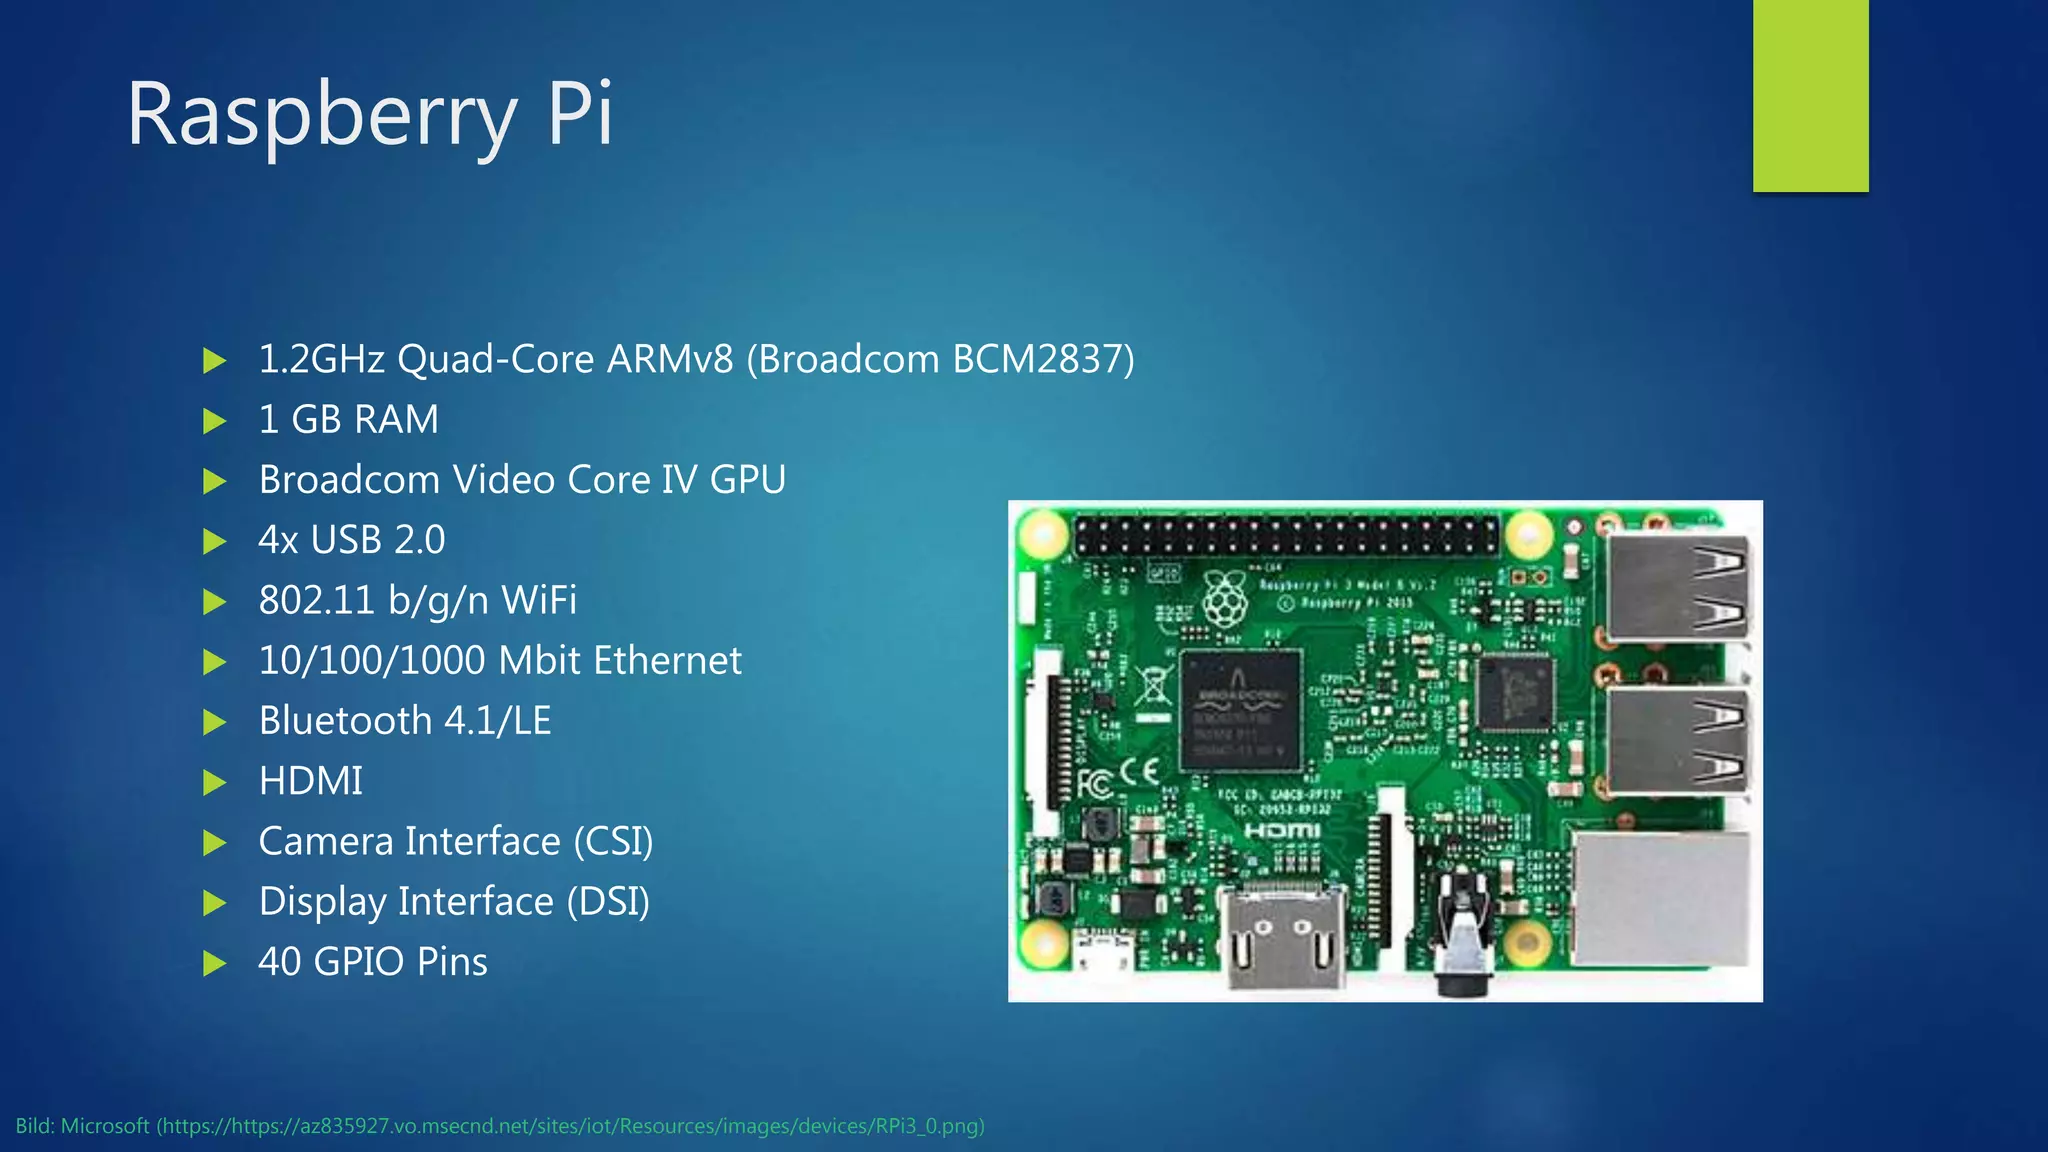
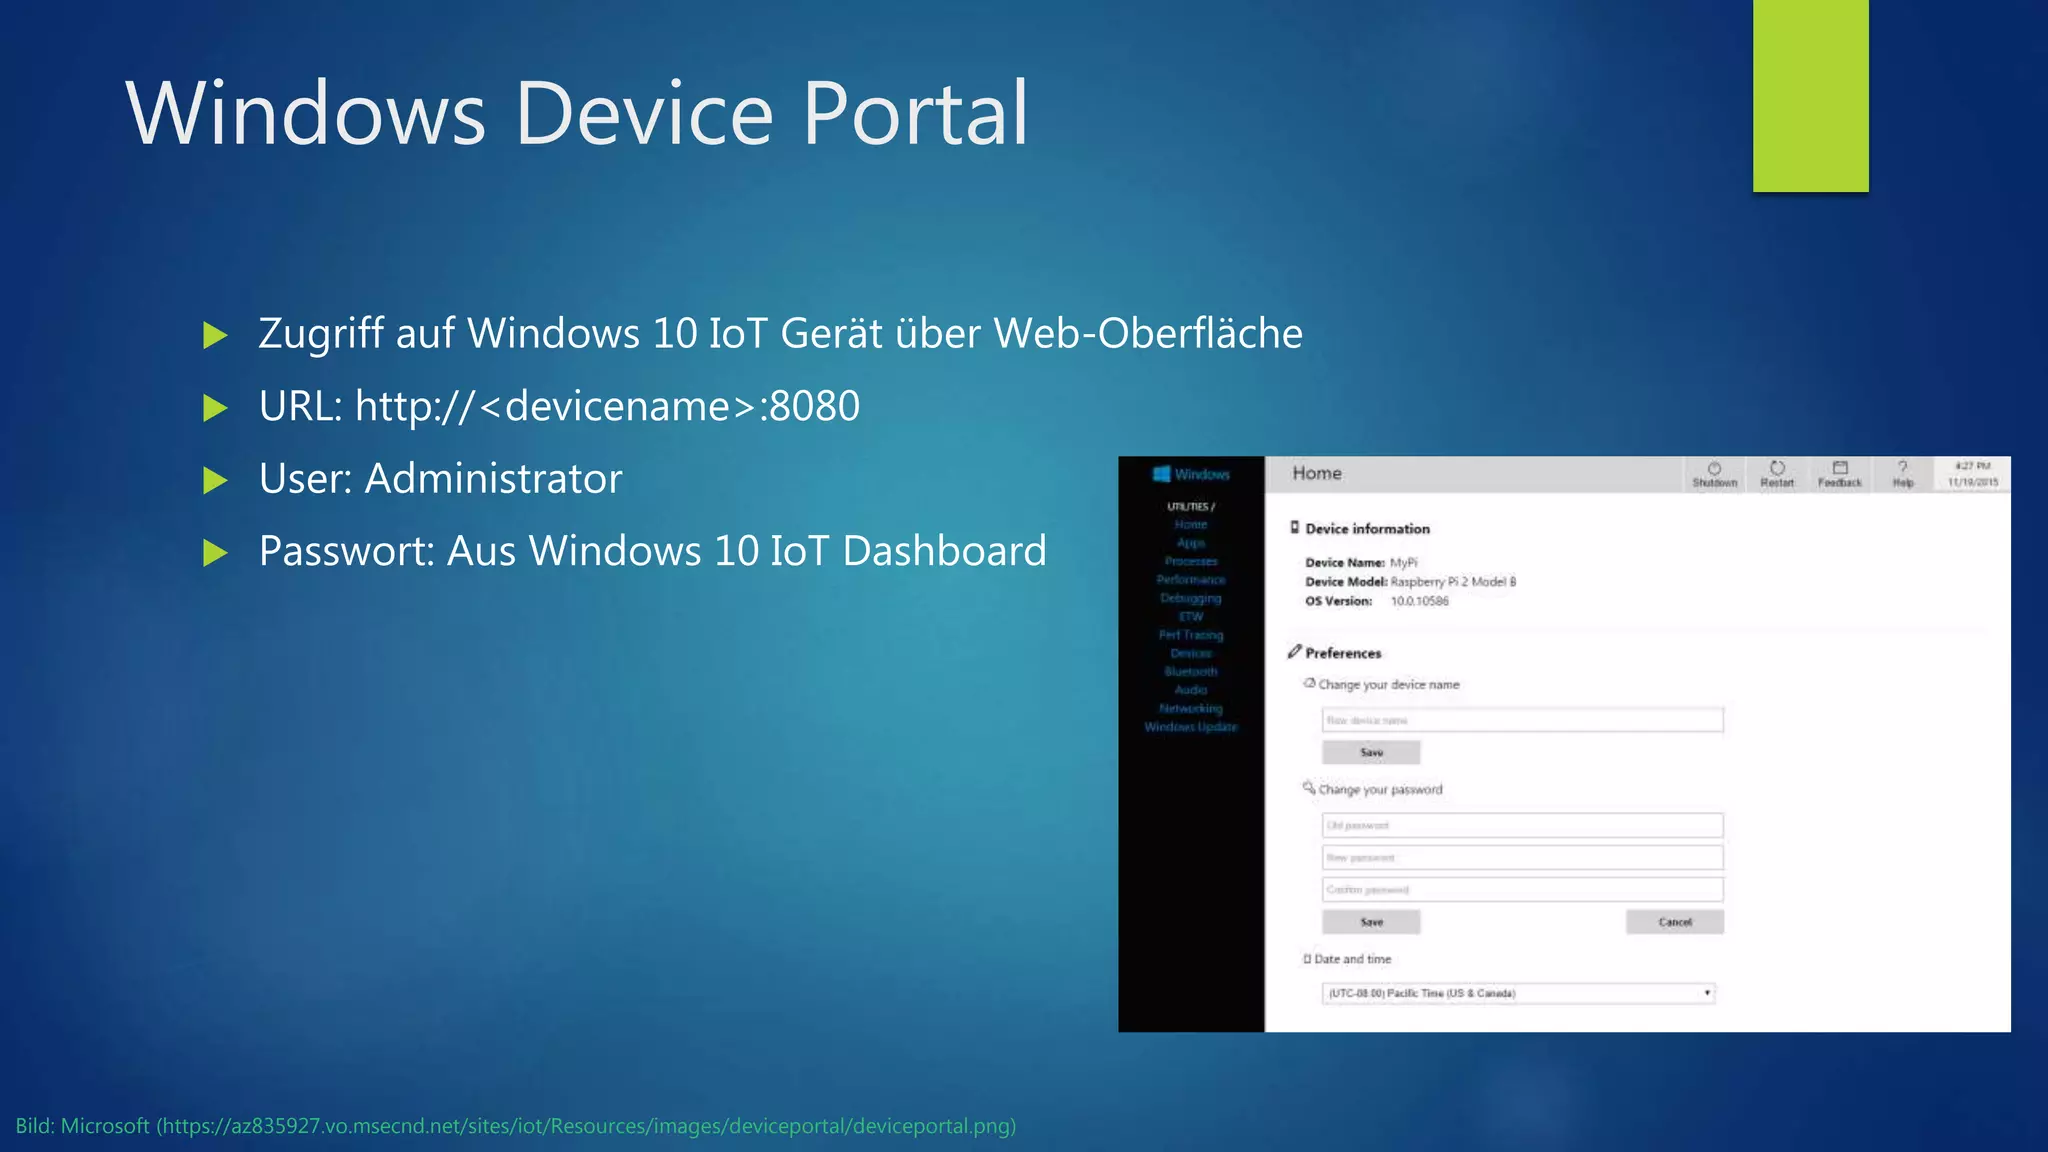
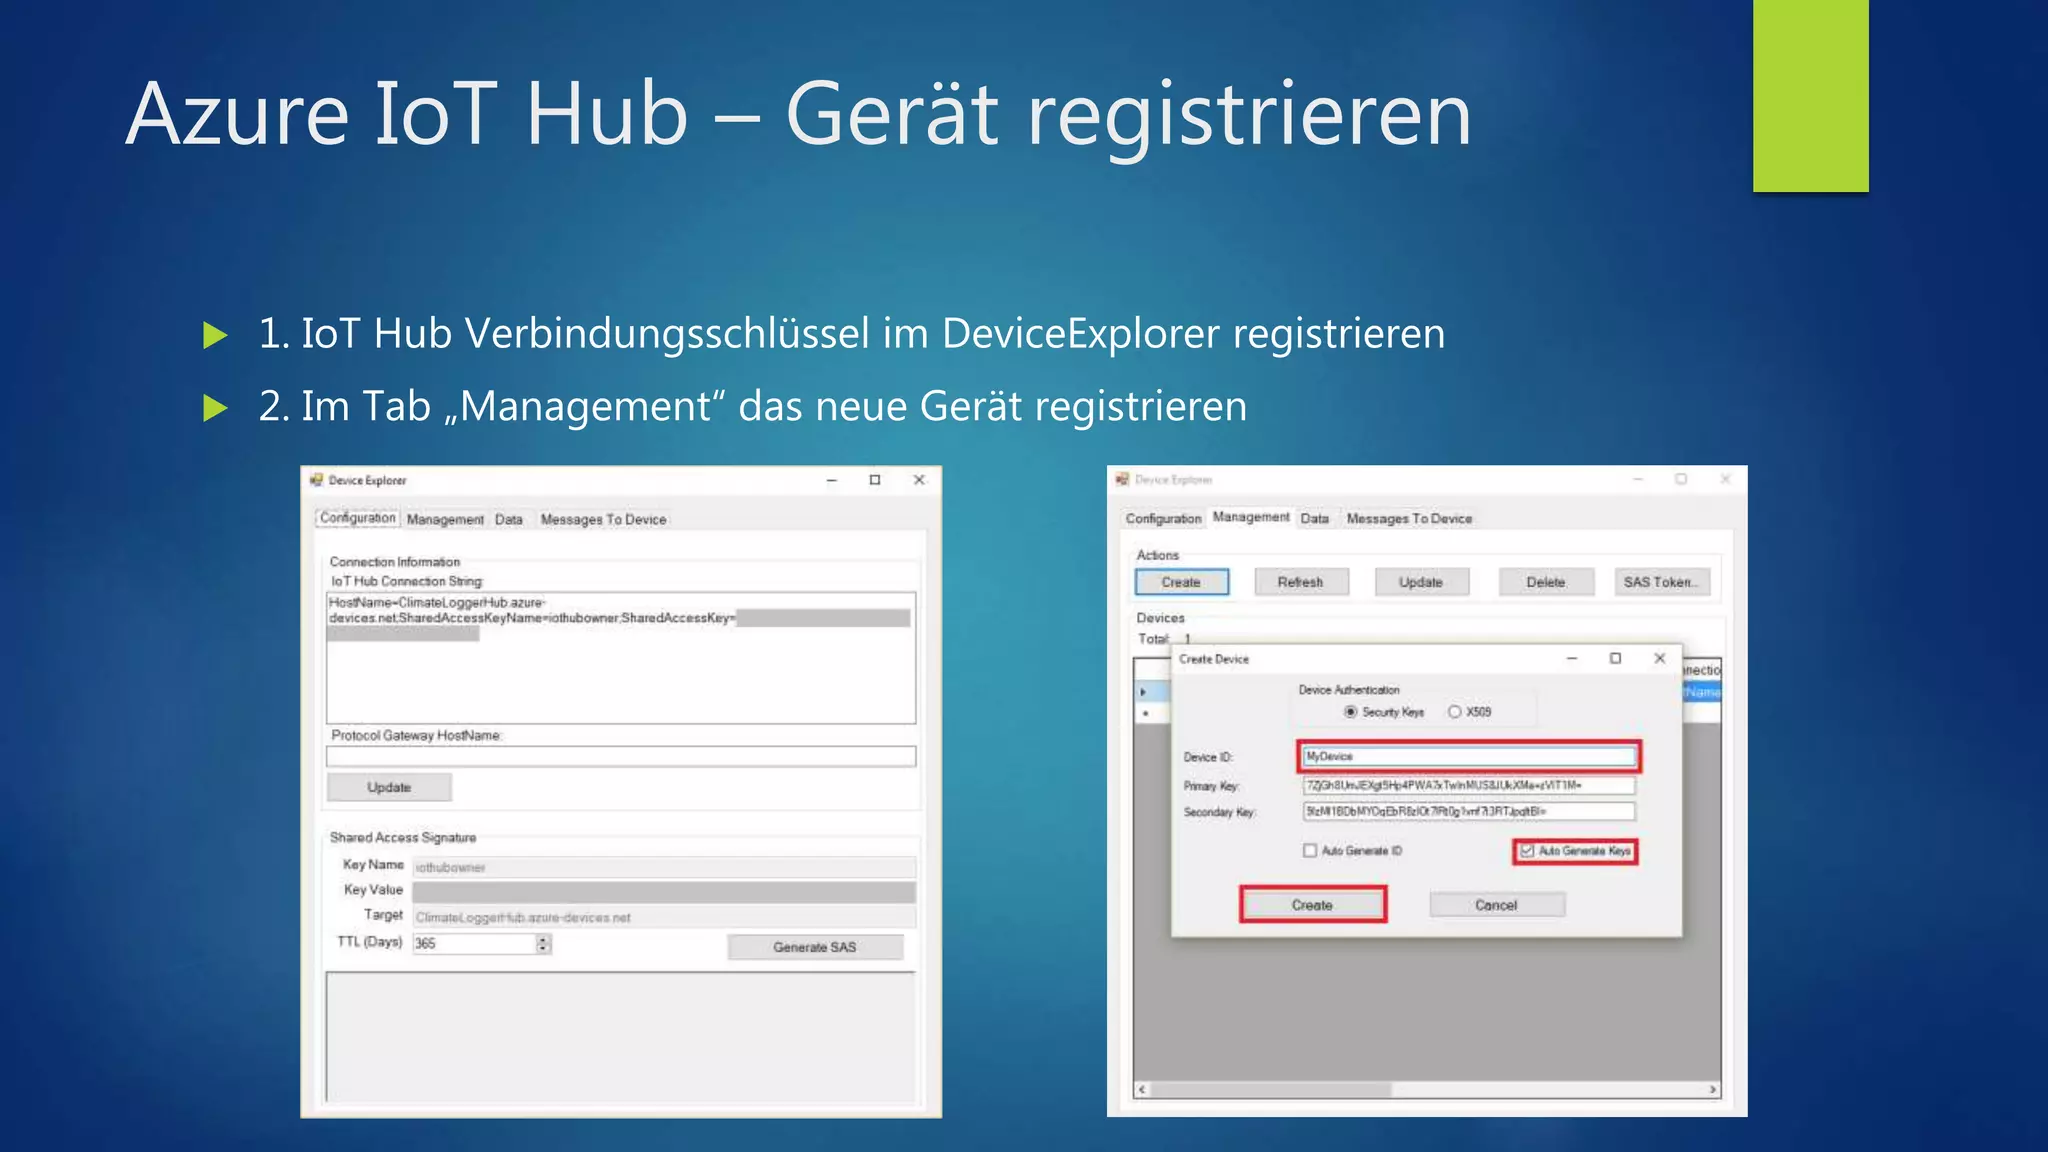
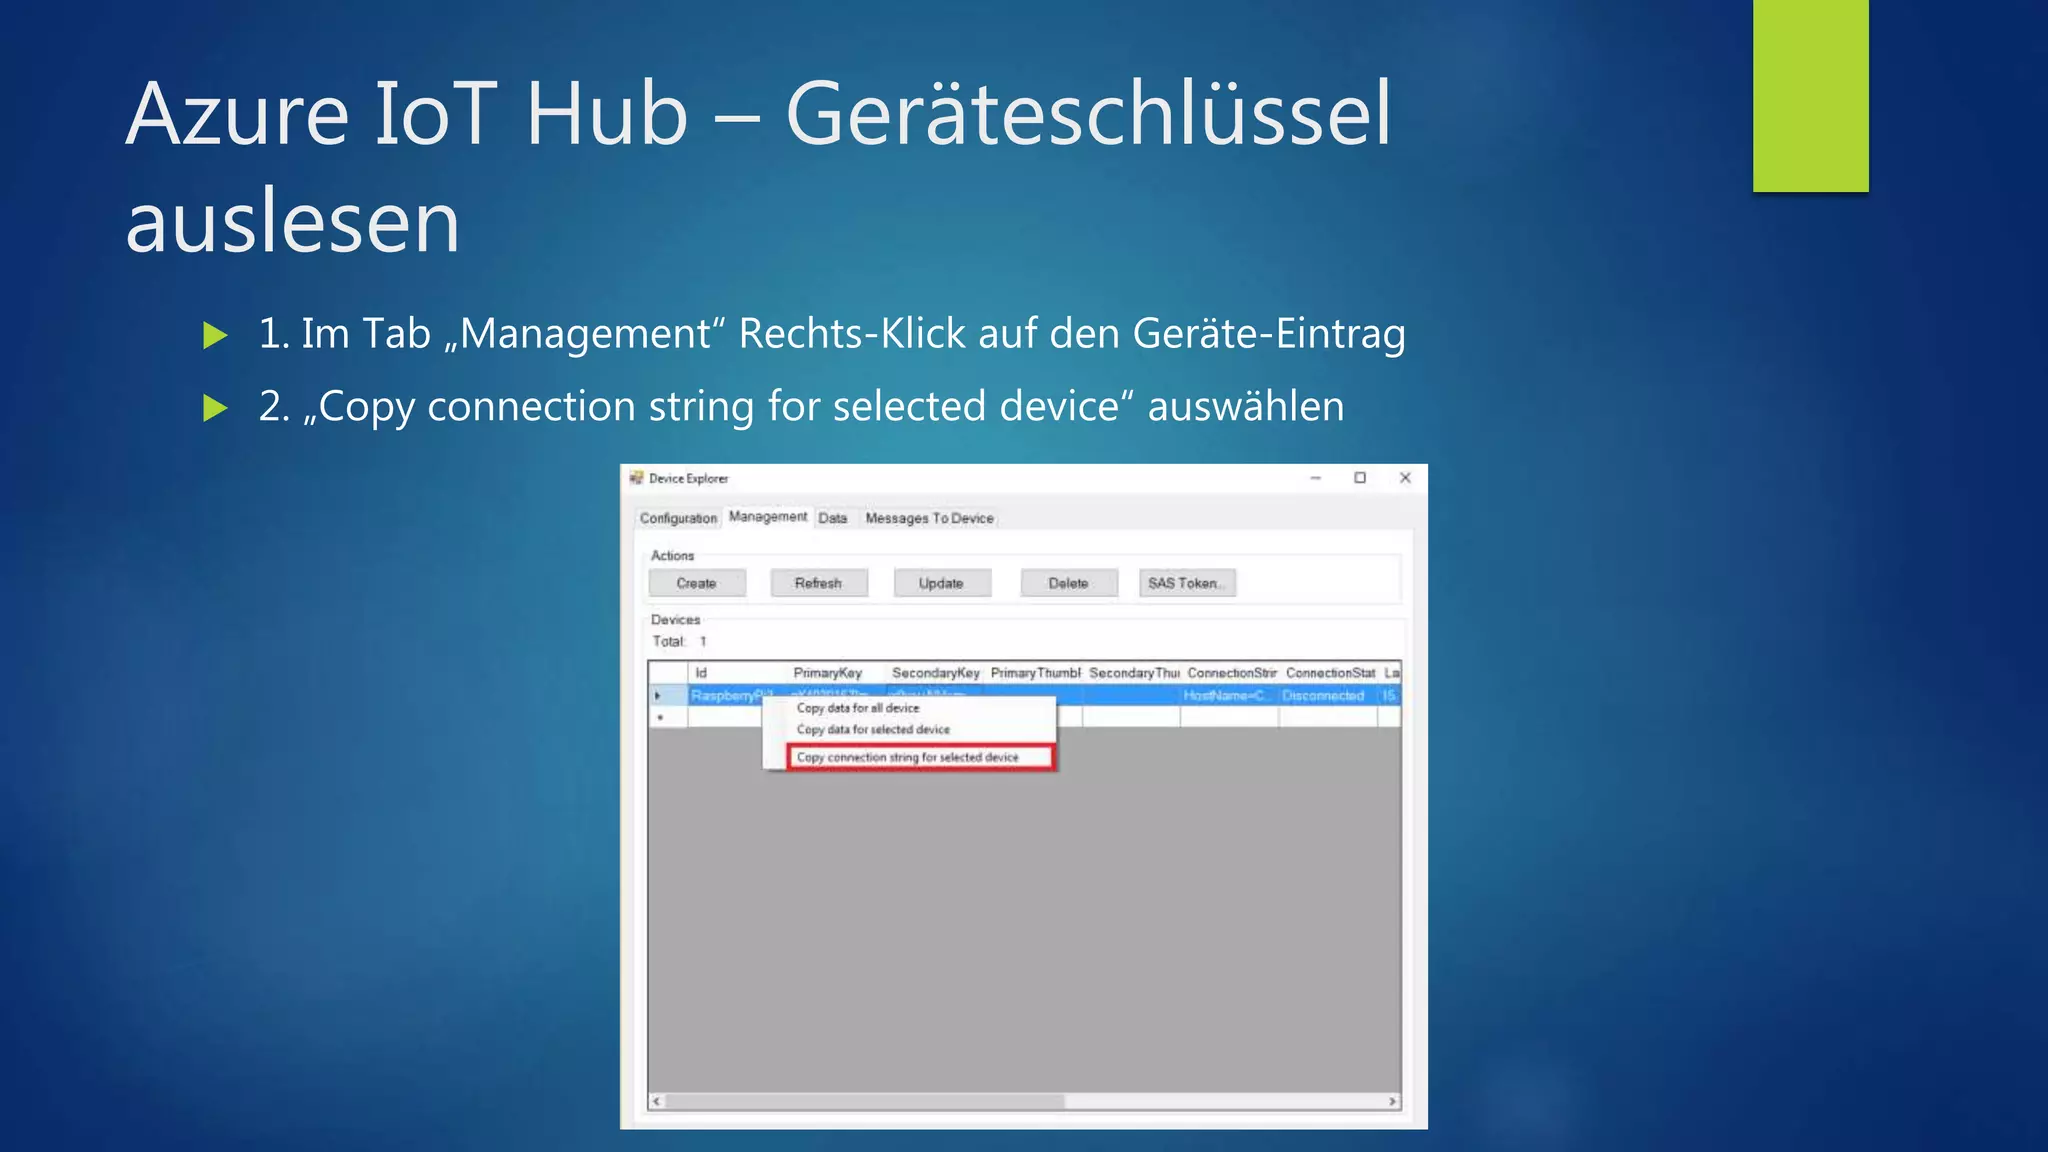
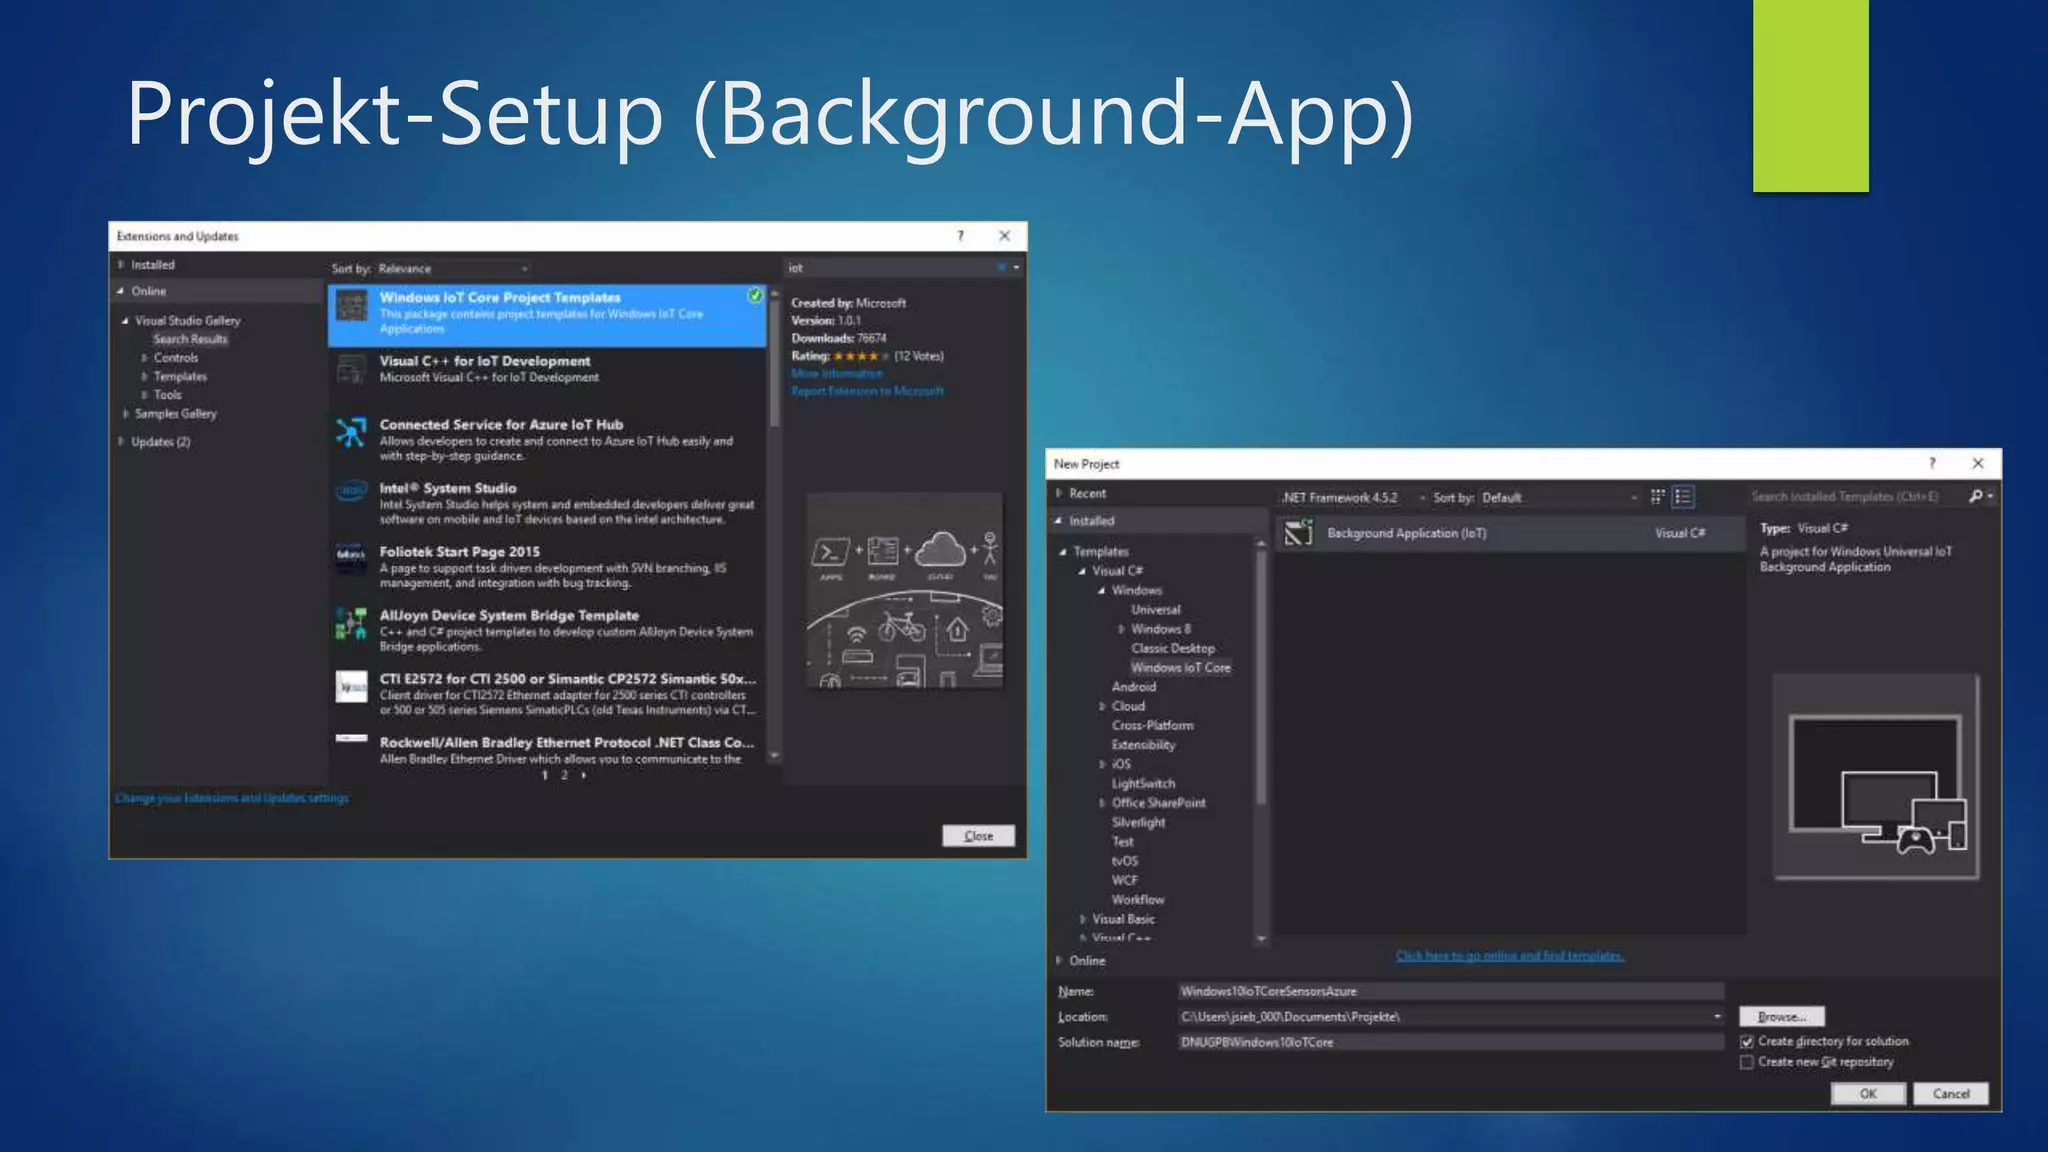
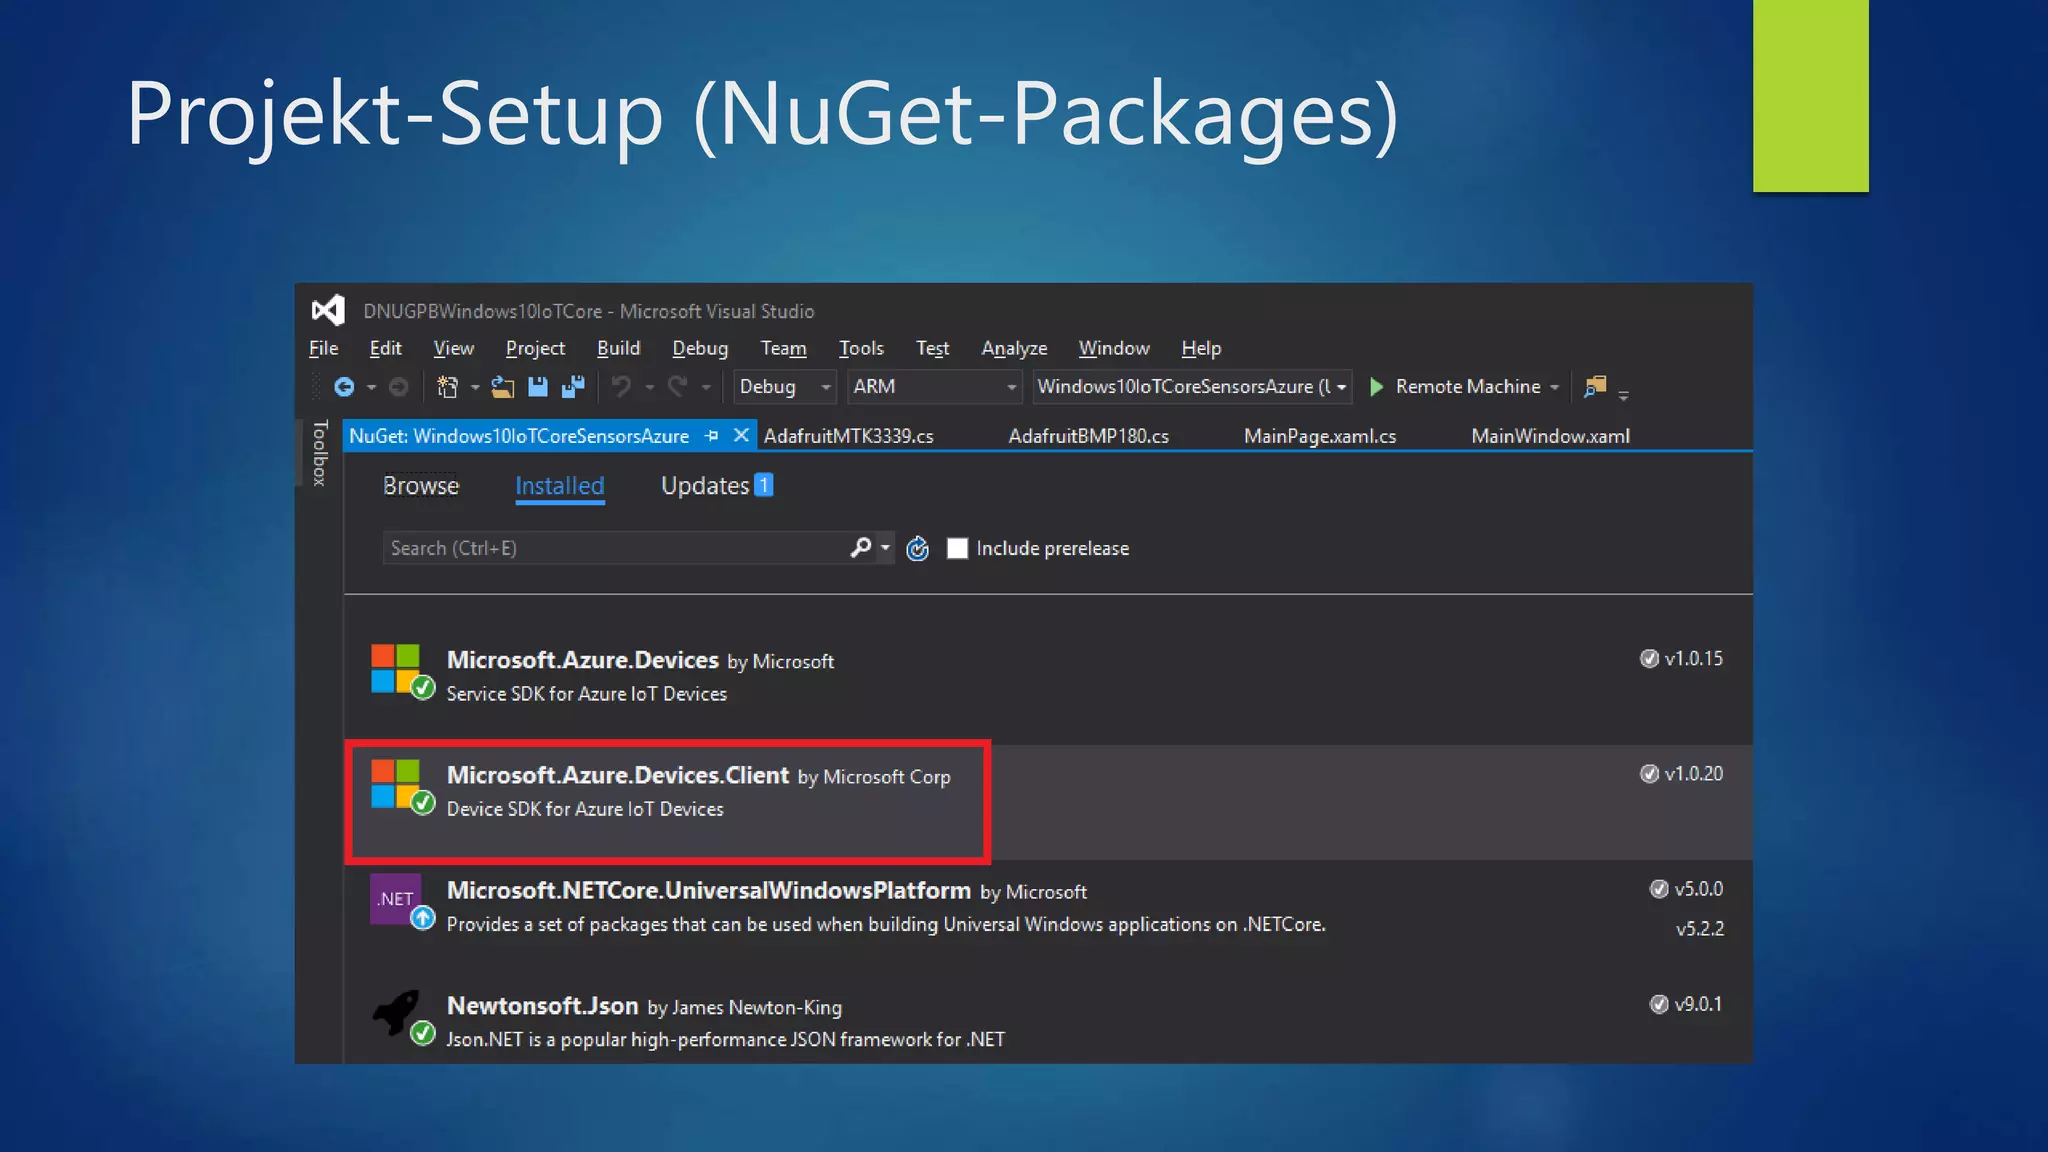
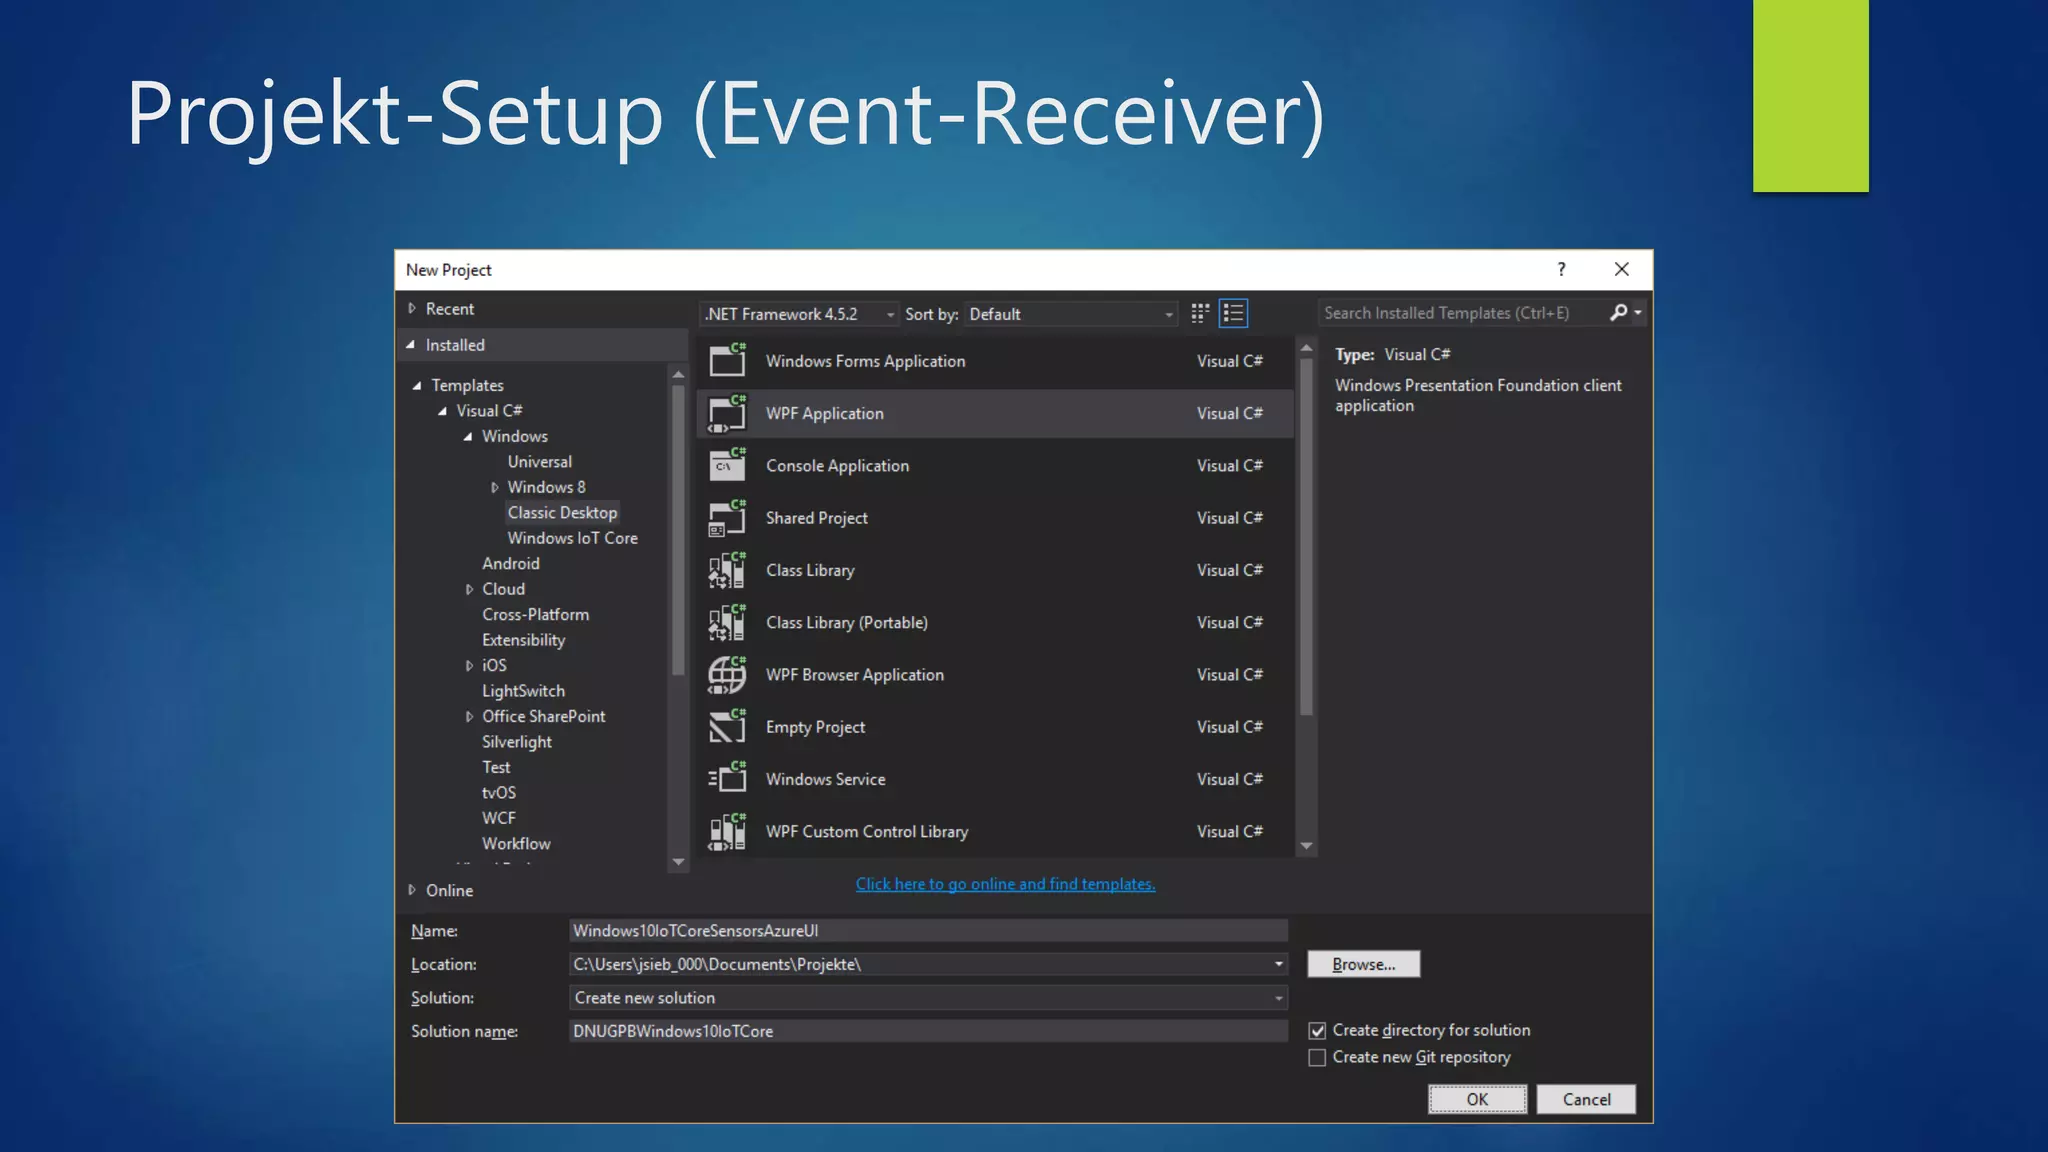
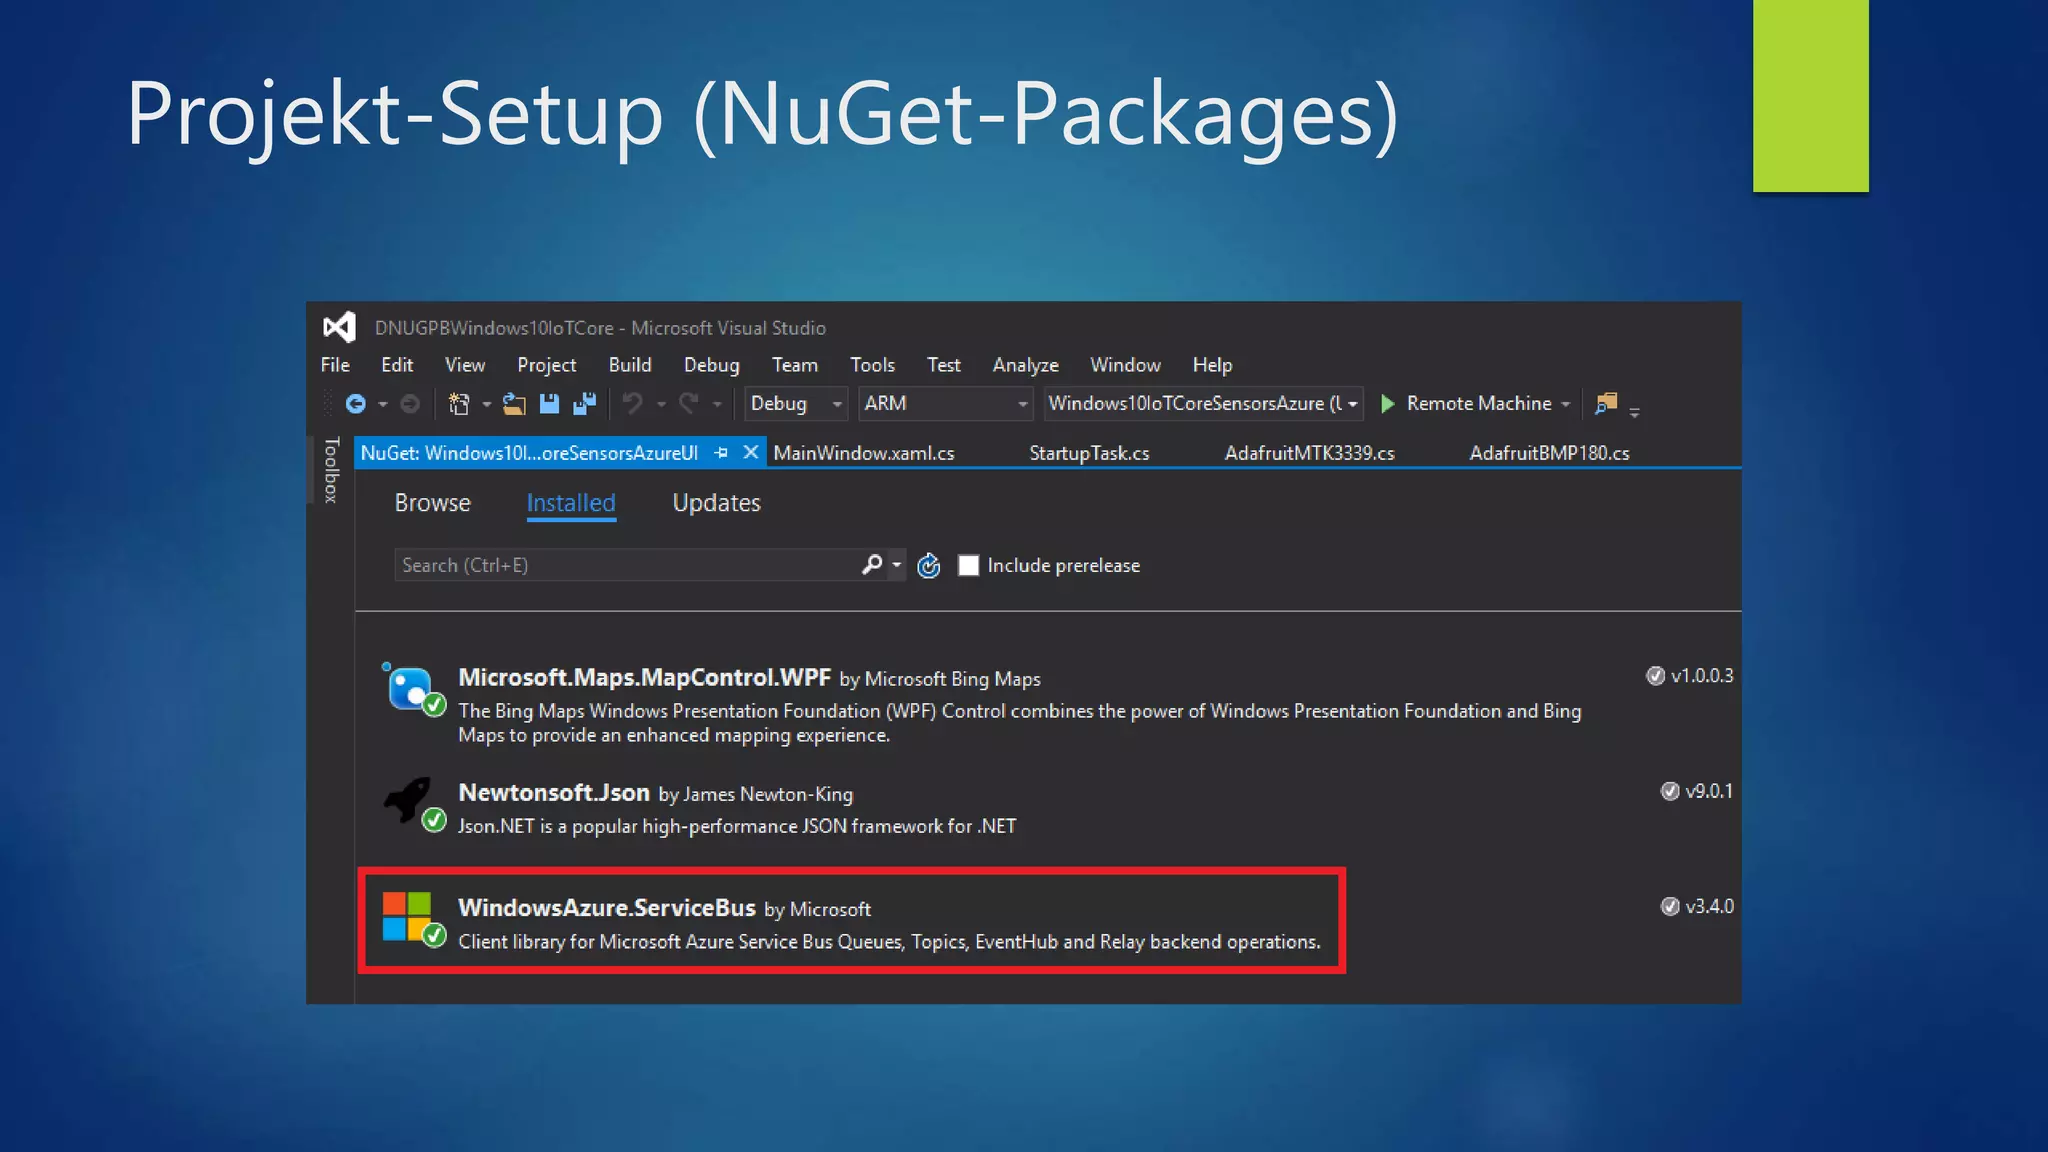
Die Präsentation behandelt Windows 10 IoT Core und seine Anwendungsmöglichkeiten auf Geräten wie dem Raspberry Pi, einschließlich der notwendigen Hardware und Software sowie der Programmierschnittstellen für die Nutzung von GPIO, I2C und UART. Zudem wird erklärt, wie man ein Azure IoT Hub einrichtet und mit einem Raspberry Pi kommuniziert, um IoT-Anwendungen zu entwickeln. Es werden Beispiele für den Umgang mit Sensoren und die Verwaltung von Geräten im IoT-Umfeld gegeben.

![Build your own IoT Cloud! [GER]](https://cdn.slidesharecdn.com/ss_thumbnails/iotcloud-workshop-140905072951-phpapp01-thumbnail.jpg?width=640&height=640&fit=bounds)