Instructions BUSHNELL Nature View Spotting Scope | Optics Trade
•
0 gefällt mir•647 views

Instructions BUSHNELL Nature View Spotting Scope | Optics Trade

Empfohlen
Empfohlen
Weitere ähnliche Inhalte
Was ist angesagt?
Was ist angesagt? (20)
Andere mochten auch
Andere mochten auch (8)
Ähnlich wie Instructions BUSHNELL Nature View Spotting Scope | Optics Trade
Ähnlich wie Instructions BUSHNELL Nature View Spotting Scope | Optics Trade (20)
Mehr von Optics-Trade
Mehr von Optics-Trade (20)
Instructions BUSHNELL Nature View Spotting Scope | Optics Trade
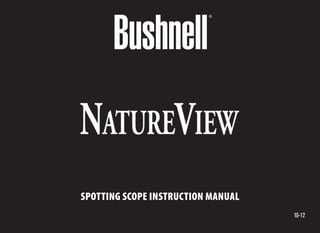
- 1. 10-12 SPOTTING SCOPE INSTRUCTION MANUAL
- 5. 5 English Enviro-Friendly. All NatureView spotting scopes feature lead free glass. High Quality Optics. BaK-4 prisms and fully multi-coated optics work together to deliver ultra-bright, razor-sharp images. Durable. Rugged, non-slip rubber armor absorbs shock. NatureView spotting scopes are waterproof and nitrogen purged (fogproof) for clear, reliable viewing in all weather conditions. Conversely, to see them all, you and your optics have to be remarkably versatile. Our NatureView® spotting scopes thrive in virtually any setting, offering bright, crisp views of your quarry near and far. Fully multi-coated optics and premium lead free glass help you catalog every detail. A compact tripod with integrated car window mount and both soft and hard carrying cases are included. They’re a natural selection for wherever your next field trip takes you. THE MOST RARE AND REMARKABLE SPECIES ARE ALSO THOSE MOST SPECIFICALLY ADAPTED TO THEIR ENVIRONMENT.
- 6. 6 Thank you for purchasing your new Bushnell NatureView® Spotting Scope. This manual will help you optimize your viewing experience by explaining how to utilize the scope’s controls and features, and how to care for it. Read the instructions carefully before using your scope or the included mini tripod/car window mount. Zoom Ring Tripod Mounting Base Focus Knob Sliding Sun Shade Lens Cap Tripod Mounting Collar Knob PARTS GUIDEEyecup (“down”position) Eyecup Extended (“up”position)
- 7. 7 TRIPOD MOUNTING After setting up your tripod on a stable, level surface, fasten the scope’s mounting base to the screw on the tripod’s platform, so that the scope is held securely in place (see “Using the Mini Tripod” on the next page if you are using the included tripod). The scope has a rotating tripod mounting collar. Loosen the tripod collar knob, then twist the scope to the desired position (for example, you may prefer to position the focus knob off to one side instead of on top), then tighten the knob back clockwise to secure the scope in place. USING the ZOOM EYEPIECE and FOCUSING Remove the tethered objective lens cap before viewing by pulling the tab at the top of the cap out and letting the cap hang down. While looking through the scope, rotate the zoom ring on the eyepiece to adjust magnifying power from low to high. Lower power settings will provide a brighter image with a wider field of view; higher powers allow observing smaller details on more distant subjects. To reduce the need to readjust focus when zooming, set the zoom to its highest power (45x or 60x depending on your model) and focus on your subject.When you zoom back down a lower power, it will stay in focus. If you don’t wear eyeglasses, twist the eyecup at the end of the eyepiece counter-clockwise until the eyecup is in a position which allows you to view the full image. To retract the eyecup back down, twist it in a clockwise direction. Note: the NatureView scope’s zoom eyepiece is not interchangeable. Do not attempt to remove it from the scope. WATERPROOF / FOGPROOF Your Bushnell NatureView spotting scope has been designed and built utilizing the latest waterproof and fogproof technology. The scope is O-ring sealed for complete moisture protection. Fogproof protection is achieved from dry nitrogen purging that removes all internal air which can retain moisture.
- 8. 8 USING the MINITRIPOD • Unfold the legs fully and set the tripod on a stable, level surface such as a table or the ground. • Attach the scope by lining up the screw at the top of the tripod with the 1/4”-20 socket on the bottom of the scope’s tripod mounting base, then turning the mounting knob on the tripod until the scope is securely attached to the tripod (do not overtighten). • To tilt or rotate (pan) the spotting scope, twist the pan handle counter-clockwise, move the scope to the desired position, then tighten the pan handle (clockwise) to hold it in place. • To adjust the tripod height, loosen the height lock collar, move the center column up or down, then tighten the lock collar. • To remove the car window mount section of the tripod for separate use, loosen the large clamp bolt fully and pull the top section off of the plate at the top of the center column. • When using the car window mount, roll your window down part way and place the padded clamp of the mount onto it, then carefully tighten the clamp bolt (do not overtighten!). Finally, attach the scope to the mounting screw. CarWindow Mount Pan/Tilt Handle Legs Mounting Knob Height Lock Collar CarWindow Mount Clamp Bolt Mounting Screw Center Column Sun Shade Extended Plate (not visible)
- 9. 9 USING the SLIDING SUN SHADE If you experience glare or lens flare due to the angle and direction of the sun relative to the front lens, pull the sun shade forwards to extend it. Push straight back on the sun shade to collapse it for storage. CLEANING The lenses of your NatureView spotting scope are fully multi-coated for highest light transmission. As with any multi-coated optics, special care must be taken in cleaning the lenses. Follow these steps for proper lens cleaning: • Blow away any dust or debris on the lens (or use a soft lens brush). • To remove dirt or finger prints, clean with the supplied micro-fiber cloth rubbing in a circular motion. Use of a coarse cloth or unnecessary rubbing may scratch the lens surface and eventually cause permanent damage. A washable microfiber cleaning cloth is ideal for the routine cleaning of your optics. Simply breathe lightly on the lens to provide a slight amount of moisture, then gently rub the lens with the microfiber cloth. • For a more thorough cleaning, photographic lens tissue and photographic-type lens cleaning fluid or isopropyl alcohol may be used. Always apply the fluid to the cleaning cloth – never directly on the lens. GENERAL CARE and CAUTIONS Never disassemble your spotting scope. Irreparable damage can result from unauthorized service attempts, which also void the warranty. NEVER LOOK DIRECTLY ATTHE SUNWITHYOUR SCOPE AS IT MAY CAUSE SERIOUS DAMAGETOYOUR EYES
- 10. 10 WARRANTY/REPAIR LIFETIME LIMITED WARRANTY We are so proud of our Bushnell® NatureView™ Spotting Scopes that their materials and workmanship are warranted to be free of defects for the life of the product. The warranty is available to any owner of a NatureView spotting scope. No receipt or warranty card is required. This warranty does not cover damages caused by misuse or improper handling, installation or maintenance of the binoculars. At our option, we will repair or replace any defective NatureView spotting scope, which shall be your sole remedy under this warranty. In no event shall we be liable for transportation costs to us, costs of removal or reinstallation of the scope, or incidental or consequential damages. Some states do not allow the exclusion of limitation of incidental or consequential damages, so the above limitation or exclusion may not apply to you. Any return in the U.S. or Canada made under this warranty must be accompanied by the items listed below: 1) A check/money order in the amount of $10.00 to cover the cost of postage and handling 2) Name and address for product return 3) An explanation of the defect 4) Proof of Purchase 5) Product should be well packed in a sturdy outside shipping carton, to prevent damage in transit, with return postage prepaid to the address listed below: IN U.S.A. Send To: IN CANADA Send To: Bushnell Outdoor Products Bushnell Outdoor Products Attn.: Repairs Attn.: Repairs 9200 Cody 25A East Pearce Street, Unit 1 Overland Park, Kansas 66214 Richmond Hill, Ontario L4B 2M9 For products purchased outside the United States or Canada please contact your local dealer for applicable warranty information. In Europe you may also contact Bushnell at: Bushnell Germany GmbH European Service Centre Mathias-Brüggen-Str. 80 D-50827 Köln GERMANY Tel: +49 221 995568-0 Fax: +49 221 995568-20 This warranty gives you specific legal rights. You may have other rights which vary from country to country. ©2012 Bushnell Outdoor Products
- 11. 11 LES ESPÈCES LES PLUS RARES ET LES PLUS REMARQUABLES SONT AUSSI LES MIEUX ADAPTÉES À LEUR ENVIRONNEMENT. À l’inverse, pour observer toutes ces espèces, votre optique et vous-même devez faire preuve d’une incroyable polyvalence. Nos lunettes terrestres NatureView® optimise pratiquement tout type de paysage, vous permettant de voir votre gibier de façon nette et lumineuse, qu’il soit près ou loin. Grâce aux optiques à revêtements multiples et au verre de première qualité, sans plomb, vous ne manquerez aucun détail. Un trépied compact avec monture intégrée pour vitre de véhicule, une mallette rigide et un étui souple sont fournis avec l’appareil. Elles s’imposent comme un choix naturel, quelle que soit la destination de votre prochaine expédition. Français Respectueuses de l’environnement. Les lunettes terrestres NatureView contiennent toutes du verre sans plomb. Optique de haute qualité. Ensemble, les prismes Bak-4 et l’optique traitée multicouches garantissent des images d’une netteté et d’une luminosité extraordinaires. Durable. Le revêtement robuste et antidérapant absorbe les chocs. Les lunettes terrestres NatureView sont étanches et purgées à l’azote (pour empêcher la formation de buée) afin de vous garantir des observations nettes et précises quelles que soient les conditions météos.
- 12. 12 Merci d’avoir acheté votre nouvelle lunette terrestre Bushnell NatureView™. Ce manuel vous aidera à optimiser vos observations en expliquant comment utiliser les réglages et les caractéristiques de votre lunette terrestre et comment l’entretenir. Lisez attentivement les instructions avant d’utiliser votre lunette ou le mini trépied et la monture pour vitre de véhicule fournis avec. Platine de montage du trépied Capuchon de l’objectif Molette du collier de fixation du trépied GUIDE DES PIÈCESBague de zoom Molette de mise au point Œilleton (position basse) Œilleton allongé (position haute) Pare-soleil coulissant
- 13. 13 MONTAGE DUTRÉPIED Après avoir installé votre trépied sur une surface stable et plane, fixez la platine de montage de la lunette à la vis située sur le support du trépied de façon à bien maintenir la lunette en place (voir « Utilisation du mini-trépied » à la page suivante si vous utilisez le trépied inclus). La lunette est équipée d’un collier de fixation rotatif prévu à cet effet. Desserrez la molette du collier du trépied puis tournez la lunette jusqu’à la position désirée (par exemple, vous pouvez placer la molette de mise au point sur le côté et non sur la partie supérieure si vous le souhaitez), puis resserrez la molette dans le sens des aiguilles d’une montre pour verrouiller le trépied. UTILISATION de L’OCULAIRE ZOOM et de la MISE AU POINT Ôtez le cache de l’objectif avant utilisation, en tirant sur la languette en haut du cache. Grâce à son attache, vous pouvez laisser pendre le cache pendant l’utilisation de la lunette. Tournez la bague de zoom située sur l’oculaire afin de diminuer ou d’augmenter la puissance de grossissement. Les réglages pour grossissement faible permettent une image plus lumineuse avec une profondeur de champ plus grande, tandis que les réglages pour grossissement fort permettent d’observer des détails plus petits sur des sujets plus éloignés. Pour réduire la nécessité de refaire la mise au point lors de l’utilisation du zoom, réglez le zoom sur son grossissement maximal (45x ou 60x selon votre modèle), puis mettez au point sur votre sujet. La mise au point est conservée lorsque vous réduisez le zoom pour un grossissement plus faible. Si vous ne portez pas de lunettes, tournez l’œilleton dans le sens inverse des aiguilles d’une montre à l’extrémité de l’oculaire jusqu’à ce que l’œilleton atteigne une position qui vous permette de voir une image complète. Pour ramener l’œilleton à sa position initiale, tournez-le dans le sens des aiguilles d’une montre. Remarque : le zoom n’est pas interchangeable. Ne tentez pas de le retirer de la lunette terrestre. ÉTANCHE / ANTIBUÉE Votre lunette terrestre Bushnell NatureView a été conçue et construite en utilisant la toute dernière technologie en matière d’étanchéité et de protection antibuée. Un joint torique assure l’étanchéité de l’appareil et offre une protection complète contre l’humidité. Un système de purge au nitrogène sec éliminant l’air interne et pouvant retenir l’humidité assure la protection antibuée.
- 14. 14 UTILISATION du MINITRÉPIED • Dépliez complètement les pieds et placez le trépied sur une surface stable et horizontale, comme une table ou le sol. • Fixez la lunette en alignant la vis située en haut du trépied sur le pas de vis standard ¼-20 po sur la partie inférieure du support du trépied, puis tournez la molette du trépied jusqu’à ce que la lunette soit solidement fixée au trépied (ne serrez pas trop fort). • Pour incliner ou faire coulisser (réglage) la tête du trépied ou la lunette fixée à ce dernier, tournez la poignée de réglage dans le sens inverse des aiguilles d’une montre puis resserrez-là (dans sens des aiguilles d’une montre) pour la maintenir en place. • Pour ajuster la hauteur du trépied, desserrez le collier de verrouillage de la hauteur, déplacez la colonne centrale vers le haut ou vers le bas, puis resserrez le collier de verrouillage. • Si vous souhaitez détacher la monture pour vitre de véhicule du trépied pour un usage séparé, desserrez complètement la grande molette de serrage et séparez la partie supérieure de la plaque qui se trouve au-dessus de la colonne centrale. • Pour utiliser la monture sur vitre de véhicule, descendez la vitre à mi-hauteur et placez l’attache de serrage matelassée dessus, puis serrez Monture pour vitre de véhicule Levier de manœuvre/ azimut Pieds Molette de fixation Collier de verrouillage de la hauteur Molette de serrage de la monture pour vitre de véhicule Vis de montage Colonne centrale Pare-soleil déplié Plaque (invisible)
- 15. 15 doucement la molette (ne serrez pas trop fort !). Enfin, fixez la lunette sur la vis de montage UTILISATION du PARE-SOLEIL COULISSANT Si vous observez un halo de lumière ou un effet de lentille dû à l’angle et à la direction du soleil par rapport à la lentille frontale, tirez sur le pare-soleil pour le déplier. Il suffit de le repousser en arrière, bien droit, pour le replier. NETTOYAGE Les lentilles de votre lunette terrestre NatureView possèdent plusieurs couches pour une transmission optimale de la lumière. Comme avec toutes les optiques multicouches, un soin particulier doit être accordé au nettoyage des lentilles. Suivez les étapes suivantes pour assurer un nettoyage correct des lentilles : • Souffler sur la lentille pour en éliminer la poussière ou les particules (ou utilisez une brosse douce conçue pour le nettoyage des lentilles). • Pour nettoyer la poussière ou les traces de doigt, utilisez avec le chiffon microfibre fourni en frottant selon un mouvement circulaire. L’utilisation d’un tissu grossier ou un frottement inutile risquerait de rayer la surface de la lentille et éventuellement de causer des dégâts permanents. Un chiffon de nettoyage en microfibre lavable est idéal pour le nettoyage régulier de votre optique. Simplement soufflez légèrement sur la lentille pour créer une petite quantité d’humidité, puis frottez doucement la lentille avec le chiffon microfibre. • Pour un nettoyage plus en profondeur, vous pouvez utiliser des tissus ou des nettoyants pour lentilles spéciaux ou de l’alcool isopropylique. Appliquez toujours le liquide sur le chiffon, jamais directement sur la lentille. ENTRETIEN GÉNÉRAL ET PRÉCAUTIONS Ne démontez jamais votre lunette terrestre. Des tentatives de réparations non autorisées peuvent entraîner des dommages irréparables et annuler également la garantie. NE REGARDEZ JAMAIS LE SOLEIL DIRECTEMENT AVECVOTRE LUNETTE TERRESTRE ; CELA PEUT OCCASIONNER DE GRAVES LÉSIONS OCULAIRES
- 16. 16 GARANTIE / RÉPARATION GARANTIE À VIE LIMITÉE NatureView® Nous avons une telle confiance en la lunette terrestre NatureView™ Bushnell® que leurs matériaux et fabrication sont garantis exempts de défauts durant la durée de service des lunette terrestre NatureView. La garantie est disponible pour tout propriétaire de la lunette terrestre NatureView. La présente garantie ne couvre pas les dommages causés par une utilisation, une manipulation, une installation et un entretien incorrects de l’instrument. Nous réparerons ou remplacerons, à notre discrétion, la lunette terrestre NatureView défectueuses, ce qui constituera votre seul recours dans le cadre de la présente garantie. En aucun cas nous ne serons responsables des frais de port jusqu’à notre société, des frais de démontage et remontage des jumelles, ni des dommages fortuits ou indirects. Certains états n’admettent pas l’exclusion ou la limitation des dommages fortuits ou indirects ; il se peut donc que la limitation ou l’exclusion ci-dessus ne s’applique pas à votre cas. Tout retour effectué aux États-Unis ou au Canada, dans le cadre de la présente garantie, doit être accompagné des articles indiqués ci-dessous : 1) Un chèque ou mandat d’une somme de 10,00 $ US pour couvrir les frais d’envoi et de manutention 2) Le nom et l’adresse pour le retour du produit 3) Une description du défaut constaté 4) La preuve d’achat 5) Le produit doit être emballé soigneusement, dans un carton d’expédition solide, pour éviter qu’il ne soit endommagé durant le transport ; envoyez-le en port payé, à l’adresse indiquée ci-dessous : Aux États-Unis, envoyez à : Au CANADA, envoyez à : Bushnell Outdoor Products Bushnell Outdoor Products Attn.: Repairs Attn.: Repairs 9200 Cody 25A East Pearce Street, Unit 1 Overland Park, Kansas 66214 Richmond Hill, Ontario L4B 2M9 Pour les produits achetés en dehors des États-Unis et du Canada, veuillez contacter votre distributeur local pour tous renseignements concernant la garantie. En Europe, vous pouvez aussi contacter Bushnell au : Bushnell Germany GmbH European Service Centre Mathias-Brüggen-Str. 80 D-50827 Köln GERMANY Tel: +49 221 995568-0 Fax: +49 221 995568-20 La présente garantie vous donne des droits légaux spécifiques. Vous pouvez avoir d’autres droits qui varient selon les pays. ©2012 Bushnell Outdoor Products
- 17. 17 Español Respetuoso con el medioambiente. Todos los telescopios NatureView tienen cristal libre de plomo. Óptica de alta calidad. Los prismas BaK-4 y el equipo óptico con multitratamiento completo trabajan juntos para proporcionar imágenes ultrabrillantes y muy nítidas. Duraderos. La cubierta de goma rugosa y antideslizante absorbe los golpes. El telescopio NatureView es impermeable y se ha purgado con nitrógeno (anti- niebla) para una visualización nítida y fiable en todas las condiciones meteorológicas. Sin embargo, para poder verlas todas, usted y su equipo óptico tienen que ser extraordinariamente versátiles. Nuestros telescopios NatureView® son perfectos en prácticamente cualquier escenario, ya que ofrecen unas vistas claras y limpias de su objetivo, tanto de cerca como de lejos. La óptica de recubrimiento completo múltiple y el cristal sin plomo de gran calidad le ayudan a catalogar cada detalle. Se incluye un trípode compacto con un soporte para ventanilla de vehículo integrado y unas maletas de transporte rígidas y flexibles. Son la elección natural para cualquier destino al que le lleve su próximo viaje. LAS ESPECIES MÁS RARAS Y EXTRAORDINARIAS TAMBIÉN SON LAS QUE ESTÁN MÁS ADAPTADAS A SU ENTORNO.
- 18. 18 Gracias por comprar su nuevo telescopio terrestre Bushnell NatureView™. Este manual le ayudará a optimizar su experiencia de observación explicándole cómo puede utilizar los controles y funciones del telescopio y cómo cuidar del mismo. Lea las instrucciones con atención antes de utilizar el telescopio o el mini trípode/soporte para ventanilla de vehículo incluidos. GUÍA DE COMPONENTESAro del zoom Base de montaje del trípode Mando de enfoque Visera deslizante Tapa de la lente Rueda de montaje del trípode Ocular (posición “bajada”) Ocular extendido (posición“subida”)
- 19. 19 MONTAJE DELTRÍPODE Coloque el trípode en una superficie estable y nivelada, y sujete la base de montaje del telescopio al perno del trípode para asegurarlo (consulte “Uso del minitrípode” en la página siguiente si va a utilizar el trípode incluido). El telescopio dispone de una rueda giratoria de montaje del trípode. Afloje la rueda del trípode y gire el telescopio hacia la dirección que desee (por ejemplo, si prefiere colocar el objetivo en un lado en vez de hacia arriba), y vuelva a apretar la rueda hacia la derecha para fijar el telescopio en el lugar. USO del OCULAR DEL ZOOM y ENFOQUE Extraiga la tapa sujeta a la lente del objetivo antes de mirar extrayéndola de la parte superior y dejándola colgando. Gire el aro del zoom del ocular para ajustar la potencia del aumento desde baja hasta alta. Un ajuste de baja potencia proporcionará una imagen más brillante con un campo de visión más amplio; las potencias más altas permiten observar detalles más pequeños en sujetos más distantes. Para reducir la necesidad de reajustar el enfoque al utilizar el zoom, ponga el zoom a la potencia más alta (45x o 60x en función de su modelo) y enfoque a su sujeto. Cuando reduzca el zoom a una potencia más baja, se mantendrá enfocado. Si no lleva gafas, gire el ocular hasta el extremo del visor en el sentido contrario a las agujas de reloj hasta que el ocular esté en una posición que le permita ver la imagen completa. Para retraer el ocular, gírelo en el sentido de las agujas del reloj. Nota: El ocular del zoom no es intercambiable. No intente desmontarlo del telescopio. RESISTENTE AL AGUA/RESISTENTE A LA NIEBLA Su telescopio terrestre Bushnell NatureView se ha diseñado y fabricado utilizando la más avanzada tecnología resistente al agua y a la niebla. El telescopio está sellado con juntas tóricas para protegerlo plenamente contra la humedad. La protección frente a la niebla se consigue mediante una purga con nitrógeno seco que elimina todo el aire interno que podría retener la humedad. NUNCA MIRE DIRECTAMENTE AL SOL CON ELTELESCOPIO YA QUE PODRÍA CAUSARLE DAÑO GRAVE A LOS OJOS
- 20. 20 USO del MINITRÍPODE • Despliegue totalmente las patas y coloque el trípode en una superficie estable y nivelada, como una mesa o el suelo. • Monte el telescopio alineando el perno de la parte superior del trípode con el conector de 1/4”-20delaparteinferiordelabasedemontaje del trípode del telescopio; a continuación, gire la rueda del trípode hasta que el telescopio quede sujeto a este (no lo apriete demasiado). • Para inclinar o girar la cabeza del trípode o el telescopio montado, gire el mango hacia la izquierda, mueva la cabeza/telescopio a la posición deseada y apriete el mango (hacia la derecha) para sujetarlo. • Para ajustar la altura del trípode, afloje la rueda de seguridad de altura, suba o baje la columna central y, después, apriete la rueda de seguridad. • Para extraer la sección de soporte de la ventanilla del vehículo del trípode para un uso por separado, afloje del todo el perno de sujeción grande y extraiga la sección superior de la placa en la parte de arriba de la columna central. Soporte para ventanilla de vehículo Mango de giro horizontal/inclinación Patas Rueda de montaje Rueda de seguridad de altura Perno de sujeción para soporte de ventanilla de vehículo Tornillo de montaje Columna central Visera extendida Placa (novisible)
- 21. 21 • Al utilizar el soporte de la ventanilla del vehículo, baje un poco la ventanilla, coloque las fijaciones acolchadas en el soporte y apriete con cuidado el perno de sujeción (no apriete en exceso). Por último, fije el telescopio con el tornillo de montaje. USO de laVISERA DESLIZANTE Siseproducenreflejosodeslumbramientodebidoalánguloyladireccióndelsolrespectoalobjetivodelantero, tire hacia fuera de la visera para extenderla. Empuje hasta el fondo la visera para retraerla y guardarla. LIMPIEZA Las lentes de su telescopio NatureView incorporan un recubrimiento multicapa para conseguir la máxima transmisión de la luz. Al igual que con cualquier lente con recubrimiento multicapa, debe prestarse un cuidado especial a la limpieza de las lentes. Para limpiar correctamente las lentes, siga estos pasos: • Sople el polvo o la suciedad de las lentes (o use un cepillo suave para lentes). • Para eliminar la suciedad y las marcas de dedos, utilice el paño de microfibra incluido y frote con movimientos circulares. Usar un paño áspero o frotar innecesariamente las lentes puede rayar su superficie y causar daños permanentes. Un paño de microfibra lavable es ideal para la limpieza rutinaria de sus equipos ópticos. Eche un poco de aliento en la lente para humedecerla ligeramente y frótela suavemente con el paño de microfibra. • Para una limpieza más profunda, se puede usar tejido para lentes fotográficas y líquidos para lentes fotográficas o alcohol isopropílico. Aplique siempre el producto en el paño: nunca directamente sobre la lente. CUIDADOS y PRECAUCIONES GENERALES No desmonte nunca el telescopio terrestre. Un intento de revisión no autorizado podría provocar daños irreparables que también anularían la garantía.
- 22. 22 GARANTÍA / REPARACIÓN GRANTÍA LIMITADA PARA TODA LA VIDA DE NatureView™ Nos sentimos tan orgullosos de nuestros telescopio terrestre NatureView™ de Bushnell® que garantizamos que sus materiales y fabricación están libres de defectos durante la vida útil de la telescopio terrestre NatureView. La garantía está disponible para cualquier propietario de la telescopio terrestre NatureView. Esta garantía no cubre los daños causados por un uso indebido ni por un manejo, instalación o mantenimiento inapropiados de la telescopio terrestre. A nuestra opción, repararemos o sustituiremos cual quier telescopio terrestre NatureView defectuoso, lo cual constituirá su único recurso legal bajo esta garantía. En ningún caso seremos responsables de los gastos de transporte, desmontaje o reinstalación de los binoculares, ni de los daños imprevistos o consiguientes. Algunos estados no permiten la exclusión de limitación de los daños imprevistos o consiguientes, de modo que es posible que la limitación o exclusión anterior no se aplique a su caso. Cualquier devolución o envío que se haga en EE.UU. o Canadá bajo esta garantía deberá ir acompañado por los siguientes puntos: 1) Un cheque/giro postal por la cantidad de 10 dólares para cubrir los gastos postales y de manejo. 2) Nombre y dirección donde quiere que se le envíe el producto. 3) Una explicación del defecto. 4) Una prueba de la compra. 5) El producto debe empaquetarse bien en una caja resistente para evitar que se dañe durante el transporte, con los portes prepagados a la dirección que se muestra a continuación: EN EE.UU. ENVIAR A: EN CANADÁ ENVIAR A: Bushnell Outdoor Products Bushnell Outdoor Products Attn.: Repairs Attn.: Repairs 9200 Cody 25A East Pearce Street, Unit 1 Overland Park, Kansas 66214 Richmond Hill, Ontario L4B 2M9 En el caso de productos comprados fuera de Estados Unidos o Canadá, póngase en contacto con su distribuidor local para que le den la información pertinente sobre la garantía. En Europa también puede ponerse en contacto con Bushnell en: Bushnell Germany GmbH European Service Centre Mathias-Brüggen-Str. 80 D-50827 Köln GERMANY Tel: +49 221 995568-0 Fax: +49 221 995568-20 Esta garantía le ofrece derechos legales específicos. Puede que tenga otros derechos que varían de un país a otro. ©2012 Bushnell Outdoor Products
- 23. 23 DIE SELTENSTEN UND INTERESSANTESTEN SPEZIES SIND MEIST BESONDERS GUT GETARNT. Um diese Spezies zu sichten, müssen Sie selbst und Ihr Optik besonders wendig sein. Unser NatureView® -Spektive überzeugt in nahezu allen Einstellungen mit einer klaren, scharfen Sicht, egal ob nah oder fern. Durch die vollständig mehrfachvergütete Optik und hochwertiges bleifreies Glas entgeht Ihnen kein einziges Detail. Kompaktes Stativ mit integrierter Fahrzeugfensterhalterung, weiche Tragetasche und Hartschalenkoffer inklusive. Es ist die beste Wahl, egal wohin Sie die nächste Exkursion führt. Deutsch Umweltfreundlich. Alle NatureView-Spektive sind mit bleifreien Gläsern ausgestattet. Hochwertige Optik. Die Kombination aus BaK-4- Prismen und mehrfach vergüteter Optik liefert extrem klare, rasiermesserscharfe Bilder. Langlebig. Stöße werden durch die robuste, rutschfeste Gummiarmierung gedämpft. NatureView Spektive sind wasserdicht und mit Stickstoff gefüllt (beschlagfrei) und bieten so klare, zuverlässige Sicht bei jedem Wetter. SCHAUEN SIE MIT IHREM SPEKTIV NIEMALS DIREKT IN DIE SONNE, DA DIES ZU SCHWERWIEGENDEN AUGENVERLETZUNGEN FÜHREN KANN
- 24. 24 Vielen Dank, dass Sie sich für das neue Bushnell NatureView™-Spektiv entschieden haben. Dieses Handbuch hilft Ihnen, Ihr Betrachtungserlebnis zu optimieren, indem es erläutert, wie Sie die Bedienelemente und Funktionen des Spektivs verwenden und wie Sie diese pflegen. Lesen Sie die Anweisungen aufmerksam durch, bevor Sie das Spektiv oder das enthaltene Ministativ/ die Fahrzeugfensterhalterung benutzen. Zoom - Ring Stativmontagebasis Fokussierknopf Verschiebbare Gegenlichtblende Linsen- kappe Knopf des Lagers für die Stativmontage TeileanleitungAugenmuschel (Position„unten“) Ausgefahrene Augenmuschel (Position„oben“)
- 25. 25 STATIVMONTAGE Stellen Sie das Stativ auf einer stabilen und ebenen Oberfläche auf und befestigen Sie anschließend die Montageplatte an der Schraube der Stativplattform, sodass das Spektiv fest sitzt (falls Sie das im Lieferumfang enthaltene Stativ verwenden, erhalten Sie weitere Informationen im Abschnitt „Verwendung des Minispektivs“). Das Spektiv verfügt über ein drehbares Lager für die Stativmontage. Lösen Sie den Knopf des Stativlagers, drehen Sie das Spektiv in die gewünschte Position (möglicherweise möchten Sie den Fokusknopf auf der Seite anstatt oben positionieren) und drehen Sie den Knopf im Uhrzeigersinn wieder fest, um das Spektiv zu sichern. VERWENDUNG des ZOOM-OKULARS und FOKUSSIERUNG Entfernen Sie vor dem Durchsehen die angebundene Linsenkappe, indem Sie die Lasche auf der Oberseite der Kappe herausziehen und die Kappe nach unten hängen lassen. Stellen Sie den Vergrößerungsgrad von gering bis hoch durch Drehen des Zoom-Rings am Okular ein. Niedrigere Leistungseinstellungen bieten ein helleres Bild mit einem größeren Sichtfeld; höhere Leistungen ermöglichen das Betrachten kleinerer Details an weiter entfernten Objekten. Um die Notwendigkeit zum Nachjustieren beim Zoomen zu verringern, das Zoom auf seine größte Leistung stellen (45x oder 60x je nach Modell) und auf Ihr Objekt fokussieren. Wenn Sie zurück auf niedrige Leistungsstufen zoomen, bleibt der Fokus erhalten. Wenn Sie keine Brille tragen, drehen Sie die Augenmuschel am Ende des Okulars gegen den Uhrzeigersinn, bis sich die Augenmuschel in einer Position befindet, in der Sie das ganze Sichtfeld sehen können. Drehen Sie die Augenmuschel im Uhrzeigersinn, um sie wieder einzufahren. HINWEIS: Das Zoom-Okular ist nicht auswechselbar. Versuchen Sie nicht, es vom Stativ zu lösen. WASSERDICHT/NEBELDICHT IhrBushnellNatureView-SpektivwurdeunterAnwendungderneuestenWasser-undBeschlagschutzverfahren entwickelt und hergestellt. Das Spektiv ist für vollständigen Schutz gegen Feuchtigkeit durch einen O-Ring abgedichtet. Der Nebelschutz wird durch Trockenstickstoffspülen erreicht, das die gesamte potenziell feuchtigkeitshaltige Innenluft entfernt.
- 26. 26 VERWENDUNG des MINISPEKTIVS • Die Beine ganz auseinanderklappen und das Stativ auf eine feste, ebene Fläche stellen, wie beispielsweise auf einen Tisch oder auf den Boden. • Bringen Sie das Spektiv an, indem Sie die obere Schraube des Stativs mit der ¼“-20-Fassung an der Unterseite der Stativmontageplattform ausrichten. Drehen Sie den Knopf am Stativ so lange fest, bis das Spektiv fest auf dem Stativ sitzt (nicht überdrehen). • Wenn Sie den Stativkopf/das befestigte Spektiv kippen oder drehen möchten, drehen Sie den Schwenkgriff gegen den Uhrzeigersinn, bringen Sie den Kopf bzw. das Spektiv in die gewünschte Position und ziehen Sie den Schwenkgriff dann im Uhrzeigersinn wieder fest. • Um die Stativhöhe zu verstellen, lösen Sie das Lager für die Höheneinstellung, ziehen Sie die Mittelsäule nach oben oder unten und drehen Sie das Lager wieder fest. • Wenn Sie die Fahrzeugfensterhalterung des Stativs für einen anderweitigen Gebrauch entfernen möchten, lösen Sie den großen Klemmbolzen vollständig und ziehen Sie den oberen Teil von der Platte auf der Mittelsäule ab. Fahrzeugfenster- halterung Schwenk-/Neigegriff Stativbeine Montageknopf Lager für die Höheneinstellung Klemmbolzen für Fahrzeugfenster- halterung Befestigungsschraube Mittelsäule Gegenlichtblende verlängert Platte (nichtsichtbar)
- 27. 27 • Wenn Sie die Fahrzeugfensterhalterung nutzen möchten, machen Sie das Fenster bis zur Hälfte auf und platzieren Sie die gepolsterte Halterungsklemme darauf. Ziehen Sie anschließend den Klemmbolzen fest (nicht zu stark anziehen!). Zuletzt bringen Sie das Spektiv auf der Befestigungsschraube an. VERWENDUNG derVERSCHIEBBAREN GEGENLICHTBLENDE Wenn aufgrund des Winkels und der Richtung der Sonne in Relation zum vorderen Objektiv Blendung oder Reflexionsflecken auftreten, ziehen Sie die Gegenlichtblende zum Verlängern heraus. An der Sonnenblende gerade nach hinten ziehen, um sie nach Gebrauch zusammenzuklappen. REINIGUNG Die Linsen Ihres NatureView-Spektivs sind für höchste Lichtdurchlässigkeit mehrfachbeschichtet. Wie bei allen Mehrfachbeschichtungsoptiken muss bei der Reinigung des Objektivs besondere Sorgfalt angewendet werden. Befolgen Sie zur ordnungsgemäßen Objektivreinigung folgende Schritte: • Pusten Sie Staub oder Schmutz vom Objektiv (oder verwenden Sie einen weichen Objektivpinsel). • Um Schmutz oder Fingerabdrücke zu entfernen, reinigen Sie die Objektive mit einem weichen Baumwolltuch in kreisförmigen Bewegungen. Die Verwendung eines rauen Tuches oder ein unnötiges Rubbeln kann die Objektivoberfläche zerkratzen und zu dauerhaften Schäden führen. Das waschbare Mikrofaser-Reinigungstuch ist ideal für die routinemäßige Reinigung der Optik. Hauchen Sie das Objektiv an und reiben Sie die Oberfläche behutsam mit dem Mikrofasertuch. • Für eine gründlichere Reinigung können Sie fotografische Objektivtücher und ein Reinigungsfluid für den Fotobedarf oder Isopropylalkohol verwenden. Geben Sie das Pflegemittel stets auf das Tuch und niemals direkt auf das Objektiv. ALLGEMEINE PFLEGE undVORSICHTSMASSNAHMEN Zerlegen Sie Ihr Spektiv niemals. Nicht autorisierte Wartungsversuche können irreparable Schäden hervorrufen, die auch die Garantie ungültig machen.
- 28. 28 GARANTIE / REPARATUR NatureView™ LEBENSLANGE BESCHRÄNKTE GARANTIE Da wir auf die Qualität von Bushnell® NatureView™ Spektivs vertrauen, garantieren wir fehlerlose Materialien und Verarbeitung für die gesamte Lebensdauer jedes NatureView Spektiv*. Diese Garantie wird allen Eigentümern von NatureView Spektiv gewährt. Diese Garantie schließt nicht Schäden ein, die durch einen falschen Gebrauch, eine unvorschriftsmäßige Handhabung, Installation oder Wartung des spektivs entstanden sind. Auf Ihren Wunsch reparieren oder ersetzen wir jedes defekte NatureView Fernrohr. Andere Garantieansprüche können nicht erhoben werden. Wir übernehmen keinerlei Haftung für die Transportkosten zu unserem Werk sowie die Demontage und den erneuten Zusammenbau des Fernglases. Ausgenommen von der Haftung sind außerdem alle Neben- und Folgeschäden. Da in einigen Staaten kein Haftungsausschluss für Neben- und Folgeschäden erlaubt ist, hat diese Einschränkung der Haftung unter Umständen für Sie keine Gültigkeit. Alle Warenrücksendungen unter Garantie in den USA und Kanada müssen Folgendes enthalten: 1) Scheck/Mandat in Höhe von 10,00 $ für Porto und Handhabung 2) Name und Anschrift für Rücksendung des Produkts 3) Beschreibung des Defekts 4) Kaufnachweis 5) Um zu verhindern, dass beim Versand Transportschäden entstehen, das Produkt gut in einem stabilen Karton verpacken. Beizufügen ist das Porto für die Rücksendung an den Absender. Produkt einsenden an: In den USA: In KANADA: Bushnell Outdoor Products Bushnell Outdoor Products Attn.: Repairs Attn.: Repairs 9200 Cody 25A East Pearce Street, Unit 1 Overland Park, Kansas 66214 Richmond Hill, Ontario L4B 2M9 Im Falle von Produkten, die außerhalb der USA oder Kanadas erworben wurden, erfragen Sie Informationen zur gültigen Garantie bitte bei Ihrem Fachhändler. In Europa können Sie sich außerdem wenden an: Bushnell Germany GmbH European Service Centre Mathias-Brüggen-Str. 80 D-50827 Köln GERMANY Tel: +49 221 995568-0 Fax: +49 221 995568-20 Vorliegende Garantie gibt Ihnen bestimmte gesetzlich festgelegte Rechte. Gegebenenfalls haben Sie andere Rechte, die von der im jeweiligen Land gültigen Gesetzgebung abhängen. ©2012 Bushnell Outdoor Products
- 29. 29 Italiano Basso impatto ecologico. Tutti i cannocchiali da osservazione NatureView hanno vetri che non contengono piombo. Ottiche di alta qualità. I prismi BaK-4 e le ottiche interamente multistrato operano in simbiosi per offrire immagini straordinariamente chiare e nitidissime. Massima durabilità. La solida armatura in gomma evita lo scivolamento e assorbe gli urti. I cannocchiali da osservazione NatureView sono impermeabili e antiappannamento grazie al riempimento di azoto, per una visione chiara e affidabile in qualsiasi condizione. Per questo motivo, l’unico modo per poterle vedere è disporre di lenti altrettanto versatili. I nostri cannocchiali da osservazione NatureView® sono ideali in qualsiasi condizione e offrono una visione chiara e precisa della selvaggina vicina e lontana. Le ottiche interamente multistrato e il vetro senza piombo aiutano a distinguere ogni dettaglio. A corredo del cannocchiale sono inclusi un treppiedi compatto con supporto per il finestrino dell’auto e le custodie di trasporto morbida e rigida. Una selezione naturale, qualsiasi sia il luogo della vostra prossima escursione. LE SPECIE PIÙ RARE E NOTEVOLI SONO ANCHE QUELLE CHE SI ADATTANO MAGGIORMENTE E IN MODO SPECIFICO AL PROPRIO AMBIENTE.
- 30. 30 Grazie per aver acquistato il nuovo cannocchiale da osservazione Bushnell NatureView™. Questo manuale fornisce informazioni su come utilizzare al meglio i comandi e le funzioni del cannocchiale e come eseguirne la manutenzione. Leggere attentamente le istruzioni prima di utilizzare il cannocchiale o il mini treppiedi con supporto per il finestrino dell’auto. Anello di zoom Base di montaggio treppiedi Manopola messa a fuoco Paraluce a scorrimento Tappo dell’obiettivo Manopola di montaggio treppiedi GUIDA AI COMPONENTIConchiglia oculare (posizione“giù”) Conchiglia oculare estesa (posizione“su”)
- 31. 31 MONTAGGIO SUTREPPIEDI Dopo aver posizionato il treppiedi su una superficie stabile e piana, assicurare la base di montaggio del cannocchiale alla vite sulla piattaforma del treppiedi, in modo che il cannocchiale sia fissato in posizione (vedere la sezione “Uso del mini treppiedi” nella pagina seguente se si utilizza il treppiedi fornito in dotazione). Il cannocchiale è dotato di un anello di montaggio sul treppiedi rotante. Allentare la manopola del treppiedi, spostare il cannocchiale nella posizione desiderata (ad esempio, è possibile posizionare la manopola della messa a fuoco lateralmente anziché nella parte superiore) e quindi stringere nuovamente la manopola in senso orario per fissare il cannocchiale in posizione. USO DELL’OCULARE DI ZOOM e MESSA A FUOCO Prima di iniziare l’uso del cannocchiale, rimuovere il tappo dell’obiettivo tirandolo dall’apposita linguetta e lasciandolo penzolare. Ruotare l’anello di zoom sull’oculare per regolare l’ingrandimento da basso ad alto. Valori più bassi forniscono un’immagine più luminosa con un campo visivo più ampio; valori più alti consentono l’osservazione di dettagli più piccoli di soggetti a maggiore distanza. Per ridurre la necessità di regolare la messa a fuoco durante lo zoom, impostare lo zoom sul valore massimo (45x o 60x a seconda del modello) e mettere a fuoco il soggetto. Una volta reimpostato lo zoom su un valore più basso, il soggetto rimane a fuoco. Se non si indossano degli occhiali, ruotare in senso antiorario la conchiglia oculare all’estremità dell’oculare fino a raggiungere una posizione in cui la conchiglia consente la visione dell’intera immagine. Per riportare indietro la conchiglia oculare, ruotarla in senso orario. Nota: l’oculare di zoom non è intercambiabile. Non tentare di rimuoverlo dal cannocchiale. MPERMEABILE/ANTIAPPANNANTE Il cannocchiale da osservazione Bushnell NatureView è stato progettato e prodotto utilizzando la più avanzata tecnologia impermeabile e antiappannante. Il cannocchiale è sigillato mediante un anello di tenuta per garantire la protezione dall’umidità. La protezione antiappannante viene ottenuta mediante l’espulsione dell’azoto secco che rimuove tutta l’aria interna che potrebbe trattenere l’umidità.
- 32. 32 UTILIZZO del MINITREPPIEDI • Distendere completamente le gambe del treppiedi su una superficie stabile e piana, ad esempio un tavolo o il pavimento. • Collegare il cannocchiale allineando la vite nella parte superiore del treppiedi allo zoccolo da 1/4”-20 nella parte inferiore della base di montaggio del treppiedi del cannocchiale, quindi girare la manopola sul treppiedi fino a quando il cannocchiale non è ben fissato sul treppiedi (non stringere eccessivamente la manopola). • Per inclinare o ruotare la parte superiore del treppiedi/cannocchiale collegato, ruotare l’apposita maniglia in senso antiorario, spostare la parte superiore/cannocchiale nella posizione desiderata e stringere la maniglia in senso orario per fissarla in posizione. • Per regolare l’altezza del treppiedi, svitare la ghiera di regolazione dell’altezza, alzare o abbassare la colonna centrale e quindi serrare nuovamente la ghiera per bloccare l’altezza impostata. • Per rimuovere la parte del treppiedi che funge da supporto per il finestrino dell’auto e utilizzarla separatamente, svitare completamente il grande bullone del morsetto ed estrarre la parte superiore della piastra che si trova sulla colonna centrale. • Per utilizzare il supporto per il finestrino dell’auto, abbassare a metà il finestrino e fissare su di esso il Supporto per il finestrino dell’auto Maniglia della panoramica Gambe Manopola di montaggio Ghiera di regolazione dell’altezza Bullone del morsetto del supporto per finestrino dell’auto Vite di montaggio Colonna centrale Paraluce allungato Piastra (nonvisibile)
- 33. 33 morsetto imbottito del supporto, quindi serrare saldamente (ma non eccessivamente) il bullone del morsetto. Infine fissare il cannocchiale alla vite di montaggio. USO DEL PARALUCE A SCORRIMENTO In caso di eventuale abbagliamento o immagini fantasma dovute all’angolazione e alla direzione del sole rispetto all’obiettivo anteriore, spingere il paraluce in avanti per estenderlo. Spingere di nuovo il paraluce indietro per riportarlo in posizione di riposo. PULIZIA Gli obiettivi del cannocchiale da osservazione NatureView sono a rivestimento multiplo per garantire la massima trasmissione della luce. Come qualunque ottica a rivestimento multiplo, è necessario prestare la massima attenzione nella pulizia degli obiettivi. Seguire queste indicazioni per una pulizia appropriata dell’obiettivo: • Soffiare sugli obiettivi per rimuovere ogni traccia di polvere o di sporcizia soffiando (altrimenti, utilizzare una spazzola morbida per obiettivi). • Per rimuovere polvere o impronte, pulire con il panno in microfibra in dotazione strofinando con un movimento circolare. L’uso di un panno ruvido o una eccessiva strofinatura possono graffiare la superficie delle lenti dell’obiettivo e causare danni irreversibili. Il panno lavabile di pulizia in microfibra è ideale per la pulizia ordinaria delle ottiche. Alitare leggermente sulle lenti dell’obiettivo per produrre una leggera umidità, quindi sfregare delicatamente le lenti con il panno in microfibra. • Per una pulizia più accurata è possibile usare salviette per lenti fotografiche e un detergente apposito oppure alcol isopropilico. Applicare sempre il liquido sul panno utilizzato per la pulizia, mai direttamente sulle lenti. MANUTENZIONE GENERALE e AVVERTIMENTI Non smontare mai il cannocchiale da osservazione. Operazioni non autorizzate possono provocare danni irreparabili, che, inoltre, annullano la garanzia. NON GUARDARE MAI DIRETTAMENTE IL SOLE ATTRAVERSO IL CANNOCCHIALE PER EVITARE POSSIBILI DANNI AGLI OCCHI
- 34. 34 GARANZIA / RIPARAZIONI GARANZIA LIMITATA A VITA NatureView™ Si garantisce che i cannocchiale da osservazione Bushnell® NatureView™ saranno esenti da difetti di materiale e fabbricazione per la loro intera durata*. La garanzia viene offerta a ogni proprietario di un cannocchiale da osservazione NatureView. Sono esclusi dalla garanzia eventuali danni causati da abuso oppure maneggiamento, installazione o manutenzione impropri del cannocchiale da osservazione. A nostra sola discrezione ripareremo o sostituiremo un cannocchiale da osservazione NatureView eventualmente difettoso; tale rimedio è l’unico previsto da questa garanzia. Non saremo responsabili in nessun caso dei costi di trasporto al nostro recapito, dei costi di rimozione o reinstallazione del binocolo oppure di danni incidentali o indiretti. In alcuni stati o nazioni le norme di legge non permettono l’esclusione della limitazione di danni incidentali o diretti; in tal caso la precedente limitazione o esclusione non si applica. A un prodotto restituito negli Stati Uniti o in Canada e coperto da questa garanzia occorre allegare quanto segue. 1) Assegno/ordine di pagamento per l’importo di 10 $US per coprire i costi di spedizione. 2) Nome e indirizzo da utilizzare per la restituzione del prodotto. 3) Una spiegazione del difetto. 4) Scontrino. 5) Il prodotto deve essere imballato in una scatola robusta, per prevenire danni durante il trasporto, e va spedito franco destinatario a uno dei seguenti indirizzi. Recapito negli Stati Uniti Recapito in Canada Bushnell Outdoor Products Bushnell Outdoor Products Attn.: Repairs Attn.: Repairs 9200 Cody 25A East Pearce Street, Unit 1 Overland Park, Kansas 66214 USA Richmond Hill, Ontario L4B 2M9 Per prodotti acquistati fuori degli Stati Uniti o del Canada, rivolgersi al rivenditore per le clausole pertinenti della garanzia. n Europa si può anche contattare la Bushnell a al seguente recapito. Bushnell Germany GmbH European Service Centre Mathias-Brüggen-Str. 80 D-50827 Köln GERMANY Tel: +49 221 995568-0 Fax: +49 221 995568-20 Questa garanzia dà specifici diritti legali. Eventuali altri diritti variano da una nazione all’altra. ©2012 Bushnell Outdoor Products
- 36. Forfurtherquestionsoradditionalinformationpleasecontact: Bushnell Outdoor Products 9200 Cody, Overland Park, Kansas 66214 (800)423-3537 • www.bushnell.com ©2012 Bushnell Outdoor Products