SlideShare ist ein Scribd-Unternehmen logo
1 von 27
Downloaden Sie, um offline zu lesen
BINOCULARS | JUMELLE
BINOCULARES | FERNGLAS
BINOCOLI
ENGLISH..................................2
FRANÇAIS...............................12
ESPAÑOL.................................22
DEUTSCH.................................32
ITALIANO.................................42
2 I ENGLISH ENGLISH I 3
Thank you for purchasing a Celestron Cometron binocular. We trust this binocular will provide you
with years of enjoyment and faithful service. Please read the instructions carefully before using your
binocular to ensure proper use and care.
The interpupillary distance, or the distance
between the pupils, varies from person to
person. The binocular must be correctly aligned
(adjusted) to the distance between your pupils
to achieve a single, clear image. To adjust this
distance, lift the binocular up to your eyes (using
both hands) and look through them at an object
in the distance. Move the two barrels (halves)
of the binocular closer together or further
apart until you see a single, clear image (Fig.
2). Check that the interpupillary distance is set
correctly every time you use your binocular.
celestron®
Cometron binoculars Adjusting the Interpupillary Distance (IPD)
Fig. 1
WARNING: Viewing the Sun may cause permanent eye damage. Do not
view the Sun with your binoculars or even with the naked eye.
Eyecup
Eyepiece
Focus
Wheel
Objective
Lens
Diopter
Adjustment
Logo Plate / Tripod Adapter Thread
Fig. 2
Rainguard
(12x70)
Tripod Adapter
(12x70)
Objective Lens
Caps
Eyepiece
Caps
4 I ENGLISH ENGLISH I 5
To ensure a crisp, sharp image the focusing
system of the binocular must be set to
compensate for any differences in your
eyesight. This is achieved by setting the diopter
(located on the right eyepiece) before use. To
set the binocular to your eyesight follow the
instructions below.
1. View an object in the distance through the
binocular.
2. Cover the right objective lens with your hand
or the objective lens cap.
3. Rotate the focus wheel until the image
viewed with your left eye is clear and sharp.
4. Cover the left objective lens with your hand
or objective lens cap.
5. Viewing the same object, rotate the right
eyepiece (the diopter) until the image viewed
with your right eye is clear and sharp.
6. Your binocular is now adjusted to your eyes
and focusing on any object can now be
achieved by simply turning the focus wheel.
Tip: Eyeglasses worn for nearsightedness should be worn when using
binoculars as you may not be able to obtain focus at infinity
without them.
Eyecup Adjustment
The Cometron binoculars feature foldable
rubber eyecups to accommodate both eyeglass
and non-eyeglass wearers. If you do not wear
eyeglasses, leave the rubber eyecups in the
up position. If you wear eyeglasses, make sure
that the eyecups are folded down to obtain the
maximum field of view. When done observing,
make sure the rubber eyecups are in the up
position for storage.
Diopter Adjustment
Focus Wheel
Fig. 3
Setting the Diopter / Focusing
Fig. 4
6 I ENGLISH ENGLISH I 7
Tripod Adaptability
The Cometron binocular series feature built-in
threads that allow the binocular to be attached
to a tripod using a binocular tripod adapter
(included with model #71199). These threads
can be accessed by unscrewing the logo plate
found on the front of the hinge (Fig. 5).
To attach the binocular to a tripod, thread the
adapter into the binocular and attach the other
end of the adapter to a photographic tripod.
Mounting the binocular on a tripod allows for
added stability and comfort during prolonged
viewing.
Care and Storage
Your Celestron binocular will provide you years
of dependable service if it is cared for and
stored properly.
1. Protect the binocular from impact and do not
force any of the moving parts beyond their
limits.
2. Protect the optics of your binocular by
putting on all lens caps when not in use.
3. Store your binocular in a cool, dry place
whenever possible.
4. When storing for an extended period of time,
place the binocular in a plastic bag or airtight
container with a desiccant.
5. Do not leave the binocular in a car on a hot/
sunny day or near anything that generates
heat as this may cause damage.
6. Clean any dust, dirt or water that may get
on the binocular or inside moving parts as
soon as possible to prevent any unforeseen
damage.
Fig. 5
8 I ENGLISH ENGLISH I 9
Service and Repair
If warranty problems arise or repairs are
necessary, contact the Celestron customer
service department if you live in the United
States or Canada. If you live outside of these
countries, please contact the dealer you
purchased your binocular from or the Celestron
distributor in your country. A list of our
distributors can be found on our website.,
www.celestron.com
Cleaning
Proper cleaning of the lenses is essential
to maintaining the optical integrity of your
binocular. Dirty lenses diminish the amount of
light transmitted through the binocular and your
overall viewing experience.
1. Remove any dust on the lenses with a soft
lens brush or can of pressurized air.
2. Remove any fingerprints, stains or smudges
from the lens surface with a soft, clean lens
cloth or lens tissue by rubbing in a circular
motion. Start in the middle of the lens and
work your way to the edges. Breathe lightly
on the lens to provide moisture if needed.
3. For a more thorough cleaning we recommend
the use of a lens/optics cleaning kit available
at most photo or optical shops. Follow the
directions supplied with the cleaning kit for
best results.
Warranty
Your binocular is covered under the Celestron
Limited Lifetime Warranty. Celestron warrants
these binoculars to be free from defects in
materials and workmanship for the binoculars’
usable lifetime to the original owner. Celestron
will repair or replace the binoculars which,
upon inspection by Celestron, are found to be
defective in materials or workmanship and
within the definitions of the limits described
below.
This warranty does not cover products that
have been subject to abuse, misuse, physically
damaged, altered, or had unauthorized repairs
or modifications. This warranty does not cover
defects due to normal wear and tear and other
conditions.
This warranty is valid to U.S.A. and Canadian
customers who have purchased their binocular
from an authorized Celestron dealer in the
U.S.A. or Canada. For products purchased
outside of the U.S.A. or Canada please contact
your local Celestron Distributor or authorized
Dealer for applicable warranty information.
Additional warranty information and eligibility
details can be found on the Celestron website.
This product is designed and intended for use by those 14 years of age and older.
Product design and specifications are subject to change without prior notification.
For complete specifications and product
information:
www.celestron.com
2835 Columbia Street • Torrance, CA 90503 U.S.A
Tel: 800.421.9649
JUMELLE
FRANÇAIS
FRANÇAIS I 1312 I FRANÇAIS
Nous vous remercions d’avoir acheté les jumelles Cometron de Celestron. Nous espérons que cette
paire de jumelles vous donnera des années de plaisir et de loyaux services. Veuillez lire attentivement
les instructions avant d’utiliser vos jumelles pour vous assurer d’une utilisation appropriée.
L’écart interpupillaire, ou la distance entre les
pupilles, varie d’une personne à l’autre. Les
jumelles doivent être correctement alignées
(ajusté) à la distance entre vos pupilles afin
de créer une seule image claire. Pour régler
cette distance, soulevez les jumelles jusqu’à vos
yeux (en utilisant les deux mains) et regardez à
travers eux un objet distant. Déplacez les deux
barillets (moitiés) des jumelles le plus près
possible ou éloigné jusqu’à ce que vous voyiez
une seule image claire (Fig. 2). Vérifiez que
l’écart interpupillaire soit défini correctement
chaque fois que vous utilisez vos jumelles.
jumelles Cometron de Celestron®
RÉGLAGE DE L’ÉCART INTERPUPILLAIRE
Œilleton
Oculaire
Objectif
Réglage
dioptrique
AVERTISSEMENT: Ne jamais regarder le soleil pendant l’utilisation de vos jumelles.
Regarder vers le soleil peut causer des lésions oculaires permanentes.
Fig. 1
Plaque de logo / Auteur Tripod Adapter
Fig. 2
Rainguard
(12x70)
Adaptateur de
trépied
(12x70)
Oculaire
Caps
Objectif lentille
capuchon
Molette de
focalisation
FRANÇAIS I 1514 I FRANÇAIS
Afin d’assurer une image nette, le système de
focalisation de jumelles doit être réglé pour
compenser les différences éventuelles de votre
vision. Ceci est réalisé en réglant le dioptre
(situé sur l’oculaire droit) avant utilisation. Pour
régler les jumelles à votre vision, suivez les
instructions ci-dessous.
1. Visualisez un objet distant à travers les
jumelles.
2. Couvrez la lentille droite avec votre main ou
le capuchon d’objectif.
3. Tournez la molette de focalisation jusqu’à ce
que l’image avec votre œil gauche soit claire
et nette.
4. Couvrez la lentille gauche avec votre main ou
le capuchon d’objectif.
5. Visualisez le même objet, tourner l’oculaire
droit (la dioptrie) jusqu’à ce que l’image
affichée avec l’œil droit est claire et nette.
6. Les jumelles sont maintenant réglé pour vos
yeux et la focalisation de n’importe quel objet
peut maintenant être obtenue en tournant
simplement la molette de focalisation.
Astuce: Les lunettes de vision pour la myopie devraient être portées lors
de l’utilisation de jumelles puisque vous ne pourrez peut-être
pas être en mesure d’obtenir la mise au point à l’infini sans
celles-ci.
RÉGLAGE DES ŒILLETONS
Les jumelles Cometron dispose oeilleton
caoutchouc pliables pour accueillir les deux
lunettes et les porteurs non-lunettes. Si vous ne
portez pas de lunettes, laissez les œilletons en
caoutchouc en position relevée. Si vous portez
des lunettes, assurez-vous que les œilletons
sont rabattus pour obtenir le champ de vision
maximal. Une fois fait observer, s’assurer que
les œilletons en caoutchouc sont en position
haute pour le stockage.
RÉGLAGE DU DIOPTRE/FOCALISATION
Fig. 4
Réglage
dioptrique
Molette de focalisation
Fig. 3
FRANÇAIS I 1716 I FRANÇAIS
ADAPTABILITÉ DU TRÉPIED
Les jumelles Cometron disposent de filetages
intégrés qui permettent aux jumelles d’être
fixées sur un trépied à l’aide d’un adaptateur
de trépied de jumelles (inclus avec le modèle
# 71199). Ces filetages sont accessibles en
dévissant la plaque de logo située à l’avant de
la charnière (Fig. 5). Pour fixer les jumelles sur
un trépied, vissez l’adaptateur dans les jumelles
et fixez l’autre extrémité de l’adaptateur sur un
trépied photographique. Fixer les jumelles sur
un trépied permet une meilleure stabilité et plus
de confort pendant un visionnement prolongé.
Fig. 5
ENTRETIEN ET RANGEMENT
Les jumelles Celestron vous fourniront des
années de service fiable si elles sont bien
entretenues et stockées correctement.
1. Protégez les jumelles de tout impact et
ne forcez pas toute pièce en mouvement
au-delà de sa limite.
2. Protégez l’optique de vos jumelles en mettant
tous les bouchons d’objectif en place lorsque
vous n’utilisez pas les jumelles.
3. Entreposez vos jumelles dans un endroit frais
et sec si possible.
4. Lors de l’entreposage pendant une période
prolongée de temps, placez les jumelles
dans un sac en plastique ou un récipient
hermétique avec déshydratant.
5. Ne pas laisser les jumelles dans une voiture
lors d’une journée chaude et ensoleillée ou à
proximité de tout ce qui génère de la chaleur
car cela pourrait causer des dommages.
6. Nettoyez toute poussière, saleté ou eau
qui peut s’accumuler sur les jumelles ou à
l’intérieur de pièces en mouvement dès que
possible afin d’éviter tout dommage imprévu.
FRANÇAIS I 1918 I FRANÇAIS
SERVICE ET RÉPARATION
Si des problèmes de garantie survenaient
ou des réparations s’avéraient nécessaires,
contactez le département de service à la
clientèle de Celestron si vous résidez aux États-
Unis ou au Canada. Si vous habitez à l’extérieur
de ces pays, veuillez contacter le revendeur où
vous avez acheté vos jumelles ou le distributeur
Celestron de votre pays. Vous trouverez une liste
de nos distributeurs sur notre site Web. 	
www.celestron.com
NETTOYAGE
Un nettoyage adéquat des lentilles est
essentiel au maintien de l’intégrité optique de
vos jumelles. Des lentilles sales diminuent la
quantité de lumière transmise à travers les
jumelles et votre expérience de visionnement.
1. Enlevez toute poussière des lentilles avec
une brosse à lentilles souples ou aérosol d’air
pressurisé.
2. Retirez toute empreinte, tache ou bavure de
la surface de la lentille avec un tissu doux
de nettoyage de lentilles en frottant d’un
mouvement circulaire. Commencez au milieu
de la lentille en vous dirigeant lentement vers
les bords. Soufflez légèrement sur l’objectif
afin de fournir de l’humidité si nécessaire.
3. Pour un nettoyage plus en profondeur,
nous recommandons l’utilisation d’une
trousse de nettoyage de lentilles/optique
disponible dans la plupart des boutiques de
photos ou des magasins optiques. Suivez
les instructions fournies avec la trousse de
nettoyage pour de meilleurs résultats.
GARANTIE
Les jumelles sont couvertes par la garantie à
vie limitée Celestron. Celestron garantit que ces
jumelles sont exempts de défauts de matériaux
et de fabrication pendant la durée de vie des
jumelles »utilisable pour le propriétaire d’origine.
Celestron réparera ou remplacera les jumelles
qui, après inspection par Celestron, présentent
des défauts de matériaux ou de fabrication
et dans les définitions des limites décrites
ci-dessous.
Cette garantie ne couvre pas les produits qui
ont fait l’objet d’abus, de mauvaise utilisation,
qui sont physiquement endommagés, altérés ou
n’avaient pas reçu les autorisations nécessaires
pour les réparations ou les modifications. Cette
garantie ne couvre pas les défauts dus à une
usure normale et d’autres conditions.
Cette garantie est valable pour les clients
aux États-Unis d’Amérique et au Canada qui
ont acheté leurs jumelles chez un revendeur
Celestron agréé aux États-Unis ou au Canada.
Pour les produits achetés en dehors des États-
Unis ou au Canada, veuillez contacter votre
distributeur local de Celestron ou revendeur
agréé pour toute information de garantie
applicable. Des informations additionnelles de
garantie et de détails d’admissibilité se trouvent
sur le site Web de Celestron.
Ce produit est conçu et destiné pour les personnes de 14 ans et plus.
La conception des produits et les spécifications sont sujettes à modification sans
notification préalable.
Pour connaître les spécifications complètes
et informations sur le produit:
www.celestron.com
2835 Columbia Street • Torrance, CA 90503
É.-U. • Téléphone: 800.421.9649
BINOCULARES
ESPAÑOL
22 I ESPAÑOL ESPAÑOL I 23
Gracias por adquirir unos binoculares Cometron de Celestron. Confiamos en que estos binoculares
le ofrecerán años de servicio y satisfacción. Lea atentamente las instrucciones antes de usar sus
binoculares para garantizar un uso y cuidados adecuados.
La distancia interpupilar, o distancia entre las
pupilas, varía en cada persona. Los binoculares
deben estar correctamente alineados (ajustados)
a la distancia entre sus pupilas para obtener una
sola imagen clara. Para ajustar esta distancia,
levante los binoculares hasta los ojos (usando
ambas manos) y mire por ellos a un objeto
distante. Mueva los dos cañones (mitades) de
los binoculares más cerca o más lejos hasta que
vea una única imagen cara (fig. 2). Compruebe
que la distancia interpupilar esté correctamente
establecida cada vez que use los binoculares.
binoculares Cometron de Celestron®
AJUSTE DE LA DISTANCIA INTERPUPILAR
ATENCIÓN: No mire nunca al sol cuando use los binoculares.
Mirar al sol puede provocar daños permanentes a la vista.
Fig. 1
Amohadilla
ocular
Ocular
Rueda de
enfoque
Lente de
objetivo
Dioptría ajuste
Placa con el logo / Ranuras
de adaptador para trípode
– (bajo el tapón)Protector
para lluvia
(12x70)
Adaptador para
trípode
(12x70)
Tapas de Lente
Objetivo
Ocular
Caps
Fig. 2
24 I ESPAÑOL ESPAÑOL I 25
Para garantizar una imagen clara y definida
debe establecerse el sistema de enfoque para
que compense cualquier variación de su vista.
Esto se consigue configurando la dioptría
(situada en el ocular derecho) antes del uso.
Para adaptar los binoculares a su vista siga las
instrucciones siguientes.
1. Observe un objeto distante por los
binoculares.
2. Cubra la lente del objetivo derecho con la
mano o la tapa de la lente del objetivo.
3. Gire la rueda de enfoque hasta que la
imagen vista con el ojo izquierdo sea clara y
definida.
4. Cubra la lente del objetivo izquierdo con la
mano o la tapa de la lente del objetivo.
5. Observando el mismo objeto, gire el ocular
derecho (las dioptrías) hasta que la imagen
se ve con su ojo derecho es clara y nítida.
6. El binocular se ajustará a sus ojos y podrá
enfocar cualquier objeto girando la rueda de
enfoque.
Recomendación: Las gafas de vista cercana deben llevarse al usar
binoculares, ya que puede que no sea posible obtener
enfoque en infinito sin ellas.
AJUSTE DE LA ALMOHADILLA
El Cometron cuenta Ojeras de goma plegables
para acomodar tanto los portadores de gafas y
no gafas. Si no usa gafas, deje los oculares de
goma en la posición superior. Si usa anteojos,
asegúrese de que las ojeras se doblan hacia
abajo para obtener el máximo campo de visión.
Cuando se hace la observación, asegúrese de
que los oculares de goma están en la posición
para guardarlo.
Dioptría ajuste
Rueda de enfoquel
Fig. 3
CONFIGURAR LA DIOPTRÍA / ENFOQUE
Fig. 4
26 I ESPAÑOL ESPAÑOL I 27
ADAPTABILIDAD DE TRÍPODE
Los binocular Cometron incluyen ranuras
integradas que permiten fijar el binocular a
un trípode usando un adaptador para trípode
(incluido con el modelo # 71199). Estas
ranuras están accesibles desenroscando la
placa del logo situada en la parte delantera de
la bisagra (Fig. 5). Para fijar los binoculares a
un trípode, pase el adaptador por el binocular
y fije el otro extremo del adaptador a un
trípode fotográfico. Montar los binoculares en
un trípode permite una mayor estabilidad y
comodidad durante observaciones prolongadas.
Fig. 5
CUIDADOS Y ALMACENAMIENTO
Sus binoculares Celestron le ofrecerán años
de servicio fiable si se cuidan y guardan
adecuadamente.
1. Proteja los binoculares de impactos y no
fuerce ninguna pieza móvil más allá de sus
límites.
2. Proteja la óptica de sus binoculares poniendo
todas las tapas de lentes cuando no los use.
3. Guarde sus binoculares en un lugar fresco
y seco siempre que sea posible.
4. Cuando los guarde durante un periodo
prolongado, coloque los binoculares en una
bolsa de plástico o un recipiente hermético
con desecante.
5. No deje los binoculares en un coche en
un día cálido/soleado ni cerca de nada
que genere calor, podría dañarlos.
6. Limpie el polvo, la suciedad o el agua que
pueda estar sobre los binoculares o en las
piezas móviles en cuanto sea posible para
evitar posibles daños.
28 I ESPAÑOL ESPAÑOL I 29
SERVICIO Y REPARACIÓN
Si se presentan problemas de garantía o
reparaciones, contacte con el departamento
de servicio al cliente de Celestron si vive en
Estados Unidos o Canadá. Si vive en otro país,
contacte con el vendedor en el que adquirió
los binoculares o del distribuidor de Celestron
de su país. Puede encontrar una lista de
distribuidores en nuestro sitio web.
www.celestron.com
LIMPIEZA
Es esencial una limpieza adecuada de las
lentes para mantener la integridad óptica de
sus binoculares. Las lentes sucias reducen
la cantidad de luz que se transmite por los
binoculares y su experiencia de observación
global.
1. Saque el polvo de las lentes con un
cepillo suave para lentes o un bote de
aire comprimido.
2. Elimine cualquier huella dactilar, mancha o
suciedad de la superficie de la lente con una
gamuza suave y limpia para lentes frotándola
con un movimiento circular. Comience por el
centro de la lente y avance hacia los bordes.
Aliente ligeramente sobre la lente para
proporcionar humedad si es necesario.
3. Para una limpieza más completa
recomendamos usar un kit de limpieza
de lente/óptica, disponible en la mayoría
de tiendas de fotografía u óptica. Siga las
instrucciones incluidas en el kit de limpieza
para obtener los mejores resultados.
GARANTÍA
Sus binoculares están cubiertos por la
garantía limitada de por vida de Celestron.
Celestron garantiza que estos prismáticos
de estar libres de defectos en materiales y
mano de obra durante toda la vida útil de los
binoculares a su propietario original. Celestron
reparará o sustituirá los binoculares que, al
ser inspeccionados por Celestron, muestren
defectos de materiales o mano de obra y
estén dentro de las definiciones de los límites
descritos a continuación.
Esta garantía no cubre productos que hayan
sido sometidos a abuso, mal uso, daños físicos,
alteraciones o reparaciones o modificaciones
no autorizadas. Esta garantía no cubre defectos
por desgaste normal y otras condiciones.
Esta garantía tiene validez para clientes de
EE.UU. y Canadá que hayan adquirido sus
binoculares en un vendedor autorizado de
Celestron en EE.UU. y Canadá. Para productos
adquiridos fuera de EE.UU. o Canadá,
contacte con su distribuidor local de Celestron
o un vendedor autorizado para obtener la
información de garantía aplicable. Puede
encontrar información adicional de garantía y
elegibilidad en el sitio web de Celestron.
Los binoculares Celestron están diseñados y pretendidos para personas de 14
o más años de edad.
El diseño y las especificaciones del producto están sujetos a cambios sin
notificación previa.
Para especificaciones e información
completa del producto:
www.celestron.com
2835 Columbia Street • Torrance, CA 90503
EE.UU. • Teléfono: 800.421.9649
FERNGLAS
DEUTSCH
32 I DEUTSCH DEUTSCH I 33
Vielen Dank für den Kauf eines Cometron-Fernglases von Celestron. Wir sind davon überzeugt,
dass Ihnen dieses Fernglas jahrelang Freude bereiten und zuverlässige Dienste leisten wird. Bitte
lesen Sie diese Bedienungsanleitung vor Gebrauch des Fernglases sorgfältig durch, um eine
sichere Handhabung und Pflege sicherzustellen.
Der interpupillare Abstand oder der Abstand
zwischen den Pupillen variiert von Mensch zu
Mensch. Das Fernglas muss korrekt auf den
Abstand zwischen Ihren Pupillen ausgerichtet
(eingestellt) werden, damit ein klares Einzelbild
erreicht wird. Heben Sie zum Einstellen des
Abstands das Fernglas an Ihre Augen (unter
Verwendung beider Hände) und richten Sie
Ihren Blick hindurch auf ein entferntes Objekt.
Schieben Sie die zwei Tuben (Hälften) des
Fernglases enger zusammen oder weiter
auseinander, bis Sie ein einzelnes klares Bild
sehen (Abb. 2). Überprüfen Sie das Fernglas
bei jeder Verwendung auf einen korrekten
interpupillaren Abstand.
Cometron-Fernglases von Celestron®
DEN INTERPUPILLAREN ABSTAND EINSTELLEN
WARNUNG: Schauen Sie mit dem Fernglas keinesfalls in die Sonne. Das Schauen
in die Sonne kann zu permanenten Sehschäden führen.
Abb. 1
Augenmuschel
Okular
Fokussierradl
Objektiv
Dioptrie-
Einstellring
Logo-Etikett/Stativ-AdapterSchrauben –
(unter der Kappe)
Okularschutzdeckel
(12x70)
Stativ-Adapter
(12x70)
Objektivlinse
caps
Okular
Caps
Abb. 2
34 I DEUTSCH DEUTSCH I 35
Für ein gestochen scharfes Bild muss das
Fokussiersystem des Fernglases so eingestellt
werden, dass jeglicher Unterschied in Ihrer
Sehkraft kompensiert wird. Dies wird vor
Gebrauch durch Einstellung der Dioptrie (auf
dem rechten Okular) erreicht. Folgen Sie zum
Einstellen des Fernglases auf Ihre Sehkraft den
untenstehenden Anweisungen.
1. Richten Sie Ihren Blick durch das Fernglas
auf ein entferntes Objekt.
2. Decken Sie das rechte Objektiv mit einer
Hand oder der Objektiv-Kappe ab.
3. Drehen Sie das Fokussierrad so weit, bis das
Bild von Ihrem linken Auge klar und scharf
wahrgenommen wird.
4. Decken Sie das linke Objektiv mit einer Hand
oder der Objektiv-Kappe ab.
5. Beim Beobachten desselben Objektes
drehen Sie das rechte Okular (das Diopter)
bis das mit dem rechten Auge anvisierte Bild
deutlich und scharf zu sehen ist.
6. Ihr Fernglas ist nun auf Ihre Augen
eingestellt und das Fokussieren auf jegliches
Objekt kann nun einfach durch Drehen am
Fokussierrad erreicht werden.
Tipp: Brillen, die bei Kurzsichtigkeit getragen werden, sollten auch bei
Verwendung des Fernglases getragen werden, da ohne diese
eventuell kein perfektes Fokussieren möglich ist
EINSTELLEN DER AUGENMUSCHEL
Die Cometron Ferngläser sind mit faltbaren
Gummiaugenmuscheln ausgestattet, die sowohl
Brillenträgern als auch Benutzern ohne Brille
entgegenkommen. Wenn Sie keine Brille
tragen, lassen Sie die Gummiaugenmuscheln
in der “nach oben” Stellung. Wenn Sie eine
Brille tragen, stellen Sie sicher, dass die
Augenmuscheln nach unten gefaltet sind, um
ein maximales Blickfeld zu gewährleisten. Wenn
Sie mit dem Gebrauch fertig sind, stellen Sie
die Gummiaugenmuscheln zur Lagerung nach
oben.
DIOPTRIE-EINSTELLUNG/FOKUSSIEREN
Abb 4
Dioptrie-Einstellring
Fokussierrad
Abb. 3
36 I DEUTSCH DEUTSCH I 37
STATIV-ANWENDBARKEIT
Die Cometron Fernglasserie verfügt über
eingebaute Schrauben, mit denen das Fernglas
mithilfe des Fernglas-Stativ-Adapters an
einem Stativ angebracht werden kann (im
Lieferumfang von Modell # 71199). Diese
Schrauben können durch Abdrehen des
Logo-Etiketts vorne am Scharnier freigelegt
werden (Abb. 5). Um das Fernglas an einem
Stativ anzubringen, schrauben Sie den Adapter
in das Fernglas und bringen das andere
Ende des Adapters an ein Fotografie-Stativ
an. Die Anbringung des Fernglases an ein
Stativ ermöglicht mehr Stabilität und Komfort
während langer Betrachtungen.
PFLEGE UND AUFBEWAHRUNG
Ihr Celestron-Fernglas wird Ihnen jahrelang
zuverlässige Dienste leisten, wenn es
ordnungsgemäß gepflegt und aufbewahrt wird.
1. Schützen Sie das Fernglas vor Stößen und
beanspruchen Sie die beweglichen Teile
nicht über deren Grenzen hinaus.
2. Schützen Sie die optischen Teile Ihres
Fernglases, indem Sie bei Nicht-Verwendung
alle Objektiv-Kappen anbringen.
3. Bewahren Sie Ihr Fernglas, wann immer
möglich, an einem kühlen, trockenen Platz
auf.
4. Legen Sie das Fernglas für eine
Aufbewahrung über einen längeren Zeitraum
zusammen mit einem Trockenmittel in einen
Plastikbeutel oder einen luftdichten Behälter.
5. Lassen Sie das Fernglas an einem heißen/
sonnigen Tag nicht im Auto liegen und legen
Sie es nicht in die Nähe einer Wärmequelle,
da dies zu Schäden führen könnte.
6. Entfernen Sie Staub, Schmutz oder Wasser
so schnell wie möglich, da diese in das
Fernglas oder die internen beweglichen Teile
eindringen können und unvorhergesehene
Schäden verursachen können.
REINIGUNG
Die ordnungsgemäße Reinigung der
Objektive ist für die Aufrechterhaltung
der optischen Integrität Ihres Fernglases
unerlässlich. Verschmutze Objektive reduzieren
die Lichtmenge, die durch das Fernglas
geleitet wird, und somit Ihr gesamtes
Betrachtungserlebnis.
Abb 5
38 I DEUTSCH DEUTSCH I 39
WARTUNG UND REPARATUR
Treten Garantiefälle auf oder sind Reparaturen
nötig, wenden Sie sich bitte, wenn Sie in den
Vereinigten Staaten oder Kanada leben, an
die Celestron-Kundendienstabteilung. Leben
Sie außerhalb dieser Länder, wenden Sie sich
bitte an den Händler, bei dem Sie Ihr Fernglas
erworben haben oder an den Celestron-Vertrieb
in Ihrem Land. Eine Liste unserer Vertreiber
finden Sie auf unserer Website.
www.celestron.com
GARANTIE
Ihr Fernglas ist durch die eingeschränkte,
lebenslange Garantie von Celestron abgedeckt.
Celestron garantiert diese Ferngläser frei
von Mängeln in Material und Verarbeitung
für das Fernglas ‘nutzbare Lebensdauer
der ursprünglichen Besitzer. Celestron
wird eine Reparatur oder einen Austausch
des Fernglases, bei dem aufgrund einer
Überprüfung durch Celestron ein Material- oder
Herstellungsfehler gefunden wird, innerhalb der
Definitionen der unten beschriebenen Grenzen
durchführen.
Diese Garantie gilt nicht für Produkte,
die Gegenstand von Missbrauch oder
unsachgemäßer Verwendung waren oder
physikalisch beschädigt bzw. verändert wurden
oder an denen unautorisierte Reparaturen
oder Modifikationen vorgenommen wurden.
Diese Garantie deckt keine Defekte aufgrund
von normalem Verschleiß und anderen
Bedingungen ab.
Diese Garantie ist für Kunden in den USA
und Kanada gültig, die ihr Fernglas von einem
autorisierten Celestron-Händler in den USA
oder Kanada gekauft haben. Wenden Sie sich
für geltende Garantieinformationen bezüglich
Produkte, die außerhalb der USA oder Kanada
gekauft wurden, bitte an Ihren Celestron-
Vertreiber oder autorisierten Händler vor
Ort. Zusätzliche Garantieinformationen und
Einzelheiten über Ansprüche finden Sie auf
der Celestron-Website.
Celestron-Ferngläser wurden für 14 Jahre und älter entworfen und vorgesehen.
Produktdesign und technische Daten können ohne Vorankündigung geändert werden.
Für vollständige technische Daten und
Produktinformationen:
www.celestron.com
2835 Columbia Street • Torrance, CA 90503
U.S.A. • Telefon: 800.421.9649
1. Entfernen Sie Staub mithilfe einer weichen
Objektivbürste oder einer Druckluftdose von
den Objektiven.
2. Entfernen Sie von den Objektiv-
Oberflächen Fingerabdrücke, Flecken oder
Verschmutzungen mit einem weichen Tuch
oder Linsenreinigungstuch, indem Sie in
kreisenden Bewegungen darüber reiben.
Beginnen Sie in der Mitte des Objektivs und
arbeiten Sie sich an die Ränder vor. Hauchen
sie die Objektive leicht an, um wenn nötig
Feuchtigkeit aufzubringen.
3. Für eine gründlichere Reinigung empfehlen
wir die Verwendung eines Reinigungs-Kits
für Linsen/Objektive, das in den meisten
Foto- oder Optik-Geschäften erhältlich ist.
Befolgen Sie für optimale Ergebnisse die
Anleitung, die dem Reinigungs-Kit beiliegt.
BINOCOLI
ITALIANO
42 I ITALIANO ITALIANO I 43
Grazie per aver acquistato un binocolo Celestron Cometron. Siamo sicuri che questo binocolo offrirà
anni di divertimento e di servizio affidabile. Leggere attentamente le istruzioni prima di utilizzare il
binocolo al fine di garantire l’uso e la cura corretti.
La distanza interpupillare, o distanza tra le
pupille, varia da persona a persona. Il binocolo
deve essere allineato (regolato) correttamente
alla distanza tra le proprie pupille al fine di
ottenere un’immagine unica e chiara. Per
regolare la distanza, sollevare il binocolo ai
propri occhi (utilizzando entrambe le mani) e
guardare attraverso esso a un oggetto distante.
Spostare le due canne (metà) del binocolo
entrambe verso il centro oppure verso l’esterno
fino a quando si vedrà un’immagine unica e
chiara (Fig. 2). Controllare che la distanza
interpupillare sia impostata correttamente a ogni
utilizzo del binocolo.
binocolo Celestron®
Cometron REGOLAZIONE DELLA DISTANZA INTERPUPILLARE
Fig. 2
ATTENZIONE: Mai guardare in direzione del Sole utilizzando il binocolo. Guardare in
direzione del Sole può causare danni permanenti agli occhi.Fig. 1
Oculare
Logo Piastra / Adattatore treppiede
Obiettivo
Caps
Adattatore
treppiede
(12x70)
Oculare
Caps
Anello di
regolazione
della diottria
Coprioculare
Protezione contro la
pioggia (12x70)
Lente
dell’obiettivo
Ghiera di
messa a
fuoco
44 I ITALIANO ITALIANO I 45
Per garantire un’immagine chiara e nitida, il
sistema di messa a fuoco del binocolo deve
essere impostato per compensare qualsiasi
differenza nella propria vista. Ciò si ottiene
impostando le diottrie (poste sull’oculare di
destra) prima dell’uso. Per impostare il binocolo
secondo le proprie condizioni di vista, seguire
le istruzioni sottostanti.
1. Osservare un oggetto distante attraverso il
binocolo.
2. Coprire la lente obiettivo di destra con la
mano o con il tappo per le lenti obiettivo.
3. Ruotare la rotella di messa a fuoco fino a
quando l’immagine visualizzata con l’occhio
sinistro sarà chiara e nitida.
4. Coprire la lente obiettivo di sinistra con la
mano o con il tappo per le lenti obiettivo.
5. Osservare lo stesso oggetto, ruotare
l’oculare destro (la diottria) finché l’immagine
visualizzata con l’occhio destro è chiara e
nitida.
6. Il binocolo è ora regolato secondo i propri
occhi e la messa a fuoco di qualsiasi
oggetto può ora essere ottenuta ruotando
semplicemente la rotella di messa a fuoco.
Suggerimento: Gli occhiali per la miopia devono essere indossati
quando si utilizza il binocolo in quanto potrebbe non
essere possibile ottenere la messa a fuoco all’infinito
senza di essi.
REGOLAZIONE DELLA CONCHIGLIA OCULARE
Il Cometron dispone conchiglie oculari in
gomma pieghevoli per ospitare sia occhiali
e portatori di non-occhiali. Se non si usano
occhiali, lasciare le conchiglie oculari in gomma
in posizione sollevata. Se si indossano occhiali
da vista, assicurarsi che le conchiglie oculari
sono piegate verso il basso per ottenere
il massimo campo visivo. Una volta fatto
l’osservazione, assicurarsi che le conchiglie
oculari in gomma sono nella posizione per
la memorizzazione.
Anello di regolazione
delle diottrie
IMPOSTAZIONE DELLA DIOTTRIA / MESSA A FUOCO
Fig. 4
Fig. 3
Ghiera di
messa a
fuoco
46 I ITALIANO ITALIANO I 47
ADATTABILITÀ DEL TREPPIEDE
Le binocolo Cometron presentano filettature
integrate che consentono il collegamento
del binocolo a un treppiede utilizzando un
adattatore per treppiede per binocoli (incluso
con il modello # 71199). È possibile accedere
a tali filettature svitando la piastra del logo
che si trova sulla parte frontale della cerniera
(Fig. 5). Per collegare il binocolo al treppiede,
avvitare l’adattatore al binocolo e collegare
l’altra estremità dell’adattatore a un treppiede
fotografico. Montare il binocolo su un treppiede
consente una maggiore stabilità e comodità
durante le osservazioni prolungate.
CURA E CONSERVAZIONE
Il binocolo Celestron offrirà anni di servizio
affidabile se curato e conservato correttamente.
1. Proteggere il binocolo dagli urti e non forzare
nessuna parte movibile oltre i suoi limiti.
2. Proteggere le parti ottiche del binocolo
applicando tutti i tappi per le lenti quando
non in uso.
3. Conservare il binocolo in un luogo fresco e
asciutto ogniqualvolta ciò sia possibile.
4. In caso di conservazione per un lungo
periodo di tempo, inserire il binocolo in un
sacchetto di plastica o un contenitore a
chiusura ermetica con un essiccante.
5. Non lasciare il binocolo all’interno dell’auto in
giornate calde/soleggiate o in prossimità di
qualsiasi oggetto che generi calore, in quanto
ciò potrebbe danneggiare l’apparecchio.
6. Pulire qualsiasi pulviscolo, sporcizia o
acqua che potrebbe trovarsi sul binocolo o
all’interno delle parti movibili non appena
possibile al fine di evitare danni imprevisti.
Fig. 5
48 I ITALIANO ITALIANO I 49
ASSISTENZA E RIPARAZIONE
In caso di problemi di garanzia o di necessità di
riparazione, contattare il reparto di assistenza
clienti Celestron se si risiede negli Stati Uniti o
in Canada. Se si risiede al di fuori di tali Paesi,
contattare il rivenditore da cui si è acquistato
il binocolo oppure il distributore Celestron del
proprio Paese. Un elenco dei nostri distributori
può essere consultato sul nostro sito Internet.
www.celestron.com
PULIZIA
La corretta pulizia delle lenti è essenziale per
mantenere l’integrità dei componenti ottici
del binocolo. Le lenti sporche diminuiscono la
quantità di luce trasmessa attraverso il binocolo
e l’esperienza di osservazione complessiva.
1. Rimuovere eventuali pulviscoli sulle lenti
con un pennello soffice per lenti o una
bomboletta di aria compressa.
2. Rimuovere eventuali impronte, macchie o
sbavature dalla superficie delle lenti con un
panno per lenti soffice e pulito o un tessuto
per lenti, strofinando con movimenti circolari.
Iniziare dal centro delle lenti e proseguire
verso i bordi. Alitare leggermente sulle lenti
per applicare umidità, se necessario.
3. Per una pulizia più complete si consiglia di
utilizzare il kit di pulizia per componenti ottici/
lenti disponibile nei principali negozi di ottica
o fotografici. Seguire le istruzioni fornite con
il kit di pulizia per risultati ottimali.
GARANZIA
Il binocolo è coperto dalla Garanzia limitata
a vita di Celestron. Celestron garantisce
che questi binocoli sono esenti da difetti
di materiale e di fabbricazione per tutta la
vita utile il binocolo “al proprietario originale.
Celestron riparerà o sostituirà i binocoli
che, dopo un’analisi da parte di Celestron,
risultino presentare difetti nei materiali o nella
fabbricazione e che rientrino nelle definizioni dei
limiti descritti qui di seguito.
La presente garanzia non copre prodotti che
sono stati oggetto di abuso, uso improprio,
danni o alterazioni fisiche o che sono stati
sottoposti a modifiche o riparazioni non
autorizzate. La presente garanzia non copre
i difetti dovuti alla normale usura e ad altre
condizioni.
La presente garanzia è valida per i clienti di
Stati Uniti e Canada che hanno acquistato il
proprio binocolo da un rivenditore Celestron
autorizzato negli Stati Uniti o in Canada. Per i
prodotti acquistati al di fuori degli Stati Uniti o
del Canada, contattare il proprio distributore
Celestron o il rivenditore autorizzato per le
informazioni sulla garanzia applicabili. Ulteriori
informazioni di garanzia e criteri di idoneità
possono essere trovati sul sito Internet di
Celestron.
I binocoli Celestron sono progettati e destinati all’uso di persone di età pari o
superiore ai 14 anni.
Il design del prodotto e le specifiche sono soggette a modifiche senza previa notifica.
Per le specifiche e le informazioni di
prodotto complete:
www.celestron.com
2835 Columbia Street • Torrance, CA 90503 U.S.A
Telefono: 800.421.9649
www.celestron.com
©2013 Celestron • All rights reserved • Printed in China • 04-13
This product is designed and intended for use by those 14 years of age and older.

Weitere ähnliche Inhalte

Was ist angesagt?

Instructions MINOX BL 56mm | Optics Trade
Instructions MINOX BL 56mm | Optics TradeInstructions MINOX BL 56mm | Optics Trade
Instructions MINOX BL 56mm | Optics TradeOptics-Trade
 
Instructions ZEISS 20x60 S Binoculars | Optics Trade
Instructions ZEISS 20x60 S Binoculars | Optics TradeInstructions ZEISS 20x60 S Binoculars | Optics Trade
Instructions ZEISS 20x60 S Binoculars | Optics TradeOptics-Trade
 
Instructions MINOX BL Series | Optics Trade
Instructions MINOX BL Series | Optics TradeInstructions MINOX BL Series | Optics Trade
Instructions MINOX BL Series | Optics TradeOptics-Trade
 
Instruction Manual | Celestron Nature DX Binoculars | Optics Trade
Instruction Manual | Celestron Nature DX Binoculars | Optics TradeInstruction Manual | Celestron Nature DX Binoculars | Optics Trade
Instruction Manual | Celestron Nature DX Binoculars | Optics TradeOptics-Trade
 
Instructions MINOX BN 7x50 | Optics Trade
Instructions MINOX BN 7x50 | Optics TradeInstructions MINOX BN 7x50 | Optics Trade
Instructions MINOX BN 7x50 | Optics TradeOptics-Trade
 
Instructions MINOX BV Series | Optics Trade
Instructions MINOX BV Series | Optics TradeInstructions MINOX BV Series | Optics Trade
Instructions MINOX BV Series | Optics TradeOptics-Trade
 
Instructions MEOPTA MeoStar S1 75 Spotting Scope | Optics Trade
Instructions MEOPTA MeoStar S1 75 Spotting Scope | Optics TradeInstructions MEOPTA MeoStar S1 75 Spotting Scope | Optics Trade
Instructions MEOPTA MeoStar S1 75 Spotting Scope | Optics TradeOptics-Trade
 
Instructions MINOX Binoculars Strap | Optics Trade
Instructions MINOX Binoculars Strap | Optics TradeInstructions MINOX Binoculars Strap | Optics Trade
Instructions MINOX Binoculars Strap | Optics TradeOptics-Trade
 
Instruction Manual | Kite Optics Bonelli 2.0 | Optics Trade
Instruction Manual | Kite Optics Bonelli 2.0 | Optics TradeInstruction Manual | Kite Optics Bonelli 2.0 | Optics Trade
Instruction Manual | Kite Optics Bonelli 2.0 | Optics TradeOptics-Trade
 
Instructions BUSHNELL Nature View Spotting Scope | Optics Trade
Instructions BUSHNELL Nature View Spotting Scope | Optics TradeInstructions BUSHNELL Nature View Spotting Scope | Optics Trade
Instructions BUSHNELL Nature View Spotting Scope | Optics TradeOptics-Trade
 
Instruction Manual | Celestron UpClose Binoculars | Optics Trade
Instruction Manual | Celestron UpClose Binoculars | Optics TradeInstruction Manual | Celestron UpClose Binoculars | Optics Trade
Instruction Manual | Celestron UpClose Binoculars | Optics TradeOptics-Trade
 
Instructions MINOX MD 62 Series | Optics Trade
Instructions MINOX MD 62 Series | Optics TradeInstructions MINOX MD 62 Series | Optics Trade
Instructions MINOX MD 62 Series | Optics TradeOptics-Trade
 
Instructions MINOX MD 50 Series | Optics Trade
Instructions MINOX MD 50 Series | Optics TradeInstructions MINOX MD 50 Series | Optics Trade
Instructions MINOX MD 50 Series | Optics TradeOptics-Trade
 
Instruction Manual | Kite Optics Cervus HD | Optics Trade
Instruction Manual | Kite Optics Cervus HD | Optics TradeInstruction Manual | Kite Optics Cervus HD | Optics Trade
Instruction Manual | Kite Optics Cervus HD | Optics TradeOptics-Trade
 
Instructions MINOX BD-BR 24mm, 25mm | Optics Trade
Instructions MINOX BD-BR 24mm, 25mm | Optics TradeInstructions MINOX BD-BR 24mm, 25mm | Optics Trade
Instructions MINOX BD-BR 24mm, 25mm | Optics TradeOptics-Trade
 
Instruction Manual | Kite Optics Ibis ED | Optics Trade
Instruction Manual | Kite Optics Ibis ED | Optics TradeInstruction Manual | Kite Optics Ibis ED | Optics Trade
Instruction Manual | Kite Optics Ibis ED | Optics TradeOptics-Trade
 
Catalog DOERR Danubia | Optics Trade | 2015
Catalog DOERR Danubia | Optics Trade | 2015Catalog DOERR Danubia | Optics Trade | 2015
Catalog DOERR Danubia | Optics Trade | 2015Optics-Trade
 
Nach welchen Gesichtspunkten sollte man seine Sonnengläser auswählen?
Nach welchen Gesichtspunkten sollte man seine Sonnengläser auswählen?Nach welchen Gesichtspunkten sollte man seine Sonnengläser auswählen?
Nach welchen Gesichtspunkten sollte man seine Sonnengläser auswählen?julbo-eyewear
 
Instruction Manual Kite Optics Falco Binoculars | Optics Trade
Instruction Manual Kite Optics Falco Binoculars | Optics TradeInstruction Manual Kite Optics Falco Binoculars | Optics Trade
Instruction Manual Kite Optics Falco Binoculars | Optics TradeOptics-Trade
 
Sonnenbrillen mit Korrekturgläsern
Sonnenbrillen mit KorrekturgläsernSonnenbrillen mit Korrekturgläsern
Sonnenbrillen mit Korrekturgläsernjulbo-eyewear
 

Was ist angesagt? (20)

Instructions MINOX BL 56mm | Optics Trade
Instructions MINOX BL 56mm | Optics TradeInstructions MINOX BL 56mm | Optics Trade
Instructions MINOX BL 56mm | Optics Trade
 
Instructions ZEISS 20x60 S Binoculars | Optics Trade
Instructions ZEISS 20x60 S Binoculars | Optics TradeInstructions ZEISS 20x60 S Binoculars | Optics Trade
Instructions ZEISS 20x60 S Binoculars | Optics Trade
 
Instructions MINOX BL Series | Optics Trade
Instructions MINOX BL Series | Optics TradeInstructions MINOX BL Series | Optics Trade
Instructions MINOX BL Series | Optics Trade
 
Instruction Manual | Celestron Nature DX Binoculars | Optics Trade
Instruction Manual | Celestron Nature DX Binoculars | Optics TradeInstruction Manual | Celestron Nature DX Binoculars | Optics Trade
Instruction Manual | Celestron Nature DX Binoculars | Optics Trade
 
Instructions MINOX BN 7x50 | Optics Trade
Instructions MINOX BN 7x50 | Optics TradeInstructions MINOX BN 7x50 | Optics Trade
Instructions MINOX BN 7x50 | Optics Trade
 
Instructions MINOX BV Series | Optics Trade
Instructions MINOX BV Series | Optics TradeInstructions MINOX BV Series | Optics Trade
Instructions MINOX BV Series | Optics Trade
 
Instructions MEOPTA MeoStar S1 75 Spotting Scope | Optics Trade
Instructions MEOPTA MeoStar S1 75 Spotting Scope | Optics TradeInstructions MEOPTA MeoStar S1 75 Spotting Scope | Optics Trade
Instructions MEOPTA MeoStar S1 75 Spotting Scope | Optics Trade
 
Instructions MINOX Binoculars Strap | Optics Trade
Instructions MINOX Binoculars Strap | Optics TradeInstructions MINOX Binoculars Strap | Optics Trade
Instructions MINOX Binoculars Strap | Optics Trade
 
Instruction Manual | Kite Optics Bonelli 2.0 | Optics Trade
Instruction Manual | Kite Optics Bonelli 2.0 | Optics TradeInstruction Manual | Kite Optics Bonelli 2.0 | Optics Trade
Instruction Manual | Kite Optics Bonelli 2.0 | Optics Trade
 
Instructions BUSHNELL Nature View Spotting Scope | Optics Trade
Instructions BUSHNELL Nature View Spotting Scope | Optics TradeInstructions BUSHNELL Nature View Spotting Scope | Optics Trade
Instructions BUSHNELL Nature View Spotting Scope | Optics Trade
 
Instruction Manual | Celestron UpClose Binoculars | Optics Trade
Instruction Manual | Celestron UpClose Binoculars | Optics TradeInstruction Manual | Celestron UpClose Binoculars | Optics Trade
Instruction Manual | Celestron UpClose Binoculars | Optics Trade
 
Instructions MINOX MD 62 Series | Optics Trade
Instructions MINOX MD 62 Series | Optics TradeInstructions MINOX MD 62 Series | Optics Trade
Instructions MINOX MD 62 Series | Optics Trade
 
Instructions MINOX MD 50 Series | Optics Trade
Instructions MINOX MD 50 Series | Optics TradeInstructions MINOX MD 50 Series | Optics Trade
Instructions MINOX MD 50 Series | Optics Trade
 
Instruction Manual | Kite Optics Cervus HD | Optics Trade
Instruction Manual | Kite Optics Cervus HD | Optics TradeInstruction Manual | Kite Optics Cervus HD | Optics Trade
Instruction Manual | Kite Optics Cervus HD | Optics Trade
 
Instructions MINOX BD-BR 24mm, 25mm | Optics Trade
Instructions MINOX BD-BR 24mm, 25mm | Optics TradeInstructions MINOX BD-BR 24mm, 25mm | Optics Trade
Instructions MINOX BD-BR 24mm, 25mm | Optics Trade
 
Instruction Manual | Kite Optics Ibis ED | Optics Trade
Instruction Manual | Kite Optics Ibis ED | Optics TradeInstruction Manual | Kite Optics Ibis ED | Optics Trade
Instruction Manual | Kite Optics Ibis ED | Optics Trade
 
Catalog DOERR Danubia | Optics Trade | 2015
Catalog DOERR Danubia | Optics Trade | 2015Catalog DOERR Danubia | Optics Trade | 2015
Catalog DOERR Danubia | Optics Trade | 2015
 
Nach welchen Gesichtspunkten sollte man seine Sonnengläser auswählen?
Nach welchen Gesichtspunkten sollte man seine Sonnengläser auswählen?Nach welchen Gesichtspunkten sollte man seine Sonnengläser auswählen?
Nach welchen Gesichtspunkten sollte man seine Sonnengläser auswählen?
 
Instruction Manual Kite Optics Falco Binoculars | Optics Trade
Instruction Manual Kite Optics Falco Binoculars | Optics TradeInstruction Manual Kite Optics Falco Binoculars | Optics Trade
Instruction Manual Kite Optics Falco Binoculars | Optics Trade
 
Sonnenbrillen mit Korrekturgläsern
Sonnenbrillen mit KorrekturgläsernSonnenbrillen mit Korrekturgläsern
Sonnenbrillen mit Korrekturgläsern
 

Ähnlich wie Instruction Manual | Celestron Cometron Binoculars | Optics Trade

Instruction Manual | Hawke Vantage IR 1-4x20 | Optics Trade
Instruction Manual | Hawke Vantage IR 1-4x20 | Optics TradeInstruction Manual | Hawke Vantage IR 1-4x20 | Optics Trade
Instruction Manual | Hawke Vantage IR 1-4x20 | Optics TradeOptics-Trade
 
Instruction Manual | Hawke Vantage Riflescope | Optics Trade
Instruction Manual | Hawke Vantage Riflescope | Optics TradeInstruction Manual | Hawke Vantage Riflescope | Optics Trade
Instruction Manual | Hawke Vantage Riflescope | Optics TradeOptics-Trade
 
Instruction manual | Hawke Vantage Rifle Scopes | Optics Trade
Instruction manual | Hawke Vantage Rifle Scopes | Optics TradeInstruction manual | Hawke Vantage Rifle Scopes | Optics Trade
Instruction manual | Hawke Vantage Rifle Scopes | Optics TradeOptics-Trade
 
Instructions BUSHNELL Elite Riflescope | Optics Trade
Instructions BUSHNELL Elite Riflescope | Optics TradeInstructions BUSHNELL Elite Riflescope | Optics Trade
Instructions BUSHNELL Elite Riflescope | Optics TradeOptics-Trade
 
Instructions MINOX BF Series | Optics Trade
Instructions MINOX BF Series | Optics TradeInstructions MINOX BF Series | Optics Trade
Instructions MINOX BF Series | Optics TradeOptics-Trade
 
Insrtuction Manual | Swarovski CL Companion Habicht | Optics Trade
Insrtuction Manual | Swarovski CL Companion Habicht | Optics TradeInsrtuction Manual | Swarovski CL Companion Habicht | Optics Trade
Insrtuction Manual | Swarovski CL Companion Habicht | Optics TradeOptics-Trade
 
Instructions BUSHNELL Banner Riflescope | Optics Trade
Instructions BUSHNELL Banner Riflescope | Optics TradeInstructions BUSHNELL Banner Riflescope | Optics Trade
Instructions BUSHNELL Banner Riflescope | Optics TradeOptics-Trade
 
Instructions MINOX ZA 5i Series | Optics Trade
Instructions MINOX ZA 5i Series | Optics TradeInstructions MINOX ZA 5i Series | Optics Trade
Instructions MINOX ZA 5i Series | Optics TradeOptics-Trade
 
Instruction manual | Kowa BD56 Prominar | Optics Trade
Instruction manual | Kowa BD56 Prominar | Optics TradeInstruction manual | Kowa BD56 Prominar | Optics Trade
Instruction manual | Kowa BD56 Prominar | Optics TradeOptics-Trade
 
Trophy Riflescopes Instruction Manual | Optics Trade
Trophy Riflescopes Instruction Manual | Optics TradeTrophy Riflescopes Instruction Manual | Optics Trade
Trophy Riflescopes Instruction Manual | Optics TradeOptics-Trade
 
Instruction manual | Hawke Airmax | Optics Trade
Instruction manual | Hawke Airmax | Optics TradeInstruction manual | Hawke Airmax | Optics Trade
Instruction manual | Hawke Airmax | Optics TradeOptics-Trade
 
Instructions MINOX ZV 3 Series | Optics Trade
Instructions MINOX ZV 3 Series | Optics TradeInstructions MINOX ZV 3 Series | Optics Trade
Instructions MINOX ZV 3 Series | Optics TradeOptics-Trade
 
Instructions MINOX BD 7x28 IF | Optics Trade
Instructions MINOX BD 7x28 IF | Optics TradeInstructions MINOX BD 7x28 IF | Optics Trade
Instructions MINOX BD 7x28 IF | Optics TradeOptics-Trade
 
Instructions MINOX ZA HD Series | Optics Trade
Instructions MINOX ZA HD Series | Optics TradeInstructions MINOX ZA HD Series | Optics Trade
Instructions MINOX ZA HD Series | Optics TradeOptics-Trade
 
Instruction Manual & Warranty | Kite Optics Compact 8x23 | Optics Trade
Instruction Manual & Warranty | Kite Optics Compact 8x23 | Optics TradeInstruction Manual & Warranty | Kite Optics Compact 8x23 | Optics Trade
Instruction Manual & Warranty | Kite Optics Compact 8x23 | Optics TradeOptics-Trade
 
Instructions UWA eyepiece bino | Optics Trade
Instructions UWA eyepiece bino | Optics TradeInstructions UWA eyepiece bino | Optics Trade
Instructions UWA eyepiece bino | Optics TradeOptics-Trade
 
Instruction manual | Minox Rapid | Optics Trade
Instruction manual | Minox Rapid | Optics TradeInstruction manual | Minox Rapid | Optics Trade
Instruction manual | Minox Rapid | Optics TradeOptics-Trade
 
Instruction Manual | Kite Optics Compact | Optics Trade
Instruction Manual | Kite Optics Compact | Optics TradeInstruction Manual | Kite Optics Compact | Optics Trade
Instruction Manual | Kite Optics Compact | Optics TradeOptics-Trade
 
Instruction manual | Noblex Advanced Binoculars | Optics Trade
Instruction manual | Noblex Advanced Binoculars | Optics TradeInstruction manual | Noblex Advanced Binoculars | Optics Trade
Instruction manual | Noblex Advanced Binoculars | Optics TradeOptics-Trade
 
Instruction Manual | GPO Spectra Dot | Optics Trade
Instruction Manual | GPO Spectra Dot | Optics TradeInstruction Manual | GPO Spectra Dot | Optics Trade
Instruction Manual | GPO Spectra Dot | Optics TradeOptics-Trade
 

Ähnlich wie Instruction Manual | Celestron Cometron Binoculars | Optics Trade (20)

Instruction Manual | Hawke Vantage IR 1-4x20 | Optics Trade
Instruction Manual | Hawke Vantage IR 1-4x20 | Optics TradeInstruction Manual | Hawke Vantage IR 1-4x20 | Optics Trade
Instruction Manual | Hawke Vantage IR 1-4x20 | Optics Trade
 
Instruction Manual | Hawke Vantage Riflescope | Optics Trade
Instruction Manual | Hawke Vantage Riflescope | Optics TradeInstruction Manual | Hawke Vantage Riflescope | Optics Trade
Instruction Manual | Hawke Vantage Riflescope | Optics Trade
 
Instruction manual | Hawke Vantage Rifle Scopes | Optics Trade
Instruction manual | Hawke Vantage Rifle Scopes | Optics TradeInstruction manual | Hawke Vantage Rifle Scopes | Optics Trade
Instruction manual | Hawke Vantage Rifle Scopes | Optics Trade
 
Instructions BUSHNELL Elite Riflescope | Optics Trade
Instructions BUSHNELL Elite Riflescope | Optics TradeInstructions BUSHNELL Elite Riflescope | Optics Trade
Instructions BUSHNELL Elite Riflescope | Optics Trade
 
Instructions MINOX BF Series | Optics Trade
Instructions MINOX BF Series | Optics TradeInstructions MINOX BF Series | Optics Trade
Instructions MINOX BF Series | Optics Trade
 
Insrtuction Manual | Swarovski CL Companion Habicht | Optics Trade
Insrtuction Manual | Swarovski CL Companion Habicht | Optics TradeInsrtuction Manual | Swarovski CL Companion Habicht | Optics Trade
Insrtuction Manual | Swarovski CL Companion Habicht | Optics Trade
 
Instructions BUSHNELL Banner Riflescope | Optics Trade
Instructions BUSHNELL Banner Riflescope | Optics TradeInstructions BUSHNELL Banner Riflescope | Optics Trade
Instructions BUSHNELL Banner Riflescope | Optics Trade
 
Instructions MINOX ZA 5i Series | Optics Trade
Instructions MINOX ZA 5i Series | Optics TradeInstructions MINOX ZA 5i Series | Optics Trade
Instructions MINOX ZA 5i Series | Optics Trade
 
Instruction manual | Kowa BD56 Prominar | Optics Trade
Instruction manual | Kowa BD56 Prominar | Optics TradeInstruction manual | Kowa BD56 Prominar | Optics Trade
Instruction manual | Kowa BD56 Prominar | Optics Trade
 
Trophy Riflescopes Instruction Manual | Optics Trade
Trophy Riflescopes Instruction Manual | Optics TradeTrophy Riflescopes Instruction Manual | Optics Trade
Trophy Riflescopes Instruction Manual | Optics Trade
 
Instruction manual | Hawke Airmax | Optics Trade
Instruction manual | Hawke Airmax | Optics TradeInstruction manual | Hawke Airmax | Optics Trade
Instruction manual | Hawke Airmax | Optics Trade
 
Instructions MINOX ZV 3 Series | Optics Trade
Instructions MINOX ZV 3 Series | Optics TradeInstructions MINOX ZV 3 Series | Optics Trade
Instructions MINOX ZV 3 Series | Optics Trade
 
Instructions MINOX BD 7x28 IF | Optics Trade
Instructions MINOX BD 7x28 IF | Optics TradeInstructions MINOX BD 7x28 IF | Optics Trade
Instructions MINOX BD 7x28 IF | Optics Trade
 
Instructions MINOX ZA HD Series | Optics Trade
Instructions MINOX ZA HD Series | Optics TradeInstructions MINOX ZA HD Series | Optics Trade
Instructions MINOX ZA HD Series | Optics Trade
 
Instruction Manual & Warranty | Kite Optics Compact 8x23 | Optics Trade
Instruction Manual & Warranty | Kite Optics Compact 8x23 | Optics TradeInstruction Manual & Warranty | Kite Optics Compact 8x23 | Optics Trade
Instruction Manual & Warranty | Kite Optics Compact 8x23 | Optics Trade
 
Instructions UWA eyepiece bino | Optics Trade
Instructions UWA eyepiece bino | Optics TradeInstructions UWA eyepiece bino | Optics Trade
Instructions UWA eyepiece bino | Optics Trade
 
Instruction manual | Minox Rapid | Optics Trade
Instruction manual | Minox Rapid | Optics TradeInstruction manual | Minox Rapid | Optics Trade
Instruction manual | Minox Rapid | Optics Trade
 
Instruction Manual | Kite Optics Compact | Optics Trade
Instruction Manual | Kite Optics Compact | Optics TradeInstruction Manual | Kite Optics Compact | Optics Trade
Instruction Manual | Kite Optics Compact | Optics Trade
 
Instruction manual | Noblex Advanced Binoculars | Optics Trade
Instruction manual | Noblex Advanced Binoculars | Optics TradeInstruction manual | Noblex Advanced Binoculars | Optics Trade
Instruction manual | Noblex Advanced Binoculars | Optics Trade
 
Instruction Manual | GPO Spectra Dot | Optics Trade
Instruction Manual | GPO Spectra Dot | Optics TradeInstruction Manual | GPO Spectra Dot | Optics Trade
Instruction Manual | GPO Spectra Dot | Optics Trade
 

Mehr von Optics-Trade

Technical Data | ThermTec Wild 650L | Optics Trade
Technical Data | ThermTec Wild 650L | Optics TradeTechnical Data | ThermTec Wild 650L | Optics Trade
Technical Data | ThermTec Wild 650L | Optics TradeOptics-Trade
 
Technical Data | ThermTec Wild 635L | Optics Trade
Technical Data | ThermTec Wild 635L | Optics TradeTechnical Data | ThermTec Wild 635L | Optics Trade
Technical Data | ThermTec Wild 635L | Optics TradeOptics-Trade
 
Technical Data | ThermTec Wild 650 | Optics Trade
Technical Data | ThermTec Wild 650 | Optics TradeTechnical Data | ThermTec Wild 650 | Optics Trade
Technical Data | ThermTec Wild 650 | Optics TradeOptics-Trade
 
Technical Data | ThermTec Wild 635 | Optics Trade
Technical Data | ThermTec Wild 635 | Optics TradeTechnical Data | ThermTec Wild 635 | Optics Trade
Technical Data | ThermTec Wild 635 | Optics TradeOptics-Trade
 
Technical Data | ThermTec Wild 335 | Optics Trade
Technical Data | ThermTec Wild 335 | Optics TradeTechnical Data | ThermTec Wild 335 | Optics Trade
Technical Data | ThermTec Wild 335 | Optics TradeOptics-Trade
 
Technical Data | ThermTec Wild 325 | Optics Trade
Technical Data | ThermTec Wild 325 | Optics TradeTechnical Data | ThermTec Wild 325 | Optics Trade
Technical Data | ThermTec Wild 325 | Optics TradeOptics-Trade
 
Instruction Manual | ThermTec Wild Thermal Monoculars | Optics Trade
Instruction Manual | ThermTec Wild Thermal Monoculars | Optics TradeInstruction Manual | ThermTec Wild Thermal Monoculars | Optics Trade
Instruction Manual | ThermTec Wild Thermal Monoculars | Optics TradeOptics-Trade
 
Technical Data | ThermTec Hunt 335 | Optics Trade
Technical Data | ThermTec Hunt 335 | Optics TradeTechnical Data | ThermTec Hunt 335 | Optics Trade
Technical Data | ThermTec Hunt 335 | Optics TradeOptics-Trade
 
Instruction Manual | ThermTec Hunt Thermal Clip-On Series | Optics Trade
Instruction Manual | ThermTec Hunt Thermal Clip-On Series | Optics TradeInstruction Manual | ThermTec Hunt Thermal Clip-On Series | Optics Trade
Instruction Manual | ThermTec Hunt Thermal Clip-On Series | Optics TradeOptics-Trade
 
Instruction Manual | Steiner eRanger LRF 10x42 | Optics Trade
Instruction Manual | Steiner eRanger LRF 10x42 | Optics TradeInstruction Manual | Steiner eRanger LRF 10x42 | Optics Trade
Instruction Manual | Steiner eRanger LRF 10x42 | Optics TradeOptics-Trade
 
Flyer | Guide DN Series Handheld Digital Binoculars | Optics Trade
Flyer | Guide DN Series Handheld Digital Binoculars | Optics TradeFlyer | Guide DN Series Handheld Digital Binoculars | Optics Trade
Flyer | Guide DN Series Handheld Digital Binoculars | Optics TradeOptics-Trade
 
Quick Start Guide | Guide TB Series | Optics Trade
Quick Start Guide | Guide TB Series | Optics TradeQuick Start Guide | Guide TB Series | Optics Trade
Quick Start Guide | Guide TB Series | Optics TradeOptics-Trade
 
Instruction Manual | Pard FD1 Digital NV Front Attachment | Optics Trade
Instruction Manual | Pard FD1 Digital NV Front Attachment | Optics TradeInstruction Manual | Pard FD1 Digital NV Front Attachment | Optics Trade
Instruction Manual | Pard FD1 Digital NV Front Attachment | Optics TradeOptics-Trade
 
Instruction Manual | EOTech Vudu X 2-12x40 | Optics Trade
Instruction Manual | EOTech Vudu X 2-12x40 | Optics TradeInstruction Manual | EOTech Vudu X 2-12x40 | Optics Trade
Instruction Manual | EOTech Vudu X 2-12x40 | Optics TradeOptics-Trade
 
Instruction Manual | EOTech Vudu X 1-6x24 | Optics Trade
Instruction Manual | EOTech Vudu X 1-6x24 | Optics TradeInstruction Manual | EOTech Vudu X 1-6x24 | Optics Trade
Instruction Manual | EOTech Vudu X 1-6x24 | Optics TradeOptics-Trade
 
Instruction Manual | Nightforce CFS 6-36x50 F1 | Optics Trade
Instruction Manual | Nightforce CFS 6-36x50 F1 | Optics TradeInstruction Manual | Nightforce CFS 6-36x50 F1 | Optics Trade
Instruction Manual | Nightforce CFS 6-36x50 F1 | Optics TradeOptics-Trade
 
Instruction Manual | Athlon Cronus Tactical G2 ED 7-42x60 | Optics Trade
Instruction Manual | Athlon Cronus Tactical G2 ED 7-42x60 | Optics TradeInstruction Manual | Athlon Cronus Tactical G2 ED 7-42x60 | Optics Trade
Instruction Manual | Athlon Cronus Tactical G2 ED 7-42x60 | Optics TradeOptics-Trade
 
Technical Data | Swarovski CL Companion Habicht | Optics Trade
Technical Data | Swarovski CL Companion Habicht | Optics TradeTechnical Data | Swarovski CL Companion Habicht | Optics Trade
Technical Data | Swarovski CL Companion Habicht | Optics TradeOptics-Trade
 
Instruction Manual | Athlon Midas G2 UHD PRO | Optics Trade
Instruction Manual | Athlon Midas G2 UHD PRO | Optics TradeInstruction Manual | Athlon Midas G2 UHD PRO | Optics Trade
Instruction Manual | Athlon Midas G2 UHD PRO | Optics TradeOptics-Trade
 
Catalog 2024 | Shield Sights | Optics Trade
Catalog 2024 | Shield Sights | Optics TradeCatalog 2024 | Shield Sights | Optics Trade
Catalog 2024 | Shield Sights | Optics TradeOptics-Trade
 

Mehr von Optics-Trade (20)

Technical Data | ThermTec Wild 650L | Optics Trade
Technical Data | ThermTec Wild 650L | Optics TradeTechnical Data | ThermTec Wild 650L | Optics Trade
Technical Data | ThermTec Wild 650L | Optics Trade
 
Technical Data | ThermTec Wild 635L | Optics Trade
Technical Data | ThermTec Wild 635L | Optics TradeTechnical Data | ThermTec Wild 635L | Optics Trade
Technical Data | ThermTec Wild 635L | Optics Trade
 
Technical Data | ThermTec Wild 650 | Optics Trade
Technical Data | ThermTec Wild 650 | Optics TradeTechnical Data | ThermTec Wild 650 | Optics Trade
Technical Data | ThermTec Wild 650 | Optics Trade
 
Technical Data | ThermTec Wild 635 | Optics Trade
Technical Data | ThermTec Wild 635 | Optics TradeTechnical Data | ThermTec Wild 635 | Optics Trade
Technical Data | ThermTec Wild 635 | Optics Trade
 
Technical Data | ThermTec Wild 335 | Optics Trade
Technical Data | ThermTec Wild 335 | Optics TradeTechnical Data | ThermTec Wild 335 | Optics Trade
Technical Data | ThermTec Wild 335 | Optics Trade
 
Technical Data | ThermTec Wild 325 | Optics Trade
Technical Data | ThermTec Wild 325 | Optics TradeTechnical Data | ThermTec Wild 325 | Optics Trade
Technical Data | ThermTec Wild 325 | Optics Trade
 
Instruction Manual | ThermTec Wild Thermal Monoculars | Optics Trade
Instruction Manual | ThermTec Wild Thermal Monoculars | Optics TradeInstruction Manual | ThermTec Wild Thermal Monoculars | Optics Trade
Instruction Manual | ThermTec Wild Thermal Monoculars | Optics Trade
 
Technical Data | ThermTec Hunt 335 | Optics Trade
Technical Data | ThermTec Hunt 335 | Optics TradeTechnical Data | ThermTec Hunt 335 | Optics Trade
Technical Data | ThermTec Hunt 335 | Optics Trade
 
Instruction Manual | ThermTec Hunt Thermal Clip-On Series | Optics Trade
Instruction Manual | ThermTec Hunt Thermal Clip-On Series | Optics TradeInstruction Manual | ThermTec Hunt Thermal Clip-On Series | Optics Trade
Instruction Manual | ThermTec Hunt Thermal Clip-On Series | Optics Trade
 
Instruction Manual | Steiner eRanger LRF 10x42 | Optics Trade
Instruction Manual | Steiner eRanger LRF 10x42 | Optics TradeInstruction Manual | Steiner eRanger LRF 10x42 | Optics Trade
Instruction Manual | Steiner eRanger LRF 10x42 | Optics Trade
 
Flyer | Guide DN Series Handheld Digital Binoculars | Optics Trade
Flyer | Guide DN Series Handheld Digital Binoculars | Optics TradeFlyer | Guide DN Series Handheld Digital Binoculars | Optics Trade
Flyer | Guide DN Series Handheld Digital Binoculars | Optics Trade
 
Quick Start Guide | Guide TB Series | Optics Trade
Quick Start Guide | Guide TB Series | Optics TradeQuick Start Guide | Guide TB Series | Optics Trade
Quick Start Guide | Guide TB Series | Optics Trade
 
Instruction Manual | Pard FD1 Digital NV Front Attachment | Optics Trade
Instruction Manual | Pard FD1 Digital NV Front Attachment | Optics TradeInstruction Manual | Pard FD1 Digital NV Front Attachment | Optics Trade
Instruction Manual | Pard FD1 Digital NV Front Attachment | Optics Trade
 
Instruction Manual | EOTech Vudu X 2-12x40 | Optics Trade
Instruction Manual | EOTech Vudu X 2-12x40 | Optics TradeInstruction Manual | EOTech Vudu X 2-12x40 | Optics Trade
Instruction Manual | EOTech Vudu X 2-12x40 | Optics Trade
 
Instruction Manual | EOTech Vudu X 1-6x24 | Optics Trade
Instruction Manual | EOTech Vudu X 1-6x24 | Optics TradeInstruction Manual | EOTech Vudu X 1-6x24 | Optics Trade
Instruction Manual | EOTech Vudu X 1-6x24 | Optics Trade
 
Instruction Manual | Nightforce CFS 6-36x50 F1 | Optics Trade
Instruction Manual | Nightforce CFS 6-36x50 F1 | Optics TradeInstruction Manual | Nightforce CFS 6-36x50 F1 | Optics Trade
Instruction Manual | Nightforce CFS 6-36x50 F1 | Optics Trade
 
Instruction Manual | Athlon Cronus Tactical G2 ED 7-42x60 | Optics Trade
Instruction Manual | Athlon Cronus Tactical G2 ED 7-42x60 | Optics TradeInstruction Manual | Athlon Cronus Tactical G2 ED 7-42x60 | Optics Trade
Instruction Manual | Athlon Cronus Tactical G2 ED 7-42x60 | Optics Trade
 
Technical Data | Swarovski CL Companion Habicht | Optics Trade
Technical Data | Swarovski CL Companion Habicht | Optics TradeTechnical Data | Swarovski CL Companion Habicht | Optics Trade
Technical Data | Swarovski CL Companion Habicht | Optics Trade
 
Instruction Manual | Athlon Midas G2 UHD PRO | Optics Trade
Instruction Manual | Athlon Midas G2 UHD PRO | Optics TradeInstruction Manual | Athlon Midas G2 UHD PRO | Optics Trade
Instruction Manual | Athlon Midas G2 UHD PRO | Optics Trade
 
Catalog 2024 | Shield Sights | Optics Trade
Catalog 2024 | Shield Sights | Optics TradeCatalog 2024 | Shield Sights | Optics Trade
Catalog 2024 | Shield Sights | Optics Trade
 

Instruction Manual | Celestron Cometron Binoculars | Optics Trade

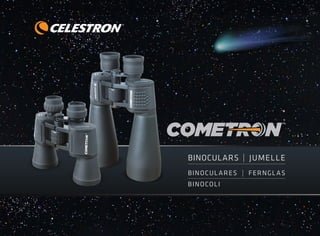
  • 1. BINOCULARS | JUMELLE BINOCULARES | FERNGLAS BINOCOLI
  • 3. 2 I ENGLISH ENGLISH I 3 Thank you for purchasing a Celestron Cometron binocular. We trust this binocular will provide you with years of enjoyment and faithful service. Please read the instructions carefully before using your binocular to ensure proper use and care. The interpupillary distance, or the distance between the pupils, varies from person to person. The binocular must be correctly aligned (adjusted) to the distance between your pupils to achieve a single, clear image. To adjust this distance, lift the binocular up to your eyes (using both hands) and look through them at an object in the distance. Move the two barrels (halves) of the binocular closer together or further apart until you see a single, clear image (Fig. 2). Check that the interpupillary distance is set correctly every time you use your binocular. celestron® Cometron binoculars Adjusting the Interpupillary Distance (IPD) Fig. 1 WARNING: Viewing the Sun may cause permanent eye damage. Do not view the Sun with your binoculars or even with the naked eye. Eyecup Eyepiece Focus Wheel Objective Lens Diopter Adjustment Logo Plate / Tripod Adapter Thread Fig. 2 Rainguard (12x70) Tripod Adapter (12x70) Objective Lens Caps Eyepiece Caps
  • 4. 4 I ENGLISH ENGLISH I 5 To ensure a crisp, sharp image the focusing system of the binocular must be set to compensate for any differences in your eyesight. This is achieved by setting the diopter (located on the right eyepiece) before use. To set the binocular to your eyesight follow the instructions below. 1. View an object in the distance through the binocular. 2. Cover the right objective lens with your hand or the objective lens cap. 3. Rotate the focus wheel until the image viewed with your left eye is clear and sharp. 4. Cover the left objective lens with your hand or objective lens cap. 5. Viewing the same object, rotate the right eyepiece (the diopter) until the image viewed with your right eye is clear and sharp. 6. Your binocular is now adjusted to your eyes and focusing on any object can now be achieved by simply turning the focus wheel. Tip: Eyeglasses worn for nearsightedness should be worn when using binoculars as you may not be able to obtain focus at infinity without them. Eyecup Adjustment The Cometron binoculars feature foldable rubber eyecups to accommodate both eyeglass and non-eyeglass wearers. If you do not wear eyeglasses, leave the rubber eyecups in the up position. If you wear eyeglasses, make sure that the eyecups are folded down to obtain the maximum field of view. When done observing, make sure the rubber eyecups are in the up position for storage. Diopter Adjustment Focus Wheel Fig. 3 Setting the Diopter / Focusing Fig. 4
  • 5. 6 I ENGLISH ENGLISH I 7 Tripod Adaptability The Cometron binocular series feature built-in threads that allow the binocular to be attached to a tripod using a binocular tripod adapter (included with model #71199). These threads can be accessed by unscrewing the logo plate found on the front of the hinge (Fig. 5). To attach the binocular to a tripod, thread the adapter into the binocular and attach the other end of the adapter to a photographic tripod. Mounting the binocular on a tripod allows for added stability and comfort during prolonged viewing. Care and Storage Your Celestron binocular will provide you years of dependable service if it is cared for and stored properly. 1. Protect the binocular from impact and do not force any of the moving parts beyond their limits. 2. Protect the optics of your binocular by putting on all lens caps when not in use. 3. Store your binocular in a cool, dry place whenever possible. 4. When storing for an extended period of time, place the binocular in a plastic bag or airtight container with a desiccant. 5. Do not leave the binocular in a car on a hot/ sunny day or near anything that generates heat as this may cause damage. 6. Clean any dust, dirt or water that may get on the binocular or inside moving parts as soon as possible to prevent any unforeseen damage. Fig. 5
  • 6. 8 I ENGLISH ENGLISH I 9 Service and Repair If warranty problems arise or repairs are necessary, contact the Celestron customer service department if you live in the United States or Canada. If you live outside of these countries, please contact the dealer you purchased your binocular from or the Celestron distributor in your country. A list of our distributors can be found on our website., www.celestron.com Cleaning Proper cleaning of the lenses is essential to maintaining the optical integrity of your binocular. Dirty lenses diminish the amount of light transmitted through the binocular and your overall viewing experience. 1. Remove any dust on the lenses with a soft lens brush or can of pressurized air. 2. Remove any fingerprints, stains or smudges from the lens surface with a soft, clean lens cloth or lens tissue by rubbing in a circular motion. Start in the middle of the lens and work your way to the edges. Breathe lightly on the lens to provide moisture if needed. 3. For a more thorough cleaning we recommend the use of a lens/optics cleaning kit available at most photo or optical shops. Follow the directions supplied with the cleaning kit for best results. Warranty Your binocular is covered under the Celestron Limited Lifetime Warranty. Celestron warrants these binoculars to be free from defects in materials and workmanship for the binoculars’ usable lifetime to the original owner. Celestron will repair or replace the binoculars which, upon inspection by Celestron, are found to be defective in materials or workmanship and within the definitions of the limits described below. This warranty does not cover products that have been subject to abuse, misuse, physically damaged, altered, or had unauthorized repairs or modifications. This warranty does not cover defects due to normal wear and tear and other conditions. This warranty is valid to U.S.A. and Canadian customers who have purchased their binocular from an authorized Celestron dealer in the U.S.A. or Canada. For products purchased outside of the U.S.A. or Canada please contact your local Celestron Distributor or authorized Dealer for applicable warranty information. Additional warranty information and eligibility details can be found on the Celestron website. This product is designed and intended for use by those 14 years of age and older. Product design and specifications are subject to change without prior notification. For complete specifications and product information: www.celestron.com 2835 Columbia Street • Torrance, CA 90503 U.S.A Tel: 800.421.9649
  • 8. FRANÇAIS I 1312 I FRANÇAIS Nous vous remercions d’avoir acheté les jumelles Cometron de Celestron. Nous espérons que cette paire de jumelles vous donnera des années de plaisir et de loyaux services. Veuillez lire attentivement les instructions avant d’utiliser vos jumelles pour vous assurer d’une utilisation appropriée. L’écart interpupillaire, ou la distance entre les pupilles, varie d’une personne à l’autre. Les jumelles doivent être correctement alignées (ajusté) à la distance entre vos pupilles afin de créer une seule image claire. Pour régler cette distance, soulevez les jumelles jusqu’à vos yeux (en utilisant les deux mains) et regardez à travers eux un objet distant. Déplacez les deux barillets (moitiés) des jumelles le plus près possible ou éloigné jusqu’à ce que vous voyiez une seule image claire (Fig. 2). Vérifiez que l’écart interpupillaire soit défini correctement chaque fois que vous utilisez vos jumelles. jumelles Cometron de Celestron® RÉGLAGE DE L’ÉCART INTERPUPILLAIRE Œilleton Oculaire Objectif Réglage dioptrique AVERTISSEMENT: Ne jamais regarder le soleil pendant l’utilisation de vos jumelles. Regarder vers le soleil peut causer des lésions oculaires permanentes. Fig. 1 Plaque de logo / Auteur Tripod Adapter Fig. 2 Rainguard (12x70) Adaptateur de trépied (12x70) Oculaire Caps Objectif lentille capuchon Molette de focalisation
  • 9. FRANÇAIS I 1514 I FRANÇAIS Afin d’assurer une image nette, le système de focalisation de jumelles doit être réglé pour compenser les différences éventuelles de votre vision. Ceci est réalisé en réglant le dioptre (situé sur l’oculaire droit) avant utilisation. Pour régler les jumelles à votre vision, suivez les instructions ci-dessous. 1. Visualisez un objet distant à travers les jumelles. 2. Couvrez la lentille droite avec votre main ou le capuchon d’objectif. 3. Tournez la molette de focalisation jusqu’à ce que l’image avec votre œil gauche soit claire et nette. 4. Couvrez la lentille gauche avec votre main ou le capuchon d’objectif. 5. Visualisez le même objet, tourner l’oculaire droit (la dioptrie) jusqu’à ce que l’image affichée avec l’œil droit est claire et nette. 6. Les jumelles sont maintenant réglé pour vos yeux et la focalisation de n’importe quel objet peut maintenant être obtenue en tournant simplement la molette de focalisation. Astuce: Les lunettes de vision pour la myopie devraient être portées lors de l’utilisation de jumelles puisque vous ne pourrez peut-être pas être en mesure d’obtenir la mise au point à l’infini sans celles-ci. RÉGLAGE DES ŒILLETONS Les jumelles Cometron dispose oeilleton caoutchouc pliables pour accueillir les deux lunettes et les porteurs non-lunettes. Si vous ne portez pas de lunettes, laissez les œilletons en caoutchouc en position relevée. Si vous portez des lunettes, assurez-vous que les œilletons sont rabattus pour obtenir le champ de vision maximal. Une fois fait observer, s’assurer que les œilletons en caoutchouc sont en position haute pour le stockage. RÉGLAGE DU DIOPTRE/FOCALISATION Fig. 4 Réglage dioptrique Molette de focalisation Fig. 3
  • 10. FRANÇAIS I 1716 I FRANÇAIS ADAPTABILITÉ DU TRÉPIED Les jumelles Cometron disposent de filetages intégrés qui permettent aux jumelles d’être fixées sur un trépied à l’aide d’un adaptateur de trépied de jumelles (inclus avec le modèle # 71199). Ces filetages sont accessibles en dévissant la plaque de logo située à l’avant de la charnière (Fig. 5). Pour fixer les jumelles sur un trépied, vissez l’adaptateur dans les jumelles et fixez l’autre extrémité de l’adaptateur sur un trépied photographique. Fixer les jumelles sur un trépied permet une meilleure stabilité et plus de confort pendant un visionnement prolongé. Fig. 5 ENTRETIEN ET RANGEMENT Les jumelles Celestron vous fourniront des années de service fiable si elles sont bien entretenues et stockées correctement. 1. Protégez les jumelles de tout impact et ne forcez pas toute pièce en mouvement au-delà de sa limite. 2. Protégez l’optique de vos jumelles en mettant tous les bouchons d’objectif en place lorsque vous n’utilisez pas les jumelles. 3. Entreposez vos jumelles dans un endroit frais et sec si possible. 4. Lors de l’entreposage pendant une période prolongée de temps, placez les jumelles dans un sac en plastique ou un récipient hermétique avec déshydratant. 5. Ne pas laisser les jumelles dans une voiture lors d’une journée chaude et ensoleillée ou à proximité de tout ce qui génère de la chaleur car cela pourrait causer des dommages. 6. Nettoyez toute poussière, saleté ou eau qui peut s’accumuler sur les jumelles ou à l’intérieur de pièces en mouvement dès que possible afin d’éviter tout dommage imprévu.
  • 11. FRANÇAIS I 1918 I FRANÇAIS SERVICE ET RÉPARATION Si des problèmes de garantie survenaient ou des réparations s’avéraient nécessaires, contactez le département de service à la clientèle de Celestron si vous résidez aux États- Unis ou au Canada. Si vous habitez à l’extérieur de ces pays, veuillez contacter le revendeur où vous avez acheté vos jumelles ou le distributeur Celestron de votre pays. Vous trouverez une liste de nos distributeurs sur notre site Web. www.celestron.com NETTOYAGE Un nettoyage adéquat des lentilles est essentiel au maintien de l’intégrité optique de vos jumelles. Des lentilles sales diminuent la quantité de lumière transmise à travers les jumelles et votre expérience de visionnement. 1. Enlevez toute poussière des lentilles avec une brosse à lentilles souples ou aérosol d’air pressurisé. 2. Retirez toute empreinte, tache ou bavure de la surface de la lentille avec un tissu doux de nettoyage de lentilles en frottant d’un mouvement circulaire. Commencez au milieu de la lentille en vous dirigeant lentement vers les bords. Soufflez légèrement sur l’objectif afin de fournir de l’humidité si nécessaire. 3. Pour un nettoyage plus en profondeur, nous recommandons l’utilisation d’une trousse de nettoyage de lentilles/optique disponible dans la plupart des boutiques de photos ou des magasins optiques. Suivez les instructions fournies avec la trousse de nettoyage pour de meilleurs résultats. GARANTIE Les jumelles sont couvertes par la garantie à vie limitée Celestron. Celestron garantit que ces jumelles sont exempts de défauts de matériaux et de fabrication pendant la durée de vie des jumelles »utilisable pour le propriétaire d’origine. Celestron réparera ou remplacera les jumelles qui, après inspection par Celestron, présentent des défauts de matériaux ou de fabrication et dans les définitions des limites décrites ci-dessous. Cette garantie ne couvre pas les produits qui ont fait l’objet d’abus, de mauvaise utilisation, qui sont physiquement endommagés, altérés ou n’avaient pas reçu les autorisations nécessaires pour les réparations ou les modifications. Cette garantie ne couvre pas les défauts dus à une usure normale et d’autres conditions. Cette garantie est valable pour les clients aux États-Unis d’Amérique et au Canada qui ont acheté leurs jumelles chez un revendeur Celestron agréé aux États-Unis ou au Canada. Pour les produits achetés en dehors des États- Unis ou au Canada, veuillez contacter votre distributeur local de Celestron ou revendeur agréé pour toute information de garantie applicable. Des informations additionnelles de garantie et de détails d’admissibilité se trouvent sur le site Web de Celestron. Ce produit est conçu et destiné pour les personnes de 14 ans et plus. La conception des produits et les spécifications sont sujettes à modification sans notification préalable. Pour connaître les spécifications complètes et informations sur le produit: www.celestron.com 2835 Columbia Street • Torrance, CA 90503 É.-U. • Téléphone: 800.421.9649
  • 13. 22 I ESPAÑOL ESPAÑOL I 23 Gracias por adquirir unos binoculares Cometron de Celestron. Confiamos en que estos binoculares le ofrecerán años de servicio y satisfacción. Lea atentamente las instrucciones antes de usar sus binoculares para garantizar un uso y cuidados adecuados. La distancia interpupilar, o distancia entre las pupilas, varía en cada persona. Los binoculares deben estar correctamente alineados (ajustados) a la distancia entre sus pupilas para obtener una sola imagen clara. Para ajustar esta distancia, levante los binoculares hasta los ojos (usando ambas manos) y mire por ellos a un objeto distante. Mueva los dos cañones (mitades) de los binoculares más cerca o más lejos hasta que vea una única imagen cara (fig. 2). Compruebe que la distancia interpupilar esté correctamente establecida cada vez que use los binoculares. binoculares Cometron de Celestron® AJUSTE DE LA DISTANCIA INTERPUPILAR ATENCIÓN: No mire nunca al sol cuando use los binoculares. Mirar al sol puede provocar daños permanentes a la vista. Fig. 1 Amohadilla ocular Ocular Rueda de enfoque Lente de objetivo Dioptría ajuste Placa con el logo / Ranuras de adaptador para trípode – (bajo el tapón)Protector para lluvia (12x70) Adaptador para trípode (12x70) Tapas de Lente Objetivo Ocular Caps Fig. 2
  • 14. 24 I ESPAÑOL ESPAÑOL I 25 Para garantizar una imagen clara y definida debe establecerse el sistema de enfoque para que compense cualquier variación de su vista. Esto se consigue configurando la dioptría (situada en el ocular derecho) antes del uso. Para adaptar los binoculares a su vista siga las instrucciones siguientes. 1. Observe un objeto distante por los binoculares. 2. Cubra la lente del objetivo derecho con la mano o la tapa de la lente del objetivo. 3. Gire la rueda de enfoque hasta que la imagen vista con el ojo izquierdo sea clara y definida. 4. Cubra la lente del objetivo izquierdo con la mano o la tapa de la lente del objetivo. 5. Observando el mismo objeto, gire el ocular derecho (las dioptrías) hasta que la imagen se ve con su ojo derecho es clara y nítida. 6. El binocular se ajustará a sus ojos y podrá enfocar cualquier objeto girando la rueda de enfoque. Recomendación: Las gafas de vista cercana deben llevarse al usar binoculares, ya que puede que no sea posible obtener enfoque en infinito sin ellas. AJUSTE DE LA ALMOHADILLA El Cometron cuenta Ojeras de goma plegables para acomodar tanto los portadores de gafas y no gafas. Si no usa gafas, deje los oculares de goma en la posición superior. Si usa anteojos, asegúrese de que las ojeras se doblan hacia abajo para obtener el máximo campo de visión. Cuando se hace la observación, asegúrese de que los oculares de goma están en la posición para guardarlo. Dioptría ajuste Rueda de enfoquel Fig. 3 CONFIGURAR LA DIOPTRÍA / ENFOQUE Fig. 4
  • 15. 26 I ESPAÑOL ESPAÑOL I 27 ADAPTABILIDAD DE TRÍPODE Los binocular Cometron incluyen ranuras integradas que permiten fijar el binocular a un trípode usando un adaptador para trípode (incluido con el modelo # 71199). Estas ranuras están accesibles desenroscando la placa del logo situada en la parte delantera de la bisagra (Fig. 5). Para fijar los binoculares a un trípode, pase el adaptador por el binocular y fije el otro extremo del adaptador a un trípode fotográfico. Montar los binoculares en un trípode permite una mayor estabilidad y comodidad durante observaciones prolongadas. Fig. 5 CUIDADOS Y ALMACENAMIENTO Sus binoculares Celestron le ofrecerán años de servicio fiable si se cuidan y guardan adecuadamente. 1. Proteja los binoculares de impactos y no fuerce ninguna pieza móvil más allá de sus límites. 2. Proteja la óptica de sus binoculares poniendo todas las tapas de lentes cuando no los use. 3. Guarde sus binoculares en un lugar fresco y seco siempre que sea posible. 4. Cuando los guarde durante un periodo prolongado, coloque los binoculares en una bolsa de plástico o un recipiente hermético con desecante. 5. No deje los binoculares en un coche en un día cálido/soleado ni cerca de nada que genere calor, podría dañarlos. 6. Limpie el polvo, la suciedad o el agua que pueda estar sobre los binoculares o en las piezas móviles en cuanto sea posible para evitar posibles daños.
  • 16. 28 I ESPAÑOL ESPAÑOL I 29 SERVICIO Y REPARACIÓN Si se presentan problemas de garantía o reparaciones, contacte con el departamento de servicio al cliente de Celestron si vive en Estados Unidos o Canadá. Si vive en otro país, contacte con el vendedor en el que adquirió los binoculares o del distribuidor de Celestron de su país. Puede encontrar una lista de distribuidores en nuestro sitio web. www.celestron.com LIMPIEZA Es esencial una limpieza adecuada de las lentes para mantener la integridad óptica de sus binoculares. Las lentes sucias reducen la cantidad de luz que se transmite por los binoculares y su experiencia de observación global. 1. Saque el polvo de las lentes con un cepillo suave para lentes o un bote de aire comprimido. 2. Elimine cualquier huella dactilar, mancha o suciedad de la superficie de la lente con una gamuza suave y limpia para lentes frotándola con un movimiento circular. Comience por el centro de la lente y avance hacia los bordes. Aliente ligeramente sobre la lente para proporcionar humedad si es necesario. 3. Para una limpieza más completa recomendamos usar un kit de limpieza de lente/óptica, disponible en la mayoría de tiendas de fotografía u óptica. Siga las instrucciones incluidas en el kit de limpieza para obtener los mejores resultados. GARANTÍA Sus binoculares están cubiertos por la garantía limitada de por vida de Celestron. Celestron garantiza que estos prismáticos de estar libres de defectos en materiales y mano de obra durante toda la vida útil de los binoculares a su propietario original. Celestron reparará o sustituirá los binoculares que, al ser inspeccionados por Celestron, muestren defectos de materiales o mano de obra y estén dentro de las definiciones de los límites descritos a continuación. Esta garantía no cubre productos que hayan sido sometidos a abuso, mal uso, daños físicos, alteraciones o reparaciones o modificaciones no autorizadas. Esta garantía no cubre defectos por desgaste normal y otras condiciones. Esta garantía tiene validez para clientes de EE.UU. y Canadá que hayan adquirido sus binoculares en un vendedor autorizado de Celestron en EE.UU. y Canadá. Para productos adquiridos fuera de EE.UU. o Canadá, contacte con su distribuidor local de Celestron o un vendedor autorizado para obtener la información de garantía aplicable. Puede encontrar información adicional de garantía y elegibilidad en el sitio web de Celestron. Los binoculares Celestron están diseñados y pretendidos para personas de 14 o más años de edad. El diseño y las especificaciones del producto están sujetos a cambios sin notificación previa. Para especificaciones e información completa del producto: www.celestron.com 2835 Columbia Street • Torrance, CA 90503 EE.UU. • Teléfono: 800.421.9649
  • 18. 32 I DEUTSCH DEUTSCH I 33 Vielen Dank für den Kauf eines Cometron-Fernglases von Celestron. Wir sind davon überzeugt, dass Ihnen dieses Fernglas jahrelang Freude bereiten und zuverlässige Dienste leisten wird. Bitte lesen Sie diese Bedienungsanleitung vor Gebrauch des Fernglases sorgfältig durch, um eine sichere Handhabung und Pflege sicherzustellen. Der interpupillare Abstand oder der Abstand zwischen den Pupillen variiert von Mensch zu Mensch. Das Fernglas muss korrekt auf den Abstand zwischen Ihren Pupillen ausgerichtet (eingestellt) werden, damit ein klares Einzelbild erreicht wird. Heben Sie zum Einstellen des Abstands das Fernglas an Ihre Augen (unter Verwendung beider Hände) und richten Sie Ihren Blick hindurch auf ein entferntes Objekt. Schieben Sie die zwei Tuben (Hälften) des Fernglases enger zusammen oder weiter auseinander, bis Sie ein einzelnes klares Bild sehen (Abb. 2). Überprüfen Sie das Fernglas bei jeder Verwendung auf einen korrekten interpupillaren Abstand. Cometron-Fernglases von Celestron® DEN INTERPUPILLAREN ABSTAND EINSTELLEN WARNUNG: Schauen Sie mit dem Fernglas keinesfalls in die Sonne. Das Schauen in die Sonne kann zu permanenten Sehschäden führen. Abb. 1 Augenmuschel Okular Fokussierradl Objektiv Dioptrie- Einstellring Logo-Etikett/Stativ-AdapterSchrauben – (unter der Kappe) Okularschutzdeckel (12x70) Stativ-Adapter (12x70) Objektivlinse caps Okular Caps Abb. 2
  • 19. 34 I DEUTSCH DEUTSCH I 35 Für ein gestochen scharfes Bild muss das Fokussiersystem des Fernglases so eingestellt werden, dass jeglicher Unterschied in Ihrer Sehkraft kompensiert wird. Dies wird vor Gebrauch durch Einstellung der Dioptrie (auf dem rechten Okular) erreicht. Folgen Sie zum Einstellen des Fernglases auf Ihre Sehkraft den untenstehenden Anweisungen. 1. Richten Sie Ihren Blick durch das Fernglas auf ein entferntes Objekt. 2. Decken Sie das rechte Objektiv mit einer Hand oder der Objektiv-Kappe ab. 3. Drehen Sie das Fokussierrad so weit, bis das Bild von Ihrem linken Auge klar und scharf wahrgenommen wird. 4. Decken Sie das linke Objektiv mit einer Hand oder der Objektiv-Kappe ab. 5. Beim Beobachten desselben Objektes drehen Sie das rechte Okular (das Diopter) bis das mit dem rechten Auge anvisierte Bild deutlich und scharf zu sehen ist. 6. Ihr Fernglas ist nun auf Ihre Augen eingestellt und das Fokussieren auf jegliches Objekt kann nun einfach durch Drehen am Fokussierrad erreicht werden. Tipp: Brillen, die bei Kurzsichtigkeit getragen werden, sollten auch bei Verwendung des Fernglases getragen werden, da ohne diese eventuell kein perfektes Fokussieren möglich ist EINSTELLEN DER AUGENMUSCHEL Die Cometron Ferngläser sind mit faltbaren Gummiaugenmuscheln ausgestattet, die sowohl Brillenträgern als auch Benutzern ohne Brille entgegenkommen. Wenn Sie keine Brille tragen, lassen Sie die Gummiaugenmuscheln in der “nach oben” Stellung. Wenn Sie eine Brille tragen, stellen Sie sicher, dass die Augenmuscheln nach unten gefaltet sind, um ein maximales Blickfeld zu gewährleisten. Wenn Sie mit dem Gebrauch fertig sind, stellen Sie die Gummiaugenmuscheln zur Lagerung nach oben. DIOPTRIE-EINSTELLUNG/FOKUSSIEREN Abb 4 Dioptrie-Einstellring Fokussierrad Abb. 3
  • 20. 36 I DEUTSCH DEUTSCH I 37 STATIV-ANWENDBARKEIT Die Cometron Fernglasserie verfügt über eingebaute Schrauben, mit denen das Fernglas mithilfe des Fernglas-Stativ-Adapters an einem Stativ angebracht werden kann (im Lieferumfang von Modell # 71199). Diese Schrauben können durch Abdrehen des Logo-Etiketts vorne am Scharnier freigelegt werden (Abb. 5). Um das Fernglas an einem Stativ anzubringen, schrauben Sie den Adapter in das Fernglas und bringen das andere Ende des Adapters an ein Fotografie-Stativ an. Die Anbringung des Fernglases an ein Stativ ermöglicht mehr Stabilität und Komfort während langer Betrachtungen. PFLEGE UND AUFBEWAHRUNG Ihr Celestron-Fernglas wird Ihnen jahrelang zuverlässige Dienste leisten, wenn es ordnungsgemäß gepflegt und aufbewahrt wird. 1. Schützen Sie das Fernglas vor Stößen und beanspruchen Sie die beweglichen Teile nicht über deren Grenzen hinaus. 2. Schützen Sie die optischen Teile Ihres Fernglases, indem Sie bei Nicht-Verwendung alle Objektiv-Kappen anbringen. 3. Bewahren Sie Ihr Fernglas, wann immer möglich, an einem kühlen, trockenen Platz auf. 4. Legen Sie das Fernglas für eine Aufbewahrung über einen längeren Zeitraum zusammen mit einem Trockenmittel in einen Plastikbeutel oder einen luftdichten Behälter. 5. Lassen Sie das Fernglas an einem heißen/ sonnigen Tag nicht im Auto liegen und legen Sie es nicht in die Nähe einer Wärmequelle, da dies zu Schäden führen könnte. 6. Entfernen Sie Staub, Schmutz oder Wasser so schnell wie möglich, da diese in das Fernglas oder die internen beweglichen Teile eindringen können und unvorhergesehene Schäden verursachen können. REINIGUNG Die ordnungsgemäße Reinigung der Objektive ist für die Aufrechterhaltung der optischen Integrität Ihres Fernglases unerlässlich. Verschmutze Objektive reduzieren die Lichtmenge, die durch das Fernglas geleitet wird, und somit Ihr gesamtes Betrachtungserlebnis. Abb 5
  • 21. 38 I DEUTSCH DEUTSCH I 39 WARTUNG UND REPARATUR Treten Garantiefälle auf oder sind Reparaturen nötig, wenden Sie sich bitte, wenn Sie in den Vereinigten Staaten oder Kanada leben, an die Celestron-Kundendienstabteilung. Leben Sie außerhalb dieser Länder, wenden Sie sich bitte an den Händler, bei dem Sie Ihr Fernglas erworben haben oder an den Celestron-Vertrieb in Ihrem Land. Eine Liste unserer Vertreiber finden Sie auf unserer Website. www.celestron.com GARANTIE Ihr Fernglas ist durch die eingeschränkte, lebenslange Garantie von Celestron abgedeckt. Celestron garantiert diese Ferngläser frei von Mängeln in Material und Verarbeitung für das Fernglas ‘nutzbare Lebensdauer der ursprünglichen Besitzer. Celestron wird eine Reparatur oder einen Austausch des Fernglases, bei dem aufgrund einer Überprüfung durch Celestron ein Material- oder Herstellungsfehler gefunden wird, innerhalb der Definitionen der unten beschriebenen Grenzen durchführen. Diese Garantie gilt nicht für Produkte, die Gegenstand von Missbrauch oder unsachgemäßer Verwendung waren oder physikalisch beschädigt bzw. verändert wurden oder an denen unautorisierte Reparaturen oder Modifikationen vorgenommen wurden. Diese Garantie deckt keine Defekte aufgrund von normalem Verschleiß und anderen Bedingungen ab. Diese Garantie ist für Kunden in den USA und Kanada gültig, die ihr Fernglas von einem autorisierten Celestron-Händler in den USA oder Kanada gekauft haben. Wenden Sie sich für geltende Garantieinformationen bezüglich Produkte, die außerhalb der USA oder Kanada gekauft wurden, bitte an Ihren Celestron- Vertreiber oder autorisierten Händler vor Ort. Zusätzliche Garantieinformationen und Einzelheiten über Ansprüche finden Sie auf der Celestron-Website. Celestron-Ferngläser wurden für 14 Jahre und älter entworfen und vorgesehen. Produktdesign und technische Daten können ohne Vorankündigung geändert werden. Für vollständige technische Daten und Produktinformationen: www.celestron.com 2835 Columbia Street • Torrance, CA 90503 U.S.A. • Telefon: 800.421.9649 1. Entfernen Sie Staub mithilfe einer weichen Objektivbürste oder einer Druckluftdose von den Objektiven. 2. Entfernen Sie von den Objektiv- Oberflächen Fingerabdrücke, Flecken oder Verschmutzungen mit einem weichen Tuch oder Linsenreinigungstuch, indem Sie in kreisenden Bewegungen darüber reiben. Beginnen Sie in der Mitte des Objektivs und arbeiten Sie sich an die Ränder vor. Hauchen sie die Objektive leicht an, um wenn nötig Feuchtigkeit aufzubringen. 3. Für eine gründlichere Reinigung empfehlen wir die Verwendung eines Reinigungs-Kits für Linsen/Objektive, das in den meisten Foto- oder Optik-Geschäften erhältlich ist. Befolgen Sie für optimale Ergebnisse die Anleitung, die dem Reinigungs-Kit beiliegt.
  • 23. 42 I ITALIANO ITALIANO I 43 Grazie per aver acquistato un binocolo Celestron Cometron. Siamo sicuri che questo binocolo offrirà anni di divertimento e di servizio affidabile. Leggere attentamente le istruzioni prima di utilizzare il binocolo al fine di garantire l’uso e la cura corretti. La distanza interpupillare, o distanza tra le pupille, varia da persona a persona. Il binocolo deve essere allineato (regolato) correttamente alla distanza tra le proprie pupille al fine di ottenere un’immagine unica e chiara. Per regolare la distanza, sollevare il binocolo ai propri occhi (utilizzando entrambe le mani) e guardare attraverso esso a un oggetto distante. Spostare le due canne (metà) del binocolo entrambe verso il centro oppure verso l’esterno fino a quando si vedrà un’immagine unica e chiara (Fig. 2). Controllare che la distanza interpupillare sia impostata correttamente a ogni utilizzo del binocolo. binocolo Celestron® Cometron REGOLAZIONE DELLA DISTANZA INTERPUPILLARE Fig. 2 ATTENZIONE: Mai guardare in direzione del Sole utilizzando il binocolo. Guardare in direzione del Sole può causare danni permanenti agli occhi.Fig. 1 Oculare Logo Piastra / Adattatore treppiede Obiettivo Caps Adattatore treppiede (12x70) Oculare Caps Anello di regolazione della diottria Coprioculare Protezione contro la pioggia (12x70) Lente dell’obiettivo Ghiera di messa a fuoco
  • 24. 44 I ITALIANO ITALIANO I 45 Per garantire un’immagine chiara e nitida, il sistema di messa a fuoco del binocolo deve essere impostato per compensare qualsiasi differenza nella propria vista. Ciò si ottiene impostando le diottrie (poste sull’oculare di destra) prima dell’uso. Per impostare il binocolo secondo le proprie condizioni di vista, seguire le istruzioni sottostanti. 1. Osservare un oggetto distante attraverso il binocolo. 2. Coprire la lente obiettivo di destra con la mano o con il tappo per le lenti obiettivo. 3. Ruotare la rotella di messa a fuoco fino a quando l’immagine visualizzata con l’occhio sinistro sarà chiara e nitida. 4. Coprire la lente obiettivo di sinistra con la mano o con il tappo per le lenti obiettivo. 5. Osservare lo stesso oggetto, ruotare l’oculare destro (la diottria) finché l’immagine visualizzata con l’occhio destro è chiara e nitida. 6. Il binocolo è ora regolato secondo i propri occhi e la messa a fuoco di qualsiasi oggetto può ora essere ottenuta ruotando semplicemente la rotella di messa a fuoco. Suggerimento: Gli occhiali per la miopia devono essere indossati quando si utilizza il binocolo in quanto potrebbe non essere possibile ottenere la messa a fuoco all’infinito senza di essi. REGOLAZIONE DELLA CONCHIGLIA OCULARE Il Cometron dispone conchiglie oculari in gomma pieghevoli per ospitare sia occhiali e portatori di non-occhiali. Se non si usano occhiali, lasciare le conchiglie oculari in gomma in posizione sollevata. Se si indossano occhiali da vista, assicurarsi che le conchiglie oculari sono piegate verso il basso per ottenere il massimo campo visivo. Una volta fatto l’osservazione, assicurarsi che le conchiglie oculari in gomma sono nella posizione per la memorizzazione. Anello di regolazione delle diottrie IMPOSTAZIONE DELLA DIOTTRIA / MESSA A FUOCO Fig. 4 Fig. 3 Ghiera di messa a fuoco
  • 25. 46 I ITALIANO ITALIANO I 47 ADATTABILITÀ DEL TREPPIEDE Le binocolo Cometron presentano filettature integrate che consentono il collegamento del binocolo a un treppiede utilizzando un adattatore per treppiede per binocoli (incluso con il modello # 71199). È possibile accedere a tali filettature svitando la piastra del logo che si trova sulla parte frontale della cerniera (Fig. 5). Per collegare il binocolo al treppiede, avvitare l’adattatore al binocolo e collegare l’altra estremità dell’adattatore a un treppiede fotografico. Montare il binocolo su un treppiede consente una maggiore stabilità e comodità durante le osservazioni prolungate. CURA E CONSERVAZIONE Il binocolo Celestron offrirà anni di servizio affidabile se curato e conservato correttamente. 1. Proteggere il binocolo dagli urti e non forzare nessuna parte movibile oltre i suoi limiti. 2. Proteggere le parti ottiche del binocolo applicando tutti i tappi per le lenti quando non in uso. 3. Conservare il binocolo in un luogo fresco e asciutto ogniqualvolta ciò sia possibile. 4. In caso di conservazione per un lungo periodo di tempo, inserire il binocolo in un sacchetto di plastica o un contenitore a chiusura ermetica con un essiccante. 5. Non lasciare il binocolo all’interno dell’auto in giornate calde/soleggiate o in prossimità di qualsiasi oggetto che generi calore, in quanto ciò potrebbe danneggiare l’apparecchio. 6. Pulire qualsiasi pulviscolo, sporcizia o acqua che potrebbe trovarsi sul binocolo o all’interno delle parti movibili non appena possibile al fine di evitare danni imprevisti. Fig. 5
  • 26. 48 I ITALIANO ITALIANO I 49 ASSISTENZA E RIPARAZIONE In caso di problemi di garanzia o di necessità di riparazione, contattare il reparto di assistenza clienti Celestron se si risiede negli Stati Uniti o in Canada. Se si risiede al di fuori di tali Paesi, contattare il rivenditore da cui si è acquistato il binocolo oppure il distributore Celestron del proprio Paese. Un elenco dei nostri distributori può essere consultato sul nostro sito Internet. www.celestron.com PULIZIA La corretta pulizia delle lenti è essenziale per mantenere l’integrità dei componenti ottici del binocolo. Le lenti sporche diminuiscono la quantità di luce trasmessa attraverso il binocolo e l’esperienza di osservazione complessiva. 1. Rimuovere eventuali pulviscoli sulle lenti con un pennello soffice per lenti o una bomboletta di aria compressa. 2. Rimuovere eventuali impronte, macchie o sbavature dalla superficie delle lenti con un panno per lenti soffice e pulito o un tessuto per lenti, strofinando con movimenti circolari. Iniziare dal centro delle lenti e proseguire verso i bordi. Alitare leggermente sulle lenti per applicare umidità, se necessario. 3. Per una pulizia più complete si consiglia di utilizzare il kit di pulizia per componenti ottici/ lenti disponibile nei principali negozi di ottica o fotografici. Seguire le istruzioni fornite con il kit di pulizia per risultati ottimali. GARANZIA Il binocolo è coperto dalla Garanzia limitata a vita di Celestron. Celestron garantisce che questi binocoli sono esenti da difetti di materiale e di fabbricazione per tutta la vita utile il binocolo “al proprietario originale. Celestron riparerà o sostituirà i binocoli che, dopo un’analisi da parte di Celestron, risultino presentare difetti nei materiali o nella fabbricazione e che rientrino nelle definizioni dei limiti descritti qui di seguito. La presente garanzia non copre prodotti che sono stati oggetto di abuso, uso improprio, danni o alterazioni fisiche o che sono stati sottoposti a modifiche o riparazioni non autorizzate. La presente garanzia non copre i difetti dovuti alla normale usura e ad altre condizioni. La presente garanzia è valida per i clienti di Stati Uniti e Canada che hanno acquistato il proprio binocolo da un rivenditore Celestron autorizzato negli Stati Uniti o in Canada. Per i prodotti acquistati al di fuori degli Stati Uniti o del Canada, contattare il proprio distributore Celestron o il rivenditore autorizzato per le informazioni sulla garanzia applicabili. Ulteriori informazioni di garanzia e criteri di idoneità possono essere trovati sul sito Internet di Celestron. I binocoli Celestron sono progettati e destinati all’uso di persone di età pari o superiore ai 14 anni. Il design del prodotto e le specifiche sono soggette a modifiche senza previa notifica. Per le specifiche e le informazioni di prodotto complete: www.celestron.com 2835 Columbia Street • Torrance, CA 90503 U.S.A Telefono: 800.421.9649
  • 27. www.celestron.com ©2013 Celestron • All rights reserved • Printed in China • 04-13 This product is designed and intended for use by those 14 years of age and older.