SlideShare ist ein Scribd-Unternehmen logo
1 von 40
Downloaden Sie, um offline zu lesen
10-13
English Français español Deutsch Italiano
Riflescope
Instruction
Manual
Lunette de visée
Manuel
d’instructions
Mira telescópica
Manual de
instrucciones
Zielfernrohr
Bedienungs-
anleitung
Cannocchiale da
puntamento
Manuale di
istruzioni
forallbasicmodels
ENGLISH			 			 4-10
Français						11-17
Español						18-24
Deutsch						25-31
Italiano						32-38
4
Congratulations on your choice of a Bushnell®
Banner®
riflescope. It is a precision instrument
constructed of the finest materials and assembled by highly skilled craftsmen for a lifetime of
trouble-free use under the most demanding conditions.
This booklet will help you achieve optimum performance by explaining how to use its various
features and how to care for it. Read the instructions carefully before mounting and using your
scope.
The following photographs are guides to the nomenclature and location of the riflescope parts
mentioned throughout this text.
Eyepiece
Fast
Focus
Ring
Power Change Ring
Elevation Adjustment
Shoulder
Windage Adjustment Objective
Lens
Adjustable Objective
(Parallax Compensation)
(selected models only)
PARTS GUIDE
English
5
EYEPIECE FOCUSING
The eyepiece is designed to provide a precise fast focus. The eyepiece will focus faster than your
eye can compensate for any inaccuracy in your adjustment.
Look at a distant object for several seconds without using your scope. Then, shift your vision
quickly, looking through the scope at a plain background.Turn the fast-focus eyepiece clockwise or
counter clockwise to adjust to your eyes. The reticle pattern should be sharp and clear before your
eye can refocus. After you have made your adjustment, with a quick glance re-check the image.
WARNING: NEVER LOOK AT THE SUN THROUGH THE RIFLESCOPE (OR ANY OTHER OPTICAL
INSTRUMENT). IT MAY PERMANENTLY DAMAGE YOUR EYES.
CENTERING THE RETICLE
The reticle was carefully set at the optical center of your riflescope at our factory. This setting
provides you with the ideal adjustment range from the center position.The riflescope’s adjustments
are used to zero-in the riflescope.
It is wise to check the center of the optical axis before mounting. Do this by placing the scope in a
solid V-block (cardboard box with two slots). While looking through the scope in a normal viewing
position, carefully rotate the scope. If the target moves in a circle larger than 1” from center (at 25
yards) in relation to intersection of crosshairs, reset windage and elevation adjustments. Remove
adjustment caps. Set each adjustment to midpoint and recheck for centering. If target still rotates,
use adjustments to correct.
MOUNTING
To achieve the best accuracy from your rifle, your Bushnell scope must be mounted properly.
6
(We strongly recommend that those unfamiliar with proper procedures have the scope mounted
by a qualified gunsmith). Should you decide to mount it yourself:
1.	 Use a high-quality mount with bases designed to fit your particular rifle. The scope should be
mounted as low as possible without touching either the barrel or the receiver.
2.	 Carefully follow the instructions packed with the scope mounts you have selected.
3.	 Before tightening the mount rings, look through the scope in your normal shooting position.
Adjust the scope (either forward or backward) until you find the furthest point forward (to
ensure maximum eye relief) that allows you to see a full field of view.
4.	 Rotate the scope in the rings until the reticle pattern is perpendicular to the bore and the
elevation adjustment is on top.
5.	 Tighten the mounting screws.
WARNING: IF THE SCOPE IS NOT MOUNTED FAR ENOUGH FORWARD, ITS REARWARD MOTION
MAY INJURE THE SHOOTER WHEN THE RIFLE RECOILS.
BORE SIGHTING
Bore sighting is a preliminary procedure to achieve proper alignment of the scope with the rifle’s
bore. It is best done using a Bushnell® Bore Sighter. If a bore sighter is not available, it can be
done as follows: Remove the bolt and sight through the gun barrel at a 100 yard target. Then sight
through the scope and bring the cross hairs to the same point on the target. Certain mounts have
integral windage adjustments and, when bore sighting, these should be used instead of the scope’s
internal adjustments. If major elevation adjustments are needed, they should be accomplished by
shimming the mount base.
7
ZEROING
Final sighting-in of your rifle should be done with live ammunition, based on your expected
shooting distance. If most of your shots will be at short range, zero-in at 100 yards. But, for long-
range shooting at big game, most experienced shooters zero-in about three inches high at 100
yards. Three-shot groups are useful for averaging the point of impact.
ELEVATION AND WINDAGE ADJUSTMENT
BushnellBannerscopesfeaturefinger-adjustableaudible-clickelevationandwindageadjustments.
	
1.	 Remove the covers from the Elevation and Windage Adjustments.
2.	 Grasp the Adjustment Bar and turn it in the appropriate“UP”(and/or“R”) direction indicated
by the arrows. Each “click” or increment on the Adjustment Scale Ring will change bullet
impact by 1/4” Minute of Angle. 1/4” MOA corresponds to 1/4 inch at 100 yards, 1/2 inch at
200 yards, 3/4 inch at 300 yards and so on (1/12”at 50 feet for air rifles).
ELEVATION
ADJUSTMENT DIAL
WINDAGE
ADJUSTMENT DIAL
8
RESETTING THE ADJUSTMENT SCALE RING (this feature is not available on all models)
This step is not necessary, but, for future reference, you may want to realign the zero marks on the
Adjustment Scale Rings with the index dots.
1.	 Using a jeweler’s screwdriver, loosen the Phillips screw on the Adjustment Scale about 1/2
turn. Take care not to disturb your zero by“losing”a click or two when loosening the screws.
2.	 Rotate the Adjustment Scale Ring (which should now turn freely) to align the “O” with the
Index Dot.
3.	 Retighten the screw in the Adjustment Scale and reinstall the Elevation and Windage
Adjustment Knobs.
VARIABLE POWER ADJUSTMENTS
To change magnification, simply rotate the Power Change Ring to align the desired number on the
power scale with index dot.
When still-hunting or stalking game, a variable scope should be set to the lowest power. You then
have the widest field of view for quick shots at close range. Higher powers should be reserved for
precise long-range shots.
WARNING: A SCOPE SHOULD NEVER BE USED AS A SUBSTITUTE FOR EITHER A BINOCULAR OR
SPOTTING SCOPE. IT MAY RESULT IN YOU INADVERTENTLY POINTING THE GUN AT ANOTHER
PERSON.
ADJUSTABLE OBJECTIVE LENS
This feature (if present on your scope) permits precise focusing, while simultaneously readjusting
the parallax-free distance, for any range from 50 yards to infinity. To change range focus, turn
9
the Objective Adjustment Ring and align the number with the distance index dot. An alternative
method is to look through the scope and turn the Objective Adjustment Ring until the target, at
whatever range, is sharply focused.
MAINTENANCE
Your Bushnell riflescope, though amazingly tough, is a precision instrument that deserves
reasonable cautious care.
1.	 When cleaning the lenses, first blow away any dirt and dust, or use a soft lens brush.
Fingerprints and lubricants can be wiped off with lens tissue, or a soft clean cotton cloth,
moistened with lens cleaning fluid.
2.	 All moving parts of the scope are permanently lubricated. Do not try to lubricate them.
3.	 No maintenance is needed on the scope’s outer surface, except to occasionally wipe off dirt
or fingerprints with a soft cloth.
4.	 Use lens covers whenever convenient.
WARNING: UNNECESSARY RUBBING OR USE OF A COARSE CLOTH MAY CAUSE PERMANENT
DAMAGE TO LENS COATINGS.
STORAGE
Avoid storing the scope in hot places, such as the passenger compartments of vehicles on hot days.
The high temperatures could adversely affect the lubricants and sealants. A vehicle’s trunk, a gun
cabinet or a closet is preferable. Never leave the scope where direct sunlight can enter either the
objective or the eyepiece lens. Damage may result from the concentration (burning glass effect)
of the sun’s rays.
10
We are so proud of our Bushnell®
Banner®
Riflescopes that their materials and workmanship are warranted to be free of defects for the life of the
binocular. The warranty is available to any owner of the Banner Riflescope. This warranty does not cover damages caused by misuse or improper
handling, installation or maintenance of the binoculars. At our option, we will repair or replace any defective Banner Riflescope, which shall be your
sole remedy under this warranty. In no event shall we be liable for transportation costs to us, costs of removal or reinstallation of the riflescope, or
incidental or consequential damages. Some states do not allow the exclusion of limitation of incidental or consequential damages, so the above
limitation or exclusion may not apply to you.
Any return made under this warranty must be accompanied by the items listed below:
1.	 Name and address for product return
2.	 An explanation of the defect
3.	 You are responsible for transport of the defective product, but we will pay for shipping the repaired or replacement product back to you
anywhere in the continental United States.
4.	 Product should be well packed in a sturdy outside shipping carton, to prevent damage in transit, to the address listed below:
	
	 IN U.S.A. Send To:			 IN CANADA Send To:	
	 Bushnell Outdoor Products			 Bushnell Outdoor Products
	 Attn.: Repairs				 Attn.: Repairs
	 9200 Cody				 140 Great Gulf Drive, Unit # B
	 Overland Park, Kansas 66214 			 Vaughan, Ontario L4K 5W1
For products purchased outside the United States or Canada please contact your local dealer for applicable warranty information. In Europe you
may also contact Bushnell at:			
				Bushnell Germany GmbH
				European Service Centre
				Mathias-Brüggen-Str. 80
				D-50827 Köln
				GERMANY
				 Tél: +49 221 995568-0
				Fax: +49 221 995568-20
This warranty gives you specific legal rights.
You may have other rights which vary from country to country.
©2013 Bushnell Outdoor Products
LIFETIME LIMITED WARRANTY
11
FELICITACIONES sur votre choix d’une lunette de visée Bushnell. C’est un instrument de précision utilisant les
meilleurs matériauz, assemblé par des artisans hautement qualifiés afin d’assurer une vie entiere de service
inégalé, même dans las conditions d’utilisation les plus exigeantes.
Ce livret vous aidera à atteindre des performances optimales en expliquant l’utilisation et l’entretien de tous les
composants de la lunette. Lisez ces instructions soigneusement avant d’installer et d’utiliser l’appareil.
Les photos suivantes servent de guides pour la nomenclature et le repérage des éléments mentionnés dans le
texte.
Français
Réglage La Hausse
Épaule
Objectif
Réglage De Derive
Oculaire
Bague De Réglage De
Grossissement
Mise Au
Point
Rapide
Bague De Réglage
De L’Objectif
12
MISE AU POINT DE L’OCULAIRE
L’oculaire est conçu pour assurer une mise au point rapide de haute précision. Il s’ajuste plus rapidement que
votre oeil ne peut comenser à la suite d’un mauvais réglage de l’appareil.
Regardez un objet distant pendant quelques secondes sans utiliser la lunette. Ensuite portez rapidement votre
oeil sure l’oculaire en direction d’un panorama neutre. Tournez l’oculaire à droite ou à gauche pour l’ajuster à
vision. Le réticule devrait être clair et net avant que votre oeil ait eu le temps de se réajuster. Après le réglage de
l’oculaire, jetez un coup d’oeil rapide sur l’objet pour vérifier ce réglage.
AVERTISSEMENT: NE JAMAIS REGARDER DIRECTEMENT LE SOLEIL A TRAVERS LA LUNETTE DE VISEE (OU AUTRE
INSTRUMENT OPTIQUE). CECI RISQUE DE CAUSER DES DEGATS PERMANENTS AUX YEUX.
CENTRAGE DU RÉTICULE
Le réticule a été soigneusement ajusté par le service optique de l’usine. Celuici assurer un réglage de portée idéal
à partir de son axe. Les réglages de la lunette de visée servent à raffiner la mise au point de la lunette.
Il est conseillé de vérifier le centrage de l’axe optique avant installation de la lunette. Ceci peut se fair en plaçant
la lunette dans un bloc en “V” solide (tel qu’une boîte à chaussures avec deux découpes). Regardez à travers
la lunette tout en la faisant tourner sur son axe. Si le point visé décrit un cercle de plus de 2,5 centimètres par
rapport à l’axe des fils croisés du réticule à une distance de 25 mètres, réajustez les mises au point de dérive et
de hausse. Enlevez les capuchons de protection des mises au point. Réglez chaque mise au point et revérifiez le
centrage. Si le point visé décrit toujours un cercle, recalez les mises au point à nouveau.
INSTALLATION
Votre lunette Bushnell doit être correctement installée pour assurer la précision optimale de votre carabine. (A ce
props, nos conseillons fortement à ceuz qui ne sont pas familiers avex les procédures applicables de faire appel à
un armurier qualifié pour l’installation de la lunette). Si vous décidez d’installer la lunette vous-même:
13
1. 	 Utilisez un support de qualité ayant une embase conçu pour votre type de carabine. La lunette devrait être
installée aussi près que possible sans toute-fois venir en contact avec le canon ou le boîtier de culasse.
2.	 Suivez scrupuleusement las instructions fournies avec le support choisi.
3. 	 Avant de serrer les brides de serrage de la lunette, regardez à travers celleci dans votre position de tir
normal. Faites glisser la lunette en avant et en arrière jusqu’à trouver la position la plus avancée qui vous
permette de voir la totalité du champ de vision. Cette position assure une détente maximale pour l’oeil
4.	 Faitestournerlalunettedanslesbridesjusqu’àcequelesfilscroisésduréticulesetrouventperpendiculaires
au canon et le curseur de hausse soit en position haute.
5.	 Serrez les vis de blocage.
AVERTISSEMENT: SI LA LUNETTE EST POSITIONNEE TROP EN ARRIERE, ELLE RISQUE DE BLESSER LE TIREUR DE
RECUL DE LA CARABINE.
VISÉE PAR LE CANON
La visée par le canon est l’étape préliminaire nécessaire à un bon alignement de la lunette par rapport l’alésage
du canon. Pour ceci, il est préférable d’utiliser un Bushnell Bore Sighter. Si un tel appareil n’est pas disponible,
procédez de la manière suivante: Enlevez la culasse et visez une cible installée à 100 mètres en regardant par
le canon. Ensuite, visez avec la lunette et amenez au point de dévers incorporées. Lors de la visée par le canon,
utilisez ces mises au point plutôt que celles de la lunette. Si des réglages de hausse importants sont nécessaires,
ils devraient être obtenus en calant les embases du support lui-même.
TIRS D’ESSAI
La mise au point finale de votre carabine devrait se faire avec des munitions de chasse et à la distance de tir
anticipée. Si la majorité de vos tirs sont à petite distance, faites les essais à 100 mètres. Cependant, lors de la
chasse de gros gibier à grande distance, la majorité des chasseurs expérminentés font leurs essais avec une
hausse de 75 millimètre pour une cible à 100 mètres. Des groupements de trois tirs sont généralement suffisants
établir le point d’impact moyen.
14
règlage de
la hausse
règlage de derive
MISE AU POINT DE LA HAUSSE ET DE LA DÉRIVE
Votre lunette Bushnell est équipée des molettes de mise au point de la hausse et de dérive qui produisent un
claquement audible.
1.	 Enlevez les capuchons des molettes de mise au point de la hausse et de la dérive.
2.	 Tournez le barre dans la direction appropriée“UP”et/ou“R”indiquée par les flèches. Chaque claquement
ou incrément sur le cadran gradué modifiera le point d’impact par 1/4 de minute d’angle. 1/4 de minute
d’angle correspondent à 7 millimètres à 100 mètres, 14 millimètres à 200 mètres, 21 millimètres à 300
mètres et ainsi de suite (1 millimètres à 10 mètres pour les carabines à air comprimé).
15
RECALAGE DU CADRAN GRADUÉ (Pas disponible sur tous modèles)
Cette opération n’est pas nécessaire, mais il se peut qu’à l’avenir vous vouilez réaligner le zéro des cadrans
gradués sur le point de repère.
1.	 A l’aide d’une tournevis de bijoutier, desserrez les vis cruciformes du cadran gradué d’environ un demi tour.
Faites attention de ne pas déplacer votre point zèro en perdant un cran ou deux lors du desserrement des
vis.
2.	 Faites tourner le cadran gradué (qui devrait alors tourner librement) pour aligner“0”sure le point de repère.
3.	 Serrez la vis du cadran gradué et réinstallez les molettes de réglage de hausse et de dérive.
RÉGLAGE DU GROSSISSEMENT
Pour modifier le grossissement, faites simplement tourner la bague de sélection de grossissement pour aligner
le chiffre voulu sure le point de repère de cadran de grossissement.
Lors de la chasse à l’affût ou de la traque du gibier, une lunette à grossissement variable devrait être à la position
de grossissement la plus faible. Cela vous assure un maximum de champ de vision pour les tirs rapides à petite
distance. Les grossissement plus élevés devraient être réservés aux tirs de précision à grande distance.
AVERTISSEMENT: UNE LUNETTE DE CARABINE NE DEVRAIT JAMAIS ETRE UTILISEE EN TANT QUE JUMELLES OU
LUNETTE DE REPERAGE. CECI RISQUE DE VOUS FAIRE BRAQUE VOTRE ARME SUR UNE AUTRE PERSONNE.
OBJECTIF RÉGLABLE
Ce dispositif (si votre lunette en est équipée) permet une mise au point précise tout en permettant le réglage
de la distance hors parallaxe à partir de 50 mètres et jusqu’à l’infini. Pour modifier la mise au point de la portée,
tournez la bague de réglage de l’objectif pour aligner le chiffre voulu sur l’indice de distance. Une méthode al-
ternative consiste en regardant par la lunette à tourner la bague de réglage de l’objectif jusqu’à ce que la cible,
qu’elle qu’en soit la distance, soit bien au point.
16
ENTRETIEN
Votre lunette de visée Bushnell, aussi robuste qu’elle pousse être, est tout de même un instrument de précision
qui nécessite un certain niveau d’entretien et certaines précautions.
	
1.	 Lors du nettoyage des lentilles, commencez en soufflant sur elles pour en éliminer la poussière, ou utilisez
une brosse à lentilles. Les empreintes et laes traces de graisse peuvent être éliminées à l’aide d’une papier
our objectifs ou en utilisant un tissu de coton humecté avec un produit de nettoyage pour optiques.
AVERTISSEMENT: LE FROTTEMENT EXCESSIF OU L’UTILISATION D’UN TISSU ABRASIF PEUVENT ENDOMMAGER LES
LENTILLES DE MANIERE PERMANENTE.
2.	 Toutes les pièces mobiles de la lunette ont une lubrification permanente. Ne tentez pas de les lubrifier.
3.	 Mise à part l’elimination des traces de doigts et des salissures à l’aide d’un chiffon doux, aucun entretien
des surfaces externes de la lunette n’est nécessaire.
4.	 Dans la mesure du possible, gardez les lentilles couvertes.
RANGEMENT
Evitez de ranger la lunette dans les endroits chauds, tels que les habitacles de voiture par temps chaud. Les
températures élevées peuvent détériorer les lubrifiants et les joints d’étanchéité. Il est préférable d’utiliser la
malle d’une voiture, une armoire à fusils ou autre rangement. Ne jamais laisser la lunette là où la lumiére du soleil
directe peut atteindre une de ses deux extrémités. Des dégâts résultant de l’effet“loupe”peuvent en résulter.
17
GARANTIE À VIE LIMITÉE
Votre produit Bushnell® est garanti exempt de défauts de matériaux et de fabrication pendant la durée de vie de son premier propriétaire.
La garantie à vie limitée traduit notre confiance dans les matériaux et l'exécution mécanique de nos produits et représente pour vous
l'assurance de toute une vie de service fiable. Au cas où un défaut apparaîtrait sous cette garantie, nous nous réservons l'option de réparer
ou de remplacer le produit, à condition de nous le renvoyer en port payé. La présente garantie ne couvre pas les dommages causés par une
utilisation, une manipulation, une installation incorrecte(s) ou un entretien incorrect ou fourni par quelqu'un d'autre qu'un centre de
réparation agréé par Bushnell.
Tout retour effectué aux États-Unis ou au Canada, dans le cadre de la présente garantie, doit être accompagné des articles indiqués ci-dessous:
	 1) 	un chèque ou mandat d'une somme de 10,00 $ US pour couvrir les frais d'envoi et de manutention
	 2) 	le nom et l'adresse pour le retour du produit
	 3) 	une description du défaut constaté
	 4) 	la preuve d'achat
	 5) 	Le produit doit être emballé soigneusement, dans un carton d'expédition solide, pour éviter qu'il ne soit endommagé durant le transport ; 	
		 envoyez-le en port payé, àl'adresse indiquée ci-dessous :
	 Aux États-Unis, envoyez à:			 Au CANADA, envoyez à:
	 Bushnell Outdoor Products			 Bushnell Outdoor Products
	 Attn.: Repairs				 Attn.: Repairs
	 9200 Cody				 140 Great Gulf Drive, Unit # B
	 Overland Park, Kansas 66214 			 Vaughan, Ontario L4K 5W1
Pour les produits achetés en dehors des États-Unis et du Canada, veuillez contacter votre distributeur local pour tous renseignements
concernant la garantie. En Europe, vous pouvez aussi contacter Bushnell au :
					Bushnell Germany GmbH
					European Service Centre
					Mathias-Brüggen-Str. 80
					D-50827 Köln
					GERMANY
					Tél: +49 221 995568-0
					Fax: +49 221 995568-20
La présente garantie vous donne des droits légaux spécifiques.
Vous pouvez avoir d'autres droits qui varient selon les pays.
©2013 Bushnell Outdoor Products
18
español
Adjuste De Elevation
Hombro
Objetivo
Adjuste De Viento
Ocular
Anillo De Cambio De
Potencia
Rapido
Enfoque
Anillo De Ajuste
Del Objetivo
FELICITACIONES por haber elegido una mira telescópica Bushnell. Se trata de un instrumento de precisión
construido con los mejores materiales y ensamblado por artesanos altamente cualificados para que pueda
disfrutarlo toda una vida sin problemas y en las condiciones más exigentes.
Este folleto le ayudará a obtener un rendimiento óptimo explicando cómo se usan sus diferentes componentes
y cómo cuidar de los mismos. Lea detenidamente las instrucciones antes de montar y usar su mira telescópica.
Las siguientes fotografías sirven como guía para la nomenclatura y la posición de las piezas de la mira telescópica
para rifle que se mencionan en el texto.
19
ENFOQUE DEL OCULAR
El ocular está diseñado para ofrecer un enfoque rápido y preciso. El ocular enfocará con mayor rapidez de la que
su ojo necesita para compensar por cualquier falta de precisión en el ajuste.
Mire a un objeto durante varios segundos sin usar su mira telescópica. Luego, cambie de visión rápidamente,
mirando a través de la mira telescópica hacia un fondo despejado. Gire el ocular de enfoque rápido a la derecha
o a la izquierda para ajustarlo a sus ojos. La imagen del retículo debe ser nítida y clara antes de que su ojo pueda
volver a enfocar. Después de haber hecho su ajuste, vuelva a comprobar la imagen dando un vistazo rápido.
ADVERTENCIA: NO MIRE NUNCA AL SOL A TRAVÉS DE LA MIRA TELESCÓPICA PARA RIFLE (NI CUALQUIER OTRO
INSTRUMENTO ÓPTICO). PODRÍA DAÑAR PERMANENTEMENTE SU VISTA.
CENTRADO DE LA RETÍCULA
La retícula se ha fijado cuidadosamente en el centro óptico de su mira telescópica para rifle en nuestra fábrica.
Este posicionamiento le ofrece la escala de ajuste ideal desde la posición central. Los ajustes de la mira telesópica
para rifle se usan para centrar dicha mira.
Conviene inspeccionar el centro del eje óptico antes del montage colocando la mira telescópica sobre un bloque
con ranuras en V (caja de cartón con dos ranuras). Mientras mira a través de la mira telescópica en la posición
normal, gire con cuidado la mira telescópica. Si el blanco se mueve en un círculo mayor que 1”(2,5 cm) desde el
centro (a 22 metros) en relación con la intersección de las retículas, reposicione los ajustes de corrección vertical
y elevación. Quite las tapas de ajuste. Coloque cada uno de los ajustes en el punto medio y vuelva a comprobar
si están centrados. Si el blanco sigue girando, use los ajustes para corregir.
MONTAJE
Para lograr la máxima precisión de su rifle, su mira telescópica Bushnell tiene que montarse adecuadamente.
(Recomendamos encarecidamente a aquellos que no estén familiarizados con los procedimientos apropiados
que pidan a un maestro armero cualificado que se encargue del montaje de la mira telescópica). Si usted decide
20
hacerlo por su cuenta:
1.	 Use una montura de alta calidad que tenga unas bases diseñadas para encajar en su rifle particular. La mira
telescópica se aointe tam bajo com sea posible sin el tacto de la base o del receptor.
2.	 Siga cuidadosamente las instrucciones que se entregan con las monturas de la mira telescópica que haya
seleccionado.
3.	 Antes de apretar los anillos de montaje, mire a través de la mira telescópica en su posición de tiro normal.
Ajuste la mira telescópica (hacia adelante o hacia atrás) hasta que logre el punto hacia adelante más lejano
(para una distancia máxima de la pupila al ocular) que le permita ver un campo de visión completo.
ADVERTENCIA: SI LA MIRA TELESCÓPICA NO ESTÁ MONTADO LO SUFICIENTEMENTE LEJOS HACIA ADELANTE, EL
IMPACTO PRODUCIDO POR EL RETROCESO DEL RIFLE PUEDE CAUSAR LESIONES AL TIRADOR.
4.	 Gire la mira telescópica por los anillos hasta que la imagen de la retícula quede perpendicular al cañon y el
ajuste de elevación esté en la parte superior.
5.	 Apriete los tornillos del montaje.
PARALELISMO ENTRE LÍNEA DE MIRA Y CAÑON
El paralelismo entre línea de mira y el cañon es un procedimiento preliminar para lograr la alineación adecuado
entre la mira telescópica y el cañon del rifle. Se hace mejor usando un colimador de paralelismo de Bushnell. Si
no dispone de un colimador de paralelismo, puede hacerse de la siguiente forma: quite el tornillo y mire a través
del cañon del arma a un blanco situado a 90 metros. Luego mire a través de la mira telescópica y alinee la réticula
con el mismo punto del blanco. Hay algunas monturas que tienen ajustes integrados de corrección vertical y, al
establecer el paralelismo entre la línea de mira y el cañon, deben usarse en lugar de los ajustes internos de la mira
telescópica. Si tiene que hacer ajustes de elevación importantes, deberán hacerse calzando la base de montaje.
AJUSTE DE LA MIRA
El ajuste final de la mira del rifle debe hacerse con munición real, basándose en la distancia de tiro esperada. Si
la mayoría de los disparos se van a hacer a corto alcance, cero en a 100 yardas. Pero para la gama larga que tira a
juego grande, la mayoría de los tiradores experimentados cero adantro en cerca de tres pulgadas en 110 yardas.
Resulta muy útil hacer grupos de tres disparos para calcular el promedio del punto de impacto.
21
ajuste
vertical
ajuste
horizontal
AJUSTES DE ELEVACIÓN Y CORRECCIÓN VERTICAL
Su mira telescópica dispone de unos ajustes de elevación y corrección vertical que se pueden accionar con un
dedo y que producen un chasquido perceptible.
1.	 Quite las tapas de los Ajustes de Elevación y Corrección Vertical.
2.	 Sujete la Barra de Ajuste y gírela en la dirección apropiada UP (y/o R) indicada por las flechas. Cada
chasquido o incremento en el Anillo de Escala del Ajuste cambiará el impacto de la bala en un 1/4” de
Minuto de Ángulo. 1/4”de MOA corresponde a 1/4 de pulgada (0,625 cm) a 90 metros, 1/2 pulgada (1,25
cm) a 180 metros, 3/4 de pulgada (1,90 cm) a 270 metros y así sucesivamente (1/12”a 50 metros para totos
los rifles de aire comprimido).
22
REPOSICIÓN DEL ANILLO DE LA ESCALA DE AJUSTE (No disponible en todo modela)
Este paso no es necasario pero, para referencia futura, puede que tenga volver a alinear las marcas de cero de los
Anillos de la Escala de Ajuste con los puntos indicadores.
1.	 Con un destornillador de joyería, afloje el tornillo de estrella de la Escala de Ajuste una 1/2 vuelta. Tenga
cuidado de no alterar el punto cero perdiendo uno o dos chasquidos al aflojarlos tornillos.
2.	 Gire el Anillo de la Escala de Ajuste (que debe girar libremente) para alinear el 0 con el Punto Indicador
3.	 Vuelva a apretar el tornillo de la Escala de Ajuste y reinstale los botones de Ajuste de Elevación y Corrección
Vertical.
AJUSTE DE POTENCIA VARIABLE
Para cambiar el aumento sólo tiene que girar el Anillo Selector de Potencia para alinear el número deseado de la
escala de potencia con el Punto Indicador.
En los casos de cacería estática o de acecho a la presa, las miras telescópicas variables se deben fijar en la potencia
menor para lograr un campo de visión más amplio con el fin de hacer disparos rápidos de corto alcance. Las
potencias más altas deben reservarse para el caso de los disparos precisos de largo alcance.
ADVERTENCIA: LAS MIRAS TELESCÓPICAS NO DEBEN USARSE NUNCA EN LUGAR DE LOS PRISMÁTICOS NI DE LAS
MIRAS TELESCÓPICAS DE LOCALIZACIÓN. PUEDE DAR COMO RESULTADO QUE APUNTE SU ARMA SIN QUERER A
OTRA PERSONA.
OBJETIVOS AJUSTABLES
Esta función (si la tuviera su mira telescópica) permite hacer un enfoque rápido mientras se reajusta
simultáneamente las distancia libre de paralaje desde 40 metros hasta el infinito. Para cambiar la distancia de
enfoque, gire el Anillo de Ajuste del Objetivo y alinee el número con el Punto Indicador de distancia. Un método
alternativo sería mirar a través de la mira telescópica y girar el Anillo de Ajuste del Objetivo hasta que el blanco
aparezca nítidamente enfocado a cualquier distancia.
23
MANTENIMIENTO
Su mira telescópica para rifle Bushnell, a pesar de tener una solidez sorprendente, es un instrumento de precisión
que debe recibir un cuidado razonable y prudente.
	
1.	 Cuando limpie las lentes, primero sople la suciedad o el polvo que puedan tener o use un cepillo suave
para lentes. Las huellas dactilares y los lubricantes pueden limpiarse con papel para vidrios ópticos o un
paño de algodón suave humedicido con líquido para limpiar lentes.
ADVERTENCIA: FROTAR INNECESARIAMENTE O USAR PAÑOS ÁSPEROS PUEDE CAUSAR DAÑOS PERMANENTES AL
REVESTIMIENTO DE LAS LENTES.
2.	 Todas las piezas móviles de la mira telescópica están lubricadas permanente. No trate de 	 lubricarlas
por su cuenta.
3.	 La parte externa de la mira telescópica no requiere ningun mantenimiento, excepto limpiar de vez en
cuando la suciedad o las huellas dactilares con un paño suave.
4.	 Use las cubiertas de las lentes siempre que sea necesario.
ALMACENAMIENTO
No guarde nunca la mira telescópica en lugares calientes, tal como la guantera de los vehículos los días de mucho
calor. Las temperaturas elevadas pueden afectar adversamente a los lubricantes y selladores. Es preferible usar
un maletero de un vehículo, una vitrina para armas o un armario. No deje nunca la mira telescópica en un lugar
donde la luz solar directa pueda penetrar en el objetivo o el ocular. La concentración de los rayos solares (efecto
del vidrio ardiente) puede causar daños a las lentes.
24
GARANTÍA LIMITADA PARA TODA LA VIDA
Su producto Bushnell® está garantizado contra defectos de material y fabricación durante toda la vida del propietario original. La Garantía
Limitada para Toda la Vida es una expresión de la confianza que tenemos en nuestros materiales y en la fabricación mecánica de nuestros
productos, que le garantiza un servicio fiable durante toda la vida. En caso de defectos bajo esta garantía, nosotros, a nuestra opción,
repararemos o sustituiremos el producto siempre que lo devuelva con portes pagados. Esta garantía no cubre defectos causados por el uso
indebido, ni por un manejo, instalación o mantenimiento del producto inapropiados, o el mantenimiento hecho por otro que no sea un
Centro de Servicio Autorizado de Bushnell.
Cualquier envío en Estados Unidos o Canadá que se haga bajo garantía deberá venir acompañado por lo siguiente:
	 1) 	Un cheque/giro postal por la cantidad de 10 dólares para cubrir los gastos de manejo y envio
	 2) 	Nombre y dirección donde quiere que se le envíe el producto
	 3) 	Una explicación del defecto
	 4) 	Prueba de compra
	 5) 	El producto debe empaquetarse bien en una caja resistente para evitar que se dañe durante el transporte, y enviarse con portes pagados a la 	
		 dirección que se muestra a continuación:
	 En EE UU, enviar a:		 En CANADÁ, enviar a:	
	 Bushnell Outdoor Products		 Bushnell Outdoor Products
	 Attn.: Repairs			 Attn.: Repairs
	 9200 Cody			 140 Great Gulf Drive, Unit # B
	 Overland Park, Kansas 66214 		 Vaughan, Ontario L4K 5W1
En el caso de los productos comprados fuera de los Estados Unidos o Canadá, llame al distribuidor local para la información pertinente sobre
la garantía. En Europa también puede llamar al:	 Bushnell Germany GmbH
				European Service Centre
				Mathias-Brüggen-Str. 80
				D-50827 Köln
				GERMANY
				 Tél: +49 221 995568-0
				Fax: +49 221 995568-20
Esta garantía le ofrece derechos legales específicos.
Puede que tenga otros derechos que varían de un país a otro.
©2013 Bushnell Outdoor Products
25
Höheneinstellung
Schulter
ObjektivSeiteneinstellung
Okular
Ring Zur Einstellung
Der VergröberungSchnelle
Scharfeneinstellung
Objektiveinstellring
HERZLICHEN GLÜCKWUNSCH zum Kauf des Bushnell-Zielfernrohrs! Dieses Präzisionsinstrument wurde von
Spitzentechnikern aus den feinsten Materialien für lebenslangen und einwandfreien Gebrauch unter den
anspruchsvollsten Bedingungen gebaut.
Dieses Handbuch gibt Anweisungen über den Gebrauch und die Wartung des Zielfernrohrs, damit Sie optimale
Ergebnisse erzielen. Bitte lesen Sie die Anweisungen vor Montage und Gebrauch des Zielfernrohrs sorgfältig
durch.
Die folgenden Photos geben Aufschluß über die in diesem Text gebrauchte Terminologie und zeigen an, wo sich
die einzelnen Teile des Zielfernrohrs befinden.
Deutsch
26
SCHÄRFEEINSTELLUNG DES OKULARS
Das Okular ist für präzise und schnelle Schärfeeinstellung konzipiert. Das Okular stellt schneller ein, als sich Ihr
Auge an eventuelle Einstellungsgenauigkeiten anpassen kann.
Schauen Sie mit bloßern Auge einige Sekunden lang auf einen fernen Gegenstand. Richten Sie dann den Blick
rasch durch das Zielfernrohr auf einen einfachen Hintergrund. Drehen Sie das Okular im Uhrzeigersinn bzw,
dagegen, um Ihr Auge anzupassen. Das Fadenkreuz sollte scharf und klar sein, bevor sich Ihr Auge angepaßt hat.
Kontrollieren Sie die Schärfe nochmals mit einem kurzen Blick durch das Zielfernrohr, nachdem Sie das Okular
eigenstellt haben.
ACHTUNG: SCHAUEN SIE NIE DURCH DAS ZIELFERNROHR (ODER ANDERE OPTISCHE GERÄTE) DIREKT IN DIE
SONNE. DA DIES IHR AUGE AUF DAUER BESCHÄDIGEN KÖNNTE.
ZENTRIEREN DES FADENKREUZES
Das Fadenkreuz wurde in unserer Fabrik sorgfältig ins optische Zentrum des Zielfernrohrs eingesetzt. Dies
gibt lhnen den idealen Einstellbereich von der Mitte aus. Die Einstellungen des Zielfernrohrs dienen dazu, das
Zielfernrohr auf das Ziel einzustellen.
Esistratsam,vordemMontierendenMittelpunktderoptischenAchsezukontrollieren.SetzenSiedasZielfernrohr
hierzu in einen festen V-Block (einen Pappkarton mit zwei Einschnitten) ein. Blicken Sie normaler Sichtstellung
durch das Zielfernrohr, und drehen Sie es dabei vorsichtig.Wenn sich das Ziel in einem Kreis bewegt, der bei etwa
20 m mehr als 2,5cm von der Mitte des Fadenkreuzes abweicht, stellen Sie die Seiten- und Höheneinstellung neu
ein. Nehmen Sie die Schutzkappen von den Einstellvorrichtungen ab. Setzen Sie beide Einstellungen auf die
Mitte, und kontrollieren Sie es nochmals, damit sie genau zentriert sind. Korrigieren Sie die Einstellung, wenn
sich das Ziel weiterhin dreht.
MONTAGE
Die Präzision des Gewehrs ist nur dann gewährleistet, wenn das Bushnell-Zielfernrohr korrekt montiert wurde.
27
(Unerfahrenen Benutzern empfehlen wir dringend, das Zielfernrohr von einem Waffenschmied montieren zu lassen.)
Beachten Sie bitte folgendes, wenn Sie es selbst montieren wollen:
1.	 Benutzen Sie einen qualitativ hochwertigen Montageblock, dessen Unterseite lhrem speziellen Gewehr
angepaßt ist. Das Zielfernrohr sollte so dicht wie möglich an das Gewehr montiert werden, ohne jedoch den
Büchsenlauf bzw. den Hülsenkopf zu berühren.
2. 	 FolgenSiesorgfältigdenAnweisungen,diemitdemMontagezubehörgeliefertwerden,dasSieausgewähit
haben.
3. 	 Bevor Sie die Montageschraube festschrauben, schauen Sie in normaler Schußstellung durch das
Zielfernrohr. Stellen Sie das Zielfernrohr ein (entweder nach vorn oder nach hinten), bis Sie den weitesten
Vorwärtspunkt erreichen, bei dem Sie ein volles Blickfeld haben. Dies ist die Lage, die Ihr Auge am meisten
schont.
ACHTUNG: WENN DAS ZIELFERNROHR NICHT WEIT GENUG NACH VORN MONTIERT IST, KANN DER SCHÜTZE
DURCH DEN RÜCKSCHLAG DES GEWEHRS VERLETZT WERDEN.
4. 	 Drehen Sie das Zielfernrohr in den Ringen, bis das Fadenkreuz senkrecht zum Richtkorn steht und die
Höheneinstellung oben ist.
5. 	 Ziehen Sie die Montageschrauben fest an.
VISIEREN DES LAUFSPIEGELS
Das Visieren des Laufspiegels ist ein Vorbereitungsvorgang, der sicherstellt, daß Zielfernrohr genau mit dem
Richtkorn des Gewehrs ausgerichtet ist. Am besten nimmt man hierzu ein Bushnell-Laufvisier. Gehen Sie wie
folgt vor, wenn kein Laufvisier zur Hand ist: Entfernen Sie den Bolzen und schauen Sie durch den Gewehrlauf auf
ein 100 m entferntes Ziel. Schauen Sie dann durch das Zielfernrohr und bringen Sie das Fadenkreuz auf denselben
Punkt auf dem Ziel. Einige Montagevorrichtungen haben eingebaute Seiteneinstellungen: beim Visieren des
Laufspiegels sollten diese anstelle der im Zielfernrohr eingebauten Einstellungen gebraucht werden.Wenn größere
Höheneinstellungen erforderlich sind, sollten diese durch Abschleifen der Unterseite der Montagevorrichtung
erfolgen.
28
HÖHENEINSTELLUNG
SEITENEINSTELLUNG
EINSTELLUNG DES NORMALVISIERS
Das endgültige Visieren Ihres Gewehrs sollte je nach der geplanten Schußweite mit Munition erfolgen. Wenn Sie
beabsichtigen, größtenteils auf kurze Entfernungen zu schießen, visieren Sie auf 100 m. Für weite Entfernungen
beim Schießen auf Großwild visieren die meisten erfahrenen Schützen jedoch bei 100 m auf 7,5 cm Höhe.
Dreischußgruppen sind nützlich, um den durchschnittlichen Aufprallpunkt festzustellen.
HÖHEN- UND SEITENEINSTELLUNG
Ihr Bushnell-Zielfernrohr ist mit Höhen- und Seiteneinstellvorrichtungen ausgestattet, die von Hand eingestellt
werden. Beim Einstellen ist ein Klicken hörbar.
1.	 Entfernen Sie die Schutzkappen von den Vorrichtungen zur Höhen- und Seiteneinstellung.
2.	 Greifen Sie den Einstellriegel und drehen Sie ihn in Pfeilrichtung in die entsprechende “UP” - bzw.
“R” - Richtung. Bei jedem “Klicken” bzw. bei jeder Änderung auf dem graduierten Einstellring wird der
Kugelaufprall um 6,4 mm Bogenminuten modifiziert. 6,4 mm Bogenminute entspricht 6,4 mm auf 91,4 m;
12,7 mm auf 182,8 m; 19,1 mm auf 274,2 m usw. 2,1 mm auf 15,2 m bei Luftgewehren.
29
NEUEINSTELLUNG DES GRADUIERTEN EINSTELLRINGS
(Nicht verfügbar auf allen Modellen)
Obwohl dieser Schritt nicht nötig ist, können Sie die Nullmarkierungen auf den graduiert Einstellring zur
künftigen Bezugnahme mit den Markierungspunkten ausrichten.
1.	 Lösen Sie die Kreuzschraube auf der graduierten Einstellvorrichtung mit einem Juwelierschraubenzieher
ungefähr um eine halbe Drehung. Achten Sie beim Lösen der Schraube darauf, die “0” - Einstellung nicht
durch den“Verlust”einiger“Klick”- Zeichen anzutasten.
2.	 Drehen Sie den graduierten Einstellring (der sich ungehindert drehen lassen sollte) so, daß die“0”mit dem
Markierungspunkt ausgerichtet ist.
3.	 Ziehen Sie die Schraube auf der graduierten Einstellvorrichtung wieder an, und montieren Sie die Seiten-
und Höheneinstellknöpfe.
VARIABLE VERGRÖßERUNGSEINSTELLUNG
Um die Vergrößerung zu modifizieren, drehen Sie einfach den Ring zur Einstellung der Vergrößerung, bis die
gewünschte Nummer auf dem Vergrößerungsanzeiger mit dem Markierungspunkt ausgerichtet ist.
Auf der Pirsch sollte ein verstellbares Zielfernrohr immer auf die niedrigste Vergrößerung eingestellt sein. So
haben Sie das weiteste Blickfeld für schnelles Schießen auf kurze Entfernungen. Stärkere Vergrößerungen sind
ausschließlich bei präzisem Schießen auf große Entfernungen erforderlich.
ACHTUNG: EIN ZIELFERNROHR SOLLTE NIE ALS ERSATZ FÜR EINEN FELDSTECHER GEBRAUCHT WERDEN DABEI
KÖNNEN SIE IHR GEWEHR VERSEHENTLICH AUF EINEN ANDEREN MENSCHEN RICHTEN.
VERSTELLBARES OBJEKTIV
Diese Vorrichtung (sofern vorhanden) ermöglicht präzise Schärfeeinstellung, während sie gleichzeitig
die Parallaxen-Entfernung für jeden Bereich von knapp 46 m bis ins Unendliche einstellt. Drehen Sie den
Einstellring auf dem Objektiv, und richten Sie die Nummer mit dem Entfernungsmarkierungspunkt aus, um
die Entfernungsschärfe zu modifizieren. Sie können hierzu auch durch das Zielfernrohr schauen, und den
Objektiveinstellring drehen, bis das Ziel ungeachtet der Entfernung scharf sichtbar ist.
30
WARTUNG
Obwohl erstaunlich strapazierfähig, ist lhr Bushnell-Zielfernrohr ein Präzisionsinstrument, das sorgfältiger Pflege
bedarf.
1.	 Blasen Sie zur Reinigung des Objektives zuerst trockenen Schmutz bzw. Staub weg oder benutzen Sie einen
weichen Objektivpinsel. Fingerabdrücke und Schmieröl können mit einem Objektivreinigungstuch oder einem
weichen, sauberen Baumwolltuch, das mit einem Objektivreinigungsmittel befeuchtet ist, entfernt werden.
ACHTUNG: UNNÖTIGES REIBEN ODER DER GEBRAUCH EINES GROBEN TUCH KÖNNEN AM OBJEKTIV BLEIBENDE
SCHÄDEN VERURSACHEN
2.	 Alle beweglichenTeile des Zielfernrohrs sind auf Dauer geschmiertVersuchen Sie es nicht, sie zu schmieren.
3.	 Die Außenfläche des Zielfernrohrs bedarf keiner Wartung; Schmutz oder Fingerabdrücke können Sie
gelegentlich mit einem weichen Tuch abwischen.
4	 Gebrauchen Sie die Objektivkappe so oft wie möglich.
AUFBEWAHRUNG
Vermeiden Sie es, das Zielfernrohr an überhitzten Orten aufzubewahren (z.B. im Passagierraum eines Fahrzeuges
bei heißem Wetter), da hohe Temperaturen die Schmierstoffe und die Dichtungen beeinträchtigen können. Der
Kofferraum eines Fahrzeuges, ein Gewehrschrank bzw. ein Schrank sind geeignetere Aufbewahrungsorte für das
Zielfernrohr. Lassen Sie das Zielfernrohr niemals an einem Ort liegen, wo direktes Sonnenlicht auf das Objektive
oder das Okular treffen könnte. Die Konzentration der Sonnenstrahlen kann Schäden (“Brennglaseffekt”)
verursachen.
31
BESCHRÄNKTE LEBENSLANGE GARANTIE
Sie erhalten für Ihr Bushnell®-Produkt eine lebenslange Garantie. Die Garantie gilt für den Erstbesitzer und erstreckt sich auf Material- und
Herstellungsfehler. Die beschränkte lebenslange Garantie ist Ausdruck unseres Vertrauens in die Materialien und die mechanische Ausführung
unserer Produkte und gewährleistet Ihnen einen lebenslangen zuverlässigen Kundendienst. Für den Fall, dass ein Mangel im Rahmen dieser
Garantie auftritt, werden wir das Produkt nach unserer Wahl reparieren oder austauschen, vorausgesetzt, dass Sie das Produkt freigemacht
zurückschicken. Von dieser Garantie ausgeschlossen sind Schäden, die auf Missbrauch, unsachgemäße Behandlung, Installations- oder War-
tungsarbeiten, die nicht von einer autorisierten Bushnell-Kundendienstabteilung vorgenommen werden, zurückzuführen sind.
Jeder Rücksendung in die USA oder nach Kanada im Rahmen dieser Garantie müssen folgende Dokumente und Angaben beigefügt werden:
	 1) 	Ein Scheck/eine Zahlungsanweisung in Höhe von 10,00 USD zur Abdeckung der Porto-und Bearbeitungskosten
	 2) 	Name und Anschrift für die Rücksendung des Produkts
	 3) 	Eine Erläuterung des Mangels
	 4) 	Kaufbeleg
	 5) 	Das Produkt sollte zur Vermeidung von Transportschäden gut verpackt in einem stabilen. Ver sandkarton an die nachstehend aufgeführte Adresse 		
		 geschickt werden, wobei die Gebühren für die Rücksendung im Voraus zu entrichten sind.
	 Adresse für Rücksendungen in die USA:		 Adresse für Rücksendungen nach KANADA:
	 Bushnell Outdoor Products			 Bushnell Outdoor Products
	 Attn.: Repairs				 Attn.: Repairs
	 9200 Cody				 140 Great Gulf Drive, Unit # B
	 Overland Park, Kansas 66214 			 Vaughan, Ontario L4K 5W1
Bei Produkten, die Sie außerhalb der Vereinigten Staaten oder Kanadas gekauft haben, erhalten Sie die entsprechenden Informationen zur
Garantie von ihrem Händler vor Ort. In Europa erreichen Sie Bushnell auch unter:	
					Bushnell Germany GmbH
					European Service Centre
					Mathias-Brüggen-Str. 80
					D-50827 Köln
					GERMANY
					Tél: +49 221 995568-0
					Fax: +49 221 995568-20
Mit dieser Garantie erwerben Sie bestimmte Rechtsansprüche.
Sie haben möglicherweise darüber hinaus noch andere Rechte, die von Land zu Land variieren.
©2013 Bushnell Outdoor Products
32
Italiano
Regolazione dell’elevazione
Tracolla
Obiettivo
Regolazione della
derivazione
Oculare
Anello di regolazione ingrandimentoOculare con messa
a fuoco rapida
Anello regolazione
obiettivo
Congratulazioni per aver scelto un cannocchiale di puntamento Bushnell®. Questo cannocchiale è uno
strumento di precisione prodotto con i migliori materiali e assemblato da artigiani esperti che funzionerà senza
problemi per molti anni a venire anche nelle condizioni più gravose.
In questo libretto sono spiegate le varie caratteristiche del prodotto e le modalità di pulizia e stoccaggio
raccomandateperimiglioririsultati.Leggereattentamenteleistruzioniprimadiinstallareedusareilcannocchiale
di puntamento.
Le foto servono da guida alla nomenclatura e all’individuazione delle parti citate nel testo.
33
MESSA A FUOCO DELL’OCULARE
L’oculare è stato ideato per realizzare una messa a fuoco precisa e veloce. Il tempo impiegato dall’oculare per
mettere a fuoco l’immagine è inferiore al tempo che occorre all’occhio per compensare eventuali imprecisioni di
regolazione dell’apparato.
Guardare un oggetto lontano per diversi secondi senza usare il cannocchiale di puntamento. Poi, spostare
rapidamente il punto di osservazione e guardare un semplice sfondo con il cannocchiale. Girare in senso orario
o antiorario l’oculare con messa a fuoco rapida per regolarlo in base ai propri occhi. Lo schema del reticolo deve
essere chiaro e nitido prima che l’occhio possa rimettere a fuoco ciò che osserva. Dopo la regolazione, dare
un’altra occhiata rapida all’immagine per ricontrollarla.
AVVERTENZA: NON GUARDARE MAI IL SOLE CON IL CANNOCCHIALE DI PUNTAMENTO (O CON ALTRI STRUMENTI
OTTICI). CIÒ POTREBBE DANNEGGIARE GLI OCCHI IN MODO PERMANENTE.
CENTRAGGIO DEL RETICOLO
Il reticolo è stato regolato con cura in corrispondenza del centro ottico del cannocchiale di puntamento presso la
fabbrica. Questa impostazione dà all’utente la gamma ideale di regolazione a partire dalla posizione centrale. Le
regolazioni successive si fanno per una messa a punto ancora maggiore.
È consigliabile controllare il centro dell’asse ottico prima del montaggio. Per farlo basta montare il cannocchiale di
puntamento in un blocco a V ben saldo (ad es., una scatola con due fessure). Guardare attraverso il cannocchiale
di puntamento, in una normale posizione di osservazione, e ruotarlo con cura. Se il bersaglio si muove in un
cerchio superiore a 2,5 cm (1”) dal centro (a 25 metri o 25 iarde) in relazione al punto di incontro dei crocicchi,
reimpostare la derivazione e l’elevazione. Togliere i tappi di regolazione. Impostare ogni punto di regolazione
a metà e ricontrollare il centraggio. Se il bersaglio continua a ruotare, eliminare il problema con le regolazioni.
34
MONTAGGIO
Per garantire la massima precisione del fucile è necessario che il cannocchiale di puntamento Bushnell sia
montato correttamente. (Si raccomanda vivamente che le persone inesperte lo facciano montare da un armaiolo
competente). Se si decide di montarlo da soli:
1.	 Usare una montatura d’alta qualità con basi adatte al proprio fucile. Il cannocchiale di puntamento va montato
quanto più in basso possibile senza venire in contatto con la canna o la culatta.
2.	 Seguire attentamente le istruzioni fornite con le montature acquistate.
3.	 Prima di serrare gli anelli della montatura, guardare attraverso il cannocchiale nella normale posizione
di tiro. Regolare il cannocchiale di puntamento (avanti o indietro) fino al punto massimo in avanti (per
assicurare il massimo comfort dell’occhio) che permette di vedere il campo visivo totale.
AVVERTENZA: SE IL CANNOCCHIALE DI PUNTAMENTO NON È MONTATO SUFFICIENTEMENTE IN AVANTI,
POTREBBE FERIRE IL TIRATORE DURANTE IL RINCULO DELL’ARMA.
4.	 Ruotare il cannocchiale di puntamento negli anelli fino a quando lo schema del reticolo è perpendicolare
all’anima e la regolazione dell’elevazione è in alto.
5.	 Serrare le viti di fissaggio.
REGOLAZIONE DEL PUNTAMENTO DELL’ANIMA
Il puntamento dell’anima del fucile è la procedura da eseguire preliminarmente per ottenere l’allineamento
corretto del cannocchiale di puntamento con l’anima del fucile. Per i migliori risultati si consiglia l’uso di un
dispositivo di puntamento (Bore Sighter) Bushnell®. Se non è disponibile, procedere in questo modo: Rimuovere
il bullone e mirare con la canna del fucile ad un bersaglio distante 100 metri. Mirare quindi attraverso il
cannocchiale di puntamento e portare il mirino a croce sullo stesso punto del bersaglio. Alcune montature sono
dotate di regolazioni della derivazione integrate da usarsi, in sede di regolazione del puntamento dell’anima, al
posto delle regolazioni interne del cannocchiale di puntamento. Se occorre regolare molto l’elevazione, inserire
degli spessori sotto le basi della montatura.
35
Regolazione
dell’elevazione
Regolazione
della derivazione
MESSA A PUNTO
La correzione finale del puntamento del fucile dovrebbe essere fatta con le munizioni sulla base della distanza di
tiro prevista. Se si prevede di tirare a distanze brevi, fare la messa a punto su 100 metri (o 100 iarde) circa. Nel caso
di tiro su distanze lunghe, su selvaggina di grosse dimensioni, la maggior parte dei tiratori esperti fa la correzione
del puntamento a 100 metri con il fucile sollevato di 7,6 cm (3”). Eseguire una serie di tre tiri di prova per fare una
media del punto d’impatto.
REGOLAZIONE DELLA DERIVAZIONE E DELL’ELEVAZIONE
Il cannocchiale di puntamento Bushnell® è dotato di dispositivi di regolazione della derivazione e dell’elevazione,
a scatto udibile, attivabili con un dito.	
1.	 Rimuovere i coperchietti dai dispositivi di regolazione della derivazione e dell’elevazione.
2.	 Afferrare la barra di regolazione e ruotarla verso “UP” (Su)(e/o “R”) come indicato dalle frecce. Ogni “clic” o
incremento dell’anello della scala di regolazione modifica l’impatto del proiettile di 1/4 di pollice di minuto
d’angolo. 1/4 di pollice di minuto d’angolo (MOA) corrisponde a 1/4 di pollice (0,63 cm) a 100 iarde (91 m),
1/2 pollice (1,2 cm) a 200 iarde (183 m), 3/4 di pollice (1,9 cm) a 300 iarde (274 m), ecc. (2.1mm di pollice a
15.2M cannocchiale per pistola ad aria compressa)
36
AZZERAMENTO DELL’ANELLO DELLA SCALA DI REGOLAZIONE (Non disponibile su tutti i
modelli)
Quest’operazione non è necessaria. Tuttavia, per riferimenti futuri, è consigliabile riallineare le indicazioni di
azzeramento sugli anelli della scala di regolazione con i punti dell’indice.
1. 	 Con un cacciavite da gioielliere, allentare di circa 1/2 giro la brugola situata sulla scala di regolazione. Fare
attenzione a non disturbare lo zero“perdendo”un clic o due mentre si allentano le viti.
2. 	 Ruotare l’anello della scala di regolazione (che adesso dovrebbe ruotare liberamente) per allineare“O”con il
puntino dell’indice.
3. 	 Riavvitare la vite della scala di regolazione e reinstallare le manopole di regolazione della derivazione e
dell’elevazione.
REGOLAZIONI DELLA POTENZA VARIABILE
Per cambiare l’ingrandimento, è sufficiente ruotare l’anello selettore della potenza e allineare il numero
desiderato, sulla scala della potenza, con il puntino dell’indice.
Durante gli spostamenti o l’inseguimento della selvaggina, regolare il cannocchiale di puntamento variabile
sulla potenza minima. In tal modo, si dispone del più ampio campo visivo per colpi veloci a distanza ravvicinata.
Riservare le potenze più alte per colpi di precisione a grandi distanze.
AVVERTENZA: NON USARE MAI IL CANNOCCHIALE DI PUNTAMENTO COME BINOCOLO O CANNOCCHIALE
D’OSSERVAZIONE. SI POTREBBE INAVVERTITAMENTE PUNTARE IL FUCILE A DELLE PERSONE.
OBIETTIVO REGOLABILE
Questo articolo (se presente sul proprio cannocchiale) permette di mettere a fuoco l’oggetto con precisione e,
contemporaneamente, di regolare la distanza senza parallasse da 45,7 metri (50 iarde) all’infinito. Per cambiare
la messa a fuoco in relazione alla distanza, ruotare l’anello di regolazione dell’obiettivo e allineare il numero
con il punto dell’indice della distanza. Un metodo alternativo consiste nel guardare attraverso il cannocchiale di
puntamento e ruotare l’anello di regolazione dell’obiettivo fino a quando il bersaglio, a qualsiasi distanza /range,
non sia perfettamente a fuoco.
37
MANUTENZIONE
Il cannocchiale di puntamento Bushnell è uno strumento eccezionalmente robusto, ma è comunque uno
strumento di precisione che merita una cura ragionevolmente attenta.
1.	 Per pulire le lenti occorre, per prima cosa, eliminare polvere e detriti soffiandovi sopra o usando una
spazzola morbida per lenti. Le impronte delle dita e le tracce dai lubrificanti possono essere rimosse con
un fazzoletto per la pulizia delle lenti oppure con un panno morbido inumidito con un liquido detergente
per lenti.
AVVERTENZA: SFREGAMENTI INUTILI O L’USO DI PANNI RUVIDI POSSONO DANNEGGIARE IN MODO PERMANENTE
I RIVESTIMENTI DELLE LENTI.
2.	 Tutte le parti mobili del cannocchiale sono lubrificate in modo permanente. Non lubrificarle.
3. 	 La superficie esterna del cannocchiale non necessita di manutenzione, tranne l’occasionale pulizia con un
panno morbido per eliminare impurità e ditate.
4.	 Montare i coperchietti per obiettivi con la massima frequenza possibile.
MAGAZZINAGGIO
Non conservare il cannocchiale in luoghi molto caldi come, ad esempio, il cruscotto dell’auto in estate. Le
temperature elevate possono influire sui lubrificanti e sui sigillanti. È meglio riporre il prodotto nel bagagliaio
del veicolo, in una fuciliera o in un armadio. Non lasciare mai il cannocchiale in luoghi che permettano l’ingresso
diretto dei raggi solari nell’obiettivo o nella lente dell’oculare. La concentrazione dei raggi solari può essere
dannosa (effetto specchio ustorio).
38
GARANZIA LIMITATA A VITA
Si garantisce che questo prodotto Bushnell® sarà esente da difetti di materiale e fabbricazione finché rimarrà in possesso del proprietario
originale. La presente garanzia limitata a vita esprime la nostra fiducia nei materiali e nella fabbricazione dei nostri prodotti e l’assicurazi-
one di anni e anni di servizio affidabile. In caso di difetto durante il periodo di garanzia, a nostra discrezione ripareremo o sostituiremo il
prodotto purché sia restituito franco destinatario. Sono esclusi dalla garanzia eventuali danni causati da abuso, maneggiamento improprio,
installazione o manutenzione eseguiti da persone non autorizzate dal servizio di assistenza Bushnell.
A un prodotto restituito negli Stati Uniti o in Canada e coperto da questa garanzia occorre allegare quanto segue.
	 1)	 Assegno/ordine di pagamento per l’importo di 10 $US per coprire i costi di spedizione.
	 2)	 Nome e indirizzo da utilizzare per la restituzione del prodotto.
	 3)	 Una spiegazione del difetto.
	 4) Scontrino.
	 5)	 Il prodotto deve essere imballato in una scatola robusta, per prevenire danni durante il trasporto, e va spedito franco destinatario a uno dei seguenti 	
		 indirizzi.
	 Recapito negli Stati Uniti:			 Recapito in Canada:	
	 Bushnell Outdoor Products			 Bushnell Outdoor Products
	 Attn.: Repairs				 Attn.: Repairs
	 9200 Cody				 140 Great Gulf Drive, Unit # B
	 Overland Park, Kansas 66214 			 Vaughan, Ontario L4K 5W1
Per prodotti acquistati fuori degli Stati Uniti o del Canada, rivolgersi al rivenditore per le clausole pertinenti della garanzia. In Europa si può
anche contattare la Bushnell a questo numero:
					Bushnell Germany GmbH
					European Service Centre
					Mathias-Brüggen-Str. 80
					D-50827 Köln
					GERMANY
					Tél: +49 221 995568-0
					Fax: +49 221 995568-20
	
Questa garanzia dà specifici diritti legali.
Eventuali altri diritti variano da una nazione all’altra.
©2013 Bushnell Outdoor Products
For further questions or additional information please contact:
Bushnell Outdoor Products
9200 Cody, Overland Park, Kansas 66214
(800) 423-3537 • www.bushnell.com

Weitere ähnliche Inhalte

Was ist angesagt?

Mimo application notes
Mimo application notesMimo application notes
Mimo application notesranjan_sharma
 
Microstrip rectangular patch antenna
Microstrip rectangular patch antenna  Microstrip rectangular patch antenna
Microstrip rectangular patch antenna Mish Jindal
 
Lecture 8 formateo de señales dm y adm. multiplexión digital
Lecture 8 formateo de señales dm y adm. multiplexión digitalLecture 8 formateo de señales dm y adm. multiplexión digital
Lecture 8 formateo de señales dm y adm. multiplexión digitalnica2009
 
Mimo ofdm by abhishek pandey
Mimo ofdm by abhishek pandeyMimo ofdm by abhishek pandey
Mimo ofdm by abhishek pandeyabhi29513
 
Introduction to spred spectrum and CDMA
Introduction to spred spectrum and CDMAIntroduction to spred spectrum and CDMA
Introduction to spred spectrum and CDMABidhan Ghimire
 
Basic Principles and Design of The Antenna in Mobile Communications
Basic Principles and Design of The Antenna in Mobile CommunicationsBasic Principles and Design of The Antenna in Mobile Communications
Basic Principles and Design of The Antenna in Mobile CommunicationsTempus Telcosys
 
Maximum likelihood sequence detection with the viterbi algorithm
Maximum likelihood sequence detection with the viterbi algorithmMaximum likelihood sequence detection with the viterbi algorithm
Maximum likelihood sequence detection with the viterbi algorithmbajrang bansal
 
Introduction to Digital Signal processors
Introduction to Digital Signal processorsIntroduction to Digital Signal processors
Introduction to Digital Signal processorsPeriyanayagiS
 
2 eso lenguaje algebraico.ficha de ampliación
2 eso lenguaje algebraico.ficha de ampliación2 eso lenguaje algebraico.ficha de ampliación
2 eso lenguaje algebraico.ficha de ampliaciónmanuel pinto
 
Sirena policial
Sirena policialSirena policial
Sirena policialByron G
 
Space time coding in mimo
Space time coding in mimo Space time coding in mimo
Space time coding in mimo ILA SHARMA
 
Updated! Debugging EMI Problems Using a Digital Oscilloscope
Updated! Debugging EMI Problems Using a Digital OscilloscopeUpdated! Debugging EMI Problems Using a Digital Oscilloscope
Updated! Debugging EMI Problems Using a Digital OscilloscopeRohde & Schwarz North America
 

Was ist angesagt? (20)

Mimo
MimoMimo
Mimo
 
Bit error rate
Bit error rateBit error rate
Bit error rate
 
Baseband Digital Data Transmission
Baseband Digital Data TransmissionBaseband Digital Data Transmission
Baseband Digital Data Transmission
 
Mimo application notes
Mimo application notesMimo application notes
Mimo application notes
 
Microstrip rectangular patch antenna
Microstrip rectangular patch antenna  Microstrip rectangular patch antenna
Microstrip rectangular patch antenna
 
Lecture 8 formateo de señales dm y adm. multiplexión digital
Lecture 8 formateo de señales dm y adm. multiplexión digitalLecture 8 formateo de señales dm y adm. multiplexión digital
Lecture 8 formateo de señales dm y adm. multiplexión digital
 
Mimo ofdm by abhishek pandey
Mimo ofdm by abhishek pandeyMimo ofdm by abhishek pandey
Mimo ofdm by abhishek pandey
 
Introduction to spred spectrum and CDMA
Introduction to spred spectrum and CDMAIntroduction to spred spectrum and CDMA
Introduction to spred spectrum and CDMA
 
Basic Principles and Design of The Antenna in Mobile Communications
Basic Principles and Design of The Antenna in Mobile CommunicationsBasic Principles and Design of The Antenna in Mobile Communications
Basic Principles and Design of The Antenna in Mobile Communications
 
Maximum likelihood sequence detection with the viterbi algorithm
Maximum likelihood sequence detection with the viterbi algorithmMaximum likelihood sequence detection with the viterbi algorithm
Maximum likelihood sequence detection with the viterbi algorithm
 
Introduction to Digital Signal processors
Introduction to Digital Signal processorsIntroduction to Digital Signal processors
Introduction to Digital Signal processors
 
2 eso lenguaje algebraico.ficha de ampliación
2 eso lenguaje algebraico.ficha de ampliación2 eso lenguaje algebraico.ficha de ampliación
2 eso lenguaje algebraico.ficha de ampliación
 
Chap04
Chap04Chap04
Chap04
 
Sirena policial
Sirena policialSirena policial
Sirena policial
 
Mimo
MimoMimo
Mimo
 
Space time coding in mimo
Space time coding in mimo Space time coding in mimo
Space time coding in mimo
 
Deber3
Deber3Deber3
Deber3
 
Updated! Debugging EMI Problems Using a Digital Oscilloscope
Updated! Debugging EMI Problems Using a Digital OscilloscopeUpdated! Debugging EMI Problems Using a Digital Oscilloscope
Updated! Debugging EMI Problems Using a Digital Oscilloscope
 
Multiple Access Techniques
Multiple Access TechniquesMultiple Access Techniques
Multiple Access Techniques
 
Digital Communication Unit 1
Digital Communication Unit 1Digital Communication Unit 1
Digital Communication Unit 1
 

Andere mochten auch

Catalog | Bushnell | 2017 | Optics Trade
Catalog | Bushnell | 2017 | Optics TradeCatalog | Bushnell | 2017 | Optics Trade
Catalog | Bushnell | 2017 | Optics TradeOptics-Trade
 
Catalog | Burris | 2017 | Optics Trade
Catalog | Burris | 2017 | Optics TradeCatalog | Burris | 2017 | Optics Trade
Catalog | Burris | 2017 | Optics TradeOptics-Trade
 
Riflescope Owners Handbook LEUPOLD | Optics Trade
Riflescope Owners Handbook LEUPOLD | Optics TradeRiflescope Owners Handbook LEUPOLD | Optics Trade
Riflescope Owners Handbook LEUPOLD | Optics TradeOptics-Trade
 
LEUPOLD Ballistics Aiming System | Optics Trade
LEUPOLD Ballistics Aiming System | Optics TradeLEUPOLD Ballistics Aiming System | Optics Trade
LEUPOLD Ballistics Aiming System | Optics TradeOptics-Trade
 
Vortex Tactical Catalog | Optics Trade | 2015
Vortex Tactical Catalog | Optics Trade | 2015Vortex Tactical Catalog | Optics Trade | 2015
Vortex Tactical Catalog | Optics Trade | 2015Optics-Trade
 
Catalog VORTEX All About Optics | Optics Trade | 2014
Catalog VORTEX All About Optics | Optics Trade | 2014Catalog VORTEX All About Optics | Optics Trade | 2014
Catalog VORTEX All About Optics | Optics Trade | 2014Optics-Trade
 
Vortex Hunting Catalog | Optics Trade | 2015
Vortex Hunting Catalog | Optics Trade | 2015Vortex Hunting Catalog | Optics Trade | 2015
Vortex Hunting Catalog | Optics Trade | 2015Optics-Trade
 
Instructions TASCO Rifle Scope | Optics Trade
Instructions TASCO Rifle Scope | Optics TradeInstructions TASCO Rifle Scope | Optics Trade
Instructions TASCO Rifle Scope | Optics TradeOptics-Trade
 
Catalog TASCO | Optics Trade | 2015
Catalog TASCO | Optics Trade | 2015Catalog TASCO | Optics Trade | 2015
Catalog TASCO | Optics Trade | 2015Optics-Trade
 
Instruction manual | Athlon Talos BTR Riflescopes | Optics Trade
Instruction manual | Athlon Talos BTR Riflescopes | Optics TradeInstruction manual | Athlon Talos BTR Riflescopes | Optics Trade
Instruction manual | Athlon Talos BTR Riflescopes | Optics TradeOptics-Trade
 
Instructions BUSHNELL AR Riflescope | Optics Trade
Instructions BUSHNELL AR Riflescope | Optics TradeInstructions BUSHNELL AR Riflescope | Optics Trade
Instructions BUSHNELL AR Riflescope | Optics TradeOptics-Trade
 
Instructions VORTEX CROSSFIRE II 1-4x24 | Optics Trade
Instructions VORTEX CROSSFIRE II 1-4x24 | Optics TradeInstructions VORTEX CROSSFIRE II 1-4x24 | Optics Trade
Instructions VORTEX CROSSFIRE II 1-4x24 | Optics TradeOptics-Trade
 
Catalog VORTEX Tactical Optics | Optics Trade | 2014
Catalog VORTEX Tactical Optics | Optics Trade | 2014Catalog VORTEX Tactical Optics | Optics Trade | 2014
Catalog VORTEX Tactical Optics | Optics Trade | 2014Optics-Trade
 
Instruction Manual | Burris Fullfield E1 RifleScopes | Optics Trade
Instruction Manual | Burris Fullfield E1 RifleScopes | Optics TradeInstruction Manual | Burris Fullfield E1 RifleScopes | Optics Trade
Instruction Manual | Burris Fullfield E1 RifleScopes | Optics TradeOptics-Trade
 
Catalog | Hawke | 2017 | Optics Trade
Catalog | Hawke | 2017 | Optics TradeCatalog | Hawke | 2017 | Optics Trade
Catalog | Hawke | 2017 | Optics TradeOptics-Trade
 
Catalog YUKON Jaeger Optical Sights Reticle | Optics Trade
Catalog YUKON Jaeger Optical Sights Reticle | Optics TradeCatalog YUKON Jaeger Optical Sights Reticle | Optics Trade
Catalog YUKON Jaeger Optical Sights Reticle | Optics TradeOptics-Trade
 
Instructions YUKON Jaeger Optical Sights | Optics Trade
Instructions YUKON Jaeger Optical Sights | Optics TradeInstructions YUKON Jaeger Optical Sights | Optics Trade
Instructions YUKON Jaeger Optical Sights | Optics TradeOptics-Trade
 
Technical data MEOPTA Reticle Subtensions | Optics Trade
Technical data MEOPTA Reticle Subtensions | Optics TradeTechnical data MEOPTA Reticle Subtensions | Optics Trade
Technical data MEOPTA Reticle Subtensions | Optics TradeOptics-Trade
 
Catalog | Yukon | 2014
Catalog | Yukon | 2014Catalog | Yukon | 2014
Catalog | Yukon | 2014Optics-Trade
 
Warranty MEOPTA | Optics Trade
Warranty MEOPTA | Optics TradeWarranty MEOPTA | Optics Trade
Warranty MEOPTA | Optics TradeOptics-Trade
 

Andere mochten auch (20)

Catalog | Bushnell | 2017 | Optics Trade
Catalog | Bushnell | 2017 | Optics TradeCatalog | Bushnell | 2017 | Optics Trade
Catalog | Bushnell | 2017 | Optics Trade
 
Catalog | Burris | 2017 | Optics Trade
Catalog | Burris | 2017 | Optics TradeCatalog | Burris | 2017 | Optics Trade
Catalog | Burris | 2017 | Optics Trade
 
Riflescope Owners Handbook LEUPOLD | Optics Trade
Riflescope Owners Handbook LEUPOLD | Optics TradeRiflescope Owners Handbook LEUPOLD | Optics Trade
Riflescope Owners Handbook LEUPOLD | Optics Trade
 
LEUPOLD Ballistics Aiming System | Optics Trade
LEUPOLD Ballistics Aiming System | Optics TradeLEUPOLD Ballistics Aiming System | Optics Trade
LEUPOLD Ballistics Aiming System | Optics Trade
 
Vortex Tactical Catalog | Optics Trade | 2015
Vortex Tactical Catalog | Optics Trade | 2015Vortex Tactical Catalog | Optics Trade | 2015
Vortex Tactical Catalog | Optics Trade | 2015
 
Catalog VORTEX All About Optics | Optics Trade | 2014
Catalog VORTEX All About Optics | Optics Trade | 2014Catalog VORTEX All About Optics | Optics Trade | 2014
Catalog VORTEX All About Optics | Optics Trade | 2014
 
Vortex Hunting Catalog | Optics Trade | 2015
Vortex Hunting Catalog | Optics Trade | 2015Vortex Hunting Catalog | Optics Trade | 2015
Vortex Hunting Catalog | Optics Trade | 2015
 
Instructions TASCO Rifle Scope | Optics Trade
Instructions TASCO Rifle Scope | Optics TradeInstructions TASCO Rifle Scope | Optics Trade
Instructions TASCO Rifle Scope | Optics Trade
 
Catalog TASCO | Optics Trade | 2015
Catalog TASCO | Optics Trade | 2015Catalog TASCO | Optics Trade | 2015
Catalog TASCO | Optics Trade | 2015
 
Instruction manual | Athlon Talos BTR Riflescopes | Optics Trade
Instruction manual | Athlon Talos BTR Riflescopes | Optics TradeInstruction manual | Athlon Talos BTR Riflescopes | Optics Trade
Instruction manual | Athlon Talos BTR Riflescopes | Optics Trade
 
Instructions BUSHNELL AR Riflescope | Optics Trade
Instructions BUSHNELL AR Riflescope | Optics TradeInstructions BUSHNELL AR Riflescope | Optics Trade
Instructions BUSHNELL AR Riflescope | Optics Trade
 
Instructions VORTEX CROSSFIRE II 1-4x24 | Optics Trade
Instructions VORTEX CROSSFIRE II 1-4x24 | Optics TradeInstructions VORTEX CROSSFIRE II 1-4x24 | Optics Trade
Instructions VORTEX CROSSFIRE II 1-4x24 | Optics Trade
 
Catalog VORTEX Tactical Optics | Optics Trade | 2014
Catalog VORTEX Tactical Optics | Optics Trade | 2014Catalog VORTEX Tactical Optics | Optics Trade | 2014
Catalog VORTEX Tactical Optics | Optics Trade | 2014
 
Instruction Manual | Burris Fullfield E1 RifleScopes | Optics Trade
Instruction Manual | Burris Fullfield E1 RifleScopes | Optics TradeInstruction Manual | Burris Fullfield E1 RifleScopes | Optics Trade
Instruction Manual | Burris Fullfield E1 RifleScopes | Optics Trade
 
Catalog | Hawke | 2017 | Optics Trade
Catalog | Hawke | 2017 | Optics TradeCatalog | Hawke | 2017 | Optics Trade
Catalog | Hawke | 2017 | Optics Trade
 
Catalog YUKON Jaeger Optical Sights Reticle | Optics Trade
Catalog YUKON Jaeger Optical Sights Reticle | Optics TradeCatalog YUKON Jaeger Optical Sights Reticle | Optics Trade
Catalog YUKON Jaeger Optical Sights Reticle | Optics Trade
 
Instructions YUKON Jaeger Optical Sights | Optics Trade
Instructions YUKON Jaeger Optical Sights | Optics TradeInstructions YUKON Jaeger Optical Sights | Optics Trade
Instructions YUKON Jaeger Optical Sights | Optics Trade
 
Technical data MEOPTA Reticle Subtensions | Optics Trade
Technical data MEOPTA Reticle Subtensions | Optics TradeTechnical data MEOPTA Reticle Subtensions | Optics Trade
Technical data MEOPTA Reticle Subtensions | Optics Trade
 
Catalog | Yukon | 2014
Catalog | Yukon | 2014Catalog | Yukon | 2014
Catalog | Yukon | 2014
 
Warranty MEOPTA | Optics Trade
Warranty MEOPTA | Optics TradeWarranty MEOPTA | Optics Trade
Warranty MEOPTA | Optics Trade
 

Ähnlich wie Instructions BUSHNELL Banner Riflescope | Optics Trade

Trophy Riflescopes Instruction Manual | Optics Trade
Trophy Riflescopes Instruction Manual | Optics TradeTrophy Riflescopes Instruction Manual | Optics Trade
Trophy Riflescopes Instruction Manual | Optics TradeOptics-Trade
 
Ar Optics Riflescopes Instruction Manual | Optics Trade
Ar Optics Riflescopes Instruction Manual | Optics TradeAr Optics Riflescopes Instruction Manual | Optics Trade
Ar Optics Riflescopes Instruction Manual | Optics TradeOptics-Trade
 
Instructions BUSHNELL Elite Riflescope | Optics Trade
Instructions BUSHNELL Elite Riflescope | Optics TradeInstructions BUSHNELL Elite Riflescope | Optics Trade
Instructions BUSHNELL Elite Riflescope | Optics TradeOptics-Trade
 
Instructions MINOX ZV 3 Series | Optics Trade
Instructions MINOX ZV 3 Series | Optics TradeInstructions MINOX ZV 3 Series | Optics Trade
Instructions MINOX ZV 3 Series | Optics TradeOptics-Trade
 
Instructions MINOX ZA 5i Series | Optics Trade
Instructions MINOX ZA 5i Series | Optics TradeInstructions MINOX ZA 5i Series | Optics Trade
Instructions MINOX ZA 5i Series | Optics TradeOptics-Trade
 
Instruction manual | Hawke Airmax | Optics Trade
Instruction manual | Hawke Airmax | Optics TradeInstruction manual | Hawke Airmax | Optics Trade
Instruction manual | Hawke Airmax | Optics TradeOptics-Trade
 
Instruction Manual | Hawke Vantage IR 1-4x20 | Optics Trade
Instruction Manual | Hawke Vantage IR 1-4x20 | Optics TradeInstruction Manual | Hawke Vantage IR 1-4x20 | Optics Trade
Instruction Manual | Hawke Vantage IR 1-4x20 | Optics TradeOptics-Trade
 
Instruction Manual | Hawke Vantage Riflescope | Optics Trade
Instruction Manual | Hawke Vantage Riflescope | Optics TradeInstruction Manual | Hawke Vantage Riflescope | Optics Trade
Instruction Manual | Hawke Vantage Riflescope | Optics TradeOptics-Trade
 
Instruction manual | Hawke Vantage Rifle Scopes | Optics Trade
Instruction manual | Hawke Vantage Rifle Scopes | Optics TradeInstruction manual | Hawke Vantage Rifle Scopes | Optics Trade
Instruction manual | Hawke Vantage Rifle Scopes | Optics TradeOptics-Trade
 
Instructions MINOX ZA HD Series | Optics Trade
Instructions MINOX ZA HD Series | Optics TradeInstructions MINOX ZA HD Series | Optics Trade
Instructions MINOX ZA HD Series | Optics TradeOptics-Trade
 
Trophy Binoculars Instruction Manual | Optics Trade
Trophy Binoculars Instruction Manual | Optics TradeTrophy Binoculars Instruction Manual | Optics Trade
Trophy Binoculars Instruction Manual | Optics TradeOptics-Trade
 
Instructions BUSHNELL Natureview Binoculars | Optics Trade
Instructions BUSHNELL Natureview Binoculars | Optics TradeInstructions BUSHNELL Natureview Binoculars | Optics Trade
Instructions BUSHNELL Natureview Binoculars | Optics TradeOptics-Trade
 
Instructions BUSHNELL Legend Ultra HD Binoculars | Optics Trade
Instructions BUSHNELL Legend Ultra HD Binoculars | Optics TradeInstructions BUSHNELL Legend Ultra HD Binoculars | Optics Trade
Instructions BUSHNELL Legend Ultra HD Binoculars | Optics TradeOptics-Trade
 
Instructions MINOX ZA3, ZA5 | Optics Trade
Instructions MINOX ZA3, ZA5 | Optics TradeInstructions MINOX ZA3, ZA5 | Optics Trade
Instructions MINOX ZA3, ZA5 | Optics TradeOptics-Trade
 
Instructions BUSHNELL Bear Grylls Binoculars | Optics Trade
Instructions BUSHNELL Bear Grylls Binoculars | Optics TradeInstructions BUSHNELL Bear Grylls Binoculars | Optics Trade
Instructions BUSHNELL Bear Grylls Binoculars | Optics TradeOptics-Trade
 
Instructions BUSHNELL Trophy XLT Binoculars | Optics Trade
Instructions BUSHNELL Trophy XLT Binoculars | Optics TradeInstructions BUSHNELL Trophy XLT Binoculars | Optics Trade
Instructions BUSHNELL Trophy XLT Binoculars | Optics TradeOptics-Trade
 
Instruction Manual | Celestron UpClose Binoculars | Optics Trade
Instruction Manual | Celestron UpClose Binoculars | Optics TradeInstruction Manual | Celestron UpClose Binoculars | Optics Trade
Instruction Manual | Celestron UpClose Binoculars | Optics TradeOptics-Trade
 
Instruction Manual | Celestron Nature DX Binoculars | Optics Trade
Instruction Manual | Celestron Nature DX Binoculars | Optics TradeInstruction Manual | Celestron Nature DX Binoculars | Optics Trade
Instruction Manual | Celestron Nature DX Binoculars | Optics TradeOptics-Trade
 
Instructions BUSHNELL Nature View Spotting Scope | Optics Trade
Instructions BUSHNELL Nature View Spotting Scope | Optics TradeInstructions BUSHNELL Nature View Spotting Scope | Optics Trade
Instructions BUSHNELL Nature View Spotting Scope | Optics TradeOptics-Trade
 
Instruction Manual | Celestron TrailSeeker Binoculars | Optics Trade
Instruction Manual | Celestron TrailSeeker Binoculars | Optics TradeInstruction Manual | Celestron TrailSeeker Binoculars | Optics Trade
Instruction Manual | Celestron TrailSeeker Binoculars | Optics TradeOptics-Trade
 

Ähnlich wie Instructions BUSHNELL Banner Riflescope | Optics Trade (20)

Trophy Riflescopes Instruction Manual | Optics Trade
Trophy Riflescopes Instruction Manual | Optics TradeTrophy Riflescopes Instruction Manual | Optics Trade
Trophy Riflescopes Instruction Manual | Optics Trade
 
Ar Optics Riflescopes Instruction Manual | Optics Trade
Ar Optics Riflescopes Instruction Manual | Optics TradeAr Optics Riflescopes Instruction Manual | Optics Trade
Ar Optics Riflescopes Instruction Manual | Optics Trade
 
Instructions BUSHNELL Elite Riflescope | Optics Trade
Instructions BUSHNELL Elite Riflescope | Optics TradeInstructions BUSHNELL Elite Riflescope | Optics Trade
Instructions BUSHNELL Elite Riflescope | Optics Trade
 
Instructions MINOX ZV 3 Series | Optics Trade
Instructions MINOX ZV 3 Series | Optics TradeInstructions MINOX ZV 3 Series | Optics Trade
Instructions MINOX ZV 3 Series | Optics Trade
 
Instructions MINOX ZA 5i Series | Optics Trade
Instructions MINOX ZA 5i Series | Optics TradeInstructions MINOX ZA 5i Series | Optics Trade
Instructions MINOX ZA 5i Series | Optics Trade
 
Instruction manual | Hawke Airmax | Optics Trade
Instruction manual | Hawke Airmax | Optics TradeInstruction manual | Hawke Airmax | Optics Trade
Instruction manual | Hawke Airmax | Optics Trade
 
Instruction Manual | Hawke Vantage IR 1-4x20 | Optics Trade
Instruction Manual | Hawke Vantage IR 1-4x20 | Optics TradeInstruction Manual | Hawke Vantage IR 1-4x20 | Optics Trade
Instruction Manual | Hawke Vantage IR 1-4x20 | Optics Trade
 
Instruction Manual | Hawke Vantage Riflescope | Optics Trade
Instruction Manual | Hawke Vantage Riflescope | Optics TradeInstruction Manual | Hawke Vantage Riflescope | Optics Trade
Instruction Manual | Hawke Vantage Riflescope | Optics Trade
 
Instruction manual | Hawke Vantage Rifle Scopes | Optics Trade
Instruction manual | Hawke Vantage Rifle Scopes | Optics TradeInstruction manual | Hawke Vantage Rifle Scopes | Optics Trade
Instruction manual | Hawke Vantage Rifle Scopes | Optics Trade
 
Instructions MINOX ZA HD Series | Optics Trade
Instructions MINOX ZA HD Series | Optics TradeInstructions MINOX ZA HD Series | Optics Trade
Instructions MINOX ZA HD Series | Optics Trade
 
Trophy Binoculars Instruction Manual | Optics Trade
Trophy Binoculars Instruction Manual | Optics TradeTrophy Binoculars Instruction Manual | Optics Trade
Trophy Binoculars Instruction Manual | Optics Trade
 
Instructions BUSHNELL Natureview Binoculars | Optics Trade
Instructions BUSHNELL Natureview Binoculars | Optics TradeInstructions BUSHNELL Natureview Binoculars | Optics Trade
Instructions BUSHNELL Natureview Binoculars | Optics Trade
 
Instructions BUSHNELL Legend Ultra HD Binoculars | Optics Trade
Instructions BUSHNELL Legend Ultra HD Binoculars | Optics TradeInstructions BUSHNELL Legend Ultra HD Binoculars | Optics Trade
Instructions BUSHNELL Legend Ultra HD Binoculars | Optics Trade
 
Instructions MINOX ZA3, ZA5 | Optics Trade
Instructions MINOX ZA3, ZA5 | Optics TradeInstructions MINOX ZA3, ZA5 | Optics Trade
Instructions MINOX ZA3, ZA5 | Optics Trade
 
Instructions BUSHNELL Bear Grylls Binoculars | Optics Trade
Instructions BUSHNELL Bear Grylls Binoculars | Optics TradeInstructions BUSHNELL Bear Grylls Binoculars | Optics Trade
Instructions BUSHNELL Bear Grylls Binoculars | Optics Trade
 
Instructions BUSHNELL Trophy XLT Binoculars | Optics Trade
Instructions BUSHNELL Trophy XLT Binoculars | Optics TradeInstructions BUSHNELL Trophy XLT Binoculars | Optics Trade
Instructions BUSHNELL Trophy XLT Binoculars | Optics Trade
 
Instruction Manual | Celestron UpClose Binoculars | Optics Trade
Instruction Manual | Celestron UpClose Binoculars | Optics TradeInstruction Manual | Celestron UpClose Binoculars | Optics Trade
Instruction Manual | Celestron UpClose Binoculars | Optics Trade
 
Instruction Manual | Celestron Nature DX Binoculars | Optics Trade
Instruction Manual | Celestron Nature DX Binoculars | Optics TradeInstruction Manual | Celestron Nature DX Binoculars | Optics Trade
Instruction Manual | Celestron Nature DX Binoculars | Optics Trade
 
Instructions BUSHNELL Nature View Spotting Scope | Optics Trade
Instructions BUSHNELL Nature View Spotting Scope | Optics TradeInstructions BUSHNELL Nature View Spotting Scope | Optics Trade
Instructions BUSHNELL Nature View Spotting Scope | Optics Trade
 
Instruction Manual | Celestron TrailSeeker Binoculars | Optics Trade
Instruction Manual | Celestron TrailSeeker Binoculars | Optics TradeInstruction Manual | Celestron TrailSeeker Binoculars | Optics Trade
Instruction Manual | Celestron TrailSeeker Binoculars | Optics Trade
 

Mehr von Optics-Trade

Technical Data | ThermTec Wild 650L | Optics Trade
Technical Data | ThermTec Wild 650L | Optics TradeTechnical Data | ThermTec Wild 650L | Optics Trade
Technical Data | ThermTec Wild 650L | Optics TradeOptics-Trade
 
Technical Data | ThermTec Wild 635L | Optics Trade
Technical Data | ThermTec Wild 635L | Optics TradeTechnical Data | ThermTec Wild 635L | Optics Trade
Technical Data | ThermTec Wild 635L | Optics TradeOptics-Trade
 
Technical Data | ThermTec Wild 650 | Optics Trade
Technical Data | ThermTec Wild 650 | Optics TradeTechnical Data | ThermTec Wild 650 | Optics Trade
Technical Data | ThermTec Wild 650 | Optics TradeOptics-Trade
 
Technical Data | ThermTec Wild 635 | Optics Trade
Technical Data | ThermTec Wild 635 | Optics TradeTechnical Data | ThermTec Wild 635 | Optics Trade
Technical Data | ThermTec Wild 635 | Optics TradeOptics-Trade
 
Technical Data | ThermTec Wild 335 | Optics Trade
Technical Data | ThermTec Wild 335 | Optics TradeTechnical Data | ThermTec Wild 335 | Optics Trade
Technical Data | ThermTec Wild 335 | Optics TradeOptics-Trade
 
Technical Data | ThermTec Wild 325 | Optics Trade
Technical Data | ThermTec Wild 325 | Optics TradeTechnical Data | ThermTec Wild 325 | Optics Trade
Technical Data | ThermTec Wild 325 | Optics TradeOptics-Trade
 
Instruction Manual | ThermTec Wild Thermal Monoculars | Optics Trade
Instruction Manual | ThermTec Wild Thermal Monoculars | Optics TradeInstruction Manual | ThermTec Wild Thermal Monoculars | Optics Trade
Instruction Manual | ThermTec Wild Thermal Monoculars | Optics TradeOptics-Trade
 
Technical Data | ThermTec Hunt 335 | Optics Trade
Technical Data | ThermTec Hunt 335 | Optics TradeTechnical Data | ThermTec Hunt 335 | Optics Trade
Technical Data | ThermTec Hunt 335 | Optics TradeOptics-Trade
 
Instruction Manual | ThermTec Hunt Thermal Clip-On Series | Optics Trade
Instruction Manual | ThermTec Hunt Thermal Clip-On Series | Optics TradeInstruction Manual | ThermTec Hunt Thermal Clip-On Series | Optics Trade
Instruction Manual | ThermTec Hunt Thermal Clip-On Series | Optics TradeOptics-Trade
 
Instruction Manual | Steiner eRanger LRF 10x42 | Optics Trade
Instruction Manual | Steiner eRanger LRF 10x42 | Optics TradeInstruction Manual | Steiner eRanger LRF 10x42 | Optics Trade
Instruction Manual | Steiner eRanger LRF 10x42 | Optics TradeOptics-Trade
 
Flyer | Guide DN Series Handheld Digital Binoculars | Optics Trade
Flyer | Guide DN Series Handheld Digital Binoculars | Optics TradeFlyer | Guide DN Series Handheld Digital Binoculars | Optics Trade
Flyer | Guide DN Series Handheld Digital Binoculars | Optics TradeOptics-Trade
 
Quick Start Guide | Guide TB Series | Optics Trade
Quick Start Guide | Guide TB Series | Optics TradeQuick Start Guide | Guide TB Series | Optics Trade
Quick Start Guide | Guide TB Series | Optics TradeOptics-Trade
 
Instruction Manual | Pard FD1 Digital NV Front Attachment | Optics Trade
Instruction Manual | Pard FD1 Digital NV Front Attachment | Optics TradeInstruction Manual | Pard FD1 Digital NV Front Attachment | Optics Trade
Instruction Manual | Pard FD1 Digital NV Front Attachment | Optics TradeOptics-Trade
 
Instruction Manual | EOTech Vudu X 2-12x40 | Optics Trade
Instruction Manual | EOTech Vudu X 2-12x40 | Optics TradeInstruction Manual | EOTech Vudu X 2-12x40 | Optics Trade
Instruction Manual | EOTech Vudu X 2-12x40 | Optics TradeOptics-Trade
 
Instruction Manual | EOTech Vudu X 1-6x24 | Optics Trade
Instruction Manual | EOTech Vudu X 1-6x24 | Optics TradeInstruction Manual | EOTech Vudu X 1-6x24 | Optics Trade
Instruction Manual | EOTech Vudu X 1-6x24 | Optics TradeOptics-Trade
 
Instruction Manual | Nightforce CFS 6-36x50 F1 | Optics Trade
Instruction Manual | Nightforce CFS 6-36x50 F1 | Optics TradeInstruction Manual | Nightforce CFS 6-36x50 F1 | Optics Trade
Instruction Manual | Nightforce CFS 6-36x50 F1 | Optics TradeOptics-Trade
 
Instruction Manual | Athlon Cronus Tactical G2 ED 7-42x60 | Optics Trade
Instruction Manual | Athlon Cronus Tactical G2 ED 7-42x60 | Optics TradeInstruction Manual | Athlon Cronus Tactical G2 ED 7-42x60 | Optics Trade
Instruction Manual | Athlon Cronus Tactical G2 ED 7-42x60 | Optics TradeOptics-Trade
 
Insrtuction Manual | Swarovski CL Companion Habicht | Optics Trade
Insrtuction Manual | Swarovski CL Companion Habicht | Optics TradeInsrtuction Manual | Swarovski CL Companion Habicht | Optics Trade
Insrtuction Manual | Swarovski CL Companion Habicht | Optics TradeOptics-Trade
 
Technical Data | Swarovski CL Companion Habicht | Optics Trade
Technical Data | Swarovski CL Companion Habicht | Optics TradeTechnical Data | Swarovski CL Companion Habicht | Optics Trade
Technical Data | Swarovski CL Companion Habicht | Optics TradeOptics-Trade
 
Instruction Manual | Athlon Midas G2 UHD PRO | Optics Trade
Instruction Manual | Athlon Midas G2 UHD PRO | Optics TradeInstruction Manual | Athlon Midas G2 UHD PRO | Optics Trade
Instruction Manual | Athlon Midas G2 UHD PRO | Optics TradeOptics-Trade
 

Mehr von Optics-Trade (20)

Technical Data | ThermTec Wild 650L | Optics Trade
Technical Data | ThermTec Wild 650L | Optics TradeTechnical Data | ThermTec Wild 650L | Optics Trade
Technical Data | ThermTec Wild 650L | Optics Trade
 
Technical Data | ThermTec Wild 635L | Optics Trade
Technical Data | ThermTec Wild 635L | Optics TradeTechnical Data | ThermTec Wild 635L | Optics Trade
Technical Data | ThermTec Wild 635L | Optics Trade
 
Technical Data | ThermTec Wild 650 | Optics Trade
Technical Data | ThermTec Wild 650 | Optics TradeTechnical Data | ThermTec Wild 650 | Optics Trade
Technical Data | ThermTec Wild 650 | Optics Trade
 
Technical Data | ThermTec Wild 635 | Optics Trade
Technical Data | ThermTec Wild 635 | Optics TradeTechnical Data | ThermTec Wild 635 | Optics Trade
Technical Data | ThermTec Wild 635 | Optics Trade
 
Technical Data | ThermTec Wild 335 | Optics Trade
Technical Data | ThermTec Wild 335 | Optics TradeTechnical Data | ThermTec Wild 335 | Optics Trade
Technical Data | ThermTec Wild 335 | Optics Trade
 
Technical Data | ThermTec Wild 325 | Optics Trade
Technical Data | ThermTec Wild 325 | Optics TradeTechnical Data | ThermTec Wild 325 | Optics Trade
Technical Data | ThermTec Wild 325 | Optics Trade
 
Instruction Manual | ThermTec Wild Thermal Monoculars | Optics Trade
Instruction Manual | ThermTec Wild Thermal Monoculars | Optics TradeInstruction Manual | ThermTec Wild Thermal Monoculars | Optics Trade
Instruction Manual | ThermTec Wild Thermal Monoculars | Optics Trade
 
Technical Data | ThermTec Hunt 335 | Optics Trade
Technical Data | ThermTec Hunt 335 | Optics TradeTechnical Data | ThermTec Hunt 335 | Optics Trade
Technical Data | ThermTec Hunt 335 | Optics Trade
 
Instruction Manual | ThermTec Hunt Thermal Clip-On Series | Optics Trade
Instruction Manual | ThermTec Hunt Thermal Clip-On Series | Optics TradeInstruction Manual | ThermTec Hunt Thermal Clip-On Series | Optics Trade
Instruction Manual | ThermTec Hunt Thermal Clip-On Series | Optics Trade
 
Instruction Manual | Steiner eRanger LRF 10x42 | Optics Trade
Instruction Manual | Steiner eRanger LRF 10x42 | Optics TradeInstruction Manual | Steiner eRanger LRF 10x42 | Optics Trade
Instruction Manual | Steiner eRanger LRF 10x42 | Optics Trade
 
Flyer | Guide DN Series Handheld Digital Binoculars | Optics Trade
Flyer | Guide DN Series Handheld Digital Binoculars | Optics TradeFlyer | Guide DN Series Handheld Digital Binoculars | Optics Trade
Flyer | Guide DN Series Handheld Digital Binoculars | Optics Trade
 
Quick Start Guide | Guide TB Series | Optics Trade
Quick Start Guide | Guide TB Series | Optics TradeQuick Start Guide | Guide TB Series | Optics Trade
Quick Start Guide | Guide TB Series | Optics Trade
 
Instruction Manual | Pard FD1 Digital NV Front Attachment | Optics Trade
Instruction Manual | Pard FD1 Digital NV Front Attachment | Optics TradeInstruction Manual | Pard FD1 Digital NV Front Attachment | Optics Trade
Instruction Manual | Pard FD1 Digital NV Front Attachment | Optics Trade
 
Instruction Manual | EOTech Vudu X 2-12x40 | Optics Trade
Instruction Manual | EOTech Vudu X 2-12x40 | Optics TradeInstruction Manual | EOTech Vudu X 2-12x40 | Optics Trade
Instruction Manual | EOTech Vudu X 2-12x40 | Optics Trade
 
Instruction Manual | EOTech Vudu X 1-6x24 | Optics Trade
Instruction Manual | EOTech Vudu X 1-6x24 | Optics TradeInstruction Manual | EOTech Vudu X 1-6x24 | Optics Trade
Instruction Manual | EOTech Vudu X 1-6x24 | Optics Trade
 
Instruction Manual | Nightforce CFS 6-36x50 F1 | Optics Trade
Instruction Manual | Nightforce CFS 6-36x50 F1 | Optics TradeInstruction Manual | Nightforce CFS 6-36x50 F1 | Optics Trade
Instruction Manual | Nightforce CFS 6-36x50 F1 | Optics Trade
 
Instruction Manual | Athlon Cronus Tactical G2 ED 7-42x60 | Optics Trade
Instruction Manual | Athlon Cronus Tactical G2 ED 7-42x60 | Optics TradeInstruction Manual | Athlon Cronus Tactical G2 ED 7-42x60 | Optics Trade
Instruction Manual | Athlon Cronus Tactical G2 ED 7-42x60 | Optics Trade
 
Insrtuction Manual | Swarovski CL Companion Habicht | Optics Trade
Insrtuction Manual | Swarovski CL Companion Habicht | Optics TradeInsrtuction Manual | Swarovski CL Companion Habicht | Optics Trade
Insrtuction Manual | Swarovski CL Companion Habicht | Optics Trade
 
Technical Data | Swarovski CL Companion Habicht | Optics Trade
Technical Data | Swarovski CL Companion Habicht | Optics TradeTechnical Data | Swarovski CL Companion Habicht | Optics Trade
Technical Data | Swarovski CL Companion Habicht | Optics Trade
 
Instruction Manual | Athlon Midas G2 UHD PRO | Optics Trade
Instruction Manual | Athlon Midas G2 UHD PRO | Optics TradeInstruction Manual | Athlon Midas G2 UHD PRO | Optics Trade
Instruction Manual | Athlon Midas G2 UHD PRO | Optics Trade
 

Instructions BUSHNELL Banner Riflescope | Optics Trade

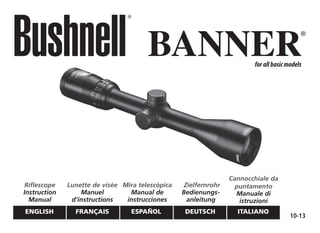
  • 1. 10-13 English Français español Deutsch Italiano Riflescope Instruction Manual Lunette de visée Manuel d’instructions Mira telescópica Manual de instrucciones Zielfernrohr Bedienungs- anleitung Cannocchiale da puntamento Manuale di istruzioni forallbasicmodels
  • 2.
  • 4. 4 Congratulations on your choice of a Bushnell® Banner® riflescope. It is a precision instrument constructed of the finest materials and assembled by highly skilled craftsmen for a lifetime of trouble-free use under the most demanding conditions. This booklet will help you achieve optimum performance by explaining how to use its various features and how to care for it. Read the instructions carefully before mounting and using your scope. The following photographs are guides to the nomenclature and location of the riflescope parts mentioned throughout this text. Eyepiece Fast Focus Ring Power Change Ring Elevation Adjustment Shoulder Windage Adjustment Objective Lens Adjustable Objective (Parallax Compensation) (selected models only) PARTS GUIDE English
  • 5. 5 EYEPIECE FOCUSING The eyepiece is designed to provide a precise fast focus. The eyepiece will focus faster than your eye can compensate for any inaccuracy in your adjustment. Look at a distant object for several seconds without using your scope. Then, shift your vision quickly, looking through the scope at a plain background.Turn the fast-focus eyepiece clockwise or counter clockwise to adjust to your eyes. The reticle pattern should be sharp and clear before your eye can refocus. After you have made your adjustment, with a quick glance re-check the image. WARNING: NEVER LOOK AT THE SUN THROUGH THE RIFLESCOPE (OR ANY OTHER OPTICAL INSTRUMENT). IT MAY PERMANENTLY DAMAGE YOUR EYES. CENTERING THE RETICLE The reticle was carefully set at the optical center of your riflescope at our factory. This setting provides you with the ideal adjustment range from the center position.The riflescope’s adjustments are used to zero-in the riflescope. It is wise to check the center of the optical axis before mounting. Do this by placing the scope in a solid V-block (cardboard box with two slots). While looking through the scope in a normal viewing position, carefully rotate the scope. If the target moves in a circle larger than 1” from center (at 25 yards) in relation to intersection of crosshairs, reset windage and elevation adjustments. Remove adjustment caps. Set each adjustment to midpoint and recheck for centering. If target still rotates, use adjustments to correct. MOUNTING To achieve the best accuracy from your rifle, your Bushnell scope must be mounted properly.
  • 6. 6 (We strongly recommend that those unfamiliar with proper procedures have the scope mounted by a qualified gunsmith). Should you decide to mount it yourself: 1. Use a high-quality mount with bases designed to fit your particular rifle. The scope should be mounted as low as possible without touching either the barrel or the receiver. 2. Carefully follow the instructions packed with the scope mounts you have selected. 3. Before tightening the mount rings, look through the scope in your normal shooting position. Adjust the scope (either forward or backward) until you find the furthest point forward (to ensure maximum eye relief) that allows you to see a full field of view. 4. Rotate the scope in the rings until the reticle pattern is perpendicular to the bore and the elevation adjustment is on top. 5. Tighten the mounting screws. WARNING: IF THE SCOPE IS NOT MOUNTED FAR ENOUGH FORWARD, ITS REARWARD MOTION MAY INJURE THE SHOOTER WHEN THE RIFLE RECOILS. BORE SIGHTING Bore sighting is a preliminary procedure to achieve proper alignment of the scope with the rifle’s bore. It is best done using a Bushnell® Bore Sighter. If a bore sighter is not available, it can be done as follows: Remove the bolt and sight through the gun barrel at a 100 yard target. Then sight through the scope and bring the cross hairs to the same point on the target. Certain mounts have integral windage adjustments and, when bore sighting, these should be used instead of the scope’s internal adjustments. If major elevation adjustments are needed, they should be accomplished by shimming the mount base.
  • 7. 7 ZEROING Final sighting-in of your rifle should be done with live ammunition, based on your expected shooting distance. If most of your shots will be at short range, zero-in at 100 yards. But, for long- range shooting at big game, most experienced shooters zero-in about three inches high at 100 yards. Three-shot groups are useful for averaging the point of impact. ELEVATION AND WINDAGE ADJUSTMENT BushnellBannerscopesfeaturefinger-adjustableaudible-clickelevationandwindageadjustments. 1. Remove the covers from the Elevation and Windage Adjustments. 2. Grasp the Adjustment Bar and turn it in the appropriate“UP”(and/or“R”) direction indicated by the arrows. Each “click” or increment on the Adjustment Scale Ring will change bullet impact by 1/4” Minute of Angle. 1/4” MOA corresponds to 1/4 inch at 100 yards, 1/2 inch at 200 yards, 3/4 inch at 300 yards and so on (1/12”at 50 feet for air rifles). ELEVATION ADJUSTMENT DIAL WINDAGE ADJUSTMENT DIAL
  • 8. 8 RESETTING THE ADJUSTMENT SCALE RING (this feature is not available on all models) This step is not necessary, but, for future reference, you may want to realign the zero marks on the Adjustment Scale Rings with the index dots. 1. Using a jeweler’s screwdriver, loosen the Phillips screw on the Adjustment Scale about 1/2 turn. Take care not to disturb your zero by“losing”a click or two when loosening the screws. 2. Rotate the Adjustment Scale Ring (which should now turn freely) to align the “O” with the Index Dot. 3. Retighten the screw in the Adjustment Scale and reinstall the Elevation and Windage Adjustment Knobs. VARIABLE POWER ADJUSTMENTS To change magnification, simply rotate the Power Change Ring to align the desired number on the power scale with index dot. When still-hunting or stalking game, a variable scope should be set to the lowest power. You then have the widest field of view for quick shots at close range. Higher powers should be reserved for precise long-range shots. WARNING: A SCOPE SHOULD NEVER BE USED AS A SUBSTITUTE FOR EITHER A BINOCULAR OR SPOTTING SCOPE. IT MAY RESULT IN YOU INADVERTENTLY POINTING THE GUN AT ANOTHER PERSON. ADJUSTABLE OBJECTIVE LENS This feature (if present on your scope) permits precise focusing, while simultaneously readjusting the parallax-free distance, for any range from 50 yards to infinity. To change range focus, turn
  • 9. 9 the Objective Adjustment Ring and align the number with the distance index dot. An alternative method is to look through the scope and turn the Objective Adjustment Ring until the target, at whatever range, is sharply focused. MAINTENANCE Your Bushnell riflescope, though amazingly tough, is a precision instrument that deserves reasonable cautious care. 1. When cleaning the lenses, first blow away any dirt and dust, or use a soft lens brush. Fingerprints and lubricants can be wiped off with lens tissue, or a soft clean cotton cloth, moistened with lens cleaning fluid. 2. All moving parts of the scope are permanently lubricated. Do not try to lubricate them. 3. No maintenance is needed on the scope’s outer surface, except to occasionally wipe off dirt or fingerprints with a soft cloth. 4. Use lens covers whenever convenient. WARNING: UNNECESSARY RUBBING OR USE OF A COARSE CLOTH MAY CAUSE PERMANENT DAMAGE TO LENS COATINGS. STORAGE Avoid storing the scope in hot places, such as the passenger compartments of vehicles on hot days. The high temperatures could adversely affect the lubricants and sealants. A vehicle’s trunk, a gun cabinet or a closet is preferable. Never leave the scope where direct sunlight can enter either the objective or the eyepiece lens. Damage may result from the concentration (burning glass effect) of the sun’s rays.
  • 10. 10 We are so proud of our Bushnell® Banner® Riflescopes that their materials and workmanship are warranted to be free of defects for the life of the binocular. The warranty is available to any owner of the Banner Riflescope. This warranty does not cover damages caused by misuse or improper handling, installation or maintenance of the binoculars. At our option, we will repair or replace any defective Banner Riflescope, which shall be your sole remedy under this warranty. In no event shall we be liable for transportation costs to us, costs of removal or reinstallation of the riflescope, or incidental or consequential damages. Some states do not allow the exclusion of limitation of incidental or consequential damages, so the above limitation or exclusion may not apply to you. Any return made under this warranty must be accompanied by the items listed below: 1. Name and address for product return 2. An explanation of the defect 3. You are responsible for transport of the defective product, but we will pay for shipping the repaired or replacement product back to you anywhere in the continental United States. 4. Product should be well packed in a sturdy outside shipping carton, to prevent damage in transit, to the address listed below: IN U.S.A. Send To: IN CANADA Send To: Bushnell Outdoor Products Bushnell Outdoor Products Attn.: Repairs Attn.: Repairs 9200 Cody 140 Great Gulf Drive, Unit # B Overland Park, Kansas 66214 Vaughan, Ontario L4K 5W1 For products purchased outside the United States or Canada please contact your local dealer for applicable warranty information. In Europe you may also contact Bushnell at: Bushnell Germany GmbH European Service Centre Mathias-Brüggen-Str. 80 D-50827 Köln GERMANY Tél: +49 221 995568-0 Fax: +49 221 995568-20 This warranty gives you specific legal rights. You may have other rights which vary from country to country. ©2013 Bushnell Outdoor Products LIFETIME LIMITED WARRANTY
  • 11. 11 FELICITACIONES sur votre choix d’une lunette de visée Bushnell. C’est un instrument de précision utilisant les meilleurs matériauz, assemblé par des artisans hautement qualifiés afin d’assurer une vie entiere de service inégalé, même dans las conditions d’utilisation les plus exigeantes. Ce livret vous aidera à atteindre des performances optimales en expliquant l’utilisation et l’entretien de tous les composants de la lunette. Lisez ces instructions soigneusement avant d’installer et d’utiliser l’appareil. Les photos suivantes servent de guides pour la nomenclature et le repérage des éléments mentionnés dans le texte. Français Réglage La Hausse Épaule Objectif Réglage De Derive Oculaire Bague De Réglage De Grossissement Mise Au Point Rapide Bague De Réglage De L’Objectif
  • 12. 12 MISE AU POINT DE L’OCULAIRE L’oculaire est conçu pour assurer une mise au point rapide de haute précision. Il s’ajuste plus rapidement que votre oeil ne peut comenser à la suite d’un mauvais réglage de l’appareil. Regardez un objet distant pendant quelques secondes sans utiliser la lunette. Ensuite portez rapidement votre oeil sure l’oculaire en direction d’un panorama neutre. Tournez l’oculaire à droite ou à gauche pour l’ajuster à vision. Le réticule devrait être clair et net avant que votre oeil ait eu le temps de se réajuster. Après le réglage de l’oculaire, jetez un coup d’oeil rapide sur l’objet pour vérifier ce réglage. AVERTISSEMENT: NE JAMAIS REGARDER DIRECTEMENT LE SOLEIL A TRAVERS LA LUNETTE DE VISEE (OU AUTRE INSTRUMENT OPTIQUE). CECI RISQUE DE CAUSER DES DEGATS PERMANENTS AUX YEUX. CENTRAGE DU RÉTICULE Le réticule a été soigneusement ajusté par le service optique de l’usine. Celuici assurer un réglage de portée idéal à partir de son axe. Les réglages de la lunette de visée servent à raffiner la mise au point de la lunette. Il est conseillé de vérifier le centrage de l’axe optique avant installation de la lunette. Ceci peut se fair en plaçant la lunette dans un bloc en “V” solide (tel qu’une boîte à chaussures avec deux découpes). Regardez à travers la lunette tout en la faisant tourner sur son axe. Si le point visé décrit un cercle de plus de 2,5 centimètres par rapport à l’axe des fils croisés du réticule à une distance de 25 mètres, réajustez les mises au point de dérive et de hausse. Enlevez les capuchons de protection des mises au point. Réglez chaque mise au point et revérifiez le centrage. Si le point visé décrit toujours un cercle, recalez les mises au point à nouveau. INSTALLATION Votre lunette Bushnell doit être correctement installée pour assurer la précision optimale de votre carabine. (A ce props, nos conseillons fortement à ceuz qui ne sont pas familiers avex les procédures applicables de faire appel à un armurier qualifié pour l’installation de la lunette). Si vous décidez d’installer la lunette vous-même:
  • 13. 13 1. Utilisez un support de qualité ayant une embase conçu pour votre type de carabine. La lunette devrait être installée aussi près que possible sans toute-fois venir en contact avec le canon ou le boîtier de culasse. 2. Suivez scrupuleusement las instructions fournies avec le support choisi. 3. Avant de serrer les brides de serrage de la lunette, regardez à travers celleci dans votre position de tir normal. Faites glisser la lunette en avant et en arrière jusqu’à trouver la position la plus avancée qui vous permette de voir la totalité du champ de vision. Cette position assure une détente maximale pour l’oeil 4. Faitestournerlalunettedanslesbridesjusqu’àcequelesfilscroisésduréticulesetrouventperpendiculaires au canon et le curseur de hausse soit en position haute. 5. Serrez les vis de blocage. AVERTISSEMENT: SI LA LUNETTE EST POSITIONNEE TROP EN ARRIERE, ELLE RISQUE DE BLESSER LE TIREUR DE RECUL DE LA CARABINE. VISÉE PAR LE CANON La visée par le canon est l’étape préliminaire nécessaire à un bon alignement de la lunette par rapport l’alésage du canon. Pour ceci, il est préférable d’utiliser un Bushnell Bore Sighter. Si un tel appareil n’est pas disponible, procédez de la manière suivante: Enlevez la culasse et visez une cible installée à 100 mètres en regardant par le canon. Ensuite, visez avec la lunette et amenez au point de dévers incorporées. Lors de la visée par le canon, utilisez ces mises au point plutôt que celles de la lunette. Si des réglages de hausse importants sont nécessaires, ils devraient être obtenus en calant les embases du support lui-même. TIRS D’ESSAI La mise au point finale de votre carabine devrait se faire avec des munitions de chasse et à la distance de tir anticipée. Si la majorité de vos tirs sont à petite distance, faites les essais à 100 mètres. Cependant, lors de la chasse de gros gibier à grande distance, la majorité des chasseurs expérminentés font leurs essais avec une hausse de 75 millimètre pour une cible à 100 mètres. Des groupements de trois tirs sont généralement suffisants établir le point d’impact moyen.
  • 14. 14 règlage de la hausse règlage de derive MISE AU POINT DE LA HAUSSE ET DE LA DÉRIVE Votre lunette Bushnell est équipée des molettes de mise au point de la hausse et de dérive qui produisent un claquement audible. 1. Enlevez les capuchons des molettes de mise au point de la hausse et de la dérive. 2. Tournez le barre dans la direction appropriée“UP”et/ou“R”indiquée par les flèches. Chaque claquement ou incrément sur le cadran gradué modifiera le point d’impact par 1/4 de minute d’angle. 1/4 de minute d’angle correspondent à 7 millimètres à 100 mètres, 14 millimètres à 200 mètres, 21 millimètres à 300 mètres et ainsi de suite (1 millimètres à 10 mètres pour les carabines à air comprimé).
  • 15. 15 RECALAGE DU CADRAN GRADUÉ (Pas disponible sur tous modèles) Cette opération n’est pas nécessaire, mais il se peut qu’à l’avenir vous vouilez réaligner le zéro des cadrans gradués sur le point de repère. 1. A l’aide d’une tournevis de bijoutier, desserrez les vis cruciformes du cadran gradué d’environ un demi tour. Faites attention de ne pas déplacer votre point zèro en perdant un cran ou deux lors du desserrement des vis. 2. Faites tourner le cadran gradué (qui devrait alors tourner librement) pour aligner“0”sure le point de repère. 3. Serrez la vis du cadran gradué et réinstallez les molettes de réglage de hausse et de dérive. RÉGLAGE DU GROSSISSEMENT Pour modifier le grossissement, faites simplement tourner la bague de sélection de grossissement pour aligner le chiffre voulu sure le point de repère de cadran de grossissement. Lors de la chasse à l’affût ou de la traque du gibier, une lunette à grossissement variable devrait être à la position de grossissement la plus faible. Cela vous assure un maximum de champ de vision pour les tirs rapides à petite distance. Les grossissement plus élevés devraient être réservés aux tirs de précision à grande distance. AVERTISSEMENT: UNE LUNETTE DE CARABINE NE DEVRAIT JAMAIS ETRE UTILISEE EN TANT QUE JUMELLES OU LUNETTE DE REPERAGE. CECI RISQUE DE VOUS FAIRE BRAQUE VOTRE ARME SUR UNE AUTRE PERSONNE. OBJECTIF RÉGLABLE Ce dispositif (si votre lunette en est équipée) permet une mise au point précise tout en permettant le réglage de la distance hors parallaxe à partir de 50 mètres et jusqu’à l’infini. Pour modifier la mise au point de la portée, tournez la bague de réglage de l’objectif pour aligner le chiffre voulu sur l’indice de distance. Une méthode al- ternative consiste en regardant par la lunette à tourner la bague de réglage de l’objectif jusqu’à ce que la cible, qu’elle qu’en soit la distance, soit bien au point.
  • 16. 16 ENTRETIEN Votre lunette de visée Bushnell, aussi robuste qu’elle pousse être, est tout de même un instrument de précision qui nécessite un certain niveau d’entretien et certaines précautions. 1. Lors du nettoyage des lentilles, commencez en soufflant sur elles pour en éliminer la poussière, ou utilisez une brosse à lentilles. Les empreintes et laes traces de graisse peuvent être éliminées à l’aide d’une papier our objectifs ou en utilisant un tissu de coton humecté avec un produit de nettoyage pour optiques. AVERTISSEMENT: LE FROTTEMENT EXCESSIF OU L’UTILISATION D’UN TISSU ABRASIF PEUVENT ENDOMMAGER LES LENTILLES DE MANIERE PERMANENTE. 2. Toutes les pièces mobiles de la lunette ont une lubrification permanente. Ne tentez pas de les lubrifier. 3. Mise à part l’elimination des traces de doigts et des salissures à l’aide d’un chiffon doux, aucun entretien des surfaces externes de la lunette n’est nécessaire. 4. Dans la mesure du possible, gardez les lentilles couvertes. RANGEMENT Evitez de ranger la lunette dans les endroits chauds, tels que les habitacles de voiture par temps chaud. Les températures élevées peuvent détériorer les lubrifiants et les joints d’étanchéité. Il est préférable d’utiliser la malle d’une voiture, une armoire à fusils ou autre rangement. Ne jamais laisser la lunette là où la lumiére du soleil directe peut atteindre une de ses deux extrémités. Des dégâts résultant de l’effet“loupe”peuvent en résulter.
  • 17. 17 GARANTIE À VIE LIMITÉE Votre produit Bushnell® est garanti exempt de défauts de matériaux et de fabrication pendant la durée de vie de son premier propriétaire. La garantie à vie limitée traduit notre confiance dans les matériaux et l'exécution mécanique de nos produits et représente pour vous l'assurance de toute une vie de service fiable. Au cas où un défaut apparaîtrait sous cette garantie, nous nous réservons l'option de réparer ou de remplacer le produit, à condition de nous le renvoyer en port payé. La présente garantie ne couvre pas les dommages causés par une utilisation, une manipulation, une installation incorrecte(s) ou un entretien incorrect ou fourni par quelqu'un d'autre qu'un centre de réparation agréé par Bushnell. Tout retour effectué aux États-Unis ou au Canada, dans le cadre de la présente garantie, doit être accompagné des articles indiqués ci-dessous: 1) un chèque ou mandat d'une somme de 10,00 $ US pour couvrir les frais d'envoi et de manutention 2) le nom et l'adresse pour le retour du produit 3) une description du défaut constaté 4) la preuve d'achat 5) Le produit doit être emballé soigneusement, dans un carton d'expédition solide, pour éviter qu'il ne soit endommagé durant le transport ; envoyez-le en port payé, àl'adresse indiquée ci-dessous : Aux États-Unis, envoyez à: Au CANADA, envoyez à: Bushnell Outdoor Products Bushnell Outdoor Products Attn.: Repairs Attn.: Repairs 9200 Cody 140 Great Gulf Drive, Unit # B Overland Park, Kansas 66214 Vaughan, Ontario L4K 5W1 Pour les produits achetés en dehors des États-Unis et du Canada, veuillez contacter votre distributeur local pour tous renseignements concernant la garantie. En Europe, vous pouvez aussi contacter Bushnell au : Bushnell Germany GmbH European Service Centre Mathias-Brüggen-Str. 80 D-50827 Köln GERMANY Tél: +49 221 995568-0 Fax: +49 221 995568-20 La présente garantie vous donne des droits légaux spécifiques. Vous pouvez avoir d'autres droits qui varient selon les pays. ©2013 Bushnell Outdoor Products
  • 18. 18 español Adjuste De Elevation Hombro Objetivo Adjuste De Viento Ocular Anillo De Cambio De Potencia Rapido Enfoque Anillo De Ajuste Del Objetivo FELICITACIONES por haber elegido una mira telescópica Bushnell. Se trata de un instrumento de precisión construido con los mejores materiales y ensamblado por artesanos altamente cualificados para que pueda disfrutarlo toda una vida sin problemas y en las condiciones más exigentes. Este folleto le ayudará a obtener un rendimiento óptimo explicando cómo se usan sus diferentes componentes y cómo cuidar de los mismos. Lea detenidamente las instrucciones antes de montar y usar su mira telescópica. Las siguientes fotografías sirven como guía para la nomenclatura y la posición de las piezas de la mira telescópica para rifle que se mencionan en el texto.
  • 19. 19 ENFOQUE DEL OCULAR El ocular está diseñado para ofrecer un enfoque rápido y preciso. El ocular enfocará con mayor rapidez de la que su ojo necesita para compensar por cualquier falta de precisión en el ajuste. Mire a un objeto durante varios segundos sin usar su mira telescópica. Luego, cambie de visión rápidamente, mirando a través de la mira telescópica hacia un fondo despejado. Gire el ocular de enfoque rápido a la derecha o a la izquierda para ajustarlo a sus ojos. La imagen del retículo debe ser nítida y clara antes de que su ojo pueda volver a enfocar. Después de haber hecho su ajuste, vuelva a comprobar la imagen dando un vistazo rápido. ADVERTENCIA: NO MIRE NUNCA AL SOL A TRAVÉS DE LA MIRA TELESCÓPICA PARA RIFLE (NI CUALQUIER OTRO INSTRUMENTO ÓPTICO). PODRÍA DAÑAR PERMANENTEMENTE SU VISTA. CENTRADO DE LA RETÍCULA La retícula se ha fijado cuidadosamente en el centro óptico de su mira telescópica para rifle en nuestra fábrica. Este posicionamiento le ofrece la escala de ajuste ideal desde la posición central. Los ajustes de la mira telesópica para rifle se usan para centrar dicha mira. Conviene inspeccionar el centro del eje óptico antes del montage colocando la mira telescópica sobre un bloque con ranuras en V (caja de cartón con dos ranuras). Mientras mira a través de la mira telescópica en la posición normal, gire con cuidado la mira telescópica. Si el blanco se mueve en un círculo mayor que 1”(2,5 cm) desde el centro (a 22 metros) en relación con la intersección de las retículas, reposicione los ajustes de corrección vertical y elevación. Quite las tapas de ajuste. Coloque cada uno de los ajustes en el punto medio y vuelva a comprobar si están centrados. Si el blanco sigue girando, use los ajustes para corregir. MONTAJE Para lograr la máxima precisión de su rifle, su mira telescópica Bushnell tiene que montarse adecuadamente. (Recomendamos encarecidamente a aquellos que no estén familiarizados con los procedimientos apropiados que pidan a un maestro armero cualificado que se encargue del montaje de la mira telescópica). Si usted decide
  • 20. 20 hacerlo por su cuenta: 1. Use una montura de alta calidad que tenga unas bases diseñadas para encajar en su rifle particular. La mira telescópica se aointe tam bajo com sea posible sin el tacto de la base o del receptor. 2. Siga cuidadosamente las instrucciones que se entregan con las monturas de la mira telescópica que haya seleccionado. 3. Antes de apretar los anillos de montaje, mire a través de la mira telescópica en su posición de tiro normal. Ajuste la mira telescópica (hacia adelante o hacia atrás) hasta que logre el punto hacia adelante más lejano (para una distancia máxima de la pupila al ocular) que le permita ver un campo de visión completo. ADVERTENCIA: SI LA MIRA TELESCÓPICA NO ESTÁ MONTADO LO SUFICIENTEMENTE LEJOS HACIA ADELANTE, EL IMPACTO PRODUCIDO POR EL RETROCESO DEL RIFLE PUEDE CAUSAR LESIONES AL TIRADOR. 4. Gire la mira telescópica por los anillos hasta que la imagen de la retícula quede perpendicular al cañon y el ajuste de elevación esté en la parte superior. 5. Apriete los tornillos del montaje. PARALELISMO ENTRE LÍNEA DE MIRA Y CAÑON El paralelismo entre línea de mira y el cañon es un procedimiento preliminar para lograr la alineación adecuado entre la mira telescópica y el cañon del rifle. Se hace mejor usando un colimador de paralelismo de Bushnell. Si no dispone de un colimador de paralelismo, puede hacerse de la siguiente forma: quite el tornillo y mire a través del cañon del arma a un blanco situado a 90 metros. Luego mire a través de la mira telescópica y alinee la réticula con el mismo punto del blanco. Hay algunas monturas que tienen ajustes integrados de corrección vertical y, al establecer el paralelismo entre la línea de mira y el cañon, deben usarse en lugar de los ajustes internos de la mira telescópica. Si tiene que hacer ajustes de elevación importantes, deberán hacerse calzando la base de montaje. AJUSTE DE LA MIRA El ajuste final de la mira del rifle debe hacerse con munición real, basándose en la distancia de tiro esperada. Si la mayoría de los disparos se van a hacer a corto alcance, cero en a 100 yardas. Pero para la gama larga que tira a juego grande, la mayoría de los tiradores experimentados cero adantro en cerca de tres pulgadas en 110 yardas. Resulta muy útil hacer grupos de tres disparos para calcular el promedio del punto de impacto.
  • 21. 21 ajuste vertical ajuste horizontal AJUSTES DE ELEVACIÓN Y CORRECCIÓN VERTICAL Su mira telescópica dispone de unos ajustes de elevación y corrección vertical que se pueden accionar con un dedo y que producen un chasquido perceptible. 1. Quite las tapas de los Ajustes de Elevación y Corrección Vertical. 2. Sujete la Barra de Ajuste y gírela en la dirección apropiada UP (y/o R) indicada por las flechas. Cada chasquido o incremento en el Anillo de Escala del Ajuste cambiará el impacto de la bala en un 1/4” de Minuto de Ángulo. 1/4”de MOA corresponde a 1/4 de pulgada (0,625 cm) a 90 metros, 1/2 pulgada (1,25 cm) a 180 metros, 3/4 de pulgada (1,90 cm) a 270 metros y así sucesivamente (1/12”a 50 metros para totos los rifles de aire comprimido).
  • 22. 22 REPOSICIÓN DEL ANILLO DE LA ESCALA DE AJUSTE (No disponible en todo modela) Este paso no es necasario pero, para referencia futura, puede que tenga volver a alinear las marcas de cero de los Anillos de la Escala de Ajuste con los puntos indicadores. 1. Con un destornillador de joyería, afloje el tornillo de estrella de la Escala de Ajuste una 1/2 vuelta. Tenga cuidado de no alterar el punto cero perdiendo uno o dos chasquidos al aflojarlos tornillos. 2. Gire el Anillo de la Escala de Ajuste (que debe girar libremente) para alinear el 0 con el Punto Indicador 3. Vuelva a apretar el tornillo de la Escala de Ajuste y reinstale los botones de Ajuste de Elevación y Corrección Vertical. AJUSTE DE POTENCIA VARIABLE Para cambiar el aumento sólo tiene que girar el Anillo Selector de Potencia para alinear el número deseado de la escala de potencia con el Punto Indicador. En los casos de cacería estática o de acecho a la presa, las miras telescópicas variables se deben fijar en la potencia menor para lograr un campo de visión más amplio con el fin de hacer disparos rápidos de corto alcance. Las potencias más altas deben reservarse para el caso de los disparos precisos de largo alcance. ADVERTENCIA: LAS MIRAS TELESCÓPICAS NO DEBEN USARSE NUNCA EN LUGAR DE LOS PRISMÁTICOS NI DE LAS MIRAS TELESCÓPICAS DE LOCALIZACIÓN. PUEDE DAR COMO RESULTADO QUE APUNTE SU ARMA SIN QUERER A OTRA PERSONA. OBJETIVOS AJUSTABLES Esta función (si la tuviera su mira telescópica) permite hacer un enfoque rápido mientras se reajusta simultáneamente las distancia libre de paralaje desde 40 metros hasta el infinito. Para cambiar la distancia de enfoque, gire el Anillo de Ajuste del Objetivo y alinee el número con el Punto Indicador de distancia. Un método alternativo sería mirar a través de la mira telescópica y girar el Anillo de Ajuste del Objetivo hasta que el blanco aparezca nítidamente enfocado a cualquier distancia.
  • 23. 23 MANTENIMIENTO Su mira telescópica para rifle Bushnell, a pesar de tener una solidez sorprendente, es un instrumento de precisión que debe recibir un cuidado razonable y prudente. 1. Cuando limpie las lentes, primero sople la suciedad o el polvo que puedan tener o use un cepillo suave para lentes. Las huellas dactilares y los lubricantes pueden limpiarse con papel para vidrios ópticos o un paño de algodón suave humedicido con líquido para limpiar lentes. ADVERTENCIA: FROTAR INNECESARIAMENTE O USAR PAÑOS ÁSPEROS PUEDE CAUSAR DAÑOS PERMANENTES AL REVESTIMIENTO DE LAS LENTES. 2. Todas las piezas móviles de la mira telescópica están lubricadas permanente. No trate de lubricarlas por su cuenta. 3. La parte externa de la mira telescópica no requiere ningun mantenimiento, excepto limpiar de vez en cuando la suciedad o las huellas dactilares con un paño suave. 4. Use las cubiertas de las lentes siempre que sea necesario. ALMACENAMIENTO No guarde nunca la mira telescópica en lugares calientes, tal como la guantera de los vehículos los días de mucho calor. Las temperaturas elevadas pueden afectar adversamente a los lubricantes y selladores. Es preferible usar un maletero de un vehículo, una vitrina para armas o un armario. No deje nunca la mira telescópica en un lugar donde la luz solar directa pueda penetrar en el objetivo o el ocular. La concentración de los rayos solares (efecto del vidrio ardiente) puede causar daños a las lentes.
  • 24. 24 GARANTÍA LIMITADA PARA TODA LA VIDA Su producto Bushnell® está garantizado contra defectos de material y fabricación durante toda la vida del propietario original. La Garantía Limitada para Toda la Vida es una expresión de la confianza que tenemos en nuestros materiales y en la fabricación mecánica de nuestros productos, que le garantiza un servicio fiable durante toda la vida. En caso de defectos bajo esta garantía, nosotros, a nuestra opción, repararemos o sustituiremos el producto siempre que lo devuelva con portes pagados. Esta garantía no cubre defectos causados por el uso indebido, ni por un manejo, instalación o mantenimiento del producto inapropiados, o el mantenimiento hecho por otro que no sea un Centro de Servicio Autorizado de Bushnell. Cualquier envío en Estados Unidos o Canadá que se haga bajo garantía deberá venir acompañado por lo siguiente: 1) Un cheque/giro postal por la cantidad de 10 dólares para cubrir los gastos de manejo y envio 2) Nombre y dirección donde quiere que se le envíe el producto 3) Una explicación del defecto 4) Prueba de compra 5) El producto debe empaquetarse bien en una caja resistente para evitar que se dañe durante el transporte, y enviarse con portes pagados a la dirección que se muestra a continuación: En EE UU, enviar a: En CANADÁ, enviar a: Bushnell Outdoor Products Bushnell Outdoor Products Attn.: Repairs Attn.: Repairs 9200 Cody 140 Great Gulf Drive, Unit # B Overland Park, Kansas 66214 Vaughan, Ontario L4K 5W1 En el caso de los productos comprados fuera de los Estados Unidos o Canadá, llame al distribuidor local para la información pertinente sobre la garantía. En Europa también puede llamar al: Bushnell Germany GmbH European Service Centre Mathias-Brüggen-Str. 80 D-50827 Köln GERMANY Tél: +49 221 995568-0 Fax: +49 221 995568-20 Esta garantía le ofrece derechos legales específicos. Puede que tenga otros derechos que varían de un país a otro. ©2013 Bushnell Outdoor Products
  • 25. 25 Höheneinstellung Schulter ObjektivSeiteneinstellung Okular Ring Zur Einstellung Der VergröberungSchnelle Scharfeneinstellung Objektiveinstellring HERZLICHEN GLÜCKWUNSCH zum Kauf des Bushnell-Zielfernrohrs! Dieses Präzisionsinstrument wurde von Spitzentechnikern aus den feinsten Materialien für lebenslangen und einwandfreien Gebrauch unter den anspruchsvollsten Bedingungen gebaut. Dieses Handbuch gibt Anweisungen über den Gebrauch und die Wartung des Zielfernrohrs, damit Sie optimale Ergebnisse erzielen. Bitte lesen Sie die Anweisungen vor Montage und Gebrauch des Zielfernrohrs sorgfältig durch. Die folgenden Photos geben Aufschluß über die in diesem Text gebrauchte Terminologie und zeigen an, wo sich die einzelnen Teile des Zielfernrohrs befinden. Deutsch
  • 26. 26 SCHÄRFEEINSTELLUNG DES OKULARS Das Okular ist für präzise und schnelle Schärfeeinstellung konzipiert. Das Okular stellt schneller ein, als sich Ihr Auge an eventuelle Einstellungsgenauigkeiten anpassen kann. Schauen Sie mit bloßern Auge einige Sekunden lang auf einen fernen Gegenstand. Richten Sie dann den Blick rasch durch das Zielfernrohr auf einen einfachen Hintergrund. Drehen Sie das Okular im Uhrzeigersinn bzw, dagegen, um Ihr Auge anzupassen. Das Fadenkreuz sollte scharf und klar sein, bevor sich Ihr Auge angepaßt hat. Kontrollieren Sie die Schärfe nochmals mit einem kurzen Blick durch das Zielfernrohr, nachdem Sie das Okular eigenstellt haben. ACHTUNG: SCHAUEN SIE NIE DURCH DAS ZIELFERNROHR (ODER ANDERE OPTISCHE GERÄTE) DIREKT IN DIE SONNE. DA DIES IHR AUGE AUF DAUER BESCHÄDIGEN KÖNNTE. ZENTRIEREN DES FADENKREUZES Das Fadenkreuz wurde in unserer Fabrik sorgfältig ins optische Zentrum des Zielfernrohrs eingesetzt. Dies gibt lhnen den idealen Einstellbereich von der Mitte aus. Die Einstellungen des Zielfernrohrs dienen dazu, das Zielfernrohr auf das Ziel einzustellen. Esistratsam,vordemMontierendenMittelpunktderoptischenAchsezukontrollieren.SetzenSiedasZielfernrohr hierzu in einen festen V-Block (einen Pappkarton mit zwei Einschnitten) ein. Blicken Sie normaler Sichtstellung durch das Zielfernrohr, und drehen Sie es dabei vorsichtig.Wenn sich das Ziel in einem Kreis bewegt, der bei etwa 20 m mehr als 2,5cm von der Mitte des Fadenkreuzes abweicht, stellen Sie die Seiten- und Höheneinstellung neu ein. Nehmen Sie die Schutzkappen von den Einstellvorrichtungen ab. Setzen Sie beide Einstellungen auf die Mitte, und kontrollieren Sie es nochmals, damit sie genau zentriert sind. Korrigieren Sie die Einstellung, wenn sich das Ziel weiterhin dreht. MONTAGE Die Präzision des Gewehrs ist nur dann gewährleistet, wenn das Bushnell-Zielfernrohr korrekt montiert wurde.
  • 27. 27 (Unerfahrenen Benutzern empfehlen wir dringend, das Zielfernrohr von einem Waffenschmied montieren zu lassen.) Beachten Sie bitte folgendes, wenn Sie es selbst montieren wollen: 1. Benutzen Sie einen qualitativ hochwertigen Montageblock, dessen Unterseite lhrem speziellen Gewehr angepaßt ist. Das Zielfernrohr sollte so dicht wie möglich an das Gewehr montiert werden, ohne jedoch den Büchsenlauf bzw. den Hülsenkopf zu berühren. 2. FolgenSiesorgfältigdenAnweisungen,diemitdemMontagezubehörgeliefertwerden,dasSieausgewähit haben. 3. Bevor Sie die Montageschraube festschrauben, schauen Sie in normaler Schußstellung durch das Zielfernrohr. Stellen Sie das Zielfernrohr ein (entweder nach vorn oder nach hinten), bis Sie den weitesten Vorwärtspunkt erreichen, bei dem Sie ein volles Blickfeld haben. Dies ist die Lage, die Ihr Auge am meisten schont. ACHTUNG: WENN DAS ZIELFERNROHR NICHT WEIT GENUG NACH VORN MONTIERT IST, KANN DER SCHÜTZE DURCH DEN RÜCKSCHLAG DES GEWEHRS VERLETZT WERDEN. 4. Drehen Sie das Zielfernrohr in den Ringen, bis das Fadenkreuz senkrecht zum Richtkorn steht und die Höheneinstellung oben ist. 5. Ziehen Sie die Montageschrauben fest an. VISIEREN DES LAUFSPIEGELS Das Visieren des Laufspiegels ist ein Vorbereitungsvorgang, der sicherstellt, daß Zielfernrohr genau mit dem Richtkorn des Gewehrs ausgerichtet ist. Am besten nimmt man hierzu ein Bushnell-Laufvisier. Gehen Sie wie folgt vor, wenn kein Laufvisier zur Hand ist: Entfernen Sie den Bolzen und schauen Sie durch den Gewehrlauf auf ein 100 m entferntes Ziel. Schauen Sie dann durch das Zielfernrohr und bringen Sie das Fadenkreuz auf denselben Punkt auf dem Ziel. Einige Montagevorrichtungen haben eingebaute Seiteneinstellungen: beim Visieren des Laufspiegels sollten diese anstelle der im Zielfernrohr eingebauten Einstellungen gebraucht werden.Wenn größere Höheneinstellungen erforderlich sind, sollten diese durch Abschleifen der Unterseite der Montagevorrichtung erfolgen.
  • 28. 28 HÖHENEINSTELLUNG SEITENEINSTELLUNG EINSTELLUNG DES NORMALVISIERS Das endgültige Visieren Ihres Gewehrs sollte je nach der geplanten Schußweite mit Munition erfolgen. Wenn Sie beabsichtigen, größtenteils auf kurze Entfernungen zu schießen, visieren Sie auf 100 m. Für weite Entfernungen beim Schießen auf Großwild visieren die meisten erfahrenen Schützen jedoch bei 100 m auf 7,5 cm Höhe. Dreischußgruppen sind nützlich, um den durchschnittlichen Aufprallpunkt festzustellen. HÖHEN- UND SEITENEINSTELLUNG Ihr Bushnell-Zielfernrohr ist mit Höhen- und Seiteneinstellvorrichtungen ausgestattet, die von Hand eingestellt werden. Beim Einstellen ist ein Klicken hörbar. 1. Entfernen Sie die Schutzkappen von den Vorrichtungen zur Höhen- und Seiteneinstellung. 2. Greifen Sie den Einstellriegel und drehen Sie ihn in Pfeilrichtung in die entsprechende “UP” - bzw. “R” - Richtung. Bei jedem “Klicken” bzw. bei jeder Änderung auf dem graduierten Einstellring wird der Kugelaufprall um 6,4 mm Bogenminuten modifiziert. 6,4 mm Bogenminute entspricht 6,4 mm auf 91,4 m; 12,7 mm auf 182,8 m; 19,1 mm auf 274,2 m usw. 2,1 mm auf 15,2 m bei Luftgewehren.
  • 29. 29 NEUEINSTELLUNG DES GRADUIERTEN EINSTELLRINGS (Nicht verfügbar auf allen Modellen) Obwohl dieser Schritt nicht nötig ist, können Sie die Nullmarkierungen auf den graduiert Einstellring zur künftigen Bezugnahme mit den Markierungspunkten ausrichten. 1. Lösen Sie die Kreuzschraube auf der graduierten Einstellvorrichtung mit einem Juwelierschraubenzieher ungefähr um eine halbe Drehung. Achten Sie beim Lösen der Schraube darauf, die “0” - Einstellung nicht durch den“Verlust”einiger“Klick”- Zeichen anzutasten. 2. Drehen Sie den graduierten Einstellring (der sich ungehindert drehen lassen sollte) so, daß die“0”mit dem Markierungspunkt ausgerichtet ist. 3. Ziehen Sie die Schraube auf der graduierten Einstellvorrichtung wieder an, und montieren Sie die Seiten- und Höheneinstellknöpfe. VARIABLE VERGRÖßERUNGSEINSTELLUNG Um die Vergrößerung zu modifizieren, drehen Sie einfach den Ring zur Einstellung der Vergrößerung, bis die gewünschte Nummer auf dem Vergrößerungsanzeiger mit dem Markierungspunkt ausgerichtet ist. Auf der Pirsch sollte ein verstellbares Zielfernrohr immer auf die niedrigste Vergrößerung eingestellt sein. So haben Sie das weiteste Blickfeld für schnelles Schießen auf kurze Entfernungen. Stärkere Vergrößerungen sind ausschließlich bei präzisem Schießen auf große Entfernungen erforderlich. ACHTUNG: EIN ZIELFERNROHR SOLLTE NIE ALS ERSATZ FÜR EINEN FELDSTECHER GEBRAUCHT WERDEN DABEI KÖNNEN SIE IHR GEWEHR VERSEHENTLICH AUF EINEN ANDEREN MENSCHEN RICHTEN. VERSTELLBARES OBJEKTIV Diese Vorrichtung (sofern vorhanden) ermöglicht präzise Schärfeeinstellung, während sie gleichzeitig die Parallaxen-Entfernung für jeden Bereich von knapp 46 m bis ins Unendliche einstellt. Drehen Sie den Einstellring auf dem Objektiv, und richten Sie die Nummer mit dem Entfernungsmarkierungspunkt aus, um die Entfernungsschärfe zu modifizieren. Sie können hierzu auch durch das Zielfernrohr schauen, und den Objektiveinstellring drehen, bis das Ziel ungeachtet der Entfernung scharf sichtbar ist.
  • 30. 30 WARTUNG Obwohl erstaunlich strapazierfähig, ist lhr Bushnell-Zielfernrohr ein Präzisionsinstrument, das sorgfältiger Pflege bedarf. 1. Blasen Sie zur Reinigung des Objektives zuerst trockenen Schmutz bzw. Staub weg oder benutzen Sie einen weichen Objektivpinsel. Fingerabdrücke und Schmieröl können mit einem Objektivreinigungstuch oder einem weichen, sauberen Baumwolltuch, das mit einem Objektivreinigungsmittel befeuchtet ist, entfernt werden. ACHTUNG: UNNÖTIGES REIBEN ODER DER GEBRAUCH EINES GROBEN TUCH KÖNNEN AM OBJEKTIV BLEIBENDE SCHÄDEN VERURSACHEN 2. Alle beweglichenTeile des Zielfernrohrs sind auf Dauer geschmiertVersuchen Sie es nicht, sie zu schmieren. 3. Die Außenfläche des Zielfernrohrs bedarf keiner Wartung; Schmutz oder Fingerabdrücke können Sie gelegentlich mit einem weichen Tuch abwischen. 4 Gebrauchen Sie die Objektivkappe so oft wie möglich. AUFBEWAHRUNG Vermeiden Sie es, das Zielfernrohr an überhitzten Orten aufzubewahren (z.B. im Passagierraum eines Fahrzeuges bei heißem Wetter), da hohe Temperaturen die Schmierstoffe und die Dichtungen beeinträchtigen können. Der Kofferraum eines Fahrzeuges, ein Gewehrschrank bzw. ein Schrank sind geeignetere Aufbewahrungsorte für das Zielfernrohr. Lassen Sie das Zielfernrohr niemals an einem Ort liegen, wo direktes Sonnenlicht auf das Objektive oder das Okular treffen könnte. Die Konzentration der Sonnenstrahlen kann Schäden (“Brennglaseffekt”) verursachen.
  • 31. 31 BESCHRÄNKTE LEBENSLANGE GARANTIE Sie erhalten für Ihr Bushnell®-Produkt eine lebenslange Garantie. Die Garantie gilt für den Erstbesitzer und erstreckt sich auf Material- und Herstellungsfehler. Die beschränkte lebenslange Garantie ist Ausdruck unseres Vertrauens in die Materialien und die mechanische Ausführung unserer Produkte und gewährleistet Ihnen einen lebenslangen zuverlässigen Kundendienst. Für den Fall, dass ein Mangel im Rahmen dieser Garantie auftritt, werden wir das Produkt nach unserer Wahl reparieren oder austauschen, vorausgesetzt, dass Sie das Produkt freigemacht zurückschicken. Von dieser Garantie ausgeschlossen sind Schäden, die auf Missbrauch, unsachgemäße Behandlung, Installations- oder War- tungsarbeiten, die nicht von einer autorisierten Bushnell-Kundendienstabteilung vorgenommen werden, zurückzuführen sind. Jeder Rücksendung in die USA oder nach Kanada im Rahmen dieser Garantie müssen folgende Dokumente und Angaben beigefügt werden: 1) Ein Scheck/eine Zahlungsanweisung in Höhe von 10,00 USD zur Abdeckung der Porto-und Bearbeitungskosten 2) Name und Anschrift für die Rücksendung des Produkts 3) Eine Erläuterung des Mangels 4) Kaufbeleg 5) Das Produkt sollte zur Vermeidung von Transportschäden gut verpackt in einem stabilen. Ver sandkarton an die nachstehend aufgeführte Adresse geschickt werden, wobei die Gebühren für die Rücksendung im Voraus zu entrichten sind. Adresse für Rücksendungen in die USA: Adresse für Rücksendungen nach KANADA: Bushnell Outdoor Products Bushnell Outdoor Products Attn.: Repairs Attn.: Repairs 9200 Cody 140 Great Gulf Drive, Unit # B Overland Park, Kansas 66214 Vaughan, Ontario L4K 5W1 Bei Produkten, die Sie außerhalb der Vereinigten Staaten oder Kanadas gekauft haben, erhalten Sie die entsprechenden Informationen zur Garantie von ihrem Händler vor Ort. In Europa erreichen Sie Bushnell auch unter: Bushnell Germany GmbH European Service Centre Mathias-Brüggen-Str. 80 D-50827 Köln GERMANY Tél: +49 221 995568-0 Fax: +49 221 995568-20 Mit dieser Garantie erwerben Sie bestimmte Rechtsansprüche. Sie haben möglicherweise darüber hinaus noch andere Rechte, die von Land zu Land variieren. ©2013 Bushnell Outdoor Products
  • 32. 32 Italiano Regolazione dell’elevazione Tracolla Obiettivo Regolazione della derivazione Oculare Anello di regolazione ingrandimentoOculare con messa a fuoco rapida Anello regolazione obiettivo Congratulazioni per aver scelto un cannocchiale di puntamento Bushnell®. Questo cannocchiale è uno strumento di precisione prodotto con i migliori materiali e assemblato da artigiani esperti che funzionerà senza problemi per molti anni a venire anche nelle condizioni più gravose. In questo libretto sono spiegate le varie caratteristiche del prodotto e le modalità di pulizia e stoccaggio raccomandateperimiglioririsultati.Leggereattentamenteleistruzioniprimadiinstallareedusareilcannocchiale di puntamento. Le foto servono da guida alla nomenclatura e all’individuazione delle parti citate nel testo.
  • 33. 33 MESSA A FUOCO DELL’OCULARE L’oculare è stato ideato per realizzare una messa a fuoco precisa e veloce. Il tempo impiegato dall’oculare per mettere a fuoco l’immagine è inferiore al tempo che occorre all’occhio per compensare eventuali imprecisioni di regolazione dell’apparato. Guardare un oggetto lontano per diversi secondi senza usare il cannocchiale di puntamento. Poi, spostare rapidamente il punto di osservazione e guardare un semplice sfondo con il cannocchiale. Girare in senso orario o antiorario l’oculare con messa a fuoco rapida per regolarlo in base ai propri occhi. Lo schema del reticolo deve essere chiaro e nitido prima che l’occhio possa rimettere a fuoco ciò che osserva. Dopo la regolazione, dare un’altra occhiata rapida all’immagine per ricontrollarla. AVVERTENZA: NON GUARDARE MAI IL SOLE CON IL CANNOCCHIALE DI PUNTAMENTO (O CON ALTRI STRUMENTI OTTICI). CIÒ POTREBBE DANNEGGIARE GLI OCCHI IN MODO PERMANENTE. CENTRAGGIO DEL RETICOLO Il reticolo è stato regolato con cura in corrispondenza del centro ottico del cannocchiale di puntamento presso la fabbrica. Questa impostazione dà all’utente la gamma ideale di regolazione a partire dalla posizione centrale. Le regolazioni successive si fanno per una messa a punto ancora maggiore. È consigliabile controllare il centro dell’asse ottico prima del montaggio. Per farlo basta montare il cannocchiale di puntamento in un blocco a V ben saldo (ad es., una scatola con due fessure). Guardare attraverso il cannocchiale di puntamento, in una normale posizione di osservazione, e ruotarlo con cura. Se il bersaglio si muove in un cerchio superiore a 2,5 cm (1”) dal centro (a 25 metri o 25 iarde) in relazione al punto di incontro dei crocicchi, reimpostare la derivazione e l’elevazione. Togliere i tappi di regolazione. Impostare ogni punto di regolazione a metà e ricontrollare il centraggio. Se il bersaglio continua a ruotare, eliminare il problema con le regolazioni.
  • 34. 34 MONTAGGIO Per garantire la massima precisione del fucile è necessario che il cannocchiale di puntamento Bushnell sia montato correttamente. (Si raccomanda vivamente che le persone inesperte lo facciano montare da un armaiolo competente). Se si decide di montarlo da soli: 1. Usare una montatura d’alta qualità con basi adatte al proprio fucile. Il cannocchiale di puntamento va montato quanto più in basso possibile senza venire in contatto con la canna o la culatta. 2. Seguire attentamente le istruzioni fornite con le montature acquistate. 3. Prima di serrare gli anelli della montatura, guardare attraverso il cannocchiale nella normale posizione di tiro. Regolare il cannocchiale di puntamento (avanti o indietro) fino al punto massimo in avanti (per assicurare il massimo comfort dell’occhio) che permette di vedere il campo visivo totale. AVVERTENZA: SE IL CANNOCCHIALE DI PUNTAMENTO NON È MONTATO SUFFICIENTEMENTE IN AVANTI, POTREBBE FERIRE IL TIRATORE DURANTE IL RINCULO DELL’ARMA. 4. Ruotare il cannocchiale di puntamento negli anelli fino a quando lo schema del reticolo è perpendicolare all’anima e la regolazione dell’elevazione è in alto. 5. Serrare le viti di fissaggio. REGOLAZIONE DEL PUNTAMENTO DELL’ANIMA Il puntamento dell’anima del fucile è la procedura da eseguire preliminarmente per ottenere l’allineamento corretto del cannocchiale di puntamento con l’anima del fucile. Per i migliori risultati si consiglia l’uso di un dispositivo di puntamento (Bore Sighter) Bushnell®. Se non è disponibile, procedere in questo modo: Rimuovere il bullone e mirare con la canna del fucile ad un bersaglio distante 100 metri. Mirare quindi attraverso il cannocchiale di puntamento e portare il mirino a croce sullo stesso punto del bersaglio. Alcune montature sono dotate di regolazioni della derivazione integrate da usarsi, in sede di regolazione del puntamento dell’anima, al posto delle regolazioni interne del cannocchiale di puntamento. Se occorre regolare molto l’elevazione, inserire degli spessori sotto le basi della montatura.
  • 35. 35 Regolazione dell’elevazione Regolazione della derivazione MESSA A PUNTO La correzione finale del puntamento del fucile dovrebbe essere fatta con le munizioni sulla base della distanza di tiro prevista. Se si prevede di tirare a distanze brevi, fare la messa a punto su 100 metri (o 100 iarde) circa. Nel caso di tiro su distanze lunghe, su selvaggina di grosse dimensioni, la maggior parte dei tiratori esperti fa la correzione del puntamento a 100 metri con il fucile sollevato di 7,6 cm (3”). Eseguire una serie di tre tiri di prova per fare una media del punto d’impatto. REGOLAZIONE DELLA DERIVAZIONE E DELL’ELEVAZIONE Il cannocchiale di puntamento Bushnell® è dotato di dispositivi di regolazione della derivazione e dell’elevazione, a scatto udibile, attivabili con un dito. 1. Rimuovere i coperchietti dai dispositivi di regolazione della derivazione e dell’elevazione. 2. Afferrare la barra di regolazione e ruotarla verso “UP” (Su)(e/o “R”) come indicato dalle frecce. Ogni “clic” o incremento dell’anello della scala di regolazione modifica l’impatto del proiettile di 1/4 di pollice di minuto d’angolo. 1/4 di pollice di minuto d’angolo (MOA) corrisponde a 1/4 di pollice (0,63 cm) a 100 iarde (91 m), 1/2 pollice (1,2 cm) a 200 iarde (183 m), 3/4 di pollice (1,9 cm) a 300 iarde (274 m), ecc. (2.1mm di pollice a 15.2M cannocchiale per pistola ad aria compressa)
  • 36. 36 AZZERAMENTO DELL’ANELLO DELLA SCALA DI REGOLAZIONE (Non disponibile su tutti i modelli) Quest’operazione non è necessaria. Tuttavia, per riferimenti futuri, è consigliabile riallineare le indicazioni di azzeramento sugli anelli della scala di regolazione con i punti dell’indice. 1. Con un cacciavite da gioielliere, allentare di circa 1/2 giro la brugola situata sulla scala di regolazione. Fare attenzione a non disturbare lo zero“perdendo”un clic o due mentre si allentano le viti. 2. Ruotare l’anello della scala di regolazione (che adesso dovrebbe ruotare liberamente) per allineare“O”con il puntino dell’indice. 3. Riavvitare la vite della scala di regolazione e reinstallare le manopole di regolazione della derivazione e dell’elevazione. REGOLAZIONI DELLA POTENZA VARIABILE Per cambiare l’ingrandimento, è sufficiente ruotare l’anello selettore della potenza e allineare il numero desiderato, sulla scala della potenza, con il puntino dell’indice. Durante gli spostamenti o l’inseguimento della selvaggina, regolare il cannocchiale di puntamento variabile sulla potenza minima. In tal modo, si dispone del più ampio campo visivo per colpi veloci a distanza ravvicinata. Riservare le potenze più alte per colpi di precisione a grandi distanze. AVVERTENZA: NON USARE MAI IL CANNOCCHIALE DI PUNTAMENTO COME BINOCOLO O CANNOCCHIALE D’OSSERVAZIONE. SI POTREBBE INAVVERTITAMENTE PUNTARE IL FUCILE A DELLE PERSONE. OBIETTIVO REGOLABILE Questo articolo (se presente sul proprio cannocchiale) permette di mettere a fuoco l’oggetto con precisione e, contemporaneamente, di regolare la distanza senza parallasse da 45,7 metri (50 iarde) all’infinito. Per cambiare la messa a fuoco in relazione alla distanza, ruotare l’anello di regolazione dell’obiettivo e allineare il numero con il punto dell’indice della distanza. Un metodo alternativo consiste nel guardare attraverso il cannocchiale di puntamento e ruotare l’anello di regolazione dell’obiettivo fino a quando il bersaglio, a qualsiasi distanza /range, non sia perfettamente a fuoco.
  • 37. 37 MANUTENZIONE Il cannocchiale di puntamento Bushnell è uno strumento eccezionalmente robusto, ma è comunque uno strumento di precisione che merita una cura ragionevolmente attenta. 1. Per pulire le lenti occorre, per prima cosa, eliminare polvere e detriti soffiandovi sopra o usando una spazzola morbida per lenti. Le impronte delle dita e le tracce dai lubrificanti possono essere rimosse con un fazzoletto per la pulizia delle lenti oppure con un panno morbido inumidito con un liquido detergente per lenti. AVVERTENZA: SFREGAMENTI INUTILI O L’USO DI PANNI RUVIDI POSSONO DANNEGGIARE IN MODO PERMANENTE I RIVESTIMENTI DELLE LENTI. 2. Tutte le parti mobili del cannocchiale sono lubrificate in modo permanente. Non lubrificarle. 3. La superficie esterna del cannocchiale non necessita di manutenzione, tranne l’occasionale pulizia con un panno morbido per eliminare impurità e ditate. 4. Montare i coperchietti per obiettivi con la massima frequenza possibile. MAGAZZINAGGIO Non conservare il cannocchiale in luoghi molto caldi come, ad esempio, il cruscotto dell’auto in estate. Le temperature elevate possono influire sui lubrificanti e sui sigillanti. È meglio riporre il prodotto nel bagagliaio del veicolo, in una fuciliera o in un armadio. Non lasciare mai il cannocchiale in luoghi che permettano l’ingresso diretto dei raggi solari nell’obiettivo o nella lente dell’oculare. La concentrazione dei raggi solari può essere dannosa (effetto specchio ustorio).
  • 38. 38 GARANZIA LIMITATA A VITA Si garantisce che questo prodotto Bushnell® sarà esente da difetti di materiale e fabbricazione finché rimarrà in possesso del proprietario originale. La presente garanzia limitata a vita esprime la nostra fiducia nei materiali e nella fabbricazione dei nostri prodotti e l’assicurazi- one di anni e anni di servizio affidabile. In caso di difetto durante il periodo di garanzia, a nostra discrezione ripareremo o sostituiremo il prodotto purché sia restituito franco destinatario. Sono esclusi dalla garanzia eventuali danni causati da abuso, maneggiamento improprio, installazione o manutenzione eseguiti da persone non autorizzate dal servizio di assistenza Bushnell. A un prodotto restituito negli Stati Uniti o in Canada e coperto da questa garanzia occorre allegare quanto segue. 1) Assegno/ordine di pagamento per l’importo di 10 $US per coprire i costi di spedizione. 2) Nome e indirizzo da utilizzare per la restituzione del prodotto. 3) Una spiegazione del difetto. 4) Scontrino. 5) Il prodotto deve essere imballato in una scatola robusta, per prevenire danni durante il trasporto, e va spedito franco destinatario a uno dei seguenti indirizzi. Recapito negli Stati Uniti: Recapito in Canada: Bushnell Outdoor Products Bushnell Outdoor Products Attn.: Repairs Attn.: Repairs 9200 Cody 140 Great Gulf Drive, Unit # B Overland Park, Kansas 66214 Vaughan, Ontario L4K 5W1 Per prodotti acquistati fuori degli Stati Uniti o del Canada, rivolgersi al rivenditore per le clausole pertinenti della garanzia. In Europa si può anche contattare la Bushnell a questo numero: Bushnell Germany GmbH European Service Centre Mathias-Brüggen-Str. 80 D-50827 Köln GERMANY Tél: +49 221 995568-0 Fax: +49 221 995568-20 Questa garanzia dà specifici diritti legali. Eventuali altri diritti variano da una nazione all’altra. ©2013 Bushnell Outdoor Products
  • 39.
  • 40. ©2013 Bushnell Outdoor Products For further questions or additional information please contact: Bushnell Outdoor Products 9200 Cody, Overland Park, Kansas 66214 (800) 423-3537 • www.bushnell.com