
Recommended
More Related Content
Viewers also liked
Viewers also liked (19)
Similar to Basics of Human Portraiture for Middle School Students
Similar to Basics of Human Portraiture for Middle School Students (20)
Recently uploaded
Recently uploaded (20)
Basics of Human Portraiture for Middle School Students
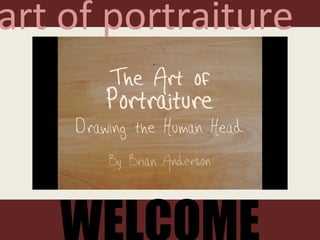
- 1. WELCOME art of portraiture
- 2. PROJECT introduction purpose Introduce students to the basics of human portraiture. Enhance their ability to draw the human face with correct proportions and features.
- 3. ADDIE analysis target audience Middle school students with limited art experience
- 4. ADDIE analysis desired outcomes Get away from “cartoon” faces. Understand the basics of portraiture Successfully draw the outline of the human face and its features
- 5. ADDIE analysis constraints Students lack classical training Students exude bad drawing habits Students lack faith in their drawing ability
- 6. ADDIE analysis delivery Interactive Web-based lesson Interactive PowerPoint lesson WebQuest
- 7. ADDIE analysis pedagogy Encourage Active Learning Emphasize Time on Task Communicate High Expectations
- 8. ADDIE design strategy Legible and Visually Organized Navigation Provided for Ease of Use Presented in a Logical Format
- 9. ADDIE design instruction Cognitive Affective Psychomotor
- 10. ADDIE development design Storyboard Layout Interactivity
- 12. formative Continual Review of Content and Functionality Target Audience Testing ADDIE evaluation
- 13. summative Students will submit a portrait for review ADDIE evaluation
- 14. PROJECT presentation demonstration http://www.slideshare.net/ ander2bc/the-art-of-portraiture
- 40. survey http://surveymonkey.com/s/52LQL8c Art of Portraiture Survey PEER evaluation
- 41. findings All activities, tasks and assessments align with learning objectives and standards. Information is organized in a clear, logical way. The assessment appropriately assessed students’ ability to meet the objectives. The graphics and animation assist in presenting an overall theme and enhance understanding of concepts, ideas and relationships. PEER evaluation
- 42. findings All activities, tasks and assessment directions are written clearly. The project is easy to navigate. The project improved your ability to draw a human face. This is a valuable resource for teaching. PEER evaluation
- 43. This product successfully introduces students to the basics of portraiture. This product shows to enhance students’ ability to draw the human face with correct proportions and features. SUMMARY conclusion
Editor's Notes
- Welcome to my presentation regarding my project entitled, “The Art of Portraiture.” I decided to produce this resource in an attempt to improve my students knowledge and ability to draw a human head.
- The basics include head shape, proper proportion, and correct placement of facial features like the eyes, nose, mouth, ears, neck and hair.
- My target audience are seventh grade students, ages 11-13, with limited art experience. No art classes K-4 with 5-6 Art equal to one term for both years.
- Students draw heads with too round or square shapes with incorrect features (i.e. mouth without lips), and inappropriate placement of features (i.e. eyes in forehead). Basics of portraiture, again, include correct head shape and proportion – head width equals 2/3 its height. Correct placement of all features with realistic outline.
- Students lack art experience during the age when both their motor skills and creative thinking are developing. Bad habits come from copying popular cartoon characters and anime without a basic understanding of illustration principles. Their lack of experience and know-how lead students to think they’re not capable of being good artists.
- I selected Interactive PowerPoint as my means of delivery because I wanted an all inclusive product not dependent on Internet access or outside resources. I also intend to use this material in two ways: in a computer lab, which I have daily access to, for independent student work, as well as projected on my Promethean Board for class review.
- Students take on an active role in their education utilizing this resource. Students are permitted to proceed at their own pace. As with all my assignments, I have high expectations for all my students.
- I wanted to steer away from sophisticated language so as not to confuse or mislead my students. I also wanted a clean presentation that would make it easier to focus on the intended message for each slide. Buttons are provided to give the user freedom of movement within the project. - They can move anywhere within this program. The project starts from the beginning – a white piece of paper – and progresses step-by-step through the entire process of drawing a portrait.
- Students must process the information presented and apply this knowledge to their own work. Students will be evaluating their experience working with this resource (i.e. whether they like or dislike it.) Students will have the opportunity to improve the motor skills required of drawing.
- I began the process by mapping out the entire procedure in detail before starting. This, of course, was to ensure that I did not leave out pertinent information and guarantee proper sequencing of events. Again, I wanted a design that was legible and organized. Proper storyboarding was essential for ensuring correct navigation within the program.
- This project will be implemented with an already established unit involving sculpture of the human form and portraiture. This past trimester, seventh-grade art students completed a unit focused on the gods of mythology. Above are three examples of student work from that project. Students are required to select a subject and draw a form for their selection that will be carved from foam, plastered, and painted. In addition, students rendered a portrait of their subject and created a tin-foil relief shield (pictured next to the figure).
- During the entire assembly of this project, I was continually evaluating it for both accuracy and completeness. Fortunately, I was allowed an opportunity to share an early version of this resource with students. From their experience with the program, I received invaluable feedbox such as the size of my original portrait. Initially, I had the rectangle drawn quite large (about one-half inch away from the edges of the paper) and students simply copied what I had done without reading the directions first. Because the project was incomplete, I had only provided instructions for one eye, not both. Students had a difficult time flipping the directions in their mind. They needed to “see” what I was asking them to do. Therefore, I was diligent in providing clear steps for all features.
- Since art is subject and both talent and ability vary so greatly from person to person, I felt that a traditional review of their work was most appropriate.
- This is the website where anyone with Internet access may view this project.
- Alright, this is my title slide for my project. From here I take the time to explain the navigational system.
- From the table of contents, students may elect where they want to go next. Of course, for first-time users it is strongly suggested they progress in order. I, however, allow for choice in the event that a student chooses to revisit a portion of the resource for whatever purpose.
- In Chapter One, I show what resources are needed to complete this project. They are asked to draw along with the program. Also evident in this view are the navigational buttons. The four in the lower left corner allow for advancement – slide-to-slide or chapter-to-chapter. In the opposite corner is the “Home” button that allows for the user to return to the Table of Contents at any moment.
- Before beginning the instruction, I reveal to the students the finished product. If they follow all the steps closely and accurately, their drawing should resemble this one quite closely.
- In the following slides, I reveal a glimpse of the process involved in drawing a human head. If you would like to see the complete process please visit http://www.slideshare.net/ander2bc/the-art-of-portraiture . In Chapter Two, students begin by establishing a rectangle (ratio 2:3) and then dividing the space equally with a vertical and horizontal line. The human face is symmetrical and balanced on the left and the right. This grid allows us to ensure we maintain this symmetry.
- In Chapter Three, students are shown how to complete the outline of the head with smooth, gradual curves. The horizontal midline is divided equally into fifths because the human head is “five-eyes” wide. Eyes are then drawn in the areas marked 2 and 4. It is within this chapter that a model for the human head is created.
- After drawing the eyes, students are next directed to the nose. Lines are dropped from the inside corners of both eyes to establish the width of the nose. A new horizontal line has been added midway between the eye line and the bottom of the box. This line marks the end of the nose. Diagonal lines are drawn to box in the area where the realistic nose will later be drawn. Curved lines are added to mark the orbital bones.
- Students are then directed to add yet another horizontal line that rests on top of the eyes. Using this line and the nose line, the area for the ears can be drawn.
- To define the area for the mouth, two more horizontal lines are added. The first is halfway between the nose line and the bottom of the box while the second is drawn midway between the new mouth line and the nose line. Two vertical lines are then dropped from the center of the eyes. This marks the width of the mouth.
- After erasing all the original and extra lines no longer needed, students are left with a drawing, hopefully, similar to this one.
- In Chapter Four, students move on to drawing much more realistically. Important to note, I have zoomed in on key areas to help with clarity. For the eyes, we begin with the right upper lid.
- This resource shows students how to complete an eye step-by-step. This slide shows the results of many of those steps. After drawing the upper lid, students then draw in sequence: the lower lid, the inside corner of the eye, the iris, and then (as shown here) the pupil. Immediately following the completion of this eye, students are shown the exact same steps again, only this time for the other eye.
- Two important aspects of eyebrows to note are direction and concentration of lines. The placement of the eyebrow should be near the curved line indicating the location of the orbital bone.
- The nose is drawn without the use of shapes. Only curved and wavy lines are used for assembly. Here we draw the tip of the nose with a wavy line and both nostrils with curved line.
- This line indicates the lateral edge of the nose.
- These extra lines add more dimension.
- Lips are oftentimes the most difficult for students. This process reveals to them that mouths can be drawn with as little as three lines. Here, the first defines where the upper and lower lips meet.
- Another line is added to finish the upper lip. A note is made on an accompanying slide indicated to pay attention to the central dip in the lip.
- Here we see a finished set of lips with some detail added.
- Like the lips, ears can be drawn with three lines. The first marks the overall shape.
- This second reveals the opening of the ear.
- Here is a completed hear with the third and final line showing the inside edge of the outside ring of the ear.
- Students then draw a line confirming the edge to their drawn face.
- Hair is another difficult aspect of portraiture. The important points to note, like with the eyebrows, are direction and concentration of line.
- Just like when the process began, a version of the finished product is revealed to students for them to evaluate their own work against.
- To assist in conducting peer evaluations, I produced and posted a short survey using surveymonkey.com. The IP address listed above is the location for the actual survey posted. I had two evaluators – an art teacher and an accountant.
- These are the first four statements of the survey evaluators are asked to rate. Both strongly agreed to all these statements.
- These are the last four statements. Again, both evaluators felt the resource greatly fulfilled these requirements.
- Indeed, I found this resource to be beneficial. For everyone (both evaluators and those students from the early test group) who used the program and followed its directions, their drawings showed significant improvement. In fact, the accountant testified she had no art talent and by using this resource she was able to draw a realistic human face.