SlideShare ist ein Scribd-Unternehmen logo
1 von 160
Downloaden Sie, um offline zu lesen
Leading Safety Standards Superior Ease of Use Reduced Cost of Ownership
	
Rotary Evaporator Hei-VAP Precision
Operating manual must be read before initial start-up.
Please follow the safety instructions provided.
Please keep for future reference.
	
Rotationsverdampfer Hei-VAP Precision
Betriebsanleitung vor Erstinbetriebnahme unbedingt lesen.
Sicherheits­hinweise beachten.
Für künftige Verwendung aufbewahren.
Operating Manual	 Page 2
Original-Betriebsanleitung	 Page 82
Intelligent
Evaporation
Contents
InhaltsverzeichnisAbout this Document	 4
Version and variants............................................................................................4
About this manual...............................................................................................4
Terms and signs used...........................................................................................5
Safety Instructions / Consignes de sécurité	 6
General safety instructions / Consignes de sécurité générales....................................6
EU Declaration of Conformity / Déclaration de conformité UE..............................6
Intended use / Utilisation conforme.................................................................7
Installation, Electrical safety / Installation, sécurité électrique............................7
Personnel qualification / Qualification du personnel............................................8
Operating company’s obligations / Obligations de la société exploitante......................8
Installation site / Lieu de montage..................................................................8
Modifications to the device / Modifications de l´appareil.....................................9
Personnel safety / Sécurité du personnel..........................................................9
Safety during use / Sécurité durant l’utilisation......................................................10
Disposal / Mise au rebut.....................................................................................11
Device Description	 12
Device overview................................................................................................12
Hei-VAP Precision: Overall view....................................................................12
Hei-VAP Precision: Control panel...................................................................13
Start-Up	14
Connect/disconnect power cord...........................................................................14
Switch unit on and off........................................................................................14
Heating bath and lift..........................................................................................15
Menu navigation................................................................................................18
Setting the language..........................................................................................19
Operation	20
Adjust flask rotation...........................................................................................20
Setting bath temperature ..................................................................................21
Calculating the vapor temperature ......................................................................22
Process modes..................................................................................................23
Timer functions.................................................................................................28
Distillation parameters: Favorites.........................................................................29
Gradient function...............................................................................................30
Softkeys...........................................................................................................32
More functions..................................................................................................33
Setup..............................................................................................................34
Menu topology..................................................................................................35
Evaporating and receiving flask...........................................................................39
Dispensing sample.............................................................................................41
Ventilation........................................................................................................41
Operating Manual
Contents
Cleaning and Maintenance	 42
Cleaning...........................................................................................................42
Maintenance.....................................................................................................43
Troubleshooting	44
Malfunctions and resolution.................................................................................44
Overheat protection: reset...........................................................................49
Assembly	50
Electrical connections.........................................................................................50
Connexions Electriques.......................................................................................51
Mount device....................................................................................................52
Assembly parts...........................................................................................52
Transportation lock.....................................................................................53
Heating bath..............................................................................................54
Vapor tube.................................................................................................54
Condenser.................................................................................................56
Inlet tubes.................................................................................................61
Vapor temperature sensor, AUTOaccurate sensor.............................................62
Evaporating flask angle and depth ................................................................62
Control panel.............................................................................................64
Connecting peripheral devices.............................................................................65
Connect cooling water.................................................................................65
Mount tubes...............................................................................................65
Connect vacuum.........................................................................................66
Additional Accessories........................................................................................73
Guard hood................................................................................................73
Safety shield..............................................................................................73
Disassembly and Storage	 74
Dismantling, transportation and storage...............................................................74
Dismantling...............................................................................................74
Transportation and storage..........................................................................75
Accessories and Spare Parts	 76
Scope of delivery...............................................................................................76
Accessories.......................................................................................................76
Attachments	77
Technical data...................................................................................................77
Solvent data..............................................................................................78
Service	79
Contact / Technical Service.................................................................................79
Warranty..........................................................................................................80
Confirmation of condition of unit..........................................................................81
Déclaration de non-opposition.............................................................................82
Safety Instructions
4
About this Document
 Version and variants
Version
This manual describes the function, operation and maintenance of the Hei-VAP Precision
evaporator.
Version Alteration date
1.3 01/2018
Variants
The units are available in different configurations. Certain features and functions apply to
specific configurations only. The varieties are documented in this manual.
 About this manual
This operating manual is a component of the device described here.
➜➜ Please read this manual carefully and obey all safety and warning
notices.
➜➜ Ensure that every operator reads this manual.
➜➜ Ensure that this manual is accessible for every operator.
➜➜ Pass on the operating manual to the subsequent owner.
For the current version of this operating manual in pdf format, please
go to:
http://www.heidolph.com/Support/Operation Manuals/Rotary
Evaporators/Hei-VAP Series/Hei-VAP Precision.
In addition, please observe the regional regulations.
5
Safety Instructions
 Terms and signs used
In this manual you will find standardized terms and signs to warn you of possible dangers
or give important hints. Please take special notice to these signs to avoid personal injury
or damage to the appliance.
The following terms and type of signs (basic drawing elements) are used:
Symbol Additional term / Description
Warning signs/
Pictogrammes
d’avertissement
The yellow triangle indicates hazardous situations. It is used in
combination with the following terms:/
Le triangle jaune indique les situations dangereuses. Il est utilisé en
association avec les termes suivants:
DANGER / DANGER:
Indicates a hazardous situation which, if not avoided, will result in
irreversible injury or death./
Indique une situation dangereuse qui, si elle n’est pas évitée,
entraîne une blessure irréversible certaine ou la mort.
WARNING / AVERTISSEMENT:
Indicates a hazardous situation which, if not avoided, could result in
serious injury or material damage./
Indique une situation dangereuse qui, si elle n’est pas évitée,
pourrait entraîner une blessure ou des dommages matériels graves.
CAUTION / ATTENTION:
Indicates a hazardous situation which, if not avoided, may result in
a minor injury or material damage./
Indique une situation dangereuse qui, si elle n’est pas évitée, peut
entraîner une blessure ou des dommages matériels légers.
Mandatory
signs
Must do:
The blue circle indicates important information. Please obey to avoid
property damage.
Other signs used
Symbol Description
➜ Handling instruction, action required
✓ Result of action
▪
▪
▪
List of information
a.
b.
c.
List of variants
Safety Instructions
6
Safety Instructions / Consignes de sécurité
 General safety instructions / Consignes de
sécurité générales
EU Declaration of Conformity / Déclaration de
conformité UE
This device complies with the following EC-Directives*:
▪▪ 2006/42/EC Machinery Directive
▪▪ 2014/30/EU Electromagnetic Compatibility Directive
*Also see attachment „EU Declaration of Conformity”.
Cet appareil est conforme aux directives EU suivantes *:
▪▪ 2006/42/CE Directive sur les machines
▪▪ 2014/30/UE Directive sur les compatibilités électromagnétiques
*Voir les pièces attachées „Déclaration de Conformité CE”
The device has been constructed according to state-of-the-art technology and recog-
nized safety regulations. However, risks may still arise during installation, operation and
maintenance./
L’appareil a été construit selon les règles de l’art de la technologie et selon les règlements
de sécurité reconnus. Toutefois, les risques peuvent encore se poser lors de l’installation,
l’exploitation et la maintenance.
➜➜ Please ensure the operating manual is available at all times./
S’il vous plaît assurez-vous que le manuel d’utilisation soit disponible à tout moment.
The device may only be used under the following circumstances:/
L’évaporateur rotatif doit être utilisé uniquement :
➜➜ Only operate the device, if it is in full working order.(
Dans des conditions techniques parfaites.
➜➜ Ensure all operators of the device possess the necessary safety and risk awareness./
Assurez-vous que l’utilisatrice / l’utilisateur possède les connaissances nécessaires
quant à la sécurité et aux dangers.
➜➜ Operate the device according to the instructions stipulated in this manual only./
Dans des conditions d’utilisation conformes aux instructions du manuel uniquement.
➜➜ If there is something you do not understand, or certain information is missing, ask
your manager or contact the manufacturer./
Demandez à votre responsable ou au fabricant si vous ne comprenez pas ou ne
trouvez pas certaines informations.
➜➜ Do not do anything on the device without authorization./
Ne modifiez en rien l’appareil sans autorisation.
➜➜ Only use the device according to its intended use./
Lorsque les instructions de ce manuel d’utilisation sont respectées.
7
Safety Instructions
Intended use / Utilisation conforme
The device is intended for use by trained and authorized personnel only./
L’appareil ne doit être exploité que par du personnel dûment formé et autorisé.
The device is suitable for the
following use:/
L’appereil est appropriée
pour:
▪▪ Distillation to separate substances/
Distillation, évaporation
▪▪ Concentration / Concentration
▪▪ Crystallization / Crystallisation
▪▪ Powder drying / Séchage de poudre
Operation of the device
is suitable in one of the
following locations:/
L’operation de l’appereil est
appropriée dans laboratoire
de:
▪▪ Chemistry / Chimie
▪▪ Pharmacy / Pharmacie
▪▪ Biology / Biologie
▪▪ Environmental analytics / Analyse environment
▪▪ Basic research / Recherche fondamentale
▪▪ Any other research laboratory / autre recherche
laboratoire
Improper use / Utilisation non autorisée
Any use which deviates from the device‘s intended use is considered to be improper. The
manufacturer does not accept liability for any damages resulting from non-permitted
uses. The risk is carried by the operator alone./
Toute utilisation ne correspondant pas à l’utilisation conforme de l’appareil est considérée
comme une utilisation non autorisée. Le fabricant décline toute responsabilité quant aux
éventuels dommages. L’utilisateur en assume l’entière responsabilité.
Installation, Electrical safety / Installation, sécurité
électrique
▪▪ The device may only be connected when the mains voltage corresponds to the infor-
mation on the rating plate of the unit./
Veuillez vérifier, avant le raccordement de l’appareil au secteur, que la tension du
secteur correspond aux indications inscrites sur la plaque caractéristique.
▪▪ The mains connection must be accessible at all times./
Connecteur et prise doivent être accessibles à tout moment.
▪▪ The house wiring must be equipped with a RCD circuit breaker (Residual Current
protective Device), that will cut off the device from the mains in the event of a fault./
L´installation électrique du laboratoire doit être équipée d´un disjoncteur RCD
(disjoncteur à courant différentiel) susceptible de couper l´appareil du réseau
électrique en cas disfonctionnement.
▪▪ Repairs may only be performed by a qualified electrician./
Les réparations de toute nature sont autorisées uniquement par un professionnel
qualifié.
▪▪ Never operate the unit with a damaged power cord./
N’utilisez pas l’appareil avec un câble électrique endommagé.
▪▪ Always turn the device OFF and disconnect mains power before performing any
maintenance or service./
Éteignez toujours l’appareil et débranchez l’alimentation avant l’entretien ou la
réparation.
Safety Instructions
8
Personnel qualification / Qualification du personnel
▪▪ The device may only be operated by qualified persons./
L’appareil doit être utilisé uniquement par le personnel qualifié.
▪▪ The device may only be operated by individuals who have been instructed in its
proper use by qualified persons./
L’appareil doit être utilisé uniquement par les personnes spécialement formées par du
personnel qualifié.
▪▪ The device may only be operated and maintained by persons who are of legal age./
L’appareil doit être utilisé et entretenu uniquement par des personnes majeures.
▪▪ Other personnel may only work with the unit under continuous supervision of an
experienced qualified operator./
D’autres personnes peuvent utiliser l’appareil uniquement sous surveillance continue
du personnel qualifié.
▪▪ This manual must be read and understood by all persons working with the device. The
personnel must receive special safety instructions in order to guarantee responsible
and safe work procedures in the laboratory./
Ce manuel d’utilisation doit être lu et compris par toutes les personnes qui travaillent
près de l’appareil Le personnel doit avoir reçu des consignes de sécurité particulières
afin d’assurer la responsabilité et la sécurité des procédures de travail dans le
laboratoire.
 Operating company’s obligations /
Obligations de la société exploitante
Installation site / Lieu de montage
▪▪ The device must be positioned in a suitable location./
L’appareil doit être installé dans un endroit approprié.
▪▪ The device must be installed sufficiently stable on a temperature resistant surface./
L’appareil doit être monté sur une surface suffisamment stable et résistante à de
fortes températures.
▪▪ Do not install the device in the vicinity of highly inflammable or explosive
substances./
Aucune substance inflammable ou explosive ne doit être entreposée à proximité de
l’évaporateur.
▪▪ Installation and operation of the device is only permitted in facilities which are fitted
with the appropriate laboratory equipment (e.g. with air extraction units)./
L’appareil peut être utilisé uniquement dans des lieux disposant de l’équipement de
laboratoire approprié (par ex. des hottes d’aspiration).
▪▪ Only operate the device (depending on the medium used) in conjunction with an
extractor hood (at least 10-fold air change, with error monitoring), see DIN EN 14175
and DIN 12924./
N´utiliser l´appareil (selon le type de substance employée) qu´en le combinant avec
une hotte aspirante (renouvellement de l´air x10, avec contrôle des erreurs), voir les
normes DIN EN 14175 et DIN 12924.
▪▪ The device may only be operated in enclosed spaces and under the following environ-
mental conditions:/
L’appareil ne peut être utilisé que dans un espace clos et dans les conditions
environnementales suivantes :
9
Safety Instructions
Ambient temperature/
température d’environment
5 - 31 °C at 80 % relative humidity/
5 - 31 °C pour 80 % d’humidité relative de l’air
32 - 40 °C decrease linearly
till max. 50 % relative humidity/
32 - 40 °C décroissant de façon linéaire
jusqu’à max. 50% d’humidité relative de l’air
Installation altitude/
Altitude d’installation
0 - 2,000 m (6,500 feet) height above sea level/
0 - 2000m au-dessus du niveau de la mer
Degree of pollution/
Degré de pollution
2
Overvoltage category/
Catégorie de surtension
II
▪▪ If the equipment is used in corrosive atmospheres, the service life of the equipment
will decrease based on concentration, volumes, and frequency of exposures to these
corrosive materials, for example concentrated Hydrochloric Acid (HCl).
▪▪ If the equipment is used in corrosive atmospheres, the service life of the equipment
will decrease based on concentration, volumes, and frequency of exposures to these
corrosive materials, for example concentrated Hydrochloric Acid (HCl)./
Lorsque l´appareil est utilisé dans une atmosphère corrosive, sa durée de vie va
diminuer en fonction de la concentration, du volume et de la fréquence d´exposition
aux matériaux corrosifs (par exemple de l´acide chlorhydrique HCl concentré).
Depending on the medium used / Selon le type de support utilisé:
➜➜ Only operate the device in conjunction with an extractor hood (at least 10-fold air
change, with error monitoring), see DIN EN 14175 and DIN 12924./
Assurez-vous que l’évaporateur rotatif est utilisé uniquement lorsqu’il est raccordé à
une hotte d’aspiration, renouvellement de l’air x10, avec contrôle des erreurs (voir les
normes DIN EN 14175 et DIN 12924).
Modifications to the device / Modifications de
l´appareil
▪▪ No unauthorized changes may be made to the unit.
▪▪ No parts may be used which have not been approved by the manufacturer.
▪▪ Unauthorized changes result in the EC Declaration of Conformity loosing its validity,
and the appliance may no longer be operated.
▪▪ The manufacturer is not liable for any damage, danger or injuries that result from
unauthorized changes or from operating the unit other than as described in this
manual.
Personnel safety / Sécurité du personnel
➜➜ Ensure that only qualified personnel operate the device./
Assurez-vous que l’appareil est utilisé uniquement par du personnel qualifié.
➜➜ Observe the following regulations: / Respectez les directives suivantes :
▪▪ Laboratory guidelines / Directive concernant les laboratoires
▪▪ Accident prevention regulation/
Règlementations relatives à la prévention des accidents
▪▪ Ordinance on hazardous substances/
Ordonnance relative aux substances dangereuses
▪▪ Other generally accepted rules of safety engineering and occupational health/
Safety Instructions
10
Diverses règlementations généralement reconnues, relatives à la sécurité et la
médecine du travail
▪▪ Local regulations / Dispositions locales
 Safety during use / Sécurité durant
l’utilisation
➜➜ Wear the appropriate protective clothing when working on the device (protective
glasses and, if necessary, safety gloves)./
Porter des vêtements de protection appropriés (lunettes de protection et gants de
protection, le cas échéant) lors de l’utilisation de l’évaporateur rotatif.
➜➜ Do not use the device in potentially explosive areas. The device is not protected
against explosion. There is no explosion or ATEX protection available./
Ne pas utiliser l’appareil dans des zones à risque d’explosion. L’appareil n’est pas
protégé contre les explosions. Il ne possède pas de protection conforme aux normes
Ex ou ATEX.
➜➜ Do not use distillation material where the distillation residue might be explosive./
Ne pas utiliser de matière à distiller dont les résidus de distillation peuvent être
explosibles.
➜➜ Do not carry out work with naked flames in the vicinity of the device (risk of
explosion)./
Ne produire aucune flamme nue près de l’évaporateur rotatif (danger d’explosion).
➜➜ Do not apply excess pressure on the device./
Ne pas exercer de pression trop importante sur l’appareil.
➜➜ Do not exceed the flow rate of 1 m/s while sucking in liquids with flammable materials
(electrostatic charge; risk of ignition)./
Ne pas dépasser un débit de 1 m/s lors de l’aspiration de liquides contenant des
substances inflammables (charge électrostatique ; danger d’inflammation).
➜➜ Eliminate the production of gases classified in explosion group IIC during distillation
by materials or due to chemical reactions, e.g. hydrogen./
Éliminer la formation de gaz du groupe d’explosion IIC lors de manipulation de
matières et de réactions chimiques, par ex. l’hydrogène.
➜➜ Do not operate or assemble devices in the vicinity which are emission or radiation
sources (electromagnetic waves) for the frequency range (3*1011
Hz to 3*1015
Hz)./
Ne monter ni mettre en service aucun appareil qui représente une source d’émission
ou de radiation (ondes électromagnétiques) pour la gamme de fréquence
(3*1011
Hz à 3*1015
Hz).
➜➜ Do not operate or assemble appliances in the vicinity of the device which constitute
emission or radiation sources for ionizing radiation or in the ultrasonic range./
Ne monter ni mettre en service aucun appareil qui représente une source d’émission
ou de radiation pour les ondes ionisantes ou dans le domaine des ultrasons.
➜➜ Do not operate the device where adiabatic compression or shock waves might occur
(shock wave combustion)./
Ne pas mettre en service l’appareil alors qu’une compression adiabatique ou onde de
choc ne peuvent être générées (inflammation d’ondes de pression).
➜➜ Do not use materials which pose a potential risk of uncontrolled energy release which
might result in pressure increase (exothermic reaction; spontaneous combustion of
dusts)./
Ne pas utiliser des matières impliquant un danger potentiel de libération d’énergie
non maîtrisée, causant une augmentation de la pression (réaction exothermique ;
combustion spontanée de poussières).
11
Safety Instructions
➜➜ Verify that the basic device is only plugged to or unplugged from the heating bath if
the main switch is switched off and/or the main power supply is disconnected./
S’assurer que l’appareil de base n’est branché au bain marie ou débranché du bain
marie que lorsque l’interrupteur est fermé et/ou que le raccordement de l’appareil est
débranché.
➜➜ Only use suited heat transfer fluid./
Utiliser uniquement des fluides caloporteurs appropriés.
➜➜ Do not adjust the maximum excess pressure of the coolant to more than 2 bar in the
condenser./
Ne pas ajuster la surpression maximale du fluide réfrigérant à plus de 2 bar dans le
condensateur.
➜➜ Glassware may not be operated with pressure difference above 2 bar./
L’écart entre la pression interne et externe des objets en verre ne doit pas être
supérieur à 2 bar.
➜➜ Connect all cables and tubes correctly and locate them outside the operating and
danger zone./
Raccorder tous les câbles et conduites correctement et les placer hors de la zone
d’exploitation et de danger.
➜➜ Avoid putting pressure on the display when you are not operating the device./
Éviter d’appuyer sur l’écran lorsque l’appareil n’est pas en marche.
➜➜ Do not spill liquids over the device or any parts of it./
Ne pas renverser de liquide sur l´appareil (ou sur une pièce quelconque appartenant
à l´appareil)
➜➜ Remove any accidentally spilled liquids immediatly./
Essuyer immédiatement tout liquide répandu accidentellement sur l´appareil.
➜➜ Eliminate errors immediately./
Les anomalies doivent être immédiatement résolues.
➜➜ Do not use abrasive material to clean the glass surface. Only wipe with damp cloth./
Utiliser uniquement des tissus humidifiés pour nettoyer les surfaces en verre et
jamais un tissu abrasif.
➜➜ Always switch the mains off after use./
Toujours éteindre l’appareil après utilisation.
 Disposal / Mise au rebut
➜➜ Check the device components for hazardous substances and solvents./
Contrôler si les composants de l’appareil sont contaminés par des substances et des
solvants dangereux.
➜➜ Clean all components before disposal./
Nettoyer tous les composants avant la mise au rebut.
➜➜ Dispose of the device according to the appropriate national legal regulations./
Éliminer l’appareil conformément aux dispositions légales en vigueur.
➜➜ Dispose of the packaging material in accordance with the appropriate national legal
regulations./
Éliminer l’emballage conformément aux dispositions légales en vigueur.
Device Description
12
Device Description
 Device overview
Hei-VAP Precision: Overall view
Flask clamp Easy-Clip
Evaporating flask
Heating bath
Motor drive
Condenser
(example)
Receiving flask
Control panel
ON/OFF switch Base unit
Device Description
13
Hei-VAP Precision: Control panel
Select Knob: choose functions
Lift down
Heating button:
Heating ON/OFF
Rotation button
Rotation ON/OFF
Softkeys
Lift up
Softkeys
Vacuum
Set
Actual
Speed
Set
Actual
Actual vapor
temperature
heating bath
temperature
Set
Actual
Main menu
Additional
menus
Start-Up
14
Start-Up
 Connect/disconnect power cord
Connect power cord
The power cord comes with a three-wire
plug and a recess on the bottom side.
Power cordUnit plug
The socket is located on the back side of
the unit.
✓✓ The device is switched OFF.
➜➜ Connect plug to the socket with the
recess facing down.
➜➜ Push plug up against socket until
securely attached.
➜➜ Connect plug to power socket.
Unit socket
Disconnect power cord
➜➜ Disconnect plug from power socket first.
➜➜ Then disconnect plug from socket on unit.
 Switch unit on and off
The ON/OFF switch is situated on the left
side of the device beneath the control panel.
Switch unit on
➜➜ Press the ON/OFF switch on the right
side.
✓✓ The display switches on and shows set
parameters.
✓✓ The unit is switched on.
ON/OFF switch: ON
Switch unit off
➜➜ Press the ON/OFF switch on the left side.
✓✓ The display switches off.
✓✓ The unit powers off.
Start-Up
15
 Heating bath and lift
You can fill the heating bath with various heating bath fluids:
▪▪ Tap water (no deionized or distilled water)
▪▪ Water soluble polyethylene glycol
▪▪ Oil with low viscosity (40 cP) and flashpoint  285°C.
Danger/ Danger
Risk of explosion! / Danger d’explosion !
Heating bath fluid oil with a flashpoint  285 °C might ignite and lead
to uncontrollable thermic reactions and explosion./
Chauffer avec un bain marie de l’huile ou un liquide avec un point
d’inflammation  285 °C est dangereux car il pourrait s’enflammer
avec des températures élevées et conduire à des réactions thermiques
incontrôlables et à des explosions.
➜➜ Only use  285 °C flashpoint oils./
N’utiliser que des huiles avec un point éclair  285°C.
The marks inside heating the bath show the minimum and maximum level for heating
bath fluid with evaporating flask completely immersed.
Evaporating flask is immersed by moving up and down via the heating bath lift.
When heating bath lift is moved downwards the evaporating flask
displaces already filled in fluid.
To prevent heating bath from overflow:
▪▪ Move down the lift with evaporating flask mounted before filling bath.
▪▪ Fill in heating bath fluid till the maximum level mark is reached.
Do not let the evaporating flask touch the bottom or the edge of the
heating bath.
(To adjust the evaporating flask depth and flask angle please view
chapter “Assembly”, section “Evaporating flask: Adjust Evaporating
flask angle and depth”.)
Immerse flask: Hand lift
➜➜ Push down hand lift lever.
➜➜ Move pushed hand lift lever to the left
to lower or to the right to raise lift.
➜➜ Release hand lift at the desired
position.
✓✓ The hand lift locks into place.
Hand lift lever: upper lift position
Immerse flask: Motor lift
✓✓ Unit is switched on.
➜➜ Push lift key down or up to move
motor lift.
➜➜ Release lift key at desired position.
✓✓ The motor lift stops.
Lift keys: up, down
Start-Up
16
Fill heating bath
✓✓ Evaporating flask is immersed.
➜➜ Fill in heating bath fluid till maximum level mark is reached.
✓✓ The level of fluid is between the minimum and the maximum mark.
Connect heating bath
Warning / Avertissement:
Risk of crushing! Risk of scalding! / Danger d’écrasement ! Ris-
que de brûlures !
When unit is switched on, rotation or heating can be started
accidentally and result in severe injuries./
Quand l’unité est allumée, la rotation ou le chauffage peut s’enclencher
accidentellement et entraîner des blessures graves.
Only connect heating bath to base unit when the unit is switched off./
Connecter le bain marie à l’unité de base uniquement lorsque l’unité
est éteinte.
The heating bath plug is located on the
right side in the back of the heating bath.
✓✓ Unit is switched off.
✓✓ Heating bath is locked into place at the
base of the unit.
➜➜ Connect 7-pole socket to plug of the
heating bath with the recess facing up.
➜➜ Fix with knurled nut turning it
clockwise.
Recess Feather
Knurled nut Plug heating bath
Start-Up
17
Empty heating bath
Warning / Avertissement:
Risk of scalding! Risk of slipping!/ Risque de brûlures ! Risque
de glissade !
When emptying the heating bath, you may burn yourself or slip on
spilled fluid./
Lors de la vidange du bain marie, vous risquez de vous brûler ou de
glisser sur du liquide répandu.
Before emptying heating bath / Avant de vider le bain marie :
▪▪ Remove evaporating flask. / Retirer le flacon d’évaporation.
▪▪ Disconnect the cable from the heating bath./
Retirer le cordon d´alimentation électrique du bain marie.
▪▪ Wait until the heating bath fluid cools down to 50°C./
Attendre que le liquide du bain marie refroidisse à 50 °C.
▪▪ Please wear protective clothes. / Porter des vêtements de protection.
▪▪ Lift the heating bath only by the insulated handle./
Soulever le bain marie uniquement au moyen des poignées isolantes.
✓✓ Evaporating flask is removed.
➜➜ Turn knurled nut counter clockwise to unlock it.
➜➜ Remove socket from heating bath.
➜➜ Empty heating bath.
➜➜ Lift bath carefully at both handles and empty.
Start-Up
18
 Menu navigation
The basic steps of operating the rotary evaporator Hei-VAP Precision will be explained in
this chapter.
The parameters for the distillation are set and monitored via the control panel.
The set parameters are stored. The last used parameters will appear after a restart.
The actual value display is always the
start screen. All current actual values are
displayed as large numbers and the target
values as small numbers.
The programs of the top menu bar are
highlighted by turning the select knob
Hei-GUIDE. The Hei-GUIDE walks through
the programs going from left to right. An
„“ or ““ shows the direction in which
the rotary pushbutton controller can be
turned, in order to reach the non-visible
menu elements.
The highlighted menu element is activated
by pressing the Select Knob Hei-GUIDE
and the status screen changes to the
respective menu.
2
8
4
1
3
5
6
7
The user can change the displayed settings in these menus.
Turning the Select Knob Hei-GUIDE is sufficient to change between individual entries. The
selected entry is always highlighted.
The selected entry will be called up when pressing the Select Knob Hei-GUIDE. The
desired value can be set when turning the Select Knob Hei-GUIDE.
The lower functions in the menu are activated via the grey softkeys.
1 Pushbutton for the button activation
of soft key display
5 Pushbutton rotation start/stop
(hard key)
2 Menu line of programs 6 Rotary pushbutton controller
(Hei-GUIDE)
3 Pushbutton heating bath on/off
(hard key)
7 Pushbutton lift down
4 Soft key display functions 8 Pushbutton lift up
Start-Up
19
 Setting the language
✓✓ The unit is switched on.
1.	 Activate the menu line function „Setup” by using the Select Knob Hei-GUIDE (6).
2.	 The menu opens by pressing the Select Knob Hei-GUIDE (6).
3.	 Activate the entry „language” highlighted in blue.
The currently set language is located next to the „language” entry.
4.	 The marking changes to orange after pressing the Select Knob Hei-GUIDE (6) and is
activated for setting the parameter.
5.	 Select the desired language by using the Select Knob Hei-GUIDE (6).
6.	 The setting is accepted by pressing it again.
The text will be displayed in the selected language.
7.	 You will change to the actual value display by selecting the menu entry „accept (OK)“.
All changes in the menu view are discarded with soft key „Esc“ (1).
Context Help
The context-sensitive help menu function shows detailed information of the just selected
menu item (such as „heating bath”, „rotation”...). This provides additional information to
aid operator in use of the Hei-VAP Precision controller.
It can be switched on and off in the setup menu. When the context-sensitive help is
shown, it hides all current actual values on the right side.
The context help is switched off when shipped.
➜➜ Activation via the „setup” menu.
✓✓ The unit is switched on.
1.	 Activate the menu element „Setup“ by using the Select Knob Hei-GUIDE (6).
2.	 The menu opens by pressing the Select Knob Hei-GUIDE (6).
3.	 Activate the entry „context help“ highlighted in blue.
4.	 The marking changes to orange after pressing the Select Knob Hei-GUIDE (6) and
activated for setting the parameter.
5.	 Select the desired status “on/off” by turning the Select Knob Hei-GUIDE (6).
6.	 The selection is confirmed by pressing the Select Knob Hei-GUIDE (6) again. Context
help will be displayed.
7.	 You will change to the actual value display by selecting the menu entry „accept (OK)“.
All changes in the menu view are discarded with softkey „Esc“ (1).
Operation
20
Operation
 Adjust flask rotation
By increasing flask rotation you can increase your evaporation rate. A shorter evaporation
time may prevent thermal damage to your sample.
Depending on flask size and heating bath temperature different rotation speeds may be
suitable.
Speed range and setting
Rotation speed can be set from 10 rpm - 280 rpm.
Warning / Avertissement:
Risk of scalding and slipping!/
Risque de brûlures et de glissade !
At high flask rotation speeds bath fluid may splash or spill over and
result in a slippery floor and/or severe scalding./
La vitesse de rotation rapide du flacon peut provoquer des éclabous-
sures ou des débordements rendant le sol glissant et/ou entraînant des
brûlures graves.
If you are operating the unit without a safety hood: /
En cas d’exploitation de l’unité sans capot de protection :
▪▪ Run a test with your heating bath fluid temperature and rotation
speed and document any size of splashing./
Pratiquer un test avec la température et la vitesse de rotation du bain
marie et noter le volume des éclaboussures.
▪▪ Ensure that this documentation is communicated and accessible to all
individuals./
S’assurer que ces notes sont communiquées et mises à disposition de
tous les individus.
▪▪ Wear safety clothes if you are working in near proximity to the unit./
Porter des vêtements de protection lors du travail à proximité de
l’unité.
▪▪ Pay attention to any amount of heating bath fluid on the floor./
Faire attention à toute quantité de liquide de bain marie répandu sur
le sol.
➜➜ Test your selected fluid
▪▪ with slowly increasing temperatures
▪▪ with different evaporating flasks
▪▪ with increasing rotation speeds
➜➜ Note these results and make them accessible for all individuals.
Depending on the oil and age of oil you are utilizing the heating bath
temperature may change the viscosity and the volume of the bath fluid.
Keep records of the exact description/manufacturer information and
period of use and repeat the documentation in the determined time
interval.
Operation
21
Setting the rotation speed
(actual value displays of all modes)
✓✓ The unit is switched on.
✓✓ The rotation is switched off (pushbutton Rotation start/stop).
✓✓ Actual value display
The range can be set from 10 - 280 [rpm] in 1 [rpm] increments.
100 [rpm] are set as default when shipping from the factory.
1.	 Select the entry „rotation” by turning the Select Knob Hei-GUIDE (6) and call up the
selected entry to be changed by pressing the Select Knob Hei-GUIDE (6) again.
2.	 Turn the Select Knob Hei-GUIDE (6) to set the desired rotation speed.
The rotation speed is readjusted synchronously as an active rotation.
3.	 Pressing it again confirms the change. The entry is exited after 10 seconds in order to
rule out accidental adjustments.
4.	 Activate the Rotation start/stop (5) pushbutton to start the rotation.
The set speed appears on the screen.
 Setting bath temperature
Possible temperature range:
▪▪ Water bath application 20°C - 100°C
▪▪ Oil bath application 20°C - 210°C
With a pre-set temperature above 75 °C to 80 °C we recommend oil or
Polyethylenglycol as heating bath fluid.
Set “Oil” as medium if you work with Polyethylenglycol. Please follow
temperature specification provided by manufacturer.
Danger/ Danger
Risk of explosion!/ Danger d’explosion !
Potential loss of life/ Danger de mort
➜➜ Only use  285°C firepoint oils./
N’utiliser que des huiles avec un point éclair 285°C.
Warning / Avertissement:
Risk of scalding! / Risque de brûlures !
If you operate your unit without a safety hood and at high heating bath
temperatures there is a risk of scalding./
En cas d’exploitation de l’unité sans capot de protection et à des
températures de chauffage élevées, il existe un risque de brûlures.
Please wear safety clothes (lab coat, gloves, safety glasses) every time
you are in near proximity to the unit during operation./
Portez des vêtements de protection (blouse de laboratoire, gants,
lunettes de protection) à chaque fois que vous vous trouvez à
proximité de l’unité lors de son exploitation.
Operation
22
Caution / Attention:
Potential damage of unit / Dommages potentiels sur l’unité
The heating starts quickly and if empty, the heating bath can be stained./
La chaleur augmente rapidement et si le bain marie est vide, il peut
être taché.
Switch on heating only when heating bath is filled sufficiently with fluid./
Allumer le chauffage uniquement lorsque le bain marie est suffisam-
ment rempli de liquide.
(Actual value displays of all modes)
✓✓ The heating bath is filled with heating bath fluid.
✓✓ The rotary evaporator is operational and switched on at the power switch of the base
unit.
1.	 Switch on the heating bath by pressing the pushbutton heating bath on/off (3).
The illuminated yellow control ring of pushbutton heating bath on/off (3) shows that
the heating bath is activated. An icon [heat waves] in the display shows that the bath
is in the heating phase (current flows into the heating coils of the bath).
2.	 Select the entry „heating bath” by turning the Select Knob Hei-GUIDE (6) and call up
the selected entry to be changed by pressing the Select Knob Hei-GUIDE (6) again.
3.	 Pressing it again confirms the change.
 Calculating the vapor temperature
(with optional vapor temperature sensor only)
If a vapor temperature sensor is connected during the operation:
➜➜ Switch the unit off and on to activate the program part.
The vapor temperature is displayed on the screen of the control panel when the vapor
temperature sensor is connected.
Operation
23
 Process modes
The Hei-VAP Precision forms a unit with the control panel, the vacuum box and the
vacuum valve, in which the vacuum is controlled by opening and closing a valve. The
vacuum valve is not required when using a speed-controlled pump.
The ventilation valve in the vacuum box is always open when the
vacuum control is switched off.
Warning/ Avertissement
Imploding glass devices!/ Appareils en verre implosifs !
Serious injuries from shattering glass./
Risque de blessure grave en cas de bris de glace.
➜➜ Check glass devices for damages (stars, breaks, etc.)./
Contrôler que les appareils en verre ne soient pas endom-
magés (étoiles, bulles, etc.).
➜➜ Only use perfect glass devices and replace all damaged
glassware as soon as possible./
Utiliser uniquement des appareils en verre en parfait état.
Operation
24
SET pressure mode
The vacuum is controlled and maintained at the set pressure in the SET pressure mode.
Menu display
The following values can be changed in the menu view:
Heating bath Setting of the bath temperature. Setting range is between
20 °C and maximum heating bath temperature (MAX TEMP is
adjustable in Setup) with a highest range of 210 °C.
Rotation Setting of rotation speed of the distillation flask. Setting
range is between 10 and 280 rpm.
Vacuum Setting of the absolute pressure in the rotary evaporating
system. Setting range is between 1 and safety pressure
(SAFETY PRESSURE is adjustable in Setup) with a high limit
of 1200 mbar.
Max. power pump Vacuum pump (Vario models) throughput % to maximize
pump power. Setting range is between 10 and 100 %. Reduc-
tion of the throughput leads to higher solvent recovery rates.
Hysteresis The value of the hysteresis indicates how much the pressure
may rise (in mbar) before the vacuum valve is opened.
Setting range is between 1 and 50 mbar (only by using valve
controlled pumps Rotavac valve control, Rotavac valve tec, or
house vacuum source).
Timer Setting of the timer to shut down the process. Setting range
is between 1 and 1440 minutes. For continuous operation
choose „off” for Timer setting. The heating bath at the end
of a timed run can be set to turn off (Parameter found in
Setup).
Selecting the entry by turning the Select Knob Hei-GUIDE (6)
1.	 Call up the selected entry to be changed by pressing the Select Knob Hei-GUIDE (6)
(entry will be highlighted in orange).
2.	 Set the value by using the Select Knob Hei-GUIDE (6).
3.	 Pressing it again confirms the change. Softkey „Esc“ (1) terminates the change of the
currently processed entry.
4.	 The new settings are accepted by the „accept” entry. It is changed to the actual value
display.
All changes in the menu view are discarded with softkey „Esc“ (1).
The parameters are stored under a name to be selected by using softkey „Store
Favorite“ (1).
Actual value display
✓✓ The evaporator is in the SET pressure mode
The setting range of the menu entry „vacuum” can be set
between 1 and the safety pressure in [mbar], however, not higher
than 1200 mbar.
Rotation speed and heating bath can be changed as described in chapter “Operation”,
section “Adjust flask rotation” and section “Setting bath temperature”.
Operation
25
Vacuum control
1.	 Select entry „vacuum” by turning the Select Knob Hei-GUIDE (6) and calling up the
selected entry to be changed by pressing the Select Knob Hei-GUIDE (6) again.
2.	 Set the absolute pressure by using the Select Knob Hei-GUIDE (6).
The pressure is readjusted synchronously at an active vacuum control.
3.	 Pressing it again confirms the change.
4.	 The entry is exited after 10 seconds in order to rule out accidental adjustments.
Softkey „Start all” and „Stop all”
A distillation can be started and stopped automatically by using softkey “Start all” (1) and
„Stop all” (1).
AUTOeasy mode
The required vacuum is automatically calculated based on a pressure measurement in
the “AUTOeasy”. The boiling pressure is detected and maintained automatically.
„AUTOeasy” is configured for easy handling and for common heating bath fluid and
cooling agent temperature. In case the amount of steam produced is insufficient and the
evaporation does not start, increase the heating bath temperature. Decrease the cooling
agent temperature or heating bath temperature in case of insufficient reclaim of solvent.
Menu display
The following values can be changed in the menu view:
Heating bath Setting of the bath temperature. Setting range is between
20 °C and maximum heating bath temperature (MAX TEMP is
adjustable in Setup) with a highest range of 210 °C.
Rotation Setting of rotation speed of the distillation flask. Setting
range is between 10 and 280 rpm.
Timer Setting of the timer to shut down the process. Setting range
is between 1 and 1440 minutes. For continuous operation
choose „off” for Timer setting. The heating bath at the end
of a timed run can be set to turn off (Parameter found in
Setup).
Pump type Selects the connected pump type. The internal control
para­meters are adjusted according to the connected pump
(only by using rpm-controlled pump Rotavac vario control or
Rotavac vario tec.)
Selecting the entry by turning the Select Knob Hei-GUIDE (6):
1.	 Call up the selected entry to be changed by pressing the Select Knob Hei-GUIDE (6)
(entry will be highlighted in orange).
2.	 Set the value by using the Select Knob Hei-GUIDE (6).
3.	 Pressing it again confirms the change. Softkey „Esc“ (1) terminates the change of the
currently processed entry.
4.	 The new settings are accepted by the „accept” entry. It is changed to the actual value
display.
▪▪ All changes in the menu view are discarded with softkey „Esc“ (1).
▪▪ The parameters are stored under a name to be selected by using softkey
“Store Favorite“ (1).
Operation
26
Actual value display
✓✓ Prerequisite: The evaporator is in the AUTOeasy mode.
Rotation speed and heating bath can be changed as described in chapter „Operating the
control panel”.
Softkey „Start all” and „Stop all”
A distillation can be started and stopped automatically by using softkey „Start all” (1) and
„Stop all” (1), as described in 6.14.
AUTOaccurate mode
The vacuum in the AUTOaccurate mode is controlled by the vapor temperature sensor
AUTOaccurate.
This mode offers the following advantages:
▪▪ Only low quantities of solvent are suctioned by this vacuum pump.
▪▪ The vapor point is detected automatically and supplemented for mixtures.
▪▪ Multiple solvent distillation is possible without any manual adjustments.
▪▪ Knowledge of the thermodynamic material data is not required
The system controls the vacuum so that a temperature increase occurs on the
AUTOaccurate sensor via the produced vapor quantity. The temperature increase refers
to the starting temperature during the deactivated process. It is also necessary that a
constant temperature (Heidolph Rotacool or RotaChill recommended) is present in the
condenser prior to the start of the process. The Hei-VAP Precision automatically checks
the temperature consistency and informs the user, if necessary. The temperature differ-
ence between the condenser temperature and the temperature at the AUTOaccurate
sensor used for controlling the vacuum will be increased when increasing the distillation
rate (dT). This results in increasing the distilled solvent quantity per time.
✓✓ Vapor temperature sensor AUTOaccurate -(569-00040-00) is installed (see chapter
10.2). The cooling medium has run for 15 min (AUTOaccurate sensor shows a
constant temperature).
A distillation with optimal recurring data results at low values for the
distillation rate (dT) (1-3).
Low values result in a slow distillation and high values in a quick
distillation.
➜➜ Select the optimal general conditions.
➜➜ AUTOaccurate mode can only be run in G3 and G6 glassware
configurations.
Operation
27
Menu display
The following values can be changed in the menu view:
Heating bath Setting of the bath temperature. Setting range is between 20 °C
and maximum heating bath temperature (MAX TEMP is adjustable
in Setup) with a highest range of 210 °C.
Rotation Setting of rotation speed of the distillation flask. Setting range is
between 10 and 280 rpm.
Distillation rate
(dT)
Setting of the distillation rate. Setting range is between 1 and 10.
A high numeric value leads to a higher rate of distillation.
Max. power pump Vacuum pump (Vario models) throughput % to maximize pump
power. Setting range is between 10 and 100 %.
Reduction of the throughput leads to higher solvent recovery
rates. (only by using rpm-controlled pump Rotavac vario control
or Rotavac vario tec.)
Hysteresis The value of the hysteresis indicates how much the pressure may
rise (in mbar) before the vacuum valve is opened.
Setting range is between 1 and 50 mbar. (only by using value
controlled pump Rotavac valve control, Rotavac valve tec, or
house vacuum.)
Multiple solvents If multiple solvents is set to „no” then the pressure is not reduced
further after the detection of the first boiling point.
If multiple solvents is set to „yes” then the pressure is reduced
until the user defined final pressure is reached.
Final pressure Setting of the absolute pressure where the distillation process is
terminated. Setting range is between 1 mbar and the safety pres-
sure (see setup for Safety Pressure).
Timer Setting of the timer to shut down the process. Setting range is
between 1 and 1440 minutes. For continuous operation choose
„off” for Timer setting. The heating bath at the end of a timed run
can be set to turn off (Parameter found in Setup).
Selecting the entry by turning the Select Knob Hei-GUIDE (6)
1.	 Call up the selected entry to be changed by pressing the Select Knob Hei-GUIDE (6)
(entry will be highlighted in orange).
2.	 Set the value by using the Select Knob Hei-GUIDE (6).
3.	 Pressing it again confirms the change. Softkey „Esc“ (1) terminates the change of the
currently processed entry.
Multiple solvent distillation = no:
Must be selected if the first vapor point must be calculated and the pressure should
not be reduced further; for example, when roughly separating 2 solvents.
The resulting pressure is accepted as target value for the vacuum. The pressure (after
reaching the vapor point) cannot be reduced further in the system when the
temperature at the AUTOaccurate sensor drops.
Multiple solvent distillation = yes:
This must be selected if the pressure should be reduced further after detecting the
first vapor point; for example, for completely distilling solvent mixtures.
Operation
28
The entry „final pressure” can be only selected with the entry „ Multiple distillation =
yes”. If the temperature on the AUTOaccurate sensor drops, the pressure in the system is
further reduced until
a) the control temperature is reached again or
b) the final pressure is reached.
The system responds similar to „Stop all” in case b.) (see 6.14). The new settings are
accepted by the „accept” entry. It is changed to the actual value display.
All changes in the menu view are discarded with softkey „Esc“ (1).
The parameters are stored under a name to be selected by using softkey
„Store Favorite“ (1).
If the distillation will not be terminated after reaching a defined
pressure, enter value 1 as final pressure.
✓✓ Valve-controlled pump is installed.
The setting range can be adjusted in the menu entry „hysteresis”
(range 1 to 50 mbar).
✓✓ Speed-controlled pump is installed.
The setting range is adjustable from 10 - 100 [%] in 10% incre-
ments in the „speed” menu entry.
Softkey „Start all” and „Stop all”
A distillation can be started and stopped automatically by using softkey „Start all” (1) and
„Stop all” (1), as described in 6.14.
 Timer functions
The timer function stops the distillation after a set period.
The setting range is adjustable from 1 - 1440 [min] in 1 minute
increments in the „timer” menu entry. Setting „off” is comparable to 0.
Selecting the entry by turning the Select Knob Hei-GUIDE (6):
1.	 Select the entry „timer” by turning the Select Knob Hei-GUIDE (6) and call up the
selected entry to be changed by pressing the Select Knob Hei-GUIDE (6) again.
2.	 Set the desired timer function for the desired time by using control knob Select Knob
Hei-GUIDE (6).
3.	 Pressing it again confirms the change.
The time is running backwards at the start with pressing the “Start Vacuum” soft key
and “Start All” soft key. The distillation is interrupted after completing the set time.
▪▪ The system will be ventilated.
▪▪ The rotation is switched off.
▪▪ The lift is raised (only motor lift models).
If required change lift settings in “Setup”.
Operation
29
Define the shutoff response of the heating bath in the setup.
1.	 Select the menu element program „Setup” by turning the Select Knob Hei-GUIDE (6).
2.	 Select the entry „Bath Power at End” by turning the Select Knob Hei-GUIDE (6) and
call up the selected entry to be changed by pressing the Select Knob Hei-GUIDE (6)
again.
The heating bath will not be switched off after the termination of the timer at the end
of the process „on” and will shut off if “off” is selected.
3.	 Pressing it again confirms the change.
4.	 Select „accept (OK)“ to change the actual value display.
 Distillation parameters: Favorites
Up to 30 different data records can be stored.
A data record contains all parameters required for the respective process management
based on the modes.
Storing the data record
✓✓ The vacuum control is not activated.
✓✓ Parameters are set.
✓✓ You are in the menu view of a mode (SET pressure, AUTOeasy, AUTOaccurate,
gradient)
➜➜ Press softkey „Store Favorite“.
The entry is set to lowercase letters with element „abc”.
The entry is set to uppercase letters with element „Abc”.
The last character on the right side is deleted by briefly pressing the
„delete” element.
1.	 Select the letter by using the Select Knob Hei-GUIDE (6) and combine a name by
pressing the Select Knob Hei-GUIDE (6).
2.	 Accept the name with softkey „Store Name“ (1) or discard the name with „Esc“ (1)
and interrupt the storage.
You will return to the menu view of the respective mode after saving.
Call up a data record (Menu favorites)
✓✓ The vacuum control is not activated.
1.	 Select the menu element „Favorites” by turning the Select Knob Hei-GUIDE (6).
2.	 Select the program name by turning the Select Knob Hei-GUIDE.
3.	 Call up the options by pressing Select Knob Hei-GUIDE; the following options will be
available:
▪▪ Apply
▪▪ Rename
▪▪ Copy
▪▪ Delete
Operation
30
Apply data record
The data record is called up and the stored mode is activated. The actual value display is
then changed to the stored parameters on the display.
The process can be started with “Startvacuum“ or “Start all”.
Rename the data record
The name can be entered similar to the „save” function. The system checks for duplicates
when naming.
Copy data record
The data record is copied and saved under a new name. An entry of the new program
name will be required. A duplication of the issuance of the program name will be
checked.
Delete data record
Deletes the data record permanently.
 Gradient function
A pressure ramp can be programmed with the gradient function, with which various
pressure values can be accessed. The respective pressures are controlled linearly over
time. A pressure drop, i.e. by 50 mbar within 10 minutes, therefore results in a slight
increase of the pressure/time curve than the same pressure reduction in 5 minutes. The
maximum attainable increase of the pressure/time curve is limited by the pump capacity
and the leak rate of the system.
Programming the pressure ramp (menu display)
The user can set the pressure and time in each line with gradient increments (but not the
sum time (total), since this is calculated automatically). The selected element is always
highlighted. The displayed gradient increments and the special elements on the right of
the menu entries are automatically scrolled upward and downward, since there is a total
of 20 gradient increments.
The currently selected entry (a pressure or a time) is called up by pressing the Select
Knob Hei-GUIDE and the user can set the desired value by turning the Select Knob
Hei-GUIDE. Pressing the Select Knob Hei-GUIDE again will confirm the set value.
Entering and confirming value = „---” at „Vacuum” or “Duration” will delete the respective
values. The following value pairs slide upward by one increment.
Last increment with a value of  0 at duration results in the total processing period.
Operation
31
The following values can be changed in the menu view:
Heating bath Setting of the bath temperature. Setting range is between 20 °C
and maximum heating bath temperature (MAX TEMP is adjustable
in Setup) with a highest range of 210 °C.
Rotation Setting of rotation speed of the distillation flask. Setting range is
between 10 and 280 rpm.
Max. power pump Setting the maximum suction power of vacuum pump. Setting
range from 10 to 100%. A reduction of the suction power results
in a higher return rate of the solvent.
Hysteresis Setting the pressure difference of the target value at which the
vacuum is re-adjusted. Setting range 1 – 50mbar (only by using
valve-controlled pump Rotavac valve control or Rotavac valve tec,
or House vacuum.)
Enter Pressure/
Time Steps
Changes the sub-menu for programming the pressure-time
ramps.
1.	 The data record can be saved by using softkey „Store Favorite“ (1).
2.	 Softkey „Esc“ (1) discards the changes and returns to the actual value display.
3.	 The gradients can be entered in sub-menu „Enter pressure/time steps“.
4.	 Up to 20 gradient steps can be entered, whereby each gradient step consists of
pressure and time.
The pressure and time can be set in each line. However, the sum of
time cannot be set, since this is automatically calculated.
The starting point is always at a time value of 0 and the atmospheric
pressure.
1.	 Select the pressure/time step to be changed by turning the Select Knob Hei-GUIDE
(6).
2.	 Confirm the selection by pressing the Select Knob Hei-GUIDE (6).
3.	 The value can be changed by turning the Select Knob Hei-GUIDE (6) to the left or
right.
4.	 The current setting is accepted by pressing the Select Knob Hei-GUIDE (6).
The data record can be saved by using softkey „Store Favorite“ (1). Softkey „Esc“ (1)
discards the changes and returns to the actual value display.
A graphic overview of the programmed ramp is displayed by using softkey „Graph“
(1).
The gradient diagram presents the time on the x-axis in [min] and the related pressure
on the y-axis in [mbar].
The scaling of the x and y axes is illustrated so that all of the entered times or pressures
are illustrated.
The entry „enter basic settings” returns to the time-unrelated basic values of the heating
bath, rotation, hysteresis, and the max. power pump.
Operation
32
Start pressure ramp
The pressure ramp is started with softkey „Start all“ (1) or „Start vacuum“ (1).
The pressure/time segments are processed.
Note: The maximum attainable increase of the pressure/time curve is limited by the
pump capacity and the leak rate of the system.
The process is terminated when reaching the last entry. The vacuum control is switched
off, the system is ventilated. The lift is raised with a motorized lift. The heating bath is
switched off depending on the setting in the setup.
Calling up the pressure ramp
Pressure ramps can be called up via the Favorites menu.
The programmed pressure ramps can be edited when the process is deactivated by
changing the respective parameters (see chapter 6.12.1).
 Softkeys
Softkey „Graph”
The pressure curve is displayed in the graphic view of the actual value display. The time
is illustrated in [min] on the x axis and the associated pressure in [mbar] on the y axis.
Switching over between „graph” and „values” is not possible when the
vacuum control unit is switched off.
Only the section for which pressure values are available is shown on the pressure axis.
The displayed time range on the x axis is set in the setup. If the set time range is
exceeded, the time window will be continuously shifted.
Softkey „Start all” and „Stop all”
A distillation can be started and stopped automatically by using softkey „Start all” (1) and
„Stop all” (1).
✓✓ The unit is operational.
✓✓ The immersion depth of the evaporator flask is set (see chapter 4.5.7).
✓✓ The desired settings are completed.
Caution - Glass breakage! The immersion depth of the evaporator
flasks must be set correctly to prevent lowering of flask into bot-tom of
heat bath on motor lift models.
”Start all”
Caution - Glass breakage! The immersion depth of the evaporator flasks must be set
correctly to prevent lowering of flask into bot-tom of heat bath on motor lift models.
All parameters of the distillation can be changed during the course of
the „Start all” function.
”Stop all”
The lift moves upward (only for the motor lift unit), rotation, vacuum control and timing
are stopped.
Operation
33
Overview of all softkeys
Softkey Function
Store Favorite Store data record for Favorites (program list).
Esc Cancel entry and back up on step, no storage of changes
Hold Vacuum valve closed, vacuum is kept; no ventilation
Start all Vacuum control on, rotation on, lower motor lift
Stop all Vacuum control off, rotation off, raise motor lift
Start Vacuum Vacuum control on
Stop Vacuum Vacuum control off, ventilate system
Graph Display of diagram of pressure/time curve
The actual curve is displayed in the actual value display.
The tabular entries are visualized in the menu program gradient.
Max. Vacuum Vacuum control on, system is evacuated to the minimum pressure
value allowable considering pump and air leaks.
Continue Vacuum control on (after Hold)
Values The actual value screen or gradient increments screen is displayed.
Accept The current actual value of the pressure is accepted as a new set
value.
List Display of all lists of the stored Favorites.
Scroll Help Scrolling within the context help to visualize hidden text.
 More functions
Calibrating the vacuum sensor
The vacuum sensor can be calibrated.
✓✓ Vacuum gauge is available.
✓✓ The unit is connected.
1.	 Interconnect the vacuum gauge near the condenser (for example, with a Y-piece).
2.	 Switch on the vacuum pump.
3.	 Change to the setup menu and select calibration p-sensor.
4.	 Confirm with „Yes”.
5.	 Enter the atmospheric pressure calculated by an external pressure gauge and confirm
by pressing the Select Knob Hei-GUIDE.
6.	 The vacuum control now automatically reduces the pressure in the system.
Please wait until the pressure value is stable.
7.	 Enter the displayed pressure calculated by an external pressure gauge and confirm by
pressing the Select Knob Hei-GUIDE.
✓✓ The calibration is completed.
Operation
34
Connecting to a PC
The vacuum box can be connected to a PC via USB.
1.	 Connect the vacuum box to a PC using an USB cable.
2.	 Configure Hyper Terminal on the PC.
3.	 Interface settings:
▪▪ Bits per second: 115200
▪▪ Data bits: 8
▪▪ Parity: none
▪▪ Stop bits: 1
▪▪ Stream control: none
4.	 The protocol values are displayed in Hyper Terminal:***
(only available, if rotation is switched on)
▪▪ For example: 20;31.4;25.3;976
▪▪ Rotation = „20“
▪▪ HB-Temperature = „31.4“
▪▪ Ext. Sensor-Temperature = „25.3“
▪▪ Vacuum = „976“
 Setup
Online Help Shows Online-Help instead of the actual values in the menu
SETpressure, AUTOeasy, AUTOaccurate, Gradient, Favorites and
Setup.
Safety pressure If the system reaches the setting of the Safety Pressure point,
the vacuum control and flask rotation is stopped, the evaporator
is vented and the motor lift is raised (motor lift only). Setting
range is between 900 and 1200 mbar.
Heating Bath Fluid Allows switching between different heating bath fluid and sets a
limit to the maximum heating bath temperature for the fluid for
operator safety.
Max. Temp. Heating
Bath
Sets the limit of the maximum heating bath temperature which
can be set. The chosen bath fluid has an influence on the
temperature range. Maximum set range between 20 and 210 °C.
Language Sets language of the interface.
Bath Power at End Sets the state of the bath after the process has ended. When
setting is „off” the bath is powered down after the process is
terminated.
Brightness Display Changes brightness of the display.
Calibrate p-sensor Opens sub-menu for calibration of the pressure sensor.
Error history Shows the errors and history of occurrence for service data.
Reboot setup All settings of the setup are put into the state of factory setting
when Reboot engaged.
Scale time axis Sets range of the visible time frame in the graphical „display
actual values”. Set range is between 1 and 120 minutes.
Operation
35
 Menu topology
Actual value display for all modes
Menu entry Value range
Vacuum 1 and 1200 mbar; default value: 1000 mbar
Vapor Vapor temperature measured at the vapor temperature sensor.
Rotation 10 and 290 rpm in 1 rpm increments; default value: 100 rpm
Heating bath 20 °C and the max. temperature of the heating bath (to be
assigned in Setup), however, no more than 210 °C
Softkey 1 Start Vacuum
Softkey 2 Start all / Stop all
Softkey 3 Max. Vacuum
Softkey 4 Stop Vacuum
SET pressure mode
Menu entry Value range
Heating bath 20 °C and the max. temperature of the heating bath (to be
assigned in Setup), however, no more than 210 °C.
Rotation 10 and 290 rpm in 1 rpm increments; default value: 100 rpm
Vacuum 1 and 1200 mbar; default value: 1000 mbar
Hysteresis 1 to 50 mbar; default value: 10 mbar
Timer 1 to 1440 min; in 1 min; default value: 0 min; 0=off
Accept (OK)
Softkey 1 Store Favorite
Softkey 4 Esc
AUTOeasy mode
Menu entry Value range
Heating bath 20 °C and the max. temperature of the heating bath (to be
assigned in Setup), however, no more than 210 °C.
Rotation 10 and 280 rpm in 1 rpm increments; default value: 100 rpm
Pump type “vario control” and “vario tec” ; default value: “variocontrol” Blank
out by using vacuum-valve
Timer 1 to 1440 min; in 1 min; default value: 0 min; 0=off
Accept
Softkey 1 Store Favorite
Softkey 4 Esc
Operation
36
AUTOaccurate mode
Menu entry Value range
Heating bath 20 °C and the max. temperature of the heating bath (to be
assigned in Setup), however, no more than 210 °C.
Rotation 10 and 280 rpm in 1 rpm increments; default value: 100 rpm
Distillation rate
(dT)
▪▪ 1 to 10
▪▪ 1-3 „low“
▪▪ 4-6 „medium“
▪▪ 7-10 „high“
Hysteresis Hysteresis value 1 to 50 mbar; default value: 10 mbar
Multiple solvent yes/no; default value: No
Final pressure Final pressure
1 mbar ... Safety pressure in 1 mbar; default value: 1000 mbar
Timer 1 to 1440 min; in 1 min; default value: 0 min; 0=off
Accept
Softkey 1 Store Favorite
Softkey 4 Esc
Operation
37
Gradient
Menu entry Sub-menu Element Value range
Heating bath 20 °C … max. temp. of the heating bath
not higher than 210 °C.
Rotation 10 … 280 rpm in 1 rpm increments;
default value: 100 rpm
Hysteresis 1 to 50 mbar; default value: 10 mbar
Enter pressure/
timesteps
Pressure/Time
Step Program step; 20 program steps
consisting of the duration and pressure
can be entered.
Vacuum 1 to 1200 mbar; default value:
1000 mbar
Duration Duration of a program step in minutes.
The pressure is reduced linear or
increased as ramp during this time,
depending on which pressure was
entered during the previous step.
Sum of Time
(Total time)
Adds the duration of the previous steps.
The number specifies the time since the
start of the process. The last number
equals the total processing time.
Enter basic
Settings
Jump back to
main menu
„gradient”
Accept
Store Favorite
 store under
abc abc Sets the entry to lowercase letters.
ABC ABC Sets the entry to uppercase
letters.
Delete Briefly pressing the Select Knob
Hei-GUIDE deletes the last character on
the right side, pressing for an extended
period (1.5 s) deletes all characters of
a program name.
[Character] a b … z
A B … Z
0 … 9
. : ; … ‘
enter at least
one character
Accept
Softkey 1 Store Favorite Softkey 4 Esc
Softkey 3 Graph/Values
Operation
38
Favorites
Menu entry Value range / status
(empty)
[name of Favorite] ▪▪ Apply
▪▪ Rename
▪▪ Copy
▪▪ Delete
Back
Softkey 4 Esc Cancel entry and back up on step, no storage of changes
Setup
Menu entry Value range / status
Online-Help On/Off
Safety pressure 900 … 1200 mbar
Heating bath fluid Water; PEG; OIL; Default value: Water
Max. Temp. Heating
bath
20 to 210 °C [max. heating bath temp.] in 0.5 °C;
▪▪ default value: 20 °C
▪▪ Water: = 90 °C; 20 ... 95 in 1 °C
▪▪ PEG, OIL = 210 °C; 20 ... 210 °C in 1 °C
Language German, English, Spanish, French, Italian
Bath Power at End On/Off; default value: On
Brightness Display 10 ... 100 % in 10 %-steps
Calibration of the
p-sensor
yes/no; default value: No
Error history yes/no; default: no
Reboot setup yes/no; default: no
Scale time axis Setting range of 1 to 120 minutes.
Accept
Softkey 4 Esc Cancel entry and back up on step, no storage of changes
Operation
39
 Evaporating and receiving flask
Warning / Avertissement:
Risk of injury! / Risque de blessure !
If unit is switched on during assembly of evaporating flask, rotation
can be started accidentally and might lead to injuries./
Si l’unité est allumée pendant l’assemblage du flacon d’évaporation, la
rotation peut s’enclencher accidentellement et entraîner des blessures.
Mount and remove evaporating flask only while unit is switched off./
Monter et retirer le flacon d’évaporation uniquement lorsque l’unité est
éteinte.
Warning / Avertissement:
Risk of glass breakage! / Risque de bris de verre !
If a flask is damaged, glass can break causing serious injuries./
Si un flacon est endommagé, cela peut entraîner un bris de verre
supplémentaire et causer des blessures graves.
Work with undamaged glass only and check all glassware regularly for
any damage./
Travailler uniquement avec du verre sans défaut et vérifier que toutes
les pièces en verre sont exemptes de dommages.
Mount and remove evaporating flask
Mount evaporating flask
➜➜ Insert evaporating flask with Easy-Clip
open over the vapor tube.
➜➜ Tilt Easy-Clip over flange of evapo-
rating flask.
✓✓ Easy-Clip is clicked into place.
✓✓ Evaporating flask is safely assembled.
Easy-Clip open Easy-Clip closed
Remove evaporating flask
Removing the evaporating flask:
▪▪ Heating must be switched off.
▪▪ Rotation must be at „0“.
▪▪ Vacuum pump must be switched off.
▪▪ Lift with the evaporating flask must be in top position
(see chapter “Start-Up, Heating bath and lift”).
▪▪ Unit must be switched off.
Operation
40
Danger / Danger:
Risk of scalding! / Risque de brûlures !
If the evaporating flask has not cooled down it may cause severe
scalding. /
Si le flacon d’évaporation n’a pas refroidi, il peut entraîner des brûlures
graves.
▪▪ Ensure that the evaporating flask has cooled down prior to
exchanging it./
S’assurer que le flacon d’évaporation a refroidi avant de le changer.
▪▪ The evaporating flask should not show a temperature above
50 °C or 122 °F./
Le flacon d’évaporation ne devrait pas afficher une température
supérieure à 50 °C ou 122 °F.
▪▪ Wear protective clothing. / Porter des vêtements de protection.
▪▪ Wear appropriate gloves to ensure a safe grip./
Porter des gants appropriés afin d’assurer une prise sûre.
➜➜ With 1-2 turns counter clockwise unscrew coupling of the flask clamp Easy-Clip.
➜➜ Hold evaporating flask with one hand and open the Easy-Clip.
➜➜ Remove evaporating flask carefully.
Mount and remove receiving flask
Mount receiving flask
➜➜ Hold receiving flask with open end
onto the flange of the condenser.
➜➜ Slide clamp over flange of condenser
and receiving flask.
➜➜ Tighten knurled screw of clamp
carefully.
✓✓ The receiving flask is mounted.
Remove receiving flask
➜➜ Hold receiving flask with one hand.
➜➜ Loosen knurled screw of clamp.
➜➜ Remove clamp from flange.
Knurled screw Clamp
Operation
41
 Dispensing sample
Regulate refill of sample during a process
through the inlet tube.
✓✓ Glassware is under vacuum.
➜➜ Turn inlet valve counter clockwise.
✓✓ Inlet valve is open and sample is
drawn into evaporating flask.
✓✓ The further you open the inlet valve,
the faster the sample will be drawn in.
➜➜ Turn inlet valve clockwise.
✓✓ Refill of sample will be reduced
respectively stopped.
Ventilation cap
Inlet valve
 Ventilation
The system can be ventilated with the ventilation cap manually.
➜➜ To ventilate turn ventilation cap slowly counter clockwise.
✓✓ System is ventilated.
➜➜ Turn ventilation cap slowly clockwise.
✓✓ Air inlet is closed gradually.
42
Cleaning and Maintenance
 Cleaning
The housing parts and all surfaces of the unit allow for cleaning with a damp cloth and if
required a mild soap lotion.
Warning / Avertissement:
Risk of electric shock! / Danger de choc électrique !
If the device is still connected to power during cleaning, you may get
in contact with live parts due to accidentally entering liquids. /
Si l´appareil est branché lors de son nettoyage, un contact avec des
pièces sous tension est possible sous l´effet de liquides tombant sur
les pièces électriques.
Prior to cleaning /Avant de nettoyer l´appareil :
▪▪ ensure that the device is switched OFF /
Eteindre l´appareil
▪▪ ensure the plug is pulled from the electric socket. /
Débrancher la fiche du secteur.
Caution / Attention:
Damage to the device / Dommage sur l’unité
Accidentally entering liquids will cause the device to fail. /
Tout liquide s´infiltrant dans d´appareil peut endommager les pièces
électroniques.
Only wipe with a damp cloth. Never use a soaked cloth. /
Nettoyer avec des chiffons humides, jamais avec des chiffons gorgés de
liquide.
Caution / Attention:
Damage to the surfaces / Dommages sur les surfaces
All surfaces can be damaged by improper cleaning./
Toutes les surfaces peuvent être endommagées par un nettoyage
inapproprié.
Do not use: / Ne jamais utiliser :
▪▪ Chlorine bleach or any cleaning agent including chlorine/
Un agent de blanchiment au chlore ou tout agent nettoyant
contenant du chlore
▪▪ Ammonia / D’ammoniaque
▪▪ Abrasive cleaning agents such as cleaning rags, scrubbing agents or
any other agents which include metal components/
D’agents nettoyants abrasifs comme des torchons, des agents de
lavage ou tout autre agent contenant des composants métalliques
Cleaning instructions for heating bath
Over a shorter or longer period of time rust and deposition of solids may be observed.
Rust can be removed easily with stainless steel polish.
Lime deposits can be removed with standard cleaning agents based on
acetic or citric acid.
Please follow the manufacturer’s instructions in both cases.
43
Cleaning and Maintenance
Cleaning instructions for coated glassware sets
High temperatures may damage the coating of your glassware sets.
Do not exceed a maximum temperature of 50° C when washing coated
glassware sets.
 Maintenance
Caution / Attention:
Damage to your system / Dommages sur votre système
Never continue working with a damaged or a worn-off PTFE seal. Other-
wise the unit can be damaged accordingly./
Ne jamais continuer à travailler avec un joint en PTFE endommagé ou
abimé. Si c’est le cas, l’unité peut être endommagée en conséquence.
Seals must be checked on a regular basis and must eventually be
replaced./
Les joints doivent être vérifiés régulièrement et remplacés si besoin.
The unit is maintenance-free. Any necessary repair must be performed by an authorized
Heidolph distributor.
Please contact Heidolph Instruments or your local Heidolph Instruments distributor.
Troubleshootimg
44
Troubleshooting
 Malfunctions and resolution
General errors /
message
Cause Remedy
Unit cannot be
switched on
Main plug not connected to
the main power supply
▪▪ Connect the main plug with the
power supply
Fuses defective or blown fuse ▪▪ Replace fuses (see chapter
“Assembly, Electrical connection”)
No heating func-
tion
Main switch is deactivated ▪▪ Activate main switch
Fuses defective or blown fuse ▪▪ Replace fuses (see chapter
“Assembly, Electrical connection”)
Main switch is defective ▪▪ Contact service
The connecting cable of the
heating bath is not connected
▪▪ Connect the connecting cable of
the heating bath
The heater of the heating
bath is defective
▪▪ Contact service
The overheat protection is on ▪▪ If the medium was in the heating
bath: Let the heating bath cool
and reset overheat protection
(see this chapter, section
“Overheat protection: reset”)
▪▪ If the medium was not in the
heating bath:
Contact service
Drive unit is not
rotating
Main switch is defective ▪▪ Contact service
Speed controller is on the left
stop
▪▪ Turn the speed controller to the
right
Drive unit is defective ▪▪ Contact service
Fuses defective or blown fuse ▪▪ Replace fuses (see chapter
“Assembly, Electrical connection”)
Motor lift is not
functioning
Main switch is deactivated ▪▪ Activate main switch
Main switch is defective ▪▪ Contact service
Fuses defective or blown fuse ▪▪ Replace fuses (see chapter
“Assembly, Electrical connection”)
Lift is at end stop ▪▪ Activate other arrow key
Mechanical system / motor is
defective
▪▪ Contact service
Height stop is not set accu-
rately
▪▪ Perform height adjustment (see
chapter „Assembly, Glassware
sets”, section „Install the
evaporator flask”)
No evacuation Power switch Rotavac vario
control or Rotavac vario tec is
not activated.
Vacuum valve is defective
Activate the power switch
Fuses defective or blown fuse Replace fuses (see chapter
“Assembly, Electrical connection”)
Troubleshootimg
45
General errors /
message
Cause Remedy
Insufficient vacuum System leaks ▪▪ Check seals, tubing and
connections
▪▪ Check stopcock, grease if
necessary
Vacuum pump is defective Observe manufacturer‘s instruc-
tions of the vacuum pump
Unit suddenly
switches off
Timer is programmed Check and switch off the timer,
if necessary (see chapter
„Operation, Timer functions”)
Fuses defective or blown fuse Replace fuses (see chapter
“Assembly, Electrical connection”)
When pressure is detected,
the Hei-VAP Precision is emer-
gency stopped.
The Hei-VAP Precision is reset
to the starting condition when
pressing any key.
Check the settings in the
setup menu.
Calibrate the vacuum sensor
(see chapter „Operation” „More
functions”)
Tabelle 7-1: Error codes
Additional conditions
Error / message
Reaction
AUTOaccurate sensor is
not connected
▪▪ Change to the SET pressure mode
▪▪ The current pressure value is accepted as target value,
similar to Hold/Accept in the SET pressure mode
▪▪ AUTOaccurate mode cannot be selected
Vapor sensor is
defective
▪▪ The actual value curve “- - -“ is displayed instead of the
vapor temperature.
The vapor sensor is not
connected
▪▪ The vapor temperature is not displayed in the actual value
display.
Heater can only be
activated at  0 °C
Table 7-2: Additional conditions
Troubleshootimg
46
Hei-VAP Precision
Error / message
Cause Remedy
The temperature sensor
for calculating the vapor
temperature is not
connected, defective or the
temperature is above the
measured range.
▪▪ Vapor sensor broken
▪▪ not connected
▪▪ above the temp.
range
▪▪ Let the vapor temperature
sensor cool
▪▪ Connect the vapor
temperature sensor
▪▪ Perform visual check
▪▪ Contact service
The vapor temperature
sensor is defective or the
temperature is below the
measured range
▪▪ Short circuit of the
vapor sensor
▪▪ below the temp.
range
▪▪ Heat the vapor temperature
sensor
▪▪ Perform visual check
▪▪ Contact service
The AUTOaccurate sensor
is defective or the tempera-
ture is below the measured
range.
▪▪ AUTOaccurate sensor
short circuit
▪▪ below the temp.
range
▪▪ Heat the AUTOaccurate
sensor
▪▪ Perform visual check
▪▪ Contact service
The AUTOaccurate sensor
is defective or the tempera-
ture is above the measured
range.
▪▪ AUTOaccurate sensor
is broken
▪▪ not connected
▪▪ above the temp.
range
▪▪ Let the AUTOaccurate
sensor cool
▪▪ Connect the AUTOaccurate
sensor
▪▪ Perform visual check
▪▪ Contact service
The transportation protection
device is active, please raise
the lift and briefly switch the
unit off and then on again.
The transportation
protection device is still
activated.
▪▪ Please raise the lift and
briefly switch the unit off
and then on again.
An error occurred in the data
bus.
Cable connection
between the control
panel and the base unit
was disconnected. An
error occurred in the
data bus.
▪▪ Restore the cable connection
between the control panel
and the base unit. Switch
the power switch off and on
again!
▪▪ Contact service
The overheating protection
was triggered or the heater
is defective
Heater is defective, i.e.
the overheating protec-
tion was triggered.
▪▪ If heating bath fluid was
in heating bath: Let the
heating bath cool down
and reset the maximum
temperature limiter (see
chapter “Cleaning and
maintenance, Maintenance”)
▪▪ If heating bath fluid was not
in the heating bath: Contact
service
A temperature above the
safety temperature was
measured in the heating bath.
The temperature measure­
ment is defective or the
medium filled in was too hot.
Heating bath safety
temperature is
exceeded
▪▪ Switch off units
▪▪ Cool the heating bath
medium
▪▪ Contact Service if heating
bath fluid was not filled in
Troubleshootimg
47
Hei-VAP Precision
Error / message
Cause Remedy
The heating bath is
completely evaporated.
Please refill the heating bath
medium.
Heating bath is
completely evaporated
▪▪ Deactivate the unit
▪▪ Check if the maximum
temperature limiter has
responded. If yes, reset
(see chapter “Cleaning and
maintenance, Maintenance”)
▪▪ Fill in heat transfer fluid
An illogical temperature
difference was measured
between the heating bath
sensors. The temperature
measurement is defective.
Heating bath sensor
variance  10 K
Contact service
The temperature sensor for
the heating bath control is
defective.
(hardware monitoring unit)
▪▪ Sensor monitoring
via hardware
▪▪ Heating bath sensor
is broken or short
circuited
Contact service
The temperature sensor for
the heating bath control unit
is broken or bath medium
that is too hot was filled in.
▪▪ Heating bath sensor
is broken
▪▪ Heating bath is more
than 217 °C
▪▪ Switch off device
▪▪ Cool down heating bath fluid
▪▪ Contact service, if no
heating bath fluid was filled
in
The temperature sensor for
the heating bath control unit
is defective or bath medium
that is too cold was filled in.
▪▪ Heating bath sensor
short circuit
▪▪ Heating bath is below
0 °C
▪▪ Switch off units
▪▪ Cool down heating bath fluid
▪▪ Contact service if heating
bath fluid was not filled in
The lift motor is defective or
blocked.
Lift end stop switch is
not reached after 10
seconds
▪▪ Contact service
The set safety pressure was
exceeded.
Pressure sensor safety
pressure is exceeded
▪▪ Deactivate the unit
▪▪ Check if the pressure sensor
has responded. If yes, reset
▪▪ Contact service
The vacuum box is not
connected or defective.
Vacuum box is not
connected or defective
▪▪ Check the connection
between the vacuum box
and the evaporator.
▪▪ Contact service
The ventilation valve is
defective.
Vacuum valve short
circuit
▪▪ Check connection between
vacuum box and evaporator
▪▪ Contact service
Troubleshootimg
48
Hei-VAP Precision
Error / message
Cause Remedy
The vacuum valve is not
connected or defective.
▪▪ The vacuum valve is not
connected
▪▪ The connection between
the vacuum box and the
vacuum valve is interrupted
▪▪ Connect the vacuum valve
▪▪ Check the connection
between the vacuum box
and the vacuum valve.
▪▪ Contact service
The vacuum valve is
defective.
The vacuum valve is short
circuited
Replace the vacuum valve
The vacuum pump
is not connected or
defective
▪▪ The vacuum pump is not
connected
▪▪ The connection between
the vacuum box and the
vacuum pump is interrupted
▪▪ Connect the vacuum pump
▪▪ Check the connection
between the vacuum box
and the vacuum pump
The rotation drive
was overloaded or is
defective.
▪▪ Drive unit is defective
▪▪ Motor overload shutdown
▪▪ Deactivate the unit
▪▪ Stop drive unit for cooling
down
▪▪ Contact service
Table 7-3: Troubleshooting table - Hei-VAP Precision
Troubleshootimg
49
The rotary evaporator is checked after „power on” in an initialization phase for connected
components. The function scope of the rotary evaporator is based on the connected units.
Missing component
Description and response of
the evaporator
Remedy
Vacuum box ▪▪ No vacuum box is connected:
▪▪ Actual value display of the
vacuum is not displayed
▪▪ The vacuum entry is not
displayed
▪▪ „AUTOeasy“, „AUTOaccurate“
and „Gradient“ modes are not
displayed.
Note: An evaporator can be
ope­rated with a separate pump
stand in this condition.
➜➜ Connect component
➜➜ Reset via power off/on
Vacuum valve or
vacuum pump
No vacuum valve or vacuum pump
is connected.
▪▪ Vacuum controller is not active
▪▪ „AUTOeasy“, „AUTOaccurate“
and „Gradient“ modes are not
displayed.
Note: An evaporator can be
ope­rated with a separate pump
stand in this condition.
➜➜ Connect component
➜➜ Reset via power off/on
Temperature sensor
T boiling
The temperature sensor for calcu-
lating the boiling temperature is
not connected:
▪▪ The vapor temperature is not
displayed
➜➜ Connect component
Temperature sensor
AUTOaccurate sensor
The temperature sensor for
controlling the AUTOaccurate
mode is not connected:
▪▪ „AUTOaccurate“ mode is not
displayed
➜➜ Connect component
Table 7-4: Missing Components
Overheat protection: reset
➜➜ Switch unit off. Remove cooled down
evaporating flask.
➜➜ Disconnect heating bath plug and
remove heating bath.
➜➜ If necessary empty heating bath and
turn it upside down.
➜➜ Push the red knob on the bottom of the
heating bath with a pointed object.
✓✓ Thermal cut-out is reset.
Reset overheat protection
If you experience a malfunction which can not be resolved, please contact your
authorized Heidolph distributor immediately.
Assembly
50
Assembly
 Electrical connections
▪▪ Fuses must only be replaced by a professional electrician.
▪▪ Repairs of any kind are allowed by qualified professional electricians only.
Any improper repair can result in a dangerous situation. Contact your local Heidolph
Instruments distributor for any repair you may have.
Warning:
Electric shock!
This device must only be connected to a grounded electrical socket.
The unit and voltage must match. The rating plate on the back side of
the unit provides all voltage specifics (see picture below).
When shipped, the unit is grounded. In case the original plug is
changed, the new plug must have a protective conductor!
If the device is still connected to power while changing the fuse, you
might get in contact with live parts.
Prior to replacing the fuse ensure that the unit is switched off and pull
the plug from the electric socket. Only use original fuses from Heidolph.
After changing a fuse check the device for safe operating condition
according to IEC 61010-1.
Rating plate
heating bath
Rating plate
device
Device plug Device
fuses
F4
F2
Color code for electrical connections:
Europe North America
GREEN/YEL-
LOW
PE: Protective
conductor (Earth)
GREEN
PE: Protective
conductor (Earth)
BLUE N: Neutral conductor WHITE N: Neutral conductor
BROWN P: Phase BLACK P: Phase
The unit is connected with the power cord supplied to the electrical socket. It plugs into
the housing on the rear side of the unit.
For countries utilizing a plug other than the standard one supplied:
▪▪ The plug supplied may only be changed by a professional electrician.
▪▪ If utilizing an adaptor ensure that it is grounded and approved by the local regulations.
▪▪ Wiring, adapter and plug must at least meet the electrical power stated on the rating
plate.
Assembly
51
 Connexions Electriques
▪▪ Les fusibles ne peuvent être remplacés que par un Electricien professionnel.
▪▪ Les réparations de toute nature sont autorisées uniquement par un Electricien
professionnel. Une réparation incorrecte peut entrainer une situation dangereuse,
contactez votre distributeur Heidolph pour toute réparation.
Avertissement:
Danger de choc électrique !
Cet appareil doit être connecté à une prise électrique mise à la terre.
Voltage et intensité de cette prise. Derrière l’instrument, il y a une
étiquette avec les requis obligatoires (voir image plus bas).
Avant tout envoi, l’appareil est mis à la terre. Si le connecteur
original est changé, alors le nouveau devra obligatoirement avoir une
connexion à la terre!
Si l’appareil est toujours connecté à l’alimentation, Il y a DANGER.
Pour changer un fusible, l’appareil doit-être éteint et celui-ci ne doit
plus être relié au réseau électrique, donc enlever le cordon d’alimenta-
tion. N’utilisez que des fusibles provenant de chez Heidolph.
Après remplacement d´un fusible, vérifier que l´appareil peut être
utilisé en toute sécurité selon IEC61010-1.
Étiquette du
bain marie
Étiquette de
l’instrument
Connecteur
Electrique
Device
Fusibles
F4
F2
Connexion électrique, code couleur:
Europe North Amerika
VERT/JAUNE
PE: fil de protection
(Terre)
VERT
PE: fil de protection
(Terre)
BLEU N: Conducteur Neutre BLANC N: Conducteur Neutre
MARRON P: Phase NOIR P: Phase
L’instrument doit être connecté avec le cordon secteur fournit. Il faudra insérer celui-ci à
l’arrière de l’appareil dans le connecteur prévu à cet effet.
Pour les pays utilisant un autre système de branchement que le connecteur standard
fournit:
▪▪ Le connecteur changé devra être effectué par un électricien professionnel.
▪▪ Si vous utilisez un adaptateur, celui-ci devra être conforme aux normes locales.
▪▪ Le dimensionnement de tous câblage, adaptateur et connecteur doit correspondre à la
puissance indiquée sur la plaque d´identification / sur la notice technique de l´appareil.
Assembly
52
 Mount device
Assembly parts
Base unit
Housing
Control panel
Lift
evaporating flask
Flask
clamp
Base plate heating bath
Heating bath Min / Max marksPouring rim
Isolated handles
Control panel Control panel Easy-Clip
Assembly
53
Warning / Avertissement :
Risk of crushing! Risk of scalding! / Danger d’écrasement !
Risque de brûlures !
When unit is switched on, rotation or heating can be started
accidentally and result in severe injuries./
Quand l’unité est allumée, la rotation ou le chauffage peut
s’enclencher accidentellement et entraîner des blessures graves.
Only assemble device when the unit is switched off. /
Connecter l’unité uniquement lorsque l’unité est éteinte.
Transportation lock
Transportation lock must be removed before you start. Keep the transportation lock for
possible return shipments.
The transportation lock consists of three
M5x8 screws and a connection plate with
drilled holes to fix the position.
✓✓ Base unit is placed on a stable surface.
➜➜ Press and hold lift contact on the lift.
Lift contact Transportation lock
➜➜ Loosen the three screws with allen key
supplied and remove plate.
➜➜ Release lift contact.
✓✓ Lift drives up automatically.
➜➜ Keep all individual parts for subse-
quent use.
Transportation lock
Assembly
54
Heating bath
Attach heating bath
✓✓ A movable base plate with an
enhanced guide rail is located on the
right side of the base unit.
➜➜ Place heating bath with gap on the
guide rail.
➜➜ Move heating bath carefully to the left
and right to lock it.
Base plate Heating bath
Guide rail Recess
Move heating bath
It may be necessary to increase the distance between heating bath and drive when
bigger evaporating flasks or spacers between the evaporating flask and vapor tube are
used.
✓✓ Base unit is placed on a stable surface.
➜➜ Allow sufficient space to move heating bath.
✓✓ On the right side the heating bath slides out approximately 20 cm to allow for
adjustment.
➜➜ Hold heating bath on both handles and slide it to the right until you have reached the
desired position.
Vapor tube
Assembly parts
▪▪ Vapor tube
▪▪ Flask clamp Easy-Clip
▪▪ Coupling vapor tube
▪▪ Clamping sleeve
The flask clamp Easy-Clip is
pre-assembled in NS 29. For smaller flasks
the Easy-Clip NS 24 is enclosed.
Clamping sleeve Flask clamp Easy-Clip
Vapor tubeCoupling vapor tube
The device is delivered with
pre-assembled coupling for the vapor tube
and the condenser.
➜➜ Hold the locking knob beneath “lock”
for a quarter turn.
➜➜ Unscrew the coupling of the vapor tube
along with the vapor tube on the right
side of the drive.
➜➜ Unscrew the coupling of the condenser
on the left side of the drive.
Coupling
condenser
Vapor tube
coupling
Flask clamp
Easy-Clip
Lock
vapor tube
Motor drive
Assembly
55
➜➜ Remove tension spring and PTFE seal
on the condenser side.
Tension spring PTFE seal
Caution / Attention:
Possible contamination, leakage, damage to your unit/
Possibilité de contamination, de fuite et de dommage sur l’unité
Due to a damaged PTFE seal your SET vacuum may not be reached,
your sample may be contaminated, your unit may be damaged./
À cause d’un joint en PTFE endommagé, le niveau de vide PROGRAMMÉ
peut ne pas être atteint, l’échantillon peut être contaminé et l’unité
endommagée.
Especially the sealing lip of the vacuum seal is susceptible to damage
in handling. Never operate your system with a damaged or worn-off
PTFE seal! Always check the condition of your PTFE seal regularly and if
required replace it./
La lèvre d’étanchéité en particulier est susceptible d’être endommagée
lors de la manipulation. Ne jamais exploiter le système avec un joint en
PTFE endommagé ou abimé ! Toujours vérifier l’état du joint en PTFE
régulièrement et le remplacer si besoin.
✓✓ Coupling and Easy-Clip are screwed
together.
➜➜ Push coupling of the vapor tube along
with Easy-Clip on the vapor tube
(direction and order as shown under
“Assembly parts).
➜➜ Push clamping sleeve with the bead to
the glass on vapor tube until it audibly
locks.
➜➜ Insert vapor tube with clamping sleeve
first from below to the drive and screw
it tight.
➜➜ At the very last quarter turn, press
locking knob.
✓✓ Coupling locks in and vapor tube is
securely mounted.
Vapor tube, clamping sleeve and coupling
Assembly
56
Condenser
Warning / Avertissement:
Risk of glass breakage! / Risque de bris de verre !
If a flask is damaged, glass can break causing serious harm./
Si un flacon est endommagé, cela peut entraîner un bris de verre
supplémentaire et causer des blessures graves.
Work with undamaged glass only and check all glassware regularly for
any damage./
Travailler uniquement avec du verre sans défaut et vérifier régulière-
ment que toutes les pièces en verre sont exemptes de dommages.
Heidolphs coated glassware sets aim to minimize the risk of injury due
to glass breakage. However they are only suitable for temperatures up
to 80° C.
PTFE seal
➜➜ Slide PTFE seal with the labeling
“Motor Side” facing drive onto the
vapor tube.
✓✓ The PTFE seal is tightened as far as it
will go.
PTFE seal
Condenser:
Glassware set G1 and G3
➜➜ Push coupling of glassware over
condenser flange.
➜➜ Push tension ring over condenser
flange.
➜➜ Screw condenser to the drive
hand-tight.
CouplingTension ring
✓✓ Condenser is mounted to the drive.
Assembly
57
Condenser:
Glassware set G5 dry ice
✓✓ Condenser is mounted to the drive.
➜➜ Screw inlet tube with inlet valve onto
opening opposite of vapor tube
(see chapter “Assembly, Inlet tubes”).
➜➜ If using inert gas screw inlet tube with
inert gas valve onto opening above
inlet valve.
Inert gas valve
Inlet valve
➜➜ Place red seal ring into notch at top of
condenser flange.
➜➜ Place white PTFE ring with collar up on
to condenser flange.
➜➜ Insert the jacket trap into condenser.
✓✓ Due to vacuum inside condenser, the
flange is drawn in and the system is
tight.
➜➜ To protect the dry ice, place black cap
on top.
Operation manual-rotary-evaporator-hei-vap-precision

Weitere ähnliche Inhalte

Was ist angesagt?

Ich guidelines for stability studies 1
Ich guidelines for stability studies 1Ich guidelines for stability studies 1
Ich guidelines for stability studies 1priyanka odela
 
Pharmaceutical Plant Layout
Pharmaceutical Plant LayoutPharmaceutical Plant Layout
Pharmaceutical Plant LayoutAkshataBairagi
 
Fragment Based Drug Discovery
Fragment Based Drug DiscoveryFragment Based Drug Discovery
Fragment Based Drug DiscoveryAnthony Coyne
 
Homogeneous catalysis 2021
Homogeneous catalysis 2021Homogeneous catalysis 2021
Homogeneous catalysis 2021MadhuraDatar
 
Reaction mechanisms
Reaction mechanismsReaction mechanisms
Reaction mechanismsdaj198
 
Comparison of sfc, gc and hplc
Comparison of sfc, gc and hplcComparison of sfc, gc and hplc
Comparison of sfc, gc and hplcVrushali Tambe
 
Polymorphism in Pharmaceuticals
Polymorphism in PharmaceuticalsPolymorphism in Pharmaceuticals
Polymorphism in PharmaceuticalsManusinghai2
 
solid phase synthesis Presentation by komal
solid phase synthesis Presentation by komalsolid phase synthesis Presentation by komal
solid phase synthesis Presentation by komalKomal Rajgire
 
Mass fragmentation & rules
Mass fragmentation & rulesMass fragmentation & rules
Mass fragmentation & rulesMehulJain143
 
Stereochemistry part 4 Conformations
Stereochemistry part 4 ConformationsStereochemistry part 4 Conformations
Stereochemistry part 4 ConformationsAtulBendale2
 
Integration of chromatographic peaks
Integration of chromatographic peaksIntegration of chromatographic peaks
Integration of chromatographic peaksdeepak mishra
 
Conformational analysis of cyclohexane
Conformational analysis of cyclohexaneConformational analysis of cyclohexane
Conformational analysis of cyclohexaneMadhusudan Bachute
 
POLYNUCLEAR HYDROCARBONS (1).pptx
POLYNUCLEAR HYDROCARBONS (1).pptxPOLYNUCLEAR HYDROCARBONS (1).pptx
POLYNUCLEAR HYDROCARBONS (1).pptxRaviraj588197
 
Continuous Flow Chemistry And The Manufacture Of Active Pharmaceutical Ingr...
Continuous Flow Chemistry  And  The Manufacture Of Active Pharmaceutical Ingr...Continuous Flow Chemistry  And  The Manufacture Of Active Pharmaceutical Ingr...
Continuous Flow Chemistry And The Manufacture Of Active Pharmaceutical Ingr...Stuart Silverman
 
Flavones & Flavonoids.pptx
Flavones & Flavonoids.pptxFlavones & Flavonoids.pptx
Flavones & Flavonoids.pptxFatmaGomaa11
 

Was ist angesagt? (20)

Ich guidelines for stability studies 1
Ich guidelines for stability studies 1Ich guidelines for stability studies 1
Ich guidelines for stability studies 1
 
Pharmaceutical Plant Layout
Pharmaceutical Plant LayoutPharmaceutical Plant Layout
Pharmaceutical Plant Layout
 
Fragment Based Drug Discovery
Fragment Based Drug DiscoveryFragment Based Drug Discovery
Fragment Based Drug Discovery
 
Homogeneous catalysis 2021
Homogeneous catalysis 2021Homogeneous catalysis 2021
Homogeneous catalysis 2021
 
Flow chemistry
Flow chemistryFlow chemistry
Flow chemistry
 
Reaction mechanisms
Reaction mechanismsReaction mechanisms
Reaction mechanisms
 
Comparison of sfc, gc and hplc
Comparison of sfc, gc and hplcComparison of sfc, gc and hplc
Comparison of sfc, gc and hplc
 
Polymorphism in Pharmaceuticals
Polymorphism in PharmaceuticalsPolymorphism in Pharmaceuticals
Polymorphism in Pharmaceuticals
 
Conformation of cyclohexane
Conformation of cyclohexaneConformation of cyclohexane
Conformation of cyclohexane
 
solid phase synthesis Presentation by komal
solid phase synthesis Presentation by komalsolid phase synthesis Presentation by komal
solid phase synthesis Presentation by komal
 
Unit operations
Unit operationsUnit operations
Unit operations
 
Mass fragmentation & rules
Mass fragmentation & rulesMass fragmentation & rules
Mass fragmentation & rules
 
Stereochemistry part 4 Conformations
Stereochemistry part 4 ConformationsStereochemistry part 4 Conformations
Stereochemistry part 4 Conformations
 
Nitration
NitrationNitration
Nitration
 
Integration of chromatographic peaks
Integration of chromatographic peaksIntegration of chromatographic peaks
Integration of chromatographic peaks
 
Conformational analysis of cyclohexane
Conformational analysis of cyclohexaneConformational analysis of cyclohexane
Conformational analysis of cyclohexane
 
Ph hypothesis
Ph hypothesisPh hypothesis
Ph hypothesis
 
POLYNUCLEAR HYDROCARBONS (1).pptx
POLYNUCLEAR HYDROCARBONS (1).pptxPOLYNUCLEAR HYDROCARBONS (1).pptx
POLYNUCLEAR HYDROCARBONS (1).pptx
 
Continuous Flow Chemistry And The Manufacture Of Active Pharmaceutical Ingr...
Continuous Flow Chemistry  And  The Manufacture Of Active Pharmaceutical Ingr...Continuous Flow Chemistry  And  The Manufacture Of Active Pharmaceutical Ingr...
Continuous Flow Chemistry And The Manufacture Of Active Pharmaceutical Ingr...
 
Flavones & Flavonoids.pptx
Flavones & Flavonoids.pptxFlavones & Flavonoids.pptx
Flavones & Flavonoids.pptx
 

Ähnlich wie Operation manual-rotary-evaporator-hei-vap-precision

208000 An 01 De Quadrocopter 450 Arf
208000 An 01 De Quadrocopter 450 Arf208000 An 01 De Quadrocopter 450 Arf
208000 An 01 De Quadrocopter 450 Arfguest0d62d7
 
The book I wrote: You can order it:http://www.amazon.de/Teile-Lagermanagement...
The book I wrote: You can order it:http://www.amazon.de/Teile-Lagermanagement...The book I wrote: You can order it:http://www.amazon.de/Teile-Lagermanagement...
The book I wrote: You can order it:http://www.amazon.de/Teile-Lagermanagement...Bernhard Seilz
 
Anleitung Miele Trockner t 494 c
Anleitung Miele Trockner t 494 cAnleitung Miele Trockner t 494 c
Anleitung Miele Trockner t 494 cOmaheim
 
Dreamweaver cs5 hilfe
Dreamweaver cs5 hilfeDreamweaver cs5 hilfe
Dreamweaver cs5 hilfefersel2015
 
Sappress Sap Controlling2
Sappress Sap Controlling2Sappress Sap Controlling2
Sappress Sap Controlling2caradha
 
Laserworld product brochure 2015
Laserworld product brochure 2015Laserworld product brochure 2015
Laserworld product brochure 2015Lee Macfarlane
 
Manual de usuario - AUTOCON III 400 - Español.pdf
Manual de usuario  - AUTOCON III 400 - Español.pdfManual de usuario  - AUTOCON III 400 - Español.pdf
Manual de usuario - AUTOCON III 400 - Español.pdfNstorMelgarejo
 
Website erstellen-mit-desktop-cms-benutzerhandbuch-zeta-producer-10
Website erstellen-mit-desktop-cms-benutzerhandbuch-zeta-producer-10Website erstellen-mit-desktop-cms-benutzerhandbuch-zeta-producer-10
Website erstellen-mit-desktop-cms-benutzerhandbuch-zeta-producer-10Hoempagecms
 
Website erstellen-mit-desktop-cms-benutzerhandbuch-zeta-producer-10
Website erstellen-mit-desktop-cms-benutzerhandbuch-zeta-producer-10Website erstellen-mit-desktop-cms-benutzerhandbuch-zeta-producer-10
Website erstellen-mit-desktop-cms-benutzerhandbuch-zeta-producer-10Websitecms
 
Homepage erstellen Benutzerhandbuch
Homepage erstellen BenutzerhandbuchHomepage erstellen Benutzerhandbuch
Homepage erstellen BenutzerhandbuchHomepageErstellen
 
Agorum core-entwickler-dokumentation-6 4-0
Agorum core-entwickler-dokumentation-6 4-0Agorum core-entwickler-dokumentation-6 4-0
Agorum core-entwickler-dokumentation-6 4-0agorum Software GmbH
 
LeitlinienküHlwasser
LeitlinienküHlwasserLeitlinienküHlwasser
LeitlinienküHlwasserguestcfc74b3
 
Sappres Netweaver Identity Management
Sappres Netweaver Identity ManagementSappres Netweaver Identity Management
Sappres Netweaver Identity Managementgueste2a899
 

Ähnlich wie Operation manual-rotary-evaporator-hei-vap-precision (20)

07168030 05
07168030 0507168030 05
07168030 05
 
208000 An 01 De Quadrocopter 450 Arf
208000 An 01 De Quadrocopter 450 Arf208000 An 01 De Quadrocopter 450 Arf
208000 An 01 De Quadrocopter 450 Arf
 
Maintenance audi 100
Maintenance audi 100Maintenance audi 100
Maintenance audi 100
 
The book I wrote: You can order it:http://www.amazon.de/Teile-Lagermanagement...
The book I wrote: You can order it:http://www.amazon.de/Teile-Lagermanagement...The book I wrote: You can order it:http://www.amazon.de/Teile-Lagermanagement...
The book I wrote: You can order it:http://www.amazon.de/Teile-Lagermanagement...
 
Anleitung Miele Trockner t 494 c
Anleitung Miele Trockner t 494 cAnleitung Miele Trockner t 494 c
Anleitung Miele Trockner t 494 c
 
Dreamweaver cs5 hilfe
Dreamweaver cs5 hilfeDreamweaver cs5 hilfe
Dreamweaver cs5 hilfe
 
Sappress Sap Controlling2
Sappress Sap Controlling2Sappress Sap Controlling2
Sappress Sap Controlling2
 
Wam 6214
Wam 6214Wam 6214
Wam 6214
 
Rotary Seals
Rotary SealsRotary Seals
Rotary Seals
 
Laserworld product brochure 2015
Laserworld product brochure 2015Laserworld product brochure 2015
Laserworld product brochure 2015
 
Manual de usuario - AUTOCON III 400 - Español.pdf
Manual de usuario  - AUTOCON III 400 - Español.pdfManual de usuario  - AUTOCON III 400 - Español.pdf
Manual de usuario - AUTOCON III 400 - Español.pdf
 
User manual
User manualUser manual
User manual
 
Bomber 2001
Bomber 2001Bomber 2001
Bomber 2001
 
Website erstellen-mit-desktop-cms-benutzerhandbuch-zeta-producer-10
Website erstellen-mit-desktop-cms-benutzerhandbuch-zeta-producer-10Website erstellen-mit-desktop-cms-benutzerhandbuch-zeta-producer-10
Website erstellen-mit-desktop-cms-benutzerhandbuch-zeta-producer-10
 
Website erstellen-mit-desktop-cms-benutzerhandbuch-zeta-producer-10
Website erstellen-mit-desktop-cms-benutzerhandbuch-zeta-producer-10Website erstellen-mit-desktop-cms-benutzerhandbuch-zeta-producer-10
Website erstellen-mit-desktop-cms-benutzerhandbuch-zeta-producer-10
 
Homepage erstellen Benutzerhandbuch
Homepage erstellen BenutzerhandbuchHomepage erstellen Benutzerhandbuch
Homepage erstellen Benutzerhandbuch
 
Agorum core-entwickler-dokumentation-6 4-0
Agorum core-entwickler-dokumentation-6 4-0Agorum core-entwickler-dokumentation-6 4-0
Agorum core-entwickler-dokumentation-6 4-0
 
LeitlinienküHlwasser
LeitlinienküHlwasserLeitlinienküHlwasser
LeitlinienküHlwasser
 
Userhandbuch
UserhandbuchUserhandbuch
Userhandbuch
 
Sappres Netweaver Identity Management
Sappres Netweaver Identity ManagementSappres Netweaver Identity Management
Sappres Netweaver Identity Management
 

Operation manual-rotary-evaporator-hei-vap-precision

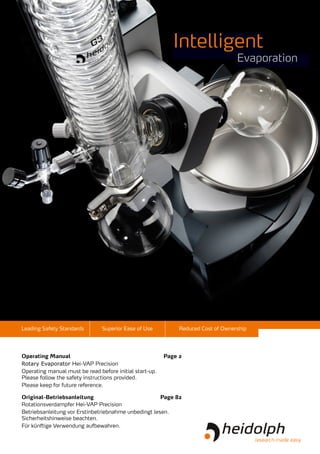
  • 1. Leading Safety Standards Superior Ease of Use Reduced Cost of Ownership Rotary Evaporator Hei-VAP Precision Operating manual must be read before initial start-up. Please follow the safety instructions provided. Please keep for future reference. Rotationsverdampfer Hei-VAP Precision Betriebsanleitung vor Erstinbetriebnahme unbedingt lesen. Sicherheits­hinweise beachten. Für künftige Verwendung aufbewahren. Operating Manual Page 2 Original-Betriebsanleitung Page 82 Intelligent Evaporation
  • 2. Contents InhaltsverzeichnisAbout this Document 4 Version and variants............................................................................................4 About this manual...............................................................................................4 Terms and signs used...........................................................................................5 Safety Instructions / Consignes de sécurité 6 General safety instructions / Consignes de sécurité générales....................................6 EU Declaration of Conformity / Déclaration de conformité UE..............................6 Intended use / Utilisation conforme.................................................................7 Installation, Electrical safety / Installation, sécurité électrique............................7 Personnel qualification / Qualification du personnel............................................8 Operating company’s obligations / Obligations de la société exploitante......................8 Installation site / Lieu de montage..................................................................8 Modifications to the device / Modifications de l´appareil.....................................9 Personnel safety / Sécurité du personnel..........................................................9 Safety during use / Sécurité durant l’utilisation......................................................10 Disposal / Mise au rebut.....................................................................................11 Device Description 12 Device overview................................................................................................12 Hei-VAP Precision: Overall view....................................................................12 Hei-VAP Precision: Control panel...................................................................13 Start-Up 14 Connect/disconnect power cord...........................................................................14 Switch unit on and off........................................................................................14 Heating bath and lift..........................................................................................15 Menu navigation................................................................................................18 Setting the language..........................................................................................19 Operation 20 Adjust flask rotation...........................................................................................20 Setting bath temperature ..................................................................................21 Calculating the vapor temperature ......................................................................22 Process modes..................................................................................................23 Timer functions.................................................................................................28 Distillation parameters: Favorites.........................................................................29 Gradient function...............................................................................................30 Softkeys...........................................................................................................32 More functions..................................................................................................33 Setup..............................................................................................................34 Menu topology..................................................................................................35 Evaporating and receiving flask...........................................................................39 Dispensing sample.............................................................................................41 Ventilation........................................................................................................41 Operating Manual
  • 3. Contents Cleaning and Maintenance 42 Cleaning...........................................................................................................42 Maintenance.....................................................................................................43 Troubleshooting 44 Malfunctions and resolution.................................................................................44 Overheat protection: reset...........................................................................49 Assembly 50 Electrical connections.........................................................................................50 Connexions Electriques.......................................................................................51 Mount device....................................................................................................52 Assembly parts...........................................................................................52 Transportation lock.....................................................................................53 Heating bath..............................................................................................54 Vapor tube.................................................................................................54 Condenser.................................................................................................56 Inlet tubes.................................................................................................61 Vapor temperature sensor, AUTOaccurate sensor.............................................62 Evaporating flask angle and depth ................................................................62 Control panel.............................................................................................64 Connecting peripheral devices.............................................................................65 Connect cooling water.................................................................................65 Mount tubes...............................................................................................65 Connect vacuum.........................................................................................66 Additional Accessories........................................................................................73 Guard hood................................................................................................73 Safety shield..............................................................................................73 Disassembly and Storage 74 Dismantling, transportation and storage...............................................................74 Dismantling...............................................................................................74 Transportation and storage..........................................................................75 Accessories and Spare Parts 76 Scope of delivery...............................................................................................76 Accessories.......................................................................................................76 Attachments 77 Technical data...................................................................................................77 Solvent data..............................................................................................78 Service 79 Contact / Technical Service.................................................................................79 Warranty..........................................................................................................80 Confirmation of condition of unit..........................................................................81 Déclaration de non-opposition.............................................................................82
  • 4. Safety Instructions 4 About this Document Version and variants Version This manual describes the function, operation and maintenance of the Hei-VAP Precision evaporator. Version Alteration date 1.3 01/2018 Variants The units are available in different configurations. Certain features and functions apply to specific configurations only. The varieties are documented in this manual. About this manual This operating manual is a component of the device described here. ➜➜ Please read this manual carefully and obey all safety and warning notices. ➜➜ Ensure that every operator reads this manual. ➜➜ Ensure that this manual is accessible for every operator. ➜➜ Pass on the operating manual to the subsequent owner. For the current version of this operating manual in pdf format, please go to: http://www.heidolph.com/Support/Operation Manuals/Rotary Evaporators/Hei-VAP Series/Hei-VAP Precision. In addition, please observe the regional regulations.
  • 5. 5 Safety Instructions Terms and signs used In this manual you will find standardized terms and signs to warn you of possible dangers or give important hints. Please take special notice to these signs to avoid personal injury or damage to the appliance. The following terms and type of signs (basic drawing elements) are used: Symbol Additional term / Description Warning signs/ Pictogrammes d’avertissement The yellow triangle indicates hazardous situations. It is used in combination with the following terms:/ Le triangle jaune indique les situations dangereuses. Il est utilisé en association avec les termes suivants: DANGER / DANGER: Indicates a hazardous situation which, if not avoided, will result in irreversible injury or death./ Indique une situation dangereuse qui, si elle n’est pas évitée, entraîne une blessure irréversible certaine ou la mort. WARNING / AVERTISSEMENT: Indicates a hazardous situation which, if not avoided, could result in serious injury or material damage./ Indique une situation dangereuse qui, si elle n’est pas évitée, pourrait entraîner une blessure ou des dommages matériels graves. CAUTION / ATTENTION: Indicates a hazardous situation which, if not avoided, may result in a minor injury or material damage./ Indique une situation dangereuse qui, si elle n’est pas évitée, peut entraîner une blessure ou des dommages matériels légers. Mandatory signs Must do: The blue circle indicates important information. Please obey to avoid property damage. Other signs used Symbol Description ➜ Handling instruction, action required ✓ Result of action ▪ ▪ ▪ List of information a. b. c. List of variants
  • 6. Safety Instructions 6 Safety Instructions / Consignes de sécurité General safety instructions / Consignes de sécurité générales EU Declaration of Conformity / Déclaration de conformité UE This device complies with the following EC-Directives*: ▪▪ 2006/42/EC Machinery Directive ▪▪ 2014/30/EU Electromagnetic Compatibility Directive *Also see attachment „EU Declaration of Conformity”. Cet appareil est conforme aux directives EU suivantes *: ▪▪ 2006/42/CE Directive sur les machines ▪▪ 2014/30/UE Directive sur les compatibilités électromagnétiques *Voir les pièces attachées „Déclaration de Conformité CE” The device has been constructed according to state-of-the-art technology and recog- nized safety regulations. However, risks may still arise during installation, operation and maintenance./ L’appareil a été construit selon les règles de l’art de la technologie et selon les règlements de sécurité reconnus. Toutefois, les risques peuvent encore se poser lors de l’installation, l’exploitation et la maintenance. ➜➜ Please ensure the operating manual is available at all times./ S’il vous plaît assurez-vous que le manuel d’utilisation soit disponible à tout moment. The device may only be used under the following circumstances:/ L’évaporateur rotatif doit être utilisé uniquement : ➜➜ Only operate the device, if it is in full working order.( Dans des conditions techniques parfaites. ➜➜ Ensure all operators of the device possess the necessary safety and risk awareness./ Assurez-vous que l’utilisatrice / l’utilisateur possède les connaissances nécessaires quant à la sécurité et aux dangers. ➜➜ Operate the device according to the instructions stipulated in this manual only./ Dans des conditions d’utilisation conformes aux instructions du manuel uniquement. ➜➜ If there is something you do not understand, or certain information is missing, ask your manager or contact the manufacturer./ Demandez à votre responsable ou au fabricant si vous ne comprenez pas ou ne trouvez pas certaines informations. ➜➜ Do not do anything on the device without authorization./ Ne modifiez en rien l’appareil sans autorisation. ➜➜ Only use the device according to its intended use./ Lorsque les instructions de ce manuel d’utilisation sont respectées.
  • 7. 7 Safety Instructions Intended use / Utilisation conforme The device is intended for use by trained and authorized personnel only./ L’appareil ne doit être exploité que par du personnel dûment formé et autorisé. The device is suitable for the following use:/ L’appereil est appropriée pour: ▪▪ Distillation to separate substances/ Distillation, évaporation ▪▪ Concentration / Concentration ▪▪ Crystallization / Crystallisation ▪▪ Powder drying / Séchage de poudre Operation of the device is suitable in one of the following locations:/ L’operation de l’appereil est appropriée dans laboratoire de: ▪▪ Chemistry / Chimie ▪▪ Pharmacy / Pharmacie ▪▪ Biology / Biologie ▪▪ Environmental analytics / Analyse environment ▪▪ Basic research / Recherche fondamentale ▪▪ Any other research laboratory / autre recherche laboratoire Improper use / Utilisation non autorisée Any use which deviates from the device‘s intended use is considered to be improper. The manufacturer does not accept liability for any damages resulting from non-permitted uses. The risk is carried by the operator alone./ Toute utilisation ne correspondant pas à l’utilisation conforme de l’appareil est considérée comme une utilisation non autorisée. Le fabricant décline toute responsabilité quant aux éventuels dommages. L’utilisateur en assume l’entière responsabilité. Installation, Electrical safety / Installation, sécurité électrique ▪▪ The device may only be connected when the mains voltage corresponds to the infor- mation on the rating plate of the unit./ Veuillez vérifier, avant le raccordement de l’appareil au secteur, que la tension du secteur correspond aux indications inscrites sur la plaque caractéristique. ▪▪ The mains connection must be accessible at all times./ Connecteur et prise doivent être accessibles à tout moment. ▪▪ The house wiring must be equipped with a RCD circuit breaker (Residual Current protective Device), that will cut off the device from the mains in the event of a fault./ L´installation électrique du laboratoire doit être équipée d´un disjoncteur RCD (disjoncteur à courant différentiel) susceptible de couper l´appareil du réseau électrique en cas disfonctionnement. ▪▪ Repairs may only be performed by a qualified electrician./ Les réparations de toute nature sont autorisées uniquement par un professionnel qualifié. ▪▪ Never operate the unit with a damaged power cord./ N’utilisez pas l’appareil avec un câble électrique endommagé. ▪▪ Always turn the device OFF and disconnect mains power before performing any maintenance or service./ Éteignez toujours l’appareil et débranchez l’alimentation avant l’entretien ou la réparation.
  • 8. Safety Instructions 8 Personnel qualification / Qualification du personnel ▪▪ The device may only be operated by qualified persons./ L’appareil doit être utilisé uniquement par le personnel qualifié. ▪▪ The device may only be operated by individuals who have been instructed in its proper use by qualified persons./ L’appareil doit être utilisé uniquement par les personnes spécialement formées par du personnel qualifié. ▪▪ The device may only be operated and maintained by persons who are of legal age./ L’appareil doit être utilisé et entretenu uniquement par des personnes majeures. ▪▪ Other personnel may only work with the unit under continuous supervision of an experienced qualified operator./ D’autres personnes peuvent utiliser l’appareil uniquement sous surveillance continue du personnel qualifié. ▪▪ This manual must be read and understood by all persons working with the device. The personnel must receive special safety instructions in order to guarantee responsible and safe work procedures in the laboratory./ Ce manuel d’utilisation doit être lu et compris par toutes les personnes qui travaillent près de l’appareil Le personnel doit avoir reçu des consignes de sécurité particulières afin d’assurer la responsabilité et la sécurité des procédures de travail dans le laboratoire. Operating company’s obligations / Obligations de la société exploitante Installation site / Lieu de montage ▪▪ The device must be positioned in a suitable location./ L’appareil doit être installé dans un endroit approprié. ▪▪ The device must be installed sufficiently stable on a temperature resistant surface./ L’appareil doit être monté sur une surface suffisamment stable et résistante à de fortes températures. ▪▪ Do not install the device in the vicinity of highly inflammable or explosive substances./ Aucune substance inflammable ou explosive ne doit être entreposée à proximité de l’évaporateur. ▪▪ Installation and operation of the device is only permitted in facilities which are fitted with the appropriate laboratory equipment (e.g. with air extraction units)./ L’appareil peut être utilisé uniquement dans des lieux disposant de l’équipement de laboratoire approprié (par ex. des hottes d’aspiration). ▪▪ Only operate the device (depending on the medium used) in conjunction with an extractor hood (at least 10-fold air change, with error monitoring), see DIN EN 14175 and DIN 12924./ N´utiliser l´appareil (selon le type de substance employée) qu´en le combinant avec une hotte aspirante (renouvellement de l´air x10, avec contrôle des erreurs), voir les normes DIN EN 14175 et DIN 12924. ▪▪ The device may only be operated in enclosed spaces and under the following environ- mental conditions:/ L’appareil ne peut être utilisé que dans un espace clos et dans les conditions environnementales suivantes :
  • 9. 9 Safety Instructions Ambient temperature/ température d’environment 5 - 31 °C at 80 % relative humidity/ 5 - 31 °C pour 80 % d’humidité relative de l’air 32 - 40 °C decrease linearly till max. 50 % relative humidity/ 32 - 40 °C décroissant de façon linéaire jusqu’à max. 50% d’humidité relative de l’air Installation altitude/ Altitude d’installation 0 - 2,000 m (6,500 feet) height above sea level/ 0 - 2000m au-dessus du niveau de la mer Degree of pollution/ Degré de pollution 2 Overvoltage category/ Catégorie de surtension II ▪▪ If the equipment is used in corrosive atmospheres, the service life of the equipment will decrease based on concentration, volumes, and frequency of exposures to these corrosive materials, for example concentrated Hydrochloric Acid (HCl). ▪▪ If the equipment is used in corrosive atmospheres, the service life of the equipment will decrease based on concentration, volumes, and frequency of exposures to these corrosive materials, for example concentrated Hydrochloric Acid (HCl)./ Lorsque l´appareil est utilisé dans une atmosphère corrosive, sa durée de vie va diminuer en fonction de la concentration, du volume et de la fréquence d´exposition aux matériaux corrosifs (par exemple de l´acide chlorhydrique HCl concentré). Depending on the medium used / Selon le type de support utilisé: ➜➜ Only operate the device in conjunction with an extractor hood (at least 10-fold air change, with error monitoring), see DIN EN 14175 and DIN 12924./ Assurez-vous que l’évaporateur rotatif est utilisé uniquement lorsqu’il est raccordé à une hotte d’aspiration, renouvellement de l’air x10, avec contrôle des erreurs (voir les normes DIN EN 14175 et DIN 12924). Modifications to the device / Modifications de l´appareil ▪▪ No unauthorized changes may be made to the unit. ▪▪ No parts may be used which have not been approved by the manufacturer. ▪▪ Unauthorized changes result in the EC Declaration of Conformity loosing its validity, and the appliance may no longer be operated. ▪▪ The manufacturer is not liable for any damage, danger or injuries that result from unauthorized changes or from operating the unit other than as described in this manual. Personnel safety / Sécurité du personnel ➜➜ Ensure that only qualified personnel operate the device./ Assurez-vous que l’appareil est utilisé uniquement par du personnel qualifié. ➜➜ Observe the following regulations: / Respectez les directives suivantes : ▪▪ Laboratory guidelines / Directive concernant les laboratoires ▪▪ Accident prevention regulation/ Règlementations relatives à la prévention des accidents ▪▪ Ordinance on hazardous substances/ Ordonnance relative aux substances dangereuses ▪▪ Other generally accepted rules of safety engineering and occupational health/
  • 10. Safety Instructions 10 Diverses règlementations généralement reconnues, relatives à la sécurité et la médecine du travail ▪▪ Local regulations / Dispositions locales Safety during use / Sécurité durant l’utilisation ➜➜ Wear the appropriate protective clothing when working on the device (protective glasses and, if necessary, safety gloves)./ Porter des vêtements de protection appropriés (lunettes de protection et gants de protection, le cas échéant) lors de l’utilisation de l’évaporateur rotatif. ➜➜ Do not use the device in potentially explosive areas. The device is not protected against explosion. There is no explosion or ATEX protection available./ Ne pas utiliser l’appareil dans des zones à risque d’explosion. L’appareil n’est pas protégé contre les explosions. Il ne possède pas de protection conforme aux normes Ex ou ATEX. ➜➜ Do not use distillation material where the distillation residue might be explosive./ Ne pas utiliser de matière à distiller dont les résidus de distillation peuvent être explosibles. ➜➜ Do not carry out work with naked flames in the vicinity of the device (risk of explosion)./ Ne produire aucune flamme nue près de l’évaporateur rotatif (danger d’explosion). ➜➜ Do not apply excess pressure on the device./ Ne pas exercer de pression trop importante sur l’appareil. ➜➜ Do not exceed the flow rate of 1 m/s while sucking in liquids with flammable materials (electrostatic charge; risk of ignition)./ Ne pas dépasser un débit de 1 m/s lors de l’aspiration de liquides contenant des substances inflammables (charge électrostatique ; danger d’inflammation). ➜➜ Eliminate the production of gases classified in explosion group IIC during distillation by materials or due to chemical reactions, e.g. hydrogen./ Éliminer la formation de gaz du groupe d’explosion IIC lors de manipulation de matières et de réactions chimiques, par ex. l’hydrogène. ➜➜ Do not operate or assemble devices in the vicinity which are emission or radiation sources (electromagnetic waves) for the frequency range (3*1011 Hz to 3*1015 Hz)./ Ne monter ni mettre en service aucun appareil qui représente une source d’émission ou de radiation (ondes électromagnétiques) pour la gamme de fréquence (3*1011 Hz à 3*1015 Hz). ➜➜ Do not operate or assemble appliances in the vicinity of the device which constitute emission or radiation sources for ionizing radiation or in the ultrasonic range./ Ne monter ni mettre en service aucun appareil qui représente une source d’émission ou de radiation pour les ondes ionisantes ou dans le domaine des ultrasons. ➜➜ Do not operate the device where adiabatic compression or shock waves might occur (shock wave combustion)./ Ne pas mettre en service l’appareil alors qu’une compression adiabatique ou onde de choc ne peuvent être générées (inflammation d’ondes de pression). ➜➜ Do not use materials which pose a potential risk of uncontrolled energy release which might result in pressure increase (exothermic reaction; spontaneous combustion of dusts)./ Ne pas utiliser des matières impliquant un danger potentiel de libération d’énergie non maîtrisée, causant une augmentation de la pression (réaction exothermique ; combustion spontanée de poussières).
  • 11. 11 Safety Instructions ➜➜ Verify that the basic device is only plugged to or unplugged from the heating bath if the main switch is switched off and/or the main power supply is disconnected./ S’assurer que l’appareil de base n’est branché au bain marie ou débranché du bain marie que lorsque l’interrupteur est fermé et/ou que le raccordement de l’appareil est débranché. ➜➜ Only use suited heat transfer fluid./ Utiliser uniquement des fluides caloporteurs appropriés. ➜➜ Do not adjust the maximum excess pressure of the coolant to more than 2 bar in the condenser./ Ne pas ajuster la surpression maximale du fluide réfrigérant à plus de 2 bar dans le condensateur. ➜➜ Glassware may not be operated with pressure difference above 2 bar./ L’écart entre la pression interne et externe des objets en verre ne doit pas être supérieur à 2 bar. ➜➜ Connect all cables and tubes correctly and locate them outside the operating and danger zone./ Raccorder tous les câbles et conduites correctement et les placer hors de la zone d’exploitation et de danger. ➜➜ Avoid putting pressure on the display when you are not operating the device./ Éviter d’appuyer sur l’écran lorsque l’appareil n’est pas en marche. ➜➜ Do not spill liquids over the device or any parts of it./ Ne pas renverser de liquide sur l´appareil (ou sur une pièce quelconque appartenant à l´appareil) ➜➜ Remove any accidentally spilled liquids immediatly./ Essuyer immédiatement tout liquide répandu accidentellement sur l´appareil. ➜➜ Eliminate errors immediately./ Les anomalies doivent être immédiatement résolues. ➜➜ Do not use abrasive material to clean the glass surface. Only wipe with damp cloth./ Utiliser uniquement des tissus humidifiés pour nettoyer les surfaces en verre et jamais un tissu abrasif. ➜➜ Always switch the mains off after use./ Toujours éteindre l’appareil après utilisation. Disposal / Mise au rebut ➜➜ Check the device components for hazardous substances and solvents./ Contrôler si les composants de l’appareil sont contaminés par des substances et des solvants dangereux. ➜➜ Clean all components before disposal./ Nettoyer tous les composants avant la mise au rebut. ➜➜ Dispose of the device according to the appropriate national legal regulations./ Éliminer l’appareil conformément aux dispositions légales en vigueur. ➜➜ Dispose of the packaging material in accordance with the appropriate national legal regulations./ Éliminer l’emballage conformément aux dispositions légales en vigueur.
  • 12. Device Description 12 Device Description Device overview Hei-VAP Precision: Overall view Flask clamp Easy-Clip Evaporating flask Heating bath Motor drive Condenser (example) Receiving flask Control panel ON/OFF switch Base unit
  • 13. Device Description 13 Hei-VAP Precision: Control panel Select Knob: choose functions Lift down Heating button: Heating ON/OFF Rotation button Rotation ON/OFF Softkeys Lift up Softkeys Vacuum Set Actual Speed Set Actual Actual vapor temperature heating bath temperature Set Actual Main menu Additional menus
  • 14. Start-Up 14 Start-Up Connect/disconnect power cord Connect power cord The power cord comes with a three-wire plug and a recess on the bottom side. Power cordUnit plug The socket is located on the back side of the unit. ✓✓ The device is switched OFF. ➜➜ Connect plug to the socket with the recess facing down. ➜➜ Push plug up against socket until securely attached. ➜➜ Connect plug to power socket. Unit socket Disconnect power cord ➜➜ Disconnect plug from power socket first. ➜➜ Then disconnect plug from socket on unit. Switch unit on and off The ON/OFF switch is situated on the left side of the device beneath the control panel. Switch unit on ➜➜ Press the ON/OFF switch on the right side. ✓✓ The display switches on and shows set parameters. ✓✓ The unit is switched on. ON/OFF switch: ON Switch unit off ➜➜ Press the ON/OFF switch on the left side. ✓✓ The display switches off. ✓✓ The unit powers off.
  • 15. Start-Up 15 Heating bath and lift You can fill the heating bath with various heating bath fluids: ▪▪ Tap water (no deionized or distilled water) ▪▪ Water soluble polyethylene glycol ▪▪ Oil with low viscosity (40 cP) and flashpoint 285°C. Danger/ Danger Risk of explosion! / Danger d’explosion ! Heating bath fluid oil with a flashpoint 285 °C might ignite and lead to uncontrollable thermic reactions and explosion./ Chauffer avec un bain marie de l’huile ou un liquide avec un point d’inflammation 285 °C est dangereux car il pourrait s’enflammer avec des températures élevées et conduire à des réactions thermiques incontrôlables et à des explosions. ➜➜ Only use 285 °C flashpoint oils./ N’utiliser que des huiles avec un point éclair 285°C. The marks inside heating the bath show the minimum and maximum level for heating bath fluid with evaporating flask completely immersed. Evaporating flask is immersed by moving up and down via the heating bath lift. When heating bath lift is moved downwards the evaporating flask displaces already filled in fluid. To prevent heating bath from overflow: ▪▪ Move down the lift with evaporating flask mounted before filling bath. ▪▪ Fill in heating bath fluid till the maximum level mark is reached. Do not let the evaporating flask touch the bottom or the edge of the heating bath. (To adjust the evaporating flask depth and flask angle please view chapter “Assembly”, section “Evaporating flask: Adjust Evaporating flask angle and depth”.) Immerse flask: Hand lift ➜➜ Push down hand lift lever. ➜➜ Move pushed hand lift lever to the left to lower or to the right to raise lift. ➜➜ Release hand lift at the desired position. ✓✓ The hand lift locks into place. Hand lift lever: upper lift position Immerse flask: Motor lift ✓✓ Unit is switched on. ➜➜ Push lift key down or up to move motor lift. ➜➜ Release lift key at desired position. ✓✓ The motor lift stops. Lift keys: up, down
  • 16. Start-Up 16 Fill heating bath ✓✓ Evaporating flask is immersed. ➜➜ Fill in heating bath fluid till maximum level mark is reached. ✓✓ The level of fluid is between the minimum and the maximum mark. Connect heating bath Warning / Avertissement: Risk of crushing! Risk of scalding! / Danger d’écrasement ! Ris- que de brûlures ! When unit is switched on, rotation or heating can be started accidentally and result in severe injuries./ Quand l’unité est allumée, la rotation ou le chauffage peut s’enclencher accidentellement et entraîner des blessures graves. Only connect heating bath to base unit when the unit is switched off./ Connecter le bain marie à l’unité de base uniquement lorsque l’unité est éteinte. The heating bath plug is located on the right side in the back of the heating bath. ✓✓ Unit is switched off. ✓✓ Heating bath is locked into place at the base of the unit. ➜➜ Connect 7-pole socket to plug of the heating bath with the recess facing up. ➜➜ Fix with knurled nut turning it clockwise. Recess Feather Knurled nut Plug heating bath
  • 17. Start-Up 17 Empty heating bath Warning / Avertissement: Risk of scalding! Risk of slipping!/ Risque de brûlures ! Risque de glissade ! When emptying the heating bath, you may burn yourself or slip on spilled fluid./ Lors de la vidange du bain marie, vous risquez de vous brûler ou de glisser sur du liquide répandu. Before emptying heating bath / Avant de vider le bain marie : ▪▪ Remove evaporating flask. / Retirer le flacon d’évaporation. ▪▪ Disconnect the cable from the heating bath./ Retirer le cordon d´alimentation électrique du bain marie. ▪▪ Wait until the heating bath fluid cools down to 50°C./ Attendre que le liquide du bain marie refroidisse à 50 °C. ▪▪ Please wear protective clothes. / Porter des vêtements de protection. ▪▪ Lift the heating bath only by the insulated handle./ Soulever le bain marie uniquement au moyen des poignées isolantes. ✓✓ Evaporating flask is removed. ➜➜ Turn knurled nut counter clockwise to unlock it. ➜➜ Remove socket from heating bath. ➜➜ Empty heating bath. ➜➜ Lift bath carefully at both handles and empty.
  • 18. Start-Up 18 Menu navigation The basic steps of operating the rotary evaporator Hei-VAP Precision will be explained in this chapter. The parameters for the distillation are set and monitored via the control panel. The set parameters are stored. The last used parameters will appear after a restart. The actual value display is always the start screen. All current actual values are displayed as large numbers and the target values as small numbers. The programs of the top menu bar are highlighted by turning the select knob Hei-GUIDE. The Hei-GUIDE walks through the programs going from left to right. An „“ or ““ shows the direction in which the rotary pushbutton controller can be turned, in order to reach the non-visible menu elements. The highlighted menu element is activated by pressing the Select Knob Hei-GUIDE and the status screen changes to the respective menu. 2 8 4 1 3 5 6 7 The user can change the displayed settings in these menus. Turning the Select Knob Hei-GUIDE is sufficient to change between individual entries. The selected entry is always highlighted. The selected entry will be called up when pressing the Select Knob Hei-GUIDE. The desired value can be set when turning the Select Knob Hei-GUIDE. The lower functions in the menu are activated via the grey softkeys. 1 Pushbutton for the button activation of soft key display 5 Pushbutton rotation start/stop (hard key) 2 Menu line of programs 6 Rotary pushbutton controller (Hei-GUIDE) 3 Pushbutton heating bath on/off (hard key) 7 Pushbutton lift down 4 Soft key display functions 8 Pushbutton lift up
  • 19. Start-Up 19 Setting the language ✓✓ The unit is switched on. 1. Activate the menu line function „Setup” by using the Select Knob Hei-GUIDE (6). 2. The menu opens by pressing the Select Knob Hei-GUIDE (6). 3. Activate the entry „language” highlighted in blue. The currently set language is located next to the „language” entry. 4. The marking changes to orange after pressing the Select Knob Hei-GUIDE (6) and is activated for setting the parameter. 5. Select the desired language by using the Select Knob Hei-GUIDE (6). 6. The setting is accepted by pressing it again. The text will be displayed in the selected language. 7. You will change to the actual value display by selecting the menu entry „accept (OK)“. All changes in the menu view are discarded with soft key „Esc“ (1). Context Help The context-sensitive help menu function shows detailed information of the just selected menu item (such as „heating bath”, „rotation”...). This provides additional information to aid operator in use of the Hei-VAP Precision controller. It can be switched on and off in the setup menu. When the context-sensitive help is shown, it hides all current actual values on the right side. The context help is switched off when shipped. ➜➜ Activation via the „setup” menu. ✓✓ The unit is switched on. 1. Activate the menu element „Setup“ by using the Select Knob Hei-GUIDE (6). 2. The menu opens by pressing the Select Knob Hei-GUIDE (6). 3. Activate the entry „context help“ highlighted in blue. 4. The marking changes to orange after pressing the Select Knob Hei-GUIDE (6) and activated for setting the parameter. 5. Select the desired status “on/off” by turning the Select Knob Hei-GUIDE (6). 6. The selection is confirmed by pressing the Select Knob Hei-GUIDE (6) again. Context help will be displayed. 7. You will change to the actual value display by selecting the menu entry „accept (OK)“. All changes in the menu view are discarded with softkey „Esc“ (1).
  • 20. Operation 20 Operation Adjust flask rotation By increasing flask rotation you can increase your evaporation rate. A shorter evaporation time may prevent thermal damage to your sample. Depending on flask size and heating bath temperature different rotation speeds may be suitable. Speed range and setting Rotation speed can be set from 10 rpm - 280 rpm. Warning / Avertissement: Risk of scalding and slipping!/ Risque de brûlures et de glissade ! At high flask rotation speeds bath fluid may splash or spill over and result in a slippery floor and/or severe scalding./ La vitesse de rotation rapide du flacon peut provoquer des éclabous- sures ou des débordements rendant le sol glissant et/ou entraînant des brûlures graves. If you are operating the unit without a safety hood: / En cas d’exploitation de l’unité sans capot de protection : ▪▪ Run a test with your heating bath fluid temperature and rotation speed and document any size of splashing./ Pratiquer un test avec la température et la vitesse de rotation du bain marie et noter le volume des éclaboussures. ▪▪ Ensure that this documentation is communicated and accessible to all individuals./ S’assurer que ces notes sont communiquées et mises à disposition de tous les individus. ▪▪ Wear safety clothes if you are working in near proximity to the unit./ Porter des vêtements de protection lors du travail à proximité de l’unité. ▪▪ Pay attention to any amount of heating bath fluid on the floor./ Faire attention à toute quantité de liquide de bain marie répandu sur le sol. ➜➜ Test your selected fluid ▪▪ with slowly increasing temperatures ▪▪ with different evaporating flasks ▪▪ with increasing rotation speeds ➜➜ Note these results and make them accessible for all individuals. Depending on the oil and age of oil you are utilizing the heating bath temperature may change the viscosity and the volume of the bath fluid. Keep records of the exact description/manufacturer information and period of use and repeat the documentation in the determined time interval.
  • 21. Operation 21 Setting the rotation speed (actual value displays of all modes) ✓✓ The unit is switched on. ✓✓ The rotation is switched off (pushbutton Rotation start/stop). ✓✓ Actual value display The range can be set from 10 - 280 [rpm] in 1 [rpm] increments. 100 [rpm] are set as default when shipping from the factory. 1. Select the entry „rotation” by turning the Select Knob Hei-GUIDE (6) and call up the selected entry to be changed by pressing the Select Knob Hei-GUIDE (6) again. 2. Turn the Select Knob Hei-GUIDE (6) to set the desired rotation speed. The rotation speed is readjusted synchronously as an active rotation. 3. Pressing it again confirms the change. The entry is exited after 10 seconds in order to rule out accidental adjustments. 4. Activate the Rotation start/stop (5) pushbutton to start the rotation. The set speed appears on the screen. Setting bath temperature Possible temperature range: ▪▪ Water bath application 20°C - 100°C ▪▪ Oil bath application 20°C - 210°C With a pre-set temperature above 75 °C to 80 °C we recommend oil or Polyethylenglycol as heating bath fluid. Set “Oil” as medium if you work with Polyethylenglycol. Please follow temperature specification provided by manufacturer. Danger/ Danger Risk of explosion!/ Danger d’explosion ! Potential loss of life/ Danger de mort ➜➜ Only use 285°C firepoint oils./ N’utiliser que des huiles avec un point éclair 285°C. Warning / Avertissement: Risk of scalding! / Risque de brûlures ! If you operate your unit without a safety hood and at high heating bath temperatures there is a risk of scalding./ En cas d’exploitation de l’unité sans capot de protection et à des températures de chauffage élevées, il existe un risque de brûlures. Please wear safety clothes (lab coat, gloves, safety glasses) every time you are in near proximity to the unit during operation./ Portez des vêtements de protection (blouse de laboratoire, gants, lunettes de protection) à chaque fois que vous vous trouvez à proximité de l’unité lors de son exploitation.
  • 22. Operation 22 Caution / Attention: Potential damage of unit / Dommages potentiels sur l’unité The heating starts quickly and if empty, the heating bath can be stained./ La chaleur augmente rapidement et si le bain marie est vide, il peut être taché. Switch on heating only when heating bath is filled sufficiently with fluid./ Allumer le chauffage uniquement lorsque le bain marie est suffisam- ment rempli de liquide. (Actual value displays of all modes) ✓✓ The heating bath is filled with heating bath fluid. ✓✓ The rotary evaporator is operational and switched on at the power switch of the base unit. 1. Switch on the heating bath by pressing the pushbutton heating bath on/off (3). The illuminated yellow control ring of pushbutton heating bath on/off (3) shows that the heating bath is activated. An icon [heat waves] in the display shows that the bath is in the heating phase (current flows into the heating coils of the bath). 2. Select the entry „heating bath” by turning the Select Knob Hei-GUIDE (6) and call up the selected entry to be changed by pressing the Select Knob Hei-GUIDE (6) again. 3. Pressing it again confirms the change. Calculating the vapor temperature (with optional vapor temperature sensor only) If a vapor temperature sensor is connected during the operation: ➜➜ Switch the unit off and on to activate the program part. The vapor temperature is displayed on the screen of the control panel when the vapor temperature sensor is connected.
  • 23. Operation 23 Process modes The Hei-VAP Precision forms a unit with the control panel, the vacuum box and the vacuum valve, in which the vacuum is controlled by opening and closing a valve. The vacuum valve is not required when using a speed-controlled pump. The ventilation valve in the vacuum box is always open when the vacuum control is switched off. Warning/ Avertissement Imploding glass devices!/ Appareils en verre implosifs ! Serious injuries from shattering glass./ Risque de blessure grave en cas de bris de glace. ➜➜ Check glass devices for damages (stars, breaks, etc.)./ Contrôler que les appareils en verre ne soient pas endom- magés (étoiles, bulles, etc.). ➜➜ Only use perfect glass devices and replace all damaged glassware as soon as possible./ Utiliser uniquement des appareils en verre en parfait état.
  • 24. Operation 24 SET pressure mode The vacuum is controlled and maintained at the set pressure in the SET pressure mode. Menu display The following values can be changed in the menu view: Heating bath Setting of the bath temperature. Setting range is between 20 °C and maximum heating bath temperature (MAX TEMP is adjustable in Setup) with a highest range of 210 °C. Rotation Setting of rotation speed of the distillation flask. Setting range is between 10 and 280 rpm. Vacuum Setting of the absolute pressure in the rotary evaporating system. Setting range is between 1 and safety pressure (SAFETY PRESSURE is adjustable in Setup) with a high limit of 1200 mbar. Max. power pump Vacuum pump (Vario models) throughput % to maximize pump power. Setting range is between 10 and 100 %. Reduc- tion of the throughput leads to higher solvent recovery rates. Hysteresis The value of the hysteresis indicates how much the pressure may rise (in mbar) before the vacuum valve is opened. Setting range is between 1 and 50 mbar (only by using valve controlled pumps Rotavac valve control, Rotavac valve tec, or house vacuum source). Timer Setting of the timer to shut down the process. Setting range is between 1 and 1440 minutes. For continuous operation choose „off” for Timer setting. The heating bath at the end of a timed run can be set to turn off (Parameter found in Setup). Selecting the entry by turning the Select Knob Hei-GUIDE (6) 1. Call up the selected entry to be changed by pressing the Select Knob Hei-GUIDE (6) (entry will be highlighted in orange). 2. Set the value by using the Select Knob Hei-GUIDE (6). 3. Pressing it again confirms the change. Softkey „Esc“ (1) terminates the change of the currently processed entry. 4. The new settings are accepted by the „accept” entry. It is changed to the actual value display. All changes in the menu view are discarded with softkey „Esc“ (1). The parameters are stored under a name to be selected by using softkey „Store Favorite“ (1). Actual value display ✓✓ The evaporator is in the SET pressure mode The setting range of the menu entry „vacuum” can be set between 1 and the safety pressure in [mbar], however, not higher than 1200 mbar. Rotation speed and heating bath can be changed as described in chapter “Operation”, section “Adjust flask rotation” and section “Setting bath temperature”.
  • 25. Operation 25 Vacuum control 1. Select entry „vacuum” by turning the Select Knob Hei-GUIDE (6) and calling up the selected entry to be changed by pressing the Select Knob Hei-GUIDE (6) again. 2. Set the absolute pressure by using the Select Knob Hei-GUIDE (6). The pressure is readjusted synchronously at an active vacuum control. 3. Pressing it again confirms the change. 4. The entry is exited after 10 seconds in order to rule out accidental adjustments. Softkey „Start all” and „Stop all” A distillation can be started and stopped automatically by using softkey “Start all” (1) and „Stop all” (1). AUTOeasy mode The required vacuum is automatically calculated based on a pressure measurement in the “AUTOeasy”. The boiling pressure is detected and maintained automatically. „AUTOeasy” is configured for easy handling and for common heating bath fluid and cooling agent temperature. In case the amount of steam produced is insufficient and the evaporation does not start, increase the heating bath temperature. Decrease the cooling agent temperature or heating bath temperature in case of insufficient reclaim of solvent. Menu display The following values can be changed in the menu view: Heating bath Setting of the bath temperature. Setting range is between 20 °C and maximum heating bath temperature (MAX TEMP is adjustable in Setup) with a highest range of 210 °C. Rotation Setting of rotation speed of the distillation flask. Setting range is between 10 and 280 rpm. Timer Setting of the timer to shut down the process. Setting range is between 1 and 1440 minutes. For continuous operation choose „off” for Timer setting. The heating bath at the end of a timed run can be set to turn off (Parameter found in Setup). Pump type Selects the connected pump type. The internal control para­meters are adjusted according to the connected pump (only by using rpm-controlled pump Rotavac vario control or Rotavac vario tec.) Selecting the entry by turning the Select Knob Hei-GUIDE (6): 1. Call up the selected entry to be changed by pressing the Select Knob Hei-GUIDE (6) (entry will be highlighted in orange). 2. Set the value by using the Select Knob Hei-GUIDE (6). 3. Pressing it again confirms the change. Softkey „Esc“ (1) terminates the change of the currently processed entry. 4. The new settings are accepted by the „accept” entry. It is changed to the actual value display. ▪▪ All changes in the menu view are discarded with softkey „Esc“ (1). ▪▪ The parameters are stored under a name to be selected by using softkey “Store Favorite“ (1).
  • 26. Operation 26 Actual value display ✓✓ Prerequisite: The evaporator is in the AUTOeasy mode. Rotation speed and heating bath can be changed as described in chapter „Operating the control panel”. Softkey „Start all” and „Stop all” A distillation can be started and stopped automatically by using softkey „Start all” (1) and „Stop all” (1), as described in 6.14. AUTOaccurate mode The vacuum in the AUTOaccurate mode is controlled by the vapor temperature sensor AUTOaccurate. This mode offers the following advantages: ▪▪ Only low quantities of solvent are suctioned by this vacuum pump. ▪▪ The vapor point is detected automatically and supplemented for mixtures. ▪▪ Multiple solvent distillation is possible without any manual adjustments. ▪▪ Knowledge of the thermodynamic material data is not required The system controls the vacuum so that a temperature increase occurs on the AUTOaccurate sensor via the produced vapor quantity. The temperature increase refers to the starting temperature during the deactivated process. It is also necessary that a constant temperature (Heidolph Rotacool or RotaChill recommended) is present in the condenser prior to the start of the process. The Hei-VAP Precision automatically checks the temperature consistency and informs the user, if necessary. The temperature differ- ence between the condenser temperature and the temperature at the AUTOaccurate sensor used for controlling the vacuum will be increased when increasing the distillation rate (dT). This results in increasing the distilled solvent quantity per time. ✓✓ Vapor temperature sensor AUTOaccurate -(569-00040-00) is installed (see chapter 10.2). The cooling medium has run for 15 min (AUTOaccurate sensor shows a constant temperature). A distillation with optimal recurring data results at low values for the distillation rate (dT) (1-3). Low values result in a slow distillation and high values in a quick distillation. ➜➜ Select the optimal general conditions. ➜➜ AUTOaccurate mode can only be run in G3 and G6 glassware configurations.
  • 27. Operation 27 Menu display The following values can be changed in the menu view: Heating bath Setting of the bath temperature. Setting range is between 20 °C and maximum heating bath temperature (MAX TEMP is adjustable in Setup) with a highest range of 210 °C. Rotation Setting of rotation speed of the distillation flask. Setting range is between 10 and 280 rpm. Distillation rate (dT) Setting of the distillation rate. Setting range is between 1 and 10. A high numeric value leads to a higher rate of distillation. Max. power pump Vacuum pump (Vario models) throughput % to maximize pump power. Setting range is between 10 and 100 %. Reduction of the throughput leads to higher solvent recovery rates. (only by using rpm-controlled pump Rotavac vario control or Rotavac vario tec.) Hysteresis The value of the hysteresis indicates how much the pressure may rise (in mbar) before the vacuum valve is opened. Setting range is between 1 and 50 mbar. (only by using value controlled pump Rotavac valve control, Rotavac valve tec, or house vacuum.) Multiple solvents If multiple solvents is set to „no” then the pressure is not reduced further after the detection of the first boiling point. If multiple solvents is set to „yes” then the pressure is reduced until the user defined final pressure is reached. Final pressure Setting of the absolute pressure where the distillation process is terminated. Setting range is between 1 mbar and the safety pres- sure (see setup for Safety Pressure). Timer Setting of the timer to shut down the process. Setting range is between 1 and 1440 minutes. For continuous operation choose „off” for Timer setting. The heating bath at the end of a timed run can be set to turn off (Parameter found in Setup). Selecting the entry by turning the Select Knob Hei-GUIDE (6) 1. Call up the selected entry to be changed by pressing the Select Knob Hei-GUIDE (6) (entry will be highlighted in orange). 2. Set the value by using the Select Knob Hei-GUIDE (6). 3. Pressing it again confirms the change. Softkey „Esc“ (1) terminates the change of the currently processed entry. Multiple solvent distillation = no: Must be selected if the first vapor point must be calculated and the pressure should not be reduced further; for example, when roughly separating 2 solvents. The resulting pressure is accepted as target value for the vacuum. The pressure (after reaching the vapor point) cannot be reduced further in the system when the temperature at the AUTOaccurate sensor drops. Multiple solvent distillation = yes: This must be selected if the pressure should be reduced further after detecting the first vapor point; for example, for completely distilling solvent mixtures.
  • 28. Operation 28 The entry „final pressure” can be only selected with the entry „ Multiple distillation = yes”. If the temperature on the AUTOaccurate sensor drops, the pressure in the system is further reduced until a) the control temperature is reached again or b) the final pressure is reached. The system responds similar to „Stop all” in case b.) (see 6.14). The new settings are accepted by the „accept” entry. It is changed to the actual value display. All changes in the menu view are discarded with softkey „Esc“ (1). The parameters are stored under a name to be selected by using softkey „Store Favorite“ (1). If the distillation will not be terminated after reaching a defined pressure, enter value 1 as final pressure. ✓✓ Valve-controlled pump is installed. The setting range can be adjusted in the menu entry „hysteresis” (range 1 to 50 mbar). ✓✓ Speed-controlled pump is installed. The setting range is adjustable from 10 - 100 [%] in 10% incre- ments in the „speed” menu entry. Softkey „Start all” and „Stop all” A distillation can be started and stopped automatically by using softkey „Start all” (1) and „Stop all” (1), as described in 6.14. Timer functions The timer function stops the distillation after a set period. The setting range is adjustable from 1 - 1440 [min] in 1 minute increments in the „timer” menu entry. Setting „off” is comparable to 0. Selecting the entry by turning the Select Knob Hei-GUIDE (6): 1. Select the entry „timer” by turning the Select Knob Hei-GUIDE (6) and call up the selected entry to be changed by pressing the Select Knob Hei-GUIDE (6) again. 2. Set the desired timer function for the desired time by using control knob Select Knob Hei-GUIDE (6). 3. Pressing it again confirms the change. The time is running backwards at the start with pressing the “Start Vacuum” soft key and “Start All” soft key. The distillation is interrupted after completing the set time. ▪▪ The system will be ventilated. ▪▪ The rotation is switched off. ▪▪ The lift is raised (only motor lift models). If required change lift settings in “Setup”.
  • 29. Operation 29 Define the shutoff response of the heating bath in the setup. 1. Select the menu element program „Setup” by turning the Select Knob Hei-GUIDE (6). 2. Select the entry „Bath Power at End” by turning the Select Knob Hei-GUIDE (6) and call up the selected entry to be changed by pressing the Select Knob Hei-GUIDE (6) again. The heating bath will not be switched off after the termination of the timer at the end of the process „on” and will shut off if “off” is selected. 3. Pressing it again confirms the change. 4. Select „accept (OK)“ to change the actual value display. Distillation parameters: Favorites Up to 30 different data records can be stored. A data record contains all parameters required for the respective process management based on the modes. Storing the data record ✓✓ The vacuum control is not activated. ✓✓ Parameters are set. ✓✓ You are in the menu view of a mode (SET pressure, AUTOeasy, AUTOaccurate, gradient) ➜➜ Press softkey „Store Favorite“. The entry is set to lowercase letters with element „abc”. The entry is set to uppercase letters with element „Abc”. The last character on the right side is deleted by briefly pressing the „delete” element. 1. Select the letter by using the Select Knob Hei-GUIDE (6) and combine a name by pressing the Select Knob Hei-GUIDE (6). 2. Accept the name with softkey „Store Name“ (1) or discard the name with „Esc“ (1) and interrupt the storage. You will return to the menu view of the respective mode after saving. Call up a data record (Menu favorites) ✓✓ The vacuum control is not activated. 1. Select the menu element „Favorites” by turning the Select Knob Hei-GUIDE (6). 2. Select the program name by turning the Select Knob Hei-GUIDE. 3. Call up the options by pressing Select Knob Hei-GUIDE; the following options will be available: ▪▪ Apply ▪▪ Rename ▪▪ Copy ▪▪ Delete
  • 30. Operation 30 Apply data record The data record is called up and the stored mode is activated. The actual value display is then changed to the stored parameters on the display. The process can be started with “Startvacuum“ or “Start all”. Rename the data record The name can be entered similar to the „save” function. The system checks for duplicates when naming. Copy data record The data record is copied and saved under a new name. An entry of the new program name will be required. A duplication of the issuance of the program name will be checked. Delete data record Deletes the data record permanently. Gradient function A pressure ramp can be programmed with the gradient function, with which various pressure values can be accessed. The respective pressures are controlled linearly over time. A pressure drop, i.e. by 50 mbar within 10 minutes, therefore results in a slight increase of the pressure/time curve than the same pressure reduction in 5 minutes. The maximum attainable increase of the pressure/time curve is limited by the pump capacity and the leak rate of the system. Programming the pressure ramp (menu display) The user can set the pressure and time in each line with gradient increments (but not the sum time (total), since this is calculated automatically). The selected element is always highlighted. The displayed gradient increments and the special elements on the right of the menu entries are automatically scrolled upward and downward, since there is a total of 20 gradient increments. The currently selected entry (a pressure or a time) is called up by pressing the Select Knob Hei-GUIDE and the user can set the desired value by turning the Select Knob Hei-GUIDE. Pressing the Select Knob Hei-GUIDE again will confirm the set value. Entering and confirming value = „---” at „Vacuum” or “Duration” will delete the respective values. The following value pairs slide upward by one increment. Last increment with a value of 0 at duration results in the total processing period.
  • 31. Operation 31 The following values can be changed in the menu view: Heating bath Setting of the bath temperature. Setting range is between 20 °C and maximum heating bath temperature (MAX TEMP is adjustable in Setup) with a highest range of 210 °C. Rotation Setting of rotation speed of the distillation flask. Setting range is between 10 and 280 rpm. Max. power pump Setting the maximum suction power of vacuum pump. Setting range from 10 to 100%. A reduction of the suction power results in a higher return rate of the solvent. Hysteresis Setting the pressure difference of the target value at which the vacuum is re-adjusted. Setting range 1 – 50mbar (only by using valve-controlled pump Rotavac valve control or Rotavac valve tec, or House vacuum.) Enter Pressure/ Time Steps Changes the sub-menu for programming the pressure-time ramps. 1. The data record can be saved by using softkey „Store Favorite“ (1). 2. Softkey „Esc“ (1) discards the changes and returns to the actual value display. 3. The gradients can be entered in sub-menu „Enter pressure/time steps“. 4. Up to 20 gradient steps can be entered, whereby each gradient step consists of pressure and time. The pressure and time can be set in each line. However, the sum of time cannot be set, since this is automatically calculated. The starting point is always at a time value of 0 and the atmospheric pressure. 1. Select the pressure/time step to be changed by turning the Select Knob Hei-GUIDE (6). 2. Confirm the selection by pressing the Select Knob Hei-GUIDE (6). 3. The value can be changed by turning the Select Knob Hei-GUIDE (6) to the left or right. 4. The current setting is accepted by pressing the Select Knob Hei-GUIDE (6). The data record can be saved by using softkey „Store Favorite“ (1). Softkey „Esc“ (1) discards the changes and returns to the actual value display. A graphic overview of the programmed ramp is displayed by using softkey „Graph“ (1). The gradient diagram presents the time on the x-axis in [min] and the related pressure on the y-axis in [mbar]. The scaling of the x and y axes is illustrated so that all of the entered times or pressures are illustrated. The entry „enter basic settings” returns to the time-unrelated basic values of the heating bath, rotation, hysteresis, and the max. power pump.
  • 32. Operation 32 Start pressure ramp The pressure ramp is started with softkey „Start all“ (1) or „Start vacuum“ (1). The pressure/time segments are processed. Note: The maximum attainable increase of the pressure/time curve is limited by the pump capacity and the leak rate of the system. The process is terminated when reaching the last entry. The vacuum control is switched off, the system is ventilated. The lift is raised with a motorized lift. The heating bath is switched off depending on the setting in the setup. Calling up the pressure ramp Pressure ramps can be called up via the Favorites menu. The programmed pressure ramps can be edited when the process is deactivated by changing the respective parameters (see chapter 6.12.1). Softkeys Softkey „Graph” The pressure curve is displayed in the graphic view of the actual value display. The time is illustrated in [min] on the x axis and the associated pressure in [mbar] on the y axis. Switching over between „graph” and „values” is not possible when the vacuum control unit is switched off. Only the section for which pressure values are available is shown on the pressure axis. The displayed time range on the x axis is set in the setup. If the set time range is exceeded, the time window will be continuously shifted. Softkey „Start all” and „Stop all” A distillation can be started and stopped automatically by using softkey „Start all” (1) and „Stop all” (1). ✓✓ The unit is operational. ✓✓ The immersion depth of the evaporator flask is set (see chapter 4.5.7). ✓✓ The desired settings are completed. Caution - Glass breakage! The immersion depth of the evaporator flasks must be set correctly to prevent lowering of flask into bot-tom of heat bath on motor lift models. ”Start all” Caution - Glass breakage! The immersion depth of the evaporator flasks must be set correctly to prevent lowering of flask into bot-tom of heat bath on motor lift models. All parameters of the distillation can be changed during the course of the „Start all” function. ”Stop all” The lift moves upward (only for the motor lift unit), rotation, vacuum control and timing are stopped.
  • 33. Operation 33 Overview of all softkeys Softkey Function Store Favorite Store data record for Favorites (program list). Esc Cancel entry and back up on step, no storage of changes Hold Vacuum valve closed, vacuum is kept; no ventilation Start all Vacuum control on, rotation on, lower motor lift Stop all Vacuum control off, rotation off, raise motor lift Start Vacuum Vacuum control on Stop Vacuum Vacuum control off, ventilate system Graph Display of diagram of pressure/time curve The actual curve is displayed in the actual value display. The tabular entries are visualized in the menu program gradient. Max. Vacuum Vacuum control on, system is evacuated to the minimum pressure value allowable considering pump and air leaks. Continue Vacuum control on (after Hold) Values The actual value screen or gradient increments screen is displayed. Accept The current actual value of the pressure is accepted as a new set value. List Display of all lists of the stored Favorites. Scroll Help Scrolling within the context help to visualize hidden text. More functions Calibrating the vacuum sensor The vacuum sensor can be calibrated. ✓✓ Vacuum gauge is available. ✓✓ The unit is connected. 1. Interconnect the vacuum gauge near the condenser (for example, with a Y-piece). 2. Switch on the vacuum pump. 3. Change to the setup menu and select calibration p-sensor. 4. Confirm with „Yes”. 5. Enter the atmospheric pressure calculated by an external pressure gauge and confirm by pressing the Select Knob Hei-GUIDE. 6. The vacuum control now automatically reduces the pressure in the system. Please wait until the pressure value is stable. 7. Enter the displayed pressure calculated by an external pressure gauge and confirm by pressing the Select Knob Hei-GUIDE. ✓✓ The calibration is completed.
  • 34. Operation 34 Connecting to a PC The vacuum box can be connected to a PC via USB. 1. Connect the vacuum box to a PC using an USB cable. 2. Configure Hyper Terminal on the PC. 3. Interface settings: ▪▪ Bits per second: 115200 ▪▪ Data bits: 8 ▪▪ Parity: none ▪▪ Stop bits: 1 ▪▪ Stream control: none 4. The protocol values are displayed in Hyper Terminal:*** (only available, if rotation is switched on) ▪▪ For example: 20;31.4;25.3;976 ▪▪ Rotation = „20“ ▪▪ HB-Temperature = „31.4“ ▪▪ Ext. Sensor-Temperature = „25.3“ ▪▪ Vacuum = „976“ Setup Online Help Shows Online-Help instead of the actual values in the menu SETpressure, AUTOeasy, AUTOaccurate, Gradient, Favorites and Setup. Safety pressure If the system reaches the setting of the Safety Pressure point, the vacuum control and flask rotation is stopped, the evaporator is vented and the motor lift is raised (motor lift only). Setting range is between 900 and 1200 mbar. Heating Bath Fluid Allows switching between different heating bath fluid and sets a limit to the maximum heating bath temperature for the fluid for operator safety. Max. Temp. Heating Bath Sets the limit of the maximum heating bath temperature which can be set. The chosen bath fluid has an influence on the temperature range. Maximum set range between 20 and 210 °C. Language Sets language of the interface. Bath Power at End Sets the state of the bath after the process has ended. When setting is „off” the bath is powered down after the process is terminated. Brightness Display Changes brightness of the display. Calibrate p-sensor Opens sub-menu for calibration of the pressure sensor. Error history Shows the errors and history of occurrence for service data. Reboot setup All settings of the setup are put into the state of factory setting when Reboot engaged. Scale time axis Sets range of the visible time frame in the graphical „display actual values”. Set range is between 1 and 120 minutes.
  • 35. Operation 35 Menu topology Actual value display for all modes Menu entry Value range Vacuum 1 and 1200 mbar; default value: 1000 mbar Vapor Vapor temperature measured at the vapor temperature sensor. Rotation 10 and 290 rpm in 1 rpm increments; default value: 100 rpm Heating bath 20 °C and the max. temperature of the heating bath (to be assigned in Setup), however, no more than 210 °C Softkey 1 Start Vacuum Softkey 2 Start all / Stop all Softkey 3 Max. Vacuum Softkey 4 Stop Vacuum SET pressure mode Menu entry Value range Heating bath 20 °C and the max. temperature of the heating bath (to be assigned in Setup), however, no more than 210 °C. Rotation 10 and 290 rpm in 1 rpm increments; default value: 100 rpm Vacuum 1 and 1200 mbar; default value: 1000 mbar Hysteresis 1 to 50 mbar; default value: 10 mbar Timer 1 to 1440 min; in 1 min; default value: 0 min; 0=off Accept (OK) Softkey 1 Store Favorite Softkey 4 Esc AUTOeasy mode Menu entry Value range Heating bath 20 °C and the max. temperature of the heating bath (to be assigned in Setup), however, no more than 210 °C. Rotation 10 and 280 rpm in 1 rpm increments; default value: 100 rpm Pump type “vario control” and “vario tec” ; default value: “variocontrol” Blank out by using vacuum-valve Timer 1 to 1440 min; in 1 min; default value: 0 min; 0=off Accept Softkey 1 Store Favorite Softkey 4 Esc
  • 36. Operation 36 AUTOaccurate mode Menu entry Value range Heating bath 20 °C and the max. temperature of the heating bath (to be assigned in Setup), however, no more than 210 °C. Rotation 10 and 280 rpm in 1 rpm increments; default value: 100 rpm Distillation rate (dT) ▪▪ 1 to 10 ▪▪ 1-3 „low“ ▪▪ 4-6 „medium“ ▪▪ 7-10 „high“ Hysteresis Hysteresis value 1 to 50 mbar; default value: 10 mbar Multiple solvent yes/no; default value: No Final pressure Final pressure 1 mbar ... Safety pressure in 1 mbar; default value: 1000 mbar Timer 1 to 1440 min; in 1 min; default value: 0 min; 0=off Accept Softkey 1 Store Favorite Softkey 4 Esc
  • 37. Operation 37 Gradient Menu entry Sub-menu Element Value range Heating bath 20 °C … max. temp. of the heating bath not higher than 210 °C. Rotation 10 … 280 rpm in 1 rpm increments; default value: 100 rpm Hysteresis 1 to 50 mbar; default value: 10 mbar Enter pressure/ timesteps Pressure/Time Step Program step; 20 program steps consisting of the duration and pressure can be entered. Vacuum 1 to 1200 mbar; default value: 1000 mbar Duration Duration of a program step in minutes. The pressure is reduced linear or increased as ramp during this time, depending on which pressure was entered during the previous step. Sum of Time (Total time) Adds the duration of the previous steps. The number specifies the time since the start of the process. The last number equals the total processing time. Enter basic Settings Jump back to main menu „gradient” Accept Store Favorite store under abc abc Sets the entry to lowercase letters. ABC ABC Sets the entry to uppercase letters. Delete Briefly pressing the Select Knob Hei-GUIDE deletes the last character on the right side, pressing for an extended period (1.5 s) deletes all characters of a program name. [Character] a b … z A B … Z 0 … 9 . : ; … ‘ enter at least one character Accept Softkey 1 Store Favorite Softkey 4 Esc Softkey 3 Graph/Values
  • 38. Operation 38 Favorites Menu entry Value range / status (empty) [name of Favorite] ▪▪ Apply ▪▪ Rename ▪▪ Copy ▪▪ Delete Back Softkey 4 Esc Cancel entry and back up on step, no storage of changes Setup Menu entry Value range / status Online-Help On/Off Safety pressure 900 … 1200 mbar Heating bath fluid Water; PEG; OIL; Default value: Water Max. Temp. Heating bath 20 to 210 °C [max. heating bath temp.] in 0.5 °C; ▪▪ default value: 20 °C ▪▪ Water: = 90 °C; 20 ... 95 in 1 °C ▪▪ PEG, OIL = 210 °C; 20 ... 210 °C in 1 °C Language German, English, Spanish, French, Italian Bath Power at End On/Off; default value: On Brightness Display 10 ... 100 % in 10 %-steps Calibration of the p-sensor yes/no; default value: No Error history yes/no; default: no Reboot setup yes/no; default: no Scale time axis Setting range of 1 to 120 minutes. Accept Softkey 4 Esc Cancel entry and back up on step, no storage of changes
  • 39. Operation 39 Evaporating and receiving flask Warning / Avertissement: Risk of injury! / Risque de blessure ! If unit is switched on during assembly of evaporating flask, rotation can be started accidentally and might lead to injuries./ Si l’unité est allumée pendant l’assemblage du flacon d’évaporation, la rotation peut s’enclencher accidentellement et entraîner des blessures. Mount and remove evaporating flask only while unit is switched off./ Monter et retirer le flacon d’évaporation uniquement lorsque l’unité est éteinte. Warning / Avertissement: Risk of glass breakage! / Risque de bris de verre ! If a flask is damaged, glass can break causing serious injuries./ Si un flacon est endommagé, cela peut entraîner un bris de verre supplémentaire et causer des blessures graves. Work with undamaged glass only and check all glassware regularly for any damage./ Travailler uniquement avec du verre sans défaut et vérifier que toutes les pièces en verre sont exemptes de dommages. Mount and remove evaporating flask Mount evaporating flask ➜➜ Insert evaporating flask with Easy-Clip open over the vapor tube. ➜➜ Tilt Easy-Clip over flange of evapo- rating flask. ✓✓ Easy-Clip is clicked into place. ✓✓ Evaporating flask is safely assembled. Easy-Clip open Easy-Clip closed Remove evaporating flask Removing the evaporating flask: ▪▪ Heating must be switched off. ▪▪ Rotation must be at „0“. ▪▪ Vacuum pump must be switched off. ▪▪ Lift with the evaporating flask must be in top position (see chapter “Start-Up, Heating bath and lift”). ▪▪ Unit must be switched off.
  • 40. Operation 40 Danger / Danger: Risk of scalding! / Risque de brûlures ! If the evaporating flask has not cooled down it may cause severe scalding. / Si le flacon d’évaporation n’a pas refroidi, il peut entraîner des brûlures graves. ▪▪ Ensure that the evaporating flask has cooled down prior to exchanging it./ S’assurer que le flacon d’évaporation a refroidi avant de le changer. ▪▪ The evaporating flask should not show a temperature above 50 °C or 122 °F./ Le flacon d’évaporation ne devrait pas afficher une température supérieure à 50 °C ou 122 °F. ▪▪ Wear protective clothing. / Porter des vêtements de protection. ▪▪ Wear appropriate gloves to ensure a safe grip./ Porter des gants appropriés afin d’assurer une prise sûre. ➜➜ With 1-2 turns counter clockwise unscrew coupling of the flask clamp Easy-Clip. ➜➜ Hold evaporating flask with one hand and open the Easy-Clip. ➜➜ Remove evaporating flask carefully. Mount and remove receiving flask Mount receiving flask ➜➜ Hold receiving flask with open end onto the flange of the condenser. ➜➜ Slide clamp over flange of condenser and receiving flask. ➜➜ Tighten knurled screw of clamp carefully. ✓✓ The receiving flask is mounted. Remove receiving flask ➜➜ Hold receiving flask with one hand. ➜➜ Loosen knurled screw of clamp. ➜➜ Remove clamp from flange. Knurled screw Clamp
  • 41. Operation 41 Dispensing sample Regulate refill of sample during a process through the inlet tube. ✓✓ Glassware is under vacuum. ➜➜ Turn inlet valve counter clockwise. ✓✓ Inlet valve is open and sample is drawn into evaporating flask. ✓✓ The further you open the inlet valve, the faster the sample will be drawn in. ➜➜ Turn inlet valve clockwise. ✓✓ Refill of sample will be reduced respectively stopped. Ventilation cap Inlet valve Ventilation The system can be ventilated with the ventilation cap manually. ➜➜ To ventilate turn ventilation cap slowly counter clockwise. ✓✓ System is ventilated. ➜➜ Turn ventilation cap slowly clockwise. ✓✓ Air inlet is closed gradually.
  • 42. 42 Cleaning and Maintenance Cleaning and Maintenance Cleaning The housing parts and all surfaces of the unit allow for cleaning with a damp cloth and if required a mild soap lotion. Warning / Avertissement: Risk of electric shock! / Danger de choc électrique ! If the device is still connected to power during cleaning, you may get in contact with live parts due to accidentally entering liquids. / Si l´appareil est branché lors de son nettoyage, un contact avec des pièces sous tension est possible sous l´effet de liquides tombant sur les pièces électriques. Prior to cleaning /Avant de nettoyer l´appareil : ▪▪ ensure that the device is switched OFF / Eteindre l´appareil ▪▪ ensure the plug is pulled from the electric socket. / Débrancher la fiche du secteur. Caution / Attention: Damage to the device / Dommage sur l’unité Accidentally entering liquids will cause the device to fail. / Tout liquide s´infiltrant dans d´appareil peut endommager les pièces électroniques. Only wipe with a damp cloth. Never use a soaked cloth. / Nettoyer avec des chiffons humides, jamais avec des chiffons gorgés de liquide. Caution / Attention: Damage to the surfaces / Dommages sur les surfaces All surfaces can be damaged by improper cleaning./ Toutes les surfaces peuvent être endommagées par un nettoyage inapproprié. Do not use: / Ne jamais utiliser : ▪▪ Chlorine bleach or any cleaning agent including chlorine/ Un agent de blanchiment au chlore ou tout agent nettoyant contenant du chlore ▪▪ Ammonia / D’ammoniaque ▪▪ Abrasive cleaning agents such as cleaning rags, scrubbing agents or any other agents which include metal components/ D’agents nettoyants abrasifs comme des torchons, des agents de lavage ou tout autre agent contenant des composants métalliques Cleaning instructions for heating bath Over a shorter or longer period of time rust and deposition of solids may be observed. Rust can be removed easily with stainless steel polish. Lime deposits can be removed with standard cleaning agents based on acetic or citric acid. Please follow the manufacturer’s instructions in both cases.
  • 43. 43 Cleaning and Maintenance Cleaning instructions for coated glassware sets High temperatures may damage the coating of your glassware sets. Do not exceed a maximum temperature of 50° C when washing coated glassware sets. Maintenance Caution / Attention: Damage to your system / Dommages sur votre système Never continue working with a damaged or a worn-off PTFE seal. Other- wise the unit can be damaged accordingly./ Ne jamais continuer à travailler avec un joint en PTFE endommagé ou abimé. Si c’est le cas, l’unité peut être endommagée en conséquence. Seals must be checked on a regular basis and must eventually be replaced./ Les joints doivent être vérifiés régulièrement et remplacés si besoin. The unit is maintenance-free. Any necessary repair must be performed by an authorized Heidolph distributor. Please contact Heidolph Instruments or your local Heidolph Instruments distributor.
  • 44. Troubleshootimg 44 Troubleshooting Malfunctions and resolution General errors / message Cause Remedy Unit cannot be switched on Main plug not connected to the main power supply ▪▪ Connect the main plug with the power supply Fuses defective or blown fuse ▪▪ Replace fuses (see chapter “Assembly, Electrical connection”) No heating func- tion Main switch is deactivated ▪▪ Activate main switch Fuses defective or blown fuse ▪▪ Replace fuses (see chapter “Assembly, Electrical connection”) Main switch is defective ▪▪ Contact service The connecting cable of the heating bath is not connected ▪▪ Connect the connecting cable of the heating bath The heater of the heating bath is defective ▪▪ Contact service The overheat protection is on ▪▪ If the medium was in the heating bath: Let the heating bath cool and reset overheat protection (see this chapter, section “Overheat protection: reset”) ▪▪ If the medium was not in the heating bath: Contact service Drive unit is not rotating Main switch is defective ▪▪ Contact service Speed controller is on the left stop ▪▪ Turn the speed controller to the right Drive unit is defective ▪▪ Contact service Fuses defective or blown fuse ▪▪ Replace fuses (see chapter “Assembly, Electrical connection”) Motor lift is not functioning Main switch is deactivated ▪▪ Activate main switch Main switch is defective ▪▪ Contact service Fuses defective or blown fuse ▪▪ Replace fuses (see chapter “Assembly, Electrical connection”) Lift is at end stop ▪▪ Activate other arrow key Mechanical system / motor is defective ▪▪ Contact service Height stop is not set accu- rately ▪▪ Perform height adjustment (see chapter „Assembly, Glassware sets”, section „Install the evaporator flask”) No evacuation Power switch Rotavac vario control or Rotavac vario tec is not activated. Vacuum valve is defective Activate the power switch Fuses defective or blown fuse Replace fuses (see chapter “Assembly, Electrical connection”)
  • 45. Troubleshootimg 45 General errors / message Cause Remedy Insufficient vacuum System leaks ▪▪ Check seals, tubing and connections ▪▪ Check stopcock, grease if necessary Vacuum pump is defective Observe manufacturer‘s instruc- tions of the vacuum pump Unit suddenly switches off Timer is programmed Check and switch off the timer, if necessary (see chapter „Operation, Timer functions”) Fuses defective or blown fuse Replace fuses (see chapter “Assembly, Electrical connection”) When pressure is detected, the Hei-VAP Precision is emer- gency stopped. The Hei-VAP Precision is reset to the starting condition when pressing any key. Check the settings in the setup menu. Calibrate the vacuum sensor (see chapter „Operation” „More functions”) Tabelle 7-1: Error codes Additional conditions Error / message Reaction AUTOaccurate sensor is not connected ▪▪ Change to the SET pressure mode ▪▪ The current pressure value is accepted as target value, similar to Hold/Accept in the SET pressure mode ▪▪ AUTOaccurate mode cannot be selected Vapor sensor is defective ▪▪ The actual value curve “- - -“ is displayed instead of the vapor temperature. The vapor sensor is not connected ▪▪ The vapor temperature is not displayed in the actual value display. Heater can only be activated at 0 °C Table 7-2: Additional conditions
  • 46. Troubleshootimg 46 Hei-VAP Precision Error / message Cause Remedy The temperature sensor for calculating the vapor temperature is not connected, defective or the temperature is above the measured range. ▪▪ Vapor sensor broken ▪▪ not connected ▪▪ above the temp. range ▪▪ Let the vapor temperature sensor cool ▪▪ Connect the vapor temperature sensor ▪▪ Perform visual check ▪▪ Contact service The vapor temperature sensor is defective or the temperature is below the measured range ▪▪ Short circuit of the vapor sensor ▪▪ below the temp. range ▪▪ Heat the vapor temperature sensor ▪▪ Perform visual check ▪▪ Contact service The AUTOaccurate sensor is defective or the tempera- ture is below the measured range. ▪▪ AUTOaccurate sensor short circuit ▪▪ below the temp. range ▪▪ Heat the AUTOaccurate sensor ▪▪ Perform visual check ▪▪ Contact service The AUTOaccurate sensor is defective or the tempera- ture is above the measured range. ▪▪ AUTOaccurate sensor is broken ▪▪ not connected ▪▪ above the temp. range ▪▪ Let the AUTOaccurate sensor cool ▪▪ Connect the AUTOaccurate sensor ▪▪ Perform visual check ▪▪ Contact service The transportation protection device is active, please raise the lift and briefly switch the unit off and then on again. The transportation protection device is still activated. ▪▪ Please raise the lift and briefly switch the unit off and then on again. An error occurred in the data bus. Cable connection between the control panel and the base unit was disconnected. An error occurred in the data bus. ▪▪ Restore the cable connection between the control panel and the base unit. Switch the power switch off and on again! ▪▪ Contact service The overheating protection was triggered or the heater is defective Heater is defective, i.e. the overheating protec- tion was triggered. ▪▪ If heating bath fluid was in heating bath: Let the heating bath cool down and reset the maximum temperature limiter (see chapter “Cleaning and maintenance, Maintenance”) ▪▪ If heating bath fluid was not in the heating bath: Contact service A temperature above the safety temperature was measured in the heating bath. The temperature measure­ ment is defective or the medium filled in was too hot. Heating bath safety temperature is exceeded ▪▪ Switch off units ▪▪ Cool the heating bath medium ▪▪ Contact Service if heating bath fluid was not filled in
  • 47. Troubleshootimg 47 Hei-VAP Precision Error / message Cause Remedy The heating bath is completely evaporated. Please refill the heating bath medium. Heating bath is completely evaporated ▪▪ Deactivate the unit ▪▪ Check if the maximum temperature limiter has responded. If yes, reset (see chapter “Cleaning and maintenance, Maintenance”) ▪▪ Fill in heat transfer fluid An illogical temperature difference was measured between the heating bath sensors. The temperature measurement is defective. Heating bath sensor variance 10 K Contact service The temperature sensor for the heating bath control is defective. (hardware monitoring unit) ▪▪ Sensor monitoring via hardware ▪▪ Heating bath sensor is broken or short circuited Contact service The temperature sensor for the heating bath control unit is broken or bath medium that is too hot was filled in. ▪▪ Heating bath sensor is broken ▪▪ Heating bath is more than 217 °C ▪▪ Switch off device ▪▪ Cool down heating bath fluid ▪▪ Contact service, if no heating bath fluid was filled in The temperature sensor for the heating bath control unit is defective or bath medium that is too cold was filled in. ▪▪ Heating bath sensor short circuit ▪▪ Heating bath is below 0 °C ▪▪ Switch off units ▪▪ Cool down heating bath fluid ▪▪ Contact service if heating bath fluid was not filled in The lift motor is defective or blocked. Lift end stop switch is not reached after 10 seconds ▪▪ Contact service The set safety pressure was exceeded. Pressure sensor safety pressure is exceeded ▪▪ Deactivate the unit ▪▪ Check if the pressure sensor has responded. If yes, reset ▪▪ Contact service The vacuum box is not connected or defective. Vacuum box is not connected or defective ▪▪ Check the connection between the vacuum box and the evaporator. ▪▪ Contact service The ventilation valve is defective. Vacuum valve short circuit ▪▪ Check connection between vacuum box and evaporator ▪▪ Contact service
  • 48. Troubleshootimg 48 Hei-VAP Precision Error / message Cause Remedy The vacuum valve is not connected or defective. ▪▪ The vacuum valve is not connected ▪▪ The connection between the vacuum box and the vacuum valve is interrupted ▪▪ Connect the vacuum valve ▪▪ Check the connection between the vacuum box and the vacuum valve. ▪▪ Contact service The vacuum valve is defective. The vacuum valve is short circuited Replace the vacuum valve The vacuum pump is not connected or defective ▪▪ The vacuum pump is not connected ▪▪ The connection between the vacuum box and the vacuum pump is interrupted ▪▪ Connect the vacuum pump ▪▪ Check the connection between the vacuum box and the vacuum pump The rotation drive was overloaded or is defective. ▪▪ Drive unit is defective ▪▪ Motor overload shutdown ▪▪ Deactivate the unit ▪▪ Stop drive unit for cooling down ▪▪ Contact service Table 7-3: Troubleshooting table - Hei-VAP Precision
  • 49. Troubleshootimg 49 The rotary evaporator is checked after „power on” in an initialization phase for connected components. The function scope of the rotary evaporator is based on the connected units. Missing component Description and response of the evaporator Remedy Vacuum box ▪▪ No vacuum box is connected: ▪▪ Actual value display of the vacuum is not displayed ▪▪ The vacuum entry is not displayed ▪▪ „AUTOeasy“, „AUTOaccurate“ and „Gradient“ modes are not displayed. Note: An evaporator can be ope­rated with a separate pump stand in this condition. ➜➜ Connect component ➜➜ Reset via power off/on Vacuum valve or vacuum pump No vacuum valve or vacuum pump is connected. ▪▪ Vacuum controller is not active ▪▪ „AUTOeasy“, „AUTOaccurate“ and „Gradient“ modes are not displayed. Note: An evaporator can be ope­rated with a separate pump stand in this condition. ➜➜ Connect component ➜➜ Reset via power off/on Temperature sensor T boiling The temperature sensor for calcu- lating the boiling temperature is not connected: ▪▪ The vapor temperature is not displayed ➜➜ Connect component Temperature sensor AUTOaccurate sensor The temperature sensor for controlling the AUTOaccurate mode is not connected: ▪▪ „AUTOaccurate“ mode is not displayed ➜➜ Connect component Table 7-4: Missing Components Overheat protection: reset ➜➜ Switch unit off. Remove cooled down evaporating flask. ➜➜ Disconnect heating bath plug and remove heating bath. ➜➜ If necessary empty heating bath and turn it upside down. ➜➜ Push the red knob on the bottom of the heating bath with a pointed object. ✓✓ Thermal cut-out is reset. Reset overheat protection If you experience a malfunction which can not be resolved, please contact your authorized Heidolph distributor immediately.
  • 50. Assembly 50 Assembly Electrical connections ▪▪ Fuses must only be replaced by a professional electrician. ▪▪ Repairs of any kind are allowed by qualified professional electricians only. Any improper repair can result in a dangerous situation. Contact your local Heidolph Instruments distributor for any repair you may have. Warning: Electric shock! This device must only be connected to a grounded electrical socket. The unit and voltage must match. The rating plate on the back side of the unit provides all voltage specifics (see picture below). When shipped, the unit is grounded. In case the original plug is changed, the new plug must have a protective conductor! If the device is still connected to power while changing the fuse, you might get in contact with live parts. Prior to replacing the fuse ensure that the unit is switched off and pull the plug from the electric socket. Only use original fuses from Heidolph. After changing a fuse check the device for safe operating condition according to IEC 61010-1. Rating plate heating bath Rating plate device Device plug Device fuses F4 F2 Color code for electrical connections: Europe North America GREEN/YEL- LOW PE: Protective conductor (Earth) GREEN PE: Protective conductor (Earth) BLUE N: Neutral conductor WHITE N: Neutral conductor BROWN P: Phase BLACK P: Phase The unit is connected with the power cord supplied to the electrical socket. It plugs into the housing on the rear side of the unit. For countries utilizing a plug other than the standard one supplied: ▪▪ The plug supplied may only be changed by a professional electrician. ▪▪ If utilizing an adaptor ensure that it is grounded and approved by the local regulations. ▪▪ Wiring, adapter and plug must at least meet the electrical power stated on the rating plate.
  • 51. Assembly 51 Connexions Electriques ▪▪ Les fusibles ne peuvent être remplacés que par un Electricien professionnel. ▪▪ Les réparations de toute nature sont autorisées uniquement par un Electricien professionnel. Une réparation incorrecte peut entrainer une situation dangereuse, contactez votre distributeur Heidolph pour toute réparation. Avertissement: Danger de choc électrique ! Cet appareil doit être connecté à une prise électrique mise à la terre. Voltage et intensité de cette prise. Derrière l’instrument, il y a une étiquette avec les requis obligatoires (voir image plus bas). Avant tout envoi, l’appareil est mis à la terre. Si le connecteur original est changé, alors le nouveau devra obligatoirement avoir une connexion à la terre! Si l’appareil est toujours connecté à l’alimentation, Il y a DANGER. Pour changer un fusible, l’appareil doit-être éteint et celui-ci ne doit plus être relié au réseau électrique, donc enlever le cordon d’alimenta- tion. N’utilisez que des fusibles provenant de chez Heidolph. Après remplacement d´un fusible, vérifier que l´appareil peut être utilisé en toute sécurité selon IEC61010-1. Étiquette du bain marie Étiquette de l’instrument Connecteur Electrique Device Fusibles F4 F2 Connexion électrique, code couleur: Europe North Amerika VERT/JAUNE PE: fil de protection (Terre) VERT PE: fil de protection (Terre) BLEU N: Conducteur Neutre BLANC N: Conducteur Neutre MARRON P: Phase NOIR P: Phase L’instrument doit être connecté avec le cordon secteur fournit. Il faudra insérer celui-ci à l’arrière de l’appareil dans le connecteur prévu à cet effet. Pour les pays utilisant un autre système de branchement que le connecteur standard fournit: ▪▪ Le connecteur changé devra être effectué par un électricien professionnel. ▪▪ Si vous utilisez un adaptateur, celui-ci devra être conforme aux normes locales. ▪▪ Le dimensionnement de tous câblage, adaptateur et connecteur doit correspondre à la puissance indiquée sur la plaque d´identification / sur la notice technique de l´appareil.
  • 52. Assembly 52 Mount device Assembly parts Base unit Housing Control panel Lift evaporating flask Flask clamp Base plate heating bath Heating bath Min / Max marksPouring rim Isolated handles Control panel Control panel Easy-Clip
  • 53. Assembly 53 Warning / Avertissement : Risk of crushing! Risk of scalding! / Danger d’écrasement ! Risque de brûlures ! When unit is switched on, rotation or heating can be started accidentally and result in severe injuries./ Quand l’unité est allumée, la rotation ou le chauffage peut s’enclencher accidentellement et entraîner des blessures graves. Only assemble device when the unit is switched off. / Connecter l’unité uniquement lorsque l’unité est éteinte. Transportation lock Transportation lock must be removed before you start. Keep the transportation lock for possible return shipments. The transportation lock consists of three M5x8 screws and a connection plate with drilled holes to fix the position. ✓✓ Base unit is placed on a stable surface. ➜➜ Press and hold lift contact on the lift. Lift contact Transportation lock ➜➜ Loosen the three screws with allen key supplied and remove plate. ➜➜ Release lift contact. ✓✓ Lift drives up automatically. ➜➜ Keep all individual parts for subse- quent use. Transportation lock
  • 54. Assembly 54 Heating bath Attach heating bath ✓✓ A movable base plate with an enhanced guide rail is located on the right side of the base unit. ➜➜ Place heating bath with gap on the guide rail. ➜➜ Move heating bath carefully to the left and right to lock it. Base plate Heating bath Guide rail Recess Move heating bath It may be necessary to increase the distance between heating bath and drive when bigger evaporating flasks or spacers between the evaporating flask and vapor tube are used. ✓✓ Base unit is placed on a stable surface. ➜➜ Allow sufficient space to move heating bath. ✓✓ On the right side the heating bath slides out approximately 20 cm to allow for adjustment. ➜➜ Hold heating bath on both handles and slide it to the right until you have reached the desired position. Vapor tube Assembly parts ▪▪ Vapor tube ▪▪ Flask clamp Easy-Clip ▪▪ Coupling vapor tube ▪▪ Clamping sleeve The flask clamp Easy-Clip is pre-assembled in NS 29. For smaller flasks the Easy-Clip NS 24 is enclosed. Clamping sleeve Flask clamp Easy-Clip Vapor tubeCoupling vapor tube The device is delivered with pre-assembled coupling for the vapor tube and the condenser. ➜➜ Hold the locking knob beneath “lock” for a quarter turn. ➜➜ Unscrew the coupling of the vapor tube along with the vapor tube on the right side of the drive. ➜➜ Unscrew the coupling of the condenser on the left side of the drive. Coupling condenser Vapor tube coupling Flask clamp Easy-Clip Lock vapor tube Motor drive
  • 55. Assembly 55 ➜➜ Remove tension spring and PTFE seal on the condenser side. Tension spring PTFE seal Caution / Attention: Possible contamination, leakage, damage to your unit/ Possibilité de contamination, de fuite et de dommage sur l’unité Due to a damaged PTFE seal your SET vacuum may not be reached, your sample may be contaminated, your unit may be damaged./ À cause d’un joint en PTFE endommagé, le niveau de vide PROGRAMMÉ peut ne pas être atteint, l’échantillon peut être contaminé et l’unité endommagée. Especially the sealing lip of the vacuum seal is susceptible to damage in handling. Never operate your system with a damaged or worn-off PTFE seal! Always check the condition of your PTFE seal regularly and if required replace it./ La lèvre d’étanchéité en particulier est susceptible d’être endommagée lors de la manipulation. Ne jamais exploiter le système avec un joint en PTFE endommagé ou abimé ! Toujours vérifier l’état du joint en PTFE régulièrement et le remplacer si besoin. ✓✓ Coupling and Easy-Clip are screwed together. ➜➜ Push coupling of the vapor tube along with Easy-Clip on the vapor tube (direction and order as shown under “Assembly parts). ➜➜ Push clamping sleeve with the bead to the glass on vapor tube until it audibly locks. ➜➜ Insert vapor tube with clamping sleeve first from below to the drive and screw it tight. ➜➜ At the very last quarter turn, press locking knob. ✓✓ Coupling locks in and vapor tube is securely mounted. Vapor tube, clamping sleeve and coupling
  • 56. Assembly 56 Condenser Warning / Avertissement: Risk of glass breakage! / Risque de bris de verre ! If a flask is damaged, glass can break causing serious harm./ Si un flacon est endommagé, cela peut entraîner un bris de verre supplémentaire et causer des blessures graves. Work with undamaged glass only and check all glassware regularly for any damage./ Travailler uniquement avec du verre sans défaut et vérifier régulière- ment que toutes les pièces en verre sont exemptes de dommages. Heidolphs coated glassware sets aim to minimize the risk of injury due to glass breakage. However they are only suitable for temperatures up to 80° C. PTFE seal ➜➜ Slide PTFE seal with the labeling “Motor Side” facing drive onto the vapor tube. ✓✓ The PTFE seal is tightened as far as it will go. PTFE seal Condenser: Glassware set G1 and G3 ➜➜ Push coupling of glassware over condenser flange. ➜➜ Push tension ring over condenser flange. ➜➜ Screw condenser to the drive hand-tight. CouplingTension ring ✓✓ Condenser is mounted to the drive.
  • 57. Assembly 57 Condenser: Glassware set G5 dry ice ✓✓ Condenser is mounted to the drive. ➜➜ Screw inlet tube with inlet valve onto opening opposite of vapor tube (see chapter “Assembly, Inlet tubes”). ➜➜ If using inert gas screw inlet tube with inert gas valve onto opening above inlet valve. Inert gas valve Inlet valve ➜➜ Place red seal ring into notch at top of condenser flange. ➜➜ Place white PTFE ring with collar up on to condenser flange. ➜➜ Insert the jacket trap into condenser. ✓✓ Due to vacuum inside condenser, the flange is drawn in and the system is tight. ➜➜ To protect the dry ice, place black cap on top.