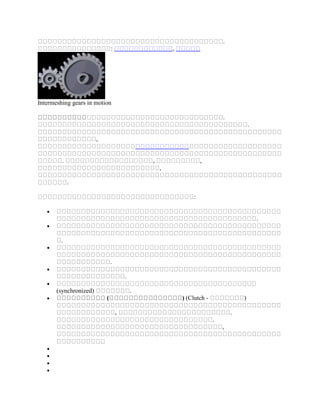
Intermeshing Gears in Motion
•Als DOCX, PDF herunterladen•
0 gefällt mir•363 views

The document provides instructions for making a rubber band-powered airplane. It describes: 1. Constructing the body of the plane from balsa wood strips or cardboard, including cutting wings and a tail piece. 2. Attaching the wings to the body and gluing on the tail section. 3. Sliding a propeller onto the front of the plane and securing it with glue, then threading a rubber band from the propeller to a paperclip attached under the tail. 4. Allowing the glue to dry before winding the rubber band and tossing the plane to make it fly.

Empfohlen
Empfohlen
Weitere ähnliche Inhalte
Ähnlich wie Intermeshing Gears in Motion
Ähnlich wie Intermeshing Gears in Motion (20)
Kürzlich hochgeladen
Kürzlich hochgeladen (20)
Intermeshing Gears in Motion
- 1. . : , Intermeshing gears in motion . . , . , , , . : . . . . (synchronized) . ( ) (Clutch - ) , . . ,
- 2. . , . . ? . . , , , . . : ,
- 3. Intermeshing gears in motion . . , . , , , . : . . . . (synchronized) .
- 4. Fuselage 1 Fit one end of the 1/8-inch by 3/8-inch by 12-inch strip of balsa wood, which will be the fuselage, into the cup of the propeller. This will form a fairly snug fit, but it may fit more easily if you first gently press the corners of the balsa wood strip against a hard surface to soften the edges. 2 Slip one end of the rubber band on the hook on the propeller. 3 Straighten one end of the paper clip and snip off a 1-inch piece of the paper clip with the cutter part of the needle-nosed pliers. 4 Bend one end of the 1-inch piece of the paper clip into a small loop with the needle-nosed pliers to hide the sharp end. 5
- 5. Lay the fuselage on a table and stretch the rubber band until just taut. Do not overstretch the rubber band or leave it too loose. Place the 1-inch piece of the paper clip between the sides of the rubber band with the sharp end facing the fuselage and the rounded end facing out. Slide it away from the propeller, taking care to not overstretch the rubber band. 6 Push the 1-inch piece of the paper clip into the fuselage. If the paper clip piece isn't straight, it will push out the side of the fuselage. 7 Remove the rubber band from the paper clip piece. Secure the paper clip piece with a drop or two of hot glue. 8 Bend the paper clip piece away from the propeller and strengthen it with a drop or two of hot glue. Tail Section 1 Form a rectangle with the 2 1/16-inch by 1/8-inch by 4-inch strip of balsa wood and 2 1/16-inch by 1/8-inch by 2-inch strip of balsa wood. Secure the corners with hot glue. 2 Cut a 5-inch by 3-inch piece of tissue paper. Glue the tissue paper to the rectangle frame using the glue stick. Trim the tissue paper close to the frame; this forms the stabilizer. 3 Build a rectangular frame with 3 1/16-inch by 1/8-inch by 2-inch strip of balsa wood, leaving one side open. Secure the corners with hot glue. 4 Cut a 3-inch square piece of tissue paper. Glue the tissue paper to the frame using the glue stick. Trim the tissue paper close to the frame. This is the rudder. 5
- 6. Stand up the rudder in the center of the stabilizer with the open side facing the stabilizer. Attach with hot glue where the balsa strips meet, ensuring the rudder is perpendicular to the stabilizer. Do not glue the tissue paper. Wings 1 Form a rectangle with the 2 1/16-inch by 1/8-inch by 12-inch strip of balsa wood and 2 1/16-inch by 1/8-inch by 2 2/8-inch strip of balsa wood. Secure the corners with hot glue. 2 Cut a 13-inch by 4-inch piece of tissue paper. Glue the tissue paper to the rectangle frame using the glue stick. Trim the tissue paper close to the frame. This is the wing section. 3 Crack, but do not break, the balsa wood in the middle of the wing, forming a wide "V." First dent the wood with your fingernail so the strip cracks in the right place. Put the balsa-wood side in on the outside of the "V" so the crack is on the balsa wood side, not the tissue-paper side. 4 Lay the wing section upside-down so that the point is on top. Move the ends of the wing until the point is about 3 inches above the table. Glue a 1/16-inch by 1/8-inch by 4-inch strip of balsa wood to the peaks of the wing section. A little bit of the strip will hang over on each side. Turn over the wing section so the peak is now facing down. 5 Attach two toothpicks to each end of the strip that hangs over the wing section with hot glue. The toothpicks should fit tightly to the wing and point straight down below the bottom of the "V." Final Assembly 1 Hold the fuselage so the rubber band is on the bottom and the propeller is at the front. Attach the tail section to the back of the fuselage with hot glue, lining up the back edge of the tail section with the back edge of the fuselage. The rudder should stand straight up. Glue only the balsa wood and not the tissue paper. 2
- 7. Attach the wing section to the fuselage by making the toothpicks straddle the fuselage with the front-end toothpicks about 3 inches from the front of the plane. Tape the toothpicks to the fuselage using electrical tape. Angle the back toothpick about ¼-inch lower than the front. Read more: How to Make a Rubber-Band Propeller Plane | eHow.comhttp://www.ehow.com/how_7895643_make-rubberband-propeller- plane.html#ixzz1DRYoOqkz
- 8. Construct the body of the plane. A long, narrow rectangular box can be used as the body without needing to cut or glue any parts. If you are using a cereal box as the base, cut three long strips of cardboard from the box. For example, strips that are as long as the cereal box and 3 inches wide. Form a three-dimensional triangle by placing glue on both long edges of each piece and gluing them all together. 2 Cut two long, rectangular pieces, each measuring 6 by 3 inches. These pieces will form the wings of the airplane. You could also use two equilateral triangles for the wings, measuring 5 inches on all sides. 3 Glue the wings to the top of the body a few inches from the front of the plane. 4 Cut a smaller triangle out of the cardboard, measuring 2 inches on all sides. This will be the tail of the plane. 5 Glue the tail to the top end section of the body. Spread glue on the base of the triangle and secure the piece so the point of the triangle is facing upwards. If the tail does not stay up with glue, try using tape to secure it more firmly, or cut a small slit in the body of the plane and insert the tail piece. 6 Allow the glue to dry. 7 Paint the airplane and allow the first coat of paint to dry. 8 Paint sets of windows on the body of the airplane and add details like words, tail numbers and logos.
- 9. Read more: How to Make an Airplane From Cardboard | eHow.comhttp://www.ehow.com/how_6299419_make-airplane- cardboard.html#ixzz1DRZvQGN7 Things You'll Need: Balsa wood Pencil Craft knife Rubber band Paper clip Propeller White glue 1. 1 Buy a propeller from a craft store or online model supply website. You can make a homemade propeller out of a popsicle stick. However, it is difficult to ensure the balance on a homemade propeller. For this craft it is advisable to purchase a pre-made one. You want to purchase a propeller which slides onto the nose of the airplane and has a eyelet that hangs under the body of the airplane. 2. 2 Draw the design for the body of your airplane lightly onto the balsa wood with a pencil. The body should be two inches high by six inches long. The nose should be pointed or rounded. And you need to include a tail fin for stabilization of the plane. 3. 3 Draw two wings for your airplane lightly onto balsa wood with pencil. The main wing should be two inches by six inches (the same length and width as the plane body). The back wing should be half of that: one inch by three inches. 4. 4 Cut all of the pieces of your plane out using a craft knife. Cut two horizontal lines into the body of your airplane. The first needs to be two inches long and should start 1/3 of the way from the nose of the plane towards the tail. The second should be one inch long and start immediately at the base of the tail fin of your plane.
- 10. 5. 5 Affix the wings into the slots so that they are centered. Secure in place with a dab of glue. 6. 6 Attach the paperclip under the tail fin by poking one end of the paperclip through the balsa wood. Twist the eyelet closed. Slide the propeller rig onto the front of the plane and secure into place with a dab of glue. 7. 7 Allow glue on the plane to fully dry. Two to four hours is adequate time. 8. 8 Thread the rubber band from the eyelet under the propeller to the paperclip eyelet under the tail so that it is taut. Twist the propeller with your finger and toss the airplane gently and it will fly away. Read more: How to Make a Rubberband Powered Glider | eHow.comhttp://www.ehow.com/how_6675780_make-rubberband-powered- glider.html#ixzz1DRbB4IBS