SlideShare ist ein Scribd-Unternehmen logo
1 von 18
Downloaden Sie, um offline zu lesen
AUGUST 2015
A PRINCIPLED TECHNOLOGIES REPORT
Commissioned by Dell Inc.
BETTER EMAIL RESPONSE TIME USING MICROSOFT EXCHANGE 2013 WITH
THE DELL POWEREDGE R730XD
Email is a vital part of your organization’s unified communications and
collaboration (UC&C) platform, which includes email, IM, and voice applications. When
selecting hardware for your Microsoft Exchange Server 2013 solution, you need to
select the server that responds quicker to user requests, because shorter wait times
make for a better user experience.
In the Principled Technologies datacenter, we tested the Microsoft Exchange
2013 performance of the Dell PowerEdge R730xd powered by the Intel Xeon processor
E5-2600 v3 family against a Supermicro server in a similar configuration. Due to its
design, the Dell PowerEdge R730xd had four more 3.5” hard-disk drives (HDDs) than did
the Supermicro server. Because the Dell PowerEdge R730xd offers more drive bays, you
have the potential to add storage capacity to your application. When handling Exchange
Server 2013 requests, we found the Dell PowerEdge R730xd delivered 31.7 percent
better response times than the similarly configured Supermicro server did. The benefits
of a better response time are obvious: if your email works faster, user productivity and
overall experience improves, making your UC&C solution a greater success.
A Principled Technologies report 2Better email response time using Microsoft Exchange 2013 with the
Dell PowerEdge R730xd
FASTER EMAIL HELPS USERS AND YOUR BUSINESS
Slow email can hurt user productivity and user experience. As your employee
numbers swell, the negative effects of slow email can affect efficiency. Giving users a
responsive email experience should be a top priority, and to do so you must choose
hardware that can deliver fast response times.
Powered by the Intel Xeon processor E5-2600 v3 family, the Dell PowerEdge
R730xd is a high capacity, storage-dense server with six storage configuration options.
Our particular configuration of the R730xd had twelve front-load 3.5” disks for data,
four internal 3.5” disks for data, and two 2.5” disks in the back for operating system
files. While the Dell offers the extra four disks by way of a special internal drive carrier,
the Supermicro by design offered only the twelve front-load 3.5” disks for data. In our
tested configuration, therefore, the Dell had a greater available disk capacity and disk
count than the Supermicro server.
Both disk count and disk capacity can affect your application’s performance and
design. In this case, having more disks may have contributed to the better response
time of the Dell server. In addition, having more disks of the same capacity increased
the gigabytes available for use by the application.
For more information about the PowerEdge R730xd and our other test
components, see Appendix A. For detailed system configuration, see Appendix B. For
step-by-step testing details, see Appendix C.
WHAT WE FOUND
About the results
We tested both the Dell PowerEdge R730xd and the current-generation
Supermicro server with 4,800 users running the Outlook_450 user profile and 250MB
mailbox size. Our test lasted for two hours and had 20-minute step ups of 1,200 users
each. Over the duration of the test window, the Supermicro server delivered a response
time of 14.75 milliseconds (ms). In contrast, the Dell PowerEdge R730xd provided a
response time of 10.07 ms (see Figure 1), 31.7 percent better. We used Windows
Performance Monitor to record the I/O Database Reads (Attached) Average Latency
Exchange counter during the run. We chose this counter as it indicates the read
response time of the underlying disk system, which directly effects application response
times. We did not include the writes latency counter as the database writes are
asynchronous, and thus it is not a clear indicator of client latency.
When you consider how many emails your users receive every day, that time
difference can add up. Better response time, also referred to as latency, speeds up the
A Principled Technologies report 3Better email response time using Microsoft Exchange 2013 with the
Dell PowerEdge R730xd
email process every time your users sends or receives an email, delivering time savings
that contribute to a more positive user experience.
Figure 1: The Dell PowerEdge
R730xd delivered a 31.7
percent better response time
than the Supermicro server
did.
CONCLUSION
In a market where servers can seem the same at a glance, look for the
differences. Your email infrastructure choices will directly affect end-user experience for
your UC&C applications. Equipped with more drives in its extra drive slots, the Dell
PowerEdge R730xd delivered 31.7 percent better Exchange 2013 response times than a
similarly configured, current-generation Supermicro server did. With better Microsoft
Exchange Server 2013 response times, the PowerEdge R730xd can help deliver an
improved experience for users in your organization.
A Principled Technologies report 4Better email response time using Microsoft Exchange 2013 with the
Dell PowerEdge R730xd
APPENDIX A – ABOUT THE COMPONENTS
About the Dell PowerEdge R730xd
Dell designed the two-socket, 2U Dell PowerEdge R730xd rack server to provide the scale-out storage efficiency
needed by big data users, including the option for hybrid internal storage tiering and six distinct storage configurations.
The configuration we tested had 12 3.5′′ front HDD bays and four 3.5′′ internal HDD bays. Powered by the latest Intel®
Xeon® processors E5-2690 v3, the PowerEdge R730xd has 24 DIMM slots to support up to 1.5 TB of memory, and
supports up to four optional NVMe Express™ Flash PCIe® SSDs.
With redundant power supply units, hot-swappable hardware, and Dual SDTM card for Failsafe Hypervisors, the
Dell PowerEdge R730xd supports hardware high availability. The PowerEdge R730xd comes standard with iDRAC8 with
Lifecycle Controller and Dell OpenManage™, which all work to streamline management. For more details on the Dell
PowerEdge R730xd, visit www.dell.com/us/business/p/poweredge-r730xd/pd.
About the Intel Xeon processor E5-2600 v3 product family
According to Intel, the Intel Xeon processor E5-2600 v3 product family “helps IT address the growing demands
placed on infrastructure, from supporting business growth to enabling new services faster, delivering new applications in
the enterprise, technical computing, communications, storage, and cloud.” It also delivers benefits in performance,
power efficiency, virtualization, and security. The E5-2600 v3 product family has up to 50 percent more cores and cache
than processors from the previous generation.
Other features include the following:
 Intel Advanced Vector Extensions 2 (AVX2)
 Intel Quick Path Interconnect link
 Up to 18 cores and 36 threads per socket
 Up to 45MB of last level cache
 Next-generation DDR4 memory support
 Intel Integrated I/O providing up to 80 PCIe® lanes per two-socket server
 Intel AES-NI data encryption/decryption
The Intel Xeon processor E5-2600 v3 product family also uses Intel Intelligent Power technology and per-core P
states to maximize energy efficiency. Learn more at http://www.intel.com/content/www/us/en/processors/xeon/xeon-
e5-brief.html
About Microsoft Load Generator 2013
To test the solutions’ mail server performance, we used the Microsoft® Load Generator 2013 (LoadGen)
benchmark, performing tasks to simulate a heavy user generating mail activity. For our workloads, we used the following
settings:
 Number of users: 4,800
 Mailbox Profile: 250MB mailboxes
 Action Profile: Outlook_450
For more details about LoadGen, see http://www.microsoft.com/en-us/download/details.aspx?id=40726
A Principled Technologies report 5Better email response time using Microsoft Exchange 2013 with the
Dell PowerEdge R730xd
APPENDIX B – SYSTEM CONFIGURATION INFORMATION
Figure 2 provides detailed configuration information for the test systems.
System Dell PowerEdge R730xd Supermicro 6028R-E1CR12N
Power supplies
Total number 2 2
Vendor and model number Dell L1100E-S1 SuperMicro PWS-920P-SQ
Wattage of each (W) 1,100 920
Cooling fans
Total number 6 3
Vendor and model number San Ace 60 9GA0612P1J651 Nidec UltraFlo V80E12BHA5-57
Dimensions (h × w) of each 2.5′ × 2.25′ 3.5 x 1.5
Volts 12 12
Amps 1.2 0.6
General
Number of processor packages 2 2
Number of cores per processor 10 10
Number of hardware threads per
core
2 2
System power management policy Performance per Watt (OS) Default
CPU
Vendor Intel Intel
Name Xeon Xeon
Model number E5-2660 v3 E5-2660 v3
Stepping M1 M1
Socket type LGA2011-3 LGA2011-3
Core frequency (GHz) 2.6 2.6
Bus frequency 5 GT/s DMI 5 GT/s DMI
L1 cache 10 × 32 KB 10 × 32 KB
L2 cache 10 × 256 KB 10 × 256 KB
L3 cache 25 MB 25 MB
Platform
Vendor and model number Dell PowerEdge R730xd Supermicro 6028R-E1CR12N
Motherboard model number 0H21J3 SuperMicro X10DRI-T4
BIOS name and version Dell 1.2.10 American Megatrends Inc. 2.17.1245
BIOS settings Default Default
Memory module(s)
Total RAM in system (GB) 128 128
Vendor and model number Hynix HMA42GR7MFR4N-TF Micron MTA36ASF2G72PZ-2G1A2KJ
Type PC4-2133P PC4-2133P
Speed (MHz) 2,133 2,133
Speed running in the system (MHz) 2,133 2,133
Timing/Latency (tCL-tRCD-tRP-
tRASmin)
15-15-15-32 15-15-15-32
A Principled Technologies report 6Better email response time using Microsoft Exchange 2013 with the
Dell PowerEdge R730xd
System Dell PowerEdge R730xd Supermicro 6028R-E1CR12N
Size (GB) 16 16
Number of RAM module(s) 8 8
Chip organization Double-sided Double-sided
Rank Dual Dual
Operating system
Name Windows Server 2012 R2 Datacenter Windows Server 2012 R2 Datacenter
Build number 9600 9600
File system NTFS NTFS
Language English English
RAID controller #1
Vendor and model number Dell PERC H730p mini LSI MegaRAID 3108
Firmware version 25.2.2-004 24.6.0-0023
Driver version 6.602.12.0 (11/03/2014) 12.0.1.1019 (08/09/2013)
Cache size (GB) 2 1
RAID controller #2
Vendor and model number N/A
Intel C600 Series Chipset SATA RAID
Adapter
Driver version N/A 12.0.1.1019 (08/09/2013)
Hard disk #1
Vendor and model number Dell Z4D15M6Q Seagate ST6000NM0054
Number of drives 16 12
Size (TB) 6 6
Type SAS SAS
Hard disk #2
Vendor and model number Dell ST91000640NS Dell 0WF12F
Number of drives 2 2
Size (TB) 1 1
RPM 7.2k 7.2k
Type SATA SATA
Ethernet adapters #1
Vendor and model number Intel Ethernet 10G 4P X540/I350 Intel Ethernet 10G 4P X540-AT2
Type Integrated Integrated
Driver 3.9.58.9101 (7/17/2014) 3.4.47.2 (06/21/2013)
Figure 2: Detailed system configuration.
A Principled Technologies report 7Better email response time using Microsoft Exchange 2013 with the
Dell PowerEdge R730xd
APPENDIX C – HOW WE TESTED
We installed Windows Server 2012 R2 on both servers and added the Hyper-V role. We configured both servers
with up-to-date drivers, firmware, and Windows updates.
Installing Microsoft Windows Server 2012 R2
1. Insert the installation media into the CD/DVD drive, and restart the server.
2. Press any key when prompted to boot from DVD.
3. When the installation screen appears, click My language is English (United States).
4. Leave language, time/currency format, and input method as default, and click Next.
5. Click Install now.
6. When the installation prompts you, enter the product key.
7. Select Windows Server 2012 R2 Datacenter (Server with a GUI), and click Next.
8. Check I accept the license terms, and click Next.
9. Click Custom: Install Windows only (advanced).
10. Select Drive 0 Unallocated Space, and click Next.
11. When the Settings page appears, fill in the Password and Reenter Password fields with the same password.
12. Log in with the password you set up previously.
Configuring Windows Update
1. In the left pane of the Server Manager window, click Local Server.
2. In the main frame, next to Windows Update, click Not configured.
3. In the Windows Update window, in the main pane, click Let me choose my settings.
4. Under Important updates, select Never check for updates (not recommended), and click OK.
5. In the left pane, click Check for updates, and install all available updates.
6. Close the Windows Update window.
Installing Hyper-V
1. Open Server Manager, and click ManageAdd Roles and Features.
2. At the Before You Begin screen, click Next.
3. At the Installation Type screen, click Next.
4. At the Server Selection screen, select one of the servers in the failover cluster.
5. At the Server Roles screen, check Hyper-V. At the prerequisite pop-up, click Add Features. Click Next.
6. At the Features screen, click Next.
7. At the Hyper-V screen, click Next.
8. At the Virtual Switches screen, click Next.
9. At the Migration screen, click Next.
10. At the Default Stores screen, enter the iSCSI storage location. Click Next.
11. At the Confirmation screen, check to automatically restart the server after installation, and click Install.
A Principled Technologies report 8Better email response time using Microsoft Exchange 2013 with the
Dell PowerEdge R730xd
Creating the base VM
1. Click Start, type Hyper-V Manager, and press Enter.
2. In the right pane, click Virtual MachinesNew Virtual Machine.
3. Select a node on which to install the VM, and click OK.
4. At the Before You Begin screen, click Next.
5. At the Specify Name and Location screen, give the VM a name, and click Next.
6. At the Assign Memory screen, type 8 GB, and click Next.
7. At the Configure Networking screen, use the drop-down menu to select the virtual switch, and click Next.
8. At the Connect Virtual Hard Disk screen, create a new disk, enter 50 GB, and click Next.
9. At the Summary screen, click Finish.
Installing the VM operating system on the first VM
1. From the VM console, connect to the ISO image of the installation DVD for Windows Server 2012 R2 Datacenter.
If the ISO image is not stored on the host, start the VM, and connect to the ISO image.
2. Start the VM.
3. At the Language Selection Screen, click Next.
4. Click Install Now.
5. Select a full installation of the Datacenter edition, and click Next.
6. Click I accept the license terms, and click Next.
7. Click Custom.
8. Click Next.
9. At the User’s password must be changed before logging on warning screen, click OK.
10. Enter the desired password for the administrator in both fields, and click the arrow to continue.
11. At the Your password has been changed screen, click OK.
12. Install the latest Host Integration Tools package on the VM. Restart as necessary.
13. Connect the machine to the Internet, and install all available Windows updates. Restart as necessary.
14. Enable remote desktop access.
15. Change the hostname, and reboot when prompted.
16. Create a shared folder to store test script files. Set permissions as needed.
17. Set up networking:
a. Click StartControl Panel, right-click Network Connections, and choose Open.
b. Right-click the VM traffic NIC, and choose Properties.
c. Select TCP/IP (v4), and choose Properties.
d. Assign the VM a static IP address.
Configuring the Active Directory server
Installing the Active Directory Domain Services role
Before completing this step, you will need to apply a static IP address for the server. In our case, we used
192.168.1.10.
A Principled Technologies report 9Better email response time using Microsoft Exchange 2013 with the
Dell PowerEdge R730xd
1. Launch Server Manager, and select Add roles and features.
2. Click Next at the Add Roles and Features Wizard.
3. Select Role-based or feature-based installation, and click Next.
4. Select the AD server from the server pool, and click Next.
5. Select Active Directory Domain Services from the list of Roles, click the Add Features button to add features that
are required by Active Directory Domain Services, and click Next.
6. Accept the defaults selected by setup at the Select Features screen, and click Next.
7. Click Next at the AD DS screen.
8. Select Restart the destination server automatically if required at the confirmation screen, and click Install.
9. Click the yellow warning triangle in the server manager window.
10. Click Promote this server to a domain controller.
11. Select Add a new forest, type in the Root domain name (fqdn), and click Next. For our testing, we used
test.local
12. Type in and confirm the password, and click Next.
13. Click Next at the DNS Options screen.
14. Verify the NetBIOS name, and click Next.
15. Accept the default paths, and click Next.
16. Review the options, and click Next.
17. Verify the prerequisite check passes successfully, and click Install.
Preparing AD for Exchange
1. Create a reverse lookup zone:
a. Click the start button, and type DNS in the search field.
b. Open the DNS manager by clicking on it in the results field.
c. Expand your Active Directory domain, and click on Reverse Lookup Zones.
d. Click ActionNew Zone.
e. Click Next on the Welcome screen.
f. Chose Primary Zone, and click Next.
g. Leave default replication scope, and click Next.
h. Choose IPv4, and click Next.
i. Enter the IP address of your domain (192.168.1 for our example).
j. Choose Allow both nonsecure and secure dynamic updates, and click Next.
k. Click Finish.
2. Insert the Exchange 2012 R2 Installation ISO in the AD VM DVD drive.
3. In Windows Explorer, double-click the Exchange DVD icon.
4. In the Exchange installation folder, hold down shift, and right-click.
5. Choose Open a command window here.
6. Run the following command:
7. Setup.exe /PrepareSchema /IAcceptExchangeServerLicenseTerms
A Principled Technologies report 10Better email response time using Microsoft Exchange 2013 with the
Dell PowerEdge R730xd
8. When the previous command completes, run the following command:
9. Setup.exe /PrepareAD /OrganizationName:”organization name”
/IAcceptExchangeServerLicenseTerms
10. Close the command window when the setup finishes.
Installing Active Directory Certificate Services
1. Launch Server Manager, and select Add roles and features.
2. Click Next at the Add Roles and Features Wizard.
3. Select Role-based or feature-based installation, and click Next.
4. Choose Active Directory Certificate Services.
5. Click Add Features, if prompted, to install any required features.
6. Click Next.
7. Click Next.
8. Click Next.
9. Choose Certificate Authority and Certification Authority Web Enrollment.
10. Click Add Features, if prompted, to install any required features.
11. Click Next.
12. Leave defaults, and click Next.
13. Click Install.
14. Click Close when the install finishes.
15. Click on the yellow warning symbol in the Server Manager, and click Configure Active Directory Certificate
Services.
16. Leave defaults, and click Next.
17. Check both Certification Authority and Certification Authority Web Enrollment, and click Next.
18. Choose Enterprise CA, and click Next.
19. Choose Root CA, and click Next.
20. Choose Create a new private key, and click Next.
21. Leave defaults, and click Next.
22. Leave defaults, and click Next.
23. Leave 5 years, and click Next.
24. Leave default locations, and click Next.
25. Click Configure.
26. Close when the configuration finishes.
27. Open Internet Explorer® and navigate to localhost/certsrv/Default.asp to verify that the installation succeeded.
Installing Exchange Server 2013 SP1 Mailbox and Client Access Server roles
Using the template, clone two VMs: one for the Exchange Client Access Server, or CAS, and the other for the
Exchange Mailbox Server. Edit the hardware settings in each. The Mailbox server should have 16 vCPUs (16 virtual
sockets each with one core) and 64 GB of memory. Using the Exchange datastore, add a 2,048 GB disk and a 20 GB disk
to the Mailbox server for the Exchange mailbox and Exchange logs respectively. Set static IPs on both VMs and join the
domain.
A Principled Technologies report 11Better email response time using Microsoft Exchange 2013 with the
Dell PowerEdge R730xd
1. On the Exchange Mailbox Server, log into the server using domain administrator credentials.
2. Open Windows PowerShell® and run the following command:
Install-WindowsFeature AS-HTTP-Activation, Desktop-Experience, NET-
Framework-45-Features, RPC-over-HTTP-proxy, RSAT-Clustering, RSAT-
Clustering-CmdInterface, RSAT-Clustering-Mgmt, RSAT-Clustering-
PowerShell, Web-Mgmt-Console, WAS-Process-Model, Web-Asp-Net45, Web-
Basic-Auth, Web-Client-Auth, Web-Digest-Auth, Web-Dir-Browsing, Web-Dyn-
Compression, Web-Http-Errors, Web-Http-Logging, Web-Http-Redirect, Web-
Http-Tracing, Web-ISAPI-Ext, Web-ISAPI-Filter, Web-Lgcy-Mgmt-Console,
Web-Metabase, Web-Mgmt-Console, Web-Mgmt-Service, Web-Net-Ext45, Web-
Request-Monitor, Web-Server, Web-Stat-Compression, Web-Static-Content,
Web-Windows-Auth, Web-WMI, Windows-Identity-Foundation
3. Restart the server.
4. Download the Microsoft Unified Communications Managed API 4.0, Core Runtime 64-bit
(go.microsoft.com/fwlink/p/?linkId=258269).
5. Run UcmaRuntimeSetup.exe.
6. When the installation completes, click Finish.
7. Navigate to the location of the Exchange installation media, and double-click Setup.exe.
8. At the Check for Updates? screen, check the Connect to the Internet and check for updates checkbox, and click
Next.
9. When the updates complete, click Next.
10. At the Introduction screen, click Next.
11. At the License Agreement screen, check the box to accept the terms, and click Next.
12. At the Recommended Settings screen, check the Don’t use recommended settings checkbox, and click Next.
13. At the Server Role Selection, select Mailbox or Client Access role, and click Next.
14. At the Installation Space and Location screen, leave the default location for the installation, and click Next.
15. At the Malware Protection Settings, select Yes to disable, and click Next.
16. At the Readiness Checks screen, allow the verification to complete. If there are no failures, click Install.
17. When the installation completes, click Finish, and restart the server.
18. Repeat steps 1–17 for the Exchange CAS server.
Configuring Exchange
1. On the CAS server, open the Exchange Admin Center by using a browser and navigating to
https://localhost/ecp
2. Enter the domain administrator credentials, and click Sign in.
3. If prompted, select the language and time zone, and click Save.
4. In the left pane, click Mail Flow, and then click Send Connectors.
5. On the Send Connectors page, click the New icon.
6. In the New Send Connector wizard, specify SMTP as the name and select Internet as the type. Click Next.
7. In the Network settings screen, choose MX record associated with recipient domain, and click Next.
8. In the Address space screen, click the Add icon.
A Principled Technologies report 12Better email response time using Microsoft Exchange 2013 with the
Dell PowerEdge R730xd
9. In the Add domain window, enter * in the Fully Qualified Domain Name (FQDN) field, and click Save.
10. Click Next.
11. In the Source Server screen, click the Add icon.
12. In the Select a Server window, select the mailbox server, click Add, and click OK.
13. Click Finish.
14. In the left pane of the EAC, click servers, select the name of the CAS server, and click Edit.
15. Click Outlook Anywhere, and enter the appropriate FQDN of the Client Access Server for the external and
internal hostname field. For example, exchangeserver.test.local
16. Choose NTLM as the authentication method, and click Save.
17. Click Virtual Directories, and then click the Configure external access domain icon.
18. In the Select the Client Access servers to use with the external URL window, click the Add icon.
19. Select the CAS server, and click Add. Click OK.
20. Type the FQDN of the CAS server in the Enter the domain, and click Save.
21. Log into the Active Directory server using administrator credentials, and complete the following steps:
a. Open Server Manager, then click ToolsDNS.
b. In DNS Manager, expand the Active Directory server nameForward Lookup Zonestest.local in
the left pane.
c. In the right pane, verify or create the DNS records as presented in Figure 3.
Type
Host or child
domain/alias name
FQDN
FQDN of mail
server
Mail Exchanger (MX) Leave blank domain.com casserver.domain.com
Alias (CNAME) Autodiscover Autodiscover.domain.com casserver.domain.com
Alias (CNAME) Owa Owa.domain.com casserver.domain.com
Figure 3: DNS records.
22. Log back into your CAS server.
23. In the Exchange PowerShell, run the following commands, replacing $HostName with the host name (not FQDN)
of your CAS server:
Set-EcpVirtualDirectory "$HostNameECP (Default Web Site)" -InternalUrl
((Get-EcpVirtualDirectory "$HostNameECP (Default Web
Site)").ExternalUrl)
Set-WebServicesVirtualDirectory "$HostNameEWS (Default Web Site)" -
InternalUrl ((get-WebServicesVirtualDirectory "$HostNameEWS (Default Web
Site)").ExternalUrl)
Set-ActiveSyncVirtualDirectory "$HostNameMicrosoft-Server-ActiveSync
(Default Web Site)" -InternalUrl ((Get-ActiveSyncVirtualDirectory
"$HostNameMicrosoft-Server-ActiveSync (Default Web Site)").ExternalUrl)
Set-OabVirtualDirectory "$HostNameOAB (Default Web Site)" -InternalUrl
((Get-OabVirtualDirectory "$HostNameOAB (Default Web
Site)").ExternalUrl)
A Principled Technologies report 13Better email response time using Microsoft Exchange 2013 with the
Dell PowerEdge R730xd
Set-OwaVirtualDirectory "$HostNameOWA (Default Web Site)" -InternalUrl
((Get-OwaVirtualDirectory "$HostNameOWA (Default Web
Site)").ExternalUrl)
Set-PowerShellVirtualDirectory "$HostNamePowerShell (Default Web Site)"
-InternalUrl ((Get-PowerShellVirtualDirectory "$HostNamePowerShell
(Default Web Site)").ExternalUrl)
Get-OfflineAddressBook | Set-OfflineAddressBook -
GlobalWebDistributionEnabled $True -VirtualDirectories $Null
Get-OutlookAnywhere | Set-OutlookAnywhere -ExternalHostname mail.ives.lan
-InternalHostname mail.ives.lan -ExternalClientsRequireSsl $true -
InternalClientsRequireSsl $true -DefaultAuthenticationMethod NTLM
24. Create a folder at the root of C: on the CAS server, and share it to Everyone with read/write permissions.
25. Log back into the Exchange admin center, and navigate to Serverscertificates.
26. Choose the CAS server in the drop-down menu, and click the plus sign to create a new certificate.
27. Choose Create a request for a certificate from a certification authority, and click Next.
28. Name the certificate, and click Next.
29. Do not request a wildcard certificate, and click Next.
30. Click Browse, choose the CAS server, and click OK. Click Next.
31. Leave defaults, and click Next.
32. Leave defaults, and click Next.
33. Enter your organization information, and click Next.
34. Enter the path to the share you created on the CAS server, and click Finish. Example:
cassharemyrequest.REQ
35. Log into the AD server, and open Internet Explorer.
36. Browse to localhost/CertSrv
37. Click Request a certificate.
38. Choose advanced certificate request.
39. Choose Submit a certificate request by using a base-64-endcoded CMC…
40. Open Windows Explorer and navigate to the share folder on the CAS server where the certificate request is
stored.
41. Open the certificate with Notepad and copy the content between BEGIN NEW CERTIFICATE REQUEST and END
NEW CERTIFICATE REQUEST.
42. Paste the copied content into the Saved Request window.
43. Choose Web Server in the Certificate Template drop-down menu, and click Submit.
44. Choose Base 64 encoded, and download the certificate.
45. Copy the new certificate into the share folder on the CAS server.
46. Log back into the CAS server and open the Exchange Admin Center.
A Principled Technologies report 14Better email response time using Microsoft Exchange 2013 with the
Dell PowerEdge R730xd
47. Go to ServersCertificates, and highlight the certificate you began before (should say Pending request in the
status column).
48. Click Complete on the right side.
49. Type the path to the certificate, including the certificate name, and click OK. Example:
cassharecertnew.CER
50. Verify that the status has changed to Valid.
51. Edit the new entry, and click Edit.
52. Go to Services, check SMTP and IIS, and click Save.
53. Click Yes on the warning message.
54. Run the following steps on the CAS and AD servers:
a. Click Start, and type MMC
b. Click FileAdd/Remove Snap-in.
c. Choose Certificates, and click Add.
d. Choose Computer account, and click Next.
e. Choose Local computer, and click Finish.
f. Click OK.
g. Expand CertificatesTrusted Root Certificate AuthoritiesCertificates.
h. Click ActionAll TasksImport.
i. Click Next.
j. Browse to the share folder on the CAS server, and choose the new certificate you created. Click
Next.
k. Leave defaults, and click Next.
l. Click Finish.
m. Click OK on the Import was successful message.
55. Log into the CAS server and open the Exchange admin center.
56. Navigate to ServersDatabases.
57. Restart the Microsoft Exchange Information Store service on the MB server.
58. Using the Edit button, disable the maintenance schedule and enable circular logging for each mailbox database.
59. Dismount and remount the databases.
60. Open the Exchange Management shell, and enter the following to move the paths of the default mailbox:
Move-Databasepath “DatabaseName” –EdbFilepath “E:NewlocationDBname.edb” –
LogFolderpath “F:Newlocation”
61. When prompted, type A and press Enter.
62. Open Exchange Management Shell, and enter the following:
Get-OutlookAnywhere |Set-OutlookAnywhere -ExternalHostname cas.domain.com -
DefaultAuthenticationMethod NTLM -ExternalClientsRequireSsl $true
A Principled Technologies report 15Better email response time using Microsoft Exchange 2013 with the
Dell PowerEdge R730xd
Installing and configuring the Exchange 2013 mail test clients and completing LoadGen
configuration on the Exchange 2013
For our testing, we used one virtual client machine to run LoadGen 2013. To create the mail clients, we installed
several software components. We followed this process for each installation:
Installing Windows Server 2012 R2 SP1
1. Insert the installation media into the CD/DVD drive, and restart the server.
2. Press any key when prompted to boot from DVD.
3. When the installation screen appears, click My language is English (United States).
4. Leave language, time/currency format, and input method as default, and click Next.
5. Click Install now.
6. When the installation prompts you, enter the product key.
7. Select Windows Server 2012 R2 Datacenter (Server with a GUI), and click Next.
8. Check I accept the license terms, and click Next.
9. Click Custom: Install Windows only (advanced).
10. Select Drive 0 Unallocated Space, and click Next.
11. When the Settings page appears, fill in the Password and Reenter Password fields with the same password.
12. Log in with the password you set up previously.
To set up this server, we had to install several additional software components. The following subsections detail
the necessary installation processes.
Joining the domain
1. Set a static IP.
2. Select StartControl PanelNetwork ConnectionsLocal Area Connection.
3. Click Properties.
4. Highlight Internet Protocol (TCP/IP), and click Properties.
5. Select the Use the following DNS server addresses radio button, and enter the IP of the DNS server in the
Preferred DNS server field. Click OK.
6. Right-click My Computer, and select Properties.
7. Under the Computer Name tab, click Change.
8. In the Computer Name Changes screen, under the Member of section, select the Domain radial box, and type
test.local
9. Select OK to start joining the domain.
10. When the screen appears asking for a person qualified on the domain, type Administrator as the username
and Password1 as the password.
11. At the Welcome pop-up window and the window warning that you must reset the computer for the changes to
take effect, click OK.
12. At the System Properties screen, click OK.
13. When a pop-up appears asking if you want to restart now, click Yes to restart your computer.
A Principled Technologies report 16Better email response time using Microsoft Exchange 2013 with the
Dell PowerEdge R730xd
Installing Internet Information Services
1. Click StartAdministrative ToolsServer Manager.
2. On the left pane, click Roles.
3. Click Add Roles.
4. Click the Application Server checkbox.
5. When the Add features required for Application Server? screen appears, click Add Required Features.
6. Click Next.
7. Click Next.
8. At the Select Role Services page for Application Server, click the Web Server (IIS) Support checkbox.
9. Click Add Required Support Role Services.
10. Click Next.
11. Click Next.
12. At the Select Role Services page for Web Server (IIS), click the IIS 6 Management Compatibility, ASP, and CGI
checkboxes, and click Next.
13. Click Install.
14. Click Close.
Installing Load Generator
Download and install Load Generator 2013 using all defaults.
Importing the certificate and editing the hosts file
1. Click Start, and type MMC
2. Click FileAdd/Remove Snap-in.
3. Choose Certificates, and click Add.
4. Choose Computer account, and click Next.
5. Choose Local computer, and click Finish.
6. Click OK.
7. Expand CertificatesTrusted Root Certificate AuthoritiesCertificates.
8. Click ActionAll TasksImport.
9. Click Next.
10. Browse to the share folder on the CAS server, and choose the new certificate you created. Click Next.
11. Leave defaults, and click Next.
12. Click Finish.
13. Click OK on the Import was successful message.
14. Open the Notepad program, and use FileOpen to open the hosts file stored at
C:WindowsSystem32driversetc.
15. Add the IP and FQDN of the CAS server.
16. Save and close Notepad.
Preparing Load Generator
1. Log into the mail client.
A Principled Technologies report 17Better email response time using Microsoft Exchange 2013 with the
Dell PowerEdge R730xd
2. Select StartAll ProgramsMicrosoft ExchangeExchange Load Generator 2013.
3. When the Load Generator screen appears, select Start a new test.
4. Select Create a new test configuration, and click Continue.
5. Change the total length of simulation to 2.5 hours.
6. In the Specify test settings screen, type Password1 as the Directory Access Password and Mailbox Account
Master Password, and click Continue with recipient management.
7. Create 4,800 users in the Mailbox Database, and click Continue.
8. To accept defaults for Advanced recipient settings, click Continue.
9. In the Specify test user groups screen, select the plus sign to add a user group.
10. Change the Client Type to Outlook 2007 Cached, the action profile to Outlook_450, and the Mailbox size to 250
MB, and click Continue.
11. In Remote configurations, check the checkbox to enable distributing the workload, enter the computer names of
all of the test clients, and click Continue.
12. Click Save the configuration file as, and name it testcfg.xml
13. Click Start the initialization phase (recommended before running the test).
14. Once you have initialized the database, create a backup copy of the Exchange mailbox databases.
A Principled Technologies report 18Better email response time using Microsoft Exchange 2013 with the
Dell PowerEdge R730xd
ABOUT PRINCIPLED TECHNOLOGIES
Principled Technologies, Inc.
1007 Slater Road, Suite 300
Durham, NC, 27703
www.principledtechnologies.com
We provide industry-leading technology assessment and fact-based
marketing services. We bring to every assignment extensive experience
with and expertise in all aspects of technology testing and analysis, from
researching new technologies, to developing new methodologies, to
testing with existing and new tools.
When the assessment is complete, we know how to present the results to
a broad range of target audiences. We provide our clients with the
materials they need, from market-focused data to use in their own
collateral to custom sales aids, such as test reports, performance
assessments, and white papers. Every document reflects the results of
our trusted independent analysis.
We provide customized services that focus on our clients’ individual
requirements. Whether the technology involves hardware, software, Web
sites, or services, we offer the experience, expertise, and tools to help our
clients assess how it will fare against its competition, its performance, its
market readiness, and its quality and reliability.
Our founders, Mark L. Van Name and Bill Catchings, have worked
together in technology assessment for over 20 years. As journalists, they
published over a thousand articles on a wide array of technology subjects.
They created and led the Ziff-Davis Benchmark Operation, which
developed such industry-standard benchmarks as Ziff Davis Media’s
Winstone and WebBench. They founded and led eTesting Labs, and after
the acquisition of that company by Lionbridge Technologies were the
head and CTO of VeriTest.
Principled Technologies is a registered trademark of Principled Technologies, Inc.
All other product names are the trademarks of their respective owners.
Disclaimer of Warranties; Limitation of Liability:
PRINCIPLED TECHNOLOGIES, INC. HAS MADE REASONABLE EFFORTS TO ENSURE THE ACCURACY AND VALIDITY OF ITS TESTING, HOWEVER,
PRINCIPLED TECHNOLOGIES, INC. SPECIFICALLY DISCLAIMS ANY WARRANTY, EXPRESSED OR IMPLIED, RELATING TO THE TEST RESULTS AND
ANALYSIS, THEIR ACCURACY, COMPLETENESS OR QUALITY, INCLUDING ANY IMPLIED WARRANTY OF FITNESS FOR ANY PARTICULAR PURPOSE.
ALL PERSONS OR ENTITIES RELYING ON THE RESULTS OF ANY TESTING DO SO AT THEIR OWN RISK, AND AGREE THAT PRINCIPLED
TECHNOLOGIES, INC., ITS EMPLOYEES AND ITS SUBCONTRACTORS SHALL HAVE NO LIABILITY WHATSOEVER FROM ANY CLAIM OF LOSS OR
DAMAGE ON ACCOUNT OF ANY ALLEGED ERROR OR DEFECT IN ANY TESTING PROCEDURE OR RESULT.
IN NO EVENT SHALL PRINCIPLED TECHNOLOGIES, INC. BE LIABLE FOR INDIRECT, SPECIAL, INCIDENTAL, OR CONSEQUENTIAL DAMAGES IN
CONNECTION WITH ITS TESTING, EVEN IF ADVISED OF THE POSSIBILITY OF SUCH DAMAGES. IN NO EVENT SHALL PRINCIPLED TECHNOLOGIES,
INC.’S LIABILITY, INCLUDING FOR DIRECT DAMAGES, EXCEED THE AMOUNTS PAID IN CONNECTION WITH PRINCIPLED TECHNOLOGIES, INC.’S
TESTING. CUSTOMER’S SOLE AND EXCLUSIVE REMEDIES ARE AS SET FORTH HEREIN.

Weitere ähnliche Inhalte

Was ist angesagt?

Dell PowerEdge M520 server solution: Energy efficiency and database performance
Dell PowerEdge M520 server solution: Energy efficiency and database performanceDell PowerEdge M520 server solution: Energy efficiency and database performance
Dell PowerEdge M520 server solution: Energy efficiency and database performancePrincipled Technologies
 
Converged architecture advantages: Dell PowerEdge FX2s and FC830 servers vs. ...
Converged architecture advantages: Dell PowerEdge FX2s and FC830 servers vs. ...Converged architecture advantages: Dell PowerEdge FX2s and FC830 servers vs. ...
Converged architecture advantages: Dell PowerEdge FX2s and FC830 servers vs. ...Principled Technologies
 
Improve deep learning inference  performance with Microsoft Azure Esv4 VMs wi...
Improve deep learning inference  performance with Microsoft Azure Esv4 VMs wi...Improve deep learning inference  performance with Microsoft Azure Esv4 VMs wi...
Improve deep learning inference  performance with Microsoft Azure Esv4 VMs wi...Principled Technologies
 
Consolidating Oracle database servers onto Dell PowerEdge R920 running Oracle VM
Consolidating Oracle database servers onto Dell PowerEdge R920 running Oracle VMConsolidating Oracle database servers onto Dell PowerEdge R920 running Oracle VM
Consolidating Oracle database servers onto Dell PowerEdge R920 running Oracle VMPrincipled Technologies
 
Consolidating database servers with Lenovo ThinkServer RD630
Consolidating database servers with Lenovo ThinkServer RD630Consolidating database servers with Lenovo ThinkServer RD630
Consolidating database servers with Lenovo ThinkServer RD630Principled Technologies
 
Database server comparison: Dell PowerEdge R630 vs. Lenovo ThinkServer RD550
Database server comparison: Dell PowerEdge R630 vs. Lenovo ThinkServer RD550Database server comparison: Dell PowerEdge R630 vs. Lenovo ThinkServer RD550
Database server comparison: Dell PowerEdge R630 vs. Lenovo ThinkServer RD550Principled Technologies
 
Remote notebook management: Dell unique vPro extensions and Dell Client Integ...
Remote notebook management: Dell unique vPro extensions and Dell Client Integ...Remote notebook management: Dell unique vPro extensions and Dell Client Integ...
Remote notebook management: Dell unique vPro extensions and Dell Client Integ...Principled Technologies
 
Database performance comparison of VMware vCloud Air, Amazon Web Services, an...
Database performance comparison of VMware vCloud Air, Amazon Web Services, an...Database performance comparison of VMware vCloud Air, Amazon Web Services, an...
Database performance comparison of VMware vCloud Air, Amazon Web Services, an...Principled Technologies
 
Reducing tco white paper rev5
Reducing tco white paper rev5Reducing tco white paper rev5
Reducing tco white paper rev5Manoj Punamia
 
Upgrade to Dell EMC PowerEdge R940 servers with VMware vSphere 7.0 and gain g...
Upgrade to Dell EMC PowerEdge R940 servers with VMware vSphere 7.0 and gain g...Upgrade to Dell EMC PowerEdge R940 servers with VMware vSphere 7.0 and gain g...
Upgrade to Dell EMC PowerEdge R940 servers with VMware vSphere 7.0 and gain g...Principled Technologies
 
Laptop drive performance comparison: Seagate Solid State Hybrid Drive vs. har...
Laptop drive performance comparison: Seagate Solid State Hybrid Drive vs. har...Laptop drive performance comparison: Seagate Solid State Hybrid Drive vs. har...
Laptop drive performance comparison: Seagate Solid State Hybrid Drive vs. har...Principled Technologies
 
Offer faster access to critical data and achieve greater inline data reductio...
Offer faster access to critical data and achieve greater inline data reductio...Offer faster access to critical data and achieve greater inline data reductio...
Offer faster access to critical data and achieve greater inline data reductio...Principled Technologies
 
Consolidating Oracle database servers onto Dell PowerEdge R920 running Oracle...
Consolidating Oracle database servers onto Dell PowerEdge R920 running Oracle...Consolidating Oracle database servers onto Dell PowerEdge R920 running Oracle...
Consolidating Oracle database servers onto Dell PowerEdge R920 running Oracle...Principled Technologies
 
Dell 3-2-1 Reference Configurations: High available and scalable performance ...
Dell 3-2-1 Reference Configurations: High available and scalable performance ...Dell 3-2-1 Reference Configurations: High available and scalable performance ...
Dell 3-2-1 Reference Configurations: High available and scalable performance ...Principled Technologies
 
DBaaS with VMware vCAC, EMC XtremIO, and Cisco UCS
DBaaS with VMware vCAC, EMC XtremIO, and Cisco UCSDBaaS with VMware vCAC, EMC XtremIO, and Cisco UCS
DBaaS with VMware vCAC, EMC XtremIO, and Cisco UCSPrincipled Technologies
 
Boosting virtualization performance with Intel SSD DC Series P3600 NVMe SSDs ...
Boosting virtualization performance with Intel SSD DC Series P3600 NVMe SSDs ...Boosting virtualization performance with Intel SSD DC Series P3600 NVMe SSDs ...
Boosting virtualization performance with Intel SSD DC Series P3600 NVMe SSDs ...Principled Technologies
 
Make sense of important data faster with AWS EC2 M6i instances
Make sense of important data faster with AWS EC2 M6i instancesMake sense of important data faster with AWS EC2 M6i instances
Make sense of important data faster with AWS EC2 M6i instancesPrincipled Technologies
 
Citrix Xen Desktop Solution White Paper
Citrix Xen Desktop Solution White PaperCitrix Xen Desktop Solution White Paper
Citrix Xen Desktop Solution White PaperReadWriteEnterprise
 
Hardware upgrades to improve database, SharePoint, Exchange, and file server ...
Hardware upgrades to improve database, SharePoint, Exchange, and file server ...Hardware upgrades to improve database, SharePoint, Exchange, and file server ...
Hardware upgrades to improve database, SharePoint, Exchange, and file server ...Principled Technologies
 

Was ist angesagt? (20)

Dell PowerEdge M520 server solution: Energy efficiency and database performance
Dell PowerEdge M520 server solution: Energy efficiency and database performanceDell PowerEdge M520 server solution: Energy efficiency and database performance
Dell PowerEdge M520 server solution: Energy efficiency and database performance
 
Converged architecture advantages: Dell PowerEdge FX2s and FC830 servers vs. ...
Converged architecture advantages: Dell PowerEdge FX2s and FC830 servers vs. ...Converged architecture advantages: Dell PowerEdge FX2s and FC830 servers vs. ...
Converged architecture advantages: Dell PowerEdge FX2s and FC830 servers vs. ...
 
Improve deep learning inference  performance with Microsoft Azure Esv4 VMs wi...
Improve deep learning inference  performance with Microsoft Azure Esv4 VMs wi...Improve deep learning inference  performance with Microsoft Azure Esv4 VMs wi...
Improve deep learning inference  performance with Microsoft Azure Esv4 VMs wi...
 
Consolidating Oracle database servers onto Dell PowerEdge R920 running Oracle VM
Consolidating Oracle database servers onto Dell PowerEdge R920 running Oracle VMConsolidating Oracle database servers onto Dell PowerEdge R920 running Oracle VM
Consolidating Oracle database servers onto Dell PowerEdge R920 running Oracle VM
 
Consolidating database servers with Lenovo ThinkServer RD630
Consolidating database servers with Lenovo ThinkServer RD630Consolidating database servers with Lenovo ThinkServer RD630
Consolidating database servers with Lenovo ThinkServer RD630
 
Database server comparison: Dell PowerEdge R630 vs. Lenovo ThinkServer RD550
Database server comparison: Dell PowerEdge R630 vs. Lenovo ThinkServer RD550Database server comparison: Dell PowerEdge R630 vs. Lenovo ThinkServer RD550
Database server comparison: Dell PowerEdge R630 vs. Lenovo ThinkServer RD550
 
Remote notebook management: Dell unique vPro extensions and Dell Client Integ...
Remote notebook management: Dell unique vPro extensions and Dell Client Integ...Remote notebook management: Dell unique vPro extensions and Dell Client Integ...
Remote notebook management: Dell unique vPro extensions and Dell Client Integ...
 
Database performance comparison of VMware vCloud Air, Amazon Web Services, an...
Database performance comparison of VMware vCloud Air, Amazon Web Services, an...Database performance comparison of VMware vCloud Air, Amazon Web Services, an...
Database performance comparison of VMware vCloud Air, Amazon Web Services, an...
 
Reducing tco white paper rev5
Reducing tco white paper rev5Reducing tco white paper rev5
Reducing tco white paper rev5
 
Upgrade to Dell EMC PowerEdge R940 servers with VMware vSphere 7.0 and gain g...
Upgrade to Dell EMC PowerEdge R940 servers with VMware vSphere 7.0 and gain g...Upgrade to Dell EMC PowerEdge R940 servers with VMware vSphere 7.0 and gain g...
Upgrade to Dell EMC PowerEdge R940 servers with VMware vSphere 7.0 and gain g...
 
Laptop drive performance comparison: Seagate Solid State Hybrid Drive vs. har...
Laptop drive performance comparison: Seagate Solid State Hybrid Drive vs. har...Laptop drive performance comparison: Seagate Solid State Hybrid Drive vs. har...
Laptop drive performance comparison: Seagate Solid State Hybrid Drive vs. har...
 
Offer faster access to critical data and achieve greater inline data reductio...
Offer faster access to critical data and achieve greater inline data reductio...Offer faster access to critical data and achieve greater inline data reductio...
Offer faster access to critical data and achieve greater inline data reductio...
 
Consolidating Oracle database servers onto Dell PowerEdge R920 running Oracle...
Consolidating Oracle database servers onto Dell PowerEdge R920 running Oracle...Consolidating Oracle database servers onto Dell PowerEdge R920 running Oracle...
Consolidating Oracle database servers onto Dell PowerEdge R920 running Oracle...
 
Dell 3-2-1 Reference Configurations: High available and scalable performance ...
Dell 3-2-1 Reference Configurations: High available and scalable performance ...Dell 3-2-1 Reference Configurations: High available and scalable performance ...
Dell 3-2-1 Reference Configurations: High available and scalable performance ...
 
DBaaS with VMware vCAC, EMC XtremIO, and Cisco UCS
DBaaS with VMware vCAC, EMC XtremIO, and Cisco UCSDBaaS with VMware vCAC, EMC XtremIO, and Cisco UCS
DBaaS with VMware vCAC, EMC XtremIO, and Cisco UCS
 
Boosting virtualization performance with Intel SSD DC Series P3600 NVMe SSDs ...
Boosting virtualization performance with Intel SSD DC Series P3600 NVMe SSDs ...Boosting virtualization performance with Intel SSD DC Series P3600 NVMe SSDs ...
Boosting virtualization performance with Intel SSD DC Series P3600 NVMe SSDs ...
 
IBM Flex System x240 Compute Node (E5-2600)
IBM Flex System x240 Compute Node (E5-2600)IBM Flex System x240 Compute Node (E5-2600)
IBM Flex System x240 Compute Node (E5-2600)
 
Make sense of important data faster with AWS EC2 M6i instances
Make sense of important data faster with AWS EC2 M6i instancesMake sense of important data faster with AWS EC2 M6i instances
Make sense of important data faster with AWS EC2 M6i instances
 
Citrix Xen Desktop Solution White Paper
Citrix Xen Desktop Solution White PaperCitrix Xen Desktop Solution White Paper
Citrix Xen Desktop Solution White Paper
 
Hardware upgrades to improve database, SharePoint, Exchange, and file server ...
Hardware upgrades to improve database, SharePoint, Exchange, and file server ...Hardware upgrades to improve database, SharePoint, Exchange, and file server ...
Hardware upgrades to improve database, SharePoint, Exchange, and file server ...
 

Andere mochten auch

eCommerce Helsinki 2016_Anders Innovations & GlobalSign_16th march, 2016, Hel...
eCommerce Helsinki 2016_Anders Innovations & GlobalSign_16th march, 2016, Hel...eCommerce Helsinki 2016_Anders Innovations & GlobalSign_16th march, 2016, Hel...
eCommerce Helsinki 2016_Anders Innovations & GlobalSign_16th march, 2016, Hel...Timo Halima
 
Foro - Ley electoral
Foro - Ley electoralForo - Ley electoral
Foro - Ley electoralPorOtraCuba
 
Maestria en gestion de la innovación uniminuto
Maestria en gestion de la innovación uniminutoMaestria en gestion de la innovación uniminuto
Maestria en gestion de la innovación uniminutoOscar Lunatico
 
Agua de mar es salud
Agua de mar es saludAgua de mar es salud
Agua de mar es saludPrema Perez
 
10 pasos a la felicidad
10 pasos a la felicidad10 pasos a la felicidad
10 pasos a la felicidadlopaumoval
 
Color vision
Color visionColor vision
Color visionguisbond
 
Industrial Investment Engineering Presentation
Industrial Investment Engineering PresentationIndustrial Investment Engineering Presentation
Industrial Investment Engineering PresentationDavid1Mayagoitia
 
The Future of News, Publishing, and Media (INMA 2010 Presentation)
The Future of News, Publishing, and Media (INMA 2010 Presentation)The Future of News, Publishing, and Media (INMA 2010 Presentation)
The Future of News, Publishing, and Media (INMA 2010 Presentation)Gerd Leonhard
 
STOP DIABETES CON FLP PERU
STOP DIABETES CON FLP PERUSTOP DIABETES CON FLP PERU
STOP DIABETES CON FLP PERUVictor Ravines
 
13 insights (Troiano Branding)
13 insights (Troiano Branding)13 insights (Troiano Branding)
13 insights (Troiano Branding)Luis Rasquilha
 
Visual speech to text conversion applicable to telephone communication
Visual speech to text conversion  applicable  to telephone communicationVisual speech to text conversion  applicable  to telephone communication
Visual speech to text conversion applicable to telephone communicationSwathi Venugopal
 
Helden - Jugend gestern Und heute
Helden - Jugend gestern Und heuteHelden - Jugend gestern Und heute
Helden - Jugend gestern Und heuteMH1970
 
DAFO PERSONAL - Catedra Bancaja UPF-idec 12 feb2011 _lluis soldevila
DAFO PERSONAL - Catedra Bancaja UPF-idec 12 feb2011 _lluis soldevilaDAFO PERSONAL - Catedra Bancaja UPF-idec 12 feb2011 _lluis soldevila
DAFO PERSONAL - Catedra Bancaja UPF-idec 12 feb2011 _lluis soldevilaEmprèn UPF
 

Andere mochten auch (20)

eCommerce Helsinki 2016_Anders Innovations & GlobalSign_16th march, 2016, Hel...
eCommerce Helsinki 2016_Anders Innovations & GlobalSign_16th march, 2016, Hel...eCommerce Helsinki 2016_Anders Innovations & GlobalSign_16th march, 2016, Hel...
eCommerce Helsinki 2016_Anders Innovations & GlobalSign_16th march, 2016, Hel...
 
resume
resumeresume
resume
 
Foro - Ley electoral
Foro - Ley electoralForo - Ley electoral
Foro - Ley electoral
 
Maestria en gestion de la innovación uniminuto
Maestria en gestion de la innovación uniminutoMaestria en gestion de la innovación uniminuto
Maestria en gestion de la innovación uniminuto
 
Proyecto marketing móvil
Proyecto marketing móvilProyecto marketing móvil
Proyecto marketing móvil
 
Noches románticas
Noches románticasNoches románticas
Noches románticas
 
(2012-12-12) HIPERTENSION ARTERIAL (DOC)
(2012-12-12) HIPERTENSION ARTERIAL (DOC)(2012-12-12) HIPERTENSION ARTERIAL (DOC)
(2012-12-12) HIPERTENSION ARTERIAL (DOC)
 
Agua de mar es salud
Agua de mar es saludAgua de mar es salud
Agua de mar es salud
 
Actividad 2
Actividad 2Actividad 2
Actividad 2
 
10 pasos a la felicidad
10 pasos a la felicidad10 pasos a la felicidad
10 pasos a la felicidad
 
Color vision
Color visionColor vision
Color vision
 
Industrial Investment Engineering Presentation
Industrial Investment Engineering PresentationIndustrial Investment Engineering Presentation
Industrial Investment Engineering Presentation
 
The Future of News, Publishing, and Media (INMA 2010 Presentation)
The Future of News, Publishing, and Media (INMA 2010 Presentation)The Future of News, Publishing, and Media (INMA 2010 Presentation)
The Future of News, Publishing, and Media (INMA 2010 Presentation)
 
STOP DIABETES CON FLP PERU
STOP DIABETES CON FLP PERUSTOP DIABETES CON FLP PERU
STOP DIABETES CON FLP PERU
 
13 insights (Troiano Branding)
13 insights (Troiano Branding)13 insights (Troiano Branding)
13 insights (Troiano Branding)
 
Visual speech to text conversion applicable to telephone communication
Visual speech to text conversion  applicable  to telephone communicationVisual speech to text conversion  applicable  to telephone communication
Visual speech to text conversion applicable to telephone communication
 
Helden - Jugend gestern Und heute
Helden - Jugend gestern Und heuteHelden - Jugend gestern Und heute
Helden - Jugend gestern Und heute
 
Historia De Mi Vida
Historia De Mi Vida Historia De Mi Vida
Historia De Mi Vida
 
DAFO PERSONAL - Catedra Bancaja UPF-idec 12 feb2011 _lluis soldevila
DAFO PERSONAL - Catedra Bancaja UPF-idec 12 feb2011 _lluis soldevilaDAFO PERSONAL - Catedra Bancaja UPF-idec 12 feb2011 _lluis soldevila
DAFO PERSONAL - Catedra Bancaja UPF-idec 12 feb2011 _lluis soldevila
 
Data Quality Everywhere
Data Quality EverywhereData Quality Everywhere
Data Quality Everywhere
 

Ähnlich wie Better email response time using Microsoft Exchange 2013 with the Dell PowerEdge R730xd

Database performance: Dell PowerEdge R730xd vs. Lenovo ThinkServer RD650
Database performance: Dell PowerEdge R730xd vs. Lenovo ThinkServer RD650Database performance: Dell PowerEdge R730xd vs. Lenovo ThinkServer RD650
Database performance: Dell PowerEdge R730xd vs. Lenovo ThinkServer RD650Principled Technologies
 
File server performance on the Intel processor-powered Dell PowerEdge R730xd ...
File server performance on the Intel processor-powered Dell PowerEdge R730xd ...File server performance on the Intel processor-powered Dell PowerEdge R730xd ...
File server performance on the Intel processor-powered Dell PowerEdge R730xd ...Principled Technologies
 
Consolidating Web servers with the Dell PowerEdge FX2 enclosure and PowerEdge...
Consolidating Web servers with the Dell PowerEdge FX2 enclosure and PowerEdge...Consolidating Web servers with the Dell PowerEdge FX2 enclosure and PowerEdge...
Consolidating Web servers with the Dell PowerEdge FX2 enclosure and PowerEdge...Principled Technologies
 
Consolidating Oracle database servers on the Dell PowerEdge R930
Consolidating Oracle database servers on the Dell PowerEdge R930Consolidating Oracle database servers on the Dell PowerEdge R930
Consolidating Oracle database servers on the Dell PowerEdge R930Principled Technologies
 
Boosting performance with the Dell Acceleration Appliance for Databases
Boosting performance with the Dell Acceleration Appliance for DatabasesBoosting performance with the Dell Acceleration Appliance for Databases
Boosting performance with the Dell Acceleration Appliance for DatabasesPrincipled Technologies
 
Scalability: Lenovo ThinkServer RD540 system and Lenovo ThinkServer SA120 sto...
Scalability: Lenovo ThinkServer RD540 system and Lenovo ThinkServer SA120 sto...Scalability: Lenovo ThinkServer RD540 system and Lenovo ThinkServer SA120 sto...
Scalability: Lenovo ThinkServer RD540 system and Lenovo ThinkServer SA120 sto...Principled Technologies
 
Get competitive logistic regression performance with servers with AMD EPYC 75...
Get competitive logistic regression performance with servers with AMD EPYC 75...Get competitive logistic regression performance with servers with AMD EPYC 75...
Get competitive logistic regression performance with servers with AMD EPYC 75...Principled Technologies
 
Get stronger SQL Server performance for less with Dell EMC PowerEdge R6515 cl...
Get stronger SQL Server performance for less with Dell EMC PowerEdge R6515 cl...Get stronger SQL Server performance for less with Dell EMC PowerEdge R6515 cl...
Get stronger SQL Server performance for less with Dell EMC PowerEdge R6515 cl...Principled Technologies
 
Webinář: Dell VRTX - datacentrum vše-v-jednom za skvělou cenu / 7.10.2013
Webinář: Dell VRTX - datacentrum vše-v-jednom za skvělou cenu / 7.10.2013Webinář: Dell VRTX - datacentrum vše-v-jednom za skvělou cenu / 7.10.2013
Webinář: Dell VRTX - datacentrum vše-v-jednom za skvělou cenu / 7.10.2013Jaroslav Prodelal
 
Webinář: Provozujte datacentrum v kanceláři (Dell VRTX) / 5.9.2013
Webinář: Provozujte datacentrum v kanceláři (Dell VRTX) / 5.9.2013Webinář: Provozujte datacentrum v kanceláři (Dell VRTX) / 5.9.2013
Webinář: Provozujte datacentrum v kanceláři (Dell VRTX) / 5.9.2013Jaroslav Prodelal
 
Database performance and memory capacity with the Intel Xeon processor E5-266...
Database performance and memory capacity with the Intel Xeon processor E5-266...Database performance and memory capacity with the Intel Xeon processor E5-266...
Database performance and memory capacity with the Intel Xeon processor E5-266...Principled Technologies
 
Component upgrades from Intel and Dell can increase VM density and boost perf...
Component upgrades from Intel and Dell can increase VM density and boost perf...Component upgrades from Intel and Dell can increase VM density and boost perf...
Component upgrades from Intel and Dell can increase VM density and boost perf...Principled Technologies
 
T310 spec sheet
T310 spec sheetT310 spec sheet
T310 spec sheetagoesimam
 
Consolidating older database servers onto Dell PowerEdge FX2 with FC830 serve...
Consolidating older database servers onto Dell PowerEdge FX2 with FC830 serve...Consolidating older database servers onto Dell PowerEdge FX2 with FC830 serve...
Consolidating older database servers onto Dell PowerEdge FX2 with FC830 serve...Principled Technologies
 
Equip your Dell EMC PowerEdge R740xd servers with Intel Optane persistent mem...
Equip your Dell EMC PowerEdge R740xd servers with Intel Optane persistent mem...Equip your Dell EMC PowerEdge R740xd servers with Intel Optane persistent mem...
Equip your Dell EMC PowerEdge R740xd servers with Intel Optane persistent mem...Principled Technologies
 

Ähnlich wie Better email response time using Microsoft Exchange 2013 with the Dell PowerEdge R730xd (20)

Database performance: Dell PowerEdge R730xd vs. Lenovo ThinkServer RD650
Database performance: Dell PowerEdge R730xd vs. Lenovo ThinkServer RD650Database performance: Dell PowerEdge R730xd vs. Lenovo ThinkServer RD650
Database performance: Dell PowerEdge R730xd vs. Lenovo ThinkServer RD650
 
File server performance on the Intel processor-powered Dell PowerEdge R730xd ...
File server performance on the Intel processor-powered Dell PowerEdge R730xd ...File server performance on the Intel processor-powered Dell PowerEdge R730xd ...
File server performance on the Intel processor-powered Dell PowerEdge R730xd ...
 
Consolidating Web servers with the Dell PowerEdge FX2 enclosure and PowerEdge...
Consolidating Web servers with the Dell PowerEdge FX2 enclosure and PowerEdge...Consolidating Web servers with the Dell PowerEdge FX2 enclosure and PowerEdge...
Consolidating Web servers with the Dell PowerEdge FX2 enclosure and PowerEdge...
 
IBM System x3500 M4
IBM System x3500 M4IBM System x3500 M4
IBM System x3500 M4
 
Consolidating Oracle database servers on the Dell PowerEdge R930
Consolidating Oracle database servers on the Dell PowerEdge R930Consolidating Oracle database servers on the Dell PowerEdge R930
Consolidating Oracle database servers on the Dell PowerEdge R930
 
Boosting performance with the Dell Acceleration Appliance for Databases
Boosting performance with the Dell Acceleration Appliance for DatabasesBoosting performance with the Dell Acceleration Appliance for Databases
Boosting performance with the Dell Acceleration Appliance for Databases
 
Scalability: Lenovo ThinkServer RD540 system and Lenovo ThinkServer SA120 sto...
Scalability: Lenovo ThinkServer RD540 system and Lenovo ThinkServer SA120 sto...Scalability: Lenovo ThinkServer RD540 system and Lenovo ThinkServer SA120 sto...
Scalability: Lenovo ThinkServer RD540 system and Lenovo ThinkServer SA120 sto...
 
Get competitive logistic regression performance with servers with AMD EPYC 75...
Get competitive logistic regression performance with servers with AMD EPYC 75...Get competitive logistic regression performance with servers with AMD EPYC 75...
Get competitive logistic regression performance with servers with AMD EPYC 75...
 
Get stronger SQL Server performance for less with Dell EMC PowerEdge R6515 cl...
Get stronger SQL Server performance for less with Dell EMC PowerEdge R6515 cl...Get stronger SQL Server performance for less with Dell EMC PowerEdge R6515 cl...
Get stronger SQL Server performance for less with Dell EMC PowerEdge R6515 cl...
 
Webinář: Dell VRTX - datacentrum vše-v-jednom za skvělou cenu / 7.10.2013
Webinář: Dell VRTX - datacentrum vše-v-jednom za skvělou cenu / 7.10.2013Webinář: Dell VRTX - datacentrum vše-v-jednom za skvělou cenu / 7.10.2013
Webinář: Dell VRTX - datacentrum vše-v-jednom za skvělou cenu / 7.10.2013
 
IBM System x3550 M4
IBM System x3550 M4IBM System x3550 M4
IBM System x3550 M4
 
Webinář: Provozujte datacentrum v kanceláři (Dell VRTX) / 5.9.2013
Webinář: Provozujte datacentrum v kanceláři (Dell VRTX) / 5.9.2013Webinář: Provozujte datacentrum v kanceláři (Dell VRTX) / 5.9.2013
Webinář: Provozujte datacentrum v kanceláři (Dell VRTX) / 5.9.2013
 
IBM System x3650 M4 HD
IBM System x3650 M4 HDIBM System x3650 M4 HD
IBM System x3650 M4 HD
 
IBM Redbooks Product Guide: IBM System x3530 M4
IBM Redbooks Product Guide: IBM System x3530 M4IBM Redbooks Product Guide: IBM System x3530 M4
IBM Redbooks Product Guide: IBM System x3530 M4
 
Database performance and memory capacity with the Intel Xeon processor E5-266...
Database performance and memory capacity with the Intel Xeon processor E5-266...Database performance and memory capacity with the Intel Xeon processor E5-266...
Database performance and memory capacity with the Intel Xeon processor E5-266...
 
IBM System x3250 M5
IBM System x3250 M5IBM System x3250 M5
IBM System x3250 M5
 
Component upgrades from Intel and Dell can increase VM density and boost perf...
Component upgrades from Intel and Dell can increase VM density and boost perf...Component upgrades from Intel and Dell can increase VM density and boost perf...
Component upgrades from Intel and Dell can increase VM density and boost perf...
 
T310 spec sheet
T310 spec sheetT310 spec sheet
T310 spec sheet
 
Consolidating older database servers onto Dell PowerEdge FX2 with FC830 serve...
Consolidating older database servers onto Dell PowerEdge FX2 with FC830 serve...Consolidating older database servers onto Dell PowerEdge FX2 with FC830 serve...
Consolidating older database servers onto Dell PowerEdge FX2 with FC830 serve...
 
Equip your Dell EMC PowerEdge R740xd servers with Intel Optane persistent mem...
Equip your Dell EMC PowerEdge R740xd servers with Intel Optane persistent mem...Equip your Dell EMC PowerEdge R740xd servers with Intel Optane persistent mem...
Equip your Dell EMC PowerEdge R740xd servers with Intel Optane persistent mem...
 

Mehr von Principled Technologies

Scale up your storage with higher-performing Dell APEX Block Storage for AWS ...
Scale up your storage with higher-performing Dell APEX Block Storage for AWS ...Scale up your storage with higher-performing Dell APEX Block Storage for AWS ...
Scale up your storage with higher-performing Dell APEX Block Storage for AWS ...Principled Technologies
 
Scale up your storage with higher-performing Dell APEX Block Storage for AWS
Scale up your storage with higher-performing Dell APEX Block Storage for AWSScale up your storage with higher-performing Dell APEX Block Storage for AWS
Scale up your storage with higher-performing Dell APEX Block Storage for AWSPrincipled Technologies
 
Get in and stay in the productivity zone with the HP Z2 G9 Tower Workstation
Get in and stay in the productivity zone with the HP Z2 G9 Tower WorkstationGet in and stay in the productivity zone with the HP Z2 G9 Tower Workstation
Get in and stay in the productivity zone with the HP Z2 G9 Tower WorkstationPrincipled Technologies
 
Open up new possibilities with higher transactional database performance from...
Open up new possibilities with higher transactional database performance from...Open up new possibilities with higher transactional database performance from...
Open up new possibilities with higher transactional database performance from...Principled Technologies
 
Improving database performance and value with an easy migration to Azure Data...
Improving database performance and value with an easy migration to Azure Data...Improving database performance and value with an easy migration to Azure Data...
Improving database performance and value with an easy migration to Azure Data...Principled Technologies
 
Realize better value and performance migrating from Azure Database for Postgr...
Realize better value and performance migrating from Azure Database for Postgr...Realize better value and performance migrating from Azure Database for Postgr...
Realize better value and performance migrating from Azure Database for Postgr...Principled Technologies
 
Set up students and teachers to excel now and in the future with Intel proces...
Set up students and teachers to excel now and in the future with Intel proces...Set up students and teachers to excel now and in the future with Intel proces...
Set up students and teachers to excel now and in the future with Intel proces...Principled Technologies
 
Finding the path to AI success with the Dell AI portfolio - Summary
Finding the path to AI success with the Dell AI portfolio - SummaryFinding the path to AI success with the Dell AI portfolio - Summary
Finding the path to AI success with the Dell AI portfolio - SummaryPrincipled Technologies
 
Finding the path to AI success with the Dell AI portfolio
Finding the path to AI success with the Dell AI portfolioFinding the path to AI success with the Dell AI portfolio
Finding the path to AI success with the Dell AI portfolioPrincipled Technologies
 
Achieve strong performance and value on Azure SQL Database Hyperscale
Achieve strong performance and value on Azure SQL Database HyperscaleAchieve strong performance and value on Azure SQL Database Hyperscale
Achieve strong performance and value on Azure SQL Database HyperscalePrincipled Technologies
 
Improve backup and recovery outcomes by combining Dell APEX Data Storage Serv...
Improve backup and recovery outcomes by combining Dell APEX Data Storage Serv...Improve backup and recovery outcomes by combining Dell APEX Data Storage Serv...
Improve backup and recovery outcomes by combining Dell APEX Data Storage Serv...Principled Technologies
 
Utilizing Azure Cosmos DB for intelligent AI‑powered applications
Utilizing Azure Cosmos DB for intelligent AI‑powered applicationsUtilizing Azure Cosmos DB for intelligent AI‑powered applications
Utilizing Azure Cosmos DB for intelligent AI‑powered applicationsPrincipled Technologies
 
Build an Azure OpenAI application using your own enterprise data
Build an Azure OpenAI application using your own enterprise dataBuild an Azure OpenAI application using your own enterprise data
Build an Azure OpenAI application using your own enterprise dataPrincipled Technologies
 
Dell Chromebooks: Durable, easy to deploy, and easy to service
Dell Chromebooks: Durable, easy to deploy, and easy to serviceDell Chromebooks: Durable, easy to deploy, and easy to service
Dell Chromebooks: Durable, easy to deploy, and easy to servicePrincipled Technologies
 
Back up and restore data faster with a Dell PowerProtect Data Manager Applian...
Back up and restore data faster with a Dell PowerProtect Data Manager Applian...Back up and restore data faster with a Dell PowerProtect Data Manager Applian...
Back up and restore data faster with a Dell PowerProtect Data Manager Applian...Principled Technologies
 
Back up and restore data faster with a Dell PowerProtect Data Manager Appliance
Back up and restore data faster with a Dell PowerProtect Data Manager ApplianceBack up and restore data faster with a Dell PowerProtect Data Manager Appliance
Back up and restore data faster with a Dell PowerProtect Data Manager AppliancePrincipled Technologies
 
Meeting the challenges of AI workloads with the Dell AI portfolio - Summary
Meeting the challenges of AI workloads with the Dell AI portfolio - SummaryMeeting the challenges of AI workloads with the Dell AI portfolio - Summary
Meeting the challenges of AI workloads with the Dell AI portfolio - SummaryPrincipled Technologies
 
The Dell Latitude 5440 survived 30 drops and still functioned properly
The Dell Latitude 5440 survived 30 drops and still functioned properlyThe Dell Latitude 5440 survived 30 drops and still functioned properly
The Dell Latitude 5440 survived 30 drops and still functioned properlyPrincipled Technologies
 

Mehr von Principled Technologies (20)

Scale up your storage with higher-performing Dell APEX Block Storage for AWS ...
Scale up your storage with higher-performing Dell APEX Block Storage for AWS ...Scale up your storage with higher-performing Dell APEX Block Storage for AWS ...
Scale up your storage with higher-performing Dell APEX Block Storage for AWS ...
 
Scale up your storage with higher-performing Dell APEX Block Storage for AWS
Scale up your storage with higher-performing Dell APEX Block Storage for AWSScale up your storage with higher-performing Dell APEX Block Storage for AWS
Scale up your storage with higher-performing Dell APEX Block Storage for AWS
 
Get in and stay in the productivity zone with the HP Z2 G9 Tower Workstation
Get in and stay in the productivity zone with the HP Z2 G9 Tower WorkstationGet in and stay in the productivity zone with the HP Z2 G9 Tower Workstation
Get in and stay in the productivity zone with the HP Z2 G9 Tower Workstation
 
Open up new possibilities with higher transactional database performance from...
Open up new possibilities with higher transactional database performance from...Open up new possibilities with higher transactional database performance from...
Open up new possibilities with higher transactional database performance from...
 
Improving database performance and value with an easy migration to Azure Data...
Improving database performance and value with an easy migration to Azure Data...Improving database performance and value with an easy migration to Azure Data...
Improving database performance and value with an easy migration to Azure Data...
 
Realize better value and performance migrating from Azure Database for Postgr...
Realize better value and performance migrating from Azure Database for Postgr...Realize better value and performance migrating from Azure Database for Postgr...
Realize better value and performance migrating from Azure Database for Postgr...
 
Realize better value and performance migrating from Azure Database for Postgr...
Realize better value and performance migrating from Azure Database for Postgr...Realize better value and performance migrating from Azure Database for Postgr...
Realize better value and performance migrating from Azure Database for Postgr...
 
Set up students and teachers to excel now and in the future with Intel proces...
Set up students and teachers to excel now and in the future with Intel proces...Set up students and teachers to excel now and in the future with Intel proces...
Set up students and teachers to excel now and in the future with Intel proces...
 
Finding the path to AI success with the Dell AI portfolio - Summary
Finding the path to AI success with the Dell AI portfolio - SummaryFinding the path to AI success with the Dell AI portfolio - Summary
Finding the path to AI success with the Dell AI portfolio - Summary
 
Finding the path to AI success with the Dell AI portfolio
Finding the path to AI success with the Dell AI portfolioFinding the path to AI success with the Dell AI portfolio
Finding the path to AI success with the Dell AI portfolio
 
Achieve strong performance and value on Azure SQL Database Hyperscale
Achieve strong performance and value on Azure SQL Database HyperscaleAchieve strong performance and value on Azure SQL Database Hyperscale
Achieve strong performance and value on Azure SQL Database Hyperscale
 
Improve backup and recovery outcomes by combining Dell APEX Data Storage Serv...
Improve backup and recovery outcomes by combining Dell APEX Data Storage Serv...Improve backup and recovery outcomes by combining Dell APEX Data Storage Serv...
Improve backup and recovery outcomes by combining Dell APEX Data Storage Serv...
 
Improve backup and recovery outcomes by combining Dell APEX Data Storage Serv...
Improve backup and recovery outcomes by combining Dell APEX Data Storage Serv...Improve backup and recovery outcomes by combining Dell APEX Data Storage Serv...
Improve backup and recovery outcomes by combining Dell APEX Data Storage Serv...
 
Utilizing Azure Cosmos DB for intelligent AI‑powered applications
Utilizing Azure Cosmos DB for intelligent AI‑powered applicationsUtilizing Azure Cosmos DB for intelligent AI‑powered applications
Utilizing Azure Cosmos DB for intelligent AI‑powered applications
 
Build an Azure OpenAI application using your own enterprise data
Build an Azure OpenAI application using your own enterprise dataBuild an Azure OpenAI application using your own enterprise data
Build an Azure OpenAI application using your own enterprise data
 
Dell Chromebooks: Durable, easy to deploy, and easy to service
Dell Chromebooks: Durable, easy to deploy, and easy to serviceDell Chromebooks: Durable, easy to deploy, and easy to service
Dell Chromebooks: Durable, easy to deploy, and easy to service
 
Back up and restore data faster with a Dell PowerProtect Data Manager Applian...
Back up and restore data faster with a Dell PowerProtect Data Manager Applian...Back up and restore data faster with a Dell PowerProtect Data Manager Applian...
Back up and restore data faster with a Dell PowerProtect Data Manager Applian...
 
Back up and restore data faster with a Dell PowerProtect Data Manager Appliance
Back up and restore data faster with a Dell PowerProtect Data Manager ApplianceBack up and restore data faster with a Dell PowerProtect Data Manager Appliance
Back up and restore data faster with a Dell PowerProtect Data Manager Appliance
 
Meeting the challenges of AI workloads with the Dell AI portfolio - Summary
Meeting the challenges of AI workloads with the Dell AI portfolio - SummaryMeeting the challenges of AI workloads with the Dell AI portfolio - Summary
Meeting the challenges of AI workloads with the Dell AI portfolio - Summary
 
The Dell Latitude 5440 survived 30 drops and still functioned properly
The Dell Latitude 5440 survived 30 drops and still functioned properlyThe Dell Latitude 5440 survived 30 drops and still functioned properly
The Dell Latitude 5440 survived 30 drops and still functioned properly
 

Kürzlich hochgeladen

Unraveling Multimodality with Large Language Models.pdf
Unraveling Multimodality with Large Language Models.pdfUnraveling Multimodality with Large Language Models.pdf
Unraveling Multimodality with Large Language Models.pdfAlex Barbosa Coqueiro
 
The Ultimate Guide to Choosing WordPress Pros and Cons
The Ultimate Guide to Choosing WordPress Pros and ConsThe Ultimate Guide to Choosing WordPress Pros and Cons
The Ultimate Guide to Choosing WordPress Pros and ConsPixlogix Infotech
 
Developer Data Modeling Mistakes: From Postgres to NoSQL
Developer Data Modeling Mistakes: From Postgres to NoSQLDeveloper Data Modeling Mistakes: From Postgres to NoSQL
Developer Data Modeling Mistakes: From Postgres to NoSQLScyllaDB
 
Search Engine Optimization SEO PDF for 2024.pdf
Search Engine Optimization SEO PDF for 2024.pdfSearch Engine Optimization SEO PDF for 2024.pdf
Search Engine Optimization SEO PDF for 2024.pdfRankYa
 
Artificial intelligence in cctv survelliance.pptx
Artificial intelligence in cctv survelliance.pptxArtificial intelligence in cctv survelliance.pptx
Artificial intelligence in cctv survelliance.pptxhariprasad279825
 
What's New in Teams Calling, Meetings and Devices March 2024
What's New in Teams Calling, Meetings and Devices March 2024What's New in Teams Calling, Meetings and Devices March 2024
What's New in Teams Calling, Meetings and Devices March 2024Stephanie Beckett
 
DSPy a system for AI to Write Prompts and Do Fine Tuning
DSPy a system for AI to Write Prompts and Do Fine TuningDSPy a system for AI to Write Prompts and Do Fine Tuning
DSPy a system for AI to Write Prompts and Do Fine TuningLars Bell
 
DevoxxFR 2024 Reproducible Builds with Apache Maven
DevoxxFR 2024 Reproducible Builds with Apache MavenDevoxxFR 2024 Reproducible Builds with Apache Maven
DevoxxFR 2024 Reproducible Builds with Apache MavenHervé Boutemy
 
Anypoint Exchange: It’s Not Just a Repo!
Anypoint Exchange: It’s Not Just a Repo!Anypoint Exchange: It’s Not Just a Repo!
Anypoint Exchange: It’s Not Just a Repo!Manik S Magar
 
Transcript: New from BookNet Canada for 2024: BNC CataList - Tech Forum 2024
Transcript: New from BookNet Canada for 2024: BNC CataList - Tech Forum 2024Transcript: New from BookNet Canada for 2024: BNC CataList - Tech Forum 2024
Transcript: New from BookNet Canada for 2024: BNC CataList - Tech Forum 2024BookNet Canada
 
Ensuring Technical Readiness For Copilot in Microsoft 365
Ensuring Technical Readiness For Copilot in Microsoft 365Ensuring Technical Readiness For Copilot in Microsoft 365
Ensuring Technical Readiness For Copilot in Microsoft 3652toLead Limited
 
Vertex AI Gemini Prompt Engineering Tips
Vertex AI Gemini Prompt Engineering TipsVertex AI Gemini Prompt Engineering Tips
Vertex AI Gemini Prompt Engineering TipsMiki Katsuragi
 
Unleash Your Potential - Namagunga Girls Coding Club
Unleash Your Potential - Namagunga Girls Coding ClubUnleash Your Potential - Namagunga Girls Coding Club
Unleash Your Potential - Namagunga Girls Coding ClubKalema Edgar
 
TrustArc Webinar - How to Build Consumer Trust Through Data Privacy
TrustArc Webinar - How to Build Consumer Trust Through Data PrivacyTrustArc Webinar - How to Build Consumer Trust Through Data Privacy
TrustArc Webinar - How to Build Consumer Trust Through Data PrivacyTrustArc
 
H2O.ai CEO/Founder: Sri Ambati Keynote at Wells Fargo Day
H2O.ai CEO/Founder: Sri Ambati Keynote at Wells Fargo DayH2O.ai CEO/Founder: Sri Ambati Keynote at Wells Fargo Day
H2O.ai CEO/Founder: Sri Ambati Keynote at Wells Fargo DaySri Ambati
 
New from BookNet Canada for 2024: BNC CataList - Tech Forum 2024
New from BookNet Canada for 2024: BNC CataList - Tech Forum 2024New from BookNet Canada for 2024: BNC CataList - Tech Forum 2024
New from BookNet Canada for 2024: BNC CataList - Tech Forum 2024BookNet Canada
 
Story boards and shot lists for my a level piece
Story boards and shot lists for my a level pieceStory boards and shot lists for my a level piece
Story boards and shot lists for my a level piececharlottematthew16
 
"Debugging python applications inside k8s environment", Andrii Soldatenko
"Debugging python applications inside k8s environment", Andrii Soldatenko"Debugging python applications inside k8s environment", Andrii Soldatenko
"Debugging python applications inside k8s environment", Andrii SoldatenkoFwdays
 
Hyperautomation and AI/ML: A Strategy for Digital Transformation Success.pdf
Hyperautomation and AI/ML: A Strategy for Digital Transformation Success.pdfHyperautomation and AI/ML: A Strategy for Digital Transformation Success.pdf
Hyperautomation and AI/ML: A Strategy for Digital Transformation Success.pdfPrecisely
 

Kürzlich hochgeladen (20)

Unraveling Multimodality with Large Language Models.pdf
Unraveling Multimodality with Large Language Models.pdfUnraveling Multimodality with Large Language Models.pdf
Unraveling Multimodality with Large Language Models.pdf
 
The Ultimate Guide to Choosing WordPress Pros and Cons
The Ultimate Guide to Choosing WordPress Pros and ConsThe Ultimate Guide to Choosing WordPress Pros and Cons
The Ultimate Guide to Choosing WordPress Pros and Cons
 
Developer Data Modeling Mistakes: From Postgres to NoSQL
Developer Data Modeling Mistakes: From Postgres to NoSQLDeveloper Data Modeling Mistakes: From Postgres to NoSQL
Developer Data Modeling Mistakes: From Postgres to NoSQL
 
Search Engine Optimization SEO PDF for 2024.pdf
Search Engine Optimization SEO PDF for 2024.pdfSearch Engine Optimization SEO PDF for 2024.pdf
Search Engine Optimization SEO PDF for 2024.pdf
 
Artificial intelligence in cctv survelliance.pptx
Artificial intelligence in cctv survelliance.pptxArtificial intelligence in cctv survelliance.pptx
Artificial intelligence in cctv survelliance.pptx
 
What's New in Teams Calling, Meetings and Devices March 2024
What's New in Teams Calling, Meetings and Devices March 2024What's New in Teams Calling, Meetings and Devices March 2024
What's New in Teams Calling, Meetings and Devices March 2024
 
DSPy a system for AI to Write Prompts and Do Fine Tuning
DSPy a system for AI to Write Prompts and Do Fine TuningDSPy a system for AI to Write Prompts and Do Fine Tuning
DSPy a system for AI to Write Prompts and Do Fine Tuning
 
DevoxxFR 2024 Reproducible Builds with Apache Maven
DevoxxFR 2024 Reproducible Builds with Apache MavenDevoxxFR 2024 Reproducible Builds with Apache Maven
DevoxxFR 2024 Reproducible Builds with Apache Maven
 
Anypoint Exchange: It’s Not Just a Repo!
Anypoint Exchange: It’s Not Just a Repo!Anypoint Exchange: It’s Not Just a Repo!
Anypoint Exchange: It’s Not Just a Repo!
 
Transcript: New from BookNet Canada for 2024: BNC CataList - Tech Forum 2024
Transcript: New from BookNet Canada for 2024: BNC CataList - Tech Forum 2024Transcript: New from BookNet Canada for 2024: BNC CataList - Tech Forum 2024
Transcript: New from BookNet Canada for 2024: BNC CataList - Tech Forum 2024
 
Ensuring Technical Readiness For Copilot in Microsoft 365
Ensuring Technical Readiness For Copilot in Microsoft 365Ensuring Technical Readiness For Copilot in Microsoft 365
Ensuring Technical Readiness For Copilot in Microsoft 365
 
Vertex AI Gemini Prompt Engineering Tips
Vertex AI Gemini Prompt Engineering TipsVertex AI Gemini Prompt Engineering Tips
Vertex AI Gemini Prompt Engineering Tips
 
Unleash Your Potential - Namagunga Girls Coding Club
Unleash Your Potential - Namagunga Girls Coding ClubUnleash Your Potential - Namagunga Girls Coding Club
Unleash Your Potential - Namagunga Girls Coding Club
 
TrustArc Webinar - How to Build Consumer Trust Through Data Privacy
TrustArc Webinar - How to Build Consumer Trust Through Data PrivacyTrustArc Webinar - How to Build Consumer Trust Through Data Privacy
TrustArc Webinar - How to Build Consumer Trust Through Data Privacy
 
H2O.ai CEO/Founder: Sri Ambati Keynote at Wells Fargo Day
H2O.ai CEO/Founder: Sri Ambati Keynote at Wells Fargo DayH2O.ai CEO/Founder: Sri Ambati Keynote at Wells Fargo Day
H2O.ai CEO/Founder: Sri Ambati Keynote at Wells Fargo Day
 
New from BookNet Canada for 2024: BNC CataList - Tech Forum 2024
New from BookNet Canada for 2024: BNC CataList - Tech Forum 2024New from BookNet Canada for 2024: BNC CataList - Tech Forum 2024
New from BookNet Canada for 2024: BNC CataList - Tech Forum 2024
 
Story boards and shot lists for my a level piece
Story boards and shot lists for my a level pieceStory boards and shot lists for my a level piece
Story boards and shot lists for my a level piece
 
"Debugging python applications inside k8s environment", Andrii Soldatenko
"Debugging python applications inside k8s environment", Andrii Soldatenko"Debugging python applications inside k8s environment", Andrii Soldatenko
"Debugging python applications inside k8s environment", Andrii Soldatenko
 
Hyperautomation and AI/ML: A Strategy for Digital Transformation Success.pdf
Hyperautomation and AI/ML: A Strategy for Digital Transformation Success.pdfHyperautomation and AI/ML: A Strategy for Digital Transformation Success.pdf
Hyperautomation and AI/ML: A Strategy for Digital Transformation Success.pdf
 
E-Vehicle_Hacking_by_Parul Sharma_null_owasp.pptx
E-Vehicle_Hacking_by_Parul Sharma_null_owasp.pptxE-Vehicle_Hacking_by_Parul Sharma_null_owasp.pptx
E-Vehicle_Hacking_by_Parul Sharma_null_owasp.pptx
 

Better email response time using Microsoft Exchange 2013 with the Dell PowerEdge R730xd

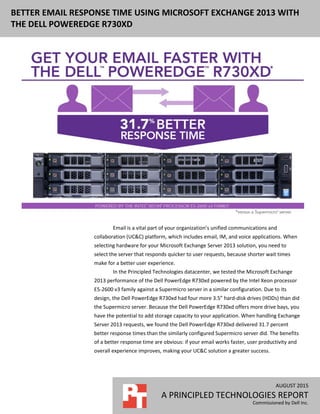
  • 1. AUGUST 2015 A PRINCIPLED TECHNOLOGIES REPORT Commissioned by Dell Inc. BETTER EMAIL RESPONSE TIME USING MICROSOFT EXCHANGE 2013 WITH THE DELL POWEREDGE R730XD Email is a vital part of your organization’s unified communications and collaboration (UC&C) platform, which includes email, IM, and voice applications. When selecting hardware for your Microsoft Exchange Server 2013 solution, you need to select the server that responds quicker to user requests, because shorter wait times make for a better user experience. In the Principled Technologies datacenter, we tested the Microsoft Exchange 2013 performance of the Dell PowerEdge R730xd powered by the Intel Xeon processor E5-2600 v3 family against a Supermicro server in a similar configuration. Due to its design, the Dell PowerEdge R730xd had four more 3.5” hard-disk drives (HDDs) than did the Supermicro server. Because the Dell PowerEdge R730xd offers more drive bays, you have the potential to add storage capacity to your application. When handling Exchange Server 2013 requests, we found the Dell PowerEdge R730xd delivered 31.7 percent better response times than the similarly configured Supermicro server did. The benefits of a better response time are obvious: if your email works faster, user productivity and overall experience improves, making your UC&C solution a greater success.
  • 2. A Principled Technologies report 2Better email response time using Microsoft Exchange 2013 with the Dell PowerEdge R730xd FASTER EMAIL HELPS USERS AND YOUR BUSINESS Slow email can hurt user productivity and user experience. As your employee numbers swell, the negative effects of slow email can affect efficiency. Giving users a responsive email experience should be a top priority, and to do so you must choose hardware that can deliver fast response times. Powered by the Intel Xeon processor E5-2600 v3 family, the Dell PowerEdge R730xd is a high capacity, storage-dense server with six storage configuration options. Our particular configuration of the R730xd had twelve front-load 3.5” disks for data, four internal 3.5” disks for data, and two 2.5” disks in the back for operating system files. While the Dell offers the extra four disks by way of a special internal drive carrier, the Supermicro by design offered only the twelve front-load 3.5” disks for data. In our tested configuration, therefore, the Dell had a greater available disk capacity and disk count than the Supermicro server. Both disk count and disk capacity can affect your application’s performance and design. In this case, having more disks may have contributed to the better response time of the Dell server. In addition, having more disks of the same capacity increased the gigabytes available for use by the application. For more information about the PowerEdge R730xd and our other test components, see Appendix A. For detailed system configuration, see Appendix B. For step-by-step testing details, see Appendix C. WHAT WE FOUND About the results We tested both the Dell PowerEdge R730xd and the current-generation Supermicro server with 4,800 users running the Outlook_450 user profile and 250MB mailbox size. Our test lasted for two hours and had 20-minute step ups of 1,200 users each. Over the duration of the test window, the Supermicro server delivered a response time of 14.75 milliseconds (ms). In contrast, the Dell PowerEdge R730xd provided a response time of 10.07 ms (see Figure 1), 31.7 percent better. We used Windows Performance Monitor to record the I/O Database Reads (Attached) Average Latency Exchange counter during the run. We chose this counter as it indicates the read response time of the underlying disk system, which directly effects application response times. We did not include the writes latency counter as the database writes are asynchronous, and thus it is not a clear indicator of client latency. When you consider how many emails your users receive every day, that time difference can add up. Better response time, also referred to as latency, speeds up the
  • 3. A Principled Technologies report 3Better email response time using Microsoft Exchange 2013 with the Dell PowerEdge R730xd email process every time your users sends or receives an email, delivering time savings that contribute to a more positive user experience. Figure 1: The Dell PowerEdge R730xd delivered a 31.7 percent better response time than the Supermicro server did. CONCLUSION In a market where servers can seem the same at a glance, look for the differences. Your email infrastructure choices will directly affect end-user experience for your UC&C applications. Equipped with more drives in its extra drive slots, the Dell PowerEdge R730xd delivered 31.7 percent better Exchange 2013 response times than a similarly configured, current-generation Supermicro server did. With better Microsoft Exchange Server 2013 response times, the PowerEdge R730xd can help deliver an improved experience for users in your organization.
  • 4. A Principled Technologies report 4Better email response time using Microsoft Exchange 2013 with the Dell PowerEdge R730xd APPENDIX A – ABOUT THE COMPONENTS About the Dell PowerEdge R730xd Dell designed the two-socket, 2U Dell PowerEdge R730xd rack server to provide the scale-out storage efficiency needed by big data users, including the option for hybrid internal storage tiering and six distinct storage configurations. The configuration we tested had 12 3.5′′ front HDD bays and four 3.5′′ internal HDD bays. Powered by the latest Intel® Xeon® processors E5-2690 v3, the PowerEdge R730xd has 24 DIMM slots to support up to 1.5 TB of memory, and supports up to four optional NVMe Express™ Flash PCIe® SSDs. With redundant power supply units, hot-swappable hardware, and Dual SDTM card for Failsafe Hypervisors, the Dell PowerEdge R730xd supports hardware high availability. The PowerEdge R730xd comes standard with iDRAC8 with Lifecycle Controller and Dell OpenManage™, which all work to streamline management. For more details on the Dell PowerEdge R730xd, visit www.dell.com/us/business/p/poweredge-r730xd/pd. About the Intel Xeon processor E5-2600 v3 product family According to Intel, the Intel Xeon processor E5-2600 v3 product family “helps IT address the growing demands placed on infrastructure, from supporting business growth to enabling new services faster, delivering new applications in the enterprise, technical computing, communications, storage, and cloud.” It also delivers benefits in performance, power efficiency, virtualization, and security. The E5-2600 v3 product family has up to 50 percent more cores and cache than processors from the previous generation. Other features include the following:  Intel Advanced Vector Extensions 2 (AVX2)  Intel Quick Path Interconnect link  Up to 18 cores and 36 threads per socket  Up to 45MB of last level cache  Next-generation DDR4 memory support  Intel Integrated I/O providing up to 80 PCIe® lanes per two-socket server  Intel AES-NI data encryption/decryption The Intel Xeon processor E5-2600 v3 product family also uses Intel Intelligent Power technology and per-core P states to maximize energy efficiency. Learn more at http://www.intel.com/content/www/us/en/processors/xeon/xeon- e5-brief.html About Microsoft Load Generator 2013 To test the solutions’ mail server performance, we used the Microsoft® Load Generator 2013 (LoadGen) benchmark, performing tasks to simulate a heavy user generating mail activity. For our workloads, we used the following settings:  Number of users: 4,800  Mailbox Profile: 250MB mailboxes  Action Profile: Outlook_450 For more details about LoadGen, see http://www.microsoft.com/en-us/download/details.aspx?id=40726
  • 5. A Principled Technologies report 5Better email response time using Microsoft Exchange 2013 with the Dell PowerEdge R730xd APPENDIX B – SYSTEM CONFIGURATION INFORMATION Figure 2 provides detailed configuration information for the test systems. System Dell PowerEdge R730xd Supermicro 6028R-E1CR12N Power supplies Total number 2 2 Vendor and model number Dell L1100E-S1 SuperMicro PWS-920P-SQ Wattage of each (W) 1,100 920 Cooling fans Total number 6 3 Vendor and model number San Ace 60 9GA0612P1J651 Nidec UltraFlo V80E12BHA5-57 Dimensions (h × w) of each 2.5′ × 2.25′ 3.5 x 1.5 Volts 12 12 Amps 1.2 0.6 General Number of processor packages 2 2 Number of cores per processor 10 10 Number of hardware threads per core 2 2 System power management policy Performance per Watt (OS) Default CPU Vendor Intel Intel Name Xeon Xeon Model number E5-2660 v3 E5-2660 v3 Stepping M1 M1 Socket type LGA2011-3 LGA2011-3 Core frequency (GHz) 2.6 2.6 Bus frequency 5 GT/s DMI 5 GT/s DMI L1 cache 10 × 32 KB 10 × 32 KB L2 cache 10 × 256 KB 10 × 256 KB L3 cache 25 MB 25 MB Platform Vendor and model number Dell PowerEdge R730xd Supermicro 6028R-E1CR12N Motherboard model number 0H21J3 SuperMicro X10DRI-T4 BIOS name and version Dell 1.2.10 American Megatrends Inc. 2.17.1245 BIOS settings Default Default Memory module(s) Total RAM in system (GB) 128 128 Vendor and model number Hynix HMA42GR7MFR4N-TF Micron MTA36ASF2G72PZ-2G1A2KJ Type PC4-2133P PC4-2133P Speed (MHz) 2,133 2,133 Speed running in the system (MHz) 2,133 2,133 Timing/Latency (tCL-tRCD-tRP- tRASmin) 15-15-15-32 15-15-15-32
  • 6. A Principled Technologies report 6Better email response time using Microsoft Exchange 2013 with the Dell PowerEdge R730xd System Dell PowerEdge R730xd Supermicro 6028R-E1CR12N Size (GB) 16 16 Number of RAM module(s) 8 8 Chip organization Double-sided Double-sided Rank Dual Dual Operating system Name Windows Server 2012 R2 Datacenter Windows Server 2012 R2 Datacenter Build number 9600 9600 File system NTFS NTFS Language English English RAID controller #1 Vendor and model number Dell PERC H730p mini LSI MegaRAID 3108 Firmware version 25.2.2-004 24.6.0-0023 Driver version 6.602.12.0 (11/03/2014) 12.0.1.1019 (08/09/2013) Cache size (GB) 2 1 RAID controller #2 Vendor and model number N/A Intel C600 Series Chipset SATA RAID Adapter Driver version N/A 12.0.1.1019 (08/09/2013) Hard disk #1 Vendor and model number Dell Z4D15M6Q Seagate ST6000NM0054 Number of drives 16 12 Size (TB) 6 6 Type SAS SAS Hard disk #2 Vendor and model number Dell ST91000640NS Dell 0WF12F Number of drives 2 2 Size (TB) 1 1 RPM 7.2k 7.2k Type SATA SATA Ethernet adapters #1 Vendor and model number Intel Ethernet 10G 4P X540/I350 Intel Ethernet 10G 4P X540-AT2 Type Integrated Integrated Driver 3.9.58.9101 (7/17/2014) 3.4.47.2 (06/21/2013) Figure 2: Detailed system configuration.
  • 7. A Principled Technologies report 7Better email response time using Microsoft Exchange 2013 with the Dell PowerEdge R730xd APPENDIX C – HOW WE TESTED We installed Windows Server 2012 R2 on both servers and added the Hyper-V role. We configured both servers with up-to-date drivers, firmware, and Windows updates. Installing Microsoft Windows Server 2012 R2 1. Insert the installation media into the CD/DVD drive, and restart the server. 2. Press any key when prompted to boot from DVD. 3. When the installation screen appears, click My language is English (United States). 4. Leave language, time/currency format, and input method as default, and click Next. 5. Click Install now. 6. When the installation prompts you, enter the product key. 7. Select Windows Server 2012 R2 Datacenter (Server with a GUI), and click Next. 8. Check I accept the license terms, and click Next. 9. Click Custom: Install Windows only (advanced). 10. Select Drive 0 Unallocated Space, and click Next. 11. When the Settings page appears, fill in the Password and Reenter Password fields with the same password. 12. Log in with the password you set up previously. Configuring Windows Update 1. In the left pane of the Server Manager window, click Local Server. 2. In the main frame, next to Windows Update, click Not configured. 3. In the Windows Update window, in the main pane, click Let me choose my settings. 4. Under Important updates, select Never check for updates (not recommended), and click OK. 5. In the left pane, click Check for updates, and install all available updates. 6. Close the Windows Update window. Installing Hyper-V 1. Open Server Manager, and click ManageAdd Roles and Features. 2. At the Before You Begin screen, click Next. 3. At the Installation Type screen, click Next. 4. At the Server Selection screen, select one of the servers in the failover cluster. 5. At the Server Roles screen, check Hyper-V. At the prerequisite pop-up, click Add Features. Click Next. 6. At the Features screen, click Next. 7. At the Hyper-V screen, click Next. 8. At the Virtual Switches screen, click Next. 9. At the Migration screen, click Next. 10. At the Default Stores screen, enter the iSCSI storage location. Click Next. 11. At the Confirmation screen, check to automatically restart the server after installation, and click Install.
  • 8. A Principled Technologies report 8Better email response time using Microsoft Exchange 2013 with the Dell PowerEdge R730xd Creating the base VM 1. Click Start, type Hyper-V Manager, and press Enter. 2. In the right pane, click Virtual MachinesNew Virtual Machine. 3. Select a node on which to install the VM, and click OK. 4. At the Before You Begin screen, click Next. 5. At the Specify Name and Location screen, give the VM a name, and click Next. 6. At the Assign Memory screen, type 8 GB, and click Next. 7. At the Configure Networking screen, use the drop-down menu to select the virtual switch, and click Next. 8. At the Connect Virtual Hard Disk screen, create a new disk, enter 50 GB, and click Next. 9. At the Summary screen, click Finish. Installing the VM operating system on the first VM 1. From the VM console, connect to the ISO image of the installation DVD for Windows Server 2012 R2 Datacenter. If the ISO image is not stored on the host, start the VM, and connect to the ISO image. 2. Start the VM. 3. At the Language Selection Screen, click Next. 4. Click Install Now. 5. Select a full installation of the Datacenter edition, and click Next. 6. Click I accept the license terms, and click Next. 7. Click Custom. 8. Click Next. 9. At the User’s password must be changed before logging on warning screen, click OK. 10. Enter the desired password for the administrator in both fields, and click the arrow to continue. 11. At the Your password has been changed screen, click OK. 12. Install the latest Host Integration Tools package on the VM. Restart as necessary. 13. Connect the machine to the Internet, and install all available Windows updates. Restart as necessary. 14. Enable remote desktop access. 15. Change the hostname, and reboot when prompted. 16. Create a shared folder to store test script files. Set permissions as needed. 17. Set up networking: a. Click StartControl Panel, right-click Network Connections, and choose Open. b. Right-click the VM traffic NIC, and choose Properties. c. Select TCP/IP (v4), and choose Properties. d. Assign the VM a static IP address. Configuring the Active Directory server Installing the Active Directory Domain Services role Before completing this step, you will need to apply a static IP address for the server. In our case, we used 192.168.1.10.
  • 9. A Principled Technologies report 9Better email response time using Microsoft Exchange 2013 with the Dell PowerEdge R730xd 1. Launch Server Manager, and select Add roles and features. 2. Click Next at the Add Roles and Features Wizard. 3. Select Role-based or feature-based installation, and click Next. 4. Select the AD server from the server pool, and click Next. 5. Select Active Directory Domain Services from the list of Roles, click the Add Features button to add features that are required by Active Directory Domain Services, and click Next. 6. Accept the defaults selected by setup at the Select Features screen, and click Next. 7. Click Next at the AD DS screen. 8. Select Restart the destination server automatically if required at the confirmation screen, and click Install. 9. Click the yellow warning triangle in the server manager window. 10. Click Promote this server to a domain controller. 11. Select Add a new forest, type in the Root domain name (fqdn), and click Next. For our testing, we used test.local 12. Type in and confirm the password, and click Next. 13. Click Next at the DNS Options screen. 14. Verify the NetBIOS name, and click Next. 15. Accept the default paths, and click Next. 16. Review the options, and click Next. 17. Verify the prerequisite check passes successfully, and click Install. Preparing AD for Exchange 1. Create a reverse lookup zone: a. Click the start button, and type DNS in the search field. b. Open the DNS manager by clicking on it in the results field. c. Expand your Active Directory domain, and click on Reverse Lookup Zones. d. Click ActionNew Zone. e. Click Next on the Welcome screen. f. Chose Primary Zone, and click Next. g. Leave default replication scope, and click Next. h. Choose IPv4, and click Next. i. Enter the IP address of your domain (192.168.1 for our example). j. Choose Allow both nonsecure and secure dynamic updates, and click Next. k. Click Finish. 2. Insert the Exchange 2012 R2 Installation ISO in the AD VM DVD drive. 3. In Windows Explorer, double-click the Exchange DVD icon. 4. In the Exchange installation folder, hold down shift, and right-click. 5. Choose Open a command window here. 6. Run the following command: 7. Setup.exe /PrepareSchema /IAcceptExchangeServerLicenseTerms
  • 10. A Principled Technologies report 10Better email response time using Microsoft Exchange 2013 with the Dell PowerEdge R730xd 8. When the previous command completes, run the following command: 9. Setup.exe /PrepareAD /OrganizationName:”organization name” /IAcceptExchangeServerLicenseTerms 10. Close the command window when the setup finishes. Installing Active Directory Certificate Services 1. Launch Server Manager, and select Add roles and features. 2. Click Next at the Add Roles and Features Wizard. 3. Select Role-based or feature-based installation, and click Next. 4. Choose Active Directory Certificate Services. 5. Click Add Features, if prompted, to install any required features. 6. Click Next. 7. Click Next. 8. Click Next. 9. Choose Certificate Authority and Certification Authority Web Enrollment. 10. Click Add Features, if prompted, to install any required features. 11. Click Next. 12. Leave defaults, and click Next. 13. Click Install. 14. Click Close when the install finishes. 15. Click on the yellow warning symbol in the Server Manager, and click Configure Active Directory Certificate Services. 16. Leave defaults, and click Next. 17. Check both Certification Authority and Certification Authority Web Enrollment, and click Next. 18. Choose Enterprise CA, and click Next. 19. Choose Root CA, and click Next. 20. Choose Create a new private key, and click Next. 21. Leave defaults, and click Next. 22. Leave defaults, and click Next. 23. Leave 5 years, and click Next. 24. Leave default locations, and click Next. 25. Click Configure. 26. Close when the configuration finishes. 27. Open Internet Explorer® and navigate to localhost/certsrv/Default.asp to verify that the installation succeeded. Installing Exchange Server 2013 SP1 Mailbox and Client Access Server roles Using the template, clone two VMs: one for the Exchange Client Access Server, or CAS, and the other for the Exchange Mailbox Server. Edit the hardware settings in each. The Mailbox server should have 16 vCPUs (16 virtual sockets each with one core) and 64 GB of memory. Using the Exchange datastore, add a 2,048 GB disk and a 20 GB disk to the Mailbox server for the Exchange mailbox and Exchange logs respectively. Set static IPs on both VMs and join the domain.
  • 11. A Principled Technologies report 11Better email response time using Microsoft Exchange 2013 with the Dell PowerEdge R730xd 1. On the Exchange Mailbox Server, log into the server using domain administrator credentials. 2. Open Windows PowerShell® and run the following command: Install-WindowsFeature AS-HTTP-Activation, Desktop-Experience, NET- Framework-45-Features, RPC-over-HTTP-proxy, RSAT-Clustering, RSAT- Clustering-CmdInterface, RSAT-Clustering-Mgmt, RSAT-Clustering- PowerShell, Web-Mgmt-Console, WAS-Process-Model, Web-Asp-Net45, Web- Basic-Auth, Web-Client-Auth, Web-Digest-Auth, Web-Dir-Browsing, Web-Dyn- Compression, Web-Http-Errors, Web-Http-Logging, Web-Http-Redirect, Web- Http-Tracing, Web-ISAPI-Ext, Web-ISAPI-Filter, Web-Lgcy-Mgmt-Console, Web-Metabase, Web-Mgmt-Console, Web-Mgmt-Service, Web-Net-Ext45, Web- Request-Monitor, Web-Server, Web-Stat-Compression, Web-Static-Content, Web-Windows-Auth, Web-WMI, Windows-Identity-Foundation 3. Restart the server. 4. Download the Microsoft Unified Communications Managed API 4.0, Core Runtime 64-bit (go.microsoft.com/fwlink/p/?linkId=258269). 5. Run UcmaRuntimeSetup.exe. 6. When the installation completes, click Finish. 7. Navigate to the location of the Exchange installation media, and double-click Setup.exe. 8. At the Check for Updates? screen, check the Connect to the Internet and check for updates checkbox, and click Next. 9. When the updates complete, click Next. 10. At the Introduction screen, click Next. 11. At the License Agreement screen, check the box to accept the terms, and click Next. 12. At the Recommended Settings screen, check the Don’t use recommended settings checkbox, and click Next. 13. At the Server Role Selection, select Mailbox or Client Access role, and click Next. 14. At the Installation Space and Location screen, leave the default location for the installation, and click Next. 15. At the Malware Protection Settings, select Yes to disable, and click Next. 16. At the Readiness Checks screen, allow the verification to complete. If there are no failures, click Install. 17. When the installation completes, click Finish, and restart the server. 18. Repeat steps 1–17 for the Exchange CAS server. Configuring Exchange 1. On the CAS server, open the Exchange Admin Center by using a browser and navigating to https://localhost/ecp 2. Enter the domain administrator credentials, and click Sign in. 3. If prompted, select the language and time zone, and click Save. 4. In the left pane, click Mail Flow, and then click Send Connectors. 5. On the Send Connectors page, click the New icon. 6. In the New Send Connector wizard, specify SMTP as the name and select Internet as the type. Click Next. 7. In the Network settings screen, choose MX record associated with recipient domain, and click Next. 8. In the Address space screen, click the Add icon.
  • 12. A Principled Technologies report 12Better email response time using Microsoft Exchange 2013 with the Dell PowerEdge R730xd 9. In the Add domain window, enter * in the Fully Qualified Domain Name (FQDN) field, and click Save. 10. Click Next. 11. In the Source Server screen, click the Add icon. 12. In the Select a Server window, select the mailbox server, click Add, and click OK. 13. Click Finish. 14. In the left pane of the EAC, click servers, select the name of the CAS server, and click Edit. 15. Click Outlook Anywhere, and enter the appropriate FQDN of the Client Access Server for the external and internal hostname field. For example, exchangeserver.test.local 16. Choose NTLM as the authentication method, and click Save. 17. Click Virtual Directories, and then click the Configure external access domain icon. 18. In the Select the Client Access servers to use with the external URL window, click the Add icon. 19. Select the CAS server, and click Add. Click OK. 20. Type the FQDN of the CAS server in the Enter the domain, and click Save. 21. Log into the Active Directory server using administrator credentials, and complete the following steps: a. Open Server Manager, then click ToolsDNS. b. In DNS Manager, expand the Active Directory server nameForward Lookup Zonestest.local in the left pane. c. In the right pane, verify or create the DNS records as presented in Figure 3. Type Host or child domain/alias name FQDN FQDN of mail server Mail Exchanger (MX) Leave blank domain.com casserver.domain.com Alias (CNAME) Autodiscover Autodiscover.domain.com casserver.domain.com Alias (CNAME) Owa Owa.domain.com casserver.domain.com Figure 3: DNS records. 22. Log back into your CAS server. 23. In the Exchange PowerShell, run the following commands, replacing $HostName with the host name (not FQDN) of your CAS server: Set-EcpVirtualDirectory "$HostNameECP (Default Web Site)" -InternalUrl ((Get-EcpVirtualDirectory "$HostNameECP (Default Web Site)").ExternalUrl) Set-WebServicesVirtualDirectory "$HostNameEWS (Default Web Site)" - InternalUrl ((get-WebServicesVirtualDirectory "$HostNameEWS (Default Web Site)").ExternalUrl) Set-ActiveSyncVirtualDirectory "$HostNameMicrosoft-Server-ActiveSync (Default Web Site)" -InternalUrl ((Get-ActiveSyncVirtualDirectory "$HostNameMicrosoft-Server-ActiveSync (Default Web Site)").ExternalUrl) Set-OabVirtualDirectory "$HostNameOAB (Default Web Site)" -InternalUrl ((Get-OabVirtualDirectory "$HostNameOAB (Default Web Site)").ExternalUrl)
  • 13. A Principled Technologies report 13Better email response time using Microsoft Exchange 2013 with the Dell PowerEdge R730xd Set-OwaVirtualDirectory "$HostNameOWA (Default Web Site)" -InternalUrl ((Get-OwaVirtualDirectory "$HostNameOWA (Default Web Site)").ExternalUrl) Set-PowerShellVirtualDirectory "$HostNamePowerShell (Default Web Site)" -InternalUrl ((Get-PowerShellVirtualDirectory "$HostNamePowerShell (Default Web Site)").ExternalUrl) Get-OfflineAddressBook | Set-OfflineAddressBook - GlobalWebDistributionEnabled $True -VirtualDirectories $Null Get-OutlookAnywhere | Set-OutlookAnywhere -ExternalHostname mail.ives.lan -InternalHostname mail.ives.lan -ExternalClientsRequireSsl $true - InternalClientsRequireSsl $true -DefaultAuthenticationMethod NTLM 24. Create a folder at the root of C: on the CAS server, and share it to Everyone with read/write permissions. 25. Log back into the Exchange admin center, and navigate to Serverscertificates. 26. Choose the CAS server in the drop-down menu, and click the plus sign to create a new certificate. 27. Choose Create a request for a certificate from a certification authority, and click Next. 28. Name the certificate, and click Next. 29. Do not request a wildcard certificate, and click Next. 30. Click Browse, choose the CAS server, and click OK. Click Next. 31. Leave defaults, and click Next. 32. Leave defaults, and click Next. 33. Enter your organization information, and click Next. 34. Enter the path to the share you created on the CAS server, and click Finish. Example: cassharemyrequest.REQ 35. Log into the AD server, and open Internet Explorer. 36. Browse to localhost/CertSrv 37. Click Request a certificate. 38. Choose advanced certificate request. 39. Choose Submit a certificate request by using a base-64-endcoded CMC… 40. Open Windows Explorer and navigate to the share folder on the CAS server where the certificate request is stored. 41. Open the certificate with Notepad and copy the content between BEGIN NEW CERTIFICATE REQUEST and END NEW CERTIFICATE REQUEST. 42. Paste the copied content into the Saved Request window. 43. Choose Web Server in the Certificate Template drop-down menu, and click Submit. 44. Choose Base 64 encoded, and download the certificate. 45. Copy the new certificate into the share folder on the CAS server. 46. Log back into the CAS server and open the Exchange Admin Center.
  • 14. A Principled Technologies report 14Better email response time using Microsoft Exchange 2013 with the Dell PowerEdge R730xd 47. Go to ServersCertificates, and highlight the certificate you began before (should say Pending request in the status column). 48. Click Complete on the right side. 49. Type the path to the certificate, including the certificate name, and click OK. Example: cassharecertnew.CER 50. Verify that the status has changed to Valid. 51. Edit the new entry, and click Edit. 52. Go to Services, check SMTP and IIS, and click Save. 53. Click Yes on the warning message. 54. Run the following steps on the CAS and AD servers: a. Click Start, and type MMC b. Click FileAdd/Remove Snap-in. c. Choose Certificates, and click Add. d. Choose Computer account, and click Next. e. Choose Local computer, and click Finish. f. Click OK. g. Expand CertificatesTrusted Root Certificate AuthoritiesCertificates. h. Click ActionAll TasksImport. i. Click Next. j. Browse to the share folder on the CAS server, and choose the new certificate you created. Click Next. k. Leave defaults, and click Next. l. Click Finish. m. Click OK on the Import was successful message. 55. Log into the CAS server and open the Exchange admin center. 56. Navigate to ServersDatabases. 57. Restart the Microsoft Exchange Information Store service on the MB server. 58. Using the Edit button, disable the maintenance schedule and enable circular logging for each mailbox database. 59. Dismount and remount the databases. 60. Open the Exchange Management shell, and enter the following to move the paths of the default mailbox: Move-Databasepath “DatabaseName” –EdbFilepath “E:NewlocationDBname.edb” – LogFolderpath “F:Newlocation” 61. When prompted, type A and press Enter. 62. Open Exchange Management Shell, and enter the following: Get-OutlookAnywhere |Set-OutlookAnywhere -ExternalHostname cas.domain.com - DefaultAuthenticationMethod NTLM -ExternalClientsRequireSsl $true
  • 15. A Principled Technologies report 15Better email response time using Microsoft Exchange 2013 with the Dell PowerEdge R730xd Installing and configuring the Exchange 2013 mail test clients and completing LoadGen configuration on the Exchange 2013 For our testing, we used one virtual client machine to run LoadGen 2013. To create the mail clients, we installed several software components. We followed this process for each installation: Installing Windows Server 2012 R2 SP1 1. Insert the installation media into the CD/DVD drive, and restart the server. 2. Press any key when prompted to boot from DVD. 3. When the installation screen appears, click My language is English (United States). 4. Leave language, time/currency format, and input method as default, and click Next. 5. Click Install now. 6. When the installation prompts you, enter the product key. 7. Select Windows Server 2012 R2 Datacenter (Server with a GUI), and click Next. 8. Check I accept the license terms, and click Next. 9. Click Custom: Install Windows only (advanced). 10. Select Drive 0 Unallocated Space, and click Next. 11. When the Settings page appears, fill in the Password and Reenter Password fields with the same password. 12. Log in with the password you set up previously. To set up this server, we had to install several additional software components. The following subsections detail the necessary installation processes. Joining the domain 1. Set a static IP. 2. Select StartControl PanelNetwork ConnectionsLocal Area Connection. 3. Click Properties. 4. Highlight Internet Protocol (TCP/IP), and click Properties. 5. Select the Use the following DNS server addresses radio button, and enter the IP of the DNS server in the Preferred DNS server field. Click OK. 6. Right-click My Computer, and select Properties. 7. Under the Computer Name tab, click Change. 8. In the Computer Name Changes screen, under the Member of section, select the Domain radial box, and type test.local 9. Select OK to start joining the domain. 10. When the screen appears asking for a person qualified on the domain, type Administrator as the username and Password1 as the password. 11. At the Welcome pop-up window and the window warning that you must reset the computer for the changes to take effect, click OK. 12. At the System Properties screen, click OK. 13. When a pop-up appears asking if you want to restart now, click Yes to restart your computer.
  • 16. A Principled Technologies report 16Better email response time using Microsoft Exchange 2013 with the Dell PowerEdge R730xd Installing Internet Information Services 1. Click StartAdministrative ToolsServer Manager. 2. On the left pane, click Roles. 3. Click Add Roles. 4. Click the Application Server checkbox. 5. When the Add features required for Application Server? screen appears, click Add Required Features. 6. Click Next. 7. Click Next. 8. At the Select Role Services page for Application Server, click the Web Server (IIS) Support checkbox. 9. Click Add Required Support Role Services. 10. Click Next. 11. Click Next. 12. At the Select Role Services page for Web Server (IIS), click the IIS 6 Management Compatibility, ASP, and CGI checkboxes, and click Next. 13. Click Install. 14. Click Close. Installing Load Generator Download and install Load Generator 2013 using all defaults. Importing the certificate and editing the hosts file 1. Click Start, and type MMC 2. Click FileAdd/Remove Snap-in. 3. Choose Certificates, and click Add. 4. Choose Computer account, and click Next. 5. Choose Local computer, and click Finish. 6. Click OK. 7. Expand CertificatesTrusted Root Certificate AuthoritiesCertificates. 8. Click ActionAll TasksImport. 9. Click Next. 10. Browse to the share folder on the CAS server, and choose the new certificate you created. Click Next. 11. Leave defaults, and click Next. 12. Click Finish. 13. Click OK on the Import was successful message. 14. Open the Notepad program, and use FileOpen to open the hosts file stored at C:WindowsSystem32driversetc. 15. Add the IP and FQDN of the CAS server. 16. Save and close Notepad. Preparing Load Generator 1. Log into the mail client.
  • 17. A Principled Technologies report 17Better email response time using Microsoft Exchange 2013 with the Dell PowerEdge R730xd 2. Select StartAll ProgramsMicrosoft ExchangeExchange Load Generator 2013. 3. When the Load Generator screen appears, select Start a new test. 4. Select Create a new test configuration, and click Continue. 5. Change the total length of simulation to 2.5 hours. 6. In the Specify test settings screen, type Password1 as the Directory Access Password and Mailbox Account Master Password, and click Continue with recipient management. 7. Create 4,800 users in the Mailbox Database, and click Continue. 8. To accept defaults for Advanced recipient settings, click Continue. 9. In the Specify test user groups screen, select the plus sign to add a user group. 10. Change the Client Type to Outlook 2007 Cached, the action profile to Outlook_450, and the Mailbox size to 250 MB, and click Continue. 11. In Remote configurations, check the checkbox to enable distributing the workload, enter the computer names of all of the test clients, and click Continue. 12. Click Save the configuration file as, and name it testcfg.xml 13. Click Start the initialization phase (recommended before running the test). 14. Once you have initialized the database, create a backup copy of the Exchange mailbox databases.
  • 18. A Principled Technologies report 18Better email response time using Microsoft Exchange 2013 with the Dell PowerEdge R730xd ABOUT PRINCIPLED TECHNOLOGIES Principled Technologies, Inc. 1007 Slater Road, Suite 300 Durham, NC, 27703 www.principledtechnologies.com We provide industry-leading technology assessment and fact-based marketing services. We bring to every assignment extensive experience with and expertise in all aspects of technology testing and analysis, from researching new technologies, to developing new methodologies, to testing with existing and new tools. When the assessment is complete, we know how to present the results to a broad range of target audiences. We provide our clients with the materials they need, from market-focused data to use in their own collateral to custom sales aids, such as test reports, performance assessments, and white papers. Every document reflects the results of our trusted independent analysis. We provide customized services that focus on our clients’ individual requirements. Whether the technology involves hardware, software, Web sites, or services, we offer the experience, expertise, and tools to help our clients assess how it will fare against its competition, its performance, its market readiness, and its quality and reliability. Our founders, Mark L. Van Name and Bill Catchings, have worked together in technology assessment for over 20 years. As journalists, they published over a thousand articles on a wide array of technology subjects. They created and led the Ziff-Davis Benchmark Operation, which developed such industry-standard benchmarks as Ziff Davis Media’s Winstone and WebBench. They founded and led eTesting Labs, and after the acquisition of that company by Lionbridge Technologies were the head and CTO of VeriTest. Principled Technologies is a registered trademark of Principled Technologies, Inc. All other product names are the trademarks of their respective owners. Disclaimer of Warranties; Limitation of Liability: PRINCIPLED TECHNOLOGIES, INC. HAS MADE REASONABLE EFFORTS TO ENSURE THE ACCURACY AND VALIDITY OF ITS TESTING, HOWEVER, PRINCIPLED TECHNOLOGIES, INC. SPECIFICALLY DISCLAIMS ANY WARRANTY, EXPRESSED OR IMPLIED, RELATING TO THE TEST RESULTS AND ANALYSIS, THEIR ACCURACY, COMPLETENESS OR QUALITY, INCLUDING ANY IMPLIED WARRANTY OF FITNESS FOR ANY PARTICULAR PURPOSE. ALL PERSONS OR ENTITIES RELYING ON THE RESULTS OF ANY TESTING DO SO AT THEIR OWN RISK, AND AGREE THAT PRINCIPLED TECHNOLOGIES, INC., ITS EMPLOYEES AND ITS SUBCONTRACTORS SHALL HAVE NO LIABILITY WHATSOEVER FROM ANY CLAIM OF LOSS OR DAMAGE ON ACCOUNT OF ANY ALLEGED ERROR OR DEFECT IN ANY TESTING PROCEDURE OR RESULT. IN NO EVENT SHALL PRINCIPLED TECHNOLOGIES, INC. BE LIABLE FOR INDIRECT, SPECIAL, INCIDENTAL, OR CONSEQUENTIAL DAMAGES IN CONNECTION WITH ITS TESTING, EVEN IF ADVISED OF THE POSSIBILITY OF SUCH DAMAGES. IN NO EVENT SHALL PRINCIPLED TECHNOLOGIES, INC.’S LIABILITY, INCLUDING FOR DIRECT DAMAGES, EXCEED THE AMOUNTS PAID IN CONNECTION WITH PRINCIPLED TECHNOLOGIES, INC.’S TESTING. CUSTOMER’S SOLE AND EXCLUSIVE REMEDIES ARE AS SET FORTH HEREIN.