
Empfohlen
Weitere ähnliche Inhalte
Ähnlich wie Comm Art Unit 3 - Display Board for Design Fest!
Ähnlich wie Comm Art Unit 3 - Display Board for Design Fest! (20)
Mehr von MrLawler
Mehr von MrLawler (20)
Kürzlich hochgeladen
Kürzlich hochgeladen (20)
Comm Art Unit 3 - Display Board for Design Fest!
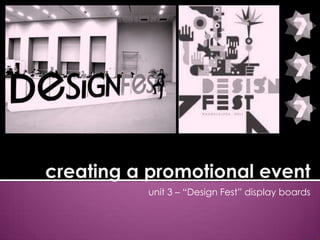
- 1. unit 3 – “Design Fest” display boards
- 2. Prompt: You have been awarded a premium space at Design Fest 2014 Display Booths must include the following: ▪ ▪ ▪ A three-fold display board A table, chair and a table cloth Promotional items: ▪ ▪ Flyers and handouts Business cards Display Boards include the following: (some illustrators/designers have decided to base their backboards on traditional tradeshow boards) ▪ ▪ ▪ Project title Abstract: brief background information about you the artist Question: ▪ ▪ ▪ ▪ ▪ ▪ ▪ Accomplishments Achievements Awards ▪ ▪ ▪ Your artistic process Step by step on what you do ▪ ▪ ▪ ▪ Media Subject matter Programs/software ▪ ▪ ▪ Qualifications Knowledge and Skills ▪ ▪ ▪ ▪ Mission statement Vision statement Goals Sales pitch (why should they hire you?) Additional information ▪ ▪ Projects planned for the future Events planned for the future Background Research: Materials Procedure Results Conclusion Future Directions
- 3. Plan for the “Design Fest” Erect a stand-alone presentation board. On the board, you can show how clients can benefit by using your services. Be creative and make it stand out. Include pictures and be sure your company name and logo. ▪ ▪ ▪ ▪ Organization and Neatness are key! Create a catchy title for the tradeshow event itself, not just your company name! Outline each section of the presentation – use graphics and images to tell your story Be prepared! Have plenty of trade show giveaways, such as business cards, brochures, pens, magnets, and anything else that has your company name and/or logo on it. And be sure to use display racks for showing your flyers, specials, brochures, and such.
- 4. Design Fest is a Tradeshow A trade fair (trade show, trade exhibition or expo) is an exhibition organized so that companies in a specific industry can showcase and demonstrate their latest products, service, study activities of rivals and examine recent market trends and opportunities. History Modern trade fairs follow in the tradition of trade fairs established in late medieval Europe, in the era of merchant capitalism. In this era, produce and craft producers visited towns for trading fairs, to sell and showcase products. From the late eighteenth century, Industrial Exhibitions in Europe and North America became more common reflecting the technological dynamism of the industrial revolution. In the 21st century, with the rapid industrialization of Asia, trade shows and exhibitions are now commonplace throughout the Asian continent, with China dominating the exhibitions industry in Asia, accounting for more than 55 per cent of all space sold in the region in 2011.
- 5. The “Do’s” of a Good Display/Presentation • Your display board should: 2-Ply White Project Board 36" x 48“ • Study examples of winning displays. However….Be original! • For any drawings or written text, start with pencil, not pen. Sketch a rough layout on a piece of paper before pasting up your display. • Come up with a catchy title and display it prominently. Leave yourself plenty of time. • • Include all required categories and content on your display. • • ▪ Board Material: Corrugated ▪ a smooth surface perfect for paints, adhesives and markers • Gather all of your material and organize it into categories. If you forgot to photograph each step of your procedure, consider re-staging it now for documentation. (Some are better than none!) Consult a book or website about graphic design. See how professionals use a grid format with columns and rows for effective layouts. • Arrange items from left to right, from top to bottom. Use black or dark colors for type. • Make type large enough to read from four feet away: As a general rule, use 24 pt type for headings, 16 pt type for text blocks. • Choose a simple font that is easy to read. You may want one font for headings and another for body text, but make sure they are both easy to read. • Use subheads and bullet points rather than long paragraphs of dense text. • Write descriptive captions for photos. • Proofread and double- and triplecheck all text before sticking it on your display board. • Avoid clutter. Tell the story of your artworkl n a logical, easy-to-read manner. • • • • Space elements evenly across your layout, to achieve a balanced, consistent look. Draw attention to the most interesting parts of your project with color and graphics. Visitors and judges will zero in on this first
- 6. The “Don’t’s” of a Good Display/Presentation • • Your display board should: 2-Ply White Project Board 36" x 48“ ▪ Board Material: Corrugated ▪ a smooth surface perfect for paints, adhesives and markers DON’T forget to spell-check and proofread! • DON’T leave your display until the last minute. DON’T write or draw directly on the board. • DON’T fancy fonts that are hard to read. • DON’T use too many different fonts on one page. • DON’T make continuous use of all caps. • DON’T use large amounts of centered text. • DON’T display photos without captions. • DON’T go crazy with colors. A few bright colors are good to accentuate key elements and add pizzazz. But stick to a handful and keep it professional. • DONT: Overdo it with 20 different colors. Color schemes usually use 3 to four main colors and a couple of neutral accent colors. • DON’T cover every inch of your display; remember to leave some breathing room (what graphic designers call “white space”) between blocks of text and graphics. • DON’T use white school glue to stick thin paper to your board, or it may ripple. • DON’T be afraid to get creative. Design is not dull; it’s dynamic! • DON’T glue any 3-D objects to the display board at home. • DONT: Just place boxes everywhere. • DONT: Write one paragraph per page that is 1,000+ words long. • DONT: Go on and on (and on) about nothing. • DONT: Make everything on your page an image. • DON’T list an unprofessional e-mail address, such as “lovenut@abc.com” or “sassyncrazy@xyz.com.” • DON’T overlook the little things..
- 7. Part 1 of your Display Board: Project title This should be more than your company or logo. It is: “Project X” brought you by “Company Y” Examples: ▪ The New Epcot Center brought you by the Disney Corporation ▪ What makes you unique? What makes you stand out as a designer? Design Questions What do you know? What do you do? How do you do it? Vision statement How do you serve the needs of your customers? What will you do for me if I hire you? What is your image – the image you want to portray? Your biography in a nutshell – keep this brief and purposeful. If you like cats – great – but does this really help you sell yourself as an artist? Who are your customers? What are your products and services? Abstract Why are you a business and not just a hobbyist? The New 52 brought to you by DC Comics Part 2 of your Display Board: Mission statement What are your underlying philosophies? What are your values? Goals Where do you want to be when graduate college? Where do you want to be in ten years?
- 8. Part 3 of your Display Board: Background Research Part 4 of your Display Board: Results Accomplishments: List any accomplishments Qualifications: What makes you a good candidate? What qualities do you have? Achievements: List any achievements Knowledge and Skills: What do you know what to do and how do you know how to do it? Awards: List any awards What do you know about your field? What research have you done? Subject matter: What content do you make? Why? Programs/software: Which programs do you know? How long have you used each program? Sales pitch (why should they hire you?): Give us a reason to pick you out of everyone else out there Media: What is your preferred media(s)? Why? Conclusion Materials Additional information: Include any other information that makes you the best of the best Future Directions Projects planned for the future: List projects you plan on doing – including preliminary sketches or thumbnails Events planned for the future: List any events you plan to attend to help promote yourself Procedure Your artistic process: How do you plan? How do you get inspiration? Step by step on what you do: take digital pictures or record steps of you making a piece
- 9. Peer Review: Share your thumbnails with your peers Choose the best thumbnail Make changes based on peer suggestions Get instructor approval of your design
- 10. Create Your Display Board: Include all the components (see above slides) Include samples of artworks and designs Keep it professional Prepare for a “mock presentation” to a “mock board of reviewers” Sell yourself!