SlideShare ist ein Scribd-Unternehmen logo
1 von 74
Downloaden Sie, um offline zu lesen
VOODOO’S INTRODUCTION TO JAVASCRIPT
                                   © 1996, 1997 by Stefan Koch


About this tutorial
Online version
This tutorial is an introduction to JavaScript. I have started this tutorial as an online tutorial whe-
re you can test all examples immediately. As the tutorial grew larger a printable version was re-
quired. It can be quite exhausting to read long parts before the monitor. It is obvious that the
printable version cannot substitute the online version completely. You can find the online ver-
sion at http://rummelplatz.uni-mannheim.de/∼skoch/js/ or at http://www.webconn.com/java/ja-
vascript/intro (US mirror).

JavaScript book and examples
I have written a JavaScript book recently. It is called ‘JavaScript - Einfuehrung, Programmie-
rung und Referenz’ and is written in german. I have build up a homepage for this book which
can be found at http://www.dpunkt.de/javascript/
There you will find information about my book and some interesting JavaScript examples. The
pages are both in german and english - so do not hesitate to have a look at the JavaScript ex-
amples even if you do not know any german.

Title: JavaScript - Einfuehrung, Programmierung und Referenz (german)
Author: Stefan Koch
Publisher: dpunkt.verlag
ISBN: 3-920993-64-0
Homepage: http://www.dpunkt.de/javascript/


Part 1: First steps
What is JavaScript
JavaScript is a new scripting language which is being developed by Netscape. With JavaScript
you can easily create interactive web-pages. This tutorial shows you what can be done with Ja-
vaScript - and more importantly how it is done.

JavaScript is not Java!
Many people believe that JavaScript is the same as Java because of the similar names. This is
not true though. I think it would go too far at the moment to show you all the differences - so
just memorize that JavaScript is not Java. For further information on this topic please read the
introduction provided by Netscape or my book :-)

Running JavaScript
What is needed in order to run scripts written in JavaScript? You need a JavaScript-enabled
browser - for example the Netscape Navigator (since version 2.0) or the Microsoft Internet Ex-
plorer (MSIE - since version 3.0). Since these two browsers are widely spread many people are
able to run scripts written in JavaScript. This is certainly an important point for choosing JavaS-
cript to enhance your web-pages.
Of course you need a basic understanding of HTML before reading this tutorial. You can find
many good online ressources covering HTML. Best you make an online search for ’html’ at
Yahoo in order to get more information on HTML.

Embedding JavaScript into a HTML-page
JavaScript code is embedded directly into the HTML-page. In order to see how this works we
are going to look at an
easy example:

<html>
<body>
<br>
This is a normal HTML document.
<br>
 <script language="JavaScript">
  document.write("This is JavaScript!")
 </script>
<br>
Back in HTML again.
</body>
</html>

At the first glance this looks like a normal HTML-file. The only new thing is the part:

 <script language="JavaScript">
  document.write("This is JavaScript!")
 </script>

This is JavaScript. In order to see this script working save this code as a normal HTML-file and
load it into your JavaScript-enabled browser. Here is the output generated by the file (if you are
using a JavaScript browser you will see 3 lines of output):

This is a normal HTML document.
This is JavaScript!
Back in HTML again.

I must admit that this script isn’t very useful - this could have been written in pure HTML more
easily. I only wanted to demonstrate the <script> tag to you. Everything between the <script>
and the </script> tag is interpreted as JavaScript code. There you see the use of document.wri-
te() - one of the most important commands in JavaScript programming. document.write() is
used in order to write something to the actual document (in this case this is the HTML-docu-
ment). So our little JavaScript program writes the text This is JavaScript! to the HTML-docu-
ment.

Non-JavaScript browsers
What does our page look like if the browser does not understand JavaScript? A non-JavaScript
browser does not know the <script> tag. It ignores the tag and outputs all following code as if
it was normal text. This means the user will see the JavaScript-code of our program inside the
HTML-document. This was certainly not our intention. There is a way for hiding the source
code from older browsers. We will use the HTML-comments <!-- -->. Our new source code
looks like this:

<html>
<body>
<br>
This is a normal HTML document.
<br>
 <script language="JavaScript">
 <!-- hide from old browsers

  document.write("This is JavaScript!")

 // -->
 </script>
<br>
Back in HTML again.
</body>
</html>

The output in a non-JavaScript browser will then look like this:

This is a normal HTML document.
Back in HTML again.

Without the HTML-comment the output of the script in a non-JavaScript browser would be:

This is a normal HTML document.
document.write("This is JavaScript!")
Back in HTML again.

Please note that you cannot hide the JavaScript source code completely. What we do here is to
prevent the output of the code in old browsers - but the user can see the code through ’View do-
cument source’ nevertheless. There is no way to hinder someone from viewing your source code
(in order to see how a certain effect is done).

Events
Events and event handlers are very important for JavaScript programming. Events are mostly
caused by user actions. If the user clicks on a button a Click-event occurs. If the mousepointer
moves across a link a MouseOver-event occurs. There are several different events. We want our
JavaScript program to react to certain events. This can be done with the help of event-handlers.
A button might create a popup window when clicked. This means the window should pop up as
a reaction to a Click-event. The event-handler we need to use is called onClick. This tells the
computer what to do if this event occurs. The following code shows an easy example of the
event-handler onClick:

<form>
<input type="button" value="Click me" onClick="alert(’Yo’)">
</form>

(The online version lets you test this script immediately)

There are a few new things in this code - so let’s take it step by step. You can see that we create
a form with a button (this is basically a HTML-problem so I won’t cover it here). The new part
is onClick="alert(’Yo’)" inside the <input> tag. As we already said this defines what happens
when the button is pushed. So if a Click-event occurs the computer shall execute alert(’Yo’).
This is JavaScript-code (Please note that we do not use the <script> tag in this case). alert() lets
you create popup windows. Inside the brackets you have to specify a string. In our case this is
’Yo’. This is the text which shall be shown in the popup window. So our script creates a window
with the contents ’Yo’ when the user clicks on the button.
One thing might be a little bit confusing: In the document.write() command we used double quo-
tes " and in combination with alert() we use only single quotes ’ - why? Basically you can use
both. But in the last example we wrote onClick="alert(’Yo’)" - you can see that we used both
double and single quotes. If we wrote onClick="alert("Yo")" the computer would get confused
as it isn’t clear which part belongs to the onClick event-handler and which not. So you have to
alternate with the quotes in this case. It doesn’t matter in which order you use the quotes - first
double quotes and then single quotes or vice versa. This means you can also write
onClick=’alert("Yo")’.

There are many different event-handlers you can use. We will get to know some during this tu-
torial - but not all. So please refer to a reference if you want to know what kind of other event-
handlers do exist.

If you are using the Netscape Navigator the popup window will contain the text JavaScript alert.
This is a security restriction. You can create a similar popup window with the prompt() method.
This window accepts an input. A malicious script could imitate a system message and ask for a
certain password. The text in the popup window shows that the window comes from your web
browser and not from your operating system. As this is a security restriction you cannot remove
this message.

Functions
We will use functions in most of our JavaScript programs. Therefore I will talk about this im-
portant concept already now. Basically functions are a way for bundling several commands to-
gether. Let’s write a script which outputs a certain text three times. Consider the following
approach:

<html>
<script language="JavaScript">
<!-- hide

document.write("Welcome to my homepage!<br>");
document.write("This is JavaScript!<br>");

document.write("Welcome to my homepage!<br>");
document.write("This is JavaScript!<br>");

document.write("Welcome to my homepage!<br>");
document.write("This is JavaScript!<br>");

// -->
</script>
</html>

This will write out the text

Welcome to my homepage!
This is JavaScript!

three times. Look at the source code - writing the code three times brings out the right result.
But is this very efficiently? No, we can solve this better. How about this code which does the
same:

<html>
<script language="JavaScript">
<!-- hide

function myFunction() {
  document.write("Welcome to my homepage!<br>");
  document.write("This is JavaScript!<br>");
}

myFunction();
myFunction();
myFunction();

// -->
</script>
</html>

In this script we define a function. This is done through the lines:

function myFunction() {
  document.write("Welcome to my homepage!<br>");
  document.write("This is JavaScript!<br>");
}

The commands inside the {} belong to the function myFunction(). This means that our two do-
cument.write() commands are bundled together and can be executed through a function call. In
our example we have three function calls. You can see that we write myFunction() three times
just below the definition of the function. These are the three function calls. This means that the
contents of the function is being executed three times. This is a very easy example of a function.
You might wonder why functions are so important. While reading this tutorial you will certainly
realize the benefits of functions. Especially variable passing makes our scripts really flexible -
we will see what this is later on.

Functions can also be used in combination with event-handlers. Please consider this example:

<html>
<head>

<script language="JavaScript">
<!-- hide

function calculation() {
 var x= 12;
 var y= 5;

    var result= x + y;

    alert(result);
}

// -->
</script>

</head>
<body>

<form>
<input type="button" value="Calculate" onClick="calculation()">
</form>

</body>
</html>

(The online version lets you test this script immediately)

The button calls the function calculation(). You can see that the function does certain calcula-
tions. For this we are using the variables x, y and result. We can define a variable with the key-
word var. Variables can be used to store different values - like numbers, text strings etc. The
line var result= x + y; tells the browser to create a variable result and store in it the result of x
+ y (i.e. 5 + 12). After this operation the variable result is 17. The command alert(result) is in
this case the same as alert(17). This means we get a popup window with the number 17 in it.

©1996,1997 by Stefan Koch
e-mail:skoch@rumms.uni-mannheim.de
http://rummelplatz.uni-mannheim.de/~skoch/
My JavaScript-book: http://www.dpunkt.de/javascript
VOODOO’S INTRODUCTION TO JAVASCRIPT
                                 © 1996, 1997 by Stefan Koch


Part 2: The HTML-document
JavaScript hierarchy
JavaScript organizes all elements on a web-page in a hierarchy. Every element is seen as a ob-
ject. Each object can have certain properties and methods. With the help of JavaScript you can
easily manipulate the objects. For this it is very important to understand the hierarchy of HTML-
objects. You will quickly understand how this works with the help of an example. The following
code is a simple HTML-page.

<html>
<head>

</head>
<body bgcolor=#ffffff>

<center>
<img src="home.gif" name="pic1" width=200 height=100>
</center>

<p>

<form name="myForm">
Name:
<input type="text" name="name" value=""><br>
e-Mail:
<input type="text" name="email" value=""><br><br>
<input type="button" value="Push me" name="myButton" onClick="alert('Yo')">
</form>

<p>
<center>
<img src="ruler.gif" name="pic4" width=300 height=15>
<p>

<a href="http://rummelplatz.uni-mannheim.de/~skoch/">My homepage</a>
</center>

</body>
</html>

Here is a screenshot of this page (I have added some things):
We have two images, one link and a form with two text fields and a button. From JavaScript’s
point of view the browser window is a window-object. This window-object contains certain ele-
ments like the statusbar. Inside a window we can load a HTML-document (or a file from another
type - we will restrict ourselves to HTML-files for now). This page is a document-object. This
means the document-object represents the HTML-document which is loaded at the moment.
The document-object is a very important object in JavaScript - you will use it over and over
again. Properties of the document-object are for example the background color of the page. But
what is more important is that all HTML-objects are properties of the document-object. A
HTML-object is for example a link, or a form. The following image illustrates the hierachy crea-
ted by our example HTML-page:
We want to be able to get information about the different objects and manipulate them. For this
we must know how to access the different objects. You can see the name of the objects in the
hierarchy. If you now want to know how to address the first image on the HTML-page you have
to look at the hierarchy. You have to start from the top. The first object is called document. The
first image the page is represented through images[0]. This means that we can access this object
through JavaScript with document.images[0]. If you for example want to know what the user
entered into the first form element you must first think about how to access this object. Again
we start from the top of our hierarchy. Follow the path to the object called elements[0] - put all
the names of the object you pass together. This means you can access the first textelement throu-
gh:

document.forms[0].elements[0]

But how can we now get to know the entered text? In order to find out which properties and
methods an object offers you have to look into a JavaScript reference (for example Netscape’s
documentation or the reference in my book). There you will see that a textelement has got the
property value. This is the text entered into the textelement. Now we can read out the value with
this line of code:

name= document.forms[0].elements[0].value;

The string is stored in the variable name. We can now work with this variable. For example we
can create a popup window with alert("Hi " + name). If the input is ’Stefan’ the command
alert("Hi " + name) will open a popup window with the text ’Hi Stefan’.
If you have large pages it might get quite confusing by addressing the different objects with
numbers - for example document.forms[3].elements[17] or was it document.forms[2].ele-
ments[18]? To avoid this problem you can give unique names to the different objects. You can
see in our HTML-code that we wrote for example:

<form name="myForm">
Name:
<input type="text" name="name" value=""><br>
...

This means that forms[0] is also called myForm. Instead of elements[0] you can use name (as
specified with the name-property in the <input> tag). So instead of writing

name= document.forms[0].elements[0].value;

we can write the following

name= document.myForm.name.value;

This makes it much easier - especially with large pages with many objects. (Please note that you
have to keep the same case - this means you cannot write myform instead of myForm) Many
properties of JavaScript-objects are not restricted to read-operations. You can assign new values
to these properties. For example you can write a new string to a textelement.

(The online version lets you test this script immediately)

Here is the code for this example - the interesting part is inside the onClick-property of the se-
cond <input> tag:

<form name="myForm">
<input type="text" name="input" value="bla bla bla">
<input type="button" value="Write"
 onClick="document.myForm.input.value= ’Yo!’; ">

I cannot describe every detail here. It gets much clearer if you try to understand the object hier-
archy with the help of a JavaScript reference. I have written a small example. There you will see
the use of different objects. Try to understand the script with the help of Netscape’s documen-
tation - or better: with my JS-book... :-)

(The online version lets you test this script immediately)

Here is the source code:

<html>
<head>
<title>Objects</title>

<script language="JavaScript">
<!-- hide

function first() {

    // creates a popup window with the
    // text which was entered into the text element

    alert("The value of the textelement is: " +
     document.myForm.myText.value);
}

function second() {

    // this function checks the state of the checkbox
var myString= "The checkbox is ";

    // is checkbox checked or not?
    if (document.myForm.myCheckbox.checked) myString+= "checked"
      else myString+= "not checked";

    // output string
    alert(myString);
}

// -->
</script>
</head>
<body bgcolor=lightblue>

<form name="myForm">
<input type="text" name="myText" value="bla bla bla">
<input type="button" name="button1" value="Button 1"
 onClick="first()">
<br>
<input type="checkbox" name="myCheckbox" CHECKED>
<input type="button" name="button2" value="Button 2"
 onClick="second()">
</form>

<p><br><br>

<script language="JavaScript">
<!-- hide

document.write("The background color is: ");
document.write(document.bgColor + "<br>");

document.write("The text on the second button is: ");
document.write(document.myForm.button2.value);

// -->
</script>

</body>
</html>

The location-object
Besides the window- and document-objects there is another important object: the location-ob-
ject. This object represents the address of the loaded HTML-document. So if you loaded the
page http://www.xyz.com/page.html then location.href is equal to this address. What is more im-
portant is that you can assign new values to location.href. This button for example loads a new
page into the actual window:
<form>
<input type=button value="Yahoo"
 onClick="location.href=’http://www.yahoo.com’; ">
</form>

©1996,1997 by Stefan Koch
e-mail:skoch@rumms.uni-mannheim.de
http://rummelplatz.uni-mannheim.de/~skoch/
My JavaScript-book: http://www.dpunkt.de/javascript
VOODOO’S INTRODUCTION TO JAVASCRIPT
                                © 1996, 1997 by Stefan Koch


Part 3: Frames
Creating frames
An often asked question is how frames and JavaScript work together. First I want to explain
what frames are and what they can be used for. After this we will see how we can use JavaScript
in combination with frames. The browser window can be split up into several frames. This me-
ans a frame is a square area inside the browser window. Each frame displays its own document
(most of the time HTML-documents). So you can for example create two frames. In the first
frame you load the homepage of Netscape and in the second frame you load the homepage of
Microsoft. Although creating frames is a HTML-problem I want to describe the basic things.
For creating frames you need two tags: <frameset> and <frame>. A HTML-page creating two
frames might look like this:

<html>
<frameset rows="50%,50%">
 <frame src="page1.htm" name="frame1">
 <frame src="page2.htm" name="frame2">
</frameset>
</html>

This will produce two frames. You can see that we use the rows property in the <frameset> tag.
This means the two frames lie above each other. The upper frame loads the HTML-page
page1.htm and the lower frame displays the document page2.htm. The created frame-structure
looks like this:


If you want to have columns instead of rows you write cols instead of rows in the <frameset>
tag. The "50%,50%" part specifies how large the two windows are. You can also write "50%,*"
if you do not want to calculate how large the second frame must be in order to get 100%. You
can specify the size in pixels by omitting the % symbol. Every frame gets an unique name with
the name property in the <frame> tag. This will help us when accessing the frames through Ja-
vaScript.

You can have several nested <frameset> tags. I’ve found this example in the documentation
provided by Netscape (I just modified it a little bit):

<frameset cols="50%,50%">
 <frameset rows="50%,50%">
  <frame src="cell.htm">
  <frame src="cell.htm">
 </frameset>
 <frameset rows="33%,33%,33%">
  <frame src="cell.htm">
  <frame src="cell.htm">
  <frame src="cell.htm">
 </frameset>
</frameset>

The created frame structure looks like this:


You can set the size of the border through the border property in the <frameset> tag. border=0
means that you do not want to have a border (does not work with Netscape 2.x).

Frames and JavaScript
Now we want to have a look at how JavaScript ’sees’ the frames in a browser window. For this
we are going to creat two frames as shown in the first example of this part. We have seen that
JavaScript organizes all elements on a webpage in a hierarchy. This is the same with frames.
The following image shows the hierarchy of the first example of this part:
At the top of the hierachy is the browser window. This window is split up into two frames. The
window is the parent in this hierarchy and the two frames are the children. We gave the two fra-
mes the unique names frame1 and frame2. With the help of these names we can exchange in-
formation between the two frames.
A script might have to solve the following problem: The user clicks on a link in the first frame
- but the page shall be loaded in the second frame rather than in the first frame. This can for
example be used for menubars (or navigationbars) where one frame always stays the same and
offers several different links to navigate through a homepage. We have to look at three cases:

       - parent window/frame accesses child frame
       - child frame accesses parent window/frame
       - child frame accesses another child frame

From the window’s point of view the two frames are called frame1 and frame2. You can see in
the image above that there is a direct connection from the parent window to each frame. So if
you have a script in the parent window - this means in the page that creates the frames - and you
want to access the frames you can just use the name of the frame. For example you can write:

frame2.document.write("A message from the parent window.");


Sometimes you want to access the parent window from a frame. This is needed for example if
you want to remove the frames. Removing the frames just means to load a new page instead of
the page which created the frames. This is in our case the page in the parent window. We can
access the parent window (or parent frame) from the child frames with parent. In order to load
a new document we have to assign a new URL to location.href. As we want to remove the fra-
mes we have to use the location-object of the parent window. As every frame can load its own
page we have a different location-object for each frame. We can load a new page into the parent
window with the command:

parent.location.href= "http://...";
Very often you will be faced with the problem to access one child frame from another child fra-
me. So how can you write something from the first frame to the second frame - this means which
command do you have to use in the HTML-page called page1.htm? In our image you can see
that there is no direct connection between the two frames. This means we cannot just call frame2
from the frame frame1 as this frame does not know anything about the existence of the second
frame. From the parent window’s point of view the second frame is called frame2 and the parent
window is called parent seen from the first frame. So we have to write the following in order to
access the document-object of the second frame:

parent.frame2.document.write("Hi, this is frame1 calling.");


Navigationbars
Let’s have a look at a navigationbar. We will have several links in one frame. If the user clicks
on these links the pages won’t show up in the same frame - they are loaded in the second frame.
First we need a script which creates the frames. This document looks like the first example we
had in this part:

frames3.htm

<html>
<frameset rows="80%,20%">
 <frame src="start.htm" name="main">
 <frame src="menu.htm" name="menu">
</frameset>
</html>

The start.htm page is the entry page which will be displayed in the main frame at the beginning.
There are no special requirements for this page. The following page is loaded into the frame
menu:

menu.htm

<html>
<head>
<script language="JavaScript">
<!-- hide

function load(url) {
  parent.main.location.href= url;
}

// -->
</script>
</head>
<body>

<a href="javascript:load(’first.htm’)">first</a>
<a href="second.htm" target="main">second</a>
<a href="third.htm" target="_top">third</a>

</body>
</html>

Here you can see different ways for loading a new page into the frame main. The first link uses
the function load(). Have a look at how this function is called:

<a href="javascript:load(’first.htm’)">first</a>

You can see that we can let the browser execute JavaScript code instead of loading another page
- we just have to use javascript: in the href property. You can see that we write ’ first.htm’ inside
the brackets. This string is passed to the function load(). The function load() is defined through:

function load(url) {
  parent.main.location.href= url;
}

There you can see that we write url inside the brackets. This means that the string ’first1.htm’ is
stored in the variable url. Inside the load() function we can now use this variable. We will see
further examples of this important concept of variable passing later on.
The second link uses the target property. Actually this isn’t JavaScript. This is a HTML-feature.
You see that we just have to specify the name of the frame. Please note that we must not put
parent before the name of the frame. This might be a little bit confusing. The reason for this is
that target is HTML and not JavaScript. The third link shows you how to remove the frames
with the target property.
If you want to remove the frames with the load() function you just have to write parent.locati-
on.href= url inside the function.

So which way should you choose? This depends on your script and what you want to do. The
target property is very simple. You might use it if you just want to load the page in another fra-
me. The JavaScript solution (i.e. the first link) is normally used if you want to do several things
as a reaction to the click on the link. One common problem is to load two pages at once in two
different frames. Although you could solve this with the target property using a JavaScript
function is more straightforward. Let’s assume you have three frames called frame1,frame2 and
frame3. The user clicks on a link in frame1. Then you want to load two different pages in the
two other frames. You can use this function for example:

function loadtwo() {
  parent.frame1.location.href= "first.htm";
  parent.frame2.location.href= "second.htm";
}

If you want to keep the function more flexible you can use variable passing here as well. This
looks like this:

function loadtwo(url1, url2) {
  parent.frame1.location.href= url1;
  parent.frame2.location.href= url2;
}

Then you can call this function with loadtwo("first.htm", "second.htm") or loadtwo("third.htm",
"forth.htm"). Variable passing makes your function more flexible. You can use it over and over
again in different contexts.

©1996,1997 by Stefan Koch
e-mail:skoch@rumms.uni-mannheim.de
http://rummelplatz.uni-mannheim.de/~skoch/
My JavaScript-book: http://www.dpunkt.de/javascript
VOODOO’S INTRODUCTION TO JAVASCRIPT
                                 © 1996, 1997 by Stefan Koch


Part 4: Windows and on-the-fly documents
Creating windows
Opening new browser windows is a great feature of JavaScript. You can either load a new do-
cument (for example a HTML-document) to the new window or you can create new documents
(on-the-fly). We will first have a look at how we can open a new window, load a HTML-page
to this window and then close it again. The following script opens a new browser window and
loads a meaningless page:

<html>
<head>
<script language="JavaScript">
<!-- hide

function openWin() {
  myWin= open("bla.htm");
}

// -->
</script>
</head>
<body>

<form>
<input type="button" value="Open new window" onClick="openWin()">
</form>

</body>
</html>

(The online version lets you test this script immediately)

The page bla.htm is loaded into the new window through the open() method.

You can control the appearance of the new window. For example you can decide if the window
shall have a statusbar, a toolbar or a menubar. Besides that you can specify the size of the win-
dow. The following script opens a new window which has got the size 400x300. The window
does not have a statusbar, toolbar or menubar.

<html>
<head>
<script language="JavaScript">
<!-- hide

function openWin2() {
  myWin= open("bla.htm", "displayWindow",
   "width=400,height=300,status=no,toolbar=no,menubar=no");
}

// -->
</script>
</head>
<body>

<form>
<input type="button" value="Open new window" onClick="openWin2()">
</form>

</body>
</html>

(The online version lets you test this script immediately)

You can see that we specify the properties in the string "width=400,height=300,status=no,tool-
bar=no,menubar=no". Please note that you must not use spaces inside this string!

Here is a list of the properties a window can have:


                         directories                              yes|no
                         height                                   number of pixels
                         location                                 yes|no
                         menubar                                  yes|no
                         resizable                                yes|no
                         scrollbars                               yes|no
                         status                                   yes|no
                         toolbar                                  yes|no
                         width                                    number of pixels

Some properties have been added with JavaScript 1.2 (i.e. Netscape Navigator 4.0). You cannot
use these properties in Netscape 2.x or 3.x or Microsoft Internet Explorer 3.x as these browsers
do not understand JavaScript 1.2. Here are the new properties:


                         alwaysLowered                            yes|no
                         alwaysRaised                             yes|no
                         dependent                                yes|no
                         hotkeys                                  yes|no
                         innerWidth                               number of pixels (re-
                                                                  places width)
innerHeight                                number of pixels (re-
                                                                     places height)
                          outerWidth                                 number of pixels
                          outerHeight                                number of pixels
                          screenX                                    position in pixels
                          screenY                                    position in pixels
                          titlebar                                   yes|no
                          z-lock                                     yes|no

You can find an explanation of these properties in the JavaScript 1.2 guide. I will have an ex-
planation and some examples in the future.
With the help of these properties you can now define at which position a window shall open.
You cannot do this with the older versions of JavaScript.

The name of a window
As you have seen we have used three arguments for opening a window:

 myWin= open("bla.htm", "displayWindow",
  "width=400,height=300,status=no,toolbar=no,menubar=no");

What is the second argument for? This is the name of the window. We have seen how to use the
target-property earlier. If you know the name of an existing window you can load a new page
to it with

<a href="bla.html" target="displayWindow">

Here you need the name of the window (if the window does not exist, a new window is created
through this code). Please note that myWin is not the name of the window. You can just access
the window through this variable. As this is a normal variable it is only valid inside the script in
which it is defined. The window name (here displayWindow) is a unique name which can be
used by all existing browser windows.

Closing windows
You can close windows through JavaScript. For this you need the close() method. Let’s open a
new window as shown before. In this window we load the following page:

<html>
<script language="JavaScript">
<!-- hide

function closeIt() {
  close();
}

// -->
</script>
<center>
<form>
<input type=button value="Close it" onClick="closeIt()">
</form>
</center>

</html>

(The online version lets you test this script immediately)

If you hit the button in the new window the window is being closed. open() and close() are me-
thods of the window-object. Normally we should think that we have to write window.open() and
window.close() instead of open() and close(). This is true - but the window-object is an excep-
tion here. You do not have to write window if you want to call a method of the window-object
(this is only true for this object).

Creating documents on-the-fly
We are coming now to a cool feature of JavaScript - creating documents on-the-fly. This means
you can let your JavaScript code create a new HTML-page. Furthermore you can create other
documents - like VRML-scenes etc.. You can output these documents in a separate window or
in a frame.
First we will create a simple HTML-document which will be displayed in a new window. Here
is the script we are going to have a look at now.

<html>
<head>
<script language="JavaScript">
<!-- hide

function openWin3() {
 myWin= open("", "displayWindow",
  "width=500,height=400,status=yes,toolbar=yes,menubar=yes");

    // open document for further output
    myWin.document.open();

    // create document
    myWin.document.write("<html><head><title>On-the-fly");
    myWin.document.write("</title></head><body>");
    myWin.document.write("<center><font size=+3>");
    myWin.document.write("This HTML-document has been created ");
    myWin.document.write("with the help of JavaScript!");
    myWin.document.write("</font></center>");
    myWin.document.write("</body></html>");

    // close the document - (not the window!)
    myWin.document.close();
}
// -->
</script>
</head>
<body>

<form>
<input type=button value="On-the-fly" onClick="openWin3()">
</form>

</body>
</html>

(The online version lets you test this script immediately)

Let’s have a look at the function winOpen3(). You can see that we open a new browser window
first. As you can see the first argument is an empty string "" - this means we do not specify an
URL. The browser should not just fetch an existing document - JavaScript shall create a new
document.
We define the variable myWin. With the help of this variable we can access the new window.
Please note that we cannot use the name of the window (displayWindow) for this task. After ope-
ning the window we have to open the document. This is done through:

 // open document for further output
 myWin.document.open();

We call the open() method of the document-object - this is a different method than the open()
method of the window-object! This command does not open a new window - it prepares the do-
cument for further output. We have to put myWin before the document.open() in order to access
the new window.
The following lines create the document with document.write():

 // create document
 myWin.document.write("<html><head><title>On-the-fly");
 myWin.document.write("</title></head><body>");
 myWin.document.write("<center><font size=+3>");
 myWin.document.write("This HTML-document has been created ");
 myWin.document.write("with the help of JavaScript!");
 myWin.document.write("</font></center>");
 myWin.document.write("</body></html>");

You can see that we write normal HTML-tags to the document. We create HTML-code! You
can write any HTML-tags here.
After the output we have to close the document again. The following code does this:

 // close the document - (not the window!)
 myWin.document.close();

As I told you before you can create documents on-the-fly and display them in a frame as well.
If you for example have got two frames with the names frame1 and frame2 and want create a
new document in frame2 you can write the following in frame1:
parent.frame2.document.open();

parent.frame2.document.write("Here goes your HTML-code");

parent.frame2.document.close();

Creating VRML-scenes on-the-fly
In order to demonstrate the flexibility of JavaScript we are now going to create a VRML-scene
on-the-fly. VRML stands for Vitual Reality Modelling Language. This is a language for crea-
ting 3D scenes. So get your 3D glasses and enjoy the ride... No, it’s just a simple example - a
blue cube. You will need a VRML plug-in in order to view this example. This script doesn’t
check if a VRML plug-in is available (this is no problem to implement).

(The online version lets you test this script immediately)

Here is the source code:

<html>
<head>
<script language="JavaScript">
<!-- hide

function vrmlScene() {
 vrml= open("", "displayWindow",
  "width=500,height=400,status=yes,toolbar=yes,menubar=yes");

 // open document for further output
 vrml.document.open("x-world/x-vrml");

 vr= vrml.document;

 // create VRML-scene
 vr.writeln("#VRML V1.0 ascii");

 // Light
 vr.write("Separator { DirectionalLight { ");
 vr.write("direction 3 -1 -2.5 } ");

 // Camera
 vr.write("PerspectiveCamera { position -8.6 2.1 5.6 ");
 vr.write("orientation -0.1352 -0.9831 -0.1233 1.1417 ");
 vr.write("focalDistance 10.84 } ");

 // Cube
 vr.write("Separator { Material { diffuseColor 0 0 1 } ");
 vr.write("Transform { translation -2.4 .2 1 rotation 0 0.5 1 .9 } ");
 vr.write("Cube {} } }");

 // close the document - (not the window!)
vrml.document.close();
}

// -->
</script>
</head>
<body>

<form>
<input type=button value="VRML on-the-fly" onClick="vrmlScene()">
</form>

</body>
</html>

This source code is quite similar to the last example. First we open a new window. Then we have
to open the document in order to prepare it for the output. Look at this code:

    // open document for further output
    vrml.document.open("x-world/x-vrml");

In the last example we did not write anything into the brackets. What does the "x-world/x-vrml"
mean? It’s the MIME-type of the file we want to create. So here we tell the browser what kind
of data follows. If we do not write anything into the brackets the MIME-type is set to "text/html"
by default (this is the MIME-type of HTML-files).
(There are different ways for getting to know a certain MIME-type - the browser itself has a list
of the known MIME-types. You can find this list in the option or preference menu.)
We have to write vrml.document.write() for creating the 3D scene. This is quite long - therefore
we define vr=vrml.document. Now we can write vr.write() instead of vrml.document.write().
Now we can output normal VRML-code. I am not going to describe the elements of a VRML-
scene. There are several good VRML sources available on the Internet. The plain VRML-code
looks like this:

#VRML V1.0 ascii

Separator {

    DirectionalLight { direction 3 -1 -2.5 }

    PerspectiveCamera {
      position -8.6 2.1 5.6
      orientation -0.1352 -0.9831 -0.1233 1.1417
      focalDistance 10.84
    }

    Separator {
     Material {
       diffuseColor 0 0 1
     }
     Transform {
       translation -2.4 .2 1
rotation 0 0.5 1 .9
        }
        Cube {}
    }
}

This is the code which we output through the document.write() commands.
Of course it is quite meaningless to create a scene on-the-fly which can also be loaded as a nor-
mal VRML-file.
It gets more interesting if you for example make a form where the user can enter different ob-
jects - like a spehre, cylinder, cone etc. - and JavaScript creates a scene from this data (I have
an example of this in my JS-book).

©1996,1997 by Stefan Koch
e-mail:skoch@rumms.uni-mannheim.de
http://rummelplatz.uni-mannheim.de/~skoch/
My JavaScript-book: http://www.dpunkt.de/javascript
VOODOO’S INTRODUCTION TO JAVASCRIPT
                                  © 1996, 1997 by Stefan Koch


Part 5: Statusbar and timeouts
The statusbar
Your JavaScript programs can write to the statusbar - this is the bar at the bottom of your brow-
ser window. All you have to do is to assign a string to window.status. The following example
shows you two buttons which can be used to write to the statusbar and to erase the text again.

(The online version lets you test this script immediately)

<html>
<head>
<script language="JavaScript">
<!-- hide

function statbar(txt) {
  window.status = txt;
}

// -->
</script>
</head>
<body>

<form>
 <input type="button" name="look" value="Write!"
  onClick="statbar('Hi! This is the statusbar!');">
 <input type="button" name="erase" value="Erase!"
  onClick="statbar('');">
</form>

</body>
</html>

We create a form with two buttons. Both buttons call the function statbar(). You can see that
the function call created by the Write! button looks like this:

statbar('Hi! This is the statusbar!');

Inside the brackets we specify the string ’Hi! This is the statusbar!’ This means this string is pas-
sed alond to the function statbar(). You can see that we defined the function statbar() like this:
function statbar(txt) {
  window.status = txt;
}

What is new is that we use txt inside the brackets of the function name. This means the string
we passed along to the function is stored in the variable txt. Passing variables to functions is an
often used way for making functions more flexible. You can pass several values to functions -
you just have to separate them through commas. The string txt is displayed on the statusbar
through window.status = txt. Erasing the text on the statusbar is achived through assigning an
empty string to window.status.

Displaying text on the statusbar can easily be used in combination with links. Instead of
showing the URL of the link you can explain in words what the next page is about. This link
demonstrates this - just move your mousepointer over the link. The code for this example looks
like this:

<a href="dontclck.htm"
 onMouseOver="window.status=’Don’t click me!’; return true;"
 onMouseOut="window.status=’’;">link</a>

Here we are using onMouseOver and onMouseOut in order to detect when the mousepointer
moves across the link. You might wonder why we have to write return true inside the on-
MouseOver property. This means that the browser won’t execute its own code as a reaction to
the MouseOver event. Normally the browser displays the URL of the link in the statusbar. If we
do not use return true the browser will write to the statusbar immediately after our code has been
executed - this means it would overwrite our text and the user couldn’t read it. In general we can
suppress the following actions of the browser by using return true in the event-handler.
onMouseOut did not exist in JavaScript 1.0. If you are using the Netscape Navigator 2.x you
might get different results on different platforms. On Unix platforms for example the text dis-
sapears even though the browser does not know onMouseOut. On Windows the text does not
dissapear. If you want your script to be compatible to Netscape 2.x on Windows you might for
example write a function which writes text to the statusbar and erases this text after a certain
period of time. This is programmed with a timeout. We will learn more about timeouts in the
following paragraph.
In this script you can see another thing - sometimes you want to output quotes. We want to out-
put the text Don’t click me - as we specify this string inside the onMouseOver event-handler we
are using the single quotes. But the word Don’t uses a single quote as well! The browser gets
mixed up if you just write ’Don’t ...’. To solve this problem you can just write a backslash  be-
fore the quote - which means that it belongs to the output (you can do the same with double quo-
tes ").

Timeouts
With the help of timeouts (or timer) you can let the computer execute some code after a certain
period of time. The following script shows a button which opens up a popup window after 3
seconds.

The script looks like this:

<script language="JavaScript">
<!-- hide

function timer() {
  setTimeout("alert(’Time is up!’)", 3000);
}

// -->
</script>

...

<form>
 <input type="button" value="Timer" onClick="timer()">
</form>

setTimeout() is a method of the window-object. It sets a timeout - I think you might have gues-
sed that. The first argument is the JavaScript code which shall be executed after a certain time.
In our case this argument is "alert(’Time is up!’)". Please note that the JavaScript code has to be
inside quotes. The second argument tells the computer when the code shall be executed. You
have to specify the time in number of milliseconds (3000 milliseconds = 3 seconds).

Scroller
Now that you know how to write to the statusbar and how timeouts work we will have a look at
scrollers. You might already know the moving text-strings in the statusbar. They can be seen all
over the Internet. We will see how to program a basic scroller. Besides that we will think of pos-
sible improvements of the scroller. Scrollers are quite easy to implement. Just let us think about
how we could realize a moving text in the statusbar. We have to write a text to the statusbar.
After a short period of time we have to write the same text to the statusbar - but we have to move
it a little bit to the left side. If we repeat this over and over again the user gets the impression of
a moving text. We have to think about how we can determine which part of the text should be
displayed as the whole text is normally longer than the statusbar.

(The online version lets you test this script immediately)

Here is the source code - I have added some comments:

<html>
<head>
<script language="JavaScript">
<!-- hide


// define the text of the scroller
var scrtxt = "This is JavaScript! " +
   "This is JavaScript! " +
   "This is JavaScript!";
var length = scrtxt.length;
var width = 100;
var pos = -(width + 2);
function scroll() {

    // display the text at the right position and set a timeout

    // move the position one step further
    pos++;

    // calculate the text which shall be displayed
    var scroller = "";
    if (pos == length) {
      pos = -(width + 2);
    }

    // if the text hasn’t reached the left side yet we have to
    // add some spaces - otherwise we have to cut of the first
    // part of the text (which moved already across the left border
    if (pos < 0) {
      for (var i = 1; i <= Math.abs(pos); i++) {
        scroller = scroller + " ";}
      scroller = scroller + scrtxt.substring(0, width - i + 1);
    }
    else {
      scroller = scroller + scrtxt.substring(pos, width + pos);
    }

    // assign the text to the statusbar
    window.status = scroller;

    // call this function again after 100 milliseconds
    setTimeout("scroll()", 100);
}

// -->
</script>
</head>

<body onLoad="scroll()">
Your HTML-page goes here.
</body>
</html>

The main part of the scroll() function is needed for calculating which part of the text is being
displayed. I am not explaining the code in detail - you just have to understand how this scroller
works in general. In order to start the scroller we are using the onLoad event-handler of the <bo-
dy> tag. This means the function scroll() will be called right after the HTML-page has been
loaded. We call the scroll() function with the onLoad property. The first step of the scroller is
being calculated and displayed. At the end of the scroll() function we set a timeout. This causes
the scroll() function to be executed again after 100 milliseconds. The text is moved one step for-
ward and another timeout is set. This goes on for ever.
(There have been some problems with this kind of scroller with Netscape Navigator 2.x. It so-
metimes caused an ’Out of memory’-error. I’ve got many mails explaining this is because of the
recursive call of the scroll() function - finally leading to a memory overflow. But this is not true.
This is not a recursive function call! We get recursion if we call the scroll() function inside the
scroll() function itself. But this isn’t what we are doing here. The old function which sets the
timeout is finished before the new function is executed. The problem was that strings could not
really be changed in JavaScript. If you tried to do it JavaScript simply created a new object -
without removing the old one. This is what filled up the memory.)

Scrollers are used widely in the Internet. There is the risk that they get unpopular quickly. I must
admit that I do not like them too much. Especially annoying on most pages is that the URL
cannot be read anymore when moving the pointer across a link. This can be solved through stop-
ping the scroller when a MouseOver event occurs - you can start it again with onMouseOut. If
you want to have a scroller try not to use the standard scroller - try to add some nice effect. May-
be one part of the text moving from left and the other part is coming from right - when they meet
in the middle the text stands still for some seconds. With some phantasy you can certainly find
some nice alternatives (I have some examples in my book).

©1996,1997 by Stefan Koch
e-mail:skoch@rumms.uni-mannheim.de
http://rummelplatz.uni-mannheim.de/~skoch/
My JavaScript-book: http://www.dpunkt.de/javascript
VOODOO’S INTRODUCTION TO JAVASCRIPT
                                 © 1996, 1997 by Stefan Koch


Part 6: Predefined objects
The Date-object
JavaScript lets you use some predefined objects. This is for example the Date-object, the Array-
object or the Math-object. There are several other objects - please refer to the documentation
provided by Netscape for a complete reference.
We are going to have a look at the Date-object first. As the name implies this object lets you
work with time and date. For example you can easily calculate how many days are left until next
christmas. Or you can add the actual time to your HTML-document.
So let’s begin with an example which displays the actual time. First we have to create a new
Date-object. For this purpose we are using the new operator. Look at this line of code:

today= new Date()

This creates a new Date-object called today. If you do not specify a certain date and time when
creating a new Date-object the actual date and time is used. This means after executing today=
new Date() the new Date-object today represents the date and time of this specific moment.
The Date-object offers some methods which can now be used with our object today. This is for
example getHours(), setHours(), getMinutes(), setMinutes(), getMonth(), setMonth() and so on.
You can find a complete reference of the Date-object and its methods in Netscapes JavaScript
documentation.
Please note that a Date-object does only represent a certain date and time. It is not like a clock
which changes the time every second or millisecond automatically.
In order to get another date and time we can use another constructor (this is the Date() method
which is called through the new operator when constructing a new Date-object):

today= new Date(1997, 0, 1, 17, 35, 23)

This will create a Date-object which represents the first of january 1997 at 17:35 and 23 secon-
ds. So you specify the date and time like this:

Date(year, month, day, hours, minutes, seconds)

Please note that you have to use 0 for january - and not 1 as you might think. 1 stands for febru-
ary and so on.

Now we will write a script which outputs the actual date and time. The result will look like this:

Time: 17:53
Date: 4/3/2010
The code looks like this:

<script language="JavaScript">
<!-- hide

now= new Date();

document.write("Time: " + now.getHours() + ":" + now.getMinutes() + "<br>");
document.write("Date: " + (now.getMonth() + 1) + "/" + now.getDate() + "/" +
        (1900 + now.getYear()));

// -->
</script>

Here we use methods like getHours() in order to display the time and date specified in out Date-
object now. You can see that we are adding 1900 to the year. The method getYear() returns the
number of years since 1900. This means if the year is 1997 it will return 97 if the year is 2010
it will return 110 - not 10! If we add 1900 we won’t have the year 2000 problem. Remember that
we have to increment the number we receive through getMonth() by one.
This script does not check whether the number of minutes is less than 10. This means you can
get a time which looks like this: 14:3 which actually means 14:03. We will see in the next script
how to solve this problem.

Now we will have a look at a script which displays a working clock:

<html>
<head>

<script Language="JavaScript">
<!-- hide

var timeStr, dateStr;

function clock() {
     now= new Date();

     // time
     hours= now.getHours();
     minutes= now.getMinutes();
     seconds= now.getSeconds();
     timeStr= "" + hours;
     timeStr+= ((minutes < 10) ? ":0" : ":") + minutes;
     timeStr+= ((seconds < 10) ? ":0" : ":") + seconds;
     document.clock.time.value = timeStr;

     // date
     date= now.getDate();
     month= now.getMonth()+1;
     year= now.getYear();
     dateStr= "" + month;
     dateStr+= ((date < 10) ? "/0" : "/") + date;
dateStr+= "/" + year;
     document.clock.date.value = dateStr;

     Timer= setTimeout("clock()",1000);
}

// -->
</script>
</head>

<body onLoad="clock()">

<form name="clock">
 Time:
 <input type="text" name="time" size="8" value=""><br>
 Date:
 <input type="text" name="date" size="8" value="">
</form>

</body>
</html>

(The online version lets you test this script immediately)

We use the setTimeout() method for setting the time and date every second. So we create every
second a new Date-object with the actual time. You can see that the function clock() is called
with the onLoad event-handler in the <body> tag. In the body-part of our HTML-page we have
two text-elements. The function clock() writes the time and date into these two form-elements
in the right format. You can see that we are using two strings timeStr and dateStr for this pur-
pose.
We have mentioned earlier that there is a problem with minutes less than 10 - this script solves
this problem through this line of code:

timeStr+= ((minutes < 10) ? ":0" : ":") + minutes;

Here the number of minutes are added to the string timeStr. If the minutes are less than 10 we
have to add a 0. This line of code might look a little bit strange to you. You could also write it
like this which might look more familar:

if (minutes < 10) timeStr+= ":0" + minutes
  else timeStr+= ":" + minutes;

The Array-object
Arrays are very important. Just think of an example where you want to store 100 different na-
mes. How could you do this with JavaScript? Well, you could define 100 variables and assign
the different names to them. This is quite complicated.
Arrays can be seen as many variables bundled together. You can access them through one name
and a number.
Let’s say out array is called names. Then we can access the first name through names[0]. The
second name is called name[1] and so on.
Since JavaScript 1.1 (Netscape Navigator 3.0) you can use the Array-object. You can create a
new array through myArray= new Array(). Now you can assign values to this array:

myArray[0]= 17;
myArray[1]= "Stefan";
myArray[2]= "Koch";

JavaScript arrays are really flexible. You do not have to bother about the size of the array - its
size is being set dynamically. If you write myArray[99]= "xyz" the size of the array get 100 ele-
ments (a JavaScript array can only grow - it hasn’t got the ability to shrink. So keep your arrays
as small as possible.). It doesn’t matter if you store numbers, strings or other objects in an array.
I haven’t mentioned every detail of arrays here but I hope you will see that arrays are a very im-
portant concept.
Certainly many things get clearer by looking at an example. The output of the following examp-
le is:

first element
second element
third element

Here is the source code:

<script language="JavaScript">
<!-- hide

myArray= new Array();

myArray[0]= "first element";
myArray[1]= "second element";
myArray[2]= "third element";

for (var i= 0; i< 3; i++) {
  document.write(myArray[i] + "<br>");
}

// -->
</script>

First we are creating a new array called myArray. Then we assign three different values to the
array. After this we start a loop. This loop executes the command document.write(myArray[i]
+ "<br>"); three times. The variable i counts from 0 to 2 with this for-loop. You can see that
we are using myArray[i] inside the for-loop. As i counts from 0 to 2 we get three document.wri-
te() calls. We could rewrite the loop as:

document.write(myArray[0] + "<br>");
document.write(myArray[1] + "<br>");
document.write(myArray[2] + "<br>");

Arrays with JavaScript 1.0
As the Array-object does not exist in JavaScript 1.0 (Netscape Navigator 2.x and Microsoft In-
ternet Explorer 3.x) we have to think of an alternative. This piece of code could be found in the
Netscape documentation:

function initArray() {
  this.length = initArray.arguments.length
  for (var i = 0; i < this.length; i++)
   this[i+1] = initArray.arguments[i]
}

You can now create an array with:

myArray= new initArray(17, 3, 5);

The numbers inside the brackets are the values the array is being initialized with (this can also
be done with the Array-object from JavaScript 1.1). Please note that this kind of array does not
implement all elements the Array-object from JavaScript 1.1 has (there is for example a sort()
method which lets you sort all elements in a specific).

The Math-object
If you need to do mathematical calculations you will find some methods in the Math-object
which might help you further. There is for example a sine-method sin(). You will find a com-
plete reference in the Netscape documentation. I want to demonstrate the random() method. If
you have read the first version of this tutorial you know that there have been some problems
with the random() method. We wrote a function which let us create random numbers. We don’t
need that anymore as the random() method now works on all platforms.
If you call Math.random() you will receive a random number between 0 and 1. Here is one pos-
sible output of document.write(Math.random()):

.7184317731538611

©1996,1997 by Stefan Koch
e-mail:skoch@rumms.uni-mannheim.de
http://rummelplatz.uni-mannheim.de/~skoch/
My JavaScript-book: http://www.dpunkt.de/javascript
VOODOO’S INTRODUCTION TO JAVASCRIPT
                                  © 1996, 1997 by Stefan Koch


Part 7: Forms
Validating form input
Forms are widely used on the Internet. The form input is often being sent back to the server or
via mail to a certain e-mail account. But how can you be certain that a valid input was done by
the user? With the help of JavaScript the form input can easily be checked before sending it over
the Internet. First I want to demonstrate how forms can be validated. Then we will have a look
at the possibilties for sending information over the Internet.

First of all we want to create a simple script. The HTML-page shall contain two text-elements.
The user has to write his name into the first and an e-mail address into the second element. If
the user has entered his name (for example ‘Stefan’) into the first text-field the script creates a
popup window with the text ‘Hi Stefan!’.

(The online version lets you test this script immediately)

Concerning the first input element you will receive an error message when nothing is entered.
Any input is seen as valid input. Of course, this does not prevent the user from entering any
wrong name. The browser even accepts numbers. So if you enter '17' you will get 'Hi 17!'. So
this might not be a good check. The second form is a little bit more sophisticated. Try to enter
a simple string - your name for example. It won't work (unless you have a @ in your name...).
The criteria for accepting the input as a valid e-mail address is the @. A single @ will do it - but
this is certainly not very meaningful. Every Internet e-mail address contains a @ so it seems ap-
propriate to check for a @ here.

What does the script for those two form elements and for the validating look like? Here it goes:

<html>
<head>
<script language="JavaScript">
<!-- Hide

function test1(form) {
  if (form.text1.value == "")
    alert("Please enter a string!")
  else {
   alert("Hi "+form.text1.value+"! Form input ok!");
  }
}

function test2(form) {
if (form.text2.value == "" ||
     form.text2.value.indexOf(’@’, 0) == -1)
      alert("No valid e-mail address!");
 else alert("OK!");
}
// -->
</script>
</head>

<body>
<form name="first">
Enter your name:<br>
<input type="text" name="text1">
<input type="button" name="button1" value="Test Input" onClick="test1(this.form)">
<P>
Enter your e-mail address:<br>
<input type="text" name="text2">
<input type="button" name="button2" value="Test Input" onClick="test2(this.form)">
</body>
</html>

First have a look at the HTML-code in the body-section. We just create two text elements and
two buttons. The buttons call the functions test1(...) or test2(...) depending on which button is
pressed. We pass this.form to the functions in order to be able to address the right elements in
the functions later on. The function test1(form) tests if the string is empty. This is done via if
(form.text1.value == "")... . ’form’ is the variable which receives the ’this.form’ value in the
function call. We can get the value of the input element through using ’value’ in combination
with form.text1. In order to look if the string is empty we compare it with "". If the input string
equals "" then no input was done. The user will get an error message. If something is entered
the user will get an ok.
The problem here is that the user might enter only spaces. This is seen as a valid input! If you
want to, you can of course check for these possibilities and exclude them. I think this is quite
easy with the information given here. Now have a look at the test2(form) function. This function
again compares the input string with the empty string "" to make sure that something has been
entered. But we have added something to the if-command. The || is called the OR-operator. You
have learned about it in part 6 of this introduction. The if-command checks if either the first or
the second comparison is true. If at least one of them is true the whole if-command gets true and
the following command will be executed. This means that you will get an error message either
if your string is empty or if there isn’t a @ in your string. The second operation in the if-com-
mand looks if the entered string contains a @.

Checking for certain characters
Sometimes you want to restrict the form input to certain characters or numbers. Just think of a
telephone number - the input should only contain digits (we assume that the telephone number
does not contain any characters). We could check if the input is a number. But most people use
different symbols in their telephone number - for example:
01234-56789, 01234/56789 or 01234 56789 (with a space inbetween). The user should not be
forced to enter the telephone number without these symbols. So we have to extend our script to
check for digits and some symbols. This is demonstrated in the next example which is taken
from my JavaScript book:

(The online version lets you test this script immediately)

<html>
<head>
<script language="JavaScript">
<!-- hide

// ******************************************************
// Script from Stefan Koch - Voodoo’s Intro to JavaScript
// http://rummelplatz.uni-mannheim.de/~skoch/js/
//     JS-book: http://www.dpunkt.de/javascript
// You can use this code if you leave this message
// ******************************************************

function check(input) {
 var ok = true;

    for (var i = 0; i < input.length; i++) {
      var chr = input.charAt(i);
      var found = false;
      for (var j = 1; j < check.length; j++) {
        if (chr == check[j]) found = true;
      }
      if (!found) ok = false;
    }

    return ok;
}

function test(input) {

    if (!check(input, "1", "2", "3", "4",
         "5", "6", "7", "8", "9", "0", "/", "-", " ")) {

     alert("Input not ok.");
    }
    else {
      alert("Input ok!");
    }
}

// -->
</script>
</head>

<body>
<form>
Telephone:
<input type="text" name="telephone" value="">
<input type="button" value="Check"
 onClick="test(this.form.telephone.value)">
</form>
</body>
</html>

The function test() specifies which characters are valid.

Submitting form input
What different possibilities do exist for submitting form input? The easiest way is to submit the
form input via e-mail. This is the method we are going to look at a little bit closer. If you want
the form input to be handled by the server you need to use CGI (Common Gateway Interface).
This allows you to process the form input automatically. The server might for example build up
a database from the input received by some customers. Another example are index-pages like
Yahoo. They usually have a form for making a search in their database. The user gets a response
quickly after the submit button was hit. He does not have to wait until the people maintaining
this server read the input and then look up the information requested. This is done
automatically by the server. JavaScript cannot do things like this. You cannot create guestbooks
with JavaScript because JavaScript isn’t able to write to a file on the server. You can only do
this through CGI. Of course you can create a guestbook with the people answering via e-mail.
You have to enter the feedback manually though. This is ok if you don’t expect to get 1000 feed-
back mails a day.
This script here is plain HTML. So no JavaScript is needed here! Only, of course, if you want
to check the input before the form is submitted you will need JavaScript. I have to add that the
mailto-command does not work everywhere - for example the Microsoft Internet Explorer 3.0
does not support it.

<form method=post action="mailto:your.address@goes.here" enctype="text/plain">
Do you like this page?
 <input name="choice" type="radio" value="1">Not at all.<br>
 <input name="choice" type="radio" value="2" CHECKED>Waste of time.<br>
 <input name="choice" type="radio" value="3">Worst site of the Net.<br>
 <input name="submit" type="submit" value="Send">
</form>

The property enctype="text/plain" is used in order to send plain text without encoded parts. This
makes it much easier to read the mail.

If you want to validate the form before it is sent over the net you can use the onSubmit event-
handler. You have to put this event-handler into the <form> tag. This looks like this:

function validate() {
 // check if input ok
 // ...

    if (inputOK) return true
      else return false;
}
...

<form ... onSubmit="return validate()">

...

With this code the form isn’t being sent over the Internet if the form input was wrong.

Setting the focus to a certain form-element
With the help of the focus() method you can make your form a little bit more user-friendly. You
can define which element is in focus at the beginning. Or you could tell the browser to focus on
the form where the input was wrong. This means that the browser will set the cursor into the
specified form-element so the user does not have to click on the form before entering anything.
You can do this with the following piece of script:

function setfocus() {
  document.first.text1.focus();
}

This script would set the focus to the first text-element in the script I have shown above. You
have to specify the name of the whole form - which is called first here - and the name of the
single form element - here text1. If you want to put the focus on this element when the page is
being loaded you can add an onLoad-property to your <body> tag. This looks like this:

<body onLoad="setfocus()">

We can extend this with the following code:

function setfocus() {
  document.first.text1.focus();
  document.first.text1.select();
}

(The online version lets you test this script immediately)

The text-element gets the focus and the text contained in this text-element is being selected.

©1996,1997 by Stefan Koch
e-mail:skoch@rumms.uni-mannheim.de
http://rummelplatz.uni-mannheim.de/~skoch/
My JavaScript-book: http://www.dpunkt.de/javascript
VOODOO’S INTRODUCTION TO JAVASCRIPT
                                 © 1996, 1997 by Stefan Koch


Part 8: The Image-object
Images on a web-page
Now we are going to have a look at the Image-object which is available since JavaScript 1.1 (i.e.
since Netscape Navigator 3.0). With the help of the Image-object you can change images on a
web-page. This allows us for example to create animations.
Please note that users of older browsers (like Netscape Navigator 2.0 or Microsoft Internet Ex-
plorer 3.0 - they use JavaScript 1.0) cannot run the scripts shown in this part - or at least they
cannot see the whole effect. First, let’s see how the images in a web-page can be addressed
through JavaScript. All images are represented through an array. This array is called images. It
is a property of the document-object. Every image on a web-page gets a number. The first image
gets the number 0, the second image gets the number 1 and so on. So we can address the first
image through document.images[0].
Every image in an HTML-document is considered as an Image-object. An Image-object has got
certain properties which can be accessed through JavaScript. You can for example see which
size an image has with the properties width and height. document.images[0].width gives you the
width (in pixel) of the first image on the web-page.
Especially if you have many images on one page it gets hard to keep count of all images. Giving
names to the different images solves this problem. If you declare an image with this tag

<img src="img.gif" name="myImage" width=100 height=100>

you can address it through document.myImage or document.images["myImage"].

Loading new images
Although it is nice to know how to get the size of an image on a web-page this is not what we
wanted to know. We want to change images on a web-page. For this purpose we need the src
property. As in the <img> tag the src property represents the address of the displayed image.
With JavaScript 1.1 you can now assign new addresses to an already loaded image on a web-
page. The result is that the image located at the new address is being loaded.
This new image replaces the old image on the web-page. Look at this example:

<img src="img1.gif" name="myImage" width=100 height=100>

The image img1.gif is being loaded and gets the name myImage. The following line of code re-
places the old image img1.gif with the new image img2.gif:

document.myImage.src= "img2.src";

The new image has always got the same size as the old image. You cannot change the size of
the area in which the image is being displayed.

(The online version lets you test this script immediately)

Preloading images
One drawback might be that the new image gets loaded after assigning a new address to the src
property. As the image is not preloaded it takes some time until the new image is retrieved
through the Internet. In some situations this is ok - but often these delays are not acceptable. So
what can we do about this? Yes, preloading the image is the solution. For this purpose we have
to create a new Image-object. Look at these lines of code:

hiddenImg= new Image();
hiddenImg.src= "img3.gif";

The first line creates a new Image-Object. The second line defines the address of the image
which shall be represented through the object hiddenImg. We have already seen that assigning
a new address to the src attribute forces the browser to load the image the address is pointing at.
So the image img2.gif gets loaded when the second line of this code is being executed. As the
name hiddenImg implies the image is not being displayed after the browser finished loading it.
It is just kept in the memory (or better in the cache) for later use. In order to display this image
we can now use this line:

document.myImage.src= hiddenImg.src;

Now the image is being taken from the cache and displayed immediately. We have managed to
preload the image. Of course the browser must have finished the preloading for being able to
display an image without delay. So if you have many images specified for preloading there
might be a delay nevertheless because the browser has been busy to download all the other pic-
tures. You always have to consider the speed of the Internet - the downloading of the images
doesn’t go faster with this code shown here. We only try to start the downloading of the images
earlier - so the user can see them earlier. This makes the whole process much smoother.
If you have a fast Internet connection you might wonder what all this talk is about. Which delay
is this guy talking about all the time? Well, there are still some people sitting behind a 14.4 mo-
dem (No, not me. I just upgraded to 33.6 - oh yes...).

Changing images on user-initiated events
You can create nice effects through changing images as a reaction to certain events. You can for
example change images when the mouse cursor is being moved over a certain area.

(The online version lets you test this script immediately)

The source code for this example looks like this:

<a href="#"
 onMouseOver="document.myImage2.src=’img2.gif’"
 onMouseOut="document.myImage2.src=’img1.gif’">
<img src="img1.gif" name="myImage2" width=160 height=50 border=0></a>
This code causes some problems though:

       - The user might not use a JavaScript 1.1 browser.
       - The second image is not being preloaded.
       - We have to rewrite the code for every image on a web-page.
       - We want to have a script which can be used in many web-page over and over again
       without large changes.

We will now have a look at a complete script which solves these problems. The script gets much
longer - but once it is written you do not have to bother about it anymore. There are two requi-
rements for keeping the script flexible:

       - Undefined number of images - it should not matter if 10 or 100 images are used
       - Undefined order of images - it should be possible to change the order of the images
       without changing the code

(The online version lets you test this script immediately)

Have a look at the code (I have added some comments):

<html>
<head>

<script language="JavaScript">
<!-- hide

// ******************************************************
// Script from Stefan Koch - Voodoo’s Intro to JavaScript
// http://rummelplatz.uni-mannheim.de/~skoch/js/
//     JS-book: http://www.dpunkt.de/javascript
// You can use this code if you leave this message
// ******************************************************

 // ok, we have a JavaScript browser
 var browserOK = false;
 var pics;

// -->
</script>

<script language="JavaScript1.1">
<!-- hide

 // JavaScript 1.1 browser - oh yes!
 browserOK = true;
 pics = new Array();

// -->
</script>
<script language="JavaScript">
<!-- hide

var objCount = 0; // number of (changing) images on web-page

function preload(name, first, second) {

    // preload images and place them in an array

    if (browserOK) {
      pics[objCount] = new Array(3);
      pics[objCount][0] = new Image();
      pics[objCount][0].src = first;
      pics[objCount][1] = new Image();
      pics[objCount][1].src = second;
      pics[objCount][2] = name;
      objCount++;
    }
}

function on(name){
  if (browserOK) {
     for (i = 0; i < objCount; i++) {
      if (document.images[pics[i][2]] != null)
        if (name != pics[i][2]) {
          // set back all other pictures
            document.images[pics[i][2]].src = pics[i][0].src;
        } else {
            // show the second image because cursor moves across this image
              document.images[pics[i][2]].src = pics[i][1].src;
        }
    }
  }
}

function off(){
  if (browserOK) {
     for (i = 0; i < objCount; i++) {
      // set back all pictures
      if (document.images[pics[i][2]] != null)
           document.images[pics[i][2]].src = pics[i][0].src;
    }
  }
}

// preload images - you have to specify which images should be preloaded
// and which Image-object on the wep-page they belong to (this is the first
// argument). Change this part if you want to use different images (of course
// you have to change the body part of the document as well)
preload("link1", "img1f.gif", "img1t.gif");
preload("link2", "img2f.gif", "img2t.gif");
preload("link3", "img3f.gif", "img3t.gif");

// -->
</script>
<head>


<body>
<a href="link1.htm" onMouseOver="on(’link1’)"
 onMouseOut="off()">
<img name="link1" src="link1f.gif"
 width="140" height="50" border="0"></a>

<a href="link2.htm" onMouseOver="on(’link2’)"
 onMouseOut="off()">
<img name="link2" src="link2f.gif"
 width="140" height="50" border="0"></a>

<a href="link3.htm" onMouseOver="on(’link3’)"
 onMouseOut="off()">
<img name="link3" src="link3f.gif"
 width="140" height="50" border="0"></a>
</body>
</html>

This script puts all images in an array pics. The preload() function which is called in the begin-
ning builds up this array. You can see that we call the preload() function like this:

preload("link1", "img1f.gif", "img1t.gif");

This means that the script should load the two images img1f.gif and img1t.gif. The first image
is the image which should be displayed when the mousecursor isn’t inside the image area. When
the user moves the mousecursor across the image area the second image is shown. With the first
argument "img1" of the call of the preload() function we specify which Image-object on the
web-page the two preloaded images belong to. If you look into the <body> part of our example
you will find an image with the name img1. We use the name of the image (and not its
number) in order to be able to change the order of the pictures without changing the script.
The two functions on() and off() are being called through the event-handlers onMouseOver and
onMouseOut. As images cannot react to the events MouseOver and MouseOut we have to put a
link around the images.
As you can see the on() function sets back all other images. This is necessary because it could
happen that several images are highlighted (the event MouseOut does not occur for example
when the user moves the cursor from an image directly outside the window).

Images are certainly a great way for enhancing your web-page. The Image-object lets you create
really sophisticated effects. But please notice not every image and JavaScript program enhances
your page. If you surf around the net you can see many examples where images are used in a
horrible way. It’s not the quantity of images that makes your web-page look good - it’s the qua-
lity. It is really annoying to download 50 kB of bad graphics.
Keep this in mind when creating image-effects with JavaScript and your visitors/customers will
come back more likely.

©1996,1997 by Stefan Koch
e-mail:skoch@rumms.uni-mannheim.de
http://rummelplatz.uni-mannheim.de/~skoch/
My JavaScript-book: http://www.dpunkt.de/javascript
VOODOO’S INTRODUCTION TO JAVASCRIPT
                                  © 1996, 1997 by Stefan Koch


Part 9: Layers I
What are layers?
Layers are one great new feature of the Netscape Navigator 4.0. This allows absolute posi-
tioning of objects like images. Besides that you can move objects on your HTML-page. You can
also hide objects.
Layers can easily be manipulated with the help of JavaScript. I hope you get as enthusiatic about
layers as I am.

You can only use layers with Netscape Navigator 4.0 at the moment!

As usual I won’t describe all details of the different tags. There is a good document describing
all elements of layers in Netscape Navigator 4.0 at http://home.netscape.com/comprod/pro-
ducts/communicator/index.html - so there is no need to rewrite this.

What exactly are layers? This can be explained quite easily: you take several sheets of paper.
On one paper you write a text. On another one you draw an image. Write some text besides an
image on a third paper and so on. Now, put these sheets of paper on a table. Let’s say every paper
is a layer. From this aspect a layer is some kind of container. It can contain objects - i.e. in this
case text and images.
Now take a paper with an image on. Move it around on the table. Watch the image following
the movements of the paper carefully. If you move the paper to the right the image will follow!
What do we learn from this fascinating experience? Layers which can contain several different
objects - like images, forms, text etc. - can be placed on your HTML-page and can be moved
around. If you move a layer all objects contained in this layer will follow this movement.
Layers can overlap each other like papers on a table. Every layer can have transparent parts. Put
a hole in one paper. Now put this paper above another paper. The hole is a ’transparent part’ of
the first paper - the content of the underlying paper shines through.


Creating layers
For creating a layer we need either the <layer> or <ilayer> tag. You can use the following pro-
perties:


               Property                                             Description
name="layerName"                                  The name of the layer
left=xPosition                                    The horizontal position of the top left corner
top=yPosition                                     The vertical position of the top left corner
z-index=layerIndex                             Index number of layer
width=layerWidth                               Width of the layer in pixel
clip="x1_offset,y1_offset,x2_offset,y2_offset" Defines the area of the layer which shall be dis-
                                               played
above="layerName"                              Defines above which layer this layer will ap-
                                               pear
below="layerName"                              Defines below which layer this layer will ap-
                                               pear
Visibility=show|hide|inherit                   The visibility of the layer
bgcolor="rgbColor"                             The background color - either name of a stan-
                                               dard color or rgb-values
background="imageURL"                          Background image

The <layer> tag is used for layers which can be explicitly positioned. If you do not specify a
position (with the left and top properties) the layer will be positioned in the top left corner of the
window.
The <ilayer> tag creates a layer which position depends on the flow of the document.

Now let’s start with an easy example. We want to create two layers. In the first layer we put an
image and in the second layer we put a text. What we want to do is to display the text above the
image.


                              The text is displayed above the image

Here is the source code:

<html>

<layer name=pic z-index=0 left=200 top=100>
<img src="img.gif" width=160 height=120>
</layer>

<layer name=txt z-index=1 left=200 top=100>
<font size=+4> <i> Layers-Demo </i> </font>
</layer>

</html>

You can see that we define two layers with the <layer> tag. Both layers are positioned at 200/
100 (defined through left and top). Everything between the <layer> and the </layer> tag (or
<ilayer> and the </ilayer> tag) belongs to this layer.
You can see that we use the property z-index. This defines in which order the layers appear - i.e.
in our case you tell the browser if the text will appear above or below the image. The layer with
the highest z-index number will be displayed on top. You do not have to use 0 and 1 for the z-
index - every positive integer is ok.
If you write z-index=100 in the first <layer> tag the text will be displayed below the image - as
the text-layer has got a smaller z-index number (z-index=1). You can see the text through the
image because I used a transparent background (gif89a format).


                             The text is displayed below the image


Layers and JavaScript
Now we are going to access layers through JavaScript. We want to start with an example where
the user can push a button in order to hide and show a layer.
First we have to know how the layers are represented in JavaScript. As usual there are several
ways. The best thing is to assign a name to every layer. If we define a layer with

<layer ... name=myLayer>
...
</layer>

we can access this layer through document.layers["myLayer"]. According to the documentation
provided by Netscape we can also write document.myLayer - but this lets my browser crash.
This is certainly only a problem of the preview version and will be solved in the final release (I
am using Netscape Navigator 4.0 PR3 on WinNT at the moment). There seem to be no problems
with document.layers["myLayer"] - so we are going to use this alternative.
You can also access the layers through an integer index. In order to access the bottommost layer
you can write document.layers[0]. Please note that the index is not the same as the z-index pro-
perty. If you have for example two layers called layer1 and layer2 with the z-index numbers 17
and 100 you can access these layers through document.layers[0] and document.layers[1] and
not through document.layers[17] and document.layers[100].

There are several layer-properties which can be changed through JavaScript. The following ex-
ample presents a button which lets you hide and display one layer (Netscape Navigator 4.0 - or
higher - required!).

(The online version lets you test this script immediately)

The source code looks like this:

<html>
<head>
<script language="JavaScript">
<!-- hide

function showHide() {
  if (document.layers["myLayer"].visibility == "show")
    document.layers["myLayer"].visibility= "hide"
  else document.layers["myLayer"].visibility= "show";
}

// -->
</script>
</head>
<body>

<ilayer name=myLayer visibility=show>
<font size=+1 color="#0000ff"><i>This text is inside a layer</i></font>
</ilayer>

<form>
<input type="button" value="Show/Hide layer" onClick="showHide()">
</form>

</body>
</html>

The button calls the function showHide(). You can see that this function accesses the property
visibility of the layer-object myLayer. Through assigning "show" or "hide" to document.lay-
ers["myLayer"].visibility you can show or hide the layer. Please note that "show" and "hide"
are strings - not reserved keywords, i.e. you cannot write document.layers["myLayer"].visibi-
lity= show.
I have used the <ilayer> tag instead of the <layer> tag because I wanted to put the layer in the
flow of the document.


Moving layers
The properties left and top define the position of the layer. You can assign new values to these
properties in order to set the position of the layer. The following line sets the horizontal position
of the layer to 200 (in pixel):

document.layers["myLayer2"].left= 200;

We are now going to program a moving layer - this looks like a scroller inside the browser win-
dow.

(The online version lets you test this script immediately)

The script looks like this:

<html>
<head>
<script language="JavaScript">
<!-- hide

function move() {
 if (pos < 0) direction= true;
 if (pos > 200) direction= false;

    if (direction) pos++
      else pos--;

    document.layers["myLayer2"].left= pos;
}

// -->
</script>
</head>
<body onLoad="setInterval(’move()’, 20)">

<ilayer name=myLayer2 left=0>
<font size=+1 color="#0000ff"><i>This text is inside a layer</i></font>
</ilayer>

</body>
</html>

We create a layer called myLayer2. You can see that we are using onLoad inside the <body>
tag. We need to start the scrolling of the layer as soon as the page is loaded. We use setInterval()
inside the onLoad event-handler. This is a new method of JavaScript 1.2 (i.e. the JavaScript ver-
sion that is implemented in Netscape Navigator 4.0). This can be used to call a function over
and over again in a certain time interval. We used setTimeout() for this in the last lessons. set-
Interval() works almost the same - but you have to call it only once.
Through setInterval() we are calling the function move() every 20 milliseconds. The function
move() sets the layer to a certain position. As we call this function over and over again we get a
fluent scrolling of the text. All we have to do in the function move() is to calculate the position
of the layer and assign this value to document.layers["myLayer2"].left= pos.

If you look into the source code of this part of the online-tutorial you will realize that my code
looks a little different. I have implemented some code so that people with older JavaScript-
browsers won’t get any errors. How can this be achieved? The following code will only be exe-
cuted by browsers which understand JavaScript 1.2:

<script language="JavaScript1.2">
<!-- hide
document.write("You are using a JavaScript 1.2 capable browser.");
// -->
</script>

This is the same problem as we had with the Image-object. We can rewrite the code in a similar
way. Setting a variable browserOK solves the problem.

(The online version demonstrates that moving layers can overlap)
©1996,1997 by Stefan Koch
e-mail:skoch@rumms.uni-mannheim.de
http://rummelplatz.uni-mannheim.de/~skoch/
My JavaScript-book: http://www.dpunkt.de/javascript
VOODOO’S INTRODUCTION TO JAVASCRIPT
                                     © 1996, 1997 by Stefan Koch


Part 10: Layers II
We have already talked about the basics of the new layers technique. This lesson covers the fol-
lowing topics:

•Clipping
•Nested Layers
•Effects with transparent   layers


Clipping
You can define which rectangular part of a layer will be visible. Everything outside this area
won’t be shown. This is called clipping. You can use the HTML-property clip like this:

<ilayer left=0 top=0 clip="20,50,110,120">
<img src="davinci.jpg" width=209 height=264>
</ilayer>

(I have added left=0 and top=0 as my Netscape version (PR3 on WinNT) seems to have some
problems if these values are missing)
Although the image is 209x264 pixels in size you can only see a small part of it:
This part has got the size 90x70 (in pixel). The first two values specified through the clip-attribut
(in the HTML-tag <layer> or <ilayer>) define the upper left corner of the clipping box. The next
two values define the lower right corner. The following image illustrates this:


More interesting things can be achieved through setting the clipping region through JavaScript.
For this you can change the properties clip.left, clip.top, clip.right and clip.bottom of the Layer-
object. Just assign a new pixel value to one of these properties and the clipping region will chan-
ge. The following example changes the clipping region dynamically. The user gets the impres-
sion that the image is being built up slowly:

(The online version lets you test this script immediately)

Here is the code:

<html>
<head>

<script language="JavaScript">
<!-- hide

var middleX, middleY, pos;


function start() {
 // get size of image
 var width= document.layers["imgLayer"].document.davinci.width;
 var height= document.layers["imgLayer"].document.davinci.height;

 // calculate pixel in the middle of image
 middleX= Math.round(width/2);
 middleY= Math.round(height/2);
4007655 introduction-to-javascript

Weitere ähnliche Inhalte

Was ist angesagt?

Copycat Site BluePrint - make money online fast
Copycat Site BluePrint - make money online fastCopycat Site BluePrint - make money online fast
Copycat Site BluePrint - make money online fastEdward806784
 
Lecture 5 - Comm Lab: Web @ ITP
Lecture 5 - Comm Lab: Web @ ITPLecture 5 - Comm Lab: Web @ ITP
Lecture 5 - Comm Lab: Web @ ITPyucefmerhi
 
Techniques For A Modern Web UI (With Notes)
Techniques For A Modern Web UI (With Notes)Techniques For A Modern Web UI (With Notes)
Techniques For A Modern Web UI (With Notes)patrick.t.joyce
 
Introduction to java script
Introduction to java scriptIntroduction to java script
Introduction to java scriptDivyaKS12
 
THE ULTIMATE BLACKHAT CASH MACHINE - make money online
THE ULTIMATE BLACKHAT CASH MACHINE - make money onlineTHE ULTIMATE BLACKHAT CASH MACHINE - make money online
THE ULTIMATE BLACKHAT CASH MACHINE - make money onlineEdward806784
 
JavaScript guide 2020 Learn JavaScript
JavaScript guide 2020 Learn JavaScriptJavaScript guide 2020 Learn JavaScript
JavaScript guide 2020 Learn JavaScriptLaurence Svekis ✔
 
Worry Free Web Development
Worry Free Web DevelopmentWorry Free Web Development
Worry Free Web DevelopmentAra Pehlivanian
 
Introduction to java script
Introduction to java scriptIntroduction to java script
Introduction to java scriptnanjil1984
 
JavaScript and DOM Pattern Implementation
JavaScript and DOM Pattern ImplementationJavaScript and DOM Pattern Implementation
JavaScript and DOM Pattern Implementationdavejohnson
 
Facebook Black book 3 - make money online everyday
Facebook Black book 3 - make money online everydayFacebook Black book 3 - make money online everyday
Facebook Black book 3 - make money online everydayEdward806784
 
Top 7 Angular Best Practices to Organize Your Angular App
Top 7 Angular Best Practices to Organize Your Angular AppTop 7 Angular Best Practices to Organize Your Angular App
Top 7 Angular Best Practices to Organize Your Angular AppKaty Slemon
 
3-TIER ARCHITECTURE IN ASP.NET MVC
3-TIER ARCHITECTURE IN ASP.NET MVC3-TIER ARCHITECTURE IN ASP.NET MVC
3-TIER ARCHITECTURE IN ASP.NET MVCMohd Manzoor Ahmed
 
Javascript 2009
Javascript 2009Javascript 2009
Javascript 2009borkweb
 
Cucumber meets iPhone
Cucumber meets iPhoneCucumber meets iPhone
Cucumber meets iPhoneErin Dees
 

Was ist angesagt? (20)

Java script
Java scriptJava script
Java script
 
Copycat Site BluePrint - make money online fast
Copycat Site BluePrint - make money online fastCopycat Site BluePrint - make money online fast
Copycat Site BluePrint - make money online fast
 
JavaScript Basic
JavaScript BasicJavaScript Basic
JavaScript Basic
 
Lecture 5 - Comm Lab: Web @ ITP
Lecture 5 - Comm Lab: Web @ ITPLecture 5 - Comm Lab: Web @ ITP
Lecture 5 - Comm Lab: Web @ ITP
 
Techniques For A Modern Web UI (With Notes)
Techniques For A Modern Web UI (With Notes)Techniques For A Modern Web UI (With Notes)
Techniques For A Modern Web UI (With Notes)
 
Introduction to java script
Introduction to java scriptIntroduction to java script
Introduction to java script
 
THE ULTIMATE BLACKHAT CASH MACHINE - make money online
THE ULTIMATE BLACKHAT CASH MACHINE - make money onlineTHE ULTIMATE BLACKHAT CASH MACHINE - make money online
THE ULTIMATE BLACKHAT CASH MACHINE - make money online
 
JavaScript guide 2020 Learn JavaScript
JavaScript guide 2020 Learn JavaScriptJavaScript guide 2020 Learn JavaScript
JavaScript guide 2020 Learn JavaScript
 
Worry Free Web Development
Worry Free Web DevelopmentWorry Free Web Development
Worry Free Web Development
 
Shifting Gears
Shifting GearsShifting Gears
Shifting Gears
 
Java Script
Java ScriptJava Script
Java Script
 
Javascript tutorial
Javascript tutorialJavascript tutorial
Javascript tutorial
 
Introduction to java script
Introduction to java scriptIntroduction to java script
Introduction to java script
 
JavaScript and DOM Pattern Implementation
JavaScript and DOM Pattern ImplementationJavaScript and DOM Pattern Implementation
JavaScript and DOM Pattern Implementation
 
Javascript by geetanjali
Javascript by geetanjaliJavascript by geetanjali
Javascript by geetanjali
 
Facebook Black book 3 - make money online everyday
Facebook Black book 3 - make money online everydayFacebook Black book 3 - make money online everyday
Facebook Black book 3 - make money online everyday
 
Top 7 Angular Best Practices to Organize Your Angular App
Top 7 Angular Best Practices to Organize Your Angular AppTop 7 Angular Best Practices to Organize Your Angular App
Top 7 Angular Best Practices to Organize Your Angular App
 
3-TIER ARCHITECTURE IN ASP.NET MVC
3-TIER ARCHITECTURE IN ASP.NET MVC3-TIER ARCHITECTURE IN ASP.NET MVC
3-TIER ARCHITECTURE IN ASP.NET MVC
 
Javascript 2009
Javascript 2009Javascript 2009
Javascript 2009
 
Cucumber meets iPhone
Cucumber meets iPhoneCucumber meets iPhone
Cucumber meets iPhone
 

Andere mochten auch

Javascript Guide - Belajar Pemrograman JavaScript
Javascript Guide - Belajar Pemrograman JavaScriptJavascript Guide - Belajar Pemrograman JavaScript
Javascript Guide - Belajar Pemrograman JavaScriptBeni Krisbiantoro
 
PhoneGap: Building Mobile Applications with HTML/JS
PhoneGap: Building Mobile Applications with HTML/JSPhoneGap: Building Mobile Applications with HTML/JS
PhoneGap: Building Mobile Applications with HTML/JSRyan Stewart
 
Apps with Apache Cordova and Phonegap
Apps with Apache Cordova and PhonegapApps with Apache Cordova and Phonegap
Apps with Apache Cordova and PhonegapChristian Grobmeier
 
HTML5 & JavaScript Games
HTML5 & JavaScript GamesHTML5 & JavaScript Games
HTML5 & JavaScript GamesRobin Hawkes
 
HTML5 is the Future of Mobile, PhoneGap Takes You There Today
HTML5 is the Future of Mobile, PhoneGap Takes You There TodayHTML5 is the Future of Mobile, PhoneGap Takes You There Today
HTML5 is the Future of Mobile, PhoneGap Takes You There Todaydavyjones
 
Javascript tutorial basic for starter
Javascript tutorial basic for starterJavascript tutorial basic for starter
Javascript tutorial basic for starterMarcello Harford
 

Andere mochten auch (6)

Javascript Guide - Belajar Pemrograman JavaScript
Javascript Guide - Belajar Pemrograman JavaScriptJavascript Guide - Belajar Pemrograman JavaScript
Javascript Guide - Belajar Pemrograman JavaScript
 
PhoneGap: Building Mobile Applications with HTML/JS
PhoneGap: Building Mobile Applications with HTML/JSPhoneGap: Building Mobile Applications with HTML/JS
PhoneGap: Building Mobile Applications with HTML/JS
 
Apps with Apache Cordova and Phonegap
Apps with Apache Cordova and PhonegapApps with Apache Cordova and Phonegap
Apps with Apache Cordova and Phonegap
 
HTML5 & JavaScript Games
HTML5 & JavaScript GamesHTML5 & JavaScript Games
HTML5 & JavaScript Games
 
HTML5 is the Future of Mobile, PhoneGap Takes You There Today
HTML5 is the Future of Mobile, PhoneGap Takes You There TodayHTML5 is the Future of Mobile, PhoneGap Takes You There Today
HTML5 is the Future of Mobile, PhoneGap Takes You There Today
 
Javascript tutorial basic for starter
Javascript tutorial basic for starterJavascript tutorial basic for starter
Javascript tutorial basic for starter
 

Ähnlich wie 4007655 introduction-to-javascript

Essential_Javascript_--_A_Javascript_Tutorial
Essential_Javascript_--_A_Javascript_TutorialEssential_Javascript_--_A_Javascript_Tutorial
Essential_Javascript_--_A_Javascript_Tutorialtutorialsruby
 
Essential Javascript -- A Javascript &lt;b>Tutorial&lt;/b>
Essential Javascript -- A Javascript &lt;b>Tutorial&lt;/b>Essential Javascript -- A Javascript &lt;b>Tutorial&lt;/b>
Essential Javascript -- A Javascript &lt;b>Tutorial&lt;/b>tutorialsruby
 
Essential_Javascript_--_A_Javascript_Tutorial
Essential_Javascript_--_A_Javascript_TutorialEssential_Javascript_--_A_Javascript_Tutorial
Essential_Javascript_--_A_Javascript_Tutorialtutorialsruby
 
&lt;img src="../i/r_14.png" />
&lt;img src="../i/r_14.png" />&lt;img src="../i/r_14.png" />
&lt;img src="../i/r_14.png" />tutorialsruby
 
Unit 4 Java script.pptx
Unit 4 Java script.pptxUnit 4 Java script.pptx
Unit 4 Java script.pptxGangesh8
 
LabsLab8.htmlLab 8 Im Thinking of a NumberBefore yo.docx
LabsLab8.htmlLab 8 Im Thinking of a NumberBefore yo.docxLabsLab8.htmlLab 8 Im Thinking of a NumberBefore yo.docx
LabsLab8.htmlLab 8 Im Thinking of a NumberBefore yo.docxDIPESH30
 
JavaScript - Getting Started.pptx
JavaScript - Getting Started.pptxJavaScript - Getting Started.pptx
JavaScript - Getting Started.pptxJonnJorellPunto
 
Basic JavaScript Tutorial
Basic JavaScript TutorialBasic JavaScript Tutorial
Basic JavaScript TutorialDHTMLExtreme
 
Javascript
JavascriptJavascript
JavascriptSushma M
 
Basic Java script handouts for students
Basic Java script handouts for students Basic Java script handouts for students
Basic Java script handouts for students shafiq sangi
 
JAVA SCRIPT
JAVA SCRIPTJAVA SCRIPT
JAVA SCRIPTGo4Guru
 
8.-Javascript-report powerpoint presentation
8.-Javascript-report powerpoint presentation8.-Javascript-report powerpoint presentation
8.-Javascript-report powerpoint presentationJohnLagman3
 
Java script by Act Academy
Java script by Act AcademyJava script by Act Academy
Java script by Act Academyactanimation
 

Ähnlich wie 4007655 introduction-to-javascript (20)

Java script hello world
Java script hello worldJava script hello world
Java script hello world
 
Essential_Javascript_--_A_Javascript_Tutorial
Essential_Javascript_--_A_Javascript_TutorialEssential_Javascript_--_A_Javascript_Tutorial
Essential_Javascript_--_A_Javascript_Tutorial
 
Essential Javascript -- A Javascript &lt;b>Tutorial&lt;/b>
Essential Javascript -- A Javascript &lt;b>Tutorial&lt;/b>Essential Javascript -- A Javascript &lt;b>Tutorial&lt;/b>
Essential Javascript -- A Javascript &lt;b>Tutorial&lt;/b>
 
Essential_Javascript_--_A_Javascript_Tutorial
Essential_Javascript_--_A_Javascript_TutorialEssential_Javascript_--_A_Javascript_Tutorial
Essential_Javascript_--_A_Javascript_Tutorial
 
&lt;img src="../i/r_14.png" />
&lt;img src="../i/r_14.png" />&lt;img src="../i/r_14.png" />
&lt;img src="../i/r_14.png" />
 
Unit 4 Java script.pptx
Unit 4 Java script.pptxUnit 4 Java script.pptx
Unit 4 Java script.pptx
 
LabsLab8.htmlLab 8 Im Thinking of a NumberBefore yo.docx
LabsLab8.htmlLab 8 Im Thinking of a NumberBefore yo.docxLabsLab8.htmlLab 8 Im Thinking of a NumberBefore yo.docx
LabsLab8.htmlLab 8 Im Thinking of a NumberBefore yo.docx
 
JavaScript - Getting Started.pptx
JavaScript - Getting Started.pptxJavaScript - Getting Started.pptx
JavaScript - Getting Started.pptx
 
Javascript
JavascriptJavascript
Javascript
 
Basic JavaScript Tutorial
Basic JavaScript TutorialBasic JavaScript Tutorial
Basic JavaScript Tutorial
 
Javascript
JavascriptJavascript
Javascript
 
Basic Java script handouts for students
Basic Java script handouts for students Basic Java script handouts for students
Basic Java script handouts for students
 
JAVA SCRIPT
JAVA SCRIPTJAVA SCRIPT
JAVA SCRIPT
 
CSC PPT 12.pptx
CSC PPT 12.pptxCSC PPT 12.pptx
CSC PPT 12.pptx
 
Introduction to Java Scripting
Introduction to Java ScriptingIntroduction to Java Scripting
Introduction to Java Scripting
 
JAVA SCRIPT
JAVA SCRIPTJAVA SCRIPT
JAVA SCRIPT
 
Java scipt
Java sciptJava scipt
Java scipt
 
8.-Javascript-report powerpoint presentation
8.-Javascript-report powerpoint presentation8.-Javascript-report powerpoint presentation
8.-Javascript-report powerpoint presentation
 
Html web workers
Html web workersHtml web workers
Html web workers
 
Java script by Act Academy
Java script by Act AcademyJava script by Act Academy
Java script by Act Academy
 

Kürzlich hochgeladen

SOCIAL AND HISTORICAL CONTEXT - LFTVD.pptx
SOCIAL AND HISTORICAL CONTEXT - LFTVD.pptxSOCIAL AND HISTORICAL CONTEXT - LFTVD.pptx
SOCIAL AND HISTORICAL CONTEXT - LFTVD.pptxiammrhaywood
 
“Oh GOSH! Reflecting on Hackteria's Collaborative Practices in a Global Do-It...
“Oh GOSH! Reflecting on Hackteria's Collaborative Practices in a Global Do-It...“Oh GOSH! Reflecting on Hackteria's Collaborative Practices in a Global Do-It...
“Oh GOSH! Reflecting on Hackteria's Collaborative Practices in a Global Do-It...Marc Dusseiller Dusjagr
 
Micromeritics - Fundamental and Derived Properties of Powders
Micromeritics - Fundamental and Derived Properties of PowdersMicromeritics - Fundamental and Derived Properties of Powders
Micromeritics - Fundamental and Derived Properties of PowdersChitralekhaTherkar
 
BASLIQ CURRENT LOOKBOOK LOOKBOOK(1) (1).pdf
BASLIQ CURRENT LOOKBOOK  LOOKBOOK(1) (1).pdfBASLIQ CURRENT LOOKBOOK  LOOKBOOK(1) (1).pdf
BASLIQ CURRENT LOOKBOOK LOOKBOOK(1) (1).pdfSoniaTolstoy
 
18-04-UA_REPORT_MEDIALITERAСY_INDEX-DM_23-1-final-eng.pdf
18-04-UA_REPORT_MEDIALITERAСY_INDEX-DM_23-1-final-eng.pdf18-04-UA_REPORT_MEDIALITERAСY_INDEX-DM_23-1-final-eng.pdf
18-04-UA_REPORT_MEDIALITERAСY_INDEX-DM_23-1-final-eng.pdfssuser54595a
 
microwave assisted reaction. General introduction
microwave assisted reaction. General introductionmicrowave assisted reaction. General introduction
microwave assisted reaction. General introductionMaksud Ahmed
 
Accessible design: Minimum effort, maximum impact
Accessible design: Minimum effort, maximum impactAccessible design: Minimum effort, maximum impact
Accessible design: Minimum effort, maximum impactdawncurless
 
Separation of Lanthanides/ Lanthanides and Actinides
Separation of Lanthanides/ Lanthanides and ActinidesSeparation of Lanthanides/ Lanthanides and Actinides
Separation of Lanthanides/ Lanthanides and ActinidesFatimaKhan178732
 
Hybridoma Technology ( Production , Purification , and Application )
Hybridoma Technology  ( Production , Purification , and Application  ) Hybridoma Technology  ( Production , Purification , and Application  )
Hybridoma Technology ( Production , Purification , and Application ) Sakshi Ghasle
 
Solving Puzzles Benefits Everyone (English).pptx
Solving Puzzles Benefits Everyone (English).pptxSolving Puzzles Benefits Everyone (English).pptx
Solving Puzzles Benefits Everyone (English).pptxOH TEIK BIN
 
Q4-W6-Restating Informational Text Grade 3
Q4-W6-Restating Informational Text Grade 3Q4-W6-Restating Informational Text Grade 3
Q4-W6-Restating Informational Text Grade 3JemimahLaneBuaron
 
APM Welcome, APM North West Network Conference, Synergies Across Sectors
APM Welcome, APM North West Network Conference, Synergies Across SectorsAPM Welcome, APM North West Network Conference, Synergies Across Sectors
APM Welcome, APM North West Network Conference, Synergies Across SectorsAssociation for Project Management
 
Introduction to AI in Higher Education_draft.pptx
Introduction to AI in Higher Education_draft.pptxIntroduction to AI in Higher Education_draft.pptx
Introduction to AI in Higher Education_draft.pptxpboyjonauth
 
Contemporary philippine arts from the regions_PPT_Module_12 [Autosaved] (1).pptx
Contemporary philippine arts from the regions_PPT_Module_12 [Autosaved] (1).pptxContemporary philippine arts from the regions_PPT_Module_12 [Autosaved] (1).pptx
Contemporary philippine arts from the regions_PPT_Module_12 [Autosaved] (1).pptxRoyAbrique
 
Organic Name Reactions for the students and aspirants of Chemistry12th.pptx
Organic Name Reactions  for the students and aspirants of Chemistry12th.pptxOrganic Name Reactions  for the students and aspirants of Chemistry12th.pptx
Organic Name Reactions for the students and aspirants of Chemistry12th.pptxVS Mahajan Coaching Centre
 
How to Make a Pirate ship Primary Education.pptx
How to Make a Pirate ship Primary Education.pptxHow to Make a Pirate ship Primary Education.pptx
How to Make a Pirate ship Primary Education.pptxmanuelaromero2013
 
Incoming and Outgoing Shipments in 1 STEP Using Odoo 17
Incoming and Outgoing Shipments in 1 STEP Using Odoo 17Incoming and Outgoing Shipments in 1 STEP Using Odoo 17
Incoming and Outgoing Shipments in 1 STEP Using Odoo 17Celine George
 
Sanyam Choudhary Chemistry practical.pdf
Sanyam Choudhary Chemistry practical.pdfSanyam Choudhary Chemistry practical.pdf
Sanyam Choudhary Chemistry practical.pdfsanyamsingh5019
 
Arihant handbook biology for class 11 .pdf
Arihant handbook biology for class 11 .pdfArihant handbook biology for class 11 .pdf
Arihant handbook biology for class 11 .pdfchloefrazer622
 

Kürzlich hochgeladen (20)

SOCIAL AND HISTORICAL CONTEXT - LFTVD.pptx
SOCIAL AND HISTORICAL CONTEXT - LFTVD.pptxSOCIAL AND HISTORICAL CONTEXT - LFTVD.pptx
SOCIAL AND HISTORICAL CONTEXT - LFTVD.pptx
 
“Oh GOSH! Reflecting on Hackteria's Collaborative Practices in a Global Do-It...
“Oh GOSH! Reflecting on Hackteria's Collaborative Practices in a Global Do-It...“Oh GOSH! Reflecting on Hackteria's Collaborative Practices in a Global Do-It...
“Oh GOSH! Reflecting on Hackteria's Collaborative Practices in a Global Do-It...
 
Micromeritics - Fundamental and Derived Properties of Powders
Micromeritics - Fundamental and Derived Properties of PowdersMicromeritics - Fundamental and Derived Properties of Powders
Micromeritics - Fundamental and Derived Properties of Powders
 
BASLIQ CURRENT LOOKBOOK LOOKBOOK(1) (1).pdf
BASLIQ CURRENT LOOKBOOK  LOOKBOOK(1) (1).pdfBASLIQ CURRENT LOOKBOOK  LOOKBOOK(1) (1).pdf
BASLIQ CURRENT LOOKBOOK LOOKBOOK(1) (1).pdf
 
18-04-UA_REPORT_MEDIALITERAСY_INDEX-DM_23-1-final-eng.pdf
18-04-UA_REPORT_MEDIALITERAСY_INDEX-DM_23-1-final-eng.pdf18-04-UA_REPORT_MEDIALITERAСY_INDEX-DM_23-1-final-eng.pdf
18-04-UA_REPORT_MEDIALITERAСY_INDEX-DM_23-1-final-eng.pdf
 
microwave assisted reaction. General introduction
microwave assisted reaction. General introductionmicrowave assisted reaction. General introduction
microwave assisted reaction. General introduction
 
Accessible design: Minimum effort, maximum impact
Accessible design: Minimum effort, maximum impactAccessible design: Minimum effort, maximum impact
Accessible design: Minimum effort, maximum impact
 
Separation of Lanthanides/ Lanthanides and Actinides
Separation of Lanthanides/ Lanthanides and ActinidesSeparation of Lanthanides/ Lanthanides and Actinides
Separation of Lanthanides/ Lanthanides and Actinides
 
Hybridoma Technology ( Production , Purification , and Application )
Hybridoma Technology  ( Production , Purification , and Application  ) Hybridoma Technology  ( Production , Purification , and Application  )
Hybridoma Technology ( Production , Purification , and Application )
 
Código Creativo y Arte de Software | Unidad 1
Código Creativo y Arte de Software | Unidad 1Código Creativo y Arte de Software | Unidad 1
Código Creativo y Arte de Software | Unidad 1
 
Solving Puzzles Benefits Everyone (English).pptx
Solving Puzzles Benefits Everyone (English).pptxSolving Puzzles Benefits Everyone (English).pptx
Solving Puzzles Benefits Everyone (English).pptx
 
Q4-W6-Restating Informational Text Grade 3
Q4-W6-Restating Informational Text Grade 3Q4-W6-Restating Informational Text Grade 3
Q4-W6-Restating Informational Text Grade 3
 
APM Welcome, APM North West Network Conference, Synergies Across Sectors
APM Welcome, APM North West Network Conference, Synergies Across SectorsAPM Welcome, APM North West Network Conference, Synergies Across Sectors
APM Welcome, APM North West Network Conference, Synergies Across Sectors
 
Introduction to AI in Higher Education_draft.pptx
Introduction to AI in Higher Education_draft.pptxIntroduction to AI in Higher Education_draft.pptx
Introduction to AI in Higher Education_draft.pptx
 
Contemporary philippine arts from the regions_PPT_Module_12 [Autosaved] (1).pptx
Contemporary philippine arts from the regions_PPT_Module_12 [Autosaved] (1).pptxContemporary philippine arts from the regions_PPT_Module_12 [Autosaved] (1).pptx
Contemporary philippine arts from the regions_PPT_Module_12 [Autosaved] (1).pptx
 
Organic Name Reactions for the students and aspirants of Chemistry12th.pptx
Organic Name Reactions  for the students and aspirants of Chemistry12th.pptxOrganic Name Reactions  for the students and aspirants of Chemistry12th.pptx
Organic Name Reactions for the students and aspirants of Chemistry12th.pptx
 
How to Make a Pirate ship Primary Education.pptx
How to Make a Pirate ship Primary Education.pptxHow to Make a Pirate ship Primary Education.pptx
How to Make a Pirate ship Primary Education.pptx
 
Incoming and Outgoing Shipments in 1 STEP Using Odoo 17
Incoming and Outgoing Shipments in 1 STEP Using Odoo 17Incoming and Outgoing Shipments in 1 STEP Using Odoo 17
Incoming and Outgoing Shipments in 1 STEP Using Odoo 17
 
Sanyam Choudhary Chemistry practical.pdf
Sanyam Choudhary Chemistry practical.pdfSanyam Choudhary Chemistry practical.pdf
Sanyam Choudhary Chemistry practical.pdf
 
Arihant handbook biology for class 11 .pdf
Arihant handbook biology for class 11 .pdfArihant handbook biology for class 11 .pdf
Arihant handbook biology for class 11 .pdf
 

4007655 introduction-to-javascript

  • 1. VOODOO’S INTRODUCTION TO JAVASCRIPT © 1996, 1997 by Stefan Koch About this tutorial Online version This tutorial is an introduction to JavaScript. I have started this tutorial as an online tutorial whe- re you can test all examples immediately. As the tutorial grew larger a printable version was re- quired. It can be quite exhausting to read long parts before the monitor. It is obvious that the printable version cannot substitute the online version completely. You can find the online ver- sion at http://rummelplatz.uni-mannheim.de/∼skoch/js/ or at http://www.webconn.com/java/ja- vascript/intro (US mirror). JavaScript book and examples I have written a JavaScript book recently. It is called ‘JavaScript - Einfuehrung, Programmie- rung und Referenz’ and is written in german. I have build up a homepage for this book which can be found at http://www.dpunkt.de/javascript/ There you will find information about my book and some interesting JavaScript examples. The pages are both in german and english - so do not hesitate to have a look at the JavaScript ex- amples even if you do not know any german. Title: JavaScript - Einfuehrung, Programmierung und Referenz (german) Author: Stefan Koch Publisher: dpunkt.verlag ISBN: 3-920993-64-0 Homepage: http://www.dpunkt.de/javascript/ Part 1: First steps What is JavaScript JavaScript is a new scripting language which is being developed by Netscape. With JavaScript you can easily create interactive web-pages. This tutorial shows you what can be done with Ja- vaScript - and more importantly how it is done. JavaScript is not Java! Many people believe that JavaScript is the same as Java because of the similar names. This is not true though. I think it would go too far at the moment to show you all the differences - so just memorize that JavaScript is not Java. For further information on this topic please read the
  • 2. introduction provided by Netscape or my book :-) Running JavaScript What is needed in order to run scripts written in JavaScript? You need a JavaScript-enabled browser - for example the Netscape Navigator (since version 2.0) or the Microsoft Internet Ex- plorer (MSIE - since version 3.0). Since these two browsers are widely spread many people are able to run scripts written in JavaScript. This is certainly an important point for choosing JavaS- cript to enhance your web-pages. Of course you need a basic understanding of HTML before reading this tutorial. You can find many good online ressources covering HTML. Best you make an online search for ’html’ at Yahoo in order to get more information on HTML. Embedding JavaScript into a HTML-page JavaScript code is embedded directly into the HTML-page. In order to see how this works we are going to look at an easy example: <html> <body> <br> This is a normal HTML document. <br> <script language="JavaScript"> document.write("This is JavaScript!") </script> <br> Back in HTML again. </body> </html> At the first glance this looks like a normal HTML-file. The only new thing is the part: <script language="JavaScript"> document.write("This is JavaScript!") </script> This is JavaScript. In order to see this script working save this code as a normal HTML-file and load it into your JavaScript-enabled browser. Here is the output generated by the file (if you are using a JavaScript browser you will see 3 lines of output): This is a normal HTML document. This is JavaScript! Back in HTML again. I must admit that this script isn’t very useful - this could have been written in pure HTML more easily. I only wanted to demonstrate the <script> tag to you. Everything between the <script> and the </script> tag is interpreted as JavaScript code. There you see the use of document.wri- te() - one of the most important commands in JavaScript programming. document.write() is
  • 3. used in order to write something to the actual document (in this case this is the HTML-docu- ment). So our little JavaScript program writes the text This is JavaScript! to the HTML-docu- ment. Non-JavaScript browsers What does our page look like if the browser does not understand JavaScript? A non-JavaScript browser does not know the <script> tag. It ignores the tag and outputs all following code as if it was normal text. This means the user will see the JavaScript-code of our program inside the HTML-document. This was certainly not our intention. There is a way for hiding the source code from older browsers. We will use the HTML-comments <!-- -->. Our new source code looks like this: <html> <body> <br> This is a normal HTML document. <br> <script language="JavaScript"> <!-- hide from old browsers document.write("This is JavaScript!") // --> </script> <br> Back in HTML again. </body> </html> The output in a non-JavaScript browser will then look like this: This is a normal HTML document. Back in HTML again. Without the HTML-comment the output of the script in a non-JavaScript browser would be: This is a normal HTML document. document.write("This is JavaScript!") Back in HTML again. Please note that you cannot hide the JavaScript source code completely. What we do here is to prevent the output of the code in old browsers - but the user can see the code through ’View do- cument source’ nevertheless. There is no way to hinder someone from viewing your source code (in order to see how a certain effect is done). Events Events and event handlers are very important for JavaScript programming. Events are mostly caused by user actions. If the user clicks on a button a Click-event occurs. If the mousepointer
  • 4. moves across a link a MouseOver-event occurs. There are several different events. We want our JavaScript program to react to certain events. This can be done with the help of event-handlers. A button might create a popup window when clicked. This means the window should pop up as a reaction to a Click-event. The event-handler we need to use is called onClick. This tells the computer what to do if this event occurs. The following code shows an easy example of the event-handler onClick: <form> <input type="button" value="Click me" onClick="alert(’Yo’)"> </form> (The online version lets you test this script immediately) There are a few new things in this code - so let’s take it step by step. You can see that we create a form with a button (this is basically a HTML-problem so I won’t cover it here). The new part is onClick="alert(’Yo’)" inside the <input> tag. As we already said this defines what happens when the button is pushed. So if a Click-event occurs the computer shall execute alert(’Yo’). This is JavaScript-code (Please note that we do not use the <script> tag in this case). alert() lets you create popup windows. Inside the brackets you have to specify a string. In our case this is ’Yo’. This is the text which shall be shown in the popup window. So our script creates a window with the contents ’Yo’ when the user clicks on the button. One thing might be a little bit confusing: In the document.write() command we used double quo- tes " and in combination with alert() we use only single quotes ’ - why? Basically you can use both. But in the last example we wrote onClick="alert(’Yo’)" - you can see that we used both double and single quotes. If we wrote onClick="alert("Yo")" the computer would get confused as it isn’t clear which part belongs to the onClick event-handler and which not. So you have to alternate with the quotes in this case. It doesn’t matter in which order you use the quotes - first double quotes and then single quotes or vice versa. This means you can also write onClick=’alert("Yo")’. There are many different event-handlers you can use. We will get to know some during this tu- torial - but not all. So please refer to a reference if you want to know what kind of other event- handlers do exist. If you are using the Netscape Navigator the popup window will contain the text JavaScript alert. This is a security restriction. You can create a similar popup window with the prompt() method. This window accepts an input. A malicious script could imitate a system message and ask for a certain password. The text in the popup window shows that the window comes from your web browser and not from your operating system. As this is a security restriction you cannot remove this message. Functions We will use functions in most of our JavaScript programs. Therefore I will talk about this im- portant concept already now. Basically functions are a way for bundling several commands to- gether. Let’s write a script which outputs a certain text three times. Consider the following approach: <html> <script language="JavaScript">
  • 5. <!-- hide document.write("Welcome to my homepage!<br>"); document.write("This is JavaScript!<br>"); document.write("Welcome to my homepage!<br>"); document.write("This is JavaScript!<br>"); document.write("Welcome to my homepage!<br>"); document.write("This is JavaScript!<br>"); // --> </script> </html> This will write out the text Welcome to my homepage! This is JavaScript! three times. Look at the source code - writing the code three times brings out the right result. But is this very efficiently? No, we can solve this better. How about this code which does the same: <html> <script language="JavaScript"> <!-- hide function myFunction() { document.write("Welcome to my homepage!<br>"); document.write("This is JavaScript!<br>"); } myFunction(); myFunction(); myFunction(); // --> </script> </html> In this script we define a function. This is done through the lines: function myFunction() { document.write("Welcome to my homepage!<br>"); document.write("This is JavaScript!<br>"); } The commands inside the {} belong to the function myFunction(). This means that our two do- cument.write() commands are bundled together and can be executed through a function call. In our example we have three function calls. You can see that we write myFunction() three times
  • 6. just below the definition of the function. These are the three function calls. This means that the contents of the function is being executed three times. This is a very easy example of a function. You might wonder why functions are so important. While reading this tutorial you will certainly realize the benefits of functions. Especially variable passing makes our scripts really flexible - we will see what this is later on. Functions can also be used in combination with event-handlers. Please consider this example: <html> <head> <script language="JavaScript"> <!-- hide function calculation() { var x= 12; var y= 5; var result= x + y; alert(result); } // --> </script> </head> <body> <form> <input type="button" value="Calculate" onClick="calculation()"> </form> </body> </html> (The online version lets you test this script immediately) The button calls the function calculation(). You can see that the function does certain calcula- tions. For this we are using the variables x, y and result. We can define a variable with the key- word var. Variables can be used to store different values - like numbers, text strings etc. The line var result= x + y; tells the browser to create a variable result and store in it the result of x + y (i.e. 5 + 12). After this operation the variable result is 17. The command alert(result) is in this case the same as alert(17). This means we get a popup window with the number 17 in it. ©1996,1997 by Stefan Koch e-mail:skoch@rumms.uni-mannheim.de http://rummelplatz.uni-mannheim.de/~skoch/ My JavaScript-book: http://www.dpunkt.de/javascript
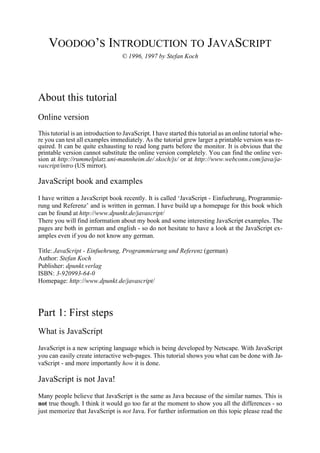
  • 7. VOODOO’S INTRODUCTION TO JAVASCRIPT © 1996, 1997 by Stefan Koch Part 2: The HTML-document JavaScript hierarchy JavaScript organizes all elements on a web-page in a hierarchy. Every element is seen as a ob- ject. Each object can have certain properties and methods. With the help of JavaScript you can easily manipulate the objects. For this it is very important to understand the hierarchy of HTML- objects. You will quickly understand how this works with the help of an example. The following code is a simple HTML-page. <html> <head> </head> <body bgcolor=#ffffff> <center> <img src="home.gif" name="pic1" width=200 height=100> </center> <p> <form name="myForm"> Name: <input type="text" name="name" value=""><br> e-Mail: <input type="text" name="email" value=""><br><br> <input type="button" value="Push me" name="myButton" onClick="alert('Yo')"> </form> <p> <center> <img src="ruler.gif" name="pic4" width=300 height=15> <p> <a href="http://rummelplatz.uni-mannheim.de/~skoch/">My homepage</a> </center> </body> </html> Here is a screenshot of this page (I have added some things):
  • 8. We have two images, one link and a form with two text fields and a button. From JavaScript’s point of view the browser window is a window-object. This window-object contains certain ele- ments like the statusbar. Inside a window we can load a HTML-document (or a file from another type - we will restrict ourselves to HTML-files for now). This page is a document-object. This means the document-object represents the HTML-document which is loaded at the moment. The document-object is a very important object in JavaScript - you will use it over and over again. Properties of the document-object are for example the background color of the page. But what is more important is that all HTML-objects are properties of the document-object. A HTML-object is for example a link, or a form. The following image illustrates the hierachy crea- ted by our example HTML-page:
  • 9. We want to be able to get information about the different objects and manipulate them. For this we must know how to access the different objects. You can see the name of the objects in the hierarchy. If you now want to know how to address the first image on the HTML-page you have to look at the hierarchy. You have to start from the top. The first object is called document. The first image the page is represented through images[0]. This means that we can access this object through JavaScript with document.images[0]. If you for example want to know what the user entered into the first form element you must first think about how to access this object. Again we start from the top of our hierarchy. Follow the path to the object called elements[0] - put all the names of the object you pass together. This means you can access the first textelement throu- gh: document.forms[0].elements[0] But how can we now get to know the entered text? In order to find out which properties and methods an object offers you have to look into a JavaScript reference (for example Netscape’s documentation or the reference in my book). There you will see that a textelement has got the property value. This is the text entered into the textelement. Now we can read out the value with this line of code: name= document.forms[0].elements[0].value; The string is stored in the variable name. We can now work with this variable. For example we can create a popup window with alert("Hi " + name). If the input is ’Stefan’ the command alert("Hi " + name) will open a popup window with the text ’Hi Stefan’. If you have large pages it might get quite confusing by addressing the different objects with numbers - for example document.forms[3].elements[17] or was it document.forms[2].ele- ments[18]? To avoid this problem you can give unique names to the different objects. You can see in our HTML-code that we wrote for example: <form name="myForm"> Name: <input type="text" name="name" value=""><br> ... This means that forms[0] is also called myForm. Instead of elements[0] you can use name (as
  • 10. specified with the name-property in the <input> tag). So instead of writing name= document.forms[0].elements[0].value; we can write the following name= document.myForm.name.value; This makes it much easier - especially with large pages with many objects. (Please note that you have to keep the same case - this means you cannot write myform instead of myForm) Many properties of JavaScript-objects are not restricted to read-operations. You can assign new values to these properties. For example you can write a new string to a textelement. (The online version lets you test this script immediately) Here is the code for this example - the interesting part is inside the onClick-property of the se- cond <input> tag: <form name="myForm"> <input type="text" name="input" value="bla bla bla"> <input type="button" value="Write" onClick="document.myForm.input.value= ’Yo!’; "> I cannot describe every detail here. It gets much clearer if you try to understand the object hier- archy with the help of a JavaScript reference. I have written a small example. There you will see the use of different objects. Try to understand the script with the help of Netscape’s documen- tation - or better: with my JS-book... :-) (The online version lets you test this script immediately) Here is the source code: <html> <head> <title>Objects</title> <script language="JavaScript"> <!-- hide function first() { // creates a popup window with the // text which was entered into the text element alert("The value of the textelement is: " + document.myForm.myText.value); } function second() { // this function checks the state of the checkbox
  • 11. var myString= "The checkbox is "; // is checkbox checked or not? if (document.myForm.myCheckbox.checked) myString+= "checked" else myString+= "not checked"; // output string alert(myString); } // --> </script> </head> <body bgcolor=lightblue> <form name="myForm"> <input type="text" name="myText" value="bla bla bla"> <input type="button" name="button1" value="Button 1" onClick="first()"> <br> <input type="checkbox" name="myCheckbox" CHECKED> <input type="button" name="button2" value="Button 2" onClick="second()"> </form> <p><br><br> <script language="JavaScript"> <!-- hide document.write("The background color is: "); document.write(document.bgColor + "<br>"); document.write("The text on the second button is: "); document.write(document.myForm.button2.value); // --> </script> </body> </html> The location-object Besides the window- and document-objects there is another important object: the location-ob- ject. This object represents the address of the loaded HTML-document. So if you loaded the page http://www.xyz.com/page.html then location.href is equal to this address. What is more im- portant is that you can assign new values to location.href. This button for example loads a new page into the actual window:
  • 12. <form> <input type=button value="Yahoo" onClick="location.href=’http://www.yahoo.com’; "> </form> ©1996,1997 by Stefan Koch e-mail:skoch@rumms.uni-mannheim.de http://rummelplatz.uni-mannheim.de/~skoch/ My JavaScript-book: http://www.dpunkt.de/javascript
  • 13. VOODOO’S INTRODUCTION TO JAVASCRIPT © 1996, 1997 by Stefan Koch Part 3: Frames Creating frames An often asked question is how frames and JavaScript work together. First I want to explain what frames are and what they can be used for. After this we will see how we can use JavaScript in combination with frames. The browser window can be split up into several frames. This me- ans a frame is a square area inside the browser window. Each frame displays its own document (most of the time HTML-documents). So you can for example create two frames. In the first frame you load the homepage of Netscape and in the second frame you load the homepage of Microsoft. Although creating frames is a HTML-problem I want to describe the basic things. For creating frames you need two tags: <frameset> and <frame>. A HTML-page creating two frames might look like this: <html> <frameset rows="50%,50%"> <frame src="page1.htm" name="frame1"> <frame src="page2.htm" name="frame2"> </frameset> </html> This will produce two frames. You can see that we use the rows property in the <frameset> tag. This means the two frames lie above each other. The upper frame loads the HTML-page page1.htm and the lower frame displays the document page2.htm. The created frame-structure looks like this: If you want to have columns instead of rows you write cols instead of rows in the <frameset>
  • 14. tag. The "50%,50%" part specifies how large the two windows are. You can also write "50%,*" if you do not want to calculate how large the second frame must be in order to get 100%. You can specify the size in pixels by omitting the % symbol. Every frame gets an unique name with the name property in the <frame> tag. This will help us when accessing the frames through Ja- vaScript. You can have several nested <frameset> tags. I’ve found this example in the documentation provided by Netscape (I just modified it a little bit): <frameset cols="50%,50%"> <frameset rows="50%,50%"> <frame src="cell.htm"> <frame src="cell.htm"> </frameset> <frameset rows="33%,33%,33%"> <frame src="cell.htm"> <frame src="cell.htm"> <frame src="cell.htm"> </frameset> </frameset> The created frame structure looks like this: You can set the size of the border through the border property in the <frameset> tag. border=0 means that you do not want to have a border (does not work with Netscape 2.x). Frames and JavaScript Now we want to have a look at how JavaScript ’sees’ the frames in a browser window. For this we are going to creat two frames as shown in the first example of this part. We have seen that JavaScript organizes all elements on a webpage in a hierarchy. This is the same with frames. The following image shows the hierarchy of the first example of this part:
  • 15. At the top of the hierachy is the browser window. This window is split up into two frames. The window is the parent in this hierarchy and the two frames are the children. We gave the two fra- mes the unique names frame1 and frame2. With the help of these names we can exchange in- formation between the two frames. A script might have to solve the following problem: The user clicks on a link in the first frame - but the page shall be loaded in the second frame rather than in the first frame. This can for example be used for menubars (or navigationbars) where one frame always stays the same and offers several different links to navigate through a homepage. We have to look at three cases: - parent window/frame accesses child frame - child frame accesses parent window/frame - child frame accesses another child frame From the window’s point of view the two frames are called frame1 and frame2. You can see in the image above that there is a direct connection from the parent window to each frame. So if you have a script in the parent window - this means in the page that creates the frames - and you want to access the frames you can just use the name of the frame. For example you can write: frame2.document.write("A message from the parent window."); Sometimes you want to access the parent window from a frame. This is needed for example if you want to remove the frames. Removing the frames just means to load a new page instead of the page which created the frames. This is in our case the page in the parent window. We can access the parent window (or parent frame) from the child frames with parent. In order to load a new document we have to assign a new URL to location.href. As we want to remove the fra- mes we have to use the location-object of the parent window. As every frame can load its own page we have a different location-object for each frame. We can load a new page into the parent window with the command: parent.location.href= "http://...";
  • 16. Very often you will be faced with the problem to access one child frame from another child fra- me. So how can you write something from the first frame to the second frame - this means which command do you have to use in the HTML-page called page1.htm? In our image you can see that there is no direct connection between the two frames. This means we cannot just call frame2 from the frame frame1 as this frame does not know anything about the existence of the second frame. From the parent window’s point of view the second frame is called frame2 and the parent window is called parent seen from the first frame. So we have to write the following in order to access the document-object of the second frame: parent.frame2.document.write("Hi, this is frame1 calling."); Navigationbars Let’s have a look at a navigationbar. We will have several links in one frame. If the user clicks on these links the pages won’t show up in the same frame - they are loaded in the second frame. First we need a script which creates the frames. This document looks like the first example we had in this part: frames3.htm <html> <frameset rows="80%,20%"> <frame src="start.htm" name="main"> <frame src="menu.htm" name="menu"> </frameset> </html> The start.htm page is the entry page which will be displayed in the main frame at the beginning.
  • 17. There are no special requirements for this page. The following page is loaded into the frame menu: menu.htm <html> <head> <script language="JavaScript"> <!-- hide function load(url) { parent.main.location.href= url; } // --> </script> </head> <body> <a href="javascript:load(’first.htm’)">first</a> <a href="second.htm" target="main">second</a> <a href="third.htm" target="_top">third</a> </body> </html> Here you can see different ways for loading a new page into the frame main. The first link uses the function load(). Have a look at how this function is called: <a href="javascript:load(’first.htm’)">first</a> You can see that we can let the browser execute JavaScript code instead of loading another page - we just have to use javascript: in the href property. You can see that we write ’ first.htm’ inside the brackets. This string is passed to the function load(). The function load() is defined through: function load(url) { parent.main.location.href= url; } There you can see that we write url inside the brackets. This means that the string ’first1.htm’ is stored in the variable url. Inside the load() function we can now use this variable. We will see further examples of this important concept of variable passing later on. The second link uses the target property. Actually this isn’t JavaScript. This is a HTML-feature. You see that we just have to specify the name of the frame. Please note that we must not put parent before the name of the frame. This might be a little bit confusing. The reason for this is that target is HTML and not JavaScript. The third link shows you how to remove the frames with the target property. If you want to remove the frames with the load() function you just have to write parent.locati- on.href= url inside the function. So which way should you choose? This depends on your script and what you want to do. The
  • 18. target property is very simple. You might use it if you just want to load the page in another fra- me. The JavaScript solution (i.e. the first link) is normally used if you want to do several things as a reaction to the click on the link. One common problem is to load two pages at once in two different frames. Although you could solve this with the target property using a JavaScript function is more straightforward. Let’s assume you have three frames called frame1,frame2 and frame3. The user clicks on a link in frame1. Then you want to load two different pages in the two other frames. You can use this function for example: function loadtwo() { parent.frame1.location.href= "first.htm"; parent.frame2.location.href= "second.htm"; } If you want to keep the function more flexible you can use variable passing here as well. This looks like this: function loadtwo(url1, url2) { parent.frame1.location.href= url1; parent.frame2.location.href= url2; } Then you can call this function with loadtwo("first.htm", "second.htm") or loadtwo("third.htm", "forth.htm"). Variable passing makes your function more flexible. You can use it over and over again in different contexts. ©1996,1997 by Stefan Koch e-mail:skoch@rumms.uni-mannheim.de http://rummelplatz.uni-mannheim.de/~skoch/ My JavaScript-book: http://www.dpunkt.de/javascript
  • 19. VOODOO’S INTRODUCTION TO JAVASCRIPT © 1996, 1997 by Stefan Koch Part 4: Windows and on-the-fly documents Creating windows Opening new browser windows is a great feature of JavaScript. You can either load a new do- cument (for example a HTML-document) to the new window or you can create new documents (on-the-fly). We will first have a look at how we can open a new window, load a HTML-page to this window and then close it again. The following script opens a new browser window and loads a meaningless page: <html> <head> <script language="JavaScript"> <!-- hide function openWin() { myWin= open("bla.htm"); } // --> </script> </head> <body> <form> <input type="button" value="Open new window" onClick="openWin()"> </form> </body> </html> (The online version lets you test this script immediately) The page bla.htm is loaded into the new window through the open() method. You can control the appearance of the new window. For example you can decide if the window shall have a statusbar, a toolbar or a menubar. Besides that you can specify the size of the win- dow. The following script opens a new window which has got the size 400x300. The window does not have a statusbar, toolbar or menubar. <html> <head>
  • 20. <script language="JavaScript"> <!-- hide function openWin2() { myWin= open("bla.htm", "displayWindow", "width=400,height=300,status=no,toolbar=no,menubar=no"); } // --> </script> </head> <body> <form> <input type="button" value="Open new window" onClick="openWin2()"> </form> </body> </html> (The online version lets you test this script immediately) You can see that we specify the properties in the string "width=400,height=300,status=no,tool- bar=no,menubar=no". Please note that you must not use spaces inside this string! Here is a list of the properties a window can have: directories yes|no height number of pixels location yes|no menubar yes|no resizable yes|no scrollbars yes|no status yes|no toolbar yes|no width number of pixels Some properties have been added with JavaScript 1.2 (i.e. Netscape Navigator 4.0). You cannot use these properties in Netscape 2.x or 3.x or Microsoft Internet Explorer 3.x as these browsers do not understand JavaScript 1.2. Here are the new properties: alwaysLowered yes|no alwaysRaised yes|no dependent yes|no hotkeys yes|no innerWidth number of pixels (re- places width)
  • 21. innerHeight number of pixels (re- places height) outerWidth number of pixels outerHeight number of pixels screenX position in pixels screenY position in pixels titlebar yes|no z-lock yes|no You can find an explanation of these properties in the JavaScript 1.2 guide. I will have an ex- planation and some examples in the future. With the help of these properties you can now define at which position a window shall open. You cannot do this with the older versions of JavaScript. The name of a window As you have seen we have used three arguments for opening a window: myWin= open("bla.htm", "displayWindow", "width=400,height=300,status=no,toolbar=no,menubar=no"); What is the second argument for? This is the name of the window. We have seen how to use the target-property earlier. If you know the name of an existing window you can load a new page to it with <a href="bla.html" target="displayWindow"> Here you need the name of the window (if the window does not exist, a new window is created through this code). Please note that myWin is not the name of the window. You can just access the window through this variable. As this is a normal variable it is only valid inside the script in which it is defined. The window name (here displayWindow) is a unique name which can be used by all existing browser windows. Closing windows You can close windows through JavaScript. For this you need the close() method. Let’s open a new window as shown before. In this window we load the following page: <html> <script language="JavaScript"> <!-- hide function closeIt() { close(); } // --> </script>
  • 22. <center> <form> <input type=button value="Close it" onClick="closeIt()"> </form> </center> </html> (The online version lets you test this script immediately) If you hit the button in the new window the window is being closed. open() and close() are me- thods of the window-object. Normally we should think that we have to write window.open() and window.close() instead of open() and close(). This is true - but the window-object is an excep- tion here. You do not have to write window if you want to call a method of the window-object (this is only true for this object). Creating documents on-the-fly We are coming now to a cool feature of JavaScript - creating documents on-the-fly. This means you can let your JavaScript code create a new HTML-page. Furthermore you can create other documents - like VRML-scenes etc.. You can output these documents in a separate window or in a frame. First we will create a simple HTML-document which will be displayed in a new window. Here is the script we are going to have a look at now. <html> <head> <script language="JavaScript"> <!-- hide function openWin3() { myWin= open("", "displayWindow", "width=500,height=400,status=yes,toolbar=yes,menubar=yes"); // open document for further output myWin.document.open(); // create document myWin.document.write("<html><head><title>On-the-fly"); myWin.document.write("</title></head><body>"); myWin.document.write("<center><font size=+3>"); myWin.document.write("This HTML-document has been created "); myWin.document.write("with the help of JavaScript!"); myWin.document.write("</font></center>"); myWin.document.write("</body></html>"); // close the document - (not the window!) myWin.document.close(); }
  • 23. // --> </script> </head> <body> <form> <input type=button value="On-the-fly" onClick="openWin3()"> </form> </body> </html> (The online version lets you test this script immediately) Let’s have a look at the function winOpen3(). You can see that we open a new browser window first. As you can see the first argument is an empty string "" - this means we do not specify an URL. The browser should not just fetch an existing document - JavaScript shall create a new document. We define the variable myWin. With the help of this variable we can access the new window. Please note that we cannot use the name of the window (displayWindow) for this task. After ope- ning the window we have to open the document. This is done through: // open document for further output myWin.document.open(); We call the open() method of the document-object - this is a different method than the open() method of the window-object! This command does not open a new window - it prepares the do- cument for further output. We have to put myWin before the document.open() in order to access the new window. The following lines create the document with document.write(): // create document myWin.document.write("<html><head><title>On-the-fly"); myWin.document.write("</title></head><body>"); myWin.document.write("<center><font size=+3>"); myWin.document.write("This HTML-document has been created "); myWin.document.write("with the help of JavaScript!"); myWin.document.write("</font></center>"); myWin.document.write("</body></html>"); You can see that we write normal HTML-tags to the document. We create HTML-code! You can write any HTML-tags here. After the output we have to close the document again. The following code does this: // close the document - (not the window!) myWin.document.close(); As I told you before you can create documents on-the-fly and display them in a frame as well. If you for example have got two frames with the names frame1 and frame2 and want create a new document in frame2 you can write the following in frame1:
  • 24. parent.frame2.document.open(); parent.frame2.document.write("Here goes your HTML-code"); parent.frame2.document.close(); Creating VRML-scenes on-the-fly In order to demonstrate the flexibility of JavaScript we are now going to create a VRML-scene on-the-fly. VRML stands for Vitual Reality Modelling Language. This is a language for crea- ting 3D scenes. So get your 3D glasses and enjoy the ride... No, it’s just a simple example - a blue cube. You will need a VRML plug-in in order to view this example. This script doesn’t check if a VRML plug-in is available (this is no problem to implement). (The online version lets you test this script immediately) Here is the source code: <html> <head> <script language="JavaScript"> <!-- hide function vrmlScene() { vrml= open("", "displayWindow", "width=500,height=400,status=yes,toolbar=yes,menubar=yes"); // open document for further output vrml.document.open("x-world/x-vrml"); vr= vrml.document; // create VRML-scene vr.writeln("#VRML V1.0 ascii"); // Light vr.write("Separator { DirectionalLight { "); vr.write("direction 3 -1 -2.5 } "); // Camera vr.write("PerspectiveCamera { position -8.6 2.1 5.6 "); vr.write("orientation -0.1352 -0.9831 -0.1233 1.1417 "); vr.write("focalDistance 10.84 } "); // Cube vr.write("Separator { Material { diffuseColor 0 0 1 } "); vr.write("Transform { translation -2.4 .2 1 rotation 0 0.5 1 .9 } "); vr.write("Cube {} } }"); // close the document - (not the window!)
  • 25. vrml.document.close(); } // --> </script> </head> <body> <form> <input type=button value="VRML on-the-fly" onClick="vrmlScene()"> </form> </body> </html> This source code is quite similar to the last example. First we open a new window. Then we have to open the document in order to prepare it for the output. Look at this code: // open document for further output vrml.document.open("x-world/x-vrml"); In the last example we did not write anything into the brackets. What does the "x-world/x-vrml" mean? It’s the MIME-type of the file we want to create. So here we tell the browser what kind of data follows. If we do not write anything into the brackets the MIME-type is set to "text/html" by default (this is the MIME-type of HTML-files). (There are different ways for getting to know a certain MIME-type - the browser itself has a list of the known MIME-types. You can find this list in the option or preference menu.) We have to write vrml.document.write() for creating the 3D scene. This is quite long - therefore we define vr=vrml.document. Now we can write vr.write() instead of vrml.document.write(). Now we can output normal VRML-code. I am not going to describe the elements of a VRML- scene. There are several good VRML sources available on the Internet. The plain VRML-code looks like this: #VRML V1.0 ascii Separator { DirectionalLight { direction 3 -1 -2.5 } PerspectiveCamera { position -8.6 2.1 5.6 orientation -0.1352 -0.9831 -0.1233 1.1417 focalDistance 10.84 } Separator { Material { diffuseColor 0 0 1 } Transform { translation -2.4 .2 1
  • 26. rotation 0 0.5 1 .9 } Cube {} } } This is the code which we output through the document.write() commands. Of course it is quite meaningless to create a scene on-the-fly which can also be loaded as a nor- mal VRML-file. It gets more interesting if you for example make a form where the user can enter different ob- jects - like a spehre, cylinder, cone etc. - and JavaScript creates a scene from this data (I have an example of this in my JS-book). ©1996,1997 by Stefan Koch e-mail:skoch@rumms.uni-mannheim.de http://rummelplatz.uni-mannheim.de/~skoch/ My JavaScript-book: http://www.dpunkt.de/javascript
  • 27. VOODOO’S INTRODUCTION TO JAVASCRIPT © 1996, 1997 by Stefan Koch Part 5: Statusbar and timeouts The statusbar Your JavaScript programs can write to the statusbar - this is the bar at the bottom of your brow- ser window. All you have to do is to assign a string to window.status. The following example shows you two buttons which can be used to write to the statusbar and to erase the text again. (The online version lets you test this script immediately) <html> <head> <script language="JavaScript"> <!-- hide function statbar(txt) { window.status = txt; } // --> </script> </head> <body> <form> <input type="button" name="look" value="Write!" onClick="statbar('Hi! This is the statusbar!');"> <input type="button" name="erase" value="Erase!" onClick="statbar('');"> </form> </body> </html> We create a form with two buttons. Both buttons call the function statbar(). You can see that the function call created by the Write! button looks like this: statbar('Hi! This is the statusbar!'); Inside the brackets we specify the string ’Hi! This is the statusbar!’ This means this string is pas- sed alond to the function statbar(). You can see that we defined the function statbar() like this:
  • 28. function statbar(txt) { window.status = txt; } What is new is that we use txt inside the brackets of the function name. This means the string we passed along to the function is stored in the variable txt. Passing variables to functions is an often used way for making functions more flexible. You can pass several values to functions - you just have to separate them through commas. The string txt is displayed on the statusbar through window.status = txt. Erasing the text on the statusbar is achived through assigning an empty string to window.status. Displaying text on the statusbar can easily be used in combination with links. Instead of showing the URL of the link you can explain in words what the next page is about. This link demonstrates this - just move your mousepointer over the link. The code for this example looks like this: <a href="dontclck.htm" onMouseOver="window.status=’Don’t click me!’; return true;" onMouseOut="window.status=’’;">link</a> Here we are using onMouseOver and onMouseOut in order to detect when the mousepointer moves across the link. You might wonder why we have to write return true inside the on- MouseOver property. This means that the browser won’t execute its own code as a reaction to the MouseOver event. Normally the browser displays the URL of the link in the statusbar. If we do not use return true the browser will write to the statusbar immediately after our code has been executed - this means it would overwrite our text and the user couldn’t read it. In general we can suppress the following actions of the browser by using return true in the event-handler. onMouseOut did not exist in JavaScript 1.0. If you are using the Netscape Navigator 2.x you might get different results on different platforms. On Unix platforms for example the text dis- sapears even though the browser does not know onMouseOut. On Windows the text does not dissapear. If you want your script to be compatible to Netscape 2.x on Windows you might for example write a function which writes text to the statusbar and erases this text after a certain period of time. This is programmed with a timeout. We will learn more about timeouts in the following paragraph. In this script you can see another thing - sometimes you want to output quotes. We want to out- put the text Don’t click me - as we specify this string inside the onMouseOver event-handler we are using the single quotes. But the word Don’t uses a single quote as well! The browser gets mixed up if you just write ’Don’t ...’. To solve this problem you can just write a backslash be- fore the quote - which means that it belongs to the output (you can do the same with double quo- tes "). Timeouts With the help of timeouts (or timer) you can let the computer execute some code after a certain period of time. The following script shows a button which opens up a popup window after 3 seconds. The script looks like this: <script language="JavaScript">
  • 29. <!-- hide function timer() { setTimeout("alert(’Time is up!’)", 3000); } // --> </script> ... <form> <input type="button" value="Timer" onClick="timer()"> </form> setTimeout() is a method of the window-object. It sets a timeout - I think you might have gues- sed that. The first argument is the JavaScript code which shall be executed after a certain time. In our case this argument is "alert(’Time is up!’)". Please note that the JavaScript code has to be inside quotes. The second argument tells the computer when the code shall be executed. You have to specify the time in number of milliseconds (3000 milliseconds = 3 seconds). Scroller Now that you know how to write to the statusbar and how timeouts work we will have a look at scrollers. You might already know the moving text-strings in the statusbar. They can be seen all over the Internet. We will see how to program a basic scroller. Besides that we will think of pos- sible improvements of the scroller. Scrollers are quite easy to implement. Just let us think about how we could realize a moving text in the statusbar. We have to write a text to the statusbar. After a short period of time we have to write the same text to the statusbar - but we have to move it a little bit to the left side. If we repeat this over and over again the user gets the impression of a moving text. We have to think about how we can determine which part of the text should be displayed as the whole text is normally longer than the statusbar. (The online version lets you test this script immediately) Here is the source code - I have added some comments: <html> <head> <script language="JavaScript"> <!-- hide // define the text of the scroller var scrtxt = "This is JavaScript! " + "This is JavaScript! " + "This is JavaScript!"; var length = scrtxt.length; var width = 100; var pos = -(width + 2);
  • 30. function scroll() { // display the text at the right position and set a timeout // move the position one step further pos++; // calculate the text which shall be displayed var scroller = ""; if (pos == length) { pos = -(width + 2); } // if the text hasn’t reached the left side yet we have to // add some spaces - otherwise we have to cut of the first // part of the text (which moved already across the left border if (pos < 0) { for (var i = 1; i <= Math.abs(pos); i++) { scroller = scroller + " ";} scroller = scroller + scrtxt.substring(0, width - i + 1); } else { scroller = scroller + scrtxt.substring(pos, width + pos); } // assign the text to the statusbar window.status = scroller; // call this function again after 100 milliseconds setTimeout("scroll()", 100); } // --> </script> </head> <body onLoad="scroll()"> Your HTML-page goes here. </body> </html> The main part of the scroll() function is needed for calculating which part of the text is being displayed. I am not explaining the code in detail - you just have to understand how this scroller works in general. In order to start the scroller we are using the onLoad event-handler of the <bo- dy> tag. This means the function scroll() will be called right after the HTML-page has been loaded. We call the scroll() function with the onLoad property. The first step of the scroller is being calculated and displayed. At the end of the scroll() function we set a timeout. This causes the scroll() function to be executed again after 100 milliseconds. The text is moved one step for- ward and another timeout is set. This goes on for ever. (There have been some problems with this kind of scroller with Netscape Navigator 2.x. It so-
  • 31. metimes caused an ’Out of memory’-error. I’ve got many mails explaining this is because of the recursive call of the scroll() function - finally leading to a memory overflow. But this is not true. This is not a recursive function call! We get recursion if we call the scroll() function inside the scroll() function itself. But this isn’t what we are doing here. The old function which sets the timeout is finished before the new function is executed. The problem was that strings could not really be changed in JavaScript. If you tried to do it JavaScript simply created a new object - without removing the old one. This is what filled up the memory.) Scrollers are used widely in the Internet. There is the risk that they get unpopular quickly. I must admit that I do not like them too much. Especially annoying on most pages is that the URL cannot be read anymore when moving the pointer across a link. This can be solved through stop- ping the scroller when a MouseOver event occurs - you can start it again with onMouseOut. If you want to have a scroller try not to use the standard scroller - try to add some nice effect. May- be one part of the text moving from left and the other part is coming from right - when they meet in the middle the text stands still for some seconds. With some phantasy you can certainly find some nice alternatives (I have some examples in my book). ©1996,1997 by Stefan Koch e-mail:skoch@rumms.uni-mannheim.de http://rummelplatz.uni-mannheim.de/~skoch/ My JavaScript-book: http://www.dpunkt.de/javascript
  • 32. VOODOO’S INTRODUCTION TO JAVASCRIPT © 1996, 1997 by Stefan Koch Part 6: Predefined objects The Date-object JavaScript lets you use some predefined objects. This is for example the Date-object, the Array- object or the Math-object. There are several other objects - please refer to the documentation provided by Netscape for a complete reference. We are going to have a look at the Date-object first. As the name implies this object lets you work with time and date. For example you can easily calculate how many days are left until next christmas. Or you can add the actual time to your HTML-document. So let’s begin with an example which displays the actual time. First we have to create a new Date-object. For this purpose we are using the new operator. Look at this line of code: today= new Date() This creates a new Date-object called today. If you do not specify a certain date and time when creating a new Date-object the actual date and time is used. This means after executing today= new Date() the new Date-object today represents the date and time of this specific moment. The Date-object offers some methods which can now be used with our object today. This is for example getHours(), setHours(), getMinutes(), setMinutes(), getMonth(), setMonth() and so on. You can find a complete reference of the Date-object and its methods in Netscapes JavaScript documentation. Please note that a Date-object does only represent a certain date and time. It is not like a clock which changes the time every second or millisecond automatically. In order to get another date and time we can use another constructor (this is the Date() method which is called through the new operator when constructing a new Date-object): today= new Date(1997, 0, 1, 17, 35, 23) This will create a Date-object which represents the first of january 1997 at 17:35 and 23 secon- ds. So you specify the date and time like this: Date(year, month, day, hours, minutes, seconds) Please note that you have to use 0 for january - and not 1 as you might think. 1 stands for febru- ary and so on. Now we will write a script which outputs the actual date and time. The result will look like this: Time: 17:53 Date: 4/3/2010
  • 33. The code looks like this: <script language="JavaScript"> <!-- hide now= new Date(); document.write("Time: " + now.getHours() + ":" + now.getMinutes() + "<br>"); document.write("Date: " + (now.getMonth() + 1) + "/" + now.getDate() + "/" + (1900 + now.getYear())); // --> </script> Here we use methods like getHours() in order to display the time and date specified in out Date- object now. You can see that we are adding 1900 to the year. The method getYear() returns the number of years since 1900. This means if the year is 1997 it will return 97 if the year is 2010 it will return 110 - not 10! If we add 1900 we won’t have the year 2000 problem. Remember that we have to increment the number we receive through getMonth() by one. This script does not check whether the number of minutes is less than 10. This means you can get a time which looks like this: 14:3 which actually means 14:03. We will see in the next script how to solve this problem. Now we will have a look at a script which displays a working clock: <html> <head> <script Language="JavaScript"> <!-- hide var timeStr, dateStr; function clock() { now= new Date(); // time hours= now.getHours(); minutes= now.getMinutes(); seconds= now.getSeconds(); timeStr= "" + hours; timeStr+= ((minutes < 10) ? ":0" : ":") + minutes; timeStr+= ((seconds < 10) ? ":0" : ":") + seconds; document.clock.time.value = timeStr; // date date= now.getDate(); month= now.getMonth()+1; year= now.getYear(); dateStr= "" + month; dateStr+= ((date < 10) ? "/0" : "/") + date;
  • 34. dateStr+= "/" + year; document.clock.date.value = dateStr; Timer= setTimeout("clock()",1000); } // --> </script> </head> <body onLoad="clock()"> <form name="clock"> Time: <input type="text" name="time" size="8" value=""><br> Date: <input type="text" name="date" size="8" value=""> </form> </body> </html> (The online version lets you test this script immediately) We use the setTimeout() method for setting the time and date every second. So we create every second a new Date-object with the actual time. You can see that the function clock() is called with the onLoad event-handler in the <body> tag. In the body-part of our HTML-page we have two text-elements. The function clock() writes the time and date into these two form-elements in the right format. You can see that we are using two strings timeStr and dateStr for this pur- pose. We have mentioned earlier that there is a problem with minutes less than 10 - this script solves this problem through this line of code: timeStr+= ((minutes < 10) ? ":0" : ":") + minutes; Here the number of minutes are added to the string timeStr. If the minutes are less than 10 we have to add a 0. This line of code might look a little bit strange to you. You could also write it like this which might look more familar: if (minutes < 10) timeStr+= ":0" + minutes else timeStr+= ":" + minutes; The Array-object Arrays are very important. Just think of an example where you want to store 100 different na- mes. How could you do this with JavaScript? Well, you could define 100 variables and assign the different names to them. This is quite complicated. Arrays can be seen as many variables bundled together. You can access them through one name and a number. Let’s say out array is called names. Then we can access the first name through names[0]. The
  • 35. second name is called name[1] and so on. Since JavaScript 1.1 (Netscape Navigator 3.0) you can use the Array-object. You can create a new array through myArray= new Array(). Now you can assign values to this array: myArray[0]= 17; myArray[1]= "Stefan"; myArray[2]= "Koch"; JavaScript arrays are really flexible. You do not have to bother about the size of the array - its size is being set dynamically. If you write myArray[99]= "xyz" the size of the array get 100 ele- ments (a JavaScript array can only grow - it hasn’t got the ability to shrink. So keep your arrays as small as possible.). It doesn’t matter if you store numbers, strings or other objects in an array. I haven’t mentioned every detail of arrays here but I hope you will see that arrays are a very im- portant concept. Certainly many things get clearer by looking at an example. The output of the following examp- le is: first element second element third element Here is the source code: <script language="JavaScript"> <!-- hide myArray= new Array(); myArray[0]= "first element"; myArray[1]= "second element"; myArray[2]= "third element"; for (var i= 0; i< 3; i++) { document.write(myArray[i] + "<br>"); } // --> </script> First we are creating a new array called myArray. Then we assign three different values to the array. After this we start a loop. This loop executes the command document.write(myArray[i] + "<br>"); three times. The variable i counts from 0 to 2 with this for-loop. You can see that we are using myArray[i] inside the for-loop. As i counts from 0 to 2 we get three document.wri- te() calls. We could rewrite the loop as: document.write(myArray[0] + "<br>"); document.write(myArray[1] + "<br>"); document.write(myArray[2] + "<br>"); Arrays with JavaScript 1.0
  • 36. As the Array-object does not exist in JavaScript 1.0 (Netscape Navigator 2.x and Microsoft In- ternet Explorer 3.x) we have to think of an alternative. This piece of code could be found in the Netscape documentation: function initArray() { this.length = initArray.arguments.length for (var i = 0; i < this.length; i++) this[i+1] = initArray.arguments[i] } You can now create an array with: myArray= new initArray(17, 3, 5); The numbers inside the brackets are the values the array is being initialized with (this can also be done with the Array-object from JavaScript 1.1). Please note that this kind of array does not implement all elements the Array-object from JavaScript 1.1 has (there is for example a sort() method which lets you sort all elements in a specific). The Math-object If you need to do mathematical calculations you will find some methods in the Math-object which might help you further. There is for example a sine-method sin(). You will find a com- plete reference in the Netscape documentation. I want to demonstrate the random() method. If you have read the first version of this tutorial you know that there have been some problems with the random() method. We wrote a function which let us create random numbers. We don’t need that anymore as the random() method now works on all platforms. If you call Math.random() you will receive a random number between 0 and 1. Here is one pos- sible output of document.write(Math.random()): .7184317731538611 ©1996,1997 by Stefan Koch e-mail:skoch@rumms.uni-mannheim.de http://rummelplatz.uni-mannheim.de/~skoch/ My JavaScript-book: http://www.dpunkt.de/javascript
  • 37. VOODOO’S INTRODUCTION TO JAVASCRIPT © 1996, 1997 by Stefan Koch Part 7: Forms Validating form input Forms are widely used on the Internet. The form input is often being sent back to the server or via mail to a certain e-mail account. But how can you be certain that a valid input was done by the user? With the help of JavaScript the form input can easily be checked before sending it over the Internet. First I want to demonstrate how forms can be validated. Then we will have a look at the possibilties for sending information over the Internet. First of all we want to create a simple script. The HTML-page shall contain two text-elements. The user has to write his name into the first and an e-mail address into the second element. If the user has entered his name (for example ‘Stefan’) into the first text-field the script creates a popup window with the text ‘Hi Stefan!’. (The online version lets you test this script immediately) Concerning the first input element you will receive an error message when nothing is entered. Any input is seen as valid input. Of course, this does not prevent the user from entering any wrong name. The browser even accepts numbers. So if you enter '17' you will get 'Hi 17!'. So this might not be a good check. The second form is a little bit more sophisticated. Try to enter a simple string - your name for example. It won't work (unless you have a @ in your name...). The criteria for accepting the input as a valid e-mail address is the @. A single @ will do it - but this is certainly not very meaningful. Every Internet e-mail address contains a @ so it seems ap- propriate to check for a @ here. What does the script for those two form elements and for the validating look like? Here it goes: <html> <head> <script language="JavaScript"> <!-- Hide function test1(form) { if (form.text1.value == "") alert("Please enter a string!") else { alert("Hi "+form.text1.value+"! Form input ok!"); } } function test2(form) {
  • 38. if (form.text2.value == "" || form.text2.value.indexOf(’@’, 0) == -1) alert("No valid e-mail address!"); else alert("OK!"); } // --> </script> </head> <body> <form name="first"> Enter your name:<br> <input type="text" name="text1"> <input type="button" name="button1" value="Test Input" onClick="test1(this.form)"> <P> Enter your e-mail address:<br> <input type="text" name="text2"> <input type="button" name="button2" value="Test Input" onClick="test2(this.form)"> </body> </html> First have a look at the HTML-code in the body-section. We just create two text elements and two buttons. The buttons call the functions test1(...) or test2(...) depending on which button is pressed. We pass this.form to the functions in order to be able to address the right elements in the functions later on. The function test1(form) tests if the string is empty. This is done via if (form.text1.value == "")... . ’form’ is the variable which receives the ’this.form’ value in the function call. We can get the value of the input element through using ’value’ in combination with form.text1. In order to look if the string is empty we compare it with "". If the input string equals "" then no input was done. The user will get an error message. If something is entered the user will get an ok. The problem here is that the user might enter only spaces. This is seen as a valid input! If you want to, you can of course check for these possibilities and exclude them. I think this is quite easy with the information given here. Now have a look at the test2(form) function. This function again compares the input string with the empty string "" to make sure that something has been entered. But we have added something to the if-command. The || is called the OR-operator. You have learned about it in part 6 of this introduction. The if-command checks if either the first or the second comparison is true. If at least one of them is true the whole if-command gets true and the following command will be executed. This means that you will get an error message either if your string is empty or if there isn’t a @ in your string. The second operation in the if-com- mand looks if the entered string contains a @. Checking for certain characters Sometimes you want to restrict the form input to certain characters or numbers. Just think of a telephone number - the input should only contain digits (we assume that the telephone number does not contain any characters). We could check if the input is a number. But most people use different symbols in their telephone number - for example: 01234-56789, 01234/56789 or 01234 56789 (with a space inbetween). The user should not be forced to enter the telephone number without these symbols. So we have to extend our script to check for digits and some symbols. This is demonstrated in the next example which is taken
  • 39. from my JavaScript book: (The online version lets you test this script immediately) <html> <head> <script language="JavaScript"> <!-- hide // ****************************************************** // Script from Stefan Koch - Voodoo’s Intro to JavaScript // http://rummelplatz.uni-mannheim.de/~skoch/js/ // JS-book: http://www.dpunkt.de/javascript // You can use this code if you leave this message // ****************************************************** function check(input) { var ok = true; for (var i = 0; i < input.length; i++) { var chr = input.charAt(i); var found = false; for (var j = 1; j < check.length; j++) { if (chr == check[j]) found = true; } if (!found) ok = false; } return ok; } function test(input) { if (!check(input, "1", "2", "3", "4", "5", "6", "7", "8", "9", "0", "/", "-", " ")) { alert("Input not ok."); } else { alert("Input ok!"); } } // --> </script> </head> <body> <form> Telephone: <input type="text" name="telephone" value="">
  • 40. <input type="button" value="Check" onClick="test(this.form.telephone.value)"> </form> </body> </html> The function test() specifies which characters are valid. Submitting form input What different possibilities do exist for submitting form input? The easiest way is to submit the form input via e-mail. This is the method we are going to look at a little bit closer. If you want the form input to be handled by the server you need to use CGI (Common Gateway Interface). This allows you to process the form input automatically. The server might for example build up a database from the input received by some customers. Another example are index-pages like Yahoo. They usually have a form for making a search in their database. The user gets a response quickly after the submit button was hit. He does not have to wait until the people maintaining this server read the input and then look up the information requested. This is done automatically by the server. JavaScript cannot do things like this. You cannot create guestbooks with JavaScript because JavaScript isn’t able to write to a file on the server. You can only do this through CGI. Of course you can create a guestbook with the people answering via e-mail. You have to enter the feedback manually though. This is ok if you don’t expect to get 1000 feed- back mails a day. This script here is plain HTML. So no JavaScript is needed here! Only, of course, if you want to check the input before the form is submitted you will need JavaScript. I have to add that the mailto-command does not work everywhere - for example the Microsoft Internet Explorer 3.0 does not support it. <form method=post action="mailto:your.address@goes.here" enctype="text/plain"> Do you like this page? <input name="choice" type="radio" value="1">Not at all.<br> <input name="choice" type="radio" value="2" CHECKED>Waste of time.<br> <input name="choice" type="radio" value="3">Worst site of the Net.<br> <input name="submit" type="submit" value="Send"> </form> The property enctype="text/plain" is used in order to send plain text without encoded parts. This makes it much easier to read the mail. If you want to validate the form before it is sent over the net you can use the onSubmit event- handler. You have to put this event-handler into the <form> tag. This looks like this: function validate() { // check if input ok // ... if (inputOK) return true else return false; }
  • 41. ... <form ... onSubmit="return validate()"> ... With this code the form isn’t being sent over the Internet if the form input was wrong. Setting the focus to a certain form-element With the help of the focus() method you can make your form a little bit more user-friendly. You can define which element is in focus at the beginning. Or you could tell the browser to focus on the form where the input was wrong. This means that the browser will set the cursor into the specified form-element so the user does not have to click on the form before entering anything. You can do this with the following piece of script: function setfocus() { document.first.text1.focus(); } This script would set the focus to the first text-element in the script I have shown above. You have to specify the name of the whole form - which is called first here - and the name of the single form element - here text1. If you want to put the focus on this element when the page is being loaded you can add an onLoad-property to your <body> tag. This looks like this: <body onLoad="setfocus()"> We can extend this with the following code: function setfocus() { document.first.text1.focus(); document.first.text1.select(); } (The online version lets you test this script immediately) The text-element gets the focus and the text contained in this text-element is being selected. ©1996,1997 by Stefan Koch e-mail:skoch@rumms.uni-mannheim.de http://rummelplatz.uni-mannheim.de/~skoch/ My JavaScript-book: http://www.dpunkt.de/javascript
  • 42. VOODOO’S INTRODUCTION TO JAVASCRIPT © 1996, 1997 by Stefan Koch Part 8: The Image-object Images on a web-page Now we are going to have a look at the Image-object which is available since JavaScript 1.1 (i.e. since Netscape Navigator 3.0). With the help of the Image-object you can change images on a web-page. This allows us for example to create animations. Please note that users of older browsers (like Netscape Navigator 2.0 or Microsoft Internet Ex- plorer 3.0 - they use JavaScript 1.0) cannot run the scripts shown in this part - or at least they cannot see the whole effect. First, let’s see how the images in a web-page can be addressed through JavaScript. All images are represented through an array. This array is called images. It is a property of the document-object. Every image on a web-page gets a number. The first image gets the number 0, the second image gets the number 1 and so on. So we can address the first image through document.images[0]. Every image in an HTML-document is considered as an Image-object. An Image-object has got certain properties which can be accessed through JavaScript. You can for example see which size an image has with the properties width and height. document.images[0].width gives you the width (in pixel) of the first image on the web-page. Especially if you have many images on one page it gets hard to keep count of all images. Giving names to the different images solves this problem. If you declare an image with this tag <img src="img.gif" name="myImage" width=100 height=100> you can address it through document.myImage or document.images["myImage"]. Loading new images Although it is nice to know how to get the size of an image on a web-page this is not what we wanted to know. We want to change images on a web-page. For this purpose we need the src property. As in the <img> tag the src property represents the address of the displayed image. With JavaScript 1.1 you can now assign new addresses to an already loaded image on a web- page. The result is that the image located at the new address is being loaded. This new image replaces the old image on the web-page. Look at this example: <img src="img1.gif" name="myImage" width=100 height=100> The image img1.gif is being loaded and gets the name myImage. The following line of code re- places the old image img1.gif with the new image img2.gif: document.myImage.src= "img2.src"; The new image has always got the same size as the old image. You cannot change the size of
  • 43. the area in which the image is being displayed. (The online version lets you test this script immediately) Preloading images One drawback might be that the new image gets loaded after assigning a new address to the src property. As the image is not preloaded it takes some time until the new image is retrieved through the Internet. In some situations this is ok - but often these delays are not acceptable. So what can we do about this? Yes, preloading the image is the solution. For this purpose we have to create a new Image-object. Look at these lines of code: hiddenImg= new Image(); hiddenImg.src= "img3.gif"; The first line creates a new Image-Object. The second line defines the address of the image which shall be represented through the object hiddenImg. We have already seen that assigning a new address to the src attribute forces the browser to load the image the address is pointing at. So the image img2.gif gets loaded when the second line of this code is being executed. As the name hiddenImg implies the image is not being displayed after the browser finished loading it. It is just kept in the memory (or better in the cache) for later use. In order to display this image we can now use this line: document.myImage.src= hiddenImg.src; Now the image is being taken from the cache and displayed immediately. We have managed to preload the image. Of course the browser must have finished the preloading for being able to display an image without delay. So if you have many images specified for preloading there might be a delay nevertheless because the browser has been busy to download all the other pic- tures. You always have to consider the speed of the Internet - the downloading of the images doesn’t go faster with this code shown here. We only try to start the downloading of the images earlier - so the user can see them earlier. This makes the whole process much smoother. If you have a fast Internet connection you might wonder what all this talk is about. Which delay is this guy talking about all the time? Well, there are still some people sitting behind a 14.4 mo- dem (No, not me. I just upgraded to 33.6 - oh yes...). Changing images on user-initiated events You can create nice effects through changing images as a reaction to certain events. You can for example change images when the mouse cursor is being moved over a certain area. (The online version lets you test this script immediately) The source code for this example looks like this: <a href="#" onMouseOver="document.myImage2.src=’img2.gif’" onMouseOut="document.myImage2.src=’img1.gif’"> <img src="img1.gif" name="myImage2" width=160 height=50 border=0></a>
  • 44. This code causes some problems though: - The user might not use a JavaScript 1.1 browser. - The second image is not being preloaded. - We have to rewrite the code for every image on a web-page. - We want to have a script which can be used in many web-page over and over again without large changes. We will now have a look at a complete script which solves these problems. The script gets much longer - but once it is written you do not have to bother about it anymore. There are two requi- rements for keeping the script flexible: - Undefined number of images - it should not matter if 10 or 100 images are used - Undefined order of images - it should be possible to change the order of the images without changing the code (The online version lets you test this script immediately) Have a look at the code (I have added some comments): <html> <head> <script language="JavaScript"> <!-- hide // ****************************************************** // Script from Stefan Koch - Voodoo’s Intro to JavaScript // http://rummelplatz.uni-mannheim.de/~skoch/js/ // JS-book: http://www.dpunkt.de/javascript // You can use this code if you leave this message // ****************************************************** // ok, we have a JavaScript browser var browserOK = false; var pics; // --> </script> <script language="JavaScript1.1"> <!-- hide // JavaScript 1.1 browser - oh yes! browserOK = true; pics = new Array(); // --> </script>
  • 45. <script language="JavaScript"> <!-- hide var objCount = 0; // number of (changing) images on web-page function preload(name, first, second) { // preload images and place them in an array if (browserOK) { pics[objCount] = new Array(3); pics[objCount][0] = new Image(); pics[objCount][0].src = first; pics[objCount][1] = new Image(); pics[objCount][1].src = second; pics[objCount][2] = name; objCount++; } } function on(name){ if (browserOK) { for (i = 0; i < objCount; i++) { if (document.images[pics[i][2]] != null) if (name != pics[i][2]) { // set back all other pictures document.images[pics[i][2]].src = pics[i][0].src; } else { // show the second image because cursor moves across this image document.images[pics[i][2]].src = pics[i][1].src; } } } } function off(){ if (browserOK) { for (i = 0; i < objCount; i++) { // set back all pictures if (document.images[pics[i][2]] != null) document.images[pics[i][2]].src = pics[i][0].src; } } } // preload images - you have to specify which images should be preloaded // and which Image-object on the wep-page they belong to (this is the first // argument). Change this part if you want to use different images (of course // you have to change the body part of the document as well)
  • 46. preload("link1", "img1f.gif", "img1t.gif"); preload("link2", "img2f.gif", "img2t.gif"); preload("link3", "img3f.gif", "img3t.gif"); // --> </script> <head> <body> <a href="link1.htm" onMouseOver="on(’link1’)" onMouseOut="off()"> <img name="link1" src="link1f.gif" width="140" height="50" border="0"></a> <a href="link2.htm" onMouseOver="on(’link2’)" onMouseOut="off()"> <img name="link2" src="link2f.gif" width="140" height="50" border="0"></a> <a href="link3.htm" onMouseOver="on(’link3’)" onMouseOut="off()"> <img name="link3" src="link3f.gif" width="140" height="50" border="0"></a> </body> </html> This script puts all images in an array pics. The preload() function which is called in the begin- ning builds up this array. You can see that we call the preload() function like this: preload("link1", "img1f.gif", "img1t.gif"); This means that the script should load the two images img1f.gif and img1t.gif. The first image is the image which should be displayed when the mousecursor isn’t inside the image area. When the user moves the mousecursor across the image area the second image is shown. With the first argument "img1" of the call of the preload() function we specify which Image-object on the web-page the two preloaded images belong to. If you look into the <body> part of our example you will find an image with the name img1. We use the name of the image (and not its number) in order to be able to change the order of the pictures without changing the script. The two functions on() and off() are being called through the event-handlers onMouseOver and onMouseOut. As images cannot react to the events MouseOver and MouseOut we have to put a link around the images. As you can see the on() function sets back all other images. This is necessary because it could happen that several images are highlighted (the event MouseOut does not occur for example when the user moves the cursor from an image directly outside the window). Images are certainly a great way for enhancing your web-page. The Image-object lets you create really sophisticated effects. But please notice not every image and JavaScript program enhances your page. If you surf around the net you can see many examples where images are used in a horrible way. It’s not the quantity of images that makes your web-page look good - it’s the qua- lity. It is really annoying to download 50 kB of bad graphics.
  • 47. Keep this in mind when creating image-effects with JavaScript and your visitors/customers will come back more likely. ©1996,1997 by Stefan Koch e-mail:skoch@rumms.uni-mannheim.de http://rummelplatz.uni-mannheim.de/~skoch/ My JavaScript-book: http://www.dpunkt.de/javascript
  • 48. VOODOO’S INTRODUCTION TO JAVASCRIPT © 1996, 1997 by Stefan Koch Part 9: Layers I What are layers? Layers are one great new feature of the Netscape Navigator 4.0. This allows absolute posi- tioning of objects like images. Besides that you can move objects on your HTML-page. You can also hide objects. Layers can easily be manipulated with the help of JavaScript. I hope you get as enthusiatic about layers as I am. You can only use layers with Netscape Navigator 4.0 at the moment! As usual I won’t describe all details of the different tags. There is a good document describing all elements of layers in Netscape Navigator 4.0 at http://home.netscape.com/comprod/pro- ducts/communicator/index.html - so there is no need to rewrite this. What exactly are layers? This can be explained quite easily: you take several sheets of paper. On one paper you write a text. On another one you draw an image. Write some text besides an image on a third paper and so on. Now, put these sheets of paper on a table. Let’s say every paper is a layer. From this aspect a layer is some kind of container. It can contain objects - i.e. in this case text and images. Now take a paper with an image on. Move it around on the table. Watch the image following the movements of the paper carefully. If you move the paper to the right the image will follow! What do we learn from this fascinating experience? Layers which can contain several different objects - like images, forms, text etc. - can be placed on your HTML-page and can be moved around. If you move a layer all objects contained in this layer will follow this movement. Layers can overlap each other like papers on a table. Every layer can have transparent parts. Put a hole in one paper. Now put this paper above another paper. The hole is a ’transparent part’ of the first paper - the content of the underlying paper shines through. Creating layers For creating a layer we need either the <layer> or <ilayer> tag. You can use the following pro- perties: Property Description name="layerName" The name of the layer left=xPosition The horizontal position of the top left corner top=yPosition The vertical position of the top left corner
  • 49. z-index=layerIndex Index number of layer width=layerWidth Width of the layer in pixel clip="x1_offset,y1_offset,x2_offset,y2_offset" Defines the area of the layer which shall be dis- played above="layerName" Defines above which layer this layer will ap- pear below="layerName" Defines below which layer this layer will ap- pear Visibility=show|hide|inherit The visibility of the layer bgcolor="rgbColor" The background color - either name of a stan- dard color or rgb-values background="imageURL" Background image The <layer> tag is used for layers which can be explicitly positioned. If you do not specify a position (with the left and top properties) the layer will be positioned in the top left corner of the window. The <ilayer> tag creates a layer which position depends on the flow of the document. Now let’s start with an easy example. We want to create two layers. In the first layer we put an image and in the second layer we put a text. What we want to do is to display the text above the image. The text is displayed above the image Here is the source code: <html> <layer name=pic z-index=0 left=200 top=100> <img src="img.gif" width=160 height=120> </layer> <layer name=txt z-index=1 left=200 top=100> <font size=+4> <i> Layers-Demo </i> </font> </layer> </html> You can see that we define two layers with the <layer> tag. Both layers are positioned at 200/ 100 (defined through left and top). Everything between the <layer> and the </layer> tag (or <ilayer> and the </ilayer> tag) belongs to this layer. You can see that we use the property z-index. This defines in which order the layers appear - i.e. in our case you tell the browser if the text will appear above or below the image. The layer with
  • 50. the highest z-index number will be displayed on top. You do not have to use 0 and 1 for the z- index - every positive integer is ok. If you write z-index=100 in the first <layer> tag the text will be displayed below the image - as the text-layer has got a smaller z-index number (z-index=1). You can see the text through the image because I used a transparent background (gif89a format). The text is displayed below the image Layers and JavaScript Now we are going to access layers through JavaScript. We want to start with an example where the user can push a button in order to hide and show a layer. First we have to know how the layers are represented in JavaScript. As usual there are several ways. The best thing is to assign a name to every layer. If we define a layer with <layer ... name=myLayer> ... </layer> we can access this layer through document.layers["myLayer"]. According to the documentation provided by Netscape we can also write document.myLayer - but this lets my browser crash. This is certainly only a problem of the preview version and will be solved in the final release (I am using Netscape Navigator 4.0 PR3 on WinNT at the moment). There seem to be no problems with document.layers["myLayer"] - so we are going to use this alternative. You can also access the layers through an integer index. In order to access the bottommost layer you can write document.layers[0]. Please note that the index is not the same as the z-index pro- perty. If you have for example two layers called layer1 and layer2 with the z-index numbers 17 and 100 you can access these layers through document.layers[0] and document.layers[1] and not through document.layers[17] and document.layers[100]. There are several layer-properties which can be changed through JavaScript. The following ex- ample presents a button which lets you hide and display one layer (Netscape Navigator 4.0 - or higher - required!). (The online version lets you test this script immediately) The source code looks like this: <html> <head> <script language="JavaScript">
  • 51. <!-- hide function showHide() { if (document.layers["myLayer"].visibility == "show") document.layers["myLayer"].visibility= "hide" else document.layers["myLayer"].visibility= "show"; } // --> </script> </head> <body> <ilayer name=myLayer visibility=show> <font size=+1 color="#0000ff"><i>This text is inside a layer</i></font> </ilayer> <form> <input type="button" value="Show/Hide layer" onClick="showHide()"> </form> </body> </html> The button calls the function showHide(). You can see that this function accesses the property visibility of the layer-object myLayer. Through assigning "show" or "hide" to document.lay- ers["myLayer"].visibility you can show or hide the layer. Please note that "show" and "hide" are strings - not reserved keywords, i.e. you cannot write document.layers["myLayer"].visibi- lity= show. I have used the <ilayer> tag instead of the <layer> tag because I wanted to put the layer in the flow of the document. Moving layers The properties left and top define the position of the layer. You can assign new values to these properties in order to set the position of the layer. The following line sets the horizontal position of the layer to 200 (in pixel): document.layers["myLayer2"].left= 200; We are now going to program a moving layer - this looks like a scroller inside the browser win- dow. (The online version lets you test this script immediately) The script looks like this: <html> <head>
  • 52. <script language="JavaScript"> <!-- hide function move() { if (pos < 0) direction= true; if (pos > 200) direction= false; if (direction) pos++ else pos--; document.layers["myLayer2"].left= pos; } // --> </script> </head> <body onLoad="setInterval(’move()’, 20)"> <ilayer name=myLayer2 left=0> <font size=+1 color="#0000ff"><i>This text is inside a layer</i></font> </ilayer> </body> </html> We create a layer called myLayer2. You can see that we are using onLoad inside the <body> tag. We need to start the scrolling of the layer as soon as the page is loaded. We use setInterval() inside the onLoad event-handler. This is a new method of JavaScript 1.2 (i.e. the JavaScript ver- sion that is implemented in Netscape Navigator 4.0). This can be used to call a function over and over again in a certain time interval. We used setTimeout() for this in the last lessons. set- Interval() works almost the same - but you have to call it only once. Through setInterval() we are calling the function move() every 20 milliseconds. The function move() sets the layer to a certain position. As we call this function over and over again we get a fluent scrolling of the text. All we have to do in the function move() is to calculate the position of the layer and assign this value to document.layers["myLayer2"].left= pos. If you look into the source code of this part of the online-tutorial you will realize that my code looks a little different. I have implemented some code so that people with older JavaScript- browsers won’t get any errors. How can this be achieved? The following code will only be exe- cuted by browsers which understand JavaScript 1.2: <script language="JavaScript1.2"> <!-- hide document.write("You are using a JavaScript 1.2 capable browser."); // --> </script> This is the same problem as we had with the Image-object. We can rewrite the code in a similar way. Setting a variable browserOK solves the problem. (The online version demonstrates that moving layers can overlap)
  • 53. ©1996,1997 by Stefan Koch e-mail:skoch@rumms.uni-mannheim.de http://rummelplatz.uni-mannheim.de/~skoch/ My JavaScript-book: http://www.dpunkt.de/javascript
  • 54. VOODOO’S INTRODUCTION TO JAVASCRIPT © 1996, 1997 by Stefan Koch Part 10: Layers II We have already talked about the basics of the new layers technique. This lesson covers the fol- lowing topics: •Clipping •Nested Layers •Effects with transparent layers Clipping You can define which rectangular part of a layer will be visible. Everything outside this area won’t be shown. This is called clipping. You can use the HTML-property clip like this: <ilayer left=0 top=0 clip="20,50,110,120"> <img src="davinci.jpg" width=209 height=264> </ilayer> (I have added left=0 and top=0 as my Netscape version (PR3 on WinNT) seems to have some problems if these values are missing) Although the image is 209x264 pixels in size you can only see a small part of it:
  • 55. This part has got the size 90x70 (in pixel). The first two values specified through the clip-attribut (in the HTML-tag <layer> or <ilayer>) define the upper left corner of the clipping box. The next two values define the lower right corner. The following image illustrates this: More interesting things can be achieved through setting the clipping region through JavaScript. For this you can change the properties clip.left, clip.top, clip.right and clip.bottom of the Layer- object. Just assign a new pixel value to one of these properties and the clipping region will chan- ge. The following example changes the clipping region dynamically. The user gets the impres- sion that the image is being built up slowly: (The online version lets you test this script immediately) Here is the code: <html> <head> <script language="JavaScript"> <!-- hide var middleX, middleY, pos; function start() { // get size of image var width= document.layers["imgLayer"].document.davinci.width; var height= document.layers["imgLayer"].document.davinci.height; // calculate pixel in the middle of image middleX= Math.round(width/2); middleY= Math.round(height/2);