SlideShare ist ein Scribd-Unternehmen logo
1 von 17
Downloaden Sie, um offline zu lesen
REMANUFACTURADO DEL CARTUCHO DE TÓNER Y OPC DE

                                                        LEXMARK E120                                                     ™


                     EL CARTUCHO E120 CON PROGRAMA DE RETORNO COMO ESTÁ EMPACADO


                                                                              CARTUCHO DE TÓNER Y OPC


  3232 West El Segundo Blvd., Hawthorne, California 90250 USA • Ph +1 424 675 3300 • Fx +1 424 675 3400 • techsupport@uninetimaging.com • www.uninetimaging.com
© 2009 UniNet Imaging Inc. All trademark names and artwork are property of their respective owners. Product brand names mentioned are intended to show compatibility only. UniNet Imaging does not warrant downloaded information.
REMANUFACTURADO DEL CARTUCHO DE TONER Y OPC DE LEXMARK E120


                                REMANUFACTURADO DEL CARTUCHO
                                DE TÓNER Y OPC DE LEXMARK E120
                                                                                                   Por Mike Josiah


      La Lexmark E120 fue introducida en febrero del 2006. La E120 es una nueva máquina de bajo costo que de ciertas maneras es
      un tanto extraña, pero trabaja bien y en la mayoría de los casos, se venderá bien.

      Las nuevas máquinas se basan en un motor Lexmark de 19-ppm, 600-dpi. Con un precio de mercado alrededor de los US$149
      (para Marzo del 2006), estas máquinas deberán ser muy populares. Como en todos los cartuchos Lexmark actuales, cuentan
      con un chip que bloquea el cartucho después de usarlo en las versiones del Programa de Retorno. El código en este chip es
      nuevo y al momento de escribir esto, se está trabajando sobre chips nuevos de reemplazo, así que pregunte a su proveedor si
      ya están disponibles.

      También existen diferentes cartuchos para ser usados en las diferentes regiones del mundo. Todavía es muy pronto para
      afirmarlo con certeza, pero tal como sucede con otras series nuevas de Lexmark, creo sería prudente decir que la diferencie está
      en los chips.

      Esta máquina usa dos cartuchos, el de tóner y la unidad de OPC. El cartucho de tóner está catalogado para durar 2,000
      páginas y la unidad de OPC parar 25,000. En este momento no hay cartuchos de alto rendimiento disponibles. Estas máquinas
      también cuentan con cartuchos dentro del Programa de Retorno (Prebate) estándar y todos tienen chips. Los chips del Programa
      de Retorno deben ser reemplazados en cada ciclo. Las unidades de OPC son iguales en todo el mundo. Hemos incluido en este
      artículo instrucciones para el cartucho de OPC y les adelanto que es muy fácil de hacer. Se siguen haciendo pruebas, así que al
      momento que escribo esto, no sabemos si un OPC o cuchilla de limpieza durarán otro ciclo. Pruebas preliminares indican que sí,
      pero no se han corrido suficientes pruebas como para afirmarlo con certeza. No existen chips en las unidades de OPC. Las
      unidades de OPC se instalan y retiran desde la parte trasera de la impresora y los cartuchos de tóner desde el frente. Es un poco
      extraño, aunque comprensible, que estas máquinas tienen una pequeña huella. Me pregunto cuál será la reacción del cliente
      ante esto.

      Las máquinas nuevas se envían con un cartucho de inicio de 500 páginas, de modo que los nuevos propietarios estarán
      rápidamente buscando cartuchos.


      CARTUCHOS PARA USARSE EN LOS EE.UU. Y CANADÁ
      No de Parte        Tipo                                                                                           Rendimento                                Precio de Lista
      12026XW            Cartucho OPC                                                                                   25.000                                    US$ 40*
      12015SA            Cartucho Programa de Retorno                                                                   2.000                                     US$ 86,75*
      12035SA            Cartucho Estándar                                                                              2.000                                     US$ 66,75*


      CARTUCHOS PARA USARSE EN EUROPA, MEDIO ORIENTE Y ÁFRICA
      No de Parte        Tipo                               Rendimento
      12026XW            Cartucho OPC                       25.000
      12016SE            Cartucho Programa de Retorno       2.000
      12036SE            Cartucho Estándar                  2.000


  3232 West El Segundo Blvd., Hawthorne, California 90250 USA • Ph +1 424 675 3300 • Fx +1 424 675 3400 • techsupport@uninetimaging.com • www.uninetimaging.com
© 2009 UniNet Imaging Inc. All trademark names and artwork are property of their respective owners. Product brand names mentioned are intended to show compatibility only. UniNet Imaging does not warrant downloaded information.
REMANUFACTURADO DEL CARTUCHO DE TONER Y OPC DE LEXMARK E120

      CARTUCHOS PARA USARSE EN LA REGIÓN ASIA PACIFICO
      No de Parte        Tipo                                                                                           Rendimento
      12026XW            Cartucho OPC                                                                                   25.000
      12017SR            Cartucho Programa de Retorno                                                                   2.000
      12037SR            Cartucho Estándar                                                                              2.000


      CARTUCHOS PARA USARSE EN LATINO AMÉRICA
      No de Parte        Tipo                                                                                           Rendimento
      12026XW            Cartucho OPC                                                                                   25.000
      12018SL            Cartucho Programa de Retorno                                                                   2.000
      12038SL            Cartucho Estándar                                                                              2.000

      *(Precios en US para Marzo del 2006)


      Las únicas máquinas que hemos encontrado hasta ahora basadas en este motor son la Lexmark E120 y la E120n.

      La forma de hacer impresiones de prueba así como la solución de problemas se mencionará al final de éste artículo.


      HERRAMIENTAS NECESARIAS
      1. Aspiradora adecuada para tóner
      2. Desarmador común chico
      3. Desarmador de cabeza Phillips
      4. Pinzas de punta


      MATERIAL NECESARIO
      1. Tóner para Lexmark E120
      2. Trapos para tóner magnético
      3. Paños de algodón sintético libres de pelusas de 4 pulgadas
      4. Alcohol al 99 porciento isopropílico puro
      5. Motas de algodón


  3232 West El Segundo Blvd., Hawthorne, California 90250 USA • Ph +1 424 675 3300 • Fx +1 424 675 3400 • techsupport@uninetimaging.com • www.uninetimaging.com
© 2009 UniNet Imaging Inc. All trademark names and artwork are property of their respective owners. Product brand names mentioned are intended to show compatibility only. UniNet Imaging does not warrant downloaded information.
REMANUFACTURADO DEL CARTUCHO DE TONER Y OPC DE LEXMARK E120


      REMANUFACTURADO DEL CARTUCHO DE TONER                                                                         2. Del lado izquierdo, retire los dos tornillos pequeños y la
      1. Retire el tapón de llenado del lado derecho del cartucho                                                   cubierta de engranajes.
      (con el rodillo revelador viendo al lado contrario de usted).

      Limpie todo el remanente de tóner de la cavidad.


      3. Retire el tornillo central en la cubierta del rodillo revelador.


  3232 West El Segundo Blvd., Hawthorne, California 90250 USA • Ph +1 424 675 3300 • Fx +1 424 675 3400 • techsupport@uninetimaging.com • www.uninetimaging.com
© 2009 UniNet Imaging Inc. All trademark names and artwork are property of their respective owners. Product brand names mentioned are intended to show compatibility only. UniNet Imaging does not warrant downloaded information.
REMANUFACTURADO DEL CARTUCHO DE TONER Y OPC DE LEXMARK E120


                                                        4. Levante la cubierta del rodillo revelador desde el centro y retírela.

                                                   Tenga cuidado de no dañar los pines de plástico que están en la cubierta.


      5. Retire el resorte de la cuchilla dosificadora.


  3232 West El Segundo Blvd., Hawthorne, California 90250 USA • Ph +1 424 675 3300 • Fx +1 424 675 3400 • techsupport@uninetimaging.com • www.uninetimaging.com
© 2009 UniNet Imaging Inc. All trademark names and artwork are property of their respective owners. Product brand names mentioned are intended to show compatibility only. UniNet Imaging does not warrant downloaded information.
REMANUFACTURADO DEL CARTUCHO DE TONER Y OPC DE LEXMARK E120


                                  6. Ésta se soltará. Levántela con cuidado observando el resorte de contacto del lado derecho.

                   También tenga precaución de no dañar la cuchilla de retención que está localizada bajo la cuchilla dosificadora.


      7. En el engranaje largo negro de dirección, hay una arandela de sujeción de tipo estrella embonada a presión en el eje. Con un
      pequeño par de cortadores de cable, corte la arandela vieja y retírela. Puede intentar doblar las diferentes patitas de la arandela
      pero es un método tardado y es muy probable que al menos una patita se rompa y de todos modos la arandela quede inservible
      y tenga que cambiarla.


  3232 West El Segundo Blvd., Hawthorne, California 90250 USA • Ph +1 424 675 3300 • Fx +1 424 675 3400 • techsupport@uninetimaging.com • www.uninetimaging.com
© 2009 UniNet Imaging Inc. All trademark names and artwork are property of their respective owners. Product brand names mentioned are intended to show compatibility only. UniNet Imaging does not warrant downloaded information.
REMANUFACTURADO DEL CARTUCHO DE TONER Y OPC DE LEXMARK E120


      8. Retire el engranaje largo negro de dirección. Asegúrese de
      no perder la pequeña arandela plana que estaba debajo de la
      arandela tipo estrella.


         9. En el engranaje blanco del rodillo revelador, ponga las puntas del cortador de cable dentro de los dos pequeños orificios.

            Luego gire el engranaje para que el eje de metal quede en el orificio del lado opuesto del engranaje. Retire el engranaje.


  3232 West El Segundo Blvd., Hawthorne, California 90250 USA • Ph +1 424 675 3300 • Fx +1 424 675 3400 • techsupport@uninetimaging.com • www.uninetimaging.com
© 2009 UniNet Imaging Inc. All trademark names and artwork are property of their respective owners. Product brand names mentioned are intended to show compatibility only. UniNet Imaging does not warrant downloaded information.
REMANUFACTURADO DEL CARTUCHO DE TONER Y OPC DE LEXMARK E120


                                                                                      10. Retire todos los engranajes.


                                                          11. Retire los tres tornillos y la base de alineación de engranajes.


  3232 West El Segundo Blvd., Hawthorne, California 90250 USA • Ph +1 424 675 3300 • Fx +1 424 675 3400 • techsupport@uninetimaging.com • www.uninetimaging.com
© 2009 UniNet Imaging Inc. All trademark names and artwork are property of their respective owners. Product brand names mentioned are intended to show compatibility only. UniNet Imaging does not warrant downloaded information.
REMANUFACTURADO DEL CARTUCHO DE TONER Y OPC DE LEXMARK E120


      12. Con un desarmador pequeño plano de joyero, libere el                                                      13. Gire el buje del rodillo revelador de modo que la parte
      candado metálico del buje del rodillo revelador.                                                              plástica quede viendo hacia arriba.


      14. Saque el rodillo revelador del cartucho.                                                                  15. Limpie cualquier residuo de tóner de la cavidad.
                                                                                                                    Asegúrese de que la cuchilla de retención del rodillo revelador
      El buje saldrá junto con el rodillo.                                                                          no se dañe.

                                                                                                                    Limpie el rodillo revelador pasándole un trapo limpio y que no
                                                                                                                    suelte pelusas. Seguimos haciendo pruebas, pero por ahora,
                                                                                                                    no use ningún solvente químico para limpiarlo.


  3232 West El Segundo Blvd., Hawthorne, California 90250 USA • Ph +1 424 675 3300 • Fx +1 424 675 3400 • techsupport@uninetimaging.com • www.uninetimaging.com
© 2009 UniNet Imaging Inc. All trademark names and artwork are property of their respective owners. Product brand names mentioned are intended to show compatibility only. UniNet Imaging does not warrant downloaded information.
REMANUFACTURADO DEL CARTUCHO DE TONER Y OPC DE LEXMARK E120


                                        16. Reinstale el rodillo revelador. Gire el buje de plástico para que embone en su lugar.

            Instale la barra metálica aseguradora; note que el lado izquierdo embona en el pequeño orificio y el derecho en el cubo.


      17. Si la pequeña base metálica se cae del buje, reemplácela.                                                 18. Instale la base del eje del engranaje y los tres tornillos.


  3232 West El Segundo Blvd., Hawthorne, California 90250 USA • Ph +1 424 675 3300 • Fx +1 424 675 3400 • techsupport@uninetimaging.com • www.uninetimaging.com
© 2009 UniNet Imaging Inc. All trademark names and artwork are property of their respective owners. Product brand names mentioned are intended to show compatibility only. UniNet Imaging does not warrant downloaded information.
REMANUFACTURADO DEL CARTUCHO DE TONER Y OPC DE LEXMARK E120


      19. Instale los engranajes. El engranaje grande con el eje largo embona en la barra agitadora de tóner dentro de la cavidad.
      Gírelo unas cuantas veces y escuche para asegurarse que embono adecuadamente. En el engranaje largo de dirección,
      asegúrese de que la arandela plana está en su lugar e instale la nueva arandela de sujeción de tipo estrella. Asegúrese de que
      la arandela de sujeción está bien presionada contra la base del engranaje.


      20. Finalmente, en el engranaje de dirección del rodillo reve-                                                21. Limpie la cuchilla dosificadora e instálela. Asegúrese de
      lador, gire el engranaje desde los dos pequeños orificios mien-                                               que la base metálica del lado derecho embona en su ranura.
      tras sujeta en su lugar al rodillo revelador. Esto asegurara en
      engranaje en el eje.


  3232 West El Segundo Blvd., Hawthorne, California 90250 USA • Ph +1 424 675 3300 • Fx +1 424 675 3400 • techsupport@uninetimaging.com • www.uninetimaging.com
© 2009 UniNet Imaging Inc. All trademark names and artwork are property of their respective owners. Product brand names mentioned are intended to show compatibility only. UniNet Imaging does not warrant downloaded information.
REMANUFACTURADO DEL CARTUCHO DE TONER Y OPC DE LEXMARK E120


      22. Instale el resorte de la cuchilla dosificadora.                                                           23. Instale la cubierta del rodillo revelador y el tornillo.


      24. Instale la cubierta del engranaje y los dos tornillos.                                                    25. Llene la cavidad con tóner E120 y remplace el tapón de
                                                                                                                    llenado.


  3232 West El Segundo Blvd., Hawthorne, California 90250 USA • Ph +1 424 675 3300 • Fx +1 424 675 3400 • techsupport@uninetimaging.com • www.uninetimaging.com
© 2009 UniNet Imaging Inc. All trademark names and artwork are property of their respective owners. Product brand names mentioned are intended to show compatibility only. UniNet Imaging does not warrant downloaded information.
REMANUFACTURADO DEL CARTUCHO DE TONER Y OPC DE LEXMARK E120


      26. Remplace el chip.                                                                                         27. Si tiene la cubierta protectora para el cartucho, envuelva
                                                                                                                    el cartucho como se indica. Esta cubierta protege al rodillo
                                                                                                                    revelador de posibles daños. Se encuentran en desarrollo
                                                                                                                    cubiertas aftermarket.


      REMANUFACTURADO DEL CARTUCHO DEL OPC                                                                          29. Deslice hacia afuera el eje del OPC.
      28. Del lado de los engranajes en la unidad de OPC, retire la
      rondana tipo e del borde del eje del OPC.


  3232 West El Segundo Blvd., Hawthorne, California 90250 USA • Ph +1 424 675 3300 • Fx +1 424 675 3400 • techsupport@uninetimaging.com • www.uninetimaging.com
© 2009 UniNet Imaging Inc. All trademark names and artwork are property of their respective owners. Product brand names mentioned are intended to show compatibility only. UniNet Imaging does not warrant downloaded information.
REMANUFACTURADO DEL CARTUCHO DE TONER Y OPC DE LEXMARK E120


      30. Retire el OPC.                                                                                            31. Desde el lado derecho (engranajes), retire el ensamble del
                                                                                                                    PCR (el resorte que lo sostiene debe salir con él).


      32. Retire los dos tornillos de la cuchilla de limpieza y la                                                  33. Limpie y cubra con su lubricante preferido el borde de la
      cuchilla. Limpie el tóner de desperdicio.                                                                     cuchilla de limpieza. Instale la cuchilla y los dos tornillos.


  3232 West El Segundo Blvd., Hawthorne, California 90250 USA • Ph +1 424 675 3300 • Fx +1 424 675 3400 • techsupport@uninetimaging.com • www.uninetimaging.com
© 2009 UniNet Imaging Inc. All trademark names and artwork are property of their respective owners. Product brand names mentioned are intended to show compatibility only. UniNet Imaging does not warrant downloaded information.
REMANUFACTURADO DEL CARTUCHO DE TONER Y OPC DE LEXMARK E120


      34. Limpie el PCR e instálelo. Asegúrese de que el esparcidor
      negro esté orientado hacia atrás de la cuchilla de limpieza
      como se muestra.


      35. Cubra el OPC con su lubricante preferido e instale el OPC. Asegúrese de que el resorte pequeño del lado contrario a los
      engranajes embone dentro de la ranura en la pared plástica del cartucho.


  3232 West El Segundo Blvd., Hawthorne, California 90250 USA • Ph +1 424 675 3300 • Fx +1 424 675 3400 • techsupport@uninetimaging.com • www.uninetimaging.com
© 2009 UniNet Imaging Inc. All trademark names and artwork are property of their respective owners. Product brand names mentioned are intended to show compatibility only. UniNet Imaging does not warrant downloaded information.
REMANUFACTURADO DEL CARTUCHO DE TONER Y OPC DE LEXMARK E120


      36. Instale el eje del OPC desde el lado de los engranajes del
      OPC. Instale la rondana tipo e.


      COMO IMPRIMIR PÁGINAS DE PRUEBA
      1. Con la impresora en estado READY, presione el botón CONTINUE.
      2. La impresora imprimirá la página MENU SETTINGS y si está configurada, también la página NETWORK SETUP.


      DATOS DE DEFECTOS REPETITIVOS
      Rodillo Alimentador de Toner                                                         18.7 mm
      PCR (Cartucho OPC)                                                                   29.0 mm
      Rodillo Colector de Papel (Impresora)                                                30.4 mm
      Rodillo Revelador (Cartucho de toner)                                                36.1 mm
      Rodillo Exterior de Fusión (Impresora)                                               37.9 mm
      Rodillo de Transferencia (Impresora)                                                 48.1 mm
      Rodillo Alimentador de Papel (Impresora)                                             56.2 mm
      Rodillo Superior de Fusión (Impresora)                                               62.2 mm
      Drum (Cartucho OPC)                                                                  74.1 mm
      Rodillo Pickup (Impresora)                                                           92.4 mm


  3232 West El Segundo Blvd., Hawthorne, California 90250 USA • Ph +1 424 675 3300 • Fx +1 424 675 3400 • techsupport@uninetimaging.com • www.uninetimaging.com
© 2009 UniNet Imaging Inc. All trademark names and artwork are property of their respective owners. Product brand names mentioned are intended to show compatibility only. UniNet Imaging does not warrant downloaded information.
REMANUFACTURADO DEL CARTUCHO DE TONER Y OPC DE LEXMARK E120

      CÓDIGOS DE ERROR DE LA IMPRESORA (SECUENCIAS DE LUCES)
      La E120 no cuenta con display LCD. Tiene un panel de luces para indicar los problemas. Algunos de los más comunes están
      enlistados abajo. En algunos casos, la misma secuencia de una luz encendida y otra titilando tendrá diferentes significados.
      La diferencia es el número de veces que titila la luz.

      Las primeras cuatro secuencias enlistadas le darán una buena idea de a qué me refiero:

      1. Luz de ERROR Encendida / Luz de READY Titilando (4x):                                                          Región del cartucho equivocada.
                                                                                                                        Se ha instalado el chip equivocado en el cartucho.
      2. Luz de ERROR Encendida / Luz de READY Titilando (3x):                                                          Cartucho defectuoso; No hay Cartucho.
      3. Luz de ERROR Encendida / Luz de READY Titilando (1x):                                                          Puerta abierta.
      4. Luz de ERROR Encendida / Luz de READY Titilando (8x):                                                          Tóner bajo.
      5. Luz de ERROR Titilando / Luz de READY Titilando (1x):                                                          Reemplace la unidad de OPC.


      Algunas secuencias de luces cuentan con secuencia primaria y secundaria.
      La secuencia secundaria puede ser vista presionando el botón CONTINUE rápidamente dos veces.

      Este es un ejemplo de la secuencia primaria y secundaria:

      1. Primaria: Luz de TONER BAJO Encendida / Luz de ERROR Titilando
      2. Secundaria: Luz de TONER BAJO Encendida / Luz de PAPEL ATORADO Titilando / Luz de ERROR Encendida:
         Cartucho defectuoso / No hay Cartucho.


      La mayoría del resto tiene que ver con diferentes modos de papel atorado. Todos están enlistados en el manual del usuario.


  3232 West El Segundo Blvd., Hawthorne, California 90250 USA • Ph +1 424 675 3300 • Fx +1 424 675 3400 • techsupport@uninetimaging.com • www.uninetimaging.com
© 2009 UniNet Imaging Inc. All trademark names and artwork are property of their respective owners. Product brand names mentioned are intended to show compatibility only. UniNet Imaging does not warrant downloaded information.

Weitere ähnliche Inhalte

Ähnlich wie Manual de Recarga Lexmark E120 Espanhol.

Manual de Recarga HP CB435A Espanhol.
Manual de Recarga HP CB435A Espanhol.Manual de Recarga HP CB435A Espanhol.
Manual de Recarga HP CB435A Espanhol.Valejet
 
Manual de Recarga HP P2015 Espanhol.
Manual de Recarga HP P2015 Espanhol.Manual de Recarga HP P2015 Espanhol.
Manual de Recarga HP P2015 Espanhol.Valejet
 
Manual de Recarga HP CB436A Espanhol.
Manual de Recarga HP CB436A Espanhol.Manual de Recarga HP CB436A Espanhol.
Manual de Recarga HP CB436A Espanhol.Valejet
 
Manual de Recarga Samsung CLP 610N | CLP 660N | CLP 610 CLP 660 Espanhol
Manual de Recarga Samsung CLP 610N | CLP 660N | CLP 610 CLP 660 EspanholManual de Recarga Samsung CLP 610N | CLP 660N | CLP 610 CLP 660 Espanhol
Manual de Recarga Samsung CLP 610N | CLP 660N | CLP 610 CLP 660 EspanholValejet
 
Manual de Recarga HP P3005 | M3027 | M3035 Espanhol.
Manual de Recarga HP P3005 | M3027 | M3035 Espanhol.Manual de Recarga HP P3005 | M3027 | M3035 Espanhol.
Manual de Recarga HP P3005 | M3027 | M3035 Espanhol.Valejet
 
Manual de Recarga HP CP1215 | 1518 Espanhol.
Manual de Recarga HP CP1215 | 1518 Espanhol.Manual de Recarga HP CP1215 | 1518 Espanhol.
Manual de Recarga HP CP1215 | 1518 Espanhol.Valejet
 
Manual de Recarga HP CP3525 Espanhol.
Manual de Recarga HP CP3525 Espanhol.Manual de Recarga HP CP3525 Espanhol.
Manual de Recarga HP CP3525 Espanhol.Valejet
 
Manual de Recarga Okidata C5500 | 6100 Espanhol
Manual de Recarga Okidata C5500 | 6100 EspanholManual de Recarga Okidata C5500 | 6100 Espanhol
Manual de Recarga Okidata C5500 | 6100 EspanholValejet
 
Ensamble y desensamble
Ensamble y desensambleEnsamble y desensamble
Ensamble y desensambleevidencias
 
Ensamble y desensamble
Ensamble y desensambleEnsamble y desensamble
Ensamble y desensambleleoruiz01
 
Manual de Recarga HP CP6015 Espanhol.
Manual de Recarga HP CP6015 Espanhol.Manual de Recarga HP CP6015 Espanhol.
Manual de Recarga HP CP6015 Espanhol.Valejet
 
Ensamble y desensamble
Ensamble y desensambleEnsamble y desensamble
Ensamble y desensambleevidencias
 
Ensamble y desensambl ef
Ensamble y desensambl efEnsamble y desensambl ef
Ensamble y desensambl efevidencias
 
Guia mantenimiento pc
Guia mantenimiento pcGuia mantenimiento pc
Guia mantenimiento pcewinmauricio
 
Guia mantenimiento pc
Guia mantenimiento pcGuia mantenimiento pc
Guia mantenimiento pcewinmauricio
 
Ensamble y desensamble
Ensamble y desensambleEnsamble y desensamble
Ensamble y desensambleevidencias
 
Manual de Recarga HP P4015 | CC364 Espanhol.
Manual de Recarga HP P4015 | CC364 Espanhol.Manual de Recarga HP P4015 | CC364 Espanhol.
Manual de Recarga HP P4015 | CC364 Espanhol.Valejet
 

Ähnlich wie Manual de Recarga Lexmark E120 Espanhol. (20)

Hp2085a
Hp2085aHp2085a
Hp2085a
 
Manual de Recarga HP CB435A Espanhol.
Manual de Recarga HP CB435A Espanhol.Manual de Recarga HP CB435A Espanhol.
Manual de Recarga HP CB435A Espanhol.
 
Manual de Recarga HP P2015 Espanhol.
Manual de Recarga HP P2015 Espanhol.Manual de Recarga HP P2015 Espanhol.
Manual de Recarga HP P2015 Espanhol.
 
Manual de Recarga HP CB436A Espanhol.
Manual de Recarga HP CB436A Espanhol.Manual de Recarga HP CB436A Espanhol.
Manual de Recarga HP CB436A Espanhol.
 
Manual de Recarga Samsung CLP 610N | CLP 660N | CLP 610 CLP 660 Espanhol
Manual de Recarga Samsung CLP 610N | CLP 660N | CLP 610 CLP 660 EspanholManual de Recarga Samsung CLP 610N | CLP 660N | CLP 610 CLP 660 Espanhol
Manual de Recarga Samsung CLP 610N | CLP 660N | CLP 610 CLP 660 Espanhol
 
Manual de Recarga HP P3005 | M3027 | M3035 Espanhol.
Manual de Recarga HP P3005 | M3027 | M3035 Espanhol.Manual de Recarga HP P3005 | M3027 | M3035 Espanhol.
Manual de Recarga HP P3005 | M3027 | M3035 Espanhol.
 
Manual de Recarga HP CP1215 | 1518 Espanhol.
Manual de Recarga HP CP1215 | 1518 Espanhol.Manual de Recarga HP CP1215 | 1518 Espanhol.
Manual de Recarga HP CP1215 | 1518 Espanhol.
 
Xerox dc212- 214
Xerox dc212- 214Xerox dc212- 214
Xerox dc212- 214
 
Manual de Recarga HP CP3525 Espanhol.
Manual de Recarga HP CP3525 Espanhol.Manual de Recarga HP CP3525 Espanhol.
Manual de Recarga HP CP3525 Espanhol.
 
Manual de Recarga Okidata C5500 | 6100 Espanhol
Manual de Recarga Okidata C5500 | 6100 EspanholManual de Recarga Okidata C5500 | 6100 Espanhol
Manual de Recarga Okidata C5500 | 6100 Espanhol
 
Ensamble y desensamble
Ensamble y desensambleEnsamble y desensamble
Ensamble y desensamble
 
Ensamble y desensamble
Ensamble y desensambleEnsamble y desensamble
Ensamble y desensamble
 
Manual de Recarga HP CP6015 Espanhol.
Manual de Recarga HP CP6015 Espanhol.Manual de Recarga HP CP6015 Espanhol.
Manual de Recarga HP CP6015 Espanhol.
 
Ensamble y desensamble
Ensamble y desensambleEnsamble y desensamble
Ensamble y desensamble
 
Ensamble y desensambl ef
Ensamble y desensambl efEnsamble y desensambl ef
Ensamble y desensambl ef
 
Guia mantenimiento pc
Guia mantenimiento pcGuia mantenimiento pc
Guia mantenimiento pc
 
Guia mantenimiento pc
Guia mantenimiento pcGuia mantenimiento pc
Guia mantenimiento pc
 
Ensamble y desensamble
Ensamble y desensambleEnsamble y desensamble
Ensamble y desensamble
 
Manual de Recarga HP P4015 | CC364 Espanhol.
Manual de Recarga HP P4015 | CC364 Espanhol.Manual de Recarga HP P4015 | CC364 Espanhol.
Manual de Recarga HP P4015 | CC364 Espanhol.
 
Guia 6 de_laboratorio_impresoras_laser
Guia 6 de_laboratorio_impresoras_laserGuia 6 de_laboratorio_impresoras_laser
Guia 6 de_laboratorio_impresoras_laser
 

Mehr von Valejet

Manual de Recarga Xerox Phaser 6130 1320 106R01278
Manual de Recarga Xerox Phaser 6130 1320 106R01278Manual de Recarga Xerox Phaser 6130 1320 106R01278
Manual de Recarga Xerox Phaser 6130 1320 106R01278Valejet
 
Manual de Recarga Xerox Phaser 5400 13R495
Manual de Recarga Xerox Phaser 5400 13R495Manual de Recarga Xerox Phaser 5400 13R495
Manual de Recarga Xerox Phaser 5400 13R495Valejet
 
Manual de Recarga Xerox N24 N32 N40 113R173
Manual de Recarga Xerox N24 N32 N40 113R173Manual de Recarga Xerox N24 N32 N40 113R173
Manual de Recarga Xerox N24 N32 N40 113R173Valejet
 
Manual de Recarga Xerox 4118 6R1278
Manual de Recarga Xerox 4118 6R1278Manual de Recarga Xerox 4118 6R1278
Manual de Recarga Xerox 4118 6R1278Valejet
 
Manual de Recarga Sharp 1010 | 1020 | 1041 | 1200 | 1220 | 1250 | AL1000
Manual de Recarga Sharp  1010 | 1020 | 1041 | 1200 | 1220 | 1250 | AL1000Manual de Recarga Sharp  1010 | 1020 | 1041 | 1200 | 1220 | 1250 | AL1000
Manual de Recarga Sharp 1010 | 1020 | 1041 | 1200 | 1220 | 1250 | AL1000Valejet
 
Manual de Recarga Samsung 4725ELS | 4725F | 4725FN | SCX-4725
Manual de Recarga Samsung 4725ELS | 4725F | 4725FN | SCX-4725Manual de Recarga Samsung 4725ELS | 4725F | 4725FN | SCX-4725
Manual de Recarga Samsung 4725ELS | 4725F | 4725FN | SCX-4725Valejet
 
Manual de Recarga Samsung ML 1440 | ML 1450 | ML 1451 | ML 6040 | ML6060D6
Manual de Recarga Samsung ML 1440 | ML 1450 | ML 1451 | ML 6040 | ML6060D6Manual de Recarga Samsung ML 1440 | ML 1450 | ML 1451 | ML 6040 | ML6060D6
Manual de Recarga Samsung ML 1440 | ML 1450 | ML 1451 | ML 6040 | ML6060D6Valejet
 
Manual de Recarga Samsung 5050 | 5100 | 5500 | ML 5000
Manual de Recarga Samsung 5050 | 5100 | 5500 | ML 5000Manual de Recarga Samsung 5050 | 5100 | 5500 | ML 5000
Manual de Recarga Samsung 5050 | 5100 | 5500 | ML 5000Valejet
 
Manual de Recarga Samsung ML 1710 | SCX 4216 | SCX 4200 | SCX 4100
Manual de Recarga Samsung ML 1710 | SCX 4216 | SCX 4200 | SCX 4100Manual de Recarga Samsung ML 1710 | SCX 4216 | SCX 4200 | SCX 4100
Manual de Recarga Samsung ML 1710 | SCX 4216 | SCX 4200 | SCX 4100Valejet
 
Manual de Recarga Samsung ML 1650 | ML 1651N | ML1650D8
Manual de Recarga Samsung ML 1650 | ML 1651N | ML1650D8Manual de Recarga Samsung ML 1650 | ML 1651N | ML1650D8
Manual de Recarga Samsung ML 1650 | ML 1651N | ML1650D8Valejet
 
Manual de Recarga Samsung ML 1630 | SCX 4500
Manual de Recarga Samsung ML 1630 | SCX 4500Manual de Recarga Samsung ML 1630 | SCX 4500
Manual de Recarga Samsung ML 1630 | SCX 4500Valejet
 
Manual de Recarga Samsung ML 1210 | ML 1510 | ML 1610 | ML 1710 | ML 2010
Manual de Recarga Samsung ML 1210 | ML 1510 | ML 1610 | ML 1710 | ML 2010Manual de Recarga Samsung ML 1210 | ML 1510 | ML 1610 | ML 1710 | ML 2010
Manual de Recarga Samsung ML 1210 | ML 1510 | ML 1610 | ML 1710 | ML 2010Valejet
 
Manual de Recarga Samsung CLP 600
Manual de Recarga Samsung CLP 600Manual de Recarga Samsung CLP 600
Manual de Recarga Samsung CLP 600Valejet
 
Manual de Recarga Samsung CLP 600 CLP 650
Manual de Recarga Samsung CLP 600 CLP 650Manual de Recarga Samsung CLP 600 CLP 650
Manual de Recarga Samsung CLP 600 CLP 650Valejet
 
Manual de Recarga Samsung CLP 500 CLP 550
Manual de Recarga Samsung CLP 500 CLP 550Manual de Recarga Samsung CLP 500 CLP 550
Manual de Recarga Samsung CLP 500 CLP 550Valejet
 
Manual de Recarga Ricoh Type 1135
Manual de Recarga Ricoh Type 1135Manual de Recarga Ricoh Type 1135
Manual de Recarga Ricoh Type 1135Valejet
 
Manual de Recarga Okidata C7000 | C7100 Espanhol
Manual de Recarga Okidata C7000 | C7100 EspanholManual de Recarga Okidata C7000 | C7100 Espanhol
Manual de Recarga Okidata C7000 | C7100 EspanholValejet
 
Manual de Recarga Okidata C5100 Espanhol
Manual de Recarga Okidata C5100 EspanholManual de Recarga Okidata C5100 Espanhol
Manual de Recarga Okidata C5100 EspanholValejet
 
Manual de Recarga Okidata C3400
Manual de Recarga Okidata C3400Manual de Recarga Okidata C3400
Manual de Recarga Okidata C3400Valejet
 
Manual de Recarga Okidata 9000 Espanhol
Manual de Recarga Okidata 9000 EspanholManual de Recarga Okidata 9000 Espanhol
Manual de Recarga Okidata 9000 EspanholValejet
 

Mehr von Valejet (20)

Manual de Recarga Xerox Phaser 6130 1320 106R01278
Manual de Recarga Xerox Phaser 6130 1320 106R01278Manual de Recarga Xerox Phaser 6130 1320 106R01278
Manual de Recarga Xerox Phaser 6130 1320 106R01278
 
Manual de Recarga Xerox Phaser 5400 13R495
Manual de Recarga Xerox Phaser 5400 13R495Manual de Recarga Xerox Phaser 5400 13R495
Manual de Recarga Xerox Phaser 5400 13R495
 
Manual de Recarga Xerox N24 N32 N40 113R173
Manual de Recarga Xerox N24 N32 N40 113R173Manual de Recarga Xerox N24 N32 N40 113R173
Manual de Recarga Xerox N24 N32 N40 113R173
 
Manual de Recarga Xerox 4118 6R1278
Manual de Recarga Xerox 4118 6R1278Manual de Recarga Xerox 4118 6R1278
Manual de Recarga Xerox 4118 6R1278
 
Manual de Recarga Sharp 1010 | 1020 | 1041 | 1200 | 1220 | 1250 | AL1000
Manual de Recarga Sharp  1010 | 1020 | 1041 | 1200 | 1220 | 1250 | AL1000Manual de Recarga Sharp  1010 | 1020 | 1041 | 1200 | 1220 | 1250 | AL1000
Manual de Recarga Sharp 1010 | 1020 | 1041 | 1200 | 1220 | 1250 | AL1000
 
Manual de Recarga Samsung 4725ELS | 4725F | 4725FN | SCX-4725
Manual de Recarga Samsung 4725ELS | 4725F | 4725FN | SCX-4725Manual de Recarga Samsung 4725ELS | 4725F | 4725FN | SCX-4725
Manual de Recarga Samsung 4725ELS | 4725F | 4725FN | SCX-4725
 
Manual de Recarga Samsung ML 1440 | ML 1450 | ML 1451 | ML 6040 | ML6060D6
Manual de Recarga Samsung ML 1440 | ML 1450 | ML 1451 | ML 6040 | ML6060D6Manual de Recarga Samsung ML 1440 | ML 1450 | ML 1451 | ML 6040 | ML6060D6
Manual de Recarga Samsung ML 1440 | ML 1450 | ML 1451 | ML 6040 | ML6060D6
 
Manual de Recarga Samsung 5050 | 5100 | 5500 | ML 5000
Manual de Recarga Samsung 5050 | 5100 | 5500 | ML 5000Manual de Recarga Samsung 5050 | 5100 | 5500 | ML 5000
Manual de Recarga Samsung 5050 | 5100 | 5500 | ML 5000
 
Manual de Recarga Samsung ML 1710 | SCX 4216 | SCX 4200 | SCX 4100
Manual de Recarga Samsung ML 1710 | SCX 4216 | SCX 4200 | SCX 4100Manual de Recarga Samsung ML 1710 | SCX 4216 | SCX 4200 | SCX 4100
Manual de Recarga Samsung ML 1710 | SCX 4216 | SCX 4200 | SCX 4100
 
Manual de Recarga Samsung ML 1650 | ML 1651N | ML1650D8
Manual de Recarga Samsung ML 1650 | ML 1651N | ML1650D8Manual de Recarga Samsung ML 1650 | ML 1651N | ML1650D8
Manual de Recarga Samsung ML 1650 | ML 1651N | ML1650D8
 
Manual de Recarga Samsung ML 1630 | SCX 4500
Manual de Recarga Samsung ML 1630 | SCX 4500Manual de Recarga Samsung ML 1630 | SCX 4500
Manual de Recarga Samsung ML 1630 | SCX 4500
 
Manual de Recarga Samsung ML 1210 | ML 1510 | ML 1610 | ML 1710 | ML 2010
Manual de Recarga Samsung ML 1210 | ML 1510 | ML 1610 | ML 1710 | ML 2010Manual de Recarga Samsung ML 1210 | ML 1510 | ML 1610 | ML 1710 | ML 2010
Manual de Recarga Samsung ML 1210 | ML 1510 | ML 1610 | ML 1710 | ML 2010
 
Manual de Recarga Samsung CLP 600
Manual de Recarga Samsung CLP 600Manual de Recarga Samsung CLP 600
Manual de Recarga Samsung CLP 600
 
Manual de Recarga Samsung CLP 600 CLP 650
Manual de Recarga Samsung CLP 600 CLP 650Manual de Recarga Samsung CLP 600 CLP 650
Manual de Recarga Samsung CLP 600 CLP 650
 
Manual de Recarga Samsung CLP 500 CLP 550
Manual de Recarga Samsung CLP 500 CLP 550Manual de Recarga Samsung CLP 500 CLP 550
Manual de Recarga Samsung CLP 500 CLP 550
 
Manual de Recarga Ricoh Type 1135
Manual de Recarga Ricoh Type 1135Manual de Recarga Ricoh Type 1135
Manual de Recarga Ricoh Type 1135
 
Manual de Recarga Okidata C7000 | C7100 Espanhol
Manual de Recarga Okidata C7000 | C7100 EspanholManual de Recarga Okidata C7000 | C7100 Espanhol
Manual de Recarga Okidata C7000 | C7100 Espanhol
 
Manual de Recarga Okidata C5100 Espanhol
Manual de Recarga Okidata C5100 EspanholManual de Recarga Okidata C5100 Espanhol
Manual de Recarga Okidata C5100 Espanhol
 
Manual de Recarga Okidata C3400
Manual de Recarga Okidata C3400Manual de Recarga Okidata C3400
Manual de Recarga Okidata C3400
 
Manual de Recarga Okidata 9000 Espanhol
Manual de Recarga Okidata 9000 EspanholManual de Recarga Okidata 9000 Espanhol
Manual de Recarga Okidata 9000 Espanhol
 

Kürzlich hochgeladen

Avances tecnológicos del siglo XXI y ejemplos de estos
Avances tecnológicos del siglo XXI y ejemplos de estosAvances tecnológicos del siglo XXI y ejemplos de estos
Avances tecnológicos del siglo XXI y ejemplos de estossgonzalezp1
 
How to use Redis with MuleSoft. A quick start presentation.
How to use Redis with MuleSoft. A quick start presentation.How to use Redis with MuleSoft. A quick start presentation.
How to use Redis with MuleSoft. A quick start presentation.FlorenciaCattelani
 
EVOLUCION DE LA TECNOLOGIA Y SUS ASPECTOSpptx
EVOLUCION DE LA TECNOLOGIA Y SUS ASPECTOSpptxEVOLUCION DE LA TECNOLOGIA Y SUS ASPECTOSpptx
EVOLUCION DE LA TECNOLOGIA Y SUS ASPECTOSpptxJorgeParada26
 
Innovaciones tecnologicas en el siglo 21
Innovaciones tecnologicas en el siglo 21Innovaciones tecnologicas en el siglo 21
Innovaciones tecnologicas en el siglo 21mariacbr99
 
Resistencia extrema al cobre por un consorcio bacteriano conformado por Sulfo...
Resistencia extrema al cobre por un consorcio bacteriano conformado por Sulfo...Resistencia extrema al cobre por un consorcio bacteriano conformado por Sulfo...
Resistencia extrema al cobre por un consorcio bacteriano conformado por Sulfo...JohnRamos830530
 
PROYECTO FINAL. Tutorial para publicar en SlideShare.pptx
PROYECTO FINAL. Tutorial para publicar en SlideShare.pptxPROYECTO FINAL. Tutorial para publicar en SlideShare.pptx
PROYECTO FINAL. Tutorial para publicar en SlideShare.pptxAlan779941
 
Modulo-Mini Cargador.................pdf
Modulo-Mini Cargador.................pdfModulo-Mini Cargador.................pdf
Modulo-Mini Cargador.................pdfAnnimoUno1
 
Refrigerador_Inverter_Samsung_Curso_y_Manual_de_Servicio_Español.pdf
Refrigerador_Inverter_Samsung_Curso_y_Manual_de_Servicio_Español.pdfRefrigerador_Inverter_Samsung_Curso_y_Manual_de_Servicio_Español.pdf
Refrigerador_Inverter_Samsung_Curso_y_Manual_de_Servicio_Español.pdfvladimiroflores1
 
pruebas unitarias unitarias en java con JUNIT
pruebas unitarias unitarias en java con JUNITpruebas unitarias unitarias en java con JUNIT
pruebas unitarias unitarias en java con JUNITMaricarmen Sánchez Ruiz
 
Avances tecnológicos del siglo XXI 10-07 eyvana
Avances tecnológicos del siglo XXI 10-07 eyvanaAvances tecnológicos del siglo XXI 10-07 eyvana
Avances tecnológicos del siglo XXI 10-07 eyvanamcerpam
 
EL CICLO PRÁCTICO DE UN MOTOR DE CUATRO TIEMPOS.pptx
EL CICLO PRÁCTICO DE UN MOTOR DE CUATRO TIEMPOS.pptxEL CICLO PRÁCTICO DE UN MOTOR DE CUATRO TIEMPOS.pptx
EL CICLO PRÁCTICO DE UN MOTOR DE CUATRO TIEMPOS.pptxMiguelAtencio10
 

Kürzlich hochgeladen (11)

Avances tecnológicos del siglo XXI y ejemplos de estos
Avances tecnológicos del siglo XXI y ejemplos de estosAvances tecnológicos del siglo XXI y ejemplos de estos
Avances tecnológicos del siglo XXI y ejemplos de estos
 
How to use Redis with MuleSoft. A quick start presentation.
How to use Redis with MuleSoft. A quick start presentation.How to use Redis with MuleSoft. A quick start presentation.
How to use Redis with MuleSoft. A quick start presentation.
 
EVOLUCION DE LA TECNOLOGIA Y SUS ASPECTOSpptx
EVOLUCION DE LA TECNOLOGIA Y SUS ASPECTOSpptxEVOLUCION DE LA TECNOLOGIA Y SUS ASPECTOSpptx
EVOLUCION DE LA TECNOLOGIA Y SUS ASPECTOSpptx
 
Innovaciones tecnologicas en el siglo 21
Innovaciones tecnologicas en el siglo 21Innovaciones tecnologicas en el siglo 21
Innovaciones tecnologicas en el siglo 21
 
Resistencia extrema al cobre por un consorcio bacteriano conformado por Sulfo...
Resistencia extrema al cobre por un consorcio bacteriano conformado por Sulfo...Resistencia extrema al cobre por un consorcio bacteriano conformado por Sulfo...
Resistencia extrema al cobre por un consorcio bacteriano conformado por Sulfo...
 
PROYECTO FINAL. Tutorial para publicar en SlideShare.pptx
PROYECTO FINAL. Tutorial para publicar en SlideShare.pptxPROYECTO FINAL. Tutorial para publicar en SlideShare.pptx
PROYECTO FINAL. Tutorial para publicar en SlideShare.pptx
 
Modulo-Mini Cargador.................pdf
Modulo-Mini Cargador.................pdfModulo-Mini Cargador.................pdf
Modulo-Mini Cargador.................pdf
 
Refrigerador_Inverter_Samsung_Curso_y_Manual_de_Servicio_Español.pdf
Refrigerador_Inverter_Samsung_Curso_y_Manual_de_Servicio_Español.pdfRefrigerador_Inverter_Samsung_Curso_y_Manual_de_Servicio_Español.pdf
Refrigerador_Inverter_Samsung_Curso_y_Manual_de_Servicio_Español.pdf
 
pruebas unitarias unitarias en java con JUNIT
pruebas unitarias unitarias en java con JUNITpruebas unitarias unitarias en java con JUNIT
pruebas unitarias unitarias en java con JUNIT
 
Avances tecnológicos del siglo XXI 10-07 eyvana
Avances tecnológicos del siglo XXI 10-07 eyvanaAvances tecnológicos del siglo XXI 10-07 eyvana
Avances tecnológicos del siglo XXI 10-07 eyvana
 
EL CICLO PRÁCTICO DE UN MOTOR DE CUATRO TIEMPOS.pptx
EL CICLO PRÁCTICO DE UN MOTOR DE CUATRO TIEMPOS.pptxEL CICLO PRÁCTICO DE UN MOTOR DE CUATRO TIEMPOS.pptx
EL CICLO PRÁCTICO DE UN MOTOR DE CUATRO TIEMPOS.pptx
 

Manual de Recarga Lexmark E120 Espanhol.

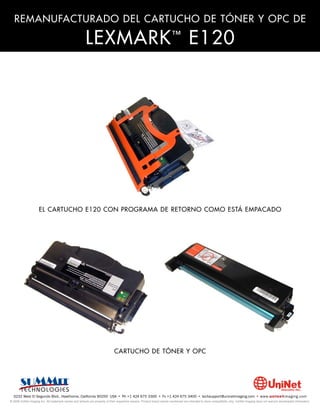
  • 1. REMANUFACTURADO DEL CARTUCHO DE TÓNER Y OPC DE LEXMARK E120 ™ EL CARTUCHO E120 CON PROGRAMA DE RETORNO COMO ESTÁ EMPACADO CARTUCHO DE TÓNER Y OPC 3232 West El Segundo Blvd., Hawthorne, California 90250 USA • Ph +1 424 675 3300 • Fx +1 424 675 3400 • techsupport@uninetimaging.com • www.uninetimaging.com © 2009 UniNet Imaging Inc. All trademark names and artwork are property of their respective owners. Product brand names mentioned are intended to show compatibility only. UniNet Imaging does not warrant downloaded information.
  • 2. REMANUFACTURADO DEL CARTUCHO DE TONER Y OPC DE LEXMARK E120 REMANUFACTURADO DEL CARTUCHO DE TÓNER Y OPC DE LEXMARK E120 Por Mike Josiah La Lexmark E120 fue introducida en febrero del 2006. La E120 es una nueva máquina de bajo costo que de ciertas maneras es un tanto extraña, pero trabaja bien y en la mayoría de los casos, se venderá bien. Las nuevas máquinas se basan en un motor Lexmark de 19-ppm, 600-dpi. Con un precio de mercado alrededor de los US$149 (para Marzo del 2006), estas máquinas deberán ser muy populares. Como en todos los cartuchos Lexmark actuales, cuentan con un chip que bloquea el cartucho después de usarlo en las versiones del Programa de Retorno. El código en este chip es nuevo y al momento de escribir esto, se está trabajando sobre chips nuevos de reemplazo, así que pregunte a su proveedor si ya están disponibles. También existen diferentes cartuchos para ser usados en las diferentes regiones del mundo. Todavía es muy pronto para afirmarlo con certeza, pero tal como sucede con otras series nuevas de Lexmark, creo sería prudente decir que la diferencie está en los chips. Esta máquina usa dos cartuchos, el de tóner y la unidad de OPC. El cartucho de tóner está catalogado para durar 2,000 páginas y la unidad de OPC parar 25,000. En este momento no hay cartuchos de alto rendimiento disponibles. Estas máquinas también cuentan con cartuchos dentro del Programa de Retorno (Prebate) estándar y todos tienen chips. Los chips del Programa de Retorno deben ser reemplazados en cada ciclo. Las unidades de OPC son iguales en todo el mundo. Hemos incluido en este artículo instrucciones para el cartucho de OPC y les adelanto que es muy fácil de hacer. Se siguen haciendo pruebas, así que al momento que escribo esto, no sabemos si un OPC o cuchilla de limpieza durarán otro ciclo. Pruebas preliminares indican que sí, pero no se han corrido suficientes pruebas como para afirmarlo con certeza. No existen chips en las unidades de OPC. Las unidades de OPC se instalan y retiran desde la parte trasera de la impresora y los cartuchos de tóner desde el frente. Es un poco extraño, aunque comprensible, que estas máquinas tienen una pequeña huella. Me pregunto cuál será la reacción del cliente ante esto. Las máquinas nuevas se envían con un cartucho de inicio de 500 páginas, de modo que los nuevos propietarios estarán rápidamente buscando cartuchos. CARTUCHOS PARA USARSE EN LOS EE.UU. Y CANADÁ No de Parte Tipo Rendimento Precio de Lista 12026XW Cartucho OPC 25.000 US$ 40* 12015SA Cartucho Programa de Retorno 2.000 US$ 86,75* 12035SA Cartucho Estándar 2.000 US$ 66,75* CARTUCHOS PARA USARSE EN EUROPA, MEDIO ORIENTE Y ÁFRICA No de Parte Tipo Rendimento 12026XW Cartucho OPC 25.000 12016SE Cartucho Programa de Retorno 2.000 12036SE Cartucho Estándar 2.000 3232 West El Segundo Blvd., Hawthorne, California 90250 USA • Ph +1 424 675 3300 • Fx +1 424 675 3400 • techsupport@uninetimaging.com • www.uninetimaging.com © 2009 UniNet Imaging Inc. All trademark names and artwork are property of their respective owners. Product brand names mentioned are intended to show compatibility only. UniNet Imaging does not warrant downloaded information.
  • 3. REMANUFACTURADO DEL CARTUCHO DE TONER Y OPC DE LEXMARK E120 CARTUCHOS PARA USARSE EN LA REGIÓN ASIA PACIFICO No de Parte Tipo Rendimento 12026XW Cartucho OPC 25.000 12017SR Cartucho Programa de Retorno 2.000 12037SR Cartucho Estándar 2.000 CARTUCHOS PARA USARSE EN LATINO AMÉRICA No de Parte Tipo Rendimento 12026XW Cartucho OPC 25.000 12018SL Cartucho Programa de Retorno 2.000 12038SL Cartucho Estándar 2.000 *(Precios en US para Marzo del 2006) Las únicas máquinas que hemos encontrado hasta ahora basadas en este motor son la Lexmark E120 y la E120n. La forma de hacer impresiones de prueba así como la solución de problemas se mencionará al final de éste artículo. HERRAMIENTAS NECESARIAS 1. Aspiradora adecuada para tóner 2. Desarmador común chico 3. Desarmador de cabeza Phillips 4. Pinzas de punta MATERIAL NECESARIO 1. Tóner para Lexmark E120 2. Trapos para tóner magnético 3. Paños de algodón sintético libres de pelusas de 4 pulgadas 4. Alcohol al 99 porciento isopropílico puro 5. Motas de algodón 3232 West El Segundo Blvd., Hawthorne, California 90250 USA • Ph +1 424 675 3300 • Fx +1 424 675 3400 • techsupport@uninetimaging.com • www.uninetimaging.com © 2009 UniNet Imaging Inc. All trademark names and artwork are property of their respective owners. Product brand names mentioned are intended to show compatibility only. UniNet Imaging does not warrant downloaded information.
  • 4. REMANUFACTURADO DEL CARTUCHO DE TONER Y OPC DE LEXMARK E120 REMANUFACTURADO DEL CARTUCHO DE TONER 2. Del lado izquierdo, retire los dos tornillos pequeños y la 1. Retire el tapón de llenado del lado derecho del cartucho cubierta de engranajes. (con el rodillo revelador viendo al lado contrario de usted). Limpie todo el remanente de tóner de la cavidad. 3. Retire el tornillo central en la cubierta del rodillo revelador. 3232 West El Segundo Blvd., Hawthorne, California 90250 USA • Ph +1 424 675 3300 • Fx +1 424 675 3400 • techsupport@uninetimaging.com • www.uninetimaging.com © 2009 UniNet Imaging Inc. All trademark names and artwork are property of their respective owners. Product brand names mentioned are intended to show compatibility only. UniNet Imaging does not warrant downloaded information.
  • 5. REMANUFACTURADO DEL CARTUCHO DE TONER Y OPC DE LEXMARK E120 4. Levante la cubierta del rodillo revelador desde el centro y retírela. Tenga cuidado de no dañar los pines de plástico que están en la cubierta. 5. Retire el resorte de la cuchilla dosificadora. 3232 West El Segundo Blvd., Hawthorne, California 90250 USA • Ph +1 424 675 3300 • Fx +1 424 675 3400 • techsupport@uninetimaging.com • www.uninetimaging.com © 2009 UniNet Imaging Inc. All trademark names and artwork are property of their respective owners. Product brand names mentioned are intended to show compatibility only. UniNet Imaging does not warrant downloaded information.
  • 6. REMANUFACTURADO DEL CARTUCHO DE TONER Y OPC DE LEXMARK E120 6. Ésta se soltará. Levántela con cuidado observando el resorte de contacto del lado derecho. También tenga precaución de no dañar la cuchilla de retención que está localizada bajo la cuchilla dosificadora. 7. En el engranaje largo negro de dirección, hay una arandela de sujeción de tipo estrella embonada a presión en el eje. Con un pequeño par de cortadores de cable, corte la arandela vieja y retírela. Puede intentar doblar las diferentes patitas de la arandela pero es un método tardado y es muy probable que al menos una patita se rompa y de todos modos la arandela quede inservible y tenga que cambiarla. 3232 West El Segundo Blvd., Hawthorne, California 90250 USA • Ph +1 424 675 3300 • Fx +1 424 675 3400 • techsupport@uninetimaging.com • www.uninetimaging.com © 2009 UniNet Imaging Inc. All trademark names and artwork are property of their respective owners. Product brand names mentioned are intended to show compatibility only. UniNet Imaging does not warrant downloaded information.
  • 7. REMANUFACTURADO DEL CARTUCHO DE TONER Y OPC DE LEXMARK E120 8. Retire el engranaje largo negro de dirección. Asegúrese de no perder la pequeña arandela plana que estaba debajo de la arandela tipo estrella. 9. En el engranaje blanco del rodillo revelador, ponga las puntas del cortador de cable dentro de los dos pequeños orificios. Luego gire el engranaje para que el eje de metal quede en el orificio del lado opuesto del engranaje. Retire el engranaje. 3232 West El Segundo Blvd., Hawthorne, California 90250 USA • Ph +1 424 675 3300 • Fx +1 424 675 3400 • techsupport@uninetimaging.com • www.uninetimaging.com © 2009 UniNet Imaging Inc. All trademark names and artwork are property of their respective owners. Product brand names mentioned are intended to show compatibility only. UniNet Imaging does not warrant downloaded information.
  • 8. REMANUFACTURADO DEL CARTUCHO DE TONER Y OPC DE LEXMARK E120 10. Retire todos los engranajes. 11. Retire los tres tornillos y la base de alineación de engranajes. 3232 West El Segundo Blvd., Hawthorne, California 90250 USA • Ph +1 424 675 3300 • Fx +1 424 675 3400 • techsupport@uninetimaging.com • www.uninetimaging.com © 2009 UniNet Imaging Inc. All trademark names and artwork are property of their respective owners. Product brand names mentioned are intended to show compatibility only. UniNet Imaging does not warrant downloaded information.
  • 9. REMANUFACTURADO DEL CARTUCHO DE TONER Y OPC DE LEXMARK E120 12. Con un desarmador pequeño plano de joyero, libere el 13. Gire el buje del rodillo revelador de modo que la parte candado metálico del buje del rodillo revelador. plástica quede viendo hacia arriba. 14. Saque el rodillo revelador del cartucho. 15. Limpie cualquier residuo de tóner de la cavidad. Asegúrese de que la cuchilla de retención del rodillo revelador El buje saldrá junto con el rodillo. no se dañe. Limpie el rodillo revelador pasándole un trapo limpio y que no suelte pelusas. Seguimos haciendo pruebas, pero por ahora, no use ningún solvente químico para limpiarlo. 3232 West El Segundo Blvd., Hawthorne, California 90250 USA • Ph +1 424 675 3300 • Fx +1 424 675 3400 • techsupport@uninetimaging.com • www.uninetimaging.com © 2009 UniNet Imaging Inc. All trademark names and artwork are property of their respective owners. Product brand names mentioned are intended to show compatibility only. UniNet Imaging does not warrant downloaded information.
  • 10. REMANUFACTURADO DEL CARTUCHO DE TONER Y OPC DE LEXMARK E120 16. Reinstale el rodillo revelador. Gire el buje de plástico para que embone en su lugar. Instale la barra metálica aseguradora; note que el lado izquierdo embona en el pequeño orificio y el derecho en el cubo. 17. Si la pequeña base metálica se cae del buje, reemplácela. 18. Instale la base del eje del engranaje y los tres tornillos. 3232 West El Segundo Blvd., Hawthorne, California 90250 USA • Ph +1 424 675 3300 • Fx +1 424 675 3400 • techsupport@uninetimaging.com • www.uninetimaging.com © 2009 UniNet Imaging Inc. All trademark names and artwork are property of their respective owners. Product brand names mentioned are intended to show compatibility only. UniNet Imaging does not warrant downloaded information.
  • 11. REMANUFACTURADO DEL CARTUCHO DE TONER Y OPC DE LEXMARK E120 19. Instale los engranajes. El engranaje grande con el eje largo embona en la barra agitadora de tóner dentro de la cavidad. Gírelo unas cuantas veces y escuche para asegurarse que embono adecuadamente. En el engranaje largo de dirección, asegúrese de que la arandela plana está en su lugar e instale la nueva arandela de sujeción de tipo estrella. Asegúrese de que la arandela de sujeción está bien presionada contra la base del engranaje. 20. Finalmente, en el engranaje de dirección del rodillo reve- 21. Limpie la cuchilla dosificadora e instálela. Asegúrese de lador, gire el engranaje desde los dos pequeños orificios mien- que la base metálica del lado derecho embona en su ranura. tras sujeta en su lugar al rodillo revelador. Esto asegurara en engranaje en el eje. 3232 West El Segundo Blvd., Hawthorne, California 90250 USA • Ph +1 424 675 3300 • Fx +1 424 675 3400 • techsupport@uninetimaging.com • www.uninetimaging.com © 2009 UniNet Imaging Inc. All trademark names and artwork are property of their respective owners. Product brand names mentioned are intended to show compatibility only. UniNet Imaging does not warrant downloaded information.
  • 12. REMANUFACTURADO DEL CARTUCHO DE TONER Y OPC DE LEXMARK E120 22. Instale el resorte de la cuchilla dosificadora. 23. Instale la cubierta del rodillo revelador y el tornillo. 24. Instale la cubierta del engranaje y los dos tornillos. 25. Llene la cavidad con tóner E120 y remplace el tapón de llenado. 3232 West El Segundo Blvd., Hawthorne, California 90250 USA • Ph +1 424 675 3300 • Fx +1 424 675 3400 • techsupport@uninetimaging.com • www.uninetimaging.com © 2009 UniNet Imaging Inc. All trademark names and artwork are property of their respective owners. Product brand names mentioned are intended to show compatibility only. UniNet Imaging does not warrant downloaded information.
  • 13. REMANUFACTURADO DEL CARTUCHO DE TONER Y OPC DE LEXMARK E120 26. Remplace el chip. 27. Si tiene la cubierta protectora para el cartucho, envuelva el cartucho como se indica. Esta cubierta protege al rodillo revelador de posibles daños. Se encuentran en desarrollo cubiertas aftermarket. REMANUFACTURADO DEL CARTUCHO DEL OPC 29. Deslice hacia afuera el eje del OPC. 28. Del lado de los engranajes en la unidad de OPC, retire la rondana tipo e del borde del eje del OPC. 3232 West El Segundo Blvd., Hawthorne, California 90250 USA • Ph +1 424 675 3300 • Fx +1 424 675 3400 • techsupport@uninetimaging.com • www.uninetimaging.com © 2009 UniNet Imaging Inc. All trademark names and artwork are property of their respective owners. Product brand names mentioned are intended to show compatibility only. UniNet Imaging does not warrant downloaded information.
  • 14. REMANUFACTURADO DEL CARTUCHO DE TONER Y OPC DE LEXMARK E120 30. Retire el OPC. 31. Desde el lado derecho (engranajes), retire el ensamble del PCR (el resorte que lo sostiene debe salir con él). 32. Retire los dos tornillos de la cuchilla de limpieza y la 33. Limpie y cubra con su lubricante preferido el borde de la cuchilla. Limpie el tóner de desperdicio. cuchilla de limpieza. Instale la cuchilla y los dos tornillos. 3232 West El Segundo Blvd., Hawthorne, California 90250 USA • Ph +1 424 675 3300 • Fx +1 424 675 3400 • techsupport@uninetimaging.com • www.uninetimaging.com © 2009 UniNet Imaging Inc. All trademark names and artwork are property of their respective owners. Product brand names mentioned are intended to show compatibility only. UniNet Imaging does not warrant downloaded information.
  • 15. REMANUFACTURADO DEL CARTUCHO DE TONER Y OPC DE LEXMARK E120 34. Limpie el PCR e instálelo. Asegúrese de que el esparcidor negro esté orientado hacia atrás de la cuchilla de limpieza como se muestra. 35. Cubra el OPC con su lubricante preferido e instale el OPC. Asegúrese de que el resorte pequeño del lado contrario a los engranajes embone dentro de la ranura en la pared plástica del cartucho. 3232 West El Segundo Blvd., Hawthorne, California 90250 USA • Ph +1 424 675 3300 • Fx +1 424 675 3400 • techsupport@uninetimaging.com • www.uninetimaging.com © 2009 UniNet Imaging Inc. All trademark names and artwork are property of their respective owners. Product brand names mentioned are intended to show compatibility only. UniNet Imaging does not warrant downloaded information.
  • 16. REMANUFACTURADO DEL CARTUCHO DE TONER Y OPC DE LEXMARK E120 36. Instale el eje del OPC desde el lado de los engranajes del OPC. Instale la rondana tipo e. COMO IMPRIMIR PÁGINAS DE PRUEBA 1. Con la impresora en estado READY, presione el botón CONTINUE. 2. La impresora imprimirá la página MENU SETTINGS y si está configurada, también la página NETWORK SETUP. DATOS DE DEFECTOS REPETITIVOS Rodillo Alimentador de Toner 18.7 mm PCR (Cartucho OPC) 29.0 mm Rodillo Colector de Papel (Impresora) 30.4 mm Rodillo Revelador (Cartucho de toner) 36.1 mm Rodillo Exterior de Fusión (Impresora) 37.9 mm Rodillo de Transferencia (Impresora) 48.1 mm Rodillo Alimentador de Papel (Impresora) 56.2 mm Rodillo Superior de Fusión (Impresora) 62.2 mm Drum (Cartucho OPC) 74.1 mm Rodillo Pickup (Impresora) 92.4 mm 3232 West El Segundo Blvd., Hawthorne, California 90250 USA • Ph +1 424 675 3300 • Fx +1 424 675 3400 • techsupport@uninetimaging.com • www.uninetimaging.com © 2009 UniNet Imaging Inc. All trademark names and artwork are property of their respective owners. Product brand names mentioned are intended to show compatibility only. UniNet Imaging does not warrant downloaded information.
  • 17. REMANUFACTURADO DEL CARTUCHO DE TONER Y OPC DE LEXMARK E120 CÓDIGOS DE ERROR DE LA IMPRESORA (SECUENCIAS DE LUCES) La E120 no cuenta con display LCD. Tiene un panel de luces para indicar los problemas. Algunos de los más comunes están enlistados abajo. En algunos casos, la misma secuencia de una luz encendida y otra titilando tendrá diferentes significados. La diferencia es el número de veces que titila la luz. Las primeras cuatro secuencias enlistadas le darán una buena idea de a qué me refiero: 1. Luz de ERROR Encendida / Luz de READY Titilando (4x): Región del cartucho equivocada. Se ha instalado el chip equivocado en el cartucho. 2. Luz de ERROR Encendida / Luz de READY Titilando (3x): Cartucho defectuoso; No hay Cartucho. 3. Luz de ERROR Encendida / Luz de READY Titilando (1x): Puerta abierta. 4. Luz de ERROR Encendida / Luz de READY Titilando (8x): Tóner bajo. 5. Luz de ERROR Titilando / Luz de READY Titilando (1x): Reemplace la unidad de OPC. Algunas secuencias de luces cuentan con secuencia primaria y secundaria. La secuencia secundaria puede ser vista presionando el botón CONTINUE rápidamente dos veces. Este es un ejemplo de la secuencia primaria y secundaria: 1. Primaria: Luz de TONER BAJO Encendida / Luz de ERROR Titilando 2. Secundaria: Luz de TONER BAJO Encendida / Luz de PAPEL ATORADO Titilando / Luz de ERROR Encendida: Cartucho defectuoso / No hay Cartucho. La mayoría del resto tiene que ver con diferentes modos de papel atorado. Todos están enlistados en el manual del usuario. 3232 West El Segundo Blvd., Hawthorne, California 90250 USA • Ph +1 424 675 3300 • Fx +1 424 675 3400 • techsupport@uninetimaging.com • www.uninetimaging.com © 2009 UniNet Imaging Inc. All trademark names and artwork are property of their respective owners. Product brand names mentioned are intended to show compatibility only. UniNet Imaging does not warrant downloaded information.