

Empfohlen
Empfohlen
Weitere ähnliche Inhalte
Was ist angesagt?
Was ist angesagt? (18)
Ähnlich wie BT Decor 2500
Ähnlich wie BT Decor 2500 (20)
Mehr von Telephones Online
Mehr von Telephones Online (20)
Kürzlich hochgeladen
Kürzlich hochgeladen (20)
BT Decor 2500
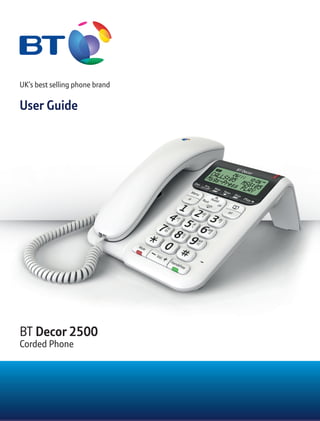
- 1. UK’s best selling phone brand User Guide BT Decor 2500 Corded Phone
- 2. 2 If you experience any problems, please visit www.bt.com/producthelp Got everything? • BT Decor 2500 telephone with handset attached • Telephone line cord (pre-installed) • Mains power adaptor (item code 061129) • User Guide This User Guide provides you with all the information you need to get the most from your phone. Before you make your first call you will need to set up your phone. Follow the simple instructions in ‘Getting started’, on the next few pages. Need help? If you need any assistance with your phone or wish to view answers to Frequently Asked Questions, please www.bt.com/producthelp IMPORTANT Only use the telephone line cord supplied. Hearing aid? The BT Decor 2500 is fitted with an inductive coupler so it is compatible with hearings aids.
- 3. 3 If you experience any problems, please visit www.bt.com/producthelp In this guide Getting started Location 5 Connect the mains power adaptor 5 Connect the telephone line 5 Set the time and date on the display 6 Getting to know your phone 7 Using your phone Make a call 9 Call timer 9 Preparatory dialling 9 End a call 9 Receive a call 9 Handsfree 10 Make a call in handsfree mode 10 Answer a call in handsfree mode 10 Switch to handsfree mode during a call 10 Adjust the handsfree volume 10 Redial 10 View numbers in the redial list 10 Redial a number from the redial list 11 Save a redial number to the directory 11 Delete a number in the redial list 11 Delete the entire redial list 12 Mute 12 Directory Store a name and number in the directory 13 View/dial an entry in the directory 13 Insert a pause in a number 13 Edit an entry in the directory 14 Delete an entry in the directory 14 Delete the entire directory 14 Caller Display and the calls list Calls list 15 New calls 15 View the Calls list 15 Dial an entry in the Calls list 15 Copy a number in the Calls list to the directory 16 Delete an entry in the Calls list 16 Delete the entire Calls list 16 1571 Voice mail indication To access your voice mail messages 17 Turn 1571 on/off 17 BT Services Pre-stored BT Services numbers 18 View and dial a pre-stored BT Service 18 Add a new service 18 Edit a service 19 Delete a service 19 Restore all services 19
- 4. 4 If you experience any problems, please visit www.bt.com/producthelp Settings Ringer volume 20 Ringer melody 20 Display contrast 20 Using the answering machine Switch the answering machine on/off 21 Set the answer mode 21 Outgoing messages 21 Record your own outgoing message 22 Play/check your outgoing message 22 Reinstate the pre-recorded outgoing message 22 Message playback 23 Play messages 23 Call screening 23 Record a memo 23 Answer settings 24 Answer delay 24 Record time 24 Timed answer 25 Switch timed answer on and off 25 Message alert 25 Remote access 26 Switch remote access on or off 26 Set/change the remote access security code 26 If you forgot to switch your answering machine on before leaving home 27 Operating your answering machine remotely 27 General information Safety 28 Cleaning 28 Product disposal instructions 28 Guarantee 29 Technical information 29 How many telephones can I have? 29 Switchboard compatibility 29 Switchboard external line access code 30 To insert a pause 30 Recall 30 R&TTE 30 Declaration of Conformance 30 User Guide formats 30
- 5. 5 If you experience any problems, please visit www.bt.com/producthelp IMPORTANT Only use the telephone line cord supplied otherwise your telephone may not work. Using your telephone on a Broadband line? If this product is to be used on a broadband line then you must ensure that it is connected via an ADSL microfilter. Using this product on a Broadband line without an ADSL microfilter may cause problems with this product and your Broadband service. BT ADSL microfilters are available at www.bt.com/shop and most shops also stock ADSL filters. Getting started Location You need to place your BT Decor 2500 within 3 metres of a telephone line socket so that the cable will reach. Connect the mains power adaptor 1. Plug the mains power adaptor into the power socket on the underside of the base. Plug the other end into the mains socket and switch the power on. Connect the telephone line 1. Plug the telephone line cord into the telephone wall socket. Power socket Telephone line socket
- 6. 6 If you experience any problems, please visit www.bt.com/producthelp If you have subscribed to a Caller Display service the time and date will be set automatically when you receive your first call. Set the time and date on the display You will need to set the correct time and date so that you know when each answering machine message was received. The time and date will be shown on the display when in standby. The default time format is 24 hour, but you can change this to 12 hour if you want to, see below for instructions. Set the time 1. Press the button. Answer Machine is displayed. 2. Press or to scroll to Date and Time and press . 3. Time is displayed, press . 4. The first digit of the time flashes. Use the keypad to enter the time, using 2 digits for the hour and 2 digits for the minutes. If the 12 hour format is set you can use the or buttons to alternate between AM and PM. Press to confirm. Set the date 1. Press the button. Answer Machine is displayed. 2. Press or to scroll to Date and Time and press . 3. Time is displayed, press to display Date and press . 4. The current date is displayed with the first digit flashing. Use the keypad to enter the date using 2 digits for the day, 2 for the month and 4 for the year. Press to confirm. Set the time format 1. Press the button. Answer Machine is displayed. 2. Press or to scroll to Date and Time and press . 3. Time is displayed, press to display Time Format and press . 4. Press or to select either 12 hour or 24 hour and press . Your BT Decor 2500 is now ready for use The default setting is 00:00 The default setting is 01-01-2011. The default setting is 24 hour.
- 7. 7 If you experience any problems, please visit www.bt.com/producthelp Getting to know your phone Menu Press to access the menu. When viewing the Calls list or directory, press to access the sub menu list. 3 Line display In standby, displays the date and time, messages received and any calls in the calls list. Calls light Red light flashes to indicate an incoming call. Directory Use to store and dial directory entries. Back Press to move back to the previous menu screen or press and hold to return to the standby display screen. Redial/Up Press to dial the last number called. Use to scroll up through the menu, directory or Calls list. Calls/Down Press to access the Calls list. Use to scroll down through the menu, directory or Calls list. OK Press to confirm a menu selection. Mute (with LED indicator) During a call, mutes your voice so your caller cannot hear you. The red LED illuminates when the mute function is on. Vol -/+ Use to increase or decrease the handset or loudspeaker volume. Handsfree (with LED indicator) Press to use handsfree mode. The green LED illuminates when the handsfree function is in use. BT Use to access a range of useful pre-stored numbers and further BT Calling Features. R (Recall) Used with switchboard services and certain BT Calling Features. Microphone When using handsfree your voice is projected through the base microphone. Use to record your outgoing message and memos.
- 8. 8 If you experience any problems, please visit www.bt.com/producthelp Del During playback, press to delete the message being played. After playback, press to delete all messages. Skip (back) Press once to repeat the message or press and hold to skip back to the previous message. Skip (forward) Press to skip forward to the next message. Ans. On off Use to switch the answering machine on and off. Stop Stop message playback. Play Press to play messages. During playback, press to pause a message, press again to resume playback. Answering machine buttons
- 9. 9 If you experience any problems, please visit www.bt.com/producthelp When the handset is off the hook or Handsfree is in use the display will show the icon. Using your phone Making and receiving calls Make a call 1. Lift the handset and wait for the dial tone (or press the button). 2. Enter the telephone number. Call timer Your phone automatically times the duration of every call. The timer will activate 5 seconds into a call and will continue to display the time until 5 seconds after the call has ended. Preparatory dialling Preparatory dialling lets you view the telephone number on the display before it’s dialled out. A maximum of 32 digits will be displayed. 1. Enter the telephone number first. If you make a mistake, press the button to delete. 2. Lift the handset, or press the button to dial the number. End a call 1. Replace the handset on the base or if using handsfree mode, press the button. Receive a call 1. When you receive a call, the telephone rings and the red incoming call LED will flash. Simply pick up the handset to answer the call or press the button to answer in handsfree mode. If you have subscribed to a Caller Display Service the caller’s number (and name if stored in the directory) will be displayed when you receive a call, see page 15.
- 10. 10 If you experience any problems, please visit www.bt.com/producthelp There are 5 loudspeaker volumes. If a redial number is longer than 16 digits, the first 16 digits will be displayed for about 3 seconds and then the screen will scroll to display the remaining digits. After 3 seconds the screen reverts back and continues to scroll back and forth until you change the display information. Handsfree Handsfree mode lets you talk to your caller without holding the handset. It also allows other people in the room to listen to your conversation over the loudspeaker. The green LED on the button will illuminate when handsfree mode is in use and the icon will be displayed on the screen. Make a call in handsfree mode 1. Press the button and then enter the telephone number to be dialled. Answer a call in handsfree mode 1. When the phone rings, press the button to answer the call. Switch to handsfree mode during a call 1. During a call, press the button and replace the handset on the base. 2. To switch back to using the handset, simply pick the handset up. Adjust the handsfree volume Use the buttons to increase or decrease the loudspeaker volume. Redial The last 10 telephone numbers called are saved in the redial list. Each redial number can be up to 32 digits. If the last 6 digits match a number stored in the directory, the name of the entry will be displayed as well. You can select any of the numbers to redial, delete or copy to the directory. View numbers in the redial list 1. Press the button. The last number dialled will be shown on the display. 2. Use the or buttons to scroll through and view the numbers.
- 11. 11 If you experience any problems, please visit www.bt.com/producthelp For help with entering names, see page 13. Use the button to delete any incorrect digits/characters. Redial a number from the redial list 1. Press the button. 2. Use the or buttons to scroll through to the number you want. 3. Lift the handset or press and the number will be dialled. Or 1. Lift the handset or press , then press the button. 2. Use the or buttons to scroll through to the number you want. 3. Press the button to dial the number. Save a redial number to the directory 1. Press the button. 2. Use the or buttons to scroll to the number you want. 3. Press the button. Save Number is displayed. Press . 4. Enter Name is displayed. Use the keypad to enter the name and press . 5. Enter Number is displayed followed by the redial number you wish to save, press . Entry saved is displayed. Delete a number in the redial list 1. Press the button. 2. Use the or buttons to scroll to the number you want to delete. 3. Press the button. Save Number is displayed. 4. Press to scroll to Delete Entry and press . 5. The display will show Delete Entry? Are you sure? Press to confirm. The display will show Entry Deleted.
- 12. 12 If you experience any problems, please visit www.bt.com/producthelp Delete the entire redial list 1. Press the button, then the button. 2. Use the or buttons to scroll to Delete All and press . 3. The display will show Delete All? Are you sure? Press to confirm. The display will show Entries Deleted. Mute When on a call use the mute feature to talk to someone in the same room without your caller hearing. 1. During a call, press and release the Mute button to mute the handset microphone. The red LED on the mute button will illuminate to indicate that the mute feature is on. Your caller now cannot hear you speak. 2. To switch mute off, press and release the Mute button again. The LED will turn off and your caller will now be able to hear you.
- 13. 13 If you experience any problems, please visit www.bt.com/producthelp Numbers stored without a name will be displayed before alphabetical entries. Press and hold to exit the directory and return to standby at any time. Directory full If you try to store a new entry and the directory is full, Directory Full will be displayed. You will need to delete entries before you can add new ones, see page 14. Entering names Use the keypad to enter the letters shown on the buttons, e.g. to store TOM: Press once to enter T. Press three times to enter O. Press once to enter M. Writing tips If you make a mistake, press to delete the last digit or character. Use the and buttons to move the cursor. To enter a space, press once. Press repeatedly to enter the following punctuation symbols: & - ’ . , 1 Press to toggle between upper and lower case characters. If the next letter is on the same button that you have just pressed, wait until the cursor moves to the right before trying to enter it. Directory You can store 100 names and telephone numbers in the directory. Each name stored can be up to 16 characters and each number up to 24 digits. Directory entries are stored alphabetically. Store a name and number in the directory 1. Press the button. If the directory is empty, the display will show Directory Empty for 2 seconds and then Add Entry. Press the button. Or, if there are already entries stored, the first alphabetical entry will be displayed. Press the button, Add New Entry will be displayed. Press the button. 2. Enter Name is displayed. Use the keypad to enter the name then press . 3. Enter Number is displayed. Use the keypad to enter the telephone number and press . Entry Saved is displayed. View/dial an entry in the directory 1. Press the button, then use the or buttons to scroll through to the entry you want. Or, to search alphabetically, enter the first letter of the name you want e.g. for Emma, press twice to display all entries beginning with the letter E, then scroll using or to the entry you want. 2. When the entry you want is displayed, press to confirm then pick up the handset or press the button to dial. Insert a pause in a number Press the button in the place where you want a pause inserted in the number.
- 14. 14 If you experience any problems, please visit www.bt.com/producthelp If the telephone number is longer than 16 digits, the first 16 digits will be displayed for about 3 seconds and then the screen will scroll to display the remaining digits. After 3 seconds the screen reverts back and continues to scroll back and forth until you change the display information. Edit an entry in the directory 1. Press the button, then use the or buttons to scroll to the entry you want. 2. Press the button. Add New Entry is displayed. 3. Press to scroll to Edit Entry and press . 4. The name will be displayed. Use the button to delete and the keypad to enter new characters. When the name is correct, press . 5. The number is displayed. Use the button to delete and the keypad to enter new digits. When the number is correct, press . 6. Entry Saved is displayed briefly and then the screen will return to the directory list. Delete an entry in the directory 1. Press the button, then use the or buttons to scroll to the entry you want. 2. Press the button. Add New Entry is displayed. 3. Press to scroll to Delete Entry and press . 4. Delete entry? Are You Sure? is displayed, press to confirm. 5. Entry Deleted is displayed briefly and then the screen will return to the directory list. Delete the entire directory 1. Press the button. 2. Press the button. Add New Entry is displayed. 3. Press to scroll to Delete All and press . 4. Delete All? Are You Sure? is displayed, press to confirm. 5. Entries Deleted is displayed briefly.
- 15. 15 If you experience any problems, please visit www.bt.com/producthelp IMPORTANT To use Caller Display you must first subscribe to the service from your network provider. A quarterly fee may be payable. For more information on BT’s Calling Features call BT free on 0800 800 150. To ensure the caller’s name is displayed, make sure you have stored the full telephone number, including the dialling code in the directory. Caller information is not available With some incoming calls, the telephone number of the caller is not available and cannot therefore be displayed. In this case your BT Decor 2500 provides you with some explanatory information: Unavailable – the number is unavailable. No Number – the caller has withheld their number. International – International call. Payphone – call is from a payphone. Ringback – the call is from a number you set as a ringback number. If the telephone number is longer than 16 digits, the first 16 digits will be displayed for about 3 seconds and then the screen will scroll to display the remaining digits. After 3 seconds the screen reverts back and continues to scroll back and forth until you change the display information. Caller Display and the Calls list If you have subscribed to a Caller Display service, you will be able to see your caller’s number on the display (provided it is not withheld) prior to answering the call. If the caller’s name matches an entry you’ve stored in the directory, you will also see the caller’s name on the display. Calls list The Calls list holds the telephone numbers (and names if there is a match with the directory) of the last 30 received calls along with the date and time the call was received. The Calls list can display numbers up to 16 digits and names up to 16 characters. Calls are listed newest to oldest. When the list is full and a new call is received, the oldest entry will be deleted automatically. New calls When you have a new call in the Calls list i.e. a call you did not answer, the NEW icon will flash on the screen. When all new calls have been viewed, the NEW icon will turn off. Only unanswered calls are indicated as NEW calls. View the Calls list 1. Press the button. Calls are listed in order from the newest to the oldest. 2. Press or to scroll through the list. Dial an entry in the Calls list 1. Press the button to view the list. 2. Press or to scroll to the entry you want. 3. To dial the displayed number, lift the handset or press or .
- 16. 16 If you experience any problems, please visit www.bt.com/producthelp For help with entering names, see page 13. Use to delete incorrect digits. Press to cancel the Delete operation. Copy a number in the Calls list to the directory 1. Press the button to view the list. 2. Press or to scroll to the entry you want. 3. Press the button. Save Number will be displayed, press . 4. Use the keypad to enter a name and press . 5. Use the keypad to edit the number if necessary and then press . Entry Saved is displayed. Delete an entry in the Calls list 1. Press the button to view the list. 2. Press or to scroll to the entry you want. 3. Press the button. Save Number will be displayed. 4. Press to scroll to Delete entry and press . 5. Delete entry? Are You Sure? is displayed, press to confirm. 6. Entry Deleted is displayed and then the screen will return to the Calls list. Delete the entire Calls list 1. Press the button to view the list. 2. Press the button. Save Number will be displayed. 3. Press to scroll to Delete All and press . 4. Delete All? Are You Sure? is displayed, press to confirm (or to cancel). 5. Entries Deleted is displayed and then the screen will return to standby.
- 17. 17 If you experience any problems, please visit www.bt.com/producthelp The message waiting indicator is activated by a stuttered dial tone which you can hear when you pick up your phone. BT Calling Features, such as Call Diversion and Call Barring use a stuttered dial tone so therefore will cause the message waiting indicator to flash even if no messages have been left. IMPORTANT After an incoming call, or after lifting the handset, your BT Decor 2500 will check the line for any messages. You will experience at least a 2 minute delay before the message waiting indicator light flashes if messages have been left. 1571 Voice mail indication If you have subscribed to BT Answer 1571 or Call Minder, your BT Decor 2500 will indicate when you have received a voice mail by the display showing Msgs – Dial 1571. BT Answer 1571 and Call Minder are invisible answer machines located at your local exchange which will take messages when you are out, engaged on another call or on the Internet. To enable your BT Decor 2500 to let you know you have messages you must first subscribe to a BT messaging service: BT Answer 1571 is a basic answering service and is completely free of charge. To activate the service, dial Freefone 0800 003 800. For information on Call Minder, call BT on Freefone 0800 800 150. This is a chargeable service. To access your voice mail messages 1. Lift the handset or press . 2. Press the button. BT Answer 1571 is displayed, press to dial the service. Turn 1571 on/off 1. Press the button. Answer Machine is displayed. 2. Press or to scroll to Message Waiting and press . 3. Press or to select either ON or OFF and press . Completed is displayed.
- 18. 18 If you experience any problems, please visit www.bt.com/producthelp The new service entered can be up to 16 characters and 24 digits. BT Services By selecting the BT Services menu using the button you can access a range of useful pre-stored numbers and further BT Calling Features. There are 2 empty memory locations so you can add 2 extra services of your choice and you can also delete or edit the pre-stored numbers and add further numbers of your choice. Pre-stored BT Services numbers: BT Answer 1571 – to dial BT’s network answering service BT 118500 – to dial BT Directory Enquiries Divert On – to switch Call Divert On Divert Off - to switch Call Divert Off Check Divert – to check the status of your Call Divert Call wait on – to switch Call Waiting On Call wait off - to switch Call Waiting Off Check call wait– to check the status of your Call Waiting View and dial a pre-stored BT service 1. Lift the handset or press . 2. Press the button. BT Answer 1571 is displayed. 3. Press or to scroll to the service you want to dial and then press . The number will be dialled automatically. Add a new service 1. Press the button. BT Answer 1571 is displayed. 2. Press or to scroll to Service 1 (or 2) and press . 3. Use the keypad to enter a name for the new service and press . 4. Use the keypad to enter the telephone number and press . Entry Saved is displayed. IMPORTANT To use BT Services and BT Calling Features you must first subscribe (if required) to the relevant service from your network provider. A quarterly fee may be payable. For more details on BT’s Calling Features, call BT free on 0800 800 150. If you are not connected to the BT network, some of these services may not be available. Please contact your network provider. Call Diversion services may allow other divert options. Check with your network provider for details. For further information, see the BT Calling Features user guide supplied when you subscribe to the services of your choice.
- 19. 19 If you experience any problems, please visit www.bt.com/producthelp Edit a service 1. Press the button. BT Answer 1571 is displayed. 2. Press or to scroll to the service you want to edit and press . 3. Edit Entry? is displayed, press . 4. Use the button to delete and the keypad to enter new characters and press . 5. Use the button to delete and the keypad to enter new digits and press . Entry Saved is displayed. Delete a service 1. Press the button. BT Answer 1571 is displayed. 2. Press or to scroll to the service you want to delete and press . 3. Press or to scroll to Deleted Entry? and press . The display will show Entry Deleted. Restore all services 1. Press the button. BT Answer 1571 is displayed. 2. Press the button. Add service is displayed. 3. Press or to scroll to Restore All and press .
- 20. 20 If you experience any problems, please visit www.bt.com/producthelp Settings Ringer volume There are 3 volume settings to choose from: High, Low or Off. The default setting is High. 1. Press the button. Answer Machine is displayed. 2. Press or to scroll to Ringer Volume and press . 3. The current volume is displayed and heard. Press or to select the ringer volume you want. On each press you will hear an example ring. 4. Press to confirm. Ringer melody There are 3 standard ringer and 6 polyphonic ringer melodies to choose from. 1. Press the button. Answer Machine is displayed. 2. Press or to scroll to Ringer Tone and press . 3. The current setting is displayed and heard. Press or to select the ringer melody you want. On each press you will hear an example ring. 4. Press to confirm. Display contrast There are 8 display contrast levels to choose from. The default setting is Level 4. 1. Press the button. Answer Machine is displayed. 2. Press or to scroll to Contrast and press . 3. The current setting is displayed. Press or to select the contrast level you want and press to confirm.
- 21. 21 If you experience any problems, please visit www.bt.com/producthelp The default setting is Answer & Record. Answer & Record The pre-recorded Answer & Record outgoing message, that allows your caller to leave a message, is: “Hello, your call cannot be taken at the moment, so please leave your message after the tone”. Answer Only The pre-recorded Answer Only outgoing message where the caller hears an announcement but cannot leave a message, is: “Hello, your call cannot be taken at the moment, so please call later”. Using the answering machine Your BT Decor 2500 can digitally record up to 30 minutes of messages. It comes with two pre-recorded outgoing messages, Answer & Record or Answer Only, alternatively you can record your own version of each. When first plugged in, your BT Decor 2500 answering machine is ready to go. It is set to answer calls and record messages. If you have not already set the time and date, you will need to do this so that you will know when each message was received, see page 6. Switch the answering machine on/off 1. Press the button to switch between Answer On and Answer Off. The selected setting will be announced. Set the answer mode There are 2 answer modes to choose from: Answer & Record and Answer Only. When set to Answer & Record, your caller will hear the outgoing message and be invited to leave a message. When set to Answer Only, the caller will hear the outgoing message but will not be allowed to leave a message. 1. Press the button. Answer Machine will be displayed, press . 2. Answer Mode will be displayed, press . 3. The current mode will be displayed. Use the or buttons to scroll to the setting you want, either Answer & Record or Answer Only and press . Outgoing messages The outgoing message is the message a caller first hears when the answering machine picks up their call. There are 2 pre-recorded outgoing messages to choose from (see note right), or you can record your own.
- 22. 22 If you experience any problems, please visit www.bt.com/producthelp The display will show OGM Recording while you record your own outgoing message. Record your own outgoing message Your own outgoing message can be up to 2 minutes long. It will replace the pre-recorded outgoing message. You can re-instate the pre-recorded message if you want to, see below. 1. Press the button. Answer Machine will be displayed, press . 2. Answer Mode will be displayed, press to scroll to Outgoing Message and press . 3. Scroll to display Record OGM and press and hold down the button. 4. After the beep, speak your message clearly into the microphone on the base (located on the bottom right of base). 5. To end recording, release the button. Your message will be played back to you. Play/check your outgoing message 1. Press the button. Answer Machine will be displayed, press . 2. Answer Mode will be displayed, press to scroll to Outgoing Message and press . 3. Play OGM will be displayed, press . Your outgoing message will be played. Reinstate the pre-recorded outgoing message This will delete the outgoing message you recorded and the pre- recorded outgoing message will be re-instated. 1. Press the button. Answer Machine will be displayed, press . 2. Answer Mode will be displayed, press to scroll to Outgoing Message and press . 3. Play OGM will be displayed, press . Your outgoing message will start playing, press to delete it. The pre-recorded message will be played.
- 23. 23 If you experience any problems, please visit www.bt.com/producthelp Message playback When you receive new messages, the display will show Msgs – Press Play. The red LED will flash and you will hear a beep if the Message alert is switched on (see page 25). The total number of messages will also be displayed (new and old), i.e. if you have 3 messages MSG:03. Play messages 1. Press . Your messages will be played. During playback, you can: Press to pause the message, press again to resume playback. Press to decrease or increase the loudspeaker volume. Press to skip forward and play the next message. Press once to repeat the message being played or press twice to skip back to the previous message. Press to delete the message being played. Press to stop message playback and return to standby. When all messages have been played back, you will hear, “End of message” and the display will show Press Delete to Delete All. If you want to delete all the messages, press , or to keep the messages just let the machine return to standby on it’s own. Call screening When the answering machine is taking a call, you can listen to your caller leaving a message over the loudspeaker and decide if you want to take the call in person. 1. To speak to the caller, simply lift the handset and recording will stop immediately. Record a memo You can record a memo on the answering machine for other members of the house or users to hear. Memos are played back in the same way as normal answering machine messages. 1. Press the button. Answer Machine will be displayed, press .
- 24. 24 If you experience any problems, please visit www.bt.com/producthelp For compatibility with BT 1571 or another voicemail service it is advisable to keep to the default setting or lower. Time Saver When you ring in to access your messages remotely, if your answering machine is set to Time Saver and you have new messages it will answer after 2 rings. If you do not have any new messages, it will answer after 5 rings. This means you can hang up after the 3rd ring knowing you have no new messages, saving you time and the cost of the call. 2. Answer Mode will be displayed, press to scroll to Record Memo and press and hold down the button. 3. After the beep, speak your message clearly into the microphone on the base (located on the bottom right of base). 4. To end recording, release the button. Answer settings Answer delay Answer delay sets the number of times your BT Decor 2500 will ring before the answer machine picks up the call and starts playing the outgoing message. You can change the setting to between 2-9 rings or Time Saver. The default setting is 5 rings. 1. Press the button. Answer Machine will be displayed, press . 2. Answer Mode will be displayed, press to scroll to Answer Settings and press . 3. Answer Delay will be displayed, press . 4. The current setting will be displayed. Use the or buttons to scroll to the setting you want (2-9 rings or Time Saver) and press to confirm. Record time You can set the time you want to allocate for a message to be recorded. You can choose 1, 2, or 3 minutes or unlimited. The default is 3 minutes. 1. Press the button. Answer Machine will be displayed, press . 2. Answer Mode will be displayed, press to scroll to Answer Settings and press . 3. Answer Delay will be displayed, scroll to display Recording Time and press . 4. The current setting will be displayed. Use the or buttons to scroll to the setting you want (1-3 minutes or unlimited) and press to confirm.
- 25. 25 If you experience any problems, please visit www.bt.com/producthelp Timed answer You can set the answering machine to be turned on and off at selected times. You can select: Daily, Mon to Fri, Saturday or Sunday. Select timed answer set or timed answer off 1. Press the button. Answer Machine will be displayed, press . 2. Answer Mode will be displayed, press to scroll to Answer Settings and press . 3. Answer Delay will be displayed, scroll to display Timed Answer and press . 4. The current setting will be displayed. Use the or buttons to select either Timed Ans SET or Timed Ans OFF and press to confirm. 5. If you select Timed Ans SET then Set ON time is displayed. Enter the hh:mm using the keypad. If the clock has been set to 12 hour mode then use the button to select AM or PM. Press to confirm. 6. Set OFF time is displayed. Enter the hh:mm using the keypad. If the clock has been set to 12 hour mode then use the button to select AM or PM. Press to confirm. 7. Frequency Daily is displayed use the or buttons to scroll to the frequency setting you want, either Daily, Mon to Fri, Saturday or Sunday and press to confirm. Completed is then displayed. The screen will then display Timed Answer SET. Message alert When you receive a new answering machine message you will hear an alert beep. You can switch this alert on or off. 1. Press the button. Answer Machine will be displayed, press . 2. Answer Mode will be displayed, press to scroll to Answer Settings and press . 3. Answer Delay will be displayed, scroll to display Message Alert and press . The default setting is on.
- 26. 26 If you experience any problems, please visit www.bt.com/producthelp The default setting is on. 4. The current setting will be displayed. Use the or buttons to select either On or Off and press to confirm. Remote access When switched on, you can call in from another phone to listen to your messages and operate your answering machine. Switch remote access on or off 1. Press the button. Answer Machine will be displayed, press . 2. Answer Mode will be displayed, press to scroll to Answer Settings and press . 3. Answer Delay will be displayed, scroll to display Remote Access and press . 4. The current setting will be displayed. Use the or buttons to select either On or Off and press to confirm. Set/change the remote access security code The default code is 000 but you can change this to a 3-digit code of your choice to help prevent unauthorised access to your answering machine. 1. Press the button. Answer Machine will be displayed, press . 2. Answer Mode will be displayed, press to scroll to Answer Settings and press . 3. Answer Delay will be displayed, scroll to display Remote Access and press . 4. Press to scroll to Set Remote PIN and press . 5. Enter Old PIN will be displayed. Enter the old code (default code is 000) and press . 6. Enter New PIN will be displayed. Enter a 3-digit code of your choice and press . 7. Re-Enter PIN will be displayed. Enter the new code again and press . The display will show Completed and then return to standby.
- 27. 27 If you experience any problems, please visit www.bt.com/producthelp If you enter the security code incorrectly twice, you will hear. “Thank you for calling”, and your answering machine will hang up. To change the 3-digit security code, see page 26. If you forgot to switch your answering machine on before leaving home 1. Dial your telephone number from another phone and let it ring. After 20 rings the answering machine will switch on. 2. You can hang up and the answering machine will switch on and answer calls. Operating your answering machine remotely If you answering machine is switched on you can then operate it remotely. 1. Dial your telephone number. When you hear your outgoing message, press . You will hear 2 beeps and then, “Please enter your security code”. 2. Enter your 3-digit security code (the default code is 000). 3. If you have new messages, you will hear, “You have (x) new messages”, and your messages will start to play. If there are no new messages, you will hear, “You have no new messages”. You can now use the keypad to operate your answering machine. Follow the announcements and instructions you hear. To hear main menu, press To play/pause all messages, press To switch between Answer Record and Answer only mode, press To skip back during messages, press To delete during messages, press To skip forward during messages, press To play outgoing message, press To record a new outgoing message, press To set answer on or off, press
- 28. 28 If you experience any problems, please visit www.bt.com/producthelp General information Safety - Only use the telephone line cord supplied otherwise your telephone may not work. - Do not open the handset or base of the telephone. This could expose you to high voltages or other risks. - Do not stand your product on carpets or other surfaces that generate fibres, or place it in locations preventing the free flow of air over its surfaces. - Do not expose to direct sunlight. - Do not submerge any part of your product in water and do not use it in damp conditions, such as bathrooms. - Do not expose your product to fire, explosive or other hazardous conditions. Cleaning Clean the telephone with a damp (not wet) cloth, or an anti-static wipe. Never use household polish as this will damage the product. Never use a dry cloth as this may cause a static shock. Product disposal instructions The symbol shown here and on the product means that the product is classed as Electrical or Electronic Equipment and should not be disposed with other household or commercial waste at the end of its working life. The Waste of Electrical and Electronic Equipment (WEEE) Directive (2002/96/EC) has been put in place to recycle products using best available recovery and recycling techniques to minimize the impact on the environment, treat any hazardous substances and avoid the increasing landfill. Product disposal instructions for residential users When you have no further use for it, please remove any batteries and dispose of them and the product as per your local authority’s recycling processes. For more information please contact your local authority or the retailer where the product was purchased.
- 29. 29 If you experience any problems, please visit www.bt.com/producthelp Product disposal instructions for business users Business users should contact their suppliers and check the terms and conditions of the purchase contract and ensure that this product is not mixed with other commercial waste for disposal. Guarantee Your BT Decor 2500 is guaranteed for a period of 12 months from the date of purchase. Subject to the terms listed below, the guarantee will provide for the repair of, or at BT’s or its agent’s discretion, the option to replace the BT Decor 2500 or any component thereof, which is identified as faulty or below standard, or as a result of inferior workmanship or materials. Products over 28 days old from the date of purchase may be replaced with a refurbished or repaired product. Within the 12 month guarantee period: Prior to returning your product, please visit www.bt.com/producthelp to view answers to Frequently Asked Questions. Outside the 12 month guarantee period: If your product needs repair after the guarantee period has ended, the repair must meet the approval requirements for connection to the telephone network. We recommend that you contact BT’s approved repair agent Discount Communications Ltd on 0800 980 8999 or a local qualified repairer. Returning your phone Where possible, pack the product in its original packaging. Please remember to include all parts, including the telephone line cord and the mains power adaptor. For guarantee purposes proof of purchase is required so please keep your receipt. Technical information How many telephones can I have? All items of telephone equipment have a Ringer Equivalence Number (REN), which is used to calculate the number of items which may be connected to any one telephone line. Your BT Decor 2500 has a REN of 1. A total REN of 4 is allowed. If the total REN of 4 is exceeded, the telephones may not ring. With different telephone types there is no guarantee of ringing, even when the REN is less than 4. Switchboard compatibility This product is intended for use within the UK for connection to the public telephone network and compatible switchboards which support tone dialling and timed break recall. If in doubt, please consult your network service provider.
- 30. 30 If you experience any problems, please visit www.bt.com/producthelp Switchboard external line access code When connected to an internal switchboard, you may need to enter an access code e.g. 9 to get an outside line. So that the switchboard has time to pick up an outside line, you may also need to add a Pause after the access code. A Pause lasts 2.5 seconds. To insert a pause 1. When storing a number in the directory, press the button in the place you want a pause inserted. Recall The button is used when connected to certain switchboards e.g. to transfer calls and for some BT Calling Features or other services available from your network provider. R&TTE This product is intended for use within the UK for connection to the public telephone network and compatible switchboards. This equipment complies with the essential requirements for the Radio Equipment and Telecommunications Terminal Equipment Directive 1999/5/EC. Declaration of Conformance Hereby, BT declares that this BT Decor 2500 is in compliance with the essential requirements and other relevant provisions of Directive 1999/5/EC. If you would like a copy of the Declaration of Conformance, please visit www.bt.com/producthelp User Guide formats This document is also available in other formats, such as Large print, Braille and Audio CD. If you would like a copy, please visit www.bt.com/producthelp
- 31. Offices worldwide The services described in this publication are subject to availability and may be modified from time to time. Services and equipment are provided subject to British Telecommunications plc’s respective standard conditions of contract. Nothing in this publication forms any part of any contract. © British Telecommunications plc 2012. Registered Office: 81 Newgate Street, London EC1A 7AJ. Registered in England No. 1800000. Printed in China. Designed and produced by The Art & Design Partnership Ltd. BT Decor 2500 (12/12) Issue 2 For a Better Future We’re always looking to make our products last longer and use less power, so we don’t have such a big impact on the environment. To find out about what we are doing, visit bt.com/betterfuture