08448380779 Call Girls In Diplomatic Enclave Women Seeking Men
Mudbox tiger bust
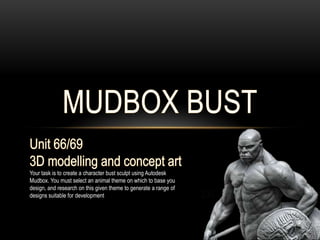
1. Your task is to create a character bust sculpt using Autodesk
Mudbox. You must select an animal theme on which to base you
design, and research on this given theme to generate a range of
designs suitable for development
2. When we were tasked with creating a mudbox bust I
automatically had a idea as to what I wanted to do, I had
a interest in creating a tough looking warrior like
tiger, the tiger would be a anthromorphic tiger with some
human features but mostly be made of the main tiger
features.
The first thing I did was to research reference images
that I could use, I needed pictures from all sides of a
tiger so I could create an accurate representation of
what it would look like. And also looked at some of the
textures I would need to use to create the tiger bust.
3. To continue researching I decided that
going onto mudbox and creating
textured and painted sphere I wanted
to capture see what the colour would
look like and how I could paint the bust
making it look realistic.
tigers colour scheme are:
-orange
-white
-black
So it is these colours that I will be
focusing on, there will be certain areas
where the colour is more distinguished
but I will turn up the opacity for these
areas.
4. The colour of the eyes however are a mixture of
colours, each different tigers can either have a light
green eyes or a light amber colour, the colours used
will mostly be
-amber
-black
-brown
Or
-light green
-black
-Light blue
6. My tiger is supposed to be a warrior or at least look like a warrior, I may if possible
add armour to the tiger to make it look much more like the warrior I intend it to
be, the armour would have to fit the tiger so I believe that armour plating would be
the better choice as it can mould to the tigers form and curves, Modelling the armour
would present a challenge and would be quite time consuming in terms of that I
would have to model the original tiger and then model the armour afterwards and this
could possibly mess up the entire model if done badly.
Here is a sketch I drew to give the look of the type of armour
that tiger would wear, the plating allows for movement and
running while giving protection
http://darkheavens-marketplace.webs.com/AR006_H031_Option.jpg
http://www.knightarmor.biz/knight-armor-images/european-knights-helm-8108.jpg
7.
8. I next went on to start sketching
the tiger in feral form to get a feel
for how the animal structure is
made up, the focus of this project
was the face so I spent most of
my time perfecting drawing the
face of the tiger, I went from
drawing with pencil to slowly
moving on to biro in order to
distinguish the main features on
the tiger and make it more bold,
doing this would also give an
amount of difficulty to drawing it
and so would take more time to do
and thus would force me to spend
more time on the minor details.
9. After sketching we moved on
to using a new program,
‘Autodesk sketchpad’, this was
a new system that I had not
used before, but the result’s
were pretty good none the
less, I used a reference image
in the background as
something to base it off and
something I can use to
correctly place the colour
scheme as well as minor and
major features I would
otherwise miss.
http://2.bp.blogspot.com/-HcAtFALFwQM/TcKPI9e82BI/AAAAAAAAAAc/cS-DoHh6BOk/s1600/tiger.jpg
10. I wanted to practise making a bust
before doing the full thing so I
made a prototype tiger bust which
is meant to focus on the texture
and colour of the bust mostly as
well as some textures and
modelling techniques, the overall
look of the tiger was reasonably
good, but it looks quite goofy and
not as warrior like as was first
intended.
11. I wanted to start making more detailed
sketches of the tiger so that I could
transfer this over to mudbox, the mudbox
bust itself would have to be a highly
detailed representation of the tiger so I
decided the best way was to use
sketchbook to start putting more of the
detail into the sketches instead of just
pencil drawings.
http://www.hoax-slayer.com/images/blue-tiger-source.jpg
12. The next picture is one of a
more detailed version the tigers
eye than I had done with the
biro.
This took awhile as I built up
layers of paint to give a much
cooler detailed look to the tigers
eye, This is a technique that I
found out by messing around
with some of the tools in
sketchbook, it gives a real nice
effect of depth and shadow
http://images2.layoutsparks.com/1/108857/tiger-eye-wild-piercing.jpg
13. As I started sculpting the main model I used some new techniques that I had
picked up from watching a really talented 3D modeller, Wayne Robson, he
showed some new techniques, these included the wax and smooth tool the
wax provided a nice build up of layers and then the scrape away the un-
needed areas and put a good amount of detail onto the model, I also used the
freeze tool to separate the areas I wanted to work on individually so that there
would be more detail on the certain areas of the tiger, the muzzle was the
hardest part to do was made much easier by using a mixture of these
techniques
14. When I started painting and texturing my model I kept the idea in my mind that my model was
going to have fine fur and this when I used the fur stamp I kept it the stamp small and the
intensity low so that it would leave to much of an impression on the model and ruin the look
while at the same time making the model look as though it was furry, some of the bust needed
more texturing than the rest such as the mane and this was the furriest area of the model and
needed to look like hair rather than an actual part of his facial structure.
Next I started painting the model, I needed to keep in mind that tigers primarily have three main
colours orange, white and black , I then looked at the more dominant colour of the tiger which
was the orange, I started by covering all of the model with a light orange with the airbrush, this
would give a nice base on which to work with and would mix really nicely with the other
colour, next I then focused on the main orange part of the tigers by increasing the intensity of
the brush and changing the colour of the pallet to a more darker intensive orange and then
started on the muzzle which has the darkest part of orange on the tiger because of the finer
hairs there, next I painted round the areas that would have the white fur and then round the
back of the head, next I Painted the blank areas white so that I could then have a completed
face to put the stripes onto, although the face currently had not much detail on it I decided to
get the base colours down before worrying to much about that.
with the face almost done in terms of basic colouring the stripes were going to be the first real
bit of detail to place onto the model, I began by going to a paint brush and then turning up the
intensity and going to a dark black so that the stripes would stand apart from the other colours.
After completing the stripes on the head I then moved on to the body and the detailing to the
head, Doing very much the same thing as before I started by covering the body and back of the
head with a light orange and then covering the rest with a bright white and orange and then
putting the stripes on afterwards.
After the basic colours were complete I then set to work on creating the details for the bust by
making darker and lighter areas as well as clean up strange looking areas and generally
making areas of the tiger look more sharper and pronounced, The muzzle it self was a focus of
detail as it was the most striking area of the tiger and gave it it’s defining feature, after
15.
16. Point lighting
Point lighting is a
small light with a
reasonable intensity,
it pretty much
represents a Torch
or table lamp.
This light could be
used to give a small
amount of light to
focus on a singular
side of the face or
objects that I want to
focus on.
This would be useful
for close up renders
Directional
lighting
Directional lighting
acts as a sun and
has a high
intensity, it can be
changed and
made to be less
bright and also
rotated to simulate
time of day, this
could be useful for
whole body
renders.
Image based
Image based
lighting is lights
the environment
you have created
and generally
creates more
illumination and
can be turned to
create nice
shading and
shadows on the
chararcter
17.
18.
19.
20. When we were asked to create a 3D model bust based on a animal I already had a idea on what I wanted to do, a warrior like tiger is what I
wanted to do, the final outcome actual looks pretty much what I wanted, the tiger it self looks muscularly and tough, it has a human shape but
a tiger head, the face is modelled well and is perhaps one of best models I have done from mudbox.
Before I started modelling we were shown a video of a professional 3D modeller Wayne Robson who does incredibly detailed 3D models, I
learnt a lot of his techniques for how he modelled, he seemed to use the wax and scrape tool a lot to give the model a more d etailed anatomy
for the bust this included the neck and back muscles which makes the actual lower bust look more realistic as it looks as if the head has
adequate muscles to support the large head.
The main head was reasonably easy to model after I got the initial shape of the head, the hardest part was properly the muzzle as I had to get
the right size and length to make it look like a tiger, as soon as the muzzle was complete I knew I could then focus on the rest of the head, one
of the problems I had while doing this was that I found the muzzle was quite hard to get right and took quite a long and took up time where I
could be focusing on other areas, if I were to do it again I would try and lessen the amount of time I spent on the muzzle wh ich could leave me
more time to focus on my PowerPoint or other areas of my model.
Colouring and texturing my model was quite easy after practising with it a little, I first put on the fur texture, I did this by putting the stamp on
the screen and then shrinking it on the actual muzzle and then turning the intensity up and the brush small to give the impression of smaller
finer fur on the muzzle, as it came to the mane and the rest of the head I changed the stamp size and brush intensity/size on what I believed
would look best the results were pretty good and then all that I needed to do was paint, overall I am happy with how it turned out and if I were
to do it again I would perhaps maybe mix up the texturing with a few more textures and fur stamps.
Overall I am happy the model and seeing as if I have not been doing this for long being able to do this type of model I am qu ite happy I am
more than happy with the way it looks.
To summarise the project we were assigned I believe I hit the expectation rather well, the model looks realistic and is based of my choice of
animal, a tiger. It is highly detailed and has been textured and painted I also did plenty of research and sketches that help ed me overall, there
were a couple of problems along the way for example the eyes were a pain to do and some of the textures had to be done again but overall I
am happy with it.
If I had to do it again I would maybe choose another animal to do such as a canine perhaps, maybe a wolf, and I would spend less time of
certain areas of the head so I could evenly spend on all areas so I would be too pressed for time.
21. BIBLIOGRAPHY
• 2012, Create and edit lights[online], Autodesk mudbox, available from
URL:http://download.autodesk.com/us/mudbox/help2010/index.html?url=WS1a9193826455f5ff-6d855556117c4584e54-
2963.htm,topicNumber=d0e6927, [accessed 24th April 2013]
• Robson, w, 2011, Blue #2 part 1[online], Vimeo, available from URL :http://vimeo.com/15518060, [accessed 28th March 2013]
• Mantra, 2010, fur body texture[online], Autodesk mudbox community, available from
URL:http://area.autodesk.com/mudcom/stencils/fur_body_texture, [accessed 31st March 2013]