Etching for Artists and Hackers: Printmaking & Circuit Boards
•
2 gefällt mir•14,546 views

Etching is the process of using corrosive chemicals to cut into the unprotected parts of an object’s surface. These slides explore the history of etching, intaglio printmaking, and the etching of circuit-boards.

Empfohlen
Weitere ähnliche Inhalte
Was ist angesagt?
Andere mochten auch
Ähnlich wie Etching for Artists and Hackers: Printmaking & Circuit Boards
Ähnlich wie Etching for Artists and Hackers: Printmaking & Circuit Boards (20)
Kürzlich hochgeladen
Kürzlich hochgeladen (20)
Etching for Artists and Hackers: Printmaking & Circuit Boards
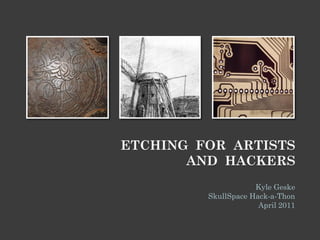
- 1. ETCHING FOR ARTISTS AND HACKERS Kyle Geske SkullSpace Hack-a-Thon April 2011
- 2. ETCHING The process of using corrosive chemicals to cut into the unprotected parts of an object’s surface. The process has been around for hundreds of years and has both artistic and industrial uses.
- 3. Mankind has always strived to leave permanent marks upon the world.
- 4. THE ISHANGO BONE A 20,000 year old baboon fibula with a piece of quartz affixed to one end. The bone is covered with the markings of a tally stick. Was the quartz perhaps used for engraving? http://en.wikipedia.org/wiki/Ishango_bone
- 5. ENGRAVING The practice of incising a design on to a hard, usually flat surface, by cutting grooves into it. In ancient times coins were manufactured using hand-engraved dies. European goldsmiths in the Middle Ages used engraving to decorate and inscribe armour, weapons, jewelery, and other metal work.
- 6. To preserve and catalogue their designs, goldsmiths would make “prints” of their work by taking impressions using cloth or paper with charcoal and ink.
- 7. With the arrival of the printing press in Europe in the early 1400s, the engraving of metal plates to produce images on paper came into its own. Many early engravers came from a goldsmithing background. Albrecht Dürer. The Knight, Death and the Devil c. 1513
- 8. Albrecht Dürer. (Detail) The Knight, Death and the Devil c. 1513
- 9. Copperplate Engravings Stanley William Hayter Wrestling Angels c. 1950 Torero c. 1932
- 10. Allan Geske - Copper plate Engraving
- 11. Allan Geske. Two Engravings c. 2005-2010 http://allangeske.ca
- 12. CHEMICAL ETCHING Acids had been known to man since the time of the ancient Egyptians and Greeks. In the Middle Ages corrosive chemicals were being exploited by alchemists to dissolve precious metals. Rembrandt. “Faust” c. 1652-53
- 13. Goldsmiths soon adopted the use of acids to etch their metalwork designs. Daniel Hopfer (Germany 1470–1536) was a craftsman who decorated armour in this way. He then applied the method to printmaking.
- 14. Etchings Rembrandt van Rijn The Three Crosses 1632 The Windmill 1641
- 15. Etchings Jim Dine Five Paint Brushes, 1972 Dartmouth Still Life, 1974
- 16. Allan Geske - Copperplate Etching
- 17. Allan Geske Allan Geske My Own Map 1981 Atlas Vignette 2006
- 18. Printing Processing 1) Ink 2) Wipe 3) Press 4) Pull http://jimhubbman.calkinsc.com/mezzotint/mezzotint.htm
- 19. The Copper Etching Process Printmaking Circuit Board
- 20. Preparing the Plate Printmaking Circuit Board • Bevel Edges • Clean Surface • Polish Surface • Dull Surface with Sandpaper
- 21. Applying a Resist – Part I Printmaking Circuit Board • Apply Acid Resistant Ground • Download or Create Circuit Layout • Affix Contact Paper to Other Side • Laser Print on Glossy Paper
- 22. Applying a Resist – Part II Printmaking Circuit Board • Scratch Image into the Ground • Iron Circuit Onto Plate as a Resist • Touch up with More Ground • Peel Away Paper (Ground coating should be consistent for best results.) • Touch up With Needle / Resist
- 23. Etch the Copper – Part I Printmaking Circuit Board • Place Plate Face Down in Tub of • Place Board Copper-side Up in Tub Ferric Chloride for 15-20 Minutes of Ferric Chloride • Acid Will “Bite” Exposed Copper • Brush Board with Plastic Brush
- 24. Etch the Copper – Part II Printmaking Circuit Board Kyle Geske - 2007 • Remove Plate from Acid • Remove From Acid When Exposed • Rinse with Water Copper has Dissolved • Remove Ground Using a Solvent • Remove Ink Using Sandpaper
- 25. Prototype Before Etching Circuit! Breadboard Stripboard
- 26. North Nassau Studio Public Tours First Friday Evening of Every Month. Hot Plate and Wiping Table Vented Acid Table
- 27. Artspace Building, 100 Arthur Street
- 28. North Nassau Studio, Room 523, Artspace Building
- 29. RESOURCES The Intaglio Printmaking Process http://www.youtube.com/watch?v=SNKn4PORGBI How to Etch a Single-Side Circuit Board http://hackaday.com/2008/07/28/how-to-etch-a-single-sided-pcb/ Two Interesting Circuit Board Etching Techniques http://robot.homepageentry.com/pages/makepcb.php http://www.pulsarprofx.com/pcbfx/main_site/pages/tech_support/tips_n_tricks/rolling_pin.html Allan Geske & North Nassau Printmakers, Winnipeg http://allangeske.ca
- 30. HE WHO PRESENTED Kyle Geske Hardware / Firmware Engineer Turned Web Developer Instructor at Red River College (Ruby/Rails, PHP, HTML, CSS, Javascript, Philosophy of Time Travel) Artist w/ Studio @ Artspace V-World Avatars Twitter, Flickr, Pinboard, Github, Gmail, Etc: stungeye stungeye.com codeglutton.tumblr.com