Salient Features of India constitution especially power and functions
Schedule planner slides for slideshare 2
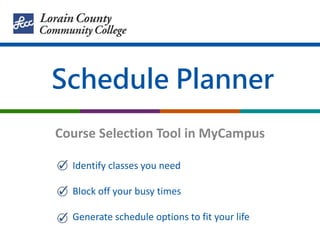
1. Schedule Planner
Course Selection Tool in MyCampus
Identify classes you need
Block off your busy times
Generate schedule options to fit your life
2. Helpful Hints
Your Advisor Can Help
Schedule an appointment online.
Holds, prerequisites and other issues
Know the issues that may prevent you from scheduling.
Know Your Curriculum
Avoid taking classes you don’t need.
www.lorainccc.edu/advising
www.lorainccc.edu/registerhelp
8. Selection Criteria
1. Change Course Status (Open Classes Only is Best)
2. Change Instruction Modes
3. Select the Term
4. Change sessions - uncheck any Sessions you don’t want to consider
(Dynamic Sessions are terms that don’t fit into the typical timeframe.)
10. Adding Courses
Know Your Curriculum
You should already have an idea of which courses you need to take. Be sure to check your
curriculum guide to make sure you’re registering for the right classes for your academic program.
Avoid wasting time and money on classes you don’t need.
Find your curriculum Guide: www.lorainccc.edu/curriculum-guides
Help choosing classes: www.lorainccc.edu/registrationhelp
Beware of Prerequisites, Holds and Issues
Schedule Planner will allow you to add courses to your plan, but if you’re missing a prerequisite,
you won’t be able to register for the class.
Your Advisor Can Help! www.lorainccc.edu/advising
11. 1. Click on Add Courses
2. Select the Subject
3. Select the Course
4. Review the Course Description
5. Click on Add Course
6. Notice each course in your
Courses list on the right
7. When you’re finished, click
Schedule Planner at the top
Adding Courses
13. Breaks
Breaks are times you are not able to attend classes. These are
consistent (or recurring) times every week when you know you
are not available. This might include your work, family or personal
obligations.
14. 1. Click on Add Break
2. Give your Break a name
3. Select start and end times
4. Select Days
5. Click on Add Break
Adding Breaks
15. Your Break is now listed:
Add more breaks, if needed.
17. Click on Generate Schedules
This will generate a list of all possible schedule scenarios that fit the criteria, courses
and breaks you identified.
If you generate an overwhelming number of schedule options, go back and add
some additional criteria to reduce the number of schedules.
If too few options are generated, remove some of the detailed criteria.
You can do this by adjusting the selection criteria at the top, changing breaks, or
adjusting Course Options.
Generate Schedules
18. Click on the Options gear for each course.
Uncheck any course section you don’t want to consider.
You may only want to take a section your friend is taking (uncheck all others)
You may only want to take sections offered at a specific learning center or location.
Note about Lectures and Labs
You may uncheck any of the LECTURES you don’t wish to consider, but make sure you
select ALL of the lab options.
Click Save and Close. Repeat for all other courses.
Adjusting Course Options
20. After Course Options have been adjusted, click on Generate Schedules.
Continue to adjust schedule options or add additional breaks until you have a reasonable
number of schedules to review.
Review a graphic of each schedule by hovering over the magnifying glass icons.
Click View to see the details of a specific schedule.
Review and Select Schedules
21. Review your potential schedule to ensure it meets your needs.
If you’re happy with your schedule, click Send to Shopping Cart.
YOU HAVE NOT YET REGISTERED FOR CLASSES!
Review and Send to Shopping Cart
23. Click back over to the Student Center tab (or browser window) to return to
MyCampus.
Click on Course Enrollment
Shopping Cart: Course Enrollment
24. 1. Click on Import Cart
2. Your courses will be displayed one at a time.
Review each course and click “Next” until your complete shopping cart is displayed. At this
time, you may remove any courses by clicking on the Delete icon.
3. To finish registering, click on Proceed to Step 2 of 3, review one last time, and click on
Finish Enrolling to register for your classes.
Congratulations! You are now registered for classes.
Adding Courses
25. Contact the Help Desk
helpdesk@lorainccc.edu
Need technical help with Schedule Planner?
(440) 366-4351
26. Your Advisor Can Help
www.lorainccc.edu/advising
Need help registering for classes?