NewTek Lightwave 3D: Modifying Lightwave Objects
•Als PPTX, PDF herunterladen•
0 gefällt mir•1,653 views

This document provides instructions for modifying 3D objects in Lightwave. It demonstrates how to: - Load objects like a ground plane and triceratops model. - Adjust the camera and grid size to frame the scene properly. - Modify object properties like adding displacement maps to warp the surface based on images. - Use clip maps to make parts of the object invisible. - Adjust render settings to control how the object appears, such as making it matte, semitransparent, or changing edge highlighting over time.

Empfohlen
Empfohlen
Weitere ähnliche Inhalte
Was ist angesagt?
Was ist angesagt? (19)
Ähnlich wie NewTek Lightwave 3D: Modifying Lightwave Objects
Ähnlich wie NewTek Lightwave 3D: Modifying Lightwave Objects (20)
Mehr von Samuel Edsall
Mehr von Samuel Edsall (20)
Kürzlich hochgeladen
Kürzlich hochgeladen (20)
NewTek Lightwave 3D: Modifying Lightwave Objects
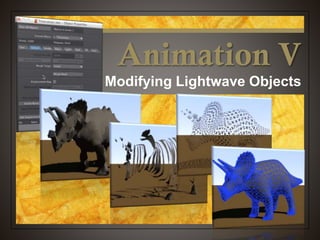
- 1. Animation V Modifying Lightwave Objects
- 2. Object Properties Properties dialogue box Some neat tricks you can do to your object Morph your object into another object Change the way the object appears Shortcut = p
- 3. Let’s Get Started Start up Lightwave 3D Select Load Object (+) In the Landscape folder, select Ground.lwo
- 4. Loading Objects Whoa, what happened? When loading large objects, Lightwave changes the grid size to fit the object on the grid The camera moves back so it can shoot the large item
- 5. Scaling Things Back to Size Select the Camera Check the settings on the numerics Grid size jumped to 500 meters! Camera is back from center nearly 5 kilometers from center
- 6. Scaling Things Back to Size Select the View tab In the Grid section, select Grid Size Type in 2 and press OK Now the ground really covers the whole space
- 7. Bring the Camera Back Select the Camera In the numerics box change the settings: X = 0 m Y = 1.75 m Z = - 8 m This is raise the camera and back it up a little from center
- 8. Let’s Look at Something From the Items tab, select Load Object From the Animals tab, select Triceratops Change your view to the Camera view (6) Press F9 to see what you have so far
- 9. Clean Up the Lighting Select the Light Switch to the Top view (2) Using the Modify tab, move the rotate the light so it’s lighting the dino better Do another test render to see how he looks
- 10. How About Some Background? Lighting is better, but he needs a backdrop Select Windows > Backdrop Options
- 11. How About Some Background? Lighting is better, but he needs a backdrop Select Windows > Backdrop Options Turn on the gradient backdrop Do another test render
- 12. Modifying Object Properties Under Objects, make sure Triceratops is selected Click on the Properties button (p)
- 13. Modifying Object Properties Select the 2nd tab Deform Morphing Displacement map Enable Bump
- 14. Modifying Object Properties Morphing Change your object into another object Displacement map Warps your object based on an image or texture map Enable Bump Roughs up the surface of your object
- 15. Add a Displacement Map Click on the T button under Displacement Map T stands for Texture Under Layer Type, select Image Map
- 16. Since our dino is mostly a cylinder, under Projection choose Cylinder Under Image, choose Load Image Add a Displacement Map
- 17. In the Reflections folder, select FractalReflections.tga Change the Texture Amplitude to 0.5 Add a Displacement Map
- 18. Do another test render to check him out This displacement is caused by an image and doesn’t change over time Modify the displacement by choosing different Texture Axis Add a Displacement Map
- 19. Render this frame (F9) and Save the frame as Displacement.jpg to the desktop. Take a Picture for your Homework
- 20. Animated Displacement Change the Layer Type to Procedural Texture Change the Procedural Type to Ripples Press the Play button to see how this displacement map changes over time
- 21. Animated Displacement Change the settings: Texture Value = 0.05 Wave Sources = 1 Wavelength = 0.5 Wave Speed = 0.02 As you change these settings, watch what happens to dino!
- 22. Decisions, Decisions Once you have your settings the way you like or don’t like, it’s time to choose Use Texture Remove Texture
- 23. Reset the Board At the bottom of the Displacement Map dialogue box choose Remove Texture This turns it off for now, but you can go back and turn it back on if you like We are going to try out some other tricks for now
- 24. Render Tab Changes how the object is seen on camera Or not seen if you like Options Change to a solid color Make it semitransparent or invisible Make parts of the object invisible Whether it casts a shadow or can have a shadow cast on it
- 25. Clip Map Makes parts of the object invisible based on an image or texture
- 26. Make a Clip Map In the Render tab, select the T button for Clip Map Under Layer Type, choose Image Map Under Projection, choose Cylindrical Under Image, choose FractalReflections.tga
- 27. Make a Clip Map This effect you can’t see until you render Press F9 to check it out
- 28. Take a Picture for your Homework Save a JPG of this render to the desktop and call it ClipMap.jpg
- 29. Make a Clip Map Change the Texture Axis to Y and X and render those versions! Like the displacement map image, these will not change over time
- 30. Make a Clip Map If you want them to change over time, use an animated texture like ripples
- 31. Render Tab Matte Object Turns your object into a solid matte color No shading or highlights to the object One flat color Interesting effect with a clip matte
- 32. Make a Matte Turn off the Clip Map texture if needed. In the Render tab select Matte Object Click on the black square and select a color Render the frame and check it out
- 33. Render Tab Object Dissolve Turns the whole object to whatever opacity setting you would like Opaque Semitransparent Invisible Distance Dissolve Makes the object become completely invisible as it moves away from the camera Kind of like in a fog
- 34. Make a Ghost Turn off the Matte Object In the Object Dissolve window, drag the arrows until you have a setting @ 50% Render the frame and check it out
- 35. Take a Picture for your Homework Save a JPG of your render to the desktop and save it as Dissolve.jpg
- 36. Using an Envelope Allows you to change parameters over time Key frames for parameters, rather than for the object itself Any time you see an E box, that setting can change over time
- 37. Make Dino Vanish Over Time Set the Object Dissolve to 0% Next to the Object Dissolve box, click on the E to open the Envelope The Graphic Editor opens up Looks complicated, but it’s pretty easy
- 38. Make Dino Vanish Over Time Click on the Key icon just under the chart At frame 120 click on the line This sets a keyframe for Dino at 0% No transparency
- 39. Make Dino Vanish Over Time Click another key frame at frame 60 Switch to the Drag icon Now we are going to change this value
- 40. Make Dino Vanish Over Time Drag this key frame up to 100 % You should see the opacity ramp up from 0% from frame 0 to 100% at frame 60, then back down to 0% at frame 120. If not, use the drag tool to make these settings
- 41. Make Dino Vanish Over Time Drag the Timeline slider and notice how your object fades out to nothing and then reappears Scary!!
- 42. Turning Off Envelopes Not as easy as Textures Hold the Command key and then click on the E box Choose Remove Envelope You can turn it back on by clicking on the E again if you want
- 43. Make Dino Vanish Over Time Hold down the Command key and click on the envelope box Choose Remove Envelope Drag the Dissolve slider back to 0%
- 44. Other Render Settings Unseen by: Makes the object unaffected or unseen by various effects Can even be hidden from the camera Shadows Turn on or off the ability to cast a shadow or receive a shadow from something else
- 45. Edges Tab Polygon Size Changes how big the polygons APPEAR to the camera Too small or too big = interesting effect Edges Highlights different lines that make up the object
- 46. Tinker with Polygon Size Drag the Polygon Size slider to 50% Render the frame and check it out Notice that you can envelope this effect to have the polygons change size over time
- 47. Tinker with Polygon Size Select over 50% and change the size to 1000% Render the frame and check it out Polygons are too big making Dino chiseled
- 48. Bring the Polys Back to Normal Drag the Polygon slider to change the size back to 100%
- 49. Paint the Edges Check the Silhouette Edges box Under Edge Color, choose a color Render a frame and check it out
- 50. Paint the Edges Uncheck Silhouette Select Other Edges Change the Size to Medium Change the color and render a frame to check it out
- 51. Just the Edges On the top change the polygon size to 1% Render the frame and check it out
- 52. Take a Picture for your Homework Save your rendered frame as a JPG to your desktop and call it Edges.jpg
- 53. Animation V Modifying Lightwave Objects