
Empfohlen
Weitere ähnliche Inhalte
Was ist angesagt?
Was ist angesagt? (19)
Andere mochten auch
Andere mochten auch (19)
Ähnlich wie Development diary music video
Ähnlich wie Development diary music video (20)
Mehr von samjewiss
Mehr von samjewiss (19)
Development diary music video
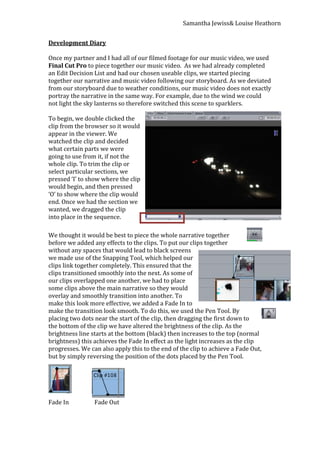
- 1. Samantha Jewiss& Louise Heathorn Development Diary Once my partner and I had all of our filmed footage for our music video, we used Final Cut Pro to piece together our music video. As we had already completed an Edit Decision List and had our chosen useable clips, we started piecing together our narrative and music video following our storyboard. As we deviated from our storyboard due to weather conditions, our music video does not exactly portray the narrative in the same way. For example, due to the wind we could not light the sky lanterns so therefore switched this scene to sparklers. To begin, we double clicked the clip from the browser so it would appear in the viewer. We watched the clip and decided what certain parts we were going to use from it, if not the whole clip. To trim the clip or select particular sections, we pressed ‘I’ to show where the clip would begin, and then pressed ‘O’ to show where the clip would end. Once we had the section we wanted, we dragged the clip into place in the sequence. We thought it would be best to piece the whole narrative together before we added any effects to the clips. To put our clips together without any spaces that would lead to black screens we made use of the Snapping Tool, which helped our clips link together completely. This ensured that the clips transitioned smoothly into the next. As some of our clips overlapped one another, we had to place some clips above the main narrative so they would overlay and smoothly transition into another. To make this look more effective, we added a Fade In to make the transition look smooth. To do this, we used the Pen Tool. By placing two dots near the start of the clip, then dragging the first down to the bottom of the clip we have altered the brightness of the clip. As the brightness line starts at the bottom (black) then increases to the top (normal brightness) this achieves the Fade In effect as the light increases as the clip progresses. We can also apply this to the end of the clip to achieve a Fade Out, but by simply reversing the position of the dots placed by the Pen Tool. Fade In Fade Out
- 2. Samantha Jewiss& Louise Heathorn As our music video features a mixture of the present and flashbacks, we wanted to add fade ins to make sure the audience would know that there was a difference in time. By adding this smooth transition instead of a cut, it shows passage of time and also makes it appear more like a memory that a character is thinking about. Instead of using the Pen Tool to create the Fade In effect, we also used different dissolves. For ours, we chose to use Cross Dissolve that achieves the same effect as a Fade Out. To further edit our music video, we used the Slice Tool to chop up our clips to create a section featuring multiple quick cuts that aim to follow the beat of the song. We sliced two clips into sections, and then pieced them together so the narrative would alternate between the two scenes. To help us place the cuts to the beat of the music, we pressed ‘M’ at the desired place along the sequence to place a marker. By placing a marker, it allows us to position a clip exactly where we have marked – the beat of the song. This helps the narrative fit well with our chosen song. Furthermore, we wanted to slow down the speed of some clips to make them appear in slow motion. We did this for the beginning clip,
- 3. Samantha Jewiss& Louise Heathorn in addition to other clips that fell on the chorus, more notably the line “I will try to fix you”. This emphasized the main lyric of the song, as the emphasis is placed here. To edit and alter the speed of a clip, we first right clicked on the clip we wanted to change. We clicked on Speed… that opened another small window. To make the clip change to slow motion, we reduced the speed to our desired number. For this particular clip, we reduced the speed to 45% to make it noticeable to the audience. We also experimented to see what it would look like if we reversed the clip. To do this, we simply checked the box next to Reverse. We didn’t like the effect of this so therefore we left it unchecked for all the clips we used. After we had pieced all our music video together, added the required transition effects and cuts we wanted to alter the colour of the flashbacks/memories so it would make it more obvious to the audience. As we produced the idea, my partner and I know the narrative however we were a little concerned that new viewers may not be able to follow the narrative. To make it more obvious for the audience, we used Colour Corrector to edit the colours of the clip. Firstly however, we had a clip of Covent Garden that we wanted to appear darker so it would portray an evening time. We used the 3-way Colour Corrector to darken the clip and reduce the bright tones as it was shot during the day. By changing the ‘Blacks’ of this clip, we were able to make it appear as if it were more like evening as opposed to early afternoon. To edit the flashbacks and memories, we wanted to achieve a more vintage effect. We tried using Black & White by reducing the saturation, however we did not feel this worked for our music video. As a lot of music video is based on flashbacks and memories, the majority of it was black and white. We didn’t feel this portrayed our music video in the best way, so we tried to find different colour effects that would help distinguish between the present and previous memories. We searched how to create a vintage effect on Google. We used the 3-way Colour Corrector. We altered the blacks by making them more yellow/red, and also adjusting the saturation. This gave use a more yellow/sepia toned effect for our
- 4. Samantha Jewiss& Louise Heathorn flashbacks instead of black and white. Once we had our desired effect, we wanted to apply these to all of the flashback scenes. I either copied the filter from the previous slide using the arrow tool below (with 1) or I dragged the filter (middle tool) onto the slides that I wanted. This helped ensure all the flashbacks had the same effect on them, helping to reduce any continuity or editing errors that may be noticed by the audience. For one of our scenes we wanted to cut an actors face out of the corner and place the emphasis on the other character. To do this, we zoomed in the actor’s face by making the clip bigger. As a result of this, we lost our horizontal black frame along the top and bottom of the clip. To ensure that our music video stayed consistent throughout, we inserted two black rectangles that would act as the frame.
- 5. Samantha Jewiss& Louise Heathorn We ensured that the rectangles were the same size as the previous clip frames, to reduce any continuity errors. We placed these rectangles above the clip that needed it to ensure it would show when the clip without the frame was played. Additionally, we wanted to zoom in to one of our clips to create a close up shot of the footage we had. We trimmed the clips so we had the long shot first, and then trimmed a close up version. We had to time the two separate clips right so that they flowed into one another without any continuity errors. We zoomed into the original clip by making the image bigger. This helps show to the audience the emotions of the actors much more clearly than the long shot. Similar to the previous clip, we had to use the rectangles to again create a frame around the clip. For the final details of our music video, we added text to conform to the conventions of a music video. The text will inform the audience of the song title, band name, and production company/distributer.
- 6. Samantha Jewiss& Louise Heathorn To do this, we selected the text option that allowed us to insert the text we wanted where we wanted. We clicked on Controls and typed in the text we needed. We then dragged it down to the sequence and placed it on top of a clip. We placed the text at the beginning of the video and at the end, conforming to your average music video. To make it appear more fluent and smooth, we added a fade in and out so the text would gradually transition onto the frame. We could also cut down the text duration and move it to the desired location on the screen. This final detail will hopefully make our music video look more professional and provide a finishing touch for the whole overall project.