SlideShare ist ein Scribd-Unternehmen logo
1 von 15
Downloaden Sie, um offline zu lesen
Wireless Humidity and Temperature Monitoring
System
Humidity and temperature monitoring systems are quite common in industries.
These environment factors need constant supervision to maintain reliability
and efficiency of the industrial devices. The monitoring systems used in
industries are generally wired where sensor unit and the sensor monitoring
system connects through a cable wire. The humidity and temperature
monitoring systems can be made wireless using the 434 RF modules. With
wireless connectivity, the sensor and the monitoring systems can be installed
separately and industrial equipments can be remotely supervised. Plus, the
cost for extensive cable installation is also saved.
The 434 RF modules have an operational range of 50-60 metre and can be
extended to 300-350 metre using antenna and increasing the transmission
power. Therefore, RF modules attached to antenna can be easily installed
anywhere and can perform wireless data communication to an impressive
range. (Even a Wi-Fi router have range limited to 45 metre indoor and 92 metre
outdoor).
This project uses a DHT11 humidity and temperature sensor and is built on
Arduino Pro Mini. The RF modules are directly interfaced to Arduino boards for
wireless implementation. The sensor readings are displayed on a 16X2 LCD
screen.
Components Required -
Sr. no. Name of component Required qut
1 RF Tx module (434Mhz) 1
2 RF Rx module (434Mhz) 1
3 Arduino pro mini 2
4 DHT11 1
5 LCD 1
6 Battery – 9V 2
7 Bread board 2
8 connecting wires
Block Diagram -
Circuit Diagram -
Circuit Connections -
There are two circuits in the project - a) Temperature and humidity sensor
circuit and b) Sensor reading display circuit. In the sensor circuit, the data pin
(Pin 2) of DHT11 sensor is connected to A2 analog pin of the Arduino Pro Mini.
The pins VCC (Pin 1) and Ground (Pin 4) are connected to VCC and ground
respectively. An RF transmitter is interfaced to the Arduino board with its serial
input pin (Pin 2) connected to pin 12 of the Arduino board. An antenna is
connected at pin 4 of the transmitter for range extension.
On the display circuit, an RF receiver is connected to another Arduino Pro Mini
with serial out pin (Pin 2) of receiver connected to pin 11 of Arduino. An
antenna is connected to pin 8 of the receiver for range extension. An LCD is
interfaced to the Arduino board for displaying temperature and humidity
readings. . The 16X2 LCD display is connected to the Arduino board by
connecting its data pins to pins 7 to 4 of the Arduino board. The RS and RW pin
of LCD is connected to pins 3 and 2 of the Arduino Pro Mini respectively. The E
pin of the LCD is grounded.
LCD Arduino UNO
RS 3
RW 2
E GRND
D7,D6,D5,D4 7,6,5,4 respectively
The standard code library for interfacing Arduino UNO and Arduino Pro Mini
are used in the project to program LCD with the board.
How the Circuit Works -
DHT11 Temperature and Humidity Sensor is a digital sensor with inbuilt
capacitive humidity sensor and Thermistor. It relays a real-time temperature
and humidity reading every 2 seconds. The sensor operates on 3.5 to 5.5 V
supply and can read temperature reading between 0° C and 50° C and relative
humidity between 20% and 95%.
The sensor cannot be directly interfaced to a digital pin of the board as it
operates on 1-wire protocol which must be implemented on the firmware. First
the data pin is configured to input and a start signal is sent to it. The start signal
comprises of a LOW for 18 milliseconds followed by a HIGH for 20 to 40
microseconds followed by a LOW again for 80 microseconds and a HIGH for 80
microseconds. After sending the start signal, the pin is configured to digital
output and 40-bit data comprising of the temperature and humidity reading is
latched out. Of the 5-byte data, the first two bytes are integer and decimal part
of reading for relative humidity respectively, third and fourth bytes are integer
and decimal part of reading for temperature and last one is checksum byte.
When interfacing DHT11 with Arduino, already a code library is available and
the sensor data can be read by read11() function of the DHT class.
On the sensor circuit, the temperature and relative humidity readings are first
fetched by the Arduino and their character representation are stored in
separate arrays. The character buffer is serially transmitted on the RF using the
VirtualWire library of the Arduino. Check out the transmitter side Arduino
program code to learn how Arduino gets the sensor value and store them to
arrays for RF transmission.
On the display circuit, character representation of sensor readings is detected
by the RF receiver and serially passed to receiver side Arduino board. The
program code on receiver side Arduino board reads the character buffer and
convert it to integer form for displaying on LCD. The standard functions of lcd
library are used to display readings on LCD. Check out the receiver side Arduino
code to learn how sensor values are read from the buffer and converted to
proper format for display on LCD screen.
Programming Guide -
On the transmitter side Arduino, first the program code imports the required
standard libraries. The VirtualWire library is required to connect with RF
module and DHT library is needed to interface DHT11 sensor. A "DHT" object is
instantiated. Global variables ledPin and Sensor1Pin are declared and mapped
to Pin 13 where transmission progress indicator LED is connected and Pin A2
where data pin of DHT11 temperature and humidity sensor is connected
respectively. A variable Sensor1Data is declared to stored sensor reading and
character type arrays Sensor1CharMsg and Sensor1CharMsg1 are declared to
store decimal representation of the relative humidity and temperature reading.
#include <VirtualWire.h>
#include <dht.h>
#define dht_dpin A0 //no ; here. Set equal to channel sensor is on
dht DHT;
// LED's
const int ledPin = 13;
// Sensors
const int Sensor1Pin = A2;
int Sensor1Data;
char Sensor1CharMsg[4];
char Sensor1CharMsg1[4];
A setup() function is called where indicator LED pin is set to output while
sensor connected pin is set to input mode using pinMode() function. The baud
rate of the Arduino is set to 9600 bits per second using the serial.begin()
function. The initial messages are flashed to the buffer using Serial.Println()
function. The baud rate for serial output is set to 2000 bits per second using
the vw_setup() function of the VirtualWire library.
void setup() {
// PinModes
// LED
pinMode(ledPin,OUTPUT);
// Sensor(s)
pinMode(Sensor1Pin,INPUT);
Serial.begin(9600);
delay(300);//Let system settle
Serial.println("Humidity and temperaturenn");
delay(700);
// VirtualWire setup
vw_setup(2000); // Bits per sec
}
A loop function is called where reading from DHT11 sensor are read using the
read11() function on DHT object and the character representation of decimal
base of the humidity reading is stored in Sensor1CharMsg array and the
character representation of decimal base of the temperature reading is stored
in Sensor1CharMsg1 array.
void loop() {
// Read and store Sensor 1 data
// Sensor1Data = analogRead(Sensor1Pin);
DHT.read11(dht_dpin);
// Convert integer data to Char array directly
itoa(DHT.humidity,Sensor1CharMsg,10);
itoa(DHT.temperature,Sensor1CharMsg1,10);
The sensor readings are serially out as human-readable ASCII text using the
Serial.print() and Serial.println() function.
// DEBUG
Serial.print("Current humidity = ");
Serial.print(DHT.humidity);
Serial.print("% ");
Serial.print("temperature = ");
Serial.print(DHT.temperature);
Serial.println("C ");
delay(800);
// END DEBUG
The transmission progress indicator LED is switched on by passing a HIGH to pin
13. The character message containing the temperature and humidity reading is
sent serially using the vw_send() function and vw_wait_tx() is used to block
transmission until new message is available for transmission. The LED at pin 13
is switched OFF by passing a LOW to indicate successful transmission of
message.
digitalWrite(13, true); // Turn on a light to show transmitting
vw_send((uint8_t *)Sensor1CharMsg, strlen(Sensor1CharMsg));
vw_wait_tx(); // Wait until the whole message is gone
delay(200);
vw_send((uint8_t *)Sensor1CharMsg1, strlen(Sensor1CharMsg1));
vw_wait_tx(); // Wait until the whole message is gone
digitalWrite(13, false); // Turn off a light after transmission
delay(200);
} // END void loop...
This ends the transmitter side Arduino code.
On the receiver side Arduino, the program code first imports the required
standard libraries. LiquidCrystal.h is imported to interface the LCD and
VirtualWire library is imported to read serial input from the RF receiver. The
pins 2 to 7 are mapped to Liquid Crystal object lcd.
#include <LiquidCrystal.h>
#include <VirtualWire.h>
LiquidCrystal lcd(2, 3, 4, 5, 6, 7);
The pin 13 where transmission progress indicator LED is connected is assigned
to ledpin variable and two variables - "Sensor1Data" and "Sensor2Data" to
capture reading of DHT11 in integer form and arrays "Sensor1CharMsg1" and
"Sensor1CharMsg2" to store character representation of the readings are
declared. There are counter variables "i" and "j" also declared.
// LED's
int ledPin = 13;
// Sensors
int Sensor1Data;
int Sensor2Data;
// RF Transmission container
char SensorCharMsg1[4];
char rxAray[8];
char SensorCharMsg2[4];
int j,k;
A setup() function is called where baud rate of the Arduino is set to 9600 bits
per second using Serial.begin() function. The lcd object is initialized to 16X2
mode. The led connected pin and pin connected to RS and RW are set to
output mode using the pinMode() function.
void setup() {
Serial.begin(9600);
lcd.begin(16, 2);
// sets the digital pin as output
pinMode(ledPin, OUTPUT);
pinMode(9, OUTPUT);
pinMode(8, OUTPUT);
The RF transmitter and receiver module does not have Push To Talk pin. They
go inactive when no data is present to transmit or receive respectively.
Therefore vw_set_ptt_inverted(true) is used to configure push to talk polarity
and prompt the receiver to continue receiving data after fetching the first
character. The baud rate for serial input is set to 2000 bits per second using
vw_setup() function. The reception of the data is initiated using vw_rx_start().
// VirtualWire
// Initialise the IO and ISR
// Required for DR3100
vw_set_ptt_inverted(true);
// Bits per sec
vw_setup(2000);
// Start the receiver PLL running
vw_rx_start();
} // END void setup
A loop() function is called inside which, array "buf[]" to read serial buffer and
"buflen" variable to store buffer length are declared. The counter variables are
initialized to zero.
void loop(){
uint8_t buf[VW_MAX_MESSAGE_LEN];
uint8_t buflen = VW_MAX_MESSAGE_LEN;
j = 0;
k = 0;
The character buffer is detected using the vw_get_message() function, if it is
present, a counter "i" is initialized. The buffer readings are first stored to
RxAray array using the for loop with the initialized counter and after detecting
the null character, the temperature and humidity sensor readings clubbed in
RxAray are separately stored to "SensorCharMsg1" and " SensorCharMsg2"
arrays.
// Non-blocking
if (vw_get_message(buf, &buflen))
{
int i;
// Message with a good checksum received, dump it.
for (i = 0; i < buflen; i++)
{
// Fill Sensor1CharMsg Char array with corresponding
// chars from buffer.
rxAray[i] = char(buf[i]);
}
rxAray[buflen] = '0';
while( j < 2)
{
SensorCharMsg1[j++] = rxAray[j++];
}
while( j < 4)
{
SensorCharMsg2[k++] = rxAray[j++];
}
The variable value along with relevant strings enclosed is passed to the
microcontroller's buffer and passed to the LCD for display in a presentable
format.
// DEBUG
Serial.print(" hum = ");
Serial.println(SensorCharMsg1);
Serial.print(" temp = ");
Serial.println(SensorCharMsg2);
lcd.setCursor(0,0);
lcd.print("Humidity = ");
lcd.print(SensorCharMsg1); // change the analog out value:
lcd.setCursor(0,1 );
lcd.print("Temparature = ");
lcd.print(SensorCharMsg2);
// END DEBUG
}
}
This ends the loop() function and the receiver side Arduino code.
PROGRAMMING CODE
#include <VirtualWire.h>
#include <dht.h>
#define dht_dpin A0 //no ; here. Set equal to channel sensor is on
dht DHT;
// LED's
const int ledPin = 13;
// Sensors
const int Sensor1Pin = A2;
int Sensor1Data;
char Sensor1CharMsg[4];
char Sensor1CharMsg1[4];
void setup() {
// PinModes
// LED
pinMode(ledPin,OUTPUT);
// Sensor(s)
pinMode(Sensor1Pin,INPUT);
Serial.begin(9600);
delay(300);//Let system settle
Serial.println("Humidity and temperaturenn");
delay(700);
// VirtualWire setup
vw_setup(2000); // Bits per sec
}
void loop() {
// Read and store Sensor 1 data
// Sensor1Data = analogRead(Sensor1Pin);
DHT.read11(dht_dpin);
// Convert integer data to Char array directly
itoa(DHT.humidity,Sensor1CharMsg,10);
itoa(DHT.temperature,Sensor1CharMsg1,10);
// DEBUG
Serial.print("Current humidity = ");
Serial.print(DHT.humidity);
Serial.print("% ");
Serial.print("temperature = ");
Serial.print(DHT.temperature);
Serial.println("C ");
delay(800);
// END DEBUG
digitalWrite(13, true); // Turn on a light to show transmitting
vw_send((uint8_t *)Sensor1CharMsg, strlen(Sensor1CharMsg));
vw_wait_tx(); // Wait until the whole message is gone
delay(200);
vw_send((uint8_t *)Sensor1CharMsg1, strlen(Sensor1CharMsg1));
vw_wait_tx(); // Wait until the whole message is gone
digitalWrite(13, false); // Turn off a light after transmission
delay(200);
} // END void loop...
#include <LiquidCrystal.h>
#include <VirtualWire.h>
LiquidCrystal lcd(2, 3, 4, 5, 6, 7);
// LED's
int ledPin = 13;
// Sensors
int Sensor1Data;
int Sensor2Data;
// RF Transmission container
char SensorCharMsg1[4];
char rxAray[8];
char SensorCharMsg2[4];
int j,k;
void setup() {
Serial.begin(9600);
lcd.begin(16, 2);
// sets the digital pin as output
pinMode(ledPin, OUTPUT);
pinMode(9, OUTPUT);
pinMode(8, OUTPUT);
// VirtualWire
// Initialise the IO and ISR
// Required for DR3100
vw_set_ptt_inverted(true);
// Bits per sec
vw_setup(2000);
// Start the receiver PLL running
vw_rx_start();
} // END void setup
void loop(){
uint8_t buf[VW_MAX_MESSAGE_LEN];
uint8_t buflen = VW_MAX_MESSAGE_LEN;
j = 0;
k = 0;
// Non-blocking
if (vw_get_message(buf, &buflen))
{
int i;
// Message with a good checksum received, dump it.
for (i = 0; i < buflen; i++)
{
// Fill Sensor1CharMsg Char array with corresponding
// chars from buffer.
rxAray[i] = char(buf[i]);
}
rxAray[buflen] = '0';
while( j < 2)
{
SensorCharMsg1[j++] = rxAray[j++];
}
while( j < 4)
{
SensorCharMsg2[k++] = rxAray[j++];
}
// DEBUG
Serial.print(" hum = ");
Serial.println(SensorCharMsg1);
Serial.print(" temp = ");
Serial.println(SensorCharMsg2);
lcd.setCursor(0,0);
lcd.print("Humidity = ");
lcd.print(SensorCharMsg1); // change the analog out value:
lcd.setCursor(0,1 );
lcd.print("Temparature = ");
lcd.print(SensorCharMsg2);
// END DEBUG
}
}

Weitere ähnliche Inhalte

Was ist angesagt?

ARDUINO EMBEDDED SYSTEM
ARDUINO EMBEDDED SYSTEMARDUINO EMBEDDED SYSTEM
ARDUINO EMBEDDED SYSTEMVishal GARG
 
Automation of shopping cart to ease queue in malls by using RFID
Automation of shopping cart to ease queue in malls by using RFIDAutomation of shopping cart to ease queue in malls by using RFID
Automation of shopping cart to ease queue in malls by using RFIDSudher Sun
 
Iot attendance system using fingerprint module
Iot attendance system using fingerprint module Iot attendance system using fingerprint module
Iot attendance system using fingerprint module AjinkyaMore29
 
Heart rate monitoring system using arduino
Heart rate monitoring system using  arduinoHeart rate monitoring system using  arduino
Heart rate monitoring system using arduinosoundaryasheshachala
 
HOME AUTOMATION SYSTEM USING RADIO FREQUENCY
HOME AUTOMATION SYSTEM USING RADIO FREQUENCYHOME AUTOMATION SYSTEM USING RADIO FREQUENCY
HOME AUTOMATION SYSTEM USING RADIO FREQUENCYSUDIP KUMAR PAUL
 
Arduino RFID Module (RC522) & Buzzer Access System
Arduino RFID Module (RC522) & Buzzer Access SystemArduino RFID Module (RC522) & Buzzer Access System
Arduino RFID Module (RC522) & Buzzer Access SystemMahmudul Hasan
 
PROJECT REPORT ON Home automation using by Bluetooth
 PROJECT REPORT ON Home automation using by Bluetooth PROJECT REPORT ON Home automation using by Bluetooth
PROJECT REPORT ON Home automation using by BluetoothAakashkumar276
 
Iot based health monitoring system
Iot based health monitoring systemIot based health monitoring system
Iot based health monitoring systemShaswataMohanta
 
Humidity & Temperature monitoring using arduino
Humidity & Temperature monitoring using arduinoHumidity & Temperature monitoring using arduino
Humidity & Temperature monitoring using arduinoMuhammadJaved191
 
Bluetooth based home automation using Arduino UNO
Bluetooth based home automation using Arduino UNOBluetooth based home automation using Arduino UNO
Bluetooth based home automation using Arduino UNOparameshwar koneti
 
Nodemcu - introduction
Nodemcu - introductionNodemcu - introduction
Nodemcu - introductionMichal Sedlak
 
Home security system using iot
Home security system using iotHome security system using iot
Home security system using iotMDMarufMF
 
Keypad scanner using Verilog code in VLSI Systems
Keypad scanner using Verilog code in VLSI SystemsKeypad scanner using Verilog code in VLSI Systems
Keypad scanner using Verilog code in VLSI SystemsSrishti Kakade
 
Introduction to arduino ppt main
Introduction to  arduino ppt mainIntroduction to  arduino ppt main
Introduction to arduino ppt maineddy royappa
 
Gas sensor Alarm
Gas sensor AlarmGas sensor Alarm
Gas sensor AlarmUdit Jain
 
Modbus introduction
Modbus introductionModbus introduction
Modbus introductionPrem Sanil
 
ARDUINO BASED TIME AND TEMPERATURE DISPLAY
ARDUINO BASED TIME AND TEMPERATURE DISPLAY ARDUINO BASED TIME AND TEMPERATURE DISPLAY
ARDUINO BASED TIME AND TEMPERATURE DISPLAY ajit kumar singh
 

Was ist angesagt? (20)

ARDUINO EMBEDDED SYSTEM
ARDUINO EMBEDDED SYSTEMARDUINO EMBEDDED SYSTEM
ARDUINO EMBEDDED SYSTEM
 
Automation of shopping cart to ease queue in malls by using RFID
Automation of shopping cart to ease queue in malls by using RFIDAutomation of shopping cart to ease queue in malls by using RFID
Automation of shopping cart to ease queue in malls by using RFID
 
Iot attendance system using fingerprint module
Iot attendance system using fingerprint module Iot attendance system using fingerprint module
Iot attendance system using fingerprint module
 
Smart shopping cart (using RFID)
Smart shopping cart (using RFID)Smart shopping cart (using RFID)
Smart shopping cart (using RFID)
 
Heart rate monitoring system using arduino
Heart rate monitoring system using  arduinoHeart rate monitoring system using  arduino
Heart rate monitoring system using arduino
 
HOME AUTOMATION SYSTEM USING RADIO FREQUENCY
HOME AUTOMATION SYSTEM USING RADIO FREQUENCYHOME AUTOMATION SYSTEM USING RADIO FREQUENCY
HOME AUTOMATION SYSTEM USING RADIO FREQUENCY
 
Arduino RFID Module (RC522) & Buzzer Access System
Arduino RFID Module (RC522) & Buzzer Access SystemArduino RFID Module (RC522) & Buzzer Access System
Arduino RFID Module (RC522) & Buzzer Access System
 
PROJECT REPORT ON Home automation using by Bluetooth
 PROJECT REPORT ON Home automation using by Bluetooth PROJECT REPORT ON Home automation using by Bluetooth
PROJECT REPORT ON Home automation using by Bluetooth
 
Iot based health monitoring system
Iot based health monitoring systemIot based health monitoring system
Iot based health monitoring system
 
Humidity & Temperature monitoring using arduino
Humidity & Temperature monitoring using arduinoHumidity & Temperature monitoring using arduino
Humidity & Temperature monitoring using arduino
 
Arduino
ArduinoArduino
Arduino
 
Rs232 protocal
Rs232 protocalRs232 protocal
Rs232 protocal
 
Bluetooth based home automation using Arduino UNO
Bluetooth based home automation using Arduino UNOBluetooth based home automation using Arduino UNO
Bluetooth based home automation using Arduino UNO
 
Nodemcu - introduction
Nodemcu - introductionNodemcu - introduction
Nodemcu - introduction
 
Home security system using iot
Home security system using iotHome security system using iot
Home security system using iot
 
Keypad scanner using Verilog code in VLSI Systems
Keypad scanner using Verilog code in VLSI SystemsKeypad scanner using Verilog code in VLSI Systems
Keypad scanner using Verilog code in VLSI Systems
 
Introduction to arduino ppt main
Introduction to  arduino ppt mainIntroduction to  arduino ppt main
Introduction to arduino ppt main
 
Gas sensor Alarm
Gas sensor AlarmGas sensor Alarm
Gas sensor Alarm
 
Modbus introduction
Modbus introductionModbus introduction
Modbus introduction
 
ARDUINO BASED TIME AND TEMPERATURE DISPLAY
ARDUINO BASED TIME AND TEMPERATURE DISPLAY ARDUINO BASED TIME AND TEMPERATURE DISPLAY
ARDUINO BASED TIME AND TEMPERATURE DISPLAY
 

Andere mochten auch

Remote temperature and humidity monitoring system using wireless sensor networks
Remote temperature and humidity monitoring system using wireless sensor networksRemote temperature and humidity monitoring system using wireless sensor networks
Remote temperature and humidity monitoring system using wireless sensor networkseSAT Journals
 
Final ppt
Final pptFinal ppt
Final pptAman SN
 
Analog data transmission on rf module using arduino
Analog data transmission on rf module using arduinoAnalog data transmission on rf module using arduino
Analog data transmission on rf module using arduinoSagar Srivastav
 
Informatique verte des capteurs intelligents à la fouille de données - 2014-1...
Informatique verte des capteurs intelligents à la fouille de données - 2014-1...Informatique verte des capteurs intelligents à la fouille de données - 2014-1...
Informatique verte des capteurs intelligents à la fouille de données - 2014-1...Jérôme Rocheteau
 
Fiche récapitulative des projets réalisés
Fiche récapitulative des projets réalisésFiche récapitulative des projets réalisés
Fiche récapitulative des projets réalisésAmine ZANNED
 
Wireless monitoring of soil moisture
Wireless monitoring of soil moistureWireless monitoring of soil moisture
Wireless monitoring of soil moistureAyushi Gagneja
 
Cours16 ressources pour arduino
Cours16   ressources pour arduinoCours16   ressources pour arduino
Cours16 ressources pour arduinolabsud
 
Présentation de projet de fin d’études
Présentation de projet de fin d’étudesPrésentation de projet de fin d’études
Présentation de projet de fin d’étudesAimen Hajri
 
Présentation microprocesseur finale
Présentation microprocesseur finalePrésentation microprocesseur finale
Présentation microprocesseur finaleMahmoud Masmoudi
 
ARDUINO + LABVIEW : CONTRÔLE DE LA TEMPÉRATURE
ARDUINO + LABVIEW : CONTRÔLE DE LA TEMPÉRATUREARDUINO + LABVIEW : CONTRÔLE DE LA TEMPÉRATURE
ARDUINO + LABVIEW : CONTRÔLE DE LA TEMPÉRATUREHajer Dahech
 
présentation soutenance PFE 2016
présentation soutenance PFE 2016présentation soutenance PFE 2016
présentation soutenance PFE 2016Mohsen Sadok
 
Projet de fin d'etude :Control d’acces par empreintes digitale
Projet de fin d'etude :Control d’acces par empreintes digitaleProjet de fin d'etude :Control d’acces par empreintes digitale
Projet de fin d'etude :Control d’acces par empreintes digitaleAbdo07
 
Présentation arduino
Présentation arduinoPrésentation arduino
Présentation arduinoJeff Simon
 
Story Lab - Sensor Journalism [23-04-2015, Liège]
Story Lab - Sensor Journalism [23-04-2015, Liège]Story Lab - Sensor Journalism [23-04-2015, Liège]
Story Lab - Sensor Journalism [23-04-2015, Liège]Gregory Berger
 
Exemple de-code-oop-avec-labview
Exemple de-code-oop-avec-labviewExemple de-code-oop-avec-labview
Exemple de-code-oop-avec-labviewLuc Desruelle
 
« LabVIEW : programmation et applications » ou comment apprendre à utiliser L...
« LabVIEW : programmation et applications » ou comment apprendre à utiliser L...« LabVIEW : programmation et applications » ou comment apprendre à utiliser L...
« LabVIEW : programmation et applications » ou comment apprendre à utiliser L...Luc Desruelle
 
Techniques de programmation avancée LabVIEW : gestion des données de la local...
Techniques de programmation avancée LabVIEW : gestion des données de la local...Techniques de programmation avancée LabVIEW : gestion des données de la local...
Techniques de programmation avancée LabVIEW : gestion des données de la local...Luc Desruelle
 
Introduction à l'IoT: du capteur à la donnée_Presentation Mix-IT2015
Introduction à l'IoT: du capteur à la donnée_Presentation Mix-IT2015Introduction à l'IoT: du capteur à la donnée_Presentation Mix-IT2015
Introduction à l'IoT: du capteur à la donnée_Presentation Mix-IT2015Sameh BEN FREDJ
 
Yassine Otmane voiture commandée à distance (XBEE)
Yassine Otmane voiture commandée à distance (XBEE)Yassine Otmane voiture commandée à distance (XBEE)
Yassine Otmane voiture commandée à distance (XBEE)Othmane Yassine
 

Andere mochten auch (20)

Remote temperature and humidity monitoring system using wireless sensor networks
Remote temperature and humidity monitoring system using wireless sensor networksRemote temperature and humidity monitoring system using wireless sensor networks
Remote temperature and humidity monitoring system using wireless sensor networks
 
Final ppt
Final pptFinal ppt
Final ppt
 
Analog data transmission on rf module using arduino
Analog data transmission on rf module using arduinoAnalog data transmission on rf module using arduino
Analog data transmission on rf module using arduino
 
Informatique verte des capteurs intelligents à la fouille de données - 2014-1...
Informatique verte des capteurs intelligents à la fouille de données - 2014-1...Informatique verte des capteurs intelligents à la fouille de données - 2014-1...
Informatique verte des capteurs intelligents à la fouille de données - 2014-1...
 
Fiche récapitulative des projets réalisés
Fiche récapitulative des projets réalisésFiche récapitulative des projets réalisés
Fiche récapitulative des projets réalisés
 
Wireless monitoring of soil moisture
Wireless monitoring of soil moistureWireless monitoring of soil moisture
Wireless monitoring of soil moisture
 
Cours16 ressources pour arduino
Cours16   ressources pour arduinoCours16   ressources pour arduino
Cours16 ressources pour arduino
 
Présentation de projet de fin d’études
Présentation de projet de fin d’étudesPrésentation de projet de fin d’études
Présentation de projet de fin d’études
 
Présentation microprocesseur finale
Présentation microprocesseur finalePrésentation microprocesseur finale
Présentation microprocesseur finale
 
ARDUINO + LABVIEW : CONTRÔLE DE LA TEMPÉRATURE
ARDUINO + LABVIEW : CONTRÔLE DE LA TEMPÉRATUREARDUINO + LABVIEW : CONTRÔLE DE LA TEMPÉRATURE
ARDUINO + LABVIEW : CONTRÔLE DE LA TEMPÉRATURE
 
présentation soutenance PFE 2016
présentation soutenance PFE 2016présentation soutenance PFE 2016
présentation soutenance PFE 2016
 
Projet de fin d'etude :Control d’acces par empreintes digitale
Projet de fin d'etude :Control d’acces par empreintes digitaleProjet de fin d'etude :Control d’acces par empreintes digitale
Projet de fin d'etude :Control d’acces par empreintes digitale
 
Les systèmes embarqués arduino
Les systèmes embarqués arduinoLes systèmes embarqués arduino
Les systèmes embarqués arduino
 
Présentation arduino
Présentation arduinoPrésentation arduino
Présentation arduino
 
Story Lab - Sensor Journalism [23-04-2015, Liège]
Story Lab - Sensor Journalism [23-04-2015, Liège]Story Lab - Sensor Journalism [23-04-2015, Liège]
Story Lab - Sensor Journalism [23-04-2015, Liège]
 
Exemple de-code-oop-avec-labview
Exemple de-code-oop-avec-labviewExemple de-code-oop-avec-labview
Exemple de-code-oop-avec-labview
 
« LabVIEW : programmation et applications » ou comment apprendre à utiliser L...
« LabVIEW : programmation et applications » ou comment apprendre à utiliser L...« LabVIEW : programmation et applications » ou comment apprendre à utiliser L...
« LabVIEW : programmation et applications » ou comment apprendre à utiliser L...
 
Techniques de programmation avancée LabVIEW : gestion des données de la local...
Techniques de programmation avancée LabVIEW : gestion des données de la local...Techniques de programmation avancée LabVIEW : gestion des données de la local...
Techniques de programmation avancée LabVIEW : gestion des données de la local...
 
Introduction à l'IoT: du capteur à la donnée_Presentation Mix-IT2015
Introduction à l'IoT: du capteur à la donnée_Presentation Mix-IT2015Introduction à l'IoT: du capteur à la donnée_Presentation Mix-IT2015
Introduction à l'IoT: du capteur à la donnée_Presentation Mix-IT2015
 
Yassine Otmane voiture commandée à distance (XBEE)
Yassine Otmane voiture commandée à distance (XBEE)Yassine Otmane voiture commandée à distance (XBEE)
Yassine Otmane voiture commandée à distance (XBEE)
 

Ähnlich wie Wireless humidity and temperature monitoring system

Internet of things laboratory
Internet of things laboratoryInternet of things laboratory
Internet of things laboratorySoumee Maschatak
 
INT4073 L07(Sensors and AcutTORS).pdf
INT4073 L07(Sensors and AcutTORS).pdfINT4073 L07(Sensors and AcutTORS).pdf
INT4073 L07(Sensors and AcutTORS).pdfMSingh88
 
Arduino projects &amp; tutorials
Arduino projects &amp; tutorialsArduino projects &amp; tutorials
Arduino projects &amp; tutorialsAnshu Pandey
 
Radio frequency identification system
Radio frequency identification systemRadio frequency identification system
Radio frequency identification systemAminu Bugaje
 
Real-Time Monitoring and Control System for Industry
Real-Time Monitoring and Control System for IndustryReal-Time Monitoring and Control System for Industry
Real-Time Monitoring and Control System for Industryijsrd.com
 
Ijeee 33-36-surveillance system for coal mines based on wireless sensor network
Ijeee 33-36-surveillance system for coal mines based on wireless sensor networkIjeee 33-36-surveillance system for coal mines based on wireless sensor network
Ijeee 33-36-surveillance system for coal mines based on wireless sensor networkKumar Goud
 
Fire Fighter Robot with Night Vision Camera (1).pptx
Fire Fighter Robot with Night Vision Camera (1).pptxFire Fighter Robot with Night Vision Camera (1).pptx
Fire Fighter Robot with Night Vision Camera (1).pptxSyedMohiuddin62
 
IRJET- Measurement of Temperature and Humidity by using Arduino Tool and DHT11
IRJET- Measurement of Temperature and Humidity by using Arduino Tool and DHT11IRJET- Measurement of Temperature and Humidity by using Arduino Tool and DHT11
IRJET- Measurement of Temperature and Humidity by using Arduino Tool and DHT11IRJET Journal
 
ARDUINO BASED GAS LEAKAGE REPORT FULL
ARDUINO BASED GAS LEAKAGE REPORT FULLARDUINO BASED GAS LEAKAGE REPORT FULL
ARDUINO BASED GAS LEAKAGE REPORT FULLHari sankar
 
Electronic voting machine using RFID
Electronic voting machine using RFIDElectronic voting machine using RFID
Electronic voting machine using RFIDBharath Chapala
 
Monitoring temperature rumah dengan display lcd dan recording
Monitoring temperature rumah dengan display lcd dan recordingMonitoring temperature rumah dengan display lcd dan recording
Monitoring temperature rumah dengan display lcd dan recordingMR Selamet
 
Monitoring temperature ruangan dengan display lcd
Monitoring temperature ruangan dengan display lcdMonitoring temperature ruangan dengan display lcd
Monitoring temperature ruangan dengan display lcdsiti_haryani
 
Monitoring temperature rumah dengan display lcd dan recording
Monitoring temperature rumah dengan display lcd dan recordingMonitoring temperature rumah dengan display lcd dan recording
Monitoring temperature rumah dengan display lcd dan recordingYuda Wardiana
 
Home Automation with MATLAB and ARDUINO Interface
Home Automation with MATLAB and ARDUINO InterfaceHome Automation with MATLAB and ARDUINO Interface
Home Automation with MATLAB and ARDUINO InterfaceAlok Tiwari
 
Monitoring temperature ruangan dengan display lcd
Monitoring temperature ruangan dengan display lcdMonitoring temperature ruangan dengan display lcd
Monitoring temperature ruangan dengan display lcdmukhammadimam
 

Ähnlich wie Wireless humidity and temperature monitoring system (20)

Internet of things laboratory
Internet of things laboratoryInternet of things laboratory
Internet of things laboratory
 
INT4073 L07(Sensors and AcutTORS).pdf
INT4073 L07(Sensors and AcutTORS).pdfINT4073 L07(Sensors and AcutTORS).pdf
INT4073 L07(Sensors and AcutTORS).pdf
 
Arduino projects &amp; tutorials
Arduino projects &amp; tutorialsArduino projects &amp; tutorials
Arduino projects &amp; tutorials
 
ARDUINO (1).pdf
ARDUINO (1).pdfARDUINO (1).pdf
ARDUINO (1).pdf
 
Radio frequency identification system
Radio frequency identification systemRadio frequency identification system
Radio frequency identification system
 
Arduino
ArduinoArduino
Arduino
 
Arduino
ArduinoArduino
Arduino
 
Real-Time Monitoring and Control System for Industry
Real-Time Monitoring and Control System for IndustryReal-Time Monitoring and Control System for Industry
Real-Time Monitoring and Control System for Industry
 
Ijeee 33-36-surveillance system for coal mines based on wireless sensor network
Ijeee 33-36-surveillance system for coal mines based on wireless sensor networkIjeee 33-36-surveillance system for coal mines based on wireless sensor network
Ijeee 33-36-surveillance system for coal mines based on wireless sensor network
 
Fire Fighter Robot with Night Vision Camera (1).pptx
Fire Fighter Robot with Night Vision Camera (1).pptxFire Fighter Robot with Night Vision Camera (1).pptx
Fire Fighter Robot with Night Vision Camera (1).pptx
 
Arduino
ArduinoArduino
Arduino
 
IRJET- Measurement of Temperature and Humidity by using Arduino Tool and DHT11
IRJET- Measurement of Temperature and Humidity by using Arduino Tool and DHT11IRJET- Measurement of Temperature and Humidity by using Arduino Tool and DHT11
IRJET- Measurement of Temperature and Humidity by using Arduino Tool and DHT11
 
ARDUINO BASED GAS LEAKAGE REPORT FULL
ARDUINO BASED GAS LEAKAGE REPORT FULLARDUINO BASED GAS LEAKAGE REPORT FULL
ARDUINO BASED GAS LEAKAGE REPORT FULL
 
Electronic voting machine using RFID
Electronic voting machine using RFIDElectronic voting machine using RFID
Electronic voting machine using RFID
 
RF ID_toll2
RF ID_toll2RF ID_toll2
RF ID_toll2
 
Monitoring temperature rumah dengan display lcd dan recording
Monitoring temperature rumah dengan display lcd dan recordingMonitoring temperature rumah dengan display lcd dan recording
Monitoring temperature rumah dengan display lcd dan recording
 
Monitoring temperature ruangan dengan display lcd
Monitoring temperature ruangan dengan display lcdMonitoring temperature ruangan dengan display lcd
Monitoring temperature ruangan dengan display lcd
 
Monitoring temperature rumah dengan display lcd dan recording
Monitoring temperature rumah dengan display lcd dan recordingMonitoring temperature rumah dengan display lcd dan recording
Monitoring temperature rumah dengan display lcd dan recording
 
Home Automation with MATLAB and ARDUINO Interface
Home Automation with MATLAB and ARDUINO InterfaceHome Automation with MATLAB and ARDUINO Interface
Home Automation with MATLAB and ARDUINO Interface
 
Monitoring temperature ruangan dengan display lcd
Monitoring temperature ruangan dengan display lcdMonitoring temperature ruangan dengan display lcd
Monitoring temperature ruangan dengan display lcd
 

Kürzlich hochgeladen

Developing An App To Navigate The Roads of Brazil
Developing An App To Navigate The Roads of BrazilDeveloping An App To Navigate The Roads of Brazil
Developing An App To Navigate The Roads of BrazilV3cube
 
04-2024-HHUG-Sales-and-Marketing-Alignment.pptx
04-2024-HHUG-Sales-and-Marketing-Alignment.pptx04-2024-HHUG-Sales-and-Marketing-Alignment.pptx
04-2024-HHUG-Sales-and-Marketing-Alignment.pptxHampshireHUG
 
Finology Group – Insurtech Innovation Award 2024
Finology Group – Insurtech Innovation Award 2024Finology Group – Insurtech Innovation Award 2024
Finology Group – Insurtech Innovation Award 2024The Digital Insurer
 
Exploring the Future Potential of AI-Enabled Smartphone Processors
Exploring the Future Potential of AI-Enabled Smartphone ProcessorsExploring the Future Potential of AI-Enabled Smartphone Processors
Exploring the Future Potential of AI-Enabled Smartphone Processorsdebabhi2
 
TrustArc Webinar - Unlock the Power of AI-Driven Data Discovery
TrustArc Webinar - Unlock the Power of AI-Driven Data DiscoveryTrustArc Webinar - Unlock the Power of AI-Driven Data Discovery
TrustArc Webinar - Unlock the Power of AI-Driven Data DiscoveryTrustArc
 
How to Troubleshoot Apps for the Modern Connected Worker
How to Troubleshoot Apps for the Modern Connected WorkerHow to Troubleshoot Apps for the Modern Connected Worker
How to Troubleshoot Apps for the Modern Connected WorkerThousandEyes
 
Driving Behavioral Change for Information Management through Data-Driven Gree...
Driving Behavioral Change for Information Management through Data-Driven Gree...Driving Behavioral Change for Information Management through Data-Driven Gree...
Driving Behavioral Change for Information Management through Data-Driven Gree...Enterprise Knowledge
 
Apidays New York 2024 - The value of a flexible API Management solution for O...
Apidays New York 2024 - The value of a flexible API Management solution for O...Apidays New York 2024 - The value of a flexible API Management solution for O...
Apidays New York 2024 - The value of a flexible API Management solution for O...apidays
 
Artificial Intelligence: Facts and Myths
Artificial Intelligence: Facts and MythsArtificial Intelligence: Facts and Myths
Artificial Intelligence: Facts and MythsJoaquim Jorge
 
What Are The Drone Anti-jamming Systems Technology?
What Are The Drone Anti-jamming Systems Technology?What Are The Drone Anti-jamming Systems Technology?
What Are The Drone Anti-jamming Systems Technology?Antenna Manufacturer Coco
 
Handwritten Text Recognition for manuscripts and early printed texts
Handwritten Text Recognition for manuscripts and early printed textsHandwritten Text Recognition for manuscripts and early printed texts
Handwritten Text Recognition for manuscripts and early printed textsMaria Levchenko
 
[2024]Digital Global Overview Report 2024 Meltwater.pdf
[2024]Digital Global Overview Report 2024 Meltwater.pdf[2024]Digital Global Overview Report 2024 Meltwater.pdf
[2024]Digital Global Overview Report 2024 Meltwater.pdfhans926745
 
Mastering MySQL Database Architecture: Deep Dive into MySQL Shell and MySQL R...
Mastering MySQL Database Architecture: Deep Dive into MySQL Shell and MySQL R...Mastering MySQL Database Architecture: Deep Dive into MySQL Shell and MySQL R...
Mastering MySQL Database Architecture: Deep Dive into MySQL Shell and MySQL R...Miguel Araújo
 
Powerful Google developer tools for immediate impact! (2023-24 C)
Powerful Google developer tools for immediate impact! (2023-24 C)Powerful Google developer tools for immediate impact! (2023-24 C)
Powerful Google developer tools for immediate impact! (2023-24 C)wesley chun
 
Tata AIG General Insurance Company - Insurer Innovation Award 2024
Tata AIG General Insurance Company - Insurer Innovation Award 2024Tata AIG General Insurance Company - Insurer Innovation Award 2024
Tata AIG General Insurance Company - Insurer Innovation Award 2024The Digital Insurer
 
presentation ICT roal in 21st century education
presentation ICT roal in 21st century educationpresentation ICT roal in 21st century education
presentation ICT roal in 21st century educationjfdjdjcjdnsjd
 
Apidays Singapore 2024 - Building Digital Trust in a Digital Economy by Veron...
Apidays Singapore 2024 - Building Digital Trust in a Digital Economy by Veron...Apidays Singapore 2024 - Building Digital Trust in a Digital Economy by Veron...
Apidays Singapore 2024 - Building Digital Trust in a Digital Economy by Veron...apidays
 
Strategies for Landing an Oracle DBA Job as a Fresher
Strategies for Landing an Oracle DBA Job as a FresherStrategies for Landing an Oracle DBA Job as a Fresher
Strategies for Landing an Oracle DBA Job as a FresherRemote DBA Services
 
Strategize a Smooth Tenant-to-tenant Migration and Copilot Takeoff
Strategize a Smooth Tenant-to-tenant Migration and Copilot TakeoffStrategize a Smooth Tenant-to-tenant Migration and Copilot Takeoff
Strategize a Smooth Tenant-to-tenant Migration and Copilot Takeoffsammart93
 
From Event to Action: Accelerate Your Decision Making with Real-Time Automation
From Event to Action: Accelerate Your Decision Making with Real-Time AutomationFrom Event to Action: Accelerate Your Decision Making with Real-Time Automation
From Event to Action: Accelerate Your Decision Making with Real-Time AutomationSafe Software
 

Kürzlich hochgeladen (20)

Developing An App To Navigate The Roads of Brazil
Developing An App To Navigate The Roads of BrazilDeveloping An App To Navigate The Roads of Brazil
Developing An App To Navigate The Roads of Brazil
 
04-2024-HHUG-Sales-and-Marketing-Alignment.pptx
04-2024-HHUG-Sales-and-Marketing-Alignment.pptx04-2024-HHUG-Sales-and-Marketing-Alignment.pptx
04-2024-HHUG-Sales-and-Marketing-Alignment.pptx
 
Finology Group – Insurtech Innovation Award 2024
Finology Group – Insurtech Innovation Award 2024Finology Group – Insurtech Innovation Award 2024
Finology Group – Insurtech Innovation Award 2024
 
Exploring the Future Potential of AI-Enabled Smartphone Processors
Exploring the Future Potential of AI-Enabled Smartphone ProcessorsExploring the Future Potential of AI-Enabled Smartphone Processors
Exploring the Future Potential of AI-Enabled Smartphone Processors
 
TrustArc Webinar - Unlock the Power of AI-Driven Data Discovery
TrustArc Webinar - Unlock the Power of AI-Driven Data DiscoveryTrustArc Webinar - Unlock the Power of AI-Driven Data Discovery
TrustArc Webinar - Unlock the Power of AI-Driven Data Discovery
 
How to Troubleshoot Apps for the Modern Connected Worker
How to Troubleshoot Apps for the Modern Connected WorkerHow to Troubleshoot Apps for the Modern Connected Worker
How to Troubleshoot Apps for the Modern Connected Worker
 
Driving Behavioral Change for Information Management through Data-Driven Gree...
Driving Behavioral Change for Information Management through Data-Driven Gree...Driving Behavioral Change for Information Management through Data-Driven Gree...
Driving Behavioral Change for Information Management through Data-Driven Gree...
 
Apidays New York 2024 - The value of a flexible API Management solution for O...
Apidays New York 2024 - The value of a flexible API Management solution for O...Apidays New York 2024 - The value of a flexible API Management solution for O...
Apidays New York 2024 - The value of a flexible API Management solution for O...
 
Artificial Intelligence: Facts and Myths
Artificial Intelligence: Facts and MythsArtificial Intelligence: Facts and Myths
Artificial Intelligence: Facts and Myths
 
What Are The Drone Anti-jamming Systems Technology?
What Are The Drone Anti-jamming Systems Technology?What Are The Drone Anti-jamming Systems Technology?
What Are The Drone Anti-jamming Systems Technology?
 
Handwritten Text Recognition for manuscripts and early printed texts
Handwritten Text Recognition for manuscripts and early printed textsHandwritten Text Recognition for manuscripts and early printed texts
Handwritten Text Recognition for manuscripts and early printed texts
 
[2024]Digital Global Overview Report 2024 Meltwater.pdf
[2024]Digital Global Overview Report 2024 Meltwater.pdf[2024]Digital Global Overview Report 2024 Meltwater.pdf
[2024]Digital Global Overview Report 2024 Meltwater.pdf
 
Mastering MySQL Database Architecture: Deep Dive into MySQL Shell and MySQL R...
Mastering MySQL Database Architecture: Deep Dive into MySQL Shell and MySQL R...Mastering MySQL Database Architecture: Deep Dive into MySQL Shell and MySQL R...
Mastering MySQL Database Architecture: Deep Dive into MySQL Shell and MySQL R...
 
Powerful Google developer tools for immediate impact! (2023-24 C)
Powerful Google developer tools for immediate impact! (2023-24 C)Powerful Google developer tools for immediate impact! (2023-24 C)
Powerful Google developer tools for immediate impact! (2023-24 C)
 
Tata AIG General Insurance Company - Insurer Innovation Award 2024
Tata AIG General Insurance Company - Insurer Innovation Award 2024Tata AIG General Insurance Company - Insurer Innovation Award 2024
Tata AIG General Insurance Company - Insurer Innovation Award 2024
 
presentation ICT roal in 21st century education
presentation ICT roal in 21st century educationpresentation ICT roal in 21st century education
presentation ICT roal in 21st century education
 
Apidays Singapore 2024 - Building Digital Trust in a Digital Economy by Veron...
Apidays Singapore 2024 - Building Digital Trust in a Digital Economy by Veron...Apidays Singapore 2024 - Building Digital Trust in a Digital Economy by Veron...
Apidays Singapore 2024 - Building Digital Trust in a Digital Economy by Veron...
 
Strategies for Landing an Oracle DBA Job as a Fresher
Strategies for Landing an Oracle DBA Job as a FresherStrategies for Landing an Oracle DBA Job as a Fresher
Strategies for Landing an Oracle DBA Job as a Fresher
 
Strategize a Smooth Tenant-to-tenant Migration and Copilot Takeoff
Strategize a Smooth Tenant-to-tenant Migration and Copilot TakeoffStrategize a Smooth Tenant-to-tenant Migration and Copilot Takeoff
Strategize a Smooth Tenant-to-tenant Migration and Copilot Takeoff
 
From Event to Action: Accelerate Your Decision Making with Real-Time Automation
From Event to Action: Accelerate Your Decision Making with Real-Time AutomationFrom Event to Action: Accelerate Your Decision Making with Real-Time Automation
From Event to Action: Accelerate Your Decision Making with Real-Time Automation
 

Wireless humidity and temperature monitoring system

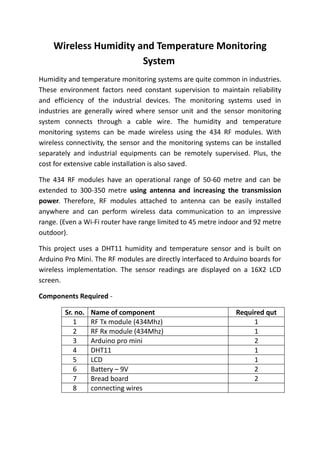
  • 1. Wireless Humidity and Temperature Monitoring System Humidity and temperature monitoring systems are quite common in industries. These environment factors need constant supervision to maintain reliability and efficiency of the industrial devices. The monitoring systems used in industries are generally wired where sensor unit and the sensor monitoring system connects through a cable wire. The humidity and temperature monitoring systems can be made wireless using the 434 RF modules. With wireless connectivity, the sensor and the monitoring systems can be installed separately and industrial equipments can be remotely supervised. Plus, the cost for extensive cable installation is also saved. The 434 RF modules have an operational range of 50-60 metre and can be extended to 300-350 metre using antenna and increasing the transmission power. Therefore, RF modules attached to antenna can be easily installed anywhere and can perform wireless data communication to an impressive range. (Even a Wi-Fi router have range limited to 45 metre indoor and 92 metre outdoor). This project uses a DHT11 humidity and temperature sensor and is built on Arduino Pro Mini. The RF modules are directly interfaced to Arduino boards for wireless implementation. The sensor readings are displayed on a 16X2 LCD screen. Components Required - Sr. no. Name of component Required qut 1 RF Tx module (434Mhz) 1 2 RF Rx module (434Mhz) 1 3 Arduino pro mini 2 4 DHT11 1 5 LCD 1 6 Battery – 9V 2 7 Bread board 2 8 connecting wires
  • 2. Block Diagram - Circuit Diagram - Circuit Connections - There are two circuits in the project - a) Temperature and humidity sensor circuit and b) Sensor reading display circuit. In the sensor circuit, the data pin (Pin 2) of DHT11 sensor is connected to A2 analog pin of the Arduino Pro Mini. The pins VCC (Pin 1) and Ground (Pin 4) are connected to VCC and ground respectively. An RF transmitter is interfaced to the Arduino board with its serial input pin (Pin 2) connected to pin 12 of the Arduino board. An antenna is connected at pin 4 of the transmitter for range extension. On the display circuit, an RF receiver is connected to another Arduino Pro Mini with serial out pin (Pin 2) of receiver connected to pin 11 of Arduino. An antenna is connected to pin 8 of the receiver for range extension. An LCD is
  • 3. interfaced to the Arduino board for displaying temperature and humidity readings. . The 16X2 LCD display is connected to the Arduino board by connecting its data pins to pins 7 to 4 of the Arduino board. The RS and RW pin of LCD is connected to pins 3 and 2 of the Arduino Pro Mini respectively. The E pin of the LCD is grounded. LCD Arduino UNO RS 3 RW 2 E GRND D7,D6,D5,D4 7,6,5,4 respectively The standard code library for interfacing Arduino UNO and Arduino Pro Mini are used in the project to program LCD with the board.
  • 4. How the Circuit Works - DHT11 Temperature and Humidity Sensor is a digital sensor with inbuilt capacitive humidity sensor and Thermistor. It relays a real-time temperature and humidity reading every 2 seconds. The sensor operates on 3.5 to 5.5 V supply and can read temperature reading between 0° C and 50° C and relative humidity between 20% and 95%. The sensor cannot be directly interfaced to a digital pin of the board as it operates on 1-wire protocol which must be implemented on the firmware. First the data pin is configured to input and a start signal is sent to it. The start signal comprises of a LOW for 18 milliseconds followed by a HIGH for 20 to 40 microseconds followed by a LOW again for 80 microseconds and a HIGH for 80 microseconds. After sending the start signal, the pin is configured to digital output and 40-bit data comprising of the temperature and humidity reading is latched out. Of the 5-byte data, the first two bytes are integer and decimal part of reading for relative humidity respectively, third and fourth bytes are integer and decimal part of reading for temperature and last one is checksum byte. When interfacing DHT11 with Arduino, already a code library is available and the sensor data can be read by read11() function of the DHT class. On the sensor circuit, the temperature and relative humidity readings are first fetched by the Arduino and their character representation are stored in separate arrays. The character buffer is serially transmitted on the RF using the VirtualWire library of the Arduino. Check out the transmitter side Arduino program code to learn how Arduino gets the sensor value and store them to arrays for RF transmission. On the display circuit, character representation of sensor readings is detected by the RF receiver and serially passed to receiver side Arduino board. The program code on receiver side Arduino board reads the character buffer and convert it to integer form for displaying on LCD. The standard functions of lcd library are used to display readings on LCD. Check out the receiver side Arduino code to learn how sensor values are read from the buffer and converted to proper format for display on LCD screen.
  • 5. Programming Guide - On the transmitter side Arduino, first the program code imports the required standard libraries. The VirtualWire library is required to connect with RF module and DHT library is needed to interface DHT11 sensor. A "DHT" object is instantiated. Global variables ledPin and Sensor1Pin are declared and mapped to Pin 13 where transmission progress indicator LED is connected and Pin A2 where data pin of DHT11 temperature and humidity sensor is connected respectively. A variable Sensor1Data is declared to stored sensor reading and character type arrays Sensor1CharMsg and Sensor1CharMsg1 are declared to store decimal representation of the relative humidity and temperature reading. #include <VirtualWire.h> #include <dht.h> #define dht_dpin A0 //no ; here. Set equal to channel sensor is on dht DHT; // LED's const int ledPin = 13; // Sensors const int Sensor1Pin = A2; int Sensor1Data; char Sensor1CharMsg[4]; char Sensor1CharMsg1[4]; A setup() function is called where indicator LED pin is set to output while sensor connected pin is set to input mode using pinMode() function. The baud rate of the Arduino is set to 9600 bits per second using the serial.begin() function. The initial messages are flashed to the buffer using Serial.Println() function. The baud rate for serial output is set to 2000 bits per second using the vw_setup() function of the VirtualWire library. void setup() { // PinModes // LED pinMode(ledPin,OUTPUT); // Sensor(s) pinMode(Sensor1Pin,INPUT);
  • 6. Serial.begin(9600); delay(300);//Let system settle Serial.println("Humidity and temperaturenn"); delay(700); // VirtualWire setup vw_setup(2000); // Bits per sec } A loop function is called where reading from DHT11 sensor are read using the read11() function on DHT object and the character representation of decimal base of the humidity reading is stored in Sensor1CharMsg array and the character representation of decimal base of the temperature reading is stored in Sensor1CharMsg1 array. void loop() { // Read and store Sensor 1 data // Sensor1Data = analogRead(Sensor1Pin); DHT.read11(dht_dpin); // Convert integer data to Char array directly itoa(DHT.humidity,Sensor1CharMsg,10); itoa(DHT.temperature,Sensor1CharMsg1,10); The sensor readings are serially out as human-readable ASCII text using the Serial.print() and Serial.println() function. // DEBUG Serial.print("Current humidity = "); Serial.print(DHT.humidity); Serial.print("% "); Serial.print("temperature = "); Serial.print(DHT.temperature); Serial.println("C "); delay(800); // END DEBUG
  • 7. The transmission progress indicator LED is switched on by passing a HIGH to pin 13. The character message containing the temperature and humidity reading is sent serially using the vw_send() function and vw_wait_tx() is used to block transmission until new message is available for transmission. The LED at pin 13 is switched OFF by passing a LOW to indicate successful transmission of message. digitalWrite(13, true); // Turn on a light to show transmitting vw_send((uint8_t *)Sensor1CharMsg, strlen(Sensor1CharMsg)); vw_wait_tx(); // Wait until the whole message is gone delay(200); vw_send((uint8_t *)Sensor1CharMsg1, strlen(Sensor1CharMsg1)); vw_wait_tx(); // Wait until the whole message is gone digitalWrite(13, false); // Turn off a light after transmission delay(200); } // END void loop... This ends the transmitter side Arduino code. On the receiver side Arduino, the program code first imports the required standard libraries. LiquidCrystal.h is imported to interface the LCD and VirtualWire library is imported to read serial input from the RF receiver. The pins 2 to 7 are mapped to Liquid Crystal object lcd. #include <LiquidCrystal.h> #include <VirtualWire.h> LiquidCrystal lcd(2, 3, 4, 5, 6, 7); The pin 13 where transmission progress indicator LED is connected is assigned to ledpin variable and two variables - "Sensor1Data" and "Sensor2Data" to capture reading of DHT11 in integer form and arrays "Sensor1CharMsg1" and "Sensor1CharMsg2" to store character representation of the readings are declared. There are counter variables "i" and "j" also declared. // LED's int ledPin = 13; // Sensors int Sensor1Data; int Sensor2Data; // RF Transmission container
  • 8. char SensorCharMsg1[4]; char rxAray[8]; char SensorCharMsg2[4]; int j,k; A setup() function is called where baud rate of the Arduino is set to 9600 bits per second using Serial.begin() function. The lcd object is initialized to 16X2 mode. The led connected pin and pin connected to RS and RW are set to output mode using the pinMode() function. void setup() { Serial.begin(9600); lcd.begin(16, 2); // sets the digital pin as output pinMode(ledPin, OUTPUT); pinMode(9, OUTPUT); pinMode(8, OUTPUT); The RF transmitter and receiver module does not have Push To Talk pin. They go inactive when no data is present to transmit or receive respectively. Therefore vw_set_ptt_inverted(true) is used to configure push to talk polarity and prompt the receiver to continue receiving data after fetching the first character. The baud rate for serial input is set to 2000 bits per second using vw_setup() function. The reception of the data is initiated using vw_rx_start(). // VirtualWire // Initialise the IO and ISR // Required for DR3100 vw_set_ptt_inverted(true); // Bits per sec vw_setup(2000); // Start the receiver PLL running vw_rx_start(); } // END void setup A loop() function is called inside which, array "buf[]" to read serial buffer and "buflen" variable to store buffer length are declared. The counter variables are initialized to zero. void loop(){ uint8_t buf[VW_MAX_MESSAGE_LEN];
  • 9. uint8_t buflen = VW_MAX_MESSAGE_LEN; j = 0; k = 0; The character buffer is detected using the vw_get_message() function, if it is present, a counter "i" is initialized. The buffer readings are first stored to RxAray array using the for loop with the initialized counter and after detecting the null character, the temperature and humidity sensor readings clubbed in RxAray are separately stored to "SensorCharMsg1" and " SensorCharMsg2" arrays. // Non-blocking if (vw_get_message(buf, &buflen)) { int i; // Message with a good checksum received, dump it. for (i = 0; i < buflen; i++) { // Fill Sensor1CharMsg Char array with corresponding // chars from buffer. rxAray[i] = char(buf[i]); } rxAray[buflen] = '0'; while( j < 2) { SensorCharMsg1[j++] = rxAray[j++]; } while( j < 4)
  • 10. { SensorCharMsg2[k++] = rxAray[j++]; } The variable value along with relevant strings enclosed is passed to the microcontroller's buffer and passed to the LCD for display in a presentable format. // DEBUG Serial.print(" hum = "); Serial.println(SensorCharMsg1); Serial.print(" temp = "); Serial.println(SensorCharMsg2); lcd.setCursor(0,0); lcd.print("Humidity = "); lcd.print(SensorCharMsg1); // change the analog out value: lcd.setCursor(0,1 ); lcd.print("Temparature = "); lcd.print(SensorCharMsg2); // END DEBUG } } This ends the loop() function and the receiver side Arduino code. PROGRAMMING CODE #include <VirtualWire.h> #include <dht.h> #define dht_dpin A0 //no ; here. Set equal to channel sensor is on dht DHT; // LED's const int ledPin = 13;
  • 11. // Sensors const int Sensor1Pin = A2; int Sensor1Data; char Sensor1CharMsg[4]; char Sensor1CharMsg1[4]; void setup() { // PinModes // LED pinMode(ledPin,OUTPUT); // Sensor(s) pinMode(Sensor1Pin,INPUT); Serial.begin(9600); delay(300);//Let system settle Serial.println("Humidity and temperaturenn"); delay(700); // VirtualWire setup vw_setup(2000); // Bits per sec } void loop() { // Read and store Sensor 1 data // Sensor1Data = analogRead(Sensor1Pin); DHT.read11(dht_dpin); // Convert integer data to Char array directly
  • 12. itoa(DHT.humidity,Sensor1CharMsg,10); itoa(DHT.temperature,Sensor1CharMsg1,10); // DEBUG Serial.print("Current humidity = "); Serial.print(DHT.humidity); Serial.print("% "); Serial.print("temperature = "); Serial.print(DHT.temperature); Serial.println("C "); delay(800); // END DEBUG digitalWrite(13, true); // Turn on a light to show transmitting vw_send((uint8_t *)Sensor1CharMsg, strlen(Sensor1CharMsg)); vw_wait_tx(); // Wait until the whole message is gone delay(200); vw_send((uint8_t *)Sensor1CharMsg1, strlen(Sensor1CharMsg1)); vw_wait_tx(); // Wait until the whole message is gone digitalWrite(13, false); // Turn off a light after transmission delay(200); } // END void loop... #include <LiquidCrystal.h> #include <VirtualWire.h> LiquidCrystal lcd(2, 3, 4, 5, 6, 7);
  • 13. // LED's int ledPin = 13; // Sensors int Sensor1Data; int Sensor2Data; // RF Transmission container char SensorCharMsg1[4]; char rxAray[8]; char SensorCharMsg2[4]; int j,k; void setup() { Serial.begin(9600); lcd.begin(16, 2); // sets the digital pin as output pinMode(ledPin, OUTPUT); pinMode(9, OUTPUT); pinMode(8, OUTPUT); // VirtualWire // Initialise the IO and ISR // Required for DR3100 vw_set_ptt_inverted(true); // Bits per sec vw_setup(2000);
  • 14. // Start the receiver PLL running vw_rx_start(); } // END void setup void loop(){ uint8_t buf[VW_MAX_MESSAGE_LEN]; uint8_t buflen = VW_MAX_MESSAGE_LEN; j = 0; k = 0; // Non-blocking if (vw_get_message(buf, &buflen)) { int i; // Message with a good checksum received, dump it. for (i = 0; i < buflen; i++) { // Fill Sensor1CharMsg Char array with corresponding // chars from buffer. rxAray[i] = char(buf[i]); } rxAray[buflen] = '0'; while( j < 2) {
  • 15. SensorCharMsg1[j++] = rxAray[j++]; } while( j < 4) { SensorCharMsg2[k++] = rxAray[j++]; } // DEBUG Serial.print(" hum = "); Serial.println(SensorCharMsg1); Serial.print(" temp = "); Serial.println(SensorCharMsg2); lcd.setCursor(0,0); lcd.print("Humidity = "); lcd.print(SensorCharMsg1); // change the analog out value: lcd.setCursor(0,1 ); lcd.print("Temparature = "); lcd.print(SensorCharMsg2); // END DEBUG } }