Clinical Digital Photography in Orthodontics

Clinical Digital Photography in Orthodontics Clinical Digital Photography in Orthodontics Clinical Digital Photography in Orthodontics Clinical Digital Photography in Orthodontics Clinical Digital Photography in Orthodontics Clinical Digital Photography in Orthodontics Clinical Digital Photography in Orthodontics Clinical Digital Photography in Orthodontics Clinical Digital Photography in Orthodontics Clinical Digital Photography in Orthodontics Clinical Digital Photography in Orthodontics Clinical Digital Photography in Orthodontics Presented By Dr. MUSTAFA HADDAD MSD , MCU 1st Year , 1st Semester Presented By Dr. MUSTAFA HADDAD MSD , MCU 1st Year , 1st Semester Presented By Dr. MUSTAFA HADDAD MSD , MCU 1st Year , 1st Semester Presented By Dr. MUSTAFA HADDAD MSD , MCU 1st Year , 1st Semester

Empfohlen
Weitere ähnliche Inhalte
Was ist angesagt?
Was ist angesagt? (20)
Ähnlich wie Clinical Digital Photography in Orthodontics
Ähnlich wie Clinical Digital Photography in Orthodontics (20)
Kürzlich hochgeladen
Kürzlich hochgeladen (20)
Clinical Digital Photography in Orthodontics
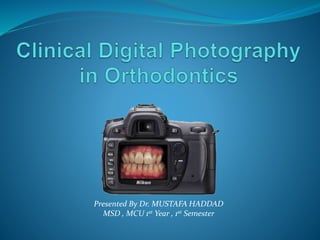
- 1. Presented By Dr. MUSTAFA HADDAD MSD , MCU 1st Year , 1st Semester
- 2. Basic Orthodontic Records include three main types of records: 1. Study models properly-trimmed, stone-cast moulds of the dentition. 2. Radiographs normally a Panorax (OPG) and a Lateral Cephalometric view. 3. Clinical photographs.
- 3. Why Take Orthodontic Photographic Records? Clinical photographs allow the orthodontist to carefully study the existing patient's Soft-tissue patterns during the treatment planning stage. Assess lip morphology, the smile arc and smile esthetics from various angles. Assess the degree of incisal show upon smiling. For purposes of research and publication, and for lecturing and teaching presentations. Growing importance of the need for such records for medico-legal reasons cannot be over emphasized.
- 4. • Can see images almost immediately • Allows for immediate retakes when needed • Can make 100% exact duplicates • Ease of manipulation • Images can be easily stored and catalogued • Images can be instantly forwarded or transmitted to interested parties, such as: patients, labs, colleagues, insurance carriers, and web pages among others Advantages of Direct digital photography :
- 5. Flash Systems The flash systems that should be utilized will fall into two categories: 1. Ring system 2. Point system Ring system flashes: are placed around the lens in either a sectored format or a more traditional single flash component that surrounds the lens.
- 6. Ring flash system the ring flash offers the advantage of evenly illuminating difficult areas within the oral environment and properly rendering their color. One potential drawback of the ring flash system is removing all shadows. This drawback is not as evident with intraoral photography because complete illumination of the subject matter is nearly impossible, as the cheeks, lips, and tongue tend to block some light.
- 7. Point flash system Unlike ring systems that distribute light in a circular pattern, point systems are meant to bring light in from the side.
- 8. • The Dental Photography Mirrors Many photographic mirrors designed specifically for intraoral photography are available. These mirrors are fabricated with chromium, rhodium, or titanium. Any of the aforementioned mirrors will suffice in capturing quality intraoral images; however titanium – coated mirrors tend to produce slightly brighter images.
- 9. Mirrors Once the type of material is selected, it is best to obtain a mirror for buccal images and at least two sizes of occlusal mirrors, so that both large and small mouths can have these mirrors placed comfortably.
- 10. Photographic contrasters Black photographic contrasters should also be utilized in the documentation of aesthetic cases . Black photographic contrasters allow the focus to fall on an individual segment of the smile while blocking distracting imagesn of the tongue, lips, or back of the mouth. Contrasters are particularly useful when communicating incisal translucency to your dental laboratory technician.
- 12. Retractors In order to properly frame images, retractors are a must. At a minimum, two sets of retractors in various sizes should be considered. One set should allow the patient or assistant to hold the retractors the other set should be auto - expanding .
- 13. NUMBER OF PHOTOGRAPHS Different clinicians take different numbers of clinical photographs, depending on who you talk to! There is no “standard” set that is universally-approved as a rule of thumb. However, it can generally be accepted - based on many authorities’ opinions in this field - that a complete “Clinical Photographic Set” for any orthodontic patient at any stage of treatment, that would enable the clinician to obtain maximum benefit and information, should include a minimum of nine photographs; four extra-oral & five intraoral photographs.
- 14. EXTRA ORAL PHOTOGRAPH 1. Face-Frontal (lips relaxed). 2. Face-Frontal (Smiling). 3. Profile (Right side preferably - Lips relaxed). 4. (45 °) Profile (also known as 3/4 Profile - Smiling).
- 15. |
- 16. Extra-oral clinical photographs are the easiest photographs to take. They only require proper positioning of the patient and clinician, in addition of course to the digital camera setup itself. Intra-oral photos require in addition to the camera setup - the proper cheek retractors, dental photography mirrors, as well as a well trained assistant if possible.
- 17. Frontal at rest Frontal dynamic (smile).
- 18. A close-up image of the posed smile This view now is recommended as a standard photograph for careful analysis of the smile relationships.
- 19. Profile (Right Side - Lips Relaxed) This position permits visualization of the contours of the chin and neck area. Profile smile The profile smile image allows one to see the angulations of the maxillary incisors.
- 20. An optional submental view Such a view may be taken to document mandibular asymmetry. In patients with asymmetries.
- 21. Purpose of the intraoral photographs Enable the orthodontist to review the hard and soft tissue findings from the clinical examination during analysis of all the diagnostic data. To record hard and soft tissue conditions as they exist before treatment
- 22. Photographs that show white-spot lesions of the enamel , hyperplastic areas, and gingival clefts are essential to document that such preexisting conditions are not caused by any subsequent orthodontic treatment.
- 23. INTRA ORAL PHOTOGRAPHS There are five essential intra-oral photographs: 1. Frontal - in occlusion 2. Right Buccal - in occlusion 3. Left Buccal - in occlusion 4. Upper Occlusal (using mirrors) 5. Lower Occlusal (using mirrors)
- 25. The frontal centered dental photograph
- 26. The first photo to be usually taken of the set. The dental mid-lines are not as reliable for this purpose as they can be shifted to one side or the other depending on the malocclusion present. It shows teeth and surrounding soft tissue and excluding retractors and lips. The photo should be taken 90° to the facial mid-line & central incisors
- 27. The right buccal dental photograph Usually the second shot in the series. The patient is asked to turn their head slightly to their left so their right side will be facing the clinician.
- 28. The left buccal dental photograph
- 29. Upper Occlusal - Mirror
- 30. The assistant now switches to the smaller retractor set. The clinician inserts the mirror with its wider end inwards to capture maximum width of the arch posteriorly, and pulls it slightly downwards so that the whole upper arch is visible to the last present molar. Minimum retractor show in the image is recommended, and no fingers should be visible at any time.
- 31. Position Of Retractors For Upper Occlusal Shot
- 33. Lower Occlusal - Mirror
- 34. Position Of Retractors For Lower Occlusal Shot
- 36. The assistant would now lower the smaller retractors into a Reverse “V” shape to retract the lower lips sideways and away form the teeth. The clinician would now lift the mirror upwards so he/she may visualize the reflection of the lower arch, while the patient is be asked to “lift their chin up” slightly. Ideally, the shot should be taken 90° to the plane of the mirror, with the last molar present visible.
- 37. An important issue here would be the tongue position of the patient while taking the photo. It is best to ask the patient to “roll back” their tongue behind the mirror so that it won’t interfere with the visibility of any teeth, particularly in the posterior area.
- 38. Ideal” Shot : Tongue Rolled Back, Midline Centered. Less-than-Ideal” Shot : Tongue Visible But Not Obstructing View.
- 39. REFERENCE Photography in Dentistry: Theory and Techniques in Modern Documentation - Drs. Loiacono & Pascoletti . The Art of Passion: a photographic journey - Dr. Edward McLaren