Noah’S Ark New Computer Technology Class 6, 2010
•Als PPTX, PDF herunterladen•
0 gefällt mir•708 views

Explanation of how to make movies or slideshows using Windows Live Photo

Empfohlen
Weitere ähnliche Inhalte
Was ist angesagt?
Was ist angesagt? (20)
Andere mochten auch
Andere mochten auch (20)
Ähnlich wie Noah’S Ark New Computer Technology Class 6, 2010
Ähnlich wie Noah’S Ark New Computer Technology Class 6, 2010 (20)
Mehr von Joe Boisvert Adjunct Professor of History, Gulf Coast State College Encore Program, Director of Compassionate Care, Amherst First Baptist Church, NH, Stephen Minister, Instructor Noah's Ark, Panama City, Florida
Mehr von Joe Boisvert Adjunct Professor of History, Gulf Coast State College Encore Program, Director of Compassionate Care, Amherst First Baptist Church, NH, Stephen Minister, Instructor Noah's Ark, Panama City, Florida (20)
Kürzlich hochgeladen
Kürzlich hochgeladen (20)
Noah’S Ark New Computer Technology Class 6, 2010
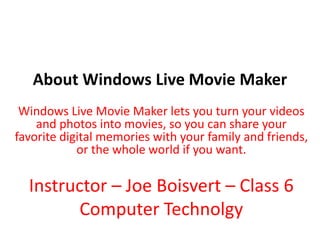
- 1. About Windows Live Movie Maker Windows Live Movie Maker lets you turn your videos and photos into movies, so you can share your favorite digital memories with your family and friends, or the whole world if you want. Instructor – Joe Boisvert – Class 6 Computer Technolgy
- 2. Here are some of the things you can do in Movie Maker: Add videos and photos: You can easily start your project by adding photos and videos to Movie Maker. Add videos and photos right in Movie Maker or through Windows Live Photo Gallery. Personalize your movie: Add transitions, pan and zoom effects, visual effects, text, and other special touches to make your movie your own. Add music: Add music to your movies to set the mood. You can use more than one audio file in your movie if you want. Make a movie quickly using AutoMovie: After you add videos and photos, you can use AutoMovie to make a great-looking movie in a few moments. AutoMovie automatically adds a title, credits, and crossfade transitions between photos and videos. It also adds pan and zoom effects to photos and fits your project to music for you.
- 3. What You Can Do With Movie Maker Preview at any time: You can preview your whole project or a single photo or video at any time when editing in Movie Maker. After that, you can make other changes or save and share your movie. Publish your movie on the web: Share your movie with family, friends, and others by publishing your movie on YouTube. Or you can download additional publishing plug-ins, so you can publish your movie on other popular websites. Save your movie on your computer and share it later: Save your movie on your computer to play or share. For example, you can send your movie in an e-mail message to someone or transfer it to a portable device or mobile phone later on. You can even burn your movie directly to DVD (depending on which edition of Windows your computer is running).
- 4. Supported file types in Windows Live Movie MakerYou can add the following types of video, photo, and audio files to Windows Live Movie Maker.Video files
- 5. Supported file types in Windows Live Movie Maker – Photo’s
- 6. Audio Files for Movie Maker
- 7. Add videos and photos The first step in making a movie is to add videos and photos to Windows Live Movie Maker. When you do this, the photos and videos are automatically added to the storyboard and used in your current project. After that, you're ready to start editing. When you make changes in Movie Maker, the original video files and photos aren’t changed. So try different things when you’re making your movie—don’t worry, your video files and photos are safe. You can add photos and videos in Movie Maker right inside Movie Maker or through Windows Live Photo Gallery.
- 8. Import photos and videos from a digital camera, memory card reader, CD, or DVD You can import photos and videos from a digital camera or memory card, or from a CD or DVD. After your import pictures or video files from a device, the photos and videos will appear in Windows Live Photo Gallery. After importing the videos and photos to your computer and into Windows Live Photo Gallery, you can use those files when making a movie in Windows Live Movie Maker.
- 9. To import photos from a digital camera, memory card reader, CD, or DVD: Make sure that your digital camera or memory card reader is turned on and attached to your computer or that the disc is inserted into your computer's CD or DVD drive. Start Movie Maker. Show me how In Windows Vista or Windows 7, click Start, and then click All Programs. Click Windows Live, and then click Windows Live Movie Maker. Click the Movie Maker button , and then click Import from device. If the Photos and videos will be imported into Windows Live Photo Gallery message appears, click OK.
- 10. Importing Photo’s and Video’s
- 11. Import Continue In the Import Photos and Videos window, click the device that you want to use, and then click Import. If you're importing from a CD or DVD, select the CD or DVD drive. Click More options. Select the options that you want to use, such as where to save the files and what format to use for the folder and file names.If your camera can detect whether you take photos vertically or horizontally, your computer can automatically rotate JPEG photos to the correct orientation when they're imported. To turn off automatic rotation, clear the Rotate photos during import check box. Click OK, and then do one of the following:
- 12. Add or remove music Music can be a great way to establish the mood of your movie, and adding music is easy to do in Windows Live Movie Maker. You can add one or more songs to use in your movie. The songs you add can be different types of music files that you might have on your computer, such as MP3, WMA, or WAV files. To add music in Movie Maker: Start Movie Maker. Show me how Add videos and photos to the storyboard. Show me how Do one of the following, depending on where you want to add the music in your project: To add music at the beginning, on the Home tab, in the Add group, click Add music. To add music at the current point in the project, on the Home tab, in the Add group, click the down arrow on Add music, and then click Add music at the current point. In the Add Music dialog box, open the folder that contains the audio file or music that you want to use in your movie, click the file, and then click Open. Note
- 13. Publish a movie on YouTube In Windows Live Movie Maker, you can quickly publish your movie on YouTube. This lets you share your movie with family, friends, and others in just a few clicks. To publish your movie on YouTube in Movie Maker: Start Movie Maker. Show me how Add videos and photos to the storyboard. Show me how After you're done editing and ready to publish your movie on YouTube, on the Home tab, in the Sharing group, click Publish on YouTube. Enter your YouTube account name and password, and then click Sign In. Type a title, description, and any tags that you want to add to your movie. Select a category, choose whether you want your movie to be public or private, and then click Publish.A copy of your movie is saved on your computer and your movie is published on YouTube. Your movie is saved and published on YouTube using a setting that matches the project aspect ratio. If your project is set to a standard (4:3) aspect ratio, your movie will be published on YouTube at this aspect ratio with a display size of 640x480 pixels. If your project is set to a widescreen (16:9) aspect ratio, your movie will be published in high-definition (HD) on YouTube at this aspect ratio with a display size of 1280x720 pixels. Publishing takes longer for HD movies. In the Your movie has been published message, click View online to watch your movie on YouTube.
- 14. Publish Continue Select a category, choose whether you want your movie to be public or private, and then click Publish. A copy of your movie is saved on your computer and your movie is published on YouTube. Your movie is saved and published on YouTube using a setting that matches the project aspect ratio. If your project is set to a standard (4:3) aspect ratio, your movie will be published on YouTube at this aspect ratio with a display size of 640x480 pixels. If your project is set to a widescreen (16:9) aspect ratio, your movie will be published in high-definition (HD) on YouTube at this aspect ratio with a display size of 1280x720 pixels. Publishing takes longer for HD movies. In the Your movie has been published message, click View online to watch your movie on YouTube.
- 15. Save a movie on your computer After you're done editing your project in Windows Live Movie Maker, you're ready for the final step—saving it as a movie. You can save your movie on your computer, so you can open and watch it on your computer using a media player, such as Windows Media Player. After you save your movie, you can also share it with others.
- 16. Burn a movie to a DVD One popular way to share your movie is to burn it to a DVD, so you and others can play it on TV using a regular DVD player, or on a computer. In Windows Live Movie Maker, you can chooseBurn a DVD so your movie is saved and then added directly into Windows DVD Maker. You can then burn your movie to a DVD using Windows DVD Maker. Notes To burn a movie to a DVD starting in Movie Maker, Windows DVD Maker must be on your computer.In Windows Vista, Windows DVD Maker is included in Windows Vista Home Premium and Windows Vista Ultimate editions. In Windows 7, Windows DVD Maker is included in Windows 7 Home Premium, Windows 7 Professional, Windows 7 Enterprise, and Windows 7 Ultimate editions. A DVD burner must be installed on your computer to burn a DVD. To play a DVD on your computer, you must have a DVD drive, a software program that can play DVDs, and a compatible DVD decoder installed on your computer.
- 17. To burn a movie to a DVD in Windows Live Movie Maker:Start Movie Maker. Show me how Add videos and photos to the storyboard. Show me how When you're done editing and ready to burn your movie to a DVD, on the Home tab, in the Sharing group, click Burn a DVD. In the File name box, type a file name for your movie, and then click Save.Your movie is saved as a Windows Media Video (.wmv) file. In the Your movie is complete message, click Close. Follow the on-screen instructions in Windows DVD Maker to burn the movie to a DVD.
- 18. Publish a movie on other websites After you're done editing your project in Windows Live Movie Maker, you can share your movie with family, friends, and others by publishing it on the web. You can do this in Movie Maker by downloading and installing additional publishing plug-ins that let you publish your movie on many different popular websites today right in Movie Maker.
- 19. To add a plug-in in Movie Maker: Start Movie Maker. Show me how Add videos and photos to the storyboard. Show me how After you're done editing, on the Home tab, in the Sharing group, click the More button, and then click Add a plug-in. Follow the instructions to download and install the publishing plug-in.