SlideShare ist ein Scribd-Unternehmen logo
1 von 244
Downloaden Sie, um offline zu lesen
THE OFFICIAL
Raspberry Pi
Beginner’s Guide
How to use your new computer
Gareth Halfacree
Written by
THE OFFICIAL RASPBERRY PI BEGINNER'S GUIDE2
3
THE OFFICIAL RASPBERRY PI BEGINNER’S GUIDE
THE OFFICIAL
Raspberry Pi
Beginner’s Guide
How to use your new computer
First published in 2018 by Raspberry Pi Trading Ltd, Station Road, Cambridge, CB1 2JH
Publishing Director: Russell Barnes • Editor: Phil King • Sub Editor: Nicola King
Design: Critical Media • Illustrations: Sam Alder
CEO: Eben Upton
The publisher, and contributors accept no responsibility in respect of any omissions
or errors relating to goods, products or services referred to or advertised in this book.
Except where otherwise noted, the content of this book is licensed under a Creative
Commons Attribution-NonCommercial-ShareAlike 3.0 Unported
(CC BY-NC-SA 3.0)
THE OFFICIAL RASPBERRY PI BEGINNER'S GUIDE4
THE OFFICIAL RASPBERRY PI BEGINNER’S GUIDE
W
e think you’re going to love the Raspberry Pi. This ultra-small, affordable computer
costs less than most video games, but can be used to learn coding, build robots,
and create all kinds of weird and wonderful projects.
The Raspberry Pi is capable of doing all the things you’d expect from a computer –
everything from browsing the internet and playing games, to watching movies and listening to
music. But the Raspberry Pi is much more than a modern computer.
With a Raspberry Pi you can get into the heart of a computer. You get to set up your own
operating system, and can connect wires and circuits directly to the pins on its board. It was
designed to teach young people how to program in languages like Scratch and Python, and all
the major programming languages are included with the official operating system.
The world needs programmers more than ever, and the Raspberry Pi has ignited a love of
computer science and technology in a new generation.
People of all ages use the
Raspberry Pi to create exciting
projects: everything from retro
games consoles to internet-
connected weather stations.
So if you want to make
games, build robots, or hack
weird and wonderful projects,
then this book is here to help
you get started.
Welcome to
the Official Raspberry
Pi Beginner’s Guide
5
THE OFFICIAL RASPBERRY PI BEGINNER'S GUIDE6
About the Author
Gareth Halfacree is a freelance
technology journalist, writer, and
former system administrator in the
education sector. With a passion for open-
source software and hardware, he was an
early adopter of the Raspberry Pi platform
and has written several publications on
its capabilities and flexibility. He can be
found on Twitter as @ghalfacree or via his
website at freelance.halfacree.co.uk.
7
THE OFFICIAL RASPBERRY PI BEGINNER’S GUIDE
Contents
Chapter 1: Get to know your Raspberry Pi 	 008
Take a guided tour of your new credit-card-sized computer
Chapter 2: Getting started with your Raspberry Pi 	 020
Connect everything you need to get the Raspberry Pi working
Chapter 3: Using your Raspberry Pi 	 036
Learn all about the Raspbian operating system
Chapter 4: Programming with Scratch 	 054
Start coding with this easy-to-learn, block-based language
Chapter 5: Programming with Python 	 092
Get to grips with text-based coding using Python
Chapter 6: Physical computing with Scratch & Python 	 120
Control electronic components connected to your Raspberry Pi’s GPIO pins
Chapter 7: Physical computing with the Sense HAT	 152
Use the sensors and LED matrix display of this add-on board
Chapter 8: The Raspberry Pi Camera Module	 194
Shoot high-resolution photos and videos with this tiny camera
APPENDICES
Appendix A: Installing NOOBS to a microSD card 	 212
Appendix B: Installing and uninstalling software	216
Appendix C: The command-line interface	222
Appendix D: Further reading	 228
Appendix E: The Raspberry Pi Configuration Tool	234
Appendix F: Raspberry Pi specifications	 240
THE OFFICIAL RASPBERRY PI BEGINNER'S GUIDE8
T
he Raspberry Pi is a remarkable device: a fully functional computer in a tiny and
low-cost package. Whether you’re looking for a device you can use to browse the
web or play games, are interested in learning how to write your own programs, or are
looking to create your own circuits and physical devices, the Raspberry Pi – and its amazing
community – will support you every step of the way.
The Raspberry Pi is known as a single-board computer, which means exactly what it sounds
like: it’s a computer, just like a desktop, laptop, or smartphone, but built on a single printed
circuit board. Like most single-board computers, the Raspberry Pi is small – roughly the same
footprint as a credit card – but that doesn’t mean it’s not powerful: a Raspberry Pi can do
anything a bigger and more power-hungry computer can do, though not necessarily as quickly.
The Raspberry Pi family was born from a desire to encourage more hands-on computer
education around the world. Its creators, who joined together to form the non-profit Raspberry
Pi Foundation, had little idea that it would prove so popular: the few thousand built in 2012 to
test the waters were immediately sold out, and millions have been shipped all over the world
in the years since. These boards have found their ways into homes, classrooms, offices, data
centres, factories, and even self-piloting boats and spacefaring balloons.
Various models of Raspberry Pi have been released since the original Model B, each
bringing either improved specifications or features specific to a particular use-case. The
Raspberry Pi Zero family, for example, is a tiny version of the full-size Raspberry Pi which
drops a few features – in particular the multiple USB ports and wired network port – in favour
of a significantly smaller layout and lowered power needs.
Get to know your
Raspberry Pi
Chapter 1
Get fully acquainted with
your new credit-card-sized
computer by taking a guided
tour of the Raspberry Pi.
Discover its numerous
components and what they do
Chapter 1 Getting to know your Raspberry Pi 9
THE OFFICIAL RASPBERRY PI BEGINNER’S GUIDE
All Raspberry Pi models have one thing in common, though: they’re compatible, meaning
that software written for one model will run on any other model. It’s even possible to take the
very latest version of the Raspberry Pi’s operating system and run it on an original pre-launch
Model B prototype. It will run more slowly, it’s true, but it will still run.
Throughout this book you’ll be learning about the Raspberry Pi 3 Model B+, the latest and
most popular version of the Raspberry Pi. What you learn, though, can be easily applied to
other models in the Raspberry Pi family, so don’t worry if you’re using a different version.
A guided tour of the Raspberry Pi
Unlike a traditional computer, which hides its inner workings in a case, a Raspberry Pi has all
its components, ports, and features out on display – although you can buy a case to provide
extra protection, if you’d prefer. This makes it a great tool for learning about what the various
parts of a computer do, and also makes it easy to learn what goes where when it comes time
to plug in the various extras – known as peripherals – you’ll need to get started.
Figure 1-1 (overleaf) shows the Raspberry Pi as seen from above. When you’re using a
Raspberry Pi with this book, try to keep it turned the same way as in the picture; if it’s turned
around it can get confusing when it comes to using things like the GPIO header (detailed in
Chapter 6, Physical computing with Scratch and Python).
THE OFFICIAL RASPBERRY PI BEGINNER'S GUIDE10
3Figure 1-1: The Raspberry
Pi 3 Model B+
While it may look like
there’s a lot packed into the
tiny board, the Raspberry Pi is
very simple to understand –
starting with its components,
the inner workings that make
the device tick.
The Raspberry Pi’s
components
Like any computer, the Pi is
made up of various different
components, each of which
has a role to play in making it
work. The first, and arguably
most important, of these
can be found just above the
centre point on the top side
of the board (Figure 1-2),
covered in a metal cap: the
system-on-chip (SoC).
5Figure 1-2: The Raspberry Pi’s system-on-chip (SoC)
Chapter 1 Getting to know your Raspberry Pi 11
THE OFFICIAL RASPBERRY PI BEGINNER’S GUIDE
The name system-on-chip is a great indicator of what you would find if you prised the
metal cover off: a silicon chip, known as an integrated circuit, which contains the bulk of the
Raspberry Pi’s system. This includes the central processing unit (CPU), commonly thought of
as the ‘brain’ of a computer, and the graphics processing unit (GPU), which handles the visual
side of things.
A brain is no good without memory, however, and on the underside of the Raspberry Pi you’ll
find exactly that: another chip, which looks like a small, black, plastic square (Figure 1-3). This
is the Pi’s random access memory (RAM). When you’re working on the Pi, it’s the RAM that
holds what you’re doing; only when you save your work will it be written to the microSD card.
Together, these components form the Pi’s volatile and non-volatile memories: the volatile RAM
loses its contents whenever the Pi is powered off, while the non-volatile microSD card keeps
its contents.
.
5Figure 1-3: The Raspberry Pi’s random access memory (RAM)
Turning the board over again you’ll find another metal lid to the upper-right, this one
featuring an etched Raspberry Pi logo (Figure 1-4, overleaf). This covers the radio, the
component which gives the Raspberry Pi the ability to communicate with devices wirelessly.
The radio itself acts as two main components, in fact: a WiFi radio, for connecting to computer
networks; and a Bluetooth radio, for connecting to peripherals like mice and for sending data to
or receiving data from nearby smart devices like sensors or smartphones.
THE OFFICIAL RASPBERRY PI BEGINNER'S GUIDE12
5Figure 1-4: The Raspberry Pi’s radio module
Another black, plastic-covered chip can be seen to the bottom edge of the board, just behind
the middle set of USB ports. This is the network and USB controller, and is responsible for
running the Ethernet port and the four USB ports. A final black chip, much smaller than the rest,
can be found a little bit above the micro USB power connector to the upper-left of the board
(Figure 1-5); this is known as a power management integrated circuit (PMIC), and handles turning
the power that comes in from the micro USB port into the power the Pi needs to run.
5Figure 1-5: The Raspberry Pi’s power management integrated circuit (PMIC)
Don’t worry if this seems like a lot to take in; you don’t need to know what each component is
or where to find it on the board in order to use the Raspberry Pi.
Chapter 1 Getting to know your Raspberry Pi 13
THE OFFICIAL RASPBERRY PI BEGINNER’S GUIDE
The Raspberry Pi’s ports
The Raspberry Pi has a range of ports, starting with four Universal Serial Bus (USB) ports
(Figure 1-6) to the middle and right-hand side of the bottom edge. These ports let you connect
any USB-compatible peripheral, from keyboards and mice to digital cameras and flash drives,
to the Pi. Speaking technically, these are known as USB 2.0 ports, which means they are based
on version two of the Universal Serial Bus standard.
5Figure 1-6: The Raspberry Pi’s USB ports
To the left of the USB ports is an Ethernet port, also known as a network port (Figure 1-7).
You can use this port to connect the Raspberry Pi to a wired computer network using a cable
with what is known as an RJ45 connector on its end. If you look closely at the Ethernet port,
you’ll see two light-emitting diodes (LEDs) at the bottom; these are status LEDs, and let you
know that the connection is working.
5Figure 1-7: The Raspberry Pi’s Ethernet port
THE OFFICIAL RASPBERRY PI BEGINNER'S GUIDE14
Just above the Ethernet port, on the left-hand edge of the Raspberry Pi, is a 3.5 mm
audio‑visual (AV) jack (Figure 1-8). This is also known as the headphone jack, and it can be used
for that exact purpose – though you’ll get better sound connecting it to amplified speakers rather
than headphones. It has a hidden, extra feature, though: as well as audio, the 3.5 mm AV jack
carries a video signal which can be connected to TVs, projectors, and other displays that support
a composite video signal using a special cable known as a tip-ring-ring-sleeve (TRRS) adapter.
5Figure 1-8: The Raspberry Pi’s 3.5 mm AV jack
Directly above the 3.5 mm AV jack is a strange-looking connector with a plastic flap which
can be pulled up; this is the camera connector, also known as the Camera Serial Interface (CSI)
(Figure 1-9). This allows you to use the specially designed Raspberry Pi Camera Module
(about which you’ll learn more in Chapter 8, The Raspberry Pi Camera Module.)
5Figure 1-9: The Raspberry Pi’s camera connector
Chapter 1 Getting to know your Raspberry Pi 15
THE OFFICIAL RASPBERRY PI BEGINNER’S GUIDE
Above that, still on the left-hand edge of the board, is the High-Definition Multimedia
Interface (HDMI) port (Figure 1-10), which is the same type of connector you’ll find on a games
console, set-top box, and TV. The multimedia part of its name tells you that it carries both
audio and video signals, while high-definition tells you that you can expect excellent quality.
You’ll use this to connect the Raspberry Pi to your display device, whether that’s a computer
monitor, TV, or projector.
5Figure 1-10: The Raspberry Pi’s HDMI port
Above the HDMI port is a micro USB power port (Figure 1-11), which you’ll use to connect
the Raspberry Pi to a power source. The micro USB port is a common sight on smartphones,
tablets, and other portable devices. So you could use a standard mobile charger to power the
Pi, but for best results you should use the official Raspberry Pi USB Power Supply.
5Figure 1-11: The Raspberry Pi’s micro USB power port
THE OFFICIAL RASPBERRY PI BEGINNER'S GUIDE16
At the top edge of the board is another strange-looking connector (Figure 1-12), which
at first glance appears to be identical to the camera connector. This, though, is the exact
opposite: a display connector, or Display Serial Interface (DSI), designed for use with the
Raspberry Pi Touch Display (Figure 1-13).
5Figure 1-12: The Raspberry Pi’s display connector (DSI)
5Figure 1-13: The Raspberry Pi Touch Display
Chapter 1 Getting to know your Raspberry Pi 17
THE OFFICIAL RASPBERRY PI BEGINNER’S GUIDE
At the right-hand edge of the board you’ll find 40 metal pins, split into two rows of 20
pins (Figure 1-14). This is the GPIO (general-purpose input/output) header, a feature of
the Raspberry Pi used to talk to additional hardware from LEDs and buttons all the way to
temperature sensors, joysticks, and pulse-rate monitors. You’ll learn more about the GPIO
header in Chapter 6, Physical computing with Scratch and Python. Just below and to the
left of this header is another, smaller header with four pins: this is used to connect the Power
over Ethernet (PoE) HAT, an optional add-on which lets the Raspberry Pi receive power from a
network connection rather than the micro USB socket.
5Figure 1-14: The Raspberry Pi’s GPIO header
There’s one final port on the Raspberry Pi, but you won’t see it on the top. Turn the board
over and you’ll find a microSD card connector on the opposite side of the board to the display
connector (Figure 1-15). This is the Raspberry Pi’s storage: the microSD card inserted in
here contains all the files you save, all the software you install, and the operating system that
makes the Raspberry Pi run.
5Figure 1-15: The Raspberry Pi’s microSD card connector
THE OFFICIAL RASPBERRY PI BEGINNER'S GUIDE18
The Raspberry Pi’s peripherals
A Raspberry Pi by itself can’t do very much, just the same as a desktop computer on its own
is little more than a door-stop. To work, the Raspberry Pi needs peripherals: at the minimum,
you’ll need a microSD card for storage; a monitor or TV so you can see what you’re doing; a
keyboard and mouse to tell the Pi what to do; and a 5 volt (5 V) micro USB power supply rated
at 2.5 amps (2.5 A) or better. With those, you’ve got yourself a fully functional computer. You’ll
learn how to connect all these peripherals to your Raspberry Pi in Chapter 2, Getting started
with your Raspberry Pi.
Those aren’t the end of the peripherals you can use with your Pi, though. Official accessories
produced by the Raspberry Pi Foundation include: the Raspberry Pi Case, which helps protect
the Pi while you’re using it without blocking your access to its various ports; the Camera
Module, detailed in Chapter 8, The Raspberry Pi Camera Module; the Raspberry Pi Touch
Display, which connects to the display port and provides both a video display and a tablet-style
touchscreen interface; and the Sense HAT (Figure 1-16), a clever multifunctional add-on which
is detailed in full in Chapter 7, Physical computing with the Sense HAT.
A wide assortment of third-party accessories are also available, ranging from kits to turn
a Raspberry Pi into a laptop or tablet, to add-ons which give it the ability to understand your
speech and even talk back to you. While it’s tempting to run out and fill a shopping trolley,
though, remember that you’ll need to learn to walk with your Raspberry Pi before taking on the
hardware equivalent of a marathon!
5Figure 1-16: The Sense HAT
Chapter 1 Getting to know your Raspberry Pi 19
THE OFFICIAL RASPBERRY PI BEGINNER’S GUIDE
THE OFFICIAL RASPBERRY PI BEGINNER'S GUIDE20
T
he Raspberry Pi has been designed to be as quick and easy to set up and use as
possible, but – like any computer – it relies on various external components, called
peripherals. While it’s easy to take a look at the bare circuit board of the Raspberry Pi –
which looks significantly different to the encased, closed-off computers you may be used to
– and worry things are about to get complicated, that’s not the case. You can be up and running
with the Raspberry Pi in well under ten minutes simply by following the steps in this guide.
If you have received this book as part of the Raspberry Pi Starter Kit, then you’ll already have
almost everything you’ll need to get started: all you need to provide is a computer monitor
or TV with an HDMI connection – the same type of connector used by set-top boxes, Blu-ray
players, and games consoles – so you can see what the Raspberry Pi is doing.
Chapter 2
Discover the essential items
you'll need for your Raspberry Pi
and how to connect them all to
get it set up and working
Getting started with
your Raspberry Pi
Chapter 2 Getting started with your Raspberry Pi 21
THE OFFICIAL RASPBERRY PI BEGINNER’S GUIDE
If you don’t have the Raspberry Pi Starter Kit, then in addition to the Raspberry Pi 3 Model B+
you’ll need:
n USB power supply – A power supply rated
at 2.5 amps (2.5A) or 12.5 watts (12.5W)
and with a micro USB connector. The
Official Raspberry Pi Power Supply is the
recommended choice, as it can cope with
the quickly switching power demands of
the Raspberry Pi.
n microSD card with NOOBS – The microSD card
acts as the Raspberry Pi’s permanent storage;
all the files you create and software you install,
along with the operating system itself, are
stored on the microSD card. An 8GB card will
get you started, though a 16GB card offers more
room to grow. Using a card with NOOBS, the
New Out-Of-Box Software, pre-installed will save
you some time; otherwise see Appendix A for
instructions on installing NOOBS on a blank
microSD card.
n USB keyboard and mouse – The keyboard
and mouse allow you to control the Raspberry
Pi. Almost any wired or wireless keyboard and
mouse with a USB connector will work with
the Raspberry Pi, though some ‘gaming’ style
keyboards with colourful lights may draw too
much power to be used reliably.
		
n HDMI Cable – The HDMI cable carries sound
and pictures from the Raspberry Pi to your TV
or monitor. There’s no need to spend a lot of
money on an HDMI cable. If you are using a
computer monitor without an HDMI socket, you
can buy HDMI to DVI-D, DisplayPort, or VGA
adapters; if you want to connect your Raspberry
Pi to an older TV which uses composite video or
has a SCART socket, use a 3.5 mm tip-ring-ring-
sleeve (TRRS) audio/video cable.
THE OFFICIAL RASPBERRY PI BEGINNER'S GUIDE22
The Raspberry Pi is safe to use without a case, providing you don’t place it on a metal
surface which could conduct electricity and cause a short-circuit. An optional case, however,
can provide additional protection; the Starter Kit includes the Official Raspberry Pi Case, while
third-party cases are available from all good stockists.
If you want to use the Raspberry Pi on a wired network, rather than a wireless (WiFi) network,
you’ll also need a network cable. This should be connected at one end to your network’s switch or
router. If you’re planning to use the Raspberry Pi’s built-in wireless radio, you won’t need a cable;
you will, however, need to know the name and key or passphrase for your wireless network.
Setting up the hardware
Begin by unpacking your Raspberry Pi from its box. The Raspberry Pi is a robust piece of
hardware, but that doesn’t mean it’s indestructible: try to get into the habit of holding the board
by the edges, rather than on its flat sides, and be extra careful around the raised metal pins. If
these pins are bent, at best it’ll make using add-on boards and other extra hardware difficult
and, at worst, can cause a short-circuit that will damage the Raspberry Pi.
If you haven’t done so already, have a look at Chapter 1, Getting to know your Raspberry Pi,
for details on exactly where the various ports are and what they do.
Assembling the case
If you’re installing your Pi in a case, it should be your first step. If you’re using the Official
Raspberry Pi Case, begin by splitting it into its five individual pieces: the red base, two white
sides, red upper, and white lid.
1 Take the base and hold it so that the raised end is to your left and the lower end to your right.
Chapter 2 Getting started with your Raspberry Pi 23
THE OFFICIAL RASPBERRY PI BEGINNER’S GUIDE
2 Holding the Pi by its USB and Ethernet ports, with the GPIO header to the top, slot the left-
hand side into the case at an angle, then gently lower the right-hand side down so it sits flat.
3 Take the two white side pieces and find the one with the cut-outs for the power connector,
HDMI port, and 3.5 mm AV jack. Line it up with the ports on the Raspberry Pi and gently push
it home until you hear a click.
THE OFFICIAL RASPBERRY PI BEGINNER'S GUIDE24
4 Take the solid white side piece and click it in to the GPIO header side of the case.
5 Take the red plastic upper piece and place the two clips at the left into the matching
holes on the left of the base, above the microSD card slot. When they’re in place, push the
right‑hand side (above the USB ports) down until you hear a click.
Chapter 2 Getting started with your Raspberry Pi 25
THE OFFICIAL RASPBERRY PI BEGINNER’S GUIDE
6 Finally, take the white lid and hold it so that the Raspberry Pi logo is to your right and the
small raised clips on its underside are lined up with the hole on the top of the case, then
gently push it down until you hear a click. Your case is now fully built.
THE OFFICIAL RASPBERRY PI BEGINNER'S GUIDE26
Connecting the microSD card
To install the microSD card, which is the Raspberry Pi’s storage, turn the Raspberry Pi over and
slide the card into the microSD slot with the label facing away from the Pi. It can only go in one
way, and should slide home without too much pressure.
The microSD card will slide into the connector, then stop without a click.
If you want to remove it again in the future, simply grip the end of the card and pull it gently
out. If you’re using an older model of Raspberry Pi, you’ll need to give the card a gentle push
first to unlock it; this isn’t necessary with a Raspberry Pi 3 or newer.
Chapter 2 Getting started with your Raspberry Pi 27
THE OFFICIAL RASPBERRY PI BEGINNER’S GUIDE
Connecting a keyboard and mouse
Connect the keyboard’s USB cable to any of the four USB ports on the Raspberry Pi. When the
keyboard is connected, simply do the same for the mouse.
The USB connectors for the keyboard and mouse should slide home without too much
pressure; if you’re having to force the connector in, there’s something wrong. Check that the
USB connector is the right way up!
KEYBOARD  MOUSE
The keyboard and mouse act as your main means of telling the
Raspberry Pi what to do; in computing, these are known as input
devices, in contrast with the display which is an output device.
THE OFFICIAL RASPBERRY PI BEGINNER'S GUIDE28
Connecting a display
Take the HDMI cable and connect one end – it doesn’t matter which – to your Raspberry Pi
and the other end to your display. If your display has more than one HDMI port, look for a port
number next to the connector itself; you’ll need to switch the TV to this input to see the Pi’s
display. If you can’t see a port number, don’t worry: you can simply switch through each input
in turn until you find the Pi.
TV CONNECTION
If your TV or monitor doesn’t have an HDMI connector, that doesn’t
mean you can’t use the Raspberry Pi. Adapter cables, available from
any electronics stockist, will allow you to convert the HDMI port on the
Raspberry Pi to DVI-D, DisplayPort, or VGA for use with older computer
monitors; these are simply connected to the Pi’s HDMI port, then a
suitable cable used to connect the adapter cable to the monitor. If
your TV has only a composite video or SCART input, you can purchase
3.5 mm tip-ring-ring-sleeve (TRRS) adapter cables and composite-to-
SCART adapters which connect to the 3.5 mm AV jack.
Chapter 2 Getting started with your Raspberry Pi 29
THE OFFICIAL RASPBERRY PI BEGINNER’S GUIDE
Connecting a network cable (optional)
To connect your Raspberry Pi to a wired network, take a network cable – known as an Ethernet
cable – and push it into the Pi’s Ethernet port, with the plastic clip facing downwards, until you
hear a click. If you need to remove the cable, just squeeze the plastic clip inwards towards the
plug and gently slide the cable free again.
The other end of your network cable should be connected to any free port on your network hub,
switch, or router in the same way.
THE OFFICIAL RASPBERRY PI BEGINNER'S GUIDE30
Connecting a power supply
Connecting the Raspberry Pi to a power supply is the very last step in the hardware setup
process, and it’s one you should do only when you’re ready to set up its software: the
Raspberry Pi does not have a power switch and will turn on as soon as it is connected to a live
power supply.
First, connect the micro USB end of the power supply cable to the micro USB power
connector on the Raspberry Pi. It can only go in one way, with the narrow part of the connector
facing downwards, and should slide home gently.
Finally, connect the power supply to a mains socket and switch the socket on; the Raspberry
Pi will immediately start running.
Congratulations: you’ve put your Raspberry Pi together!
POWER SUPPLY
If you’re using the Official Raspberry Pi Power Supply, you’ll see it
comes with multiple mains connectors suitable for the sockets of
various countries; find the one that matches your country’s socket
type, then slide it onto the power supply body until you hear a click.
Chapter 2 Getting started with your Raspberry Pi 31
THE OFFICIAL RASPBERRY PI BEGINNER’S GUIDE
Setting up the software
Before you can begin using the Raspberry Pi in earnest, you’ll need to set up its software –
in particular its operating system, the software which controls what the Pi can do. NOOBS,
the New Out-Of-Box Software, is designed to make this as easy as possible, allowing you to
choose from several different operating systems and install them automatically. Better still,
you can do all this in little more than a few clicks of the mouse.
When the Pi is first switched on, or booted, with a fresh installation of NOOBS on its microSD
card, you’ll see a screen with the Raspberry Pi logo on it and a small progress window at the
upper-left. After a short pause, which can take up to a minute the first time you use the NOOBS
microSD card, you’ll see the screen shown in Figure 2-1.
3Figure 2-1:
The NOOBS menu
without any operating
systems installed
THE OFFICIAL RASPBERRY PI BEGINNER'S GUIDE32
This is the NOOBS menu, a system which lets you choose the operating system to run on
your Pi. Two operating systems are included with NOOBS as standard: Raspbian, a version of
the Debian Linux operating system tailored specifically for the Raspberry Pi; and LibreELEC,
a version of the Kodi Entertainment Centre software. If the Pi is connected to the network –
either through a wired connection or using the ‘Wifi networks (w)’ option from the top bar of
icons – you can also download and install other operating systems.
To begin installing an operating system, use the mouse to put a cross in the box to the left
of Raspbian Full: point the cursor at the white box and click once with the left mouse button.
When you’ve done so, you’ll see that the ‘Install (i)’ menu icon is no longer greyed-out; this lets
you know that your operating system is ready to install (Figure 2-2).
5Figure 2-2: Choosing an operating system to install through NOOBS
Click the ‘Install (i)’ icon once with the left mouse button and you’ll see a warning message
telling you that installing the operating system will overwrite any data currently stored on the
microSD card – not counting NOOBS itself, which stays intact. Click ‘Yes’ and the installation
process will begin (Figure 2-3).
NO PICTURE?
If you can’t see the Raspberry Pi on your display, check you are
using the correct input. If your TV or monitor has more than one
HDMI input, switch through each in turn using the ‘Source’ or
‘Input’ button until you see the NOOBS menu.
Chapter 2 Getting started with your Raspberry Pi 33
THE OFFICIAL RASPBERRY PI BEGINNER’S GUIDE
5Figure 2-3: Installing the Raspbian operating system
The installation process can take anything from 10 to 30 minutes, depending on the speed
of your microSD card. As the operating system is installed, progress is shown in a bar along
the bottom of the window, you’ll see a slide show highlighting some of its key features; you’ll
learn more about these, and the operating system itself, in Chapter 3, Using your Raspberry Pi.
When the installation has finished, a window will pop up with an ‘OK’ button; click this and
the Pi will restart into its freshly installed operating system. You’ll see a lot of text scrolling up
the screen (Figure 2-4, overleaf); these are known as the boot messages, and the first time
you boot into Raspbian it can take a minute or two as it adjusts itself to make the best use of
the free space on your microSD card. The next time you boot, things will go more quickly.
WARNING!
It’s important that the installation isn’t interrupted as this has a
high likelihood of damaging the software, a process known as data
corruption. Do not remove the microSD card or unplug the power cable
while the operating system is being installed; if something does happen
to interrupt the installation, unplug the Pi from its power supply, then
hold down the SHIFT key on the keyboard as you connect the Raspberry
Pi back up to its power supply to bring the NOOBS menu back up. This
is known as recovery mode, and is a great way to restore a Pi whose
software has been corrupted to working order again. It also allows you
to enter the NOOBS menu after a successful installation, to reinstall the
operating system, or install one of the other operating systems.
THE OFFICIAL RASPBERRY PI BEGINNER'S GUIDE34
5Figure 2-4: The Raspbian boot messages
Finally, you’ll briefly see a window with the Raspberry Pi logo on it before the Raspbian
desktop and setup wizard appears, as in Figure 2-5. Your operating system is now fully
installed and ready to be configured, which you’ll learn to do in Chapter 3, Using your
Raspberry Pi.
5Figure 2-5: The Raspbian desktop
Chapter 2 Getting started with your Raspberry Pi 35
THE OFFICIAL RASPBERRY PI BEGINNER’S GUIDE
THE OFFICIAL RASPBERRY PI BEGINNER'S GUIDE36
T
he Raspberry Pi is able to run a wide range of software, including a number of
different operating systems – the core software that makes a computer run. The most
popular of these, and the official operating system of the Raspberry Pi Foundation,
is Raspbian. Based on Debian Linux, Raspbian is tailor-made for the Raspberry Pi and comes
with a range of extras pre-installed and ready to go.
If you’ve only ever used Microsoft Windows or Apple macOS, don’t worry: Raspbian is
based on the same windows, icons, menus, and pointer (WIMP) principles, and should quickly
feel familiar. The following chapter will get you started and introduce you to some of the
bundled software.
The Welcome Wizard
The first time you run Raspbian, you’ll see the Welcome Wizard (Figure 3-1). This helpful tool
will walk you through changing some settings in Raspbian, known as the configuration, to
match how and where you will be using the Pi.
Using your
Raspberry Pi
Chapter 3
Learn about the Raspbian operating system
Chapter 3 Using your Raspberry Pi 37
THE OFFICIAL RASPBERRY PI BEGINNER’S GUIDE
5Figure 3-1: The Welcome Wizard
Begin by clicking the Next button, then choose your country, language, and time zone on the
next screen by clicking on each drop-down box in turn and selecting your answer from the list
(Figure 3-2). When you’re finished, click Next.
5Figure 3-2: Selecting a language, among other options
CLOSING THE WIZARD
You can choose to close the Welcome Wizard by clicking the Cancel
button, but certain Raspberry Pi features – such as the wireless network –
won’t work until you answer at least the first set of questions.
THE OFFICIAL RASPBERRY PI BEGINNER'S GUIDE38
The next screen will ask you to choose a password. Normally, the password for the ‘pi’
user – which is the standard user name for all Raspberry Pi computers running Raspbian – is
‘raspberry’, but having a password everybody knows isn’t very secure. Choose a new one –
making sure it’s one you will remember – and enter it in the boxes (Figure 3-3). You can click
on the tick next to ‘Hide Passwords’ to show the passwords you’ve written, which must be the
same in both boxes. When you’re happy, click Next.
5Figure 3-3: Setting a new password
The next screen will allow you to choose your WiFi network from a list (Figure 3-4). Scroll
through the list of networks with the mouse or keyboard, find your network’s name, click on
it, then click Next. Assuming that your wireless network is secure (it really should be), you’ll
be asked for its password, also known as its pre-shared key; this is normally written on a card
with the router or on the bottom of the router itself. Click Next to connect to the network. If you
don’t want to connect to a wireless network, just click Skip.
5Figure 3-4: Choosing a wireless network
Chapter 3 Using your Raspberry Pi 39
THE OFFICIAL RASPBERRY PI BEGINNER’S GUIDE
The next screen will allow you to check for and install updates for Raspbian and the other
software on the Raspberry Pi (Figure 3-5). Raspbian is regularly updated to fix bugs, add new
features, and improve performance. To install these updates, click Next; otherwise, click Skip.
Downloading the updates can take several minutes, so be patient. When the updates are
installed, a window saying ‘System is up to date’ will appear; click the OK button.
5Figure 3-5: Checking for updates
The final screen of the Welcome Wizard (Figure 3-6) has a simple task to do: certain
changes made will only take effect when you restart your Raspberry Pi, a process known as
rebooting. If prompted to do so, click the Reboot button and the Raspberry Pi will restart. This
time the Welcome Wizard won’t appear; its job is done, and your Pi is ready to use.
5Figure 3-6: Rebooting the Raspberry Pi
WIRELESS NETWORKING
Built-in wireless networking is only available on the Raspberry Pi 3
and Raspberry Pi Zero W families. If you want to use another model of
Raspberry Pi with a wireless network, you’ll need a USB WiFi adapter.
THE OFFICIAL RASPBERRY PI BEGINNER'S GUIDE40
Navigating the desktop
The version of Raspbian installed on most Raspberry Pi boards is properly known as ‘Raspbian
with the Raspberry Pi Desktop,’ referring to its main graphical user interface (Figure 3-7).
The bulk of this desktop is taken up with a picture, known as the wallpaper (A in Figure 3-7),
on top of which the programs you run will appear. At the top of the desktop is a taskbar (B),
which allows you to actually load each of the programs; these are then indicated by tasks (C)
in the taskbar.
5Figure 3-7: The Raspbian desktop
The right-hand side of the menu bar houses
the system tray (D). At the very far right is an eject
symbol (J); clicking on this will bring up a list of
any removable storage, such as USB memory
sticks, you have connected to the Pi and allow
you to safely eject and remove them. Next to
this is the clock (I); click on it to bring up a digital
calendar (Figure 3-8).
4Figure 3-8: The digital calendar
A
B
C
D
E
F
Wallpaper
Taskbar
Task
System Tray
Bluetooth Icon
Network Icon
Volume Icon
CPU Monitor
Clock
Media Eject
Launcher
Window Titlebar
Minimise
Maximise
Close
M
N
O
P
I
J
K
L
G
H
Menu Icon (or Raspberry Icon)
A
B
C
M
N O P
L JIFE HG
DK
Chapter 3 Using your Raspberry Pi 41
THE OFFICIAL RASPBERRY PI BEGINNER’S GUIDE
Next to the clock is a box with a scrolling line graph and a number; this is the CPU monitor
(H), and lets you see how hard your Raspberry Pi is working. If it shows ‘0%’, it’s doing nothing;
if it shows ‘100%’, the Pi is working as hard as it possibly can.
Next to this is a speaker icon (G); click on it with the left mouse button to adjust the Pi’s
audio volume, or click using the right mouse button to choose which output the Pi should
use. Next to that is a network icon (F); if you’re connected to a wireless network you’ll see the
signal strength displayed as a series of bars, while if you’re connected to a wired network you’ll
just see two arrows. Clicking the network icon will bring up a list of nearby wireless networks
(Figure 3-9), while clicking on the Bluetooth icon (E) next to that will allow you to connect to a
nearby Bluetooth device.
The left-hand side of the menu bar is home to the launcher (K), which is where you’ll find the
programs installed alongside Raspbian. Some of these are visible as shortcut icons; others are
hidden away in the menu, which you can bring up by clicking the raspberry icon (L) to the far
left (Figure 3-10).
The programs in the menu are split into categories, the names of which tell you what to
expect: the Programming category, for example, contains software designed to help you write
your own programs – as explained starting in Chapter 4, Programming with Scratch – while
Games will help you while away the hours. Not all of the programs will be detailed in this guide;
feel free to experiment with them to learn more.
3Figure 3-9:
Listing nearby
wireless networks
3Figure 3-10: The
Raspbian menu
THE OFFICIAL RASPBERRY PI BEGINNER'S GUIDE42
The Chromium web browser
To practise using your Pi, start by loading the Chromium web browser: click on the raspberry
icon at the top-left to bring up the menu, move your mouse pointer to select the Internet
category, and click on Chromium Web Browser to load it (Figure 3-11).
5Figure 3-11: The Chromium web browser
If you’ve used Google’s Chrome browser on another computer, Chromium will be
immediately familiar. As a web browser, Chromium lets you visit websites, play videos, games,
and even communicate with people all over the world on forums and chat sites.
Start using Chromium by maximising its window so it takes up more of the screen: find the
three icons at the top-right of the Chromium window titlebar (M) and click on the middle, box-
like icon (O). This is the maximise button, and will make a window fill the screen. To the left of
maximise is minimise (N), which will hide a window until you click on it in the taskbar at the
top of the screen. The cross to the right of maximise is close (P), and does exactly what you’d
expect: closes the window.
Click in the address bar at the top of the Chromium window – the big white bar with
a magnifying glass on the left-hand side – and type www.raspberrypi.org, then press
the ENTER key on your keyboard. The Raspberry Pi website will load (Figure 3-12). You
can also type searches into the address bar: try searching for ‘Raspberry Pi’, ‘Raspbian’,
or ‘Educational Computing’.
CLOSE AND SAVE
Closing a window before you’ve saved any work you’ve done
is a bad idea; while many programs will warn you to save
when you click the close button, others won’t.
Chapter 3 Using your Raspberry Pi 43
THE OFFICIAL RASPBERRY PI BEGINNER’S GUIDE
5Figure 3-12: Loading the Raspberry Pi website in Chromium
The first time you load Chromium, it may bring up several tabs along the top of the window.
To switch to a different tab, click on it; to close a tab without closing Chromium itself, click the
cross on the right-hand edge of the tab you want to close. To open a new tab, which is a handy
way of having multiple websites open without having to juggle multiple Chromium windows,
either click on the tab button to the right of the last tab in the list, or hold down the CTRL key
on the keyboard and press the T key before letting go of CTRL.
When you’re finished with Chromium, click the close button at the top-right of the window.
The File Manager
Files you save – whether they’re programs or poems you’ve written, videos you’ve created, or
images you’ve downloaded from a website – all go into your home directory. To see the home
directory, click on the raspberry icon again to bring up the menu, move the mouse pointer to
select Accessories, then click on File Manager to load it (Figure 3-13).
5Figure 3-13: The File Manager program
THE OFFICIAL RASPBERRY PI BEGINNER'S GUIDE44
The File Manager lets you browse the files and folders, also known as directories, on the
Raspberry Pi’s microSD card, as well as those on any removable storage devices – like USB flash
drives – you connect to the Raspberry Pi’s USB ports. When you first open it, it automatically
goes to your home directory. In here you’ll find a series of other folders, known as subdirectories,
which – like the menu – are arranged in categories. The main subdirectories are:
	
n Desktop: This folder is what you see when you first load Raspbian; if you save a file in
here it will appear on the Raspbian desktop, making it easy to find and load.
	
n Documents: The Documents folder is home to most of the files you’ll create, from short
stories to recipes.
	
n Downloads: When you download a file from the internet using the Chromium web
browser, it will be automatically saved in Downloads.
n Music: Any music you create or put on the Raspberry Pi can be stored here.
n Pictures: This folder is specifically for pictures, known in technical terms as image files.
n Public: While most of your files are private, anything you put in Public will be available to
other users of the Raspberry Pi, even if they have their own user name and password.
n Videos: A folder for videos, and the first place most video-playing programs will look.
The File Manager window itself is split into two panes: the left pane shows the directories
on your Raspberry Pi, and the right pane shows the files and subdirectories of the directory
selected in the left pane. If you plug a removable storage device into the Raspberry Pi’s USB port,
a window will pop up asking if you’d like to open it in the File Manager (Figure 3-14); click OK and
you’ll be able to see its files and directories.
3Figure 3-14:
Inserting a
removable
storage device
Chapter 3 Using your Raspberry Pi 45
THE OFFICIAL RASPBERRY PI BEGINNER’S GUIDE
Files on a removable device can easily be copied to the Raspberry Pi’s microSD card,
or from the microSD card to a removable device: with both your home directory and the
removable device open in separate File Manager windows, move your mouse pointer to the
file you want to copy, click and hold the left mouse button down, slide your mouse pointer to
the other window, and let go of the mouse button (Figure 3-15). This is known as dragging
and dropping.
Another method is to click once on the file, click on the Edit menu, click on Copy, click on the
other window, click on the Edit menu, and click on Paste.
The Move option, also available in the Edit menu, is similar except it deletes the file from its
original home after making the copy
Both options can also be used through the keyboard shortcuts CTRL+C (copy) or CTRL+X
(cut), and paste via CTRL+V.
5Figure 3-15: Dragging and dropping a file
When you’ve finished experimenting, close the File Manager by clicking the close button
at the top-left of the window. If you have more than one window open, close them all. If you
connected a removable storage device to your Pi, eject it by clicking the eject button at the top-
right of the screen, finding it in the list, and clicking on it before unplugging it.
KEYBOARD SHORTCUTS
When you see a keyboard shortcut like CTRL+C, it means to
hold down the first key on the keyboard (CTRL), press the
second key (C), then let go of both keys.
THE OFFICIAL RASPBERRY PI BEGINNER'S GUIDE46
The LibreOffice productivity suite
For another taste of what the Raspberry Pi can do, click on the raspberry menu icon,
move your mouse pointer to Office, and click on LibreOffice Writer. This will load the word
processor portion of LibreOffice (Figure 3-16), a popular productivity suite – a fancy term for
‘software programs you’re likely to use in a school or office to make documents’. If you’ve
used Microsoft Office or Google Docs, you’ve used a productivity suite.
5Figure 3-16: The LibreOffice Writer program
A word processor lets you not only write documents, but to format them in clever ways: you
can change the font style, colour, size, add effects, and even insert pictures, charts, tables,
and other content. A word processor also lets you check your work for mistakes, highlighting
spelling and grammar problems in red and green respectively as you type.
Begin by writing a paragraph on what you’ve learned about the Raspberry Pi and its
software so far. Experiment with the different icons at the top of the window to see what
they do: see if you can make your writing bigger, and change its colour. If you’re not sure
how to do this, simply move your mouse pointer over each icon in turn to see a ‘tool tip’
telling you what that icon does. When you’re happy, click the File menu and the Save option
to save your work (Figure 3-17). Give it a name and click the Save button.
EJECT DEVICES
Always use the eject button before unplugging an external
storage device; if you don’t, the files on it can become corrupt
and unusable.
Chapter 3 Using your Raspberry Pi 47
THE OFFICIAL RASPBERRY PI BEGINNER’S GUIDE
5Figure 3-17: Saving a document
LibreOffice Writer is only part of the overall LibreOffice productivity suite. The other parts,
which you’ll find in the same Office menu category as LibreOffice Writer, are:
n LibreOffice Base: A database; a tool for storing information, looking it up quickly,
and analysing it.
	
n LibreOffice Calc: A spreadsheet; a tool for handling numbers and creating charts and graphs.
n LibreOffice Draw: An illustration program; a tool for creating pictures and diagrams.
n LibreOffice Impress: A presentation program, for creating slides and running slideshows.
	
n LibreOffice Math: A formula editor; a tool for creating properly formatted mathematical
formulae which can then be used in other documents.
LibreOffice is also available for other computers and operating systems. If you enjoy using
it on your Raspberry Pi, you can download it for free from libreoffice.org and install it on any
Microsoft Windows, Apple macOS, or Linux computer.
SAVE YOUR WORK
Get in the habit of saving your work, even if you haven’t
finished it yet. It will save you a lot of trouble if there’s a power
cut and you’re interrupted part-way through!
THE OFFICIAL RASPBERRY PI BEGINNER'S GUIDE48
If you want to know more about using LibreOffice, click on the Help menu. Otherwise, close
LibreOffice Writer by clicking the close button at the top-right of the window.
The Recommended Software tool
Although Raspbian comes preloaded with a wide range of software, it’s compatible with even
more. A selection of the best of this software, hand-chosen by the Raspberry Pi Foundation
and Raspbian project volunteers, can be found in the Recommended Software tool.
Note that the Recommended Software tool needs a connection to the internet. If your
Raspberry Pi is connected, click on the raspberry menu icon, move your mouse pointer to
Preferences, and click on Recommended Software. The tool will load, then begin downloading
information about available software.
After a few seconds, a list of compatible software packages will appear (Figure 3-18).
These, like the software in the raspberry menu, are arranged into various categories. Click on
a category in the pane on the left to see software from that category, or click All Programs to
see everything.
5Figure 3-18: The Recommended Software tool
GETTING HELP
Most programs include a Help menu which has everything
from information about what the program is to guides on how
to use it. If you ever feel lost or overwhelmed by a program,
look for the Help menu to reorient yourself.
Chapter 3 Using your Raspberry Pi 49
THE OFFICIAL RASPBERRY PI BEGINNER’S GUIDE
If a piece of software has a tick next to it, it’s already installed on your Raspberry Pi. If it
doesn’t, you can click on the check-box next to it to add a tick and mark it for installation.
You can mark as many pieces of software as you like before installing them all at once,
but if you’re using a smaller than recommended microSD card you may not have room for
them all.
You can also uninstall software in the same way: find a piece of software which already
has a tick in its check box, then click on the tick to remove it. If you’ve made a mistake or
changed your mind, just click again to put the tick back.
When you’re happy with your software selection, click the OK button to begin the
installation or uninstallation process (Figure 3-19). After downloading and installing any
new software you’ve chosen, a dialogue box will appear; click OK to close the Recommended
Software tool.
5Figure 3-19: Uninstalling software
An additional tool for installing or uninstalling software, the Add/Remove Software tool,
can be found in the same Preferences category of the Raspbian menu. This offers a wider
selection of software, but which has not been vetted by the Raspberry Pi Foundation.
THE OFFICIAL RASPBERRY PI BEGINNER'S GUIDE50
The Raspberry Pi Configuration tool
The last program you’ll learn about in this chapter is known as the Raspberry Pi Configuration
tool, and it’s a lot like the Welcome Wizard you used at the start: it allows you to change various
settings in Raspbian. Click on the raspberry icon, move your mouse pointer to select the
Preferences category, then click on Raspberry Pi Configuration to load it (Figure 3-20).
The tool is split into four tabs, each of which can control a particular aspect of Raspbian.
The first of these, which you see when the tool is first loaded, is System: this allows you to
change the password of your account, set a host name – the name the Raspberry Pi uses on
your local wireless or wired network – and change a range of other settings. The majority of
these, though, shouldn’t need changing.
Click on the Interfaces tab to bring up the next category. Here you’ll find a range of settings,
all of which start off disabled. These settings should only be changed if you’re adding new
hardware, such as the Raspberry Pi Camera Module, and then only if instructed by the
hardware’s manufacturer. The exceptions to this rule are: SSH, which enables a ‘Secure Shell’
and lets you log into the Raspberry Pi from another computer on your network using an SSH
client; VNC, which enables a ‘Virtual Network Computer’ and lets you see and control the
Raspbian desktop from another computer on your network using a VNC client; and Remote
3Figure 3-20:
The Raspberry Pi
Configuration tool
MORE DETAILS
This brief overview is simply to get you used to the tool. More
detailed information on each of its settings can be found in
Appendix E, The Raspberry Pi Configuration Tool.
Chapter 3 Using your Raspberry Pi 51
THE OFFICIAL RASPBERRY PI BEGINNER’S GUIDE
GPIO, which lets you use the Pi’s GPIO pins – about which you’ll learn more in Chapter 6,
Physical computing with Scratch and Python – from another computer on your network.
Click on the Performance tab to see the third category. Here you can set the amount of
memory used by the Pi’s graphics processing unit (GPU) and, for some models, increase the
performance of the Raspberry Pi through a process known as overclocking. As before, though,
it’s best to leave these settings alone unless you know you need to change them.
Finally, click on the Localisation tab to see the last category. Here you can change your
locale, which controls things like the language used in Raspbian and how numbers are
displayed, change the time zone, change the keyboard layout, and set your country for WiFi
purposes. For now, though, just click on Cancel to close the tool without making any changes.
Shutting down
Now you’ve explored the Raspbian desktop, it’s time to learn a very important skill: safely
shutting your Raspberry Pi down. Like any computer, the Raspberry Pi keeps the files you’re
working on in volatile memory – memory which is emptied when the system is switched off.
For documents you’re creating, it’s enough to save each in turn – which takes the file from
volatile memory to non-volatile memory, the microSD card – to ensure you don’t lose anything.
The documents you’re working on aren’t the only files open, though. Raspbian itself keeps
a number of files open while it’s running, and pulling the power cable from the Raspberry Pi
while these are still open can result in the operating system becoming corrupt and needing to
be reinstalled.
To prevent this from happening, you need to make sure you tell Raspbian to save all its
files and make itself ready for being powered off – a process known as shutting down the
operating system.
WARNING!
Different countries have different rules about what frequencies
a WiFi radio can use. Setting the WiFi country in the Raspberry
Pi Configuration Tool to a different country from the one you’re
actually in is likely to make it struggle to connect to your networks
and can even be illegal under radio licensing laws – so don’t do it!
WARNING!
Never pull the power cable from a Raspberry Pi without
shutting it down first. Doing so is likely to corrupt the
operating system and could also lose any files you have
created or downloaded.
THE OFFICIAL RASPBERRY PI BEGINNER'S GUIDE52
Click on the raspberry icon at the top left of the desktop and then click on Shutdown. A
window will appear with three options (Figure 3-21): Shutdown, Reboot, and Logout. Shutdown
is the option you’ll use most: clicking on this will tell Raspbian to close all open software and
files, then shut the Pi down. Once the display has gone black, wait a few seconds until the
flashing green light on the Pi goes off; then it’s safe to turn off the power supply.
To turn the Pi back on, simply disconnect then reconnect the micro USB power cable, or
toggle the power at the wall socket.
5Figure 3-21: Shutting down the Raspberry Pi
Reboot goes through a similar process to Shutdown, closing everything down, but instead of
turning the Pi’s power off, it restarts the Pi – in almost exactly the same way as if you’d chosen
Shutdown, then disconnected and reconnected the power cable. You’ll need to use Reboot if
you make certain changes which require a restart of the operating system – such as installing
certain updates to its core software – or if some software has gone wrong, known as crashing,
and left Raspbian in an unusable state.
Finally, Logout is only really useful if you have more than one user account on your
Raspberry Pi: it closes any programs you currently have open and takes you to a login screen
on which you are prompted for a user name and password. If you hit Logout by mistake and
want to get back in, simply type ‘pi’ as the user name and whatever password you chose in the
Welcome Wizard at the start of this chapter.
Chapter 3 Using your Raspberry Pi 53
THE OFFICIAL RASPBERRY PI BEGINNER’S GUIDE
THE OFFICIAL RASPBERRY PI BEGINNER'S GUIDE54
U
sing a Raspberry Pi isn’t just about using software other people have created; it’s
about creating your own software, based on almost anything your imagination can
conjure. Whether you have previous experience with creating your own programs
– a process known as programming or coding – or not, you’ll find the Raspberry Pi a great
platform for creation and experimentation.
Key to the accessibility of coding on the Pi is Scratch, a visual programming language
developed by the Massachusetts Institute of Technology (MIT). Whereas traditional
programming languages have you write text-based instructions for the computer to carry out,
in much the same way as you might write a recipe for baking a cake, Scratch has you build
your program step-by-step using blocks – pre-written chunks of code hidden behind colour-
coded jigsaw pieces.
Scratch is a great first language for budding coders young and old, but don’t be fooled by its
friendly appearance: it’s a powerful and fully functional programming environment for creating
everything from simple games and animations through to complex interactive robotics projects.
Programming
with Scratch
Chapter 4
Learn how to start coding using Scratch, the block-based
programming language
Chapter 4 Programming with Scratch 55
THE OFFICIAL RASPBERRY PI BEGINNER’S GUIDE
Introducing the Scratch 2 interface
A
B
C
D
E
F
Stage Area – Like actors in a play, your
sprites move around the stage under the
control of your program.
Sprite – The characters or objects you
control in a Scratch program are known
as sprites, and sit on the stage.
Stage Controls – Your stage can be
changed, including adding your own pictures
as backgrounds, using the stage controls.
Sprites List – All the sprites you have
created or loaded into Scratch will appear
in this section of the window.
Blocks Palette – All the blocks available for
your program appear in the blocks palette,
which features colour-coded categories.
SCRATCH VERSIONS
At the time this book was written,
Raspbian came with two versions of Scratch:
the original Scratch and the updated Scratch 2,
both included in the Programming section of
the Raspbian menu. This chapter is written
for Scratch 2. Make sure you don’t load the
original Scratch by mistake or you’re likely to
get very confused! Sadly, Scratch 2 won’t run
on the Pi Zero, Model A, A+, B, or B+.
Blocks – Pre-written chunks of
program code, blocks allow you to
build your program step-by-step.
Scripts Area – The scripts area
is where your program is built by
dragging-and-dropping blocks from
the blocks palette.
G
A
B
C
E
G
F
D
THE OFFICIAL RASPBERRY PI BEGINNER'S GUIDE56
Your first Scratch program: Hello, World!
Scratch 2 loads like any other program on the Pi: click on the raspberry icon to load the
Raspbian menu, move the cursor to the Programming section, and click on Scratch 2. After a
few seconds, the Scratch 2 user interface will load.
Where most programming languages need you to tell the computer what to do through
written instructions, Scratch is different. Start by clicking on the Looks category in the
blocks palette, found in the centre of the Scratch window. This brings up the blocks under
that category, coloured purple. Find the say Hello! block, click and hold the left mouse
button on it, and drag it over to the scripts area at the right-hand side of the Scratch window
before letting go of the mouse button (Figure 4-1).
5Figure 4-1: Drag and drop the block into the scripts area
Look at the shape of the block you’ve just dropped: it has a hole at the top, and a matching
part sticking out at the bottom. Like a jigsaw piece, this shows you that the block is expecting
to have something above it and something below it. For this program, that something above
is a trigger.
Click on the Events category of the blocks palette, coloured light brown, then click and drag
the when clicked block – known as a hat block – onto the scripts area. Position it so that
Chapter 4 Programming with Scratch 57
THE OFFICIAL RASPBERRY PI BEGINNER’S GUIDE
the bit sticking out of the bottom connects into the hole at the top of your say Hello! block
until you see a white outline, then let go of the mouse button. You don’t have to be precise; if
it’s close enough, the block will snap into place just like a jigsaw piece. If it doesn’t, click and
hold on it again to adjust its position until it does.
when clicked
say Hello!
Your program is now complete. To make it work, known as running the program, click on the
green flag icon at the top of the stage area. If all has gone well, the cat sprite on the stage will
greet you with a cheery ‘Hello!’ (Figure 4-2) – your first program is a success!
5Figure 4-2: Click the green flag above the stage and the cat will say ‘Hello’
THE OFFICIAL RASPBERRY PI BEGINNER'S GUIDE58
Before moving on, name and save your program. Click on the File menu, then Save Project.
Type in a name and click the Save button (Figure 4-3).
5Figure 4-3: Save your program with a memorable name
Next steps: sequencing
While your program has two blocks, it only has one real instruction: to say ‘Hello!’ every time
the flag is clicked and the program runs. To do more, you need to know about sequencing.
Computer programs, at their simplest, are a list of instructions, just like a recipe. Each
instruction follows on from the last in a logical progression known as a linear sequence.
Start by clicking and dragging the say Hello! block from the scripts area back to the blocks
palette (Figure 4-4). This deletes the block, removing it from your program and leaving just the
trigger block, when clicked .
WHAT CAN IT SAY?
Some blocks in Scratch can be changed. Try clicking on
the word ‘Hello!’ and typing something else, then click
the green flag again. What happens on the stage?
Chapter 4 Programming with Scratch 59
THE OFFICIAL RASPBERRY PI BEGINNER’S GUIDE
5Figure 4-4: To delete a block, simply drag it out of the scripts area
Click on the Motion category in the blocks palette, then click and drag the move 10 steps
block so it locks into place under the trigger block on the scripts area. As the name suggests,
this tells your sprite – the cat – to move a number of steps in the direction it’s currently facing.
when clicked
move 10 steps
Add more instructions to your program to create a sequence. Click on the Sound palette,
colour-coded pink, then click and drag the play sound meow until done block so it locks
underneath the move 10 steps block. Keep going: click back on the Motion category and drag
another move 10 steps block underneath your Sound block, but this time click on the ‘10’ to
select it and type ‘-10’ to create a move -10 steps block.
when clicked
move 10 steps
play sound meow until done
move -10 steps
THE OFFICIAL RASPBERRY PI BEGINNER'S GUIDE60
Click on the green flag above the stage to run the program. You’ll see the cat move to
the right, make a meow sound – make sure you’ve got speakers or headphones connected
to hear it – then move back to the start again. Click the flag again, and the cat will repeat
its actions.
Congratulations: you’ve created a sequence of instructions, which Scratch is running
through one at a time, top to bottom. While Scratch will only run one instruction at a time
from the sequence, it does so very quickly: try deleting the play sound meow until done
block by clicking and dragging the bottom move -10 steps block to detach it, dragging the
play sound meow until done block to the blocks palette, then replacing it with the simpler
play sound meow block before dragging your move -10 steps block back onto the bottom
of your program.
when clicked
move 10 steps
play sound meow
move -10 steps
Click the green flag to run your program again, and the cat sprite doesn’t seem to move. The
sprite is moving, in fact, but it moves back again so quickly that it appears to be standing still.
This is because using the play sound meow block doesn’t wait for the sound to finish playing
before the next step; because the Raspberry Pi ‘thinks’ so quickly, the next instruction runs
before you can ever see the cat sprite move. There’s another way to fix this, beyond using the
play sound meow until done block: click on the Control category of the blocks palette,
colour-coded gold, then click and drag a wait 1 secs block between the play sound meow
block and the bottom move -10 steps block.
when clicked
move 10 steps
play sound meow
wait 1 secs
move -10 steps
Chapter 4 Programming with Scratch 61
THE OFFICIAL RASPBERRY PI BEGINNER’S GUIDE
Click the green flag to run your program one last time, and you’ll see that the cat sprite waits
for a second after moving to the right before moving back to the left again. This is known as a
delay, and is key to controlling how long your sequence of instructions takes to run.
Looping the loop
The sequence you’ve created so far runs only once: you click the green flag, the cat sprite
moves and meows, and then the program stops until you click the green flag again. It doesn’t
have to stop, though, because Scratch includes a type of Control block known as a loop.
Click on the Control category in the blocks palette, colour-coded gold, and find the forever
block. Click and drag this into the scripts area, then drop it underneath the when clicked
block and above the first move 10 steps block.
when clicked
forever
move 10 steps
play sound meow
wait 1 secs
move -10 steps
Notice how the C-shaped forever block automatically grows to surround the other blocks in
your sequence. Click the green flag now, and you’ll quickly see what the forever block does:
instead of your program running once and finishing, it will run over and over again – quite literally
forever. In programming, this is known as an infinite loop – literally, a loop that never ends.
If the sound of constant meowing is getting a little much, click the red octagon next to
the green flag above the stage area to stop your program. To change the loop type, click and
CHALLENGE: ADD MORE STEPS
Try adding more steps to your sequence, and changing
the values in the existing steps. What happens when the
number of steps in one move block doesn’t match the
number of steps in another? What happens if you try to
play a sound while another sound is still playing?
THE OFFICIAL RASPBERRY PI BEGINNER'S GUIDE62
drag the first move 10 steps block and pull it and the blocks beneath it out of the forever
block, then drop them underneath the when clicked block. Click and drag the forever
block to the blocks palette to delete it, then click and drag the repeat 10 block under the
when clicked block so it goes around the other blocks.
when clicked
repeat 10
move 10 steps
play sound meow
wait 1 secs
move -10 steps
Click the green flag to run your new program. At first, it seems to be doing the same thing as
your original version: repeating your sequence of instructions over and over again. This time,
though, rather than continuing forever, the loop will finish after ten repetitions. This is known as
a definite loop: you define when it will finish. Loops are powerful tools, and most programs –
especially games and sensing programs – make heavy use of both infinite and definite loops.
Variables and conditionals
The final concepts to understand before beginning to code Scratch programs in earnest are
closely related: variables and conditionals. A variable is, as the name suggests, a value which
can vary – in other words, change – over time and under control of the program. A variable has
two main properties: its name, and the value it stores. That value doesn’t have to be a number,
either: it can be numbers, text, true-or-false, or completely empty – known as a null value.
Variables are powerful tools. Think of the things you have to track in a game: the health of
a character, the speed of moving object, the level currently being played, and the score. All of
these are tracked as variables.
WHAT HAPPENS NOW?
What happens if you change the number in the loop
block to make it larger? What happens if it’s smaller?
What happens if you put the number 0 in the loop block?
Chapter 4 Programming with Scratch 63
THE OFFICIAL RASPBERRY PI BEGINNER’S GUIDE
First, click the File menu and save your existing program by clicking on Save Project. Next,
click File and then New to start a new, blank project. Click on the Data category in the blocks
palette, then the ‘Make a Variable’ button. Type ‘loops’ as the variable name (Figure 4-5),
then click the OK button to make a series of blocks appear in the blocks palette.
5Figure 4-5: Give your new variable a name
Click and drag the set loops to 0 block to the scripts area. This tells your program to
initialise the variable with a value of 0. Next, click on the Looks category of the blocks palette
and drag the say Hello! for 2 secs block under your set loops to 0 block.
set loops to 0
say Hello! for 2 secs
As you found earlier, the say Hello! blocks cause the cat sprite to say whatever is written
in them. Rather than writing the message in the block yourself, though, you can use a variable
instead. Click back onto the Data category in the blocks palette, then click and drag the
rounded loops block – known as a reporter block and found at the top of the list, with a
THE OFFICIAL RASPBERRY PI BEGINNER'S GUIDE64
tick‑box next to it – over the word ‘Hello!’ in your say Hello! for 2 secs block. This creates a
new, combined block: say loops for 2 secs .
set loops to 0
say loops for 2 secs
Click on the Events category in the blocks palette, then click and drag the when clicked
block to place it on top of your sequence of blocks. Click the green flag above the stage area,
and you’ll see the cat sprite say ‘0’ (Figure 4-6) – the value you gave to the variable ‘loops’.
5Figure 4-6: This time the cat will say the value of the variable
Variables aren’t unchanging, though. Click on the Data category in the blocks palette,
then click and drag the change loops by 1 block to the bottom of your sequence. Next,
click on the Control category, then click and drag a repeat 10 block and drop it so that it
starts directly beneath your set loops to 0 block and wraps around the remaining blocks
in your sequence.
Chapter 4 Programming with Scratch 65
THE OFFICIAL RASPBERRY PI BEGINNER’S GUIDE
when clicked
set loops to 0
repeat 10
say loops for 2 secs
change loops by 1
Click the green flag again. This time, you’ll see the cat count upwards from 0 to 9. This
works because your program is now changing, or modifying, the variable itself: every time the
loop runs, the program adds one to the value in the ‘loops’ variable (Figure 4-7).
5Figure 4-7: Thanks to the loop, the cat now counts upwards
COUNTING FROM ZERO
Although the loop you’ve created runs ten times, the cat
sprite only counts up to nine. This is because we’re starting
with a value of zero for our variable. Including zero and
nine, there are ten numbers between zero and nine – so the
program stops before the cat ever says ‘10’. To change this
you could set the variable’s initial value to 1 instead of 0.
THE OFFICIAL RASPBERRY PI BEGINNER'S GUIDE66
You can do more with a variable than modify it. Click and drag the say loops for 2 secs
block to break it out of the repeat 10 block and drop it below the repeat 10 block. Click and
drag the repeat 10 block to the blocks palette to delete it, then replace it with a repeat until
block, making sure the block is connected to the bottom of the say loops for 2 secs block
and surrounds both of the other blocks in your sequence. Click on the Operators category in the
blocks palette, colour-coded green, then click and drag the diamond-shaped n = n block and
drop it on the matching diamond-shaped hole in the repeat until block.
when clicked
set loops to 0
repeat until =
say loops for 2 secs
change loops by 1
This Operators block lets you compare two values, including variables. Click on the Data
category in the blocks palette, drag the loops reporter block into the first empty square in the
n = n Operators block, then click on the second empty square and type the number ‘10’.
when clicked
set loops to 0
repeat until loops = 10
say loops for 2 secs
change loops by 1
Click on the green flag above the stage area, and you’ll find the program works the same
way as before: the cat sprite counts from 0 up to 9 (Figure 4-8) and then the program stops.
Chapter 4 Programming with Scratch 67
THE OFFICIAL RASPBERRY PI BEGINNER’S GUIDE
This is because the repeat until block is working in exactly the same way as the
repeat 10 block, but rather than counting the number of loops itself, it’s comparing the value
of the ‘loops’ variable to the value you typed to the right of the block. When the ‘loops’ variable
reaches 10, the program stops.
5Figure 4-8: Using a ‘repeat until’ block with a comparitive operator
This is known as a comparative operator: it literally compares two values. Click on the
Operators category of the blocks palette, and find the two other diamond-shape blocks above
and below the one with the ‘=’ symbol. These are also comparative operators: ‘’ compares two
values and is triggered when the value of the left is smaller than the one on the right, and ‘’
triggers when the value on the left is bigger than the one on the right.
Click on the Control category of the blocks palette, find the if then block, then click and
drag it to the scripts area before dropping it directly beneath the say loops for 2 secs block.
It will automatically surround the change loops by 1 block, so click and drag on that to move
it so it connects to the bottom of your if then block instead. Click on the Looks category
of the blocks palette, then click and drag a say Hello! for 2 secs block to drop it inside your
if then block. Click on the Operators category of the blocks palette, then click and drag the
n  n   block into the diamond-shape hole in your if then block.
THE OFFICIAL RASPBERRY PI BEGINNER'S GUIDE68
when clicked
set loops to 0
repeat until loops = 10
say loops for 2 secs
if  then
say Hello! for 2 secs
change loops by 1
The if then block is a conditional block, which means the blocks inside it will only run if
a certain condition is met. Click on the Data category of the blocks palette, drag and drop
the loops reporter block into the first empty square in your n  n    block, then click on
the second empty square and type the number ‘5’. Finally, click on the word ‘Hello!’ in your
say Hello! for 2 secs block and type ‘That’s high!’.
when clicked
set loops to 0
repeat until loops = 10
say loops for 2 secs
if loops  5 then
say That's high! for 2 secs
change loops by 1
Chapter 4 Programming with Scratch 69
THE OFFICIAL RASPBERRY PI BEGINNER’S GUIDE
Click on the green flag. At first, the program will work as before with the cat sprite counting
upwards from zero. When the number reaches 6, the first number which is greater than 5, the
if then block will begin to trigger and the cat sprite will comment on how high the numbers
are getting (Figure 4-9). Congratulations: you can now work with variables and conditionals!
5Figure 4-9: The cat makes a comment when the number reaches 6
Project 1: Astronaut Reaction Timer
Now you understand how Scratch works, it’s time to make something a little more interactive:
a reaction timer, designed to honour British ESA astronaut Tim Peake and his time aboard the
International Space Station.
Save your existing program, if you want to keep it, then open a new project by clicking on
File and New. Before you begin, give it a name by clicking on File and Save Project: call it
‘Astronaut Reaction Timer’.
CHALLENGE: HIGH AND LOW
How could you change the program so the cat sprite
comments on how low the numbers below 5 are
instead? Can you change it so that the cat will comment
on both high and low numbers? Experiment with the
if then else block to make this easier!
ONLINE PROJECT
This project is also available online at rpf.io/astronaut-game
THE OFFICIAL RASPBERRY PI BEGINNER'S GUIDE70
This project relies on two images – one as a stage background, one as a sprite – which
are not included in Scratch’s built-in resources. To download them, click on the raspberry icon
to load the Raspbian menu, move the mouse pointer to Internet, and click on Chromium Web
Browser. When the browser has loaded, type rpf.io/astronaut-backdrop into the address bar,
followed by the ENTER key. Right-click on the picture of space and click on ‘Save image as…’,
then choost the Downloads folder and click on the Save button (Figure 4-10). Click back into
the address bar, and type rpf.io/astronaut-sprite followed by the ENTER key.
5Figure 4-10: Save the background image
Again, right-click on the picture of Tim Peake and click on ‘Save image as…’, then choose the
Downloads folder and click on the Save button. With those two images saved, you can close
Chromium or leave it open and use the taskbar to switch back to Scratch 2.
Start by right-clicking on the cat sprite on the stage and clicking Delete to remove it. Find the
stage controls at the bottom-left of the Scratch 2 window and click on the upload backdrop
icon . Find the file Space-background.png in the Downloads folder, click on it to select it,
then click OK. The plain white stage background will change to the picture of space, and the
scripts area will be replaced by the backdrops area (Figure 4-11). Here you can draw over the
backdrop, but for now just click on the tab marked Scripts at the top of the Scratch 2 window.
USER INTERFACE
If you’ve been following this chapter from the start, you should
be familiar with the Scratch 2 user interface. The following
project instructions will rely on you knowing where things are;
if you forget where to find something, look back at the picture
of the user interface at the start of this chapter for a reminder.
Chapter 4 Programming with Scratch 71
THE OFFICIAL RASPBERRY PI BEGINNER’S GUIDE
5Figure 4-11: The space background appears on the stage
Upload your new sprite by clicking the upload sprite icon , next to the words ‘New sprite:’
at the top of the sprites pane. Find the file Astronaut-Tim.png in the Downloads folder, click to
select it, then click OK. The sprite appears on the stage automatically, but might not be in the
middle: click and drag it with the mouse and drop it so it’s near the lower middle (Figure 4-12).
5Figure 4-12: Drag the astronaut sprite to the lower middle of the stage
With your new background and sprite in place, you’re ready to create your program. Start
by creating a new variable called ‘time’, making sure that ‘For all sprites’ is selected before
clicking OK. Click on your sprite – either on the stage or in the sprite pane – to select it,
THE OFFICIAL RASPBERRY PI BEGINNER'S GUIDE72
then add a when clicked block from the Events category to the scripts area. Next, add a
say Hello! for 2 secs block from the Looks category, then click on it to change it to say ‘Hello!
British ESA Astronaut Tim Peake here. Are you ready?’
when clicked
say Hello! British ESA Astronaut Tim Peake here. Are you ready? for 2 secs
Add a wait 1 secs block from the Control category, then a say Hello! block. Change
this block to say ‘Hit Space!’, then add a reset timer block from the Sensing category. This
controls a special variable built into Scratch for timing things, and will be used to time how
quickly you can react in the game.
when clicked
say Hello! British ESA Astronaut Tim Peake here. Are you ready? for 2 secs
wait 1 secs
say Hit Space!
reset timer
Add a wait until Control block, then drag a key space pressed? Sensing block into its
white space. This will pause the program until you press the SPACE key on the keyboard, but
the timer will continue to run – counting exactly how long between the message telling you to
‘Hit Space!’ and you actually hitting the SPACE key.
when clicked
say Hello! British ESA Astronaut Tim Peake here. Are you ready? for 2 secs
wait 1 secs
say Hit Space!
reset timer
wait until key space pressed?
You now need Tim to tell you how long you took to press the SPACE key, but in a way that’s
easy to read. To do this, you’ll need a join Operators block. This takes two values, including
variables, and joins them together one after the other – known as concatenation.
Chapter 4 Programming with Scratch 73
THE OFFICIAL RASPBERRY PI BEGINNER’S GUIDE
Start with a say Hello! block, then drag and drop a join Operators block over the word
‘Hello!’. Fill in the first box with ‘Your reaction time was ’, making sure to add a blank space at
the end, then drag another join block into the second box. Drag a timer reporting block from
the Sensing category into what is now the middle box, and type ‘ seconds.’ into the last box –
making sure to include a blank space at the start.
when clicked
say Hello! British ESA Astronaut Tim Peake here. Are you ready? for 2 secs
wait 1 secs
say Hit Space!
reset timer
wait until key space pressed?
say join Your reaction time was join timer seconds.
Finally, drag a set time to 0 Data variables block onto the end of your sequence, then
replace the ‘0’ with a timer reporting block. Your game is now ready to test by clicking on the
green flag above the stage. Get ready, and as soon as you see the message ‘Hit Space!’, press
the SPACE key as quickly as you can (Figure 4-13) – see if you can beat our high score!
5Figure 4-13: Time to play the game!
THE OFFICIAL RASPBERRY PI BEGINNER'S GUIDE74
You can extend this project further by having it calculate roughly how far the International
Space Station has travelled in the time it took you to press the SPACE key, based on the
station’s published speed of seven kilometres per second. First, create a new variable called
‘distance’. Notice how the blocks in the Data category automatically change to show the new
variable, but the existing time variable blocks in your program remain the same.
Add a set distance to 0 block, then drag a ● * ● Operators block – indicating
multiplication – over the ‘0’. Drag a time reporting block over the first blank space, then type
in the number ‘7’ into the second space. When you’re finished, your combined block reads
set distance to time * 7 . This will take the time it took you to press the SPACE key and
multiply it by seven, to get the distance in kilometres the ISS has travelled.
when clicked
say Hello! British ESA Astronaut Tim Peake here. Are you ready? for 2 secs
wait 1 secs
say Hit Space!
reset timer
wait until key space pressed?
say join Your reaction time was join timer seconds.
set time to timer
set distance to time * 7
Add a wait 1 secs block and change it ‘4 secs’. Finally, drag another say Hello! block onto
the end of your sequence and add two join blocks, just as you did before. In the first white
space, type ‘In that time the ISS travels around ’, remembering to include the space at the end,
and in the last white space type ‘ kilometres.’, again remembering the space at the start.
Chapter 4 Programming with Scratch 75
THE OFFICIAL RASPBERRY PI BEGINNER’S GUIDE
when clicked
say Hello! British ESA Astronaut Tim Peake here. Are you ready? for 2 secs
wait 1 secs
say Hit Space!
reset timer
wait until key space pressed?
say join Your reaction time was join timer seconds.
set time to timer
set distance to time * 7
wait 4 secs
say join In that time the ISS travels around join kilometres.
Finally, drag a round Operators block into the middle blank space, then drag a distance
reporting block into the new blank space it creates. The round block rounds numbers up or
down to their nearest whole number, so instead of a hyper-accurate but hard-to-read number
of kilometres you’ll get an easy-to-read whole number.
when clicked
say Hello! British ESA Astronaut Tim Peake here. Are you ready? for 2 secs
wait 1 secs
say Hit Space!
reset timer
wait until key space pressed?
say join Your reaction time was join timer seconds.
set time to timer
set distance to time * 7
wait 4 secs
say join In that time the ISS travels around join round distance kilometres.
THE OFFICIAL RASPBERRY PI BEGINNER'S GUIDE76
Click the green flag to run your program, and see how far the ISS travels in the time it takes
you to hit the SPACE key. Remember to save your program when you’ve finished, so you can
easily load it again in the future without having to start from the beginning!
5Figure 4-14: Tim tells you how far the ISS has travelled
Project 2: Synchronised Swimming
Most games use more than a single button, and this project demonstrates that by offering
two-button control using the ← and → keys on the keyboard.
CHALLENGE: WHO’S FAST?
As well as astronaut, what other professions require
split-second reflexes? Can you draw your own sprites
and backgrounds to show one of these professions?
ONLINE PROJECT
This project is also available online at rpf.io/synchro-swimming
Chapter 4 Programming with Scratch 77
THE OFFICIAL RASPBERRY PI BEGINNER’S GUIDE
Create a new project and save it as ‘Synchronised Swimming’. Click on the Stage in the stage
control section, then click the Backdrops tab. Click on a water-like blue colour from the palette,
click on the fill with colour icon and click on the white backdrop (Figure 4-15).
5Figure 4-15: Fill the background with a blue colour
Right-click the cat sprite and click ‘delete’. In the sprite area, click the ‘choose sprite from
library’ icon to see a list of built-in sprites. Click on the Animals category, then ‘Cat1 Flying’
(Figure 4-16), then OK. This sprite also serves well for swimming projects.
Click the new sprite, then drag
two when space key pressed
Events blocks into the scripts
area. Click on the small
down‑arrow next to the word
‘space’ on the first block
and choose ‘left arrow’ from
the list of possible options.
Drag a turn

15 degrees
Motion block under your
when left arrow pressed block,
then do the same with your5Figure 4-16: Choose a sprite from the library
THE OFFICIAL RASPBERRY PI BEGINNER'S GUIDE78
second Events block except choosing ‘right arrow’ from the list and using a
turn

15 degrees Motion block.
when left arrow key pressed
turn 15 degrees
when right arrow key pressed
turn 15 degrees
Press the ← or → key to test your program. You’ll see the cat sprite turning as you do,
matching the direction you’re choosing on the keyboard. Notice how you didn’t need to click on
the green flag this time; this is because the Events trigger blocks you have used are active at
all times, even when the program isn’t ‘running’ in the normal sense.
Do the same steps twice again, but this time choosing ‘up arrow’ and ‘down arrow’ for
the Events trigger blocks, then move 10 steps and move -10 steps for the Motion blocks.
Press the arrow keys now and you’ll see your cat can turn around and swim forwards and
backwards too!
when left arrow key pressed
turn 15 degrees
when right arrow key pressed
turn 15 degrees
when up arrow key pressed
move 10 steps
when down arrow key pressed
move -10 steps
To make the cat sprite’s motion more realistic, you can change how it appears – known in
Scratch terms as its costume. Click on the cat sprite, then click on the Costumes tab above the
blocks palette. Click on the ‘cat1 flying-a’ costume and click on the round X icon that appears
Chapter 4 Programming with Scratch 79
THE OFFICIAL RASPBERRY PI BEGINNER’S GUIDE
at its top-right corner to delete it. Next, click on the ‘cat1 flying-b’ costume and use the name
box at the top to rename it to ‘right’ (Figure 4-17).
5Figure 4-17: Rename the costume as ‘right’
Right-click on the newly renamed ‘right’ costume and click ‘duplicate’ to create a copy. Click
on this copy to select it, click on the flip left-right icon , then rename it to ‘left’ (Figure 4-18).
You’ll finish with two ‘costumes’ for your sprite, which are exact mirror images: one called
‘right’ with the cat facing right, and one called ‘left’ with the cat facing left.
5Figure 4-18: Duplicate the costume, flip it, and name it ‘left’
THE OFFICIAL RASPBERRY PI BEGINNER'S GUIDE80
Click on the Scripts tab above the costume area, then drag two switch costume to left
Looks blocks under your left arrow and right arrow Events blocks, changing the one under
the right arrow block to read switch costume to right . Try the arrow keys again; the cat now
seems to turn to face the direction it’s swimming.
when left arrow key pressed
switch costume to left
turn 15 degrees
when right arrow key pressed
switch costume to right
turn 15 degrees
when up arrow key pressed
move 10 steps
when down arrow key pressed
move -10 steps
Chapter 4 Programming with Scratch 81
THE OFFICIAL RASPBERRY PI BEGINNER’S GUIDE
For Olympic-style synchronised swimming, though, we need more swimmers, and we
need a way to reset the cat sprite’s position. Add a when clicked Events block, then
underneath add a go to x: 0 y: 0 Motion block – changing the values if necessary – and a
point in direction 90 Looks block. Now, when you click the green flag, the cat will be moved
to the middle of the stage and pointing to the right.
when left arrow key pressed
switch costume to left
turn 15 degrees
when right arrow key pressed
switch costume to right
turn 15 degrees
when up arrow key pressed
move 10 steps
when down arrow key pressed
move -10 steps
when clicked
go to x: 0 y: 0
point in direction 90
THE OFFICIAL RASPBERRY PI BEGINNER'S GUIDE82
To create more swimmers, add a repeat 6 block – changing from the default value of ‘10’
– and add a create clone of myself Control block inside it. To make it so the swimmers aren’t
all swimming in the same direction, add a turn

60 degrees block above the create clone
block but still inside the repeat 6 block. Click the green flag, and try the arrow keys now to
see your swimmers come to life!
when left arrow key pressed
switch costume to left
turn 15 degrees
when right arrow key pressed
switch costume to right
turn 15 degrees
when up arrow key pressed
move 10 steps
when down arrow key pressed
move -10 steps
when clicked
go to x: 0 y: 0
point in direction 90
repeat 6
turn 60 degrees
create clone of myself
Chapter 4 Programming with Scratch 83
THE OFFICIAL RASPBERRY PI BEGINNER’S GUIDE
To complete the Olympic feel, you’ll need to add some music. Click on the Sounds tab above
the blocks palette, then click the ‘choose new sound from library’ icon . Click on the Music
Loops category, then click on the small play icons (Figure 4-19)until you find some music you
like – we’ve picked ‘dance around’. Click on the OK button to choose the music, then click on
the Scripts tab to open the scripts area again.
5Figure 4-19: Select a music loop from the sound library
Add another when clicked Events block to your scripts area, then add a forever
Control block. Inside this Control block, add a play sound dance around until done block –
remembering to look for the name of whatever piece of music you chose – and click the green
flag to test your new program. If you want to stop the music, click the red octagon to stop the
program and silence the sound!
THE OFFICIAL RASPBERRY PI BEGINNER'S GUIDE84
when left arrow key pressed
switch costume to left
turn 15 degrees
when right arrow key pressed
switch costume to right
turn 15 degrees
when up arrow key pressed
move 10 steps
when down arrow key pressed
move -10 steps
when clicked
go to x: 0 y: 0
point in direction 90
repeat 6
turn 60 degrees
create clone of myself
when clicked
forever
play sound dance around until done
Finally, you can simulate a full dancing routine by adding a new event trigger to your
program. Add a when space key pressed Events block, then a switch costume to right
block. Underneath this, add a repeat 36 block – remembering to change the value from the
default – and inside this a turn

10 degrees block and a move 10 steps block.
Chapter 4 Programming with Scratch 85
THE OFFICIAL RASPBERRY PI BEGINNER’S GUIDE
when left arrow key pressed
switch costume to left
turn 15 degrees
when right arrow key pressed
switch costume to right
turn 15 degrees
when up arrow key pressed
move 10 steps
when down arrow key pressed
move -10 steps
when clicked
go to x: 0 y: 0
point in direction 90
repeat 6
turn 60 degrees
create clone of myself
when clicked
forever
play sound dance around until done
when space key pressed
switch costume to right
repeat 36
turn 10 degrees
move 10 steps
Click the green flag to start the program, then press the SPACE key to try out the new routine
(Figure 4-20, overleaf)! Don’t forget to save your program when you’re finished.
THE OFFICIAL RASPBERRY PI BEGINNER'S GUIDE86
5Figure 4-20: The finished synchronised swimming routine
Project 3: Archery Game
Now you’re getting to be a bit of an expert at Scratch, it’s time to work on something a little
more challenging: a game of archery, where the player has to hit a target with a randomly
swaying bow and arrow.
Start by opening the Chrome Web Browser and typing rpf.io/archery-resources followed by
the ENTER key. The resources for the game only take a few seconds to download. Switch back to
Scratch 2 and click on the File menu followed by Load Project. Click on ‘pi’ in the Places pane at the
ONLINE PROJECT
This project is also available online at rpf.io/archery
CHALLENGE: CUSTOM ROUTINE
Can you create your own synchronised swimming
routine using loops? What would you need to change
if you wanted more swimmers, or fewer swimmers?
Can you add multiple swimming routines which can be
triggered using different keys on the keyboard?
Chapter 4 Programming with Scratch 87
THE OFFICIAL RASPBERRY PI BEGINNER’S GUIDE
left-hand side of the window, then the ‘Downloads’ folder, and click on ArcheryResources.sb2
followed by the Open button. You’ll be asked if you want to replace the contents of your current
project: if you haven’t saved your changes, click Cancel and save them, otherwise click OK.
5Figure 4-21: Resources project loaded for the archery game
The project you’ve just loaded contains a backdrop and a sprite (Figure 4-21), but
none of the actual code to make a game: adding that in is your job. Start by adding a
when clicked block, then a broadcast message1 block. Click on the down arrow at
the end of the block and then ‘New Message’, and type in ‘new arrow’ before clicking the OK
button. Your block now reads broadcast new arrow .
when clicked
broadcast new arrow
A broadcast is a message from one part of your program which can be received by any other
part of your program. To have it actually do something, add a when I receive message1 block,
and again change it to read when I receive new arrow . This time you can just click on the down
arrow and choose ‘new arrow’ from the list; you don’t have to create the message again.
THE OFFICIAL RASPBERRY PI BEGINNER'S GUIDE88
Below your when I receive new arrow block, add a go to x: -150 y: -150 block and a
set size to 400 % block. Remember that these aren’t the default values for those blocks, so
you’ll need to change them once you’ve dragged them onto the scripts area. Click on the green
flag to see what you’ve done so far: the arrow sprite, which the player uses to aim at the target,
will jump to the bottom-left of the stage and quadruple in size.
when clicked
broadcast new arrow
when I receive new arrow
go to x: -150 y: -150
set size to 400 %
To give the player a challenge, add movement simulating swaying as the bow is drawn
and the archer takes aim. Drag a forever block, followed by a glide 1 secs to x: -150 y: -150
block. Edit the first white box to say ‘0.5’ instead of ‘1,’ then put a pick random -150 to 150
Operators block in each of the other two white boxes. This means the arrow will drift around
the stage in a random direction, for a random distance – making it far harder to hit the target!
when clicked
broadcast new arrow
when I receive new arrow
go to x: -150 y: -150
set size to 400 %
forever
glide 0.5 secs to x: pick random -150 to 150 y: pick random -150 to 150
Click the green flag again, and you’ll see what that block does: your arrow sprite is now
drifting around the stage, covering different parts of the target. At the moment, though, you
have no way to loose the arrow at the target. Drag a when space key pressed block into your
scripts area, followed by a stop all Control block. Click the down arrow at the end of the block
and change it to a stop other scripts in sprite block.
Beginners guide v1
Beginners guide v1
Beginners guide v1
Beginners guide v1
Beginners guide v1
Beginners guide v1
Beginners guide v1
Beginners guide v1
Beginners guide v1
Beginners guide v1
Beginners guide v1
Beginners guide v1
Beginners guide v1
Beginners guide v1
Beginners guide v1
Beginners guide v1
Beginners guide v1
Beginners guide v1
Beginners guide v1
Beginners guide v1
Beginners guide v1
Beginners guide v1
Beginners guide v1
Beginners guide v1
Beginners guide v1
Beginners guide v1
Beginners guide v1
Beginners guide v1
Beginners guide v1
Beginners guide v1
Beginners guide v1
Beginners guide v1
Beginners guide v1
Beginners guide v1
Beginners guide v1
Beginners guide v1
Beginners guide v1
Beginners guide v1
Beginners guide v1
Beginners guide v1
Beginners guide v1
Beginners guide v1
Beginners guide v1
Beginners guide v1
Beginners guide v1
Beginners guide v1
Beginners guide v1
Beginners guide v1
Beginners guide v1
Beginners guide v1
Beginners guide v1
Beginners guide v1
Beginners guide v1
Beginners guide v1
Beginners guide v1
Beginners guide v1
Beginners guide v1
Beginners guide v1
Beginners guide v1
Beginners guide v1
Beginners guide v1
Beginners guide v1
Beginners guide v1
Beginners guide v1
Beginners guide v1
Beginners guide v1
Beginners guide v1
Beginners guide v1
Beginners guide v1
Beginners guide v1
Beginners guide v1
Beginners guide v1
Beginners guide v1
Beginners guide v1
Beginners guide v1
Beginners guide v1
Beginners guide v1
Beginners guide v1
Beginners guide v1
Beginners guide v1
Beginners guide v1
Beginners guide v1
Beginners guide v1
Beginners guide v1
Beginners guide v1
Beginners guide v1
Beginners guide v1
Beginners guide v1
Beginners guide v1
Beginners guide v1
Beginners guide v1
Beginners guide v1
Beginners guide v1
Beginners guide v1
Beginners guide v1
Beginners guide v1
Beginners guide v1
Beginners guide v1
Beginners guide v1
Beginners guide v1
Beginners guide v1
Beginners guide v1
Beginners guide v1
Beginners guide v1
Beginners guide v1
Beginners guide v1
Beginners guide v1
Beginners guide v1
Beginners guide v1
Beginners guide v1
Beginners guide v1
Beginners guide v1
Beginners guide v1
Beginners guide v1
Beginners guide v1
Beginners guide v1
Beginners guide v1
Beginners guide v1
Beginners guide v1
Beginners guide v1
Beginners guide v1
Beginners guide v1
Beginners guide v1
Beginners guide v1
Beginners guide v1
Beginners guide v1
Beginners guide v1
Beginners guide v1
Beginners guide v1
Beginners guide v1
Beginners guide v1
Beginners guide v1
Beginners guide v1
Beginners guide v1
Beginners guide v1
Beginners guide v1
Beginners guide v1
Beginners guide v1
Beginners guide v1
Beginners guide v1
Beginners guide v1
Beginners guide v1
Beginners guide v1
Beginners guide v1
Beginners guide v1
Beginners guide v1
Beginners guide v1
Beginners guide v1
Beginners guide v1
Beginners guide v1
Beginners guide v1
Beginners guide v1
Beginners guide v1
Beginners guide v1
Beginners guide v1
Beginners guide v1

Weitere ähnliche Inhalte

Ähnlich wie Beginners guide v1

IOT Experiment-2.pptx --- Hands on Approach & Easy to learn IOT Basics...
IOT Experiment-2.pptx --- Hands on Approach & Easy to learn IOT Basics...IOT Experiment-2.pptx --- Hands on Approach & Easy to learn IOT Basics...
IOT Experiment-2.pptx --- Hands on Approach & Easy to learn IOT Basics...
Ravindranath67
 
Raspberry pi: Proyectos de robótica raspberry pi de richard grimmett.
Raspberry pi: Proyectos de robótica raspberry pi de richard grimmett.Raspberry pi: Proyectos de robótica raspberry pi de richard grimmett.
Raspberry pi: Proyectos de robótica raspberry pi de richard grimmett.
SANTIAGO PABLO ALBERTO
 

Ähnlich wie Beginners guide v1 (20)

Introduction to the Raspberry Pi
Introduction to the Raspberry PiIntroduction to the Raspberry Pi
Introduction to the Raspberry Pi
 
IOT Experiment-2.pptx --- Hands on Approach & Easy to learn IOT Basics...
IOT Experiment-2.pptx --- Hands on Approach & Easy to learn IOT Basics...IOT Experiment-2.pptx --- Hands on Approach & Easy to learn IOT Basics...
IOT Experiment-2.pptx --- Hands on Approach & Easy to learn IOT Basics...
 
Raspberry Pi
Raspberry PiRaspberry Pi
Raspberry Pi
 
Advanced View of Projects Raspberry Pi List - Raspberry PI Projects.pdf
Advanced View of Projects Raspberry Pi List - Raspberry PI Projects.pdfAdvanced View of Projects Raspberry Pi List - Raspberry PI Projects.pdf
Advanced View of Projects Raspberry Pi List - Raspberry PI Projects.pdf
 
Advanced View of Projects Raspberry Pi List - Raspberry PI Projects.pdf
Advanced View of Projects Raspberry Pi List - Raspberry PI Projects.pdfAdvanced View of Projects Raspberry Pi List - Raspberry PI Projects.pdf
Advanced View of Projects Raspberry Pi List - Raspberry PI Projects.pdf
 
Raspberry PI
Raspberry PIRaspberry PI
Raspberry PI
 
Presentation on Raspberry pi
Presentation on Raspberry piPresentation on Raspberry pi
Presentation on Raspberry pi
 
Coffee & Pi - Fall into Pi
Coffee & Pi - Fall into PiCoffee & Pi - Fall into Pi
Coffee & Pi - Fall into Pi
 
Raspberry Pi - Unlocking New Ideas for Your Library
Raspberry Pi - Unlocking New Ideas for Your LibraryRaspberry Pi - Unlocking New Ideas for Your Library
Raspberry Pi - Unlocking New Ideas for Your Library
 
RASPBERRY PI
RASPBERRY PIRASPBERRY PI
RASPBERRY PI
 
RASPBERRY Pi.pptx
RASPBERRY Pi.pptxRASPBERRY Pi.pptx
RASPBERRY Pi.pptx
 
Uses of raspberry pi
Uses of raspberry piUses of raspberry pi
Uses of raspberry pi
 
Raspberry pi 2018
Raspberry pi 2018Raspberry pi 2018
Raspberry pi 2018
 
fras.pptx
fras.pptxfras.pptx
fras.pptx
 
Advanced View of Projects Raspberry Pi List - Raspberry PI Projects.pdf
Advanced View of Projects Raspberry Pi List - Raspberry PI Projects.pdfAdvanced View of Projects Raspberry Pi List - Raspberry PI Projects.pdf
Advanced View of Projects Raspberry Pi List - Raspberry PI Projects.pdf
 
Advanced View of Projects Raspberry Pi List - Raspberry PI Projects.pdf
Advanced View of Projects Raspberry Pi List - Raspberry PI Projects.pdfAdvanced View of Projects Raspberry Pi List - Raspberry PI Projects.pdf
Advanced View of Projects Raspberry Pi List - Raspberry PI Projects.pdf
 
Getting started with Raspberry Pi - By Ibrahim
Getting started with Raspberry Pi - By IbrahimGetting started with Raspberry Pi - By Ibrahim
Getting started with Raspberry Pi - By Ibrahim
 
IoT for data science Module 5 - Raspberry Pi.pptx
IoT for data science Module 5 - Raspberry Pi.pptxIoT for data science Module 5 - Raspberry Pi.pptx
IoT for data science Module 5 - Raspberry Pi.pptx
 
Raspberry pi: Proyectos de robótica raspberry pi de richard grimmett.
Raspberry pi: Proyectos de robótica raspberry pi de richard grimmett.Raspberry pi: Proyectos de robótica raspberry pi de richard grimmett.
Raspberry pi: Proyectos de robótica raspberry pi de richard grimmett.
 
RaspberryPi.pptx
RaspberryPi.pptxRaspberryPi.pptx
RaspberryPi.pptx
 

Kürzlich hochgeladen

Call Girls In RT Nagar ☎ 7737669865 🥵 Book Your One night Stand
Call Girls In RT Nagar ☎ 7737669865 🥵 Book Your One night StandCall Girls In RT Nagar ☎ 7737669865 🥵 Book Your One night Stand
Call Girls In RT Nagar ☎ 7737669865 🥵 Book Your One night Stand
amitlee9823
 
Vip Mumbai Call Girls Andheri East Call On 9920725232 With Body to body massa...
Vip Mumbai Call Girls Andheri East Call On 9920725232 With Body to body massa...Vip Mumbai Call Girls Andheri East Call On 9920725232 With Body to body massa...
Vip Mumbai Call Girls Andheri East Call On 9920725232 With Body to body massa...
amitlee9823
 
Just Call Vip call girls Begusarai Escorts ☎️9352988975 Two shot with one gir...
Just Call Vip call girls Begusarai Escorts ☎️9352988975 Two shot with one gir...Just Call Vip call girls Begusarai Escorts ☎️9352988975 Two shot with one gir...
Just Call Vip call girls Begusarai Escorts ☎️9352988975 Two shot with one gir...
gajnagarg
 
Vip Mumbai Call Girls Kalyan Call On 9920725232 With Body to body massage wit...
Vip Mumbai Call Girls Kalyan Call On 9920725232 With Body to body massage wit...Vip Mumbai Call Girls Kalyan Call On 9920725232 With Body to body massage wit...
Vip Mumbai Call Girls Kalyan Call On 9920725232 With Body to body massage wit...
amitlee9823
 
➥🔝 7737669865 🔝▻ Vijayawada Call-girls in Women Seeking Men 🔝Vijayawada🔝 E...
➥🔝 7737669865 🔝▻ Vijayawada Call-girls in Women Seeking Men  🔝Vijayawada🔝   E...➥🔝 7737669865 🔝▻ Vijayawada Call-girls in Women Seeking Men  🔝Vijayawada🔝   E...
➥🔝 7737669865 🔝▻ Vijayawada Call-girls in Women Seeking Men 🔝Vijayawada🔝 E...
amitlee9823
 
Just Call Vip call girls daman Escorts ☎️9352988975 Two shot with one girl (d...
Just Call Vip call girls daman Escorts ☎️9352988975 Two shot with one girl (d...Just Call Vip call girls daman Escorts ☎️9352988975 Two shot with one girl (d...
Just Call Vip call girls daman Escorts ☎️9352988975 Two shot with one girl (d...
gajnagarg
 
Escorts Service Arekere ☎ 7737669865☎ Book Your One night Stand (Bangalore)
Escorts Service Arekere ☎ 7737669865☎ Book Your One night Stand (Bangalore)Escorts Service Arekere ☎ 7737669865☎ Book Your One night Stand (Bangalore)
Escorts Service Arekere ☎ 7737669865☎ Book Your One night Stand (Bangalore)
amitlee9823
 
Kothanur Call Girls Service: 🍓 7737669865 🍓 High Profile Model Escorts | Bang...
Kothanur Call Girls Service: 🍓 7737669865 🍓 High Profile Model Escorts | Bang...Kothanur Call Girls Service: 🍓 7737669865 🍓 High Profile Model Escorts | Bang...
Kothanur Call Girls Service: 🍓 7737669865 🍓 High Profile Model Escorts | Bang...
amitlee9823
 
CHEAP Call Girls in Hauz Quazi (-DELHI )🔝 9953056974🔝(=)/CALL GIRLS SERVICE
CHEAP Call Girls in Hauz Quazi  (-DELHI )🔝 9953056974🔝(=)/CALL GIRLS SERVICECHEAP Call Girls in Hauz Quazi  (-DELHI )🔝 9953056974🔝(=)/CALL GIRLS SERVICE
CHEAP Call Girls in Hauz Quazi (-DELHI )🔝 9953056974🔝(=)/CALL GIRLS SERVICE
9953056974 Low Rate Call Girls In Saket, Delhi NCR
 
Call Now ≽ 9953056974 ≼🔝 Call Girls In Yusuf Sarai ≼🔝 Delhi door step delevry≼🔝
Call Now ≽ 9953056974 ≼🔝 Call Girls In Yusuf Sarai ≼🔝 Delhi door step delevry≼🔝Call Now ≽ 9953056974 ≼🔝 Call Girls In Yusuf Sarai ≼🔝 Delhi door step delevry≼🔝
Call Now ≽ 9953056974 ≼🔝 Call Girls In Yusuf Sarai ≼🔝 Delhi door step delevry≼🔝
9953056974 Low Rate Call Girls In Saket, Delhi NCR
 
(👉Ridhima)👉VIP Model Call Girls Mulund ( Mumbai) Call ON 9967824496 Starting ...
(👉Ridhima)👉VIP Model Call Girls Mulund ( Mumbai) Call ON 9967824496 Starting ...(👉Ridhima)👉VIP Model Call Girls Mulund ( Mumbai) Call ON 9967824496 Starting ...
(👉Ridhima)👉VIP Model Call Girls Mulund ( Mumbai) Call ON 9967824496 Starting ...
motiram463
 
➥🔝 7737669865 🔝▻ Muzaffarpur Call-girls in Women Seeking Men 🔝Muzaffarpur🔝 ...
➥🔝 7737669865 🔝▻ Muzaffarpur Call-girls in Women Seeking Men  🔝Muzaffarpur🔝  ...➥🔝 7737669865 🔝▻ Muzaffarpur Call-girls in Women Seeking Men  🔝Muzaffarpur🔝  ...
➥🔝 7737669865 🔝▻ Muzaffarpur Call-girls in Women Seeking Men 🔝Muzaffarpur🔝 ...
amitlee9823
 
一比一原版(Otago毕业证书)奥塔哥理工学院毕业证成绩单学位证靠谱定制
一比一原版(Otago毕业证书)奥塔哥理工学院毕业证成绩单学位证靠谱定制一比一原版(Otago毕业证书)奥塔哥理工学院毕业证成绩单学位证靠谱定制
一比一原版(Otago毕业证书)奥塔哥理工学院毕业证成绩单学位证靠谱定制
uodye
 
Escorts Service Sanjay Nagar ☎ 7737669865☎ Book Your One night Stand (Bangalore)
Escorts Service Sanjay Nagar ☎ 7737669865☎ Book Your One night Stand (Bangalore)Escorts Service Sanjay Nagar ☎ 7737669865☎ Book Your One night Stand (Bangalore)
Escorts Service Sanjay Nagar ☎ 7737669865☎ Book Your One night Stand (Bangalore)
amitlee9823
 
CHEAP Call Girls in Mayapuri (-DELHI )🔝 9953056974🔝(=)/CALL GIRLS SERVICE
CHEAP Call Girls in Mayapuri  (-DELHI )🔝 9953056974🔝(=)/CALL GIRLS SERVICECHEAP Call Girls in Mayapuri  (-DELHI )🔝 9953056974🔝(=)/CALL GIRLS SERVICE
CHEAP Call Girls in Mayapuri (-DELHI )🔝 9953056974🔝(=)/CALL GIRLS SERVICE
9953056974 Low Rate Call Girls In Saket, Delhi NCR
 
Call Girls Chickpet ☎ 7737669865☎ Book Your One night Stand (Bangalore)
Call Girls Chickpet ☎ 7737669865☎ Book Your One night Stand (Bangalore)Call Girls Chickpet ☎ 7737669865☎ Book Your One night Stand (Bangalore)
Call Girls Chickpet ☎ 7737669865☎ Book Your One night Stand (Bangalore)
amitlee9823
 

Kürzlich hochgeladen (20)

Call Girls In RT Nagar ☎ 7737669865 🥵 Book Your One night Stand
Call Girls In RT Nagar ☎ 7737669865 🥵 Book Your One night StandCall Girls In RT Nagar ☎ 7737669865 🥵 Book Your One night Stand
Call Girls In RT Nagar ☎ 7737669865 🥵 Book Your One night Stand
 
Vip Mumbai Call Girls Andheri East Call On 9920725232 With Body to body massa...
Vip Mumbai Call Girls Andheri East Call On 9920725232 With Body to body massa...Vip Mumbai Call Girls Andheri East Call On 9920725232 With Body to body massa...
Vip Mumbai Call Girls Andheri East Call On 9920725232 With Body to body massa...
 
Just Call Vip call girls Begusarai Escorts ☎️9352988975 Two shot with one gir...
Just Call Vip call girls Begusarai Escorts ☎️9352988975 Two shot with one gir...Just Call Vip call girls Begusarai Escorts ☎️9352988975 Two shot with one gir...
Just Call Vip call girls Begusarai Escorts ☎️9352988975 Two shot with one gir...
 
Vip Mumbai Call Girls Kalyan Call On 9920725232 With Body to body massage wit...
Vip Mumbai Call Girls Kalyan Call On 9920725232 With Body to body massage wit...Vip Mumbai Call Girls Kalyan Call On 9920725232 With Body to body massage wit...
Vip Mumbai Call Girls Kalyan Call On 9920725232 With Body to body massage wit...
 
➥🔝 7737669865 🔝▻ Vijayawada Call-girls in Women Seeking Men 🔝Vijayawada🔝 E...
➥🔝 7737669865 🔝▻ Vijayawada Call-girls in Women Seeking Men  🔝Vijayawada🔝   E...➥🔝 7737669865 🔝▻ Vijayawada Call-girls in Women Seeking Men  🔝Vijayawada🔝   E...
➥🔝 7737669865 🔝▻ Vijayawada Call-girls in Women Seeking Men 🔝Vijayawada🔝 E...
 
Just Call Vip call girls daman Escorts ☎️9352988975 Two shot with one girl (d...
Just Call Vip call girls daman Escorts ☎️9352988975 Two shot with one girl (d...Just Call Vip call girls daman Escorts ☎️9352988975 Two shot with one girl (d...
Just Call Vip call girls daman Escorts ☎️9352988975 Two shot with one girl (d...
 
Guwahati Escorts Service Girl ^ 9332606886, WhatsApp Anytime Guwahati
Guwahati Escorts Service Girl ^ 9332606886, WhatsApp Anytime GuwahatiGuwahati Escorts Service Girl ^ 9332606886, WhatsApp Anytime Guwahati
Guwahati Escorts Service Girl ^ 9332606886, WhatsApp Anytime Guwahati
 
Escorts Service Arekere ☎ 7737669865☎ Book Your One night Stand (Bangalore)
Escorts Service Arekere ☎ 7737669865☎ Book Your One night Stand (Bangalore)Escorts Service Arekere ☎ 7737669865☎ Book Your One night Stand (Bangalore)
Escorts Service Arekere ☎ 7737669865☎ Book Your One night Stand (Bangalore)
 
Kothanur Call Girls Service: 🍓 7737669865 🍓 High Profile Model Escorts | Bang...
Kothanur Call Girls Service: 🍓 7737669865 🍓 High Profile Model Escorts | Bang...Kothanur Call Girls Service: 🍓 7737669865 🍓 High Profile Model Escorts | Bang...
Kothanur Call Girls Service: 🍓 7737669865 🍓 High Profile Model Escorts | Bang...
 
CHEAP Call Girls in Hauz Quazi (-DELHI )🔝 9953056974🔝(=)/CALL GIRLS SERVICE
CHEAP Call Girls in Hauz Quazi  (-DELHI )🔝 9953056974🔝(=)/CALL GIRLS SERVICECHEAP Call Girls in Hauz Quazi  (-DELHI )🔝 9953056974🔝(=)/CALL GIRLS SERVICE
CHEAP Call Girls in Hauz Quazi (-DELHI )🔝 9953056974🔝(=)/CALL GIRLS SERVICE
 
Call Now ≽ 9953056974 ≼🔝 Call Girls In Yusuf Sarai ≼🔝 Delhi door step delevry≼🔝
Call Now ≽ 9953056974 ≼🔝 Call Girls In Yusuf Sarai ≼🔝 Delhi door step delevry≼🔝Call Now ≽ 9953056974 ≼🔝 Call Girls In Yusuf Sarai ≼🔝 Delhi door step delevry≼🔝
Call Now ≽ 9953056974 ≼🔝 Call Girls In Yusuf Sarai ≼🔝 Delhi door step delevry≼🔝
 
(👉Ridhima)👉VIP Model Call Girls Mulund ( Mumbai) Call ON 9967824496 Starting ...
(👉Ridhima)👉VIP Model Call Girls Mulund ( Mumbai) Call ON 9967824496 Starting ...(👉Ridhima)👉VIP Model Call Girls Mulund ( Mumbai) Call ON 9967824496 Starting ...
(👉Ridhima)👉VIP Model Call Girls Mulund ( Mumbai) Call ON 9967824496 Starting ...
 
Point of Care Testing in clinical laboratory
Point of Care Testing in clinical laboratoryPoint of Care Testing in clinical laboratory
Point of Care Testing in clinical laboratory
 
➥🔝 7737669865 🔝▻ Muzaffarpur Call-girls in Women Seeking Men 🔝Muzaffarpur🔝 ...
➥🔝 7737669865 🔝▻ Muzaffarpur Call-girls in Women Seeking Men  🔝Muzaffarpur🔝  ...➥🔝 7737669865 🔝▻ Muzaffarpur Call-girls in Women Seeking Men  🔝Muzaffarpur🔝  ...
➥🔝 7737669865 🔝▻ Muzaffarpur Call-girls in Women Seeking Men 🔝Muzaffarpur🔝 ...
 
一比一原版(Otago毕业证书)奥塔哥理工学院毕业证成绩单学位证靠谱定制
一比一原版(Otago毕业证书)奥塔哥理工学院毕业证成绩单学位证靠谱定制一比一原版(Otago毕业证书)奥塔哥理工学院毕业证成绩单学位证靠谱定制
一比一原版(Otago毕业证书)奥塔哥理工学院毕业证成绩单学位证靠谱定制
 
(ISHITA) Call Girls Service Aurangabad Call Now 8617697112 Aurangabad Escorts...
(ISHITA) Call Girls Service Aurangabad Call Now 8617697112 Aurangabad Escorts...(ISHITA) Call Girls Service Aurangabad Call Now 8617697112 Aurangabad Escorts...
(ISHITA) Call Girls Service Aurangabad Call Now 8617697112 Aurangabad Escorts...
 
Escorts Service Sanjay Nagar ☎ 7737669865☎ Book Your One night Stand (Bangalore)
Escorts Service Sanjay Nagar ☎ 7737669865☎ Book Your One night Stand (Bangalore)Escorts Service Sanjay Nagar ☎ 7737669865☎ Book Your One night Stand (Bangalore)
Escorts Service Sanjay Nagar ☎ 7737669865☎ Book Your One night Stand (Bangalore)
 
CHEAP Call Girls in Mayapuri (-DELHI )🔝 9953056974🔝(=)/CALL GIRLS SERVICE
CHEAP Call Girls in Mayapuri  (-DELHI )🔝 9953056974🔝(=)/CALL GIRLS SERVICECHEAP Call Girls in Mayapuri  (-DELHI )🔝 9953056974🔝(=)/CALL GIRLS SERVICE
CHEAP Call Girls in Mayapuri (-DELHI )🔝 9953056974🔝(=)/CALL GIRLS SERVICE
 
Call Girls Chickpet ☎ 7737669865☎ Book Your One night Stand (Bangalore)
Call Girls Chickpet ☎ 7737669865☎ Book Your One night Stand (Bangalore)Call Girls Chickpet ☎ 7737669865☎ Book Your One night Stand (Bangalore)
Call Girls Chickpet ☎ 7737669865☎ Book Your One night Stand (Bangalore)
 
Pooja 9892124323, Call girls Services and Mumbai Escort Service Near Hotel Th...
Pooja 9892124323, Call girls Services and Mumbai Escort Service Near Hotel Th...Pooja 9892124323, Call girls Services and Mumbai Escort Service Near Hotel Th...
Pooja 9892124323, Call girls Services and Mumbai Escort Service Near Hotel Th...
 

Beginners guide v1

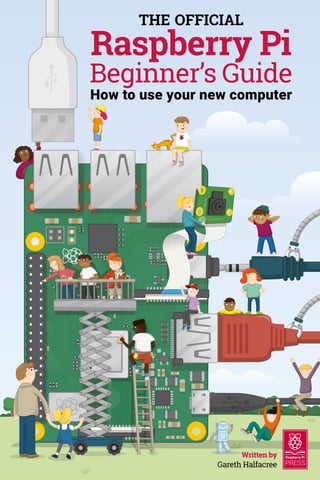
  • 1. THE OFFICIAL Raspberry Pi Beginner’s Guide How to use your new computer Gareth Halfacree Written by
  • 2. THE OFFICIAL RASPBERRY PI BEGINNER'S GUIDE2
  • 3. 3 THE OFFICIAL RASPBERRY PI BEGINNER’S GUIDE THE OFFICIAL Raspberry Pi Beginner’s Guide How to use your new computer
  • 4. First published in 2018 by Raspberry Pi Trading Ltd, Station Road, Cambridge, CB1 2JH Publishing Director: Russell Barnes • Editor: Phil King • Sub Editor: Nicola King Design: Critical Media • Illustrations: Sam Alder CEO: Eben Upton The publisher, and contributors accept no responsibility in respect of any omissions or errors relating to goods, products or services referred to or advertised in this book. Except where otherwise noted, the content of this book is licensed under a Creative Commons Attribution-NonCommercial-ShareAlike 3.0 Unported (CC BY-NC-SA 3.0) THE OFFICIAL RASPBERRY PI BEGINNER'S GUIDE4
  • 5. THE OFFICIAL RASPBERRY PI BEGINNER’S GUIDE W e think you’re going to love the Raspberry Pi. This ultra-small, affordable computer costs less than most video games, but can be used to learn coding, build robots, and create all kinds of weird and wonderful projects. The Raspberry Pi is capable of doing all the things you’d expect from a computer – everything from browsing the internet and playing games, to watching movies and listening to music. But the Raspberry Pi is much more than a modern computer. With a Raspberry Pi you can get into the heart of a computer. You get to set up your own operating system, and can connect wires and circuits directly to the pins on its board. It was designed to teach young people how to program in languages like Scratch and Python, and all the major programming languages are included with the official operating system. The world needs programmers more than ever, and the Raspberry Pi has ignited a love of computer science and technology in a new generation. People of all ages use the Raspberry Pi to create exciting projects: everything from retro games consoles to internet- connected weather stations. So if you want to make games, build robots, or hack weird and wonderful projects, then this book is here to help you get started. Welcome to the Official Raspberry Pi Beginner’s Guide 5
  • 6. THE OFFICIAL RASPBERRY PI BEGINNER'S GUIDE6 About the Author Gareth Halfacree is a freelance technology journalist, writer, and former system administrator in the education sector. With a passion for open- source software and hardware, he was an early adopter of the Raspberry Pi platform and has written several publications on its capabilities and flexibility. He can be found on Twitter as @ghalfacree or via his website at freelance.halfacree.co.uk.
  • 7. 7 THE OFFICIAL RASPBERRY PI BEGINNER’S GUIDE Contents Chapter 1: Get to know your Raspberry Pi 008 Take a guided tour of your new credit-card-sized computer Chapter 2: Getting started with your Raspberry Pi 020 Connect everything you need to get the Raspberry Pi working Chapter 3: Using your Raspberry Pi 036 Learn all about the Raspbian operating system Chapter 4: Programming with Scratch 054 Start coding with this easy-to-learn, block-based language Chapter 5: Programming with Python 092 Get to grips with text-based coding using Python Chapter 6: Physical computing with Scratch & Python 120 Control electronic components connected to your Raspberry Pi’s GPIO pins Chapter 7: Physical computing with the Sense HAT 152 Use the sensors and LED matrix display of this add-on board Chapter 8: The Raspberry Pi Camera Module 194 Shoot high-resolution photos and videos with this tiny camera APPENDICES Appendix A: Installing NOOBS to a microSD card 212 Appendix B: Installing and uninstalling software 216 Appendix C: The command-line interface 222 Appendix D: Further reading 228 Appendix E: The Raspberry Pi Configuration Tool 234 Appendix F: Raspberry Pi specifications 240
  • 8. THE OFFICIAL RASPBERRY PI BEGINNER'S GUIDE8 T he Raspberry Pi is a remarkable device: a fully functional computer in a tiny and low-cost package. Whether you’re looking for a device you can use to browse the web or play games, are interested in learning how to write your own programs, or are looking to create your own circuits and physical devices, the Raspberry Pi – and its amazing community – will support you every step of the way. The Raspberry Pi is known as a single-board computer, which means exactly what it sounds like: it’s a computer, just like a desktop, laptop, or smartphone, but built on a single printed circuit board. Like most single-board computers, the Raspberry Pi is small – roughly the same footprint as a credit card – but that doesn’t mean it’s not powerful: a Raspberry Pi can do anything a bigger and more power-hungry computer can do, though not necessarily as quickly. The Raspberry Pi family was born from a desire to encourage more hands-on computer education around the world. Its creators, who joined together to form the non-profit Raspberry Pi Foundation, had little idea that it would prove so popular: the few thousand built in 2012 to test the waters were immediately sold out, and millions have been shipped all over the world in the years since. These boards have found their ways into homes, classrooms, offices, data centres, factories, and even self-piloting boats and spacefaring balloons. Various models of Raspberry Pi have been released since the original Model B, each bringing either improved specifications or features specific to a particular use-case. The Raspberry Pi Zero family, for example, is a tiny version of the full-size Raspberry Pi which drops a few features – in particular the multiple USB ports and wired network port – in favour of a significantly smaller layout and lowered power needs. Get to know your Raspberry Pi Chapter 1 Get fully acquainted with your new credit-card-sized computer by taking a guided tour of the Raspberry Pi. Discover its numerous components and what they do
  • 9. Chapter 1 Getting to know your Raspberry Pi 9 THE OFFICIAL RASPBERRY PI BEGINNER’S GUIDE All Raspberry Pi models have one thing in common, though: they’re compatible, meaning that software written for one model will run on any other model. It’s even possible to take the very latest version of the Raspberry Pi’s operating system and run it on an original pre-launch Model B prototype. It will run more slowly, it’s true, but it will still run. Throughout this book you’ll be learning about the Raspberry Pi 3 Model B+, the latest and most popular version of the Raspberry Pi. What you learn, though, can be easily applied to other models in the Raspberry Pi family, so don’t worry if you’re using a different version. A guided tour of the Raspberry Pi Unlike a traditional computer, which hides its inner workings in a case, a Raspberry Pi has all its components, ports, and features out on display – although you can buy a case to provide extra protection, if you’d prefer. This makes it a great tool for learning about what the various parts of a computer do, and also makes it easy to learn what goes where when it comes time to plug in the various extras – known as peripherals – you’ll need to get started. Figure 1-1 (overleaf) shows the Raspberry Pi as seen from above. When you’re using a Raspberry Pi with this book, try to keep it turned the same way as in the picture; if it’s turned around it can get confusing when it comes to using things like the GPIO header (detailed in Chapter 6, Physical computing with Scratch and Python).
  • 10. THE OFFICIAL RASPBERRY PI BEGINNER'S GUIDE10 3Figure 1-1: The Raspberry Pi 3 Model B+ While it may look like there’s a lot packed into the tiny board, the Raspberry Pi is very simple to understand – starting with its components, the inner workings that make the device tick. The Raspberry Pi’s components Like any computer, the Pi is made up of various different components, each of which has a role to play in making it work. The first, and arguably most important, of these can be found just above the centre point on the top side of the board (Figure 1-2), covered in a metal cap: the system-on-chip (SoC). 5Figure 1-2: The Raspberry Pi’s system-on-chip (SoC)
  • 11. Chapter 1 Getting to know your Raspberry Pi 11 THE OFFICIAL RASPBERRY PI BEGINNER’S GUIDE The name system-on-chip is a great indicator of what you would find if you prised the metal cover off: a silicon chip, known as an integrated circuit, which contains the bulk of the Raspberry Pi’s system. This includes the central processing unit (CPU), commonly thought of as the ‘brain’ of a computer, and the graphics processing unit (GPU), which handles the visual side of things. A brain is no good without memory, however, and on the underside of the Raspberry Pi you’ll find exactly that: another chip, which looks like a small, black, plastic square (Figure 1-3). This is the Pi’s random access memory (RAM). When you’re working on the Pi, it’s the RAM that holds what you’re doing; only when you save your work will it be written to the microSD card. Together, these components form the Pi’s volatile and non-volatile memories: the volatile RAM loses its contents whenever the Pi is powered off, while the non-volatile microSD card keeps its contents. . 5Figure 1-3: The Raspberry Pi’s random access memory (RAM) Turning the board over again you’ll find another metal lid to the upper-right, this one featuring an etched Raspberry Pi logo (Figure 1-4, overleaf). This covers the radio, the component which gives the Raspberry Pi the ability to communicate with devices wirelessly. The radio itself acts as two main components, in fact: a WiFi radio, for connecting to computer networks; and a Bluetooth radio, for connecting to peripherals like mice and for sending data to or receiving data from nearby smart devices like sensors or smartphones.
  • 12. THE OFFICIAL RASPBERRY PI BEGINNER'S GUIDE12 5Figure 1-4: The Raspberry Pi’s radio module Another black, plastic-covered chip can be seen to the bottom edge of the board, just behind the middle set of USB ports. This is the network and USB controller, and is responsible for running the Ethernet port and the four USB ports. A final black chip, much smaller than the rest, can be found a little bit above the micro USB power connector to the upper-left of the board (Figure 1-5); this is known as a power management integrated circuit (PMIC), and handles turning the power that comes in from the micro USB port into the power the Pi needs to run. 5Figure 1-5: The Raspberry Pi’s power management integrated circuit (PMIC) Don’t worry if this seems like a lot to take in; you don’t need to know what each component is or where to find it on the board in order to use the Raspberry Pi.
  • 13. Chapter 1 Getting to know your Raspberry Pi 13 THE OFFICIAL RASPBERRY PI BEGINNER’S GUIDE The Raspberry Pi’s ports The Raspberry Pi has a range of ports, starting with four Universal Serial Bus (USB) ports (Figure 1-6) to the middle and right-hand side of the bottom edge. These ports let you connect any USB-compatible peripheral, from keyboards and mice to digital cameras and flash drives, to the Pi. Speaking technically, these are known as USB 2.0 ports, which means they are based on version two of the Universal Serial Bus standard. 5Figure 1-6: The Raspberry Pi’s USB ports To the left of the USB ports is an Ethernet port, also known as a network port (Figure 1-7). You can use this port to connect the Raspberry Pi to a wired computer network using a cable with what is known as an RJ45 connector on its end. If you look closely at the Ethernet port, you’ll see two light-emitting diodes (LEDs) at the bottom; these are status LEDs, and let you know that the connection is working. 5Figure 1-7: The Raspberry Pi’s Ethernet port
  • 14. THE OFFICIAL RASPBERRY PI BEGINNER'S GUIDE14 Just above the Ethernet port, on the left-hand edge of the Raspberry Pi, is a 3.5 mm audio‑visual (AV) jack (Figure 1-8). This is also known as the headphone jack, and it can be used for that exact purpose – though you’ll get better sound connecting it to amplified speakers rather than headphones. It has a hidden, extra feature, though: as well as audio, the 3.5 mm AV jack carries a video signal which can be connected to TVs, projectors, and other displays that support a composite video signal using a special cable known as a tip-ring-ring-sleeve (TRRS) adapter. 5Figure 1-8: The Raspberry Pi’s 3.5 mm AV jack Directly above the 3.5 mm AV jack is a strange-looking connector with a plastic flap which can be pulled up; this is the camera connector, also known as the Camera Serial Interface (CSI) (Figure 1-9). This allows you to use the specially designed Raspberry Pi Camera Module (about which you’ll learn more in Chapter 8, The Raspberry Pi Camera Module.) 5Figure 1-9: The Raspberry Pi’s camera connector
  • 15. Chapter 1 Getting to know your Raspberry Pi 15 THE OFFICIAL RASPBERRY PI BEGINNER’S GUIDE Above that, still on the left-hand edge of the board, is the High-Definition Multimedia Interface (HDMI) port (Figure 1-10), which is the same type of connector you’ll find on a games console, set-top box, and TV. The multimedia part of its name tells you that it carries both audio and video signals, while high-definition tells you that you can expect excellent quality. You’ll use this to connect the Raspberry Pi to your display device, whether that’s a computer monitor, TV, or projector. 5Figure 1-10: The Raspberry Pi’s HDMI port Above the HDMI port is a micro USB power port (Figure 1-11), which you’ll use to connect the Raspberry Pi to a power source. The micro USB port is a common sight on smartphones, tablets, and other portable devices. So you could use a standard mobile charger to power the Pi, but for best results you should use the official Raspberry Pi USB Power Supply. 5Figure 1-11: The Raspberry Pi’s micro USB power port
  • 16. THE OFFICIAL RASPBERRY PI BEGINNER'S GUIDE16 At the top edge of the board is another strange-looking connector (Figure 1-12), which at first glance appears to be identical to the camera connector. This, though, is the exact opposite: a display connector, or Display Serial Interface (DSI), designed for use with the Raspberry Pi Touch Display (Figure 1-13). 5Figure 1-12: The Raspberry Pi’s display connector (DSI) 5Figure 1-13: The Raspberry Pi Touch Display
  • 17. Chapter 1 Getting to know your Raspberry Pi 17 THE OFFICIAL RASPBERRY PI BEGINNER’S GUIDE At the right-hand edge of the board you’ll find 40 metal pins, split into two rows of 20 pins (Figure 1-14). This is the GPIO (general-purpose input/output) header, a feature of the Raspberry Pi used to talk to additional hardware from LEDs and buttons all the way to temperature sensors, joysticks, and pulse-rate monitors. You’ll learn more about the GPIO header in Chapter 6, Physical computing with Scratch and Python. Just below and to the left of this header is another, smaller header with four pins: this is used to connect the Power over Ethernet (PoE) HAT, an optional add-on which lets the Raspberry Pi receive power from a network connection rather than the micro USB socket. 5Figure 1-14: The Raspberry Pi’s GPIO header There’s one final port on the Raspberry Pi, but you won’t see it on the top. Turn the board over and you’ll find a microSD card connector on the opposite side of the board to the display connector (Figure 1-15). This is the Raspberry Pi’s storage: the microSD card inserted in here contains all the files you save, all the software you install, and the operating system that makes the Raspberry Pi run. 5Figure 1-15: The Raspberry Pi’s microSD card connector
  • 18. THE OFFICIAL RASPBERRY PI BEGINNER'S GUIDE18 The Raspberry Pi’s peripherals A Raspberry Pi by itself can’t do very much, just the same as a desktop computer on its own is little more than a door-stop. To work, the Raspberry Pi needs peripherals: at the minimum, you’ll need a microSD card for storage; a monitor or TV so you can see what you’re doing; a keyboard and mouse to tell the Pi what to do; and a 5 volt (5 V) micro USB power supply rated at 2.5 amps (2.5 A) or better. With those, you’ve got yourself a fully functional computer. You’ll learn how to connect all these peripherals to your Raspberry Pi in Chapter 2, Getting started with your Raspberry Pi. Those aren’t the end of the peripherals you can use with your Pi, though. Official accessories produced by the Raspberry Pi Foundation include: the Raspberry Pi Case, which helps protect the Pi while you’re using it without blocking your access to its various ports; the Camera Module, detailed in Chapter 8, The Raspberry Pi Camera Module; the Raspberry Pi Touch Display, which connects to the display port and provides both a video display and a tablet-style touchscreen interface; and the Sense HAT (Figure 1-16), a clever multifunctional add-on which is detailed in full in Chapter 7, Physical computing with the Sense HAT. A wide assortment of third-party accessories are also available, ranging from kits to turn a Raspberry Pi into a laptop or tablet, to add-ons which give it the ability to understand your speech and even talk back to you. While it’s tempting to run out and fill a shopping trolley, though, remember that you’ll need to learn to walk with your Raspberry Pi before taking on the hardware equivalent of a marathon! 5Figure 1-16: The Sense HAT
  • 19. Chapter 1 Getting to know your Raspberry Pi 19 THE OFFICIAL RASPBERRY PI BEGINNER’S GUIDE
  • 20. THE OFFICIAL RASPBERRY PI BEGINNER'S GUIDE20 T he Raspberry Pi has been designed to be as quick and easy to set up and use as possible, but – like any computer – it relies on various external components, called peripherals. While it’s easy to take a look at the bare circuit board of the Raspberry Pi – which looks significantly different to the encased, closed-off computers you may be used to – and worry things are about to get complicated, that’s not the case. You can be up and running with the Raspberry Pi in well under ten minutes simply by following the steps in this guide. If you have received this book as part of the Raspberry Pi Starter Kit, then you’ll already have almost everything you’ll need to get started: all you need to provide is a computer monitor or TV with an HDMI connection – the same type of connector used by set-top boxes, Blu-ray players, and games consoles – so you can see what the Raspberry Pi is doing. Chapter 2 Discover the essential items you'll need for your Raspberry Pi and how to connect them all to get it set up and working Getting started with your Raspberry Pi
  • 21. Chapter 2 Getting started with your Raspberry Pi 21 THE OFFICIAL RASPBERRY PI BEGINNER’S GUIDE If you don’t have the Raspberry Pi Starter Kit, then in addition to the Raspberry Pi 3 Model B+ you’ll need: n USB power supply – A power supply rated at 2.5 amps (2.5A) or 12.5 watts (12.5W) and with a micro USB connector. The Official Raspberry Pi Power Supply is the recommended choice, as it can cope with the quickly switching power demands of the Raspberry Pi. n microSD card with NOOBS – The microSD card acts as the Raspberry Pi’s permanent storage; all the files you create and software you install, along with the operating system itself, are stored on the microSD card. An 8GB card will get you started, though a 16GB card offers more room to grow. Using a card with NOOBS, the New Out-Of-Box Software, pre-installed will save you some time; otherwise see Appendix A for instructions on installing NOOBS on a blank microSD card. n USB keyboard and mouse – The keyboard and mouse allow you to control the Raspberry Pi. Almost any wired or wireless keyboard and mouse with a USB connector will work with the Raspberry Pi, though some ‘gaming’ style keyboards with colourful lights may draw too much power to be used reliably. n HDMI Cable – The HDMI cable carries sound and pictures from the Raspberry Pi to your TV or monitor. There’s no need to spend a lot of money on an HDMI cable. If you are using a computer monitor without an HDMI socket, you can buy HDMI to DVI-D, DisplayPort, or VGA adapters; if you want to connect your Raspberry Pi to an older TV which uses composite video or has a SCART socket, use a 3.5 mm tip-ring-ring- sleeve (TRRS) audio/video cable.
  • 22. THE OFFICIAL RASPBERRY PI BEGINNER'S GUIDE22 The Raspberry Pi is safe to use without a case, providing you don’t place it on a metal surface which could conduct electricity and cause a short-circuit. An optional case, however, can provide additional protection; the Starter Kit includes the Official Raspberry Pi Case, while third-party cases are available from all good stockists. If you want to use the Raspberry Pi on a wired network, rather than a wireless (WiFi) network, you’ll also need a network cable. This should be connected at one end to your network’s switch or router. If you’re planning to use the Raspberry Pi’s built-in wireless radio, you won’t need a cable; you will, however, need to know the name and key or passphrase for your wireless network. Setting up the hardware Begin by unpacking your Raspberry Pi from its box. The Raspberry Pi is a robust piece of hardware, but that doesn’t mean it’s indestructible: try to get into the habit of holding the board by the edges, rather than on its flat sides, and be extra careful around the raised metal pins. If these pins are bent, at best it’ll make using add-on boards and other extra hardware difficult and, at worst, can cause a short-circuit that will damage the Raspberry Pi. If you haven’t done so already, have a look at Chapter 1, Getting to know your Raspberry Pi, for details on exactly where the various ports are and what they do. Assembling the case If you’re installing your Pi in a case, it should be your first step. If you’re using the Official Raspberry Pi Case, begin by splitting it into its five individual pieces: the red base, two white sides, red upper, and white lid. 1 Take the base and hold it so that the raised end is to your left and the lower end to your right.
  • 23. Chapter 2 Getting started with your Raspberry Pi 23 THE OFFICIAL RASPBERRY PI BEGINNER’S GUIDE 2 Holding the Pi by its USB and Ethernet ports, with the GPIO header to the top, slot the left- hand side into the case at an angle, then gently lower the right-hand side down so it sits flat. 3 Take the two white side pieces and find the one with the cut-outs for the power connector, HDMI port, and 3.5 mm AV jack. Line it up with the ports on the Raspberry Pi and gently push it home until you hear a click.
  • 24. THE OFFICIAL RASPBERRY PI BEGINNER'S GUIDE24 4 Take the solid white side piece and click it in to the GPIO header side of the case. 5 Take the red plastic upper piece and place the two clips at the left into the matching holes on the left of the base, above the microSD card slot. When they’re in place, push the right‑hand side (above the USB ports) down until you hear a click.
  • 25. Chapter 2 Getting started with your Raspberry Pi 25 THE OFFICIAL RASPBERRY PI BEGINNER’S GUIDE 6 Finally, take the white lid and hold it so that the Raspberry Pi logo is to your right and the small raised clips on its underside are lined up with the hole on the top of the case, then gently push it down until you hear a click. Your case is now fully built.
  • 26. THE OFFICIAL RASPBERRY PI BEGINNER'S GUIDE26 Connecting the microSD card To install the microSD card, which is the Raspberry Pi’s storage, turn the Raspberry Pi over and slide the card into the microSD slot with the label facing away from the Pi. It can only go in one way, and should slide home without too much pressure. The microSD card will slide into the connector, then stop without a click. If you want to remove it again in the future, simply grip the end of the card and pull it gently out. If you’re using an older model of Raspberry Pi, you’ll need to give the card a gentle push first to unlock it; this isn’t necessary with a Raspberry Pi 3 or newer.
  • 27. Chapter 2 Getting started with your Raspberry Pi 27 THE OFFICIAL RASPBERRY PI BEGINNER’S GUIDE Connecting a keyboard and mouse Connect the keyboard’s USB cable to any of the four USB ports on the Raspberry Pi. When the keyboard is connected, simply do the same for the mouse. The USB connectors for the keyboard and mouse should slide home without too much pressure; if you’re having to force the connector in, there’s something wrong. Check that the USB connector is the right way up! KEYBOARD MOUSE The keyboard and mouse act as your main means of telling the Raspberry Pi what to do; in computing, these are known as input devices, in contrast with the display which is an output device.
  • 28. THE OFFICIAL RASPBERRY PI BEGINNER'S GUIDE28 Connecting a display Take the HDMI cable and connect one end – it doesn’t matter which – to your Raspberry Pi and the other end to your display. If your display has more than one HDMI port, look for a port number next to the connector itself; you’ll need to switch the TV to this input to see the Pi’s display. If you can’t see a port number, don’t worry: you can simply switch through each input in turn until you find the Pi. TV CONNECTION If your TV or monitor doesn’t have an HDMI connector, that doesn’t mean you can’t use the Raspberry Pi. Adapter cables, available from any electronics stockist, will allow you to convert the HDMI port on the Raspberry Pi to DVI-D, DisplayPort, or VGA for use with older computer monitors; these are simply connected to the Pi’s HDMI port, then a suitable cable used to connect the adapter cable to the monitor. If your TV has only a composite video or SCART input, you can purchase 3.5 mm tip-ring-ring-sleeve (TRRS) adapter cables and composite-to- SCART adapters which connect to the 3.5 mm AV jack.
  • 29. Chapter 2 Getting started with your Raspberry Pi 29 THE OFFICIAL RASPBERRY PI BEGINNER’S GUIDE Connecting a network cable (optional) To connect your Raspberry Pi to a wired network, take a network cable – known as an Ethernet cable – and push it into the Pi’s Ethernet port, with the plastic clip facing downwards, until you hear a click. If you need to remove the cable, just squeeze the plastic clip inwards towards the plug and gently slide the cable free again. The other end of your network cable should be connected to any free port on your network hub, switch, or router in the same way.
  • 30. THE OFFICIAL RASPBERRY PI BEGINNER'S GUIDE30 Connecting a power supply Connecting the Raspberry Pi to a power supply is the very last step in the hardware setup process, and it’s one you should do only when you’re ready to set up its software: the Raspberry Pi does not have a power switch and will turn on as soon as it is connected to a live power supply. First, connect the micro USB end of the power supply cable to the micro USB power connector on the Raspberry Pi. It can only go in one way, with the narrow part of the connector facing downwards, and should slide home gently. Finally, connect the power supply to a mains socket and switch the socket on; the Raspberry Pi will immediately start running. Congratulations: you’ve put your Raspberry Pi together! POWER SUPPLY If you’re using the Official Raspberry Pi Power Supply, you’ll see it comes with multiple mains connectors suitable for the sockets of various countries; find the one that matches your country’s socket type, then slide it onto the power supply body until you hear a click.
  • 31. Chapter 2 Getting started with your Raspberry Pi 31 THE OFFICIAL RASPBERRY PI BEGINNER’S GUIDE Setting up the software Before you can begin using the Raspberry Pi in earnest, you’ll need to set up its software – in particular its operating system, the software which controls what the Pi can do. NOOBS, the New Out-Of-Box Software, is designed to make this as easy as possible, allowing you to choose from several different operating systems and install them automatically. Better still, you can do all this in little more than a few clicks of the mouse. When the Pi is first switched on, or booted, with a fresh installation of NOOBS on its microSD card, you’ll see a screen with the Raspberry Pi logo on it and a small progress window at the upper-left. After a short pause, which can take up to a minute the first time you use the NOOBS microSD card, you’ll see the screen shown in Figure 2-1. 3Figure 2-1: The NOOBS menu without any operating systems installed
  • 32. THE OFFICIAL RASPBERRY PI BEGINNER'S GUIDE32 This is the NOOBS menu, a system which lets you choose the operating system to run on your Pi. Two operating systems are included with NOOBS as standard: Raspbian, a version of the Debian Linux operating system tailored specifically for the Raspberry Pi; and LibreELEC, a version of the Kodi Entertainment Centre software. If the Pi is connected to the network – either through a wired connection or using the ‘Wifi networks (w)’ option from the top bar of icons – you can also download and install other operating systems. To begin installing an operating system, use the mouse to put a cross in the box to the left of Raspbian Full: point the cursor at the white box and click once with the left mouse button. When you’ve done so, you’ll see that the ‘Install (i)’ menu icon is no longer greyed-out; this lets you know that your operating system is ready to install (Figure 2-2). 5Figure 2-2: Choosing an operating system to install through NOOBS Click the ‘Install (i)’ icon once with the left mouse button and you’ll see a warning message telling you that installing the operating system will overwrite any data currently stored on the microSD card – not counting NOOBS itself, which stays intact. Click ‘Yes’ and the installation process will begin (Figure 2-3). NO PICTURE? If you can’t see the Raspberry Pi on your display, check you are using the correct input. If your TV or monitor has more than one HDMI input, switch through each in turn using the ‘Source’ or ‘Input’ button until you see the NOOBS menu.
  • 33. Chapter 2 Getting started with your Raspberry Pi 33 THE OFFICIAL RASPBERRY PI BEGINNER’S GUIDE 5Figure 2-3: Installing the Raspbian operating system The installation process can take anything from 10 to 30 minutes, depending on the speed of your microSD card. As the operating system is installed, progress is shown in a bar along the bottom of the window, you’ll see a slide show highlighting some of its key features; you’ll learn more about these, and the operating system itself, in Chapter 3, Using your Raspberry Pi. When the installation has finished, a window will pop up with an ‘OK’ button; click this and the Pi will restart into its freshly installed operating system. You’ll see a lot of text scrolling up the screen (Figure 2-4, overleaf); these are known as the boot messages, and the first time you boot into Raspbian it can take a minute or two as it adjusts itself to make the best use of the free space on your microSD card. The next time you boot, things will go more quickly. WARNING! It’s important that the installation isn’t interrupted as this has a high likelihood of damaging the software, a process known as data corruption. Do not remove the microSD card or unplug the power cable while the operating system is being installed; if something does happen to interrupt the installation, unplug the Pi from its power supply, then hold down the SHIFT key on the keyboard as you connect the Raspberry Pi back up to its power supply to bring the NOOBS menu back up. This is known as recovery mode, and is a great way to restore a Pi whose software has been corrupted to working order again. It also allows you to enter the NOOBS menu after a successful installation, to reinstall the operating system, or install one of the other operating systems.
  • 34. THE OFFICIAL RASPBERRY PI BEGINNER'S GUIDE34 5Figure 2-4: The Raspbian boot messages Finally, you’ll briefly see a window with the Raspberry Pi logo on it before the Raspbian desktop and setup wizard appears, as in Figure 2-5. Your operating system is now fully installed and ready to be configured, which you’ll learn to do in Chapter 3, Using your Raspberry Pi. 5Figure 2-5: The Raspbian desktop
  • 35. Chapter 2 Getting started with your Raspberry Pi 35 THE OFFICIAL RASPBERRY PI BEGINNER’S GUIDE
  • 36. THE OFFICIAL RASPBERRY PI BEGINNER'S GUIDE36 T he Raspberry Pi is able to run a wide range of software, including a number of different operating systems – the core software that makes a computer run. The most popular of these, and the official operating system of the Raspberry Pi Foundation, is Raspbian. Based on Debian Linux, Raspbian is tailor-made for the Raspberry Pi and comes with a range of extras pre-installed and ready to go. If you’ve only ever used Microsoft Windows or Apple macOS, don’t worry: Raspbian is based on the same windows, icons, menus, and pointer (WIMP) principles, and should quickly feel familiar. The following chapter will get you started and introduce you to some of the bundled software. The Welcome Wizard The first time you run Raspbian, you’ll see the Welcome Wizard (Figure 3-1). This helpful tool will walk you through changing some settings in Raspbian, known as the configuration, to match how and where you will be using the Pi. Using your Raspberry Pi Chapter 3 Learn about the Raspbian operating system
  • 37. Chapter 3 Using your Raspberry Pi 37 THE OFFICIAL RASPBERRY PI BEGINNER’S GUIDE 5Figure 3-1: The Welcome Wizard Begin by clicking the Next button, then choose your country, language, and time zone on the next screen by clicking on each drop-down box in turn and selecting your answer from the list (Figure 3-2). When you’re finished, click Next. 5Figure 3-2: Selecting a language, among other options CLOSING THE WIZARD You can choose to close the Welcome Wizard by clicking the Cancel button, but certain Raspberry Pi features – such as the wireless network – won’t work until you answer at least the first set of questions.
  • 38. THE OFFICIAL RASPBERRY PI BEGINNER'S GUIDE38 The next screen will ask you to choose a password. Normally, the password for the ‘pi’ user – which is the standard user name for all Raspberry Pi computers running Raspbian – is ‘raspberry’, but having a password everybody knows isn’t very secure. Choose a new one – making sure it’s one you will remember – and enter it in the boxes (Figure 3-3). You can click on the tick next to ‘Hide Passwords’ to show the passwords you’ve written, which must be the same in both boxes. When you’re happy, click Next. 5Figure 3-3: Setting a new password The next screen will allow you to choose your WiFi network from a list (Figure 3-4). Scroll through the list of networks with the mouse or keyboard, find your network’s name, click on it, then click Next. Assuming that your wireless network is secure (it really should be), you’ll be asked for its password, also known as its pre-shared key; this is normally written on a card with the router or on the bottom of the router itself. Click Next to connect to the network. If you don’t want to connect to a wireless network, just click Skip. 5Figure 3-4: Choosing a wireless network
  • 39. Chapter 3 Using your Raspberry Pi 39 THE OFFICIAL RASPBERRY PI BEGINNER’S GUIDE The next screen will allow you to check for and install updates for Raspbian and the other software on the Raspberry Pi (Figure 3-5). Raspbian is regularly updated to fix bugs, add new features, and improve performance. To install these updates, click Next; otherwise, click Skip. Downloading the updates can take several minutes, so be patient. When the updates are installed, a window saying ‘System is up to date’ will appear; click the OK button. 5Figure 3-5: Checking for updates The final screen of the Welcome Wizard (Figure 3-6) has a simple task to do: certain changes made will only take effect when you restart your Raspberry Pi, a process known as rebooting. If prompted to do so, click the Reboot button and the Raspberry Pi will restart. This time the Welcome Wizard won’t appear; its job is done, and your Pi is ready to use. 5Figure 3-6: Rebooting the Raspberry Pi WIRELESS NETWORKING Built-in wireless networking is only available on the Raspberry Pi 3 and Raspberry Pi Zero W families. If you want to use another model of Raspberry Pi with a wireless network, you’ll need a USB WiFi adapter.
  • 40. THE OFFICIAL RASPBERRY PI BEGINNER'S GUIDE40 Navigating the desktop The version of Raspbian installed on most Raspberry Pi boards is properly known as ‘Raspbian with the Raspberry Pi Desktop,’ referring to its main graphical user interface (Figure 3-7). The bulk of this desktop is taken up with a picture, known as the wallpaper (A in Figure 3-7), on top of which the programs you run will appear. At the top of the desktop is a taskbar (B), which allows you to actually load each of the programs; these are then indicated by tasks (C) in the taskbar. 5Figure 3-7: The Raspbian desktop The right-hand side of the menu bar houses the system tray (D). At the very far right is an eject symbol (J); clicking on this will bring up a list of any removable storage, such as USB memory sticks, you have connected to the Pi and allow you to safely eject and remove them. Next to this is the clock (I); click on it to bring up a digital calendar (Figure 3-8). 4Figure 3-8: The digital calendar A B C D E F Wallpaper Taskbar Task System Tray Bluetooth Icon Network Icon Volume Icon CPU Monitor Clock Media Eject Launcher Window Titlebar Minimise Maximise Close M N O P I J K L G H Menu Icon (or Raspberry Icon) A B C M N O P L JIFE HG DK
  • 41. Chapter 3 Using your Raspberry Pi 41 THE OFFICIAL RASPBERRY PI BEGINNER’S GUIDE Next to the clock is a box with a scrolling line graph and a number; this is the CPU monitor (H), and lets you see how hard your Raspberry Pi is working. If it shows ‘0%’, it’s doing nothing; if it shows ‘100%’, the Pi is working as hard as it possibly can. Next to this is a speaker icon (G); click on it with the left mouse button to adjust the Pi’s audio volume, or click using the right mouse button to choose which output the Pi should use. Next to that is a network icon (F); if you’re connected to a wireless network you’ll see the signal strength displayed as a series of bars, while if you’re connected to a wired network you’ll just see two arrows. Clicking the network icon will bring up a list of nearby wireless networks (Figure 3-9), while clicking on the Bluetooth icon (E) next to that will allow you to connect to a nearby Bluetooth device. The left-hand side of the menu bar is home to the launcher (K), which is where you’ll find the programs installed alongside Raspbian. Some of these are visible as shortcut icons; others are hidden away in the menu, which you can bring up by clicking the raspberry icon (L) to the far left (Figure 3-10). The programs in the menu are split into categories, the names of which tell you what to expect: the Programming category, for example, contains software designed to help you write your own programs – as explained starting in Chapter 4, Programming with Scratch – while Games will help you while away the hours. Not all of the programs will be detailed in this guide; feel free to experiment with them to learn more. 3Figure 3-9: Listing nearby wireless networks 3Figure 3-10: The Raspbian menu
  • 42. THE OFFICIAL RASPBERRY PI BEGINNER'S GUIDE42 The Chromium web browser To practise using your Pi, start by loading the Chromium web browser: click on the raspberry icon at the top-left to bring up the menu, move your mouse pointer to select the Internet category, and click on Chromium Web Browser to load it (Figure 3-11). 5Figure 3-11: The Chromium web browser If you’ve used Google’s Chrome browser on another computer, Chromium will be immediately familiar. As a web browser, Chromium lets you visit websites, play videos, games, and even communicate with people all over the world on forums and chat sites. Start using Chromium by maximising its window so it takes up more of the screen: find the three icons at the top-right of the Chromium window titlebar (M) and click on the middle, box- like icon (O). This is the maximise button, and will make a window fill the screen. To the left of maximise is minimise (N), which will hide a window until you click on it in the taskbar at the top of the screen. The cross to the right of maximise is close (P), and does exactly what you’d expect: closes the window. Click in the address bar at the top of the Chromium window – the big white bar with a magnifying glass on the left-hand side – and type www.raspberrypi.org, then press the ENTER key on your keyboard. The Raspberry Pi website will load (Figure 3-12). You can also type searches into the address bar: try searching for ‘Raspberry Pi’, ‘Raspbian’, or ‘Educational Computing’. CLOSE AND SAVE Closing a window before you’ve saved any work you’ve done is a bad idea; while many programs will warn you to save when you click the close button, others won’t.
  • 43. Chapter 3 Using your Raspberry Pi 43 THE OFFICIAL RASPBERRY PI BEGINNER’S GUIDE 5Figure 3-12: Loading the Raspberry Pi website in Chromium The first time you load Chromium, it may bring up several tabs along the top of the window. To switch to a different tab, click on it; to close a tab without closing Chromium itself, click the cross on the right-hand edge of the tab you want to close. To open a new tab, which is a handy way of having multiple websites open without having to juggle multiple Chromium windows, either click on the tab button to the right of the last tab in the list, or hold down the CTRL key on the keyboard and press the T key before letting go of CTRL. When you’re finished with Chromium, click the close button at the top-right of the window. The File Manager Files you save – whether they’re programs or poems you’ve written, videos you’ve created, or images you’ve downloaded from a website – all go into your home directory. To see the home directory, click on the raspberry icon again to bring up the menu, move the mouse pointer to select Accessories, then click on File Manager to load it (Figure 3-13). 5Figure 3-13: The File Manager program
  • 44. THE OFFICIAL RASPBERRY PI BEGINNER'S GUIDE44 The File Manager lets you browse the files and folders, also known as directories, on the Raspberry Pi’s microSD card, as well as those on any removable storage devices – like USB flash drives – you connect to the Raspberry Pi’s USB ports. When you first open it, it automatically goes to your home directory. In here you’ll find a series of other folders, known as subdirectories, which – like the menu – are arranged in categories. The main subdirectories are: n Desktop: This folder is what you see when you first load Raspbian; if you save a file in here it will appear on the Raspbian desktop, making it easy to find and load. n Documents: The Documents folder is home to most of the files you’ll create, from short stories to recipes. n Downloads: When you download a file from the internet using the Chromium web browser, it will be automatically saved in Downloads. n Music: Any music you create or put on the Raspberry Pi can be stored here. n Pictures: This folder is specifically for pictures, known in technical terms as image files. n Public: While most of your files are private, anything you put in Public will be available to other users of the Raspberry Pi, even if they have their own user name and password. n Videos: A folder for videos, and the first place most video-playing programs will look. The File Manager window itself is split into two panes: the left pane shows the directories on your Raspberry Pi, and the right pane shows the files and subdirectories of the directory selected in the left pane. If you plug a removable storage device into the Raspberry Pi’s USB port, a window will pop up asking if you’d like to open it in the File Manager (Figure 3-14); click OK and you’ll be able to see its files and directories. 3Figure 3-14: Inserting a removable storage device
  • 45. Chapter 3 Using your Raspberry Pi 45 THE OFFICIAL RASPBERRY PI BEGINNER’S GUIDE Files on a removable device can easily be copied to the Raspberry Pi’s microSD card, or from the microSD card to a removable device: with both your home directory and the removable device open in separate File Manager windows, move your mouse pointer to the file you want to copy, click and hold the left mouse button down, slide your mouse pointer to the other window, and let go of the mouse button (Figure 3-15). This is known as dragging and dropping. Another method is to click once on the file, click on the Edit menu, click on Copy, click on the other window, click on the Edit menu, and click on Paste. The Move option, also available in the Edit menu, is similar except it deletes the file from its original home after making the copy Both options can also be used through the keyboard shortcuts CTRL+C (copy) or CTRL+X (cut), and paste via CTRL+V. 5Figure 3-15: Dragging and dropping a file When you’ve finished experimenting, close the File Manager by clicking the close button at the top-left of the window. If you have more than one window open, close them all. If you connected a removable storage device to your Pi, eject it by clicking the eject button at the top- right of the screen, finding it in the list, and clicking on it before unplugging it. KEYBOARD SHORTCUTS When you see a keyboard shortcut like CTRL+C, it means to hold down the first key on the keyboard (CTRL), press the second key (C), then let go of both keys.
  • 46. THE OFFICIAL RASPBERRY PI BEGINNER'S GUIDE46 The LibreOffice productivity suite For another taste of what the Raspberry Pi can do, click on the raspberry menu icon, move your mouse pointer to Office, and click on LibreOffice Writer. This will load the word processor portion of LibreOffice (Figure 3-16), a popular productivity suite – a fancy term for ‘software programs you’re likely to use in a school or office to make documents’. If you’ve used Microsoft Office or Google Docs, you’ve used a productivity suite. 5Figure 3-16: The LibreOffice Writer program A word processor lets you not only write documents, but to format them in clever ways: you can change the font style, colour, size, add effects, and even insert pictures, charts, tables, and other content. A word processor also lets you check your work for mistakes, highlighting spelling and grammar problems in red and green respectively as you type. Begin by writing a paragraph on what you’ve learned about the Raspberry Pi and its software so far. Experiment with the different icons at the top of the window to see what they do: see if you can make your writing bigger, and change its colour. If you’re not sure how to do this, simply move your mouse pointer over each icon in turn to see a ‘tool tip’ telling you what that icon does. When you’re happy, click the File menu and the Save option to save your work (Figure 3-17). Give it a name and click the Save button. EJECT DEVICES Always use the eject button before unplugging an external storage device; if you don’t, the files on it can become corrupt and unusable.
  • 47. Chapter 3 Using your Raspberry Pi 47 THE OFFICIAL RASPBERRY PI BEGINNER’S GUIDE 5Figure 3-17: Saving a document LibreOffice Writer is only part of the overall LibreOffice productivity suite. The other parts, which you’ll find in the same Office menu category as LibreOffice Writer, are: n LibreOffice Base: A database; a tool for storing information, looking it up quickly, and analysing it. n LibreOffice Calc: A spreadsheet; a tool for handling numbers and creating charts and graphs. n LibreOffice Draw: An illustration program; a tool for creating pictures and diagrams. n LibreOffice Impress: A presentation program, for creating slides and running slideshows. n LibreOffice Math: A formula editor; a tool for creating properly formatted mathematical formulae which can then be used in other documents. LibreOffice is also available for other computers and operating systems. If you enjoy using it on your Raspberry Pi, you can download it for free from libreoffice.org and install it on any Microsoft Windows, Apple macOS, or Linux computer. SAVE YOUR WORK Get in the habit of saving your work, even if you haven’t finished it yet. It will save you a lot of trouble if there’s a power cut and you’re interrupted part-way through!
  • 48. THE OFFICIAL RASPBERRY PI BEGINNER'S GUIDE48 If you want to know more about using LibreOffice, click on the Help menu. Otherwise, close LibreOffice Writer by clicking the close button at the top-right of the window. The Recommended Software tool Although Raspbian comes preloaded with a wide range of software, it’s compatible with even more. A selection of the best of this software, hand-chosen by the Raspberry Pi Foundation and Raspbian project volunteers, can be found in the Recommended Software tool. Note that the Recommended Software tool needs a connection to the internet. If your Raspberry Pi is connected, click on the raspberry menu icon, move your mouse pointer to Preferences, and click on Recommended Software. The tool will load, then begin downloading information about available software. After a few seconds, a list of compatible software packages will appear (Figure 3-18). These, like the software in the raspberry menu, are arranged into various categories. Click on a category in the pane on the left to see software from that category, or click All Programs to see everything. 5Figure 3-18: The Recommended Software tool GETTING HELP Most programs include a Help menu which has everything from information about what the program is to guides on how to use it. If you ever feel lost or overwhelmed by a program, look for the Help menu to reorient yourself.
  • 49. Chapter 3 Using your Raspberry Pi 49 THE OFFICIAL RASPBERRY PI BEGINNER’S GUIDE If a piece of software has a tick next to it, it’s already installed on your Raspberry Pi. If it doesn’t, you can click on the check-box next to it to add a tick and mark it for installation. You can mark as many pieces of software as you like before installing them all at once, but if you’re using a smaller than recommended microSD card you may not have room for them all. You can also uninstall software in the same way: find a piece of software which already has a tick in its check box, then click on the tick to remove it. If you’ve made a mistake or changed your mind, just click again to put the tick back. When you’re happy with your software selection, click the OK button to begin the installation or uninstallation process (Figure 3-19). After downloading and installing any new software you’ve chosen, a dialogue box will appear; click OK to close the Recommended Software tool. 5Figure 3-19: Uninstalling software An additional tool for installing or uninstalling software, the Add/Remove Software tool, can be found in the same Preferences category of the Raspbian menu. This offers a wider selection of software, but which has not been vetted by the Raspberry Pi Foundation.
  • 50. THE OFFICIAL RASPBERRY PI BEGINNER'S GUIDE50 The Raspberry Pi Configuration tool The last program you’ll learn about in this chapter is known as the Raspberry Pi Configuration tool, and it’s a lot like the Welcome Wizard you used at the start: it allows you to change various settings in Raspbian. Click on the raspberry icon, move your mouse pointer to select the Preferences category, then click on Raspberry Pi Configuration to load it (Figure 3-20). The tool is split into four tabs, each of which can control a particular aspect of Raspbian. The first of these, which you see when the tool is first loaded, is System: this allows you to change the password of your account, set a host name – the name the Raspberry Pi uses on your local wireless or wired network – and change a range of other settings. The majority of these, though, shouldn’t need changing. Click on the Interfaces tab to bring up the next category. Here you’ll find a range of settings, all of which start off disabled. These settings should only be changed if you’re adding new hardware, such as the Raspberry Pi Camera Module, and then only if instructed by the hardware’s manufacturer. The exceptions to this rule are: SSH, which enables a ‘Secure Shell’ and lets you log into the Raspberry Pi from another computer on your network using an SSH client; VNC, which enables a ‘Virtual Network Computer’ and lets you see and control the Raspbian desktop from another computer on your network using a VNC client; and Remote 3Figure 3-20: The Raspberry Pi Configuration tool MORE DETAILS This brief overview is simply to get you used to the tool. More detailed information on each of its settings can be found in Appendix E, The Raspberry Pi Configuration Tool.
  • 51. Chapter 3 Using your Raspberry Pi 51 THE OFFICIAL RASPBERRY PI BEGINNER’S GUIDE GPIO, which lets you use the Pi’s GPIO pins – about which you’ll learn more in Chapter 6, Physical computing with Scratch and Python – from another computer on your network. Click on the Performance tab to see the third category. Here you can set the amount of memory used by the Pi’s graphics processing unit (GPU) and, for some models, increase the performance of the Raspberry Pi through a process known as overclocking. As before, though, it’s best to leave these settings alone unless you know you need to change them. Finally, click on the Localisation tab to see the last category. Here you can change your locale, which controls things like the language used in Raspbian and how numbers are displayed, change the time zone, change the keyboard layout, and set your country for WiFi purposes. For now, though, just click on Cancel to close the tool without making any changes. Shutting down Now you’ve explored the Raspbian desktop, it’s time to learn a very important skill: safely shutting your Raspberry Pi down. Like any computer, the Raspberry Pi keeps the files you’re working on in volatile memory – memory which is emptied when the system is switched off. For documents you’re creating, it’s enough to save each in turn – which takes the file from volatile memory to non-volatile memory, the microSD card – to ensure you don’t lose anything. The documents you’re working on aren’t the only files open, though. Raspbian itself keeps a number of files open while it’s running, and pulling the power cable from the Raspberry Pi while these are still open can result in the operating system becoming corrupt and needing to be reinstalled. To prevent this from happening, you need to make sure you tell Raspbian to save all its files and make itself ready for being powered off – a process known as shutting down the operating system. WARNING! Different countries have different rules about what frequencies a WiFi radio can use. Setting the WiFi country in the Raspberry Pi Configuration Tool to a different country from the one you’re actually in is likely to make it struggle to connect to your networks and can even be illegal under radio licensing laws – so don’t do it! WARNING! Never pull the power cable from a Raspberry Pi without shutting it down first. Doing so is likely to corrupt the operating system and could also lose any files you have created or downloaded.
  • 52. THE OFFICIAL RASPBERRY PI BEGINNER'S GUIDE52 Click on the raspberry icon at the top left of the desktop and then click on Shutdown. A window will appear with three options (Figure 3-21): Shutdown, Reboot, and Logout. Shutdown is the option you’ll use most: clicking on this will tell Raspbian to close all open software and files, then shut the Pi down. Once the display has gone black, wait a few seconds until the flashing green light on the Pi goes off; then it’s safe to turn off the power supply. To turn the Pi back on, simply disconnect then reconnect the micro USB power cable, or toggle the power at the wall socket. 5Figure 3-21: Shutting down the Raspberry Pi Reboot goes through a similar process to Shutdown, closing everything down, but instead of turning the Pi’s power off, it restarts the Pi – in almost exactly the same way as if you’d chosen Shutdown, then disconnected and reconnected the power cable. You’ll need to use Reboot if you make certain changes which require a restart of the operating system – such as installing certain updates to its core software – or if some software has gone wrong, known as crashing, and left Raspbian in an unusable state. Finally, Logout is only really useful if you have more than one user account on your Raspberry Pi: it closes any programs you currently have open and takes you to a login screen on which you are prompted for a user name and password. If you hit Logout by mistake and want to get back in, simply type ‘pi’ as the user name and whatever password you chose in the Welcome Wizard at the start of this chapter.
  • 53. Chapter 3 Using your Raspberry Pi 53 THE OFFICIAL RASPBERRY PI BEGINNER’S GUIDE
  • 54. THE OFFICIAL RASPBERRY PI BEGINNER'S GUIDE54 U sing a Raspberry Pi isn’t just about using software other people have created; it’s about creating your own software, based on almost anything your imagination can conjure. Whether you have previous experience with creating your own programs – a process known as programming or coding – or not, you’ll find the Raspberry Pi a great platform for creation and experimentation. Key to the accessibility of coding on the Pi is Scratch, a visual programming language developed by the Massachusetts Institute of Technology (MIT). Whereas traditional programming languages have you write text-based instructions for the computer to carry out, in much the same way as you might write a recipe for baking a cake, Scratch has you build your program step-by-step using blocks – pre-written chunks of code hidden behind colour- coded jigsaw pieces. Scratch is a great first language for budding coders young and old, but don’t be fooled by its friendly appearance: it’s a powerful and fully functional programming environment for creating everything from simple games and animations through to complex interactive robotics projects. Programming with Scratch Chapter 4 Learn how to start coding using Scratch, the block-based programming language
  • 55. Chapter 4 Programming with Scratch 55 THE OFFICIAL RASPBERRY PI BEGINNER’S GUIDE Introducing the Scratch 2 interface A B C D E F Stage Area – Like actors in a play, your sprites move around the stage under the control of your program. Sprite – The characters or objects you control in a Scratch program are known as sprites, and sit on the stage. Stage Controls – Your stage can be changed, including adding your own pictures as backgrounds, using the stage controls. Sprites List – All the sprites you have created or loaded into Scratch will appear in this section of the window. Blocks Palette – All the blocks available for your program appear in the blocks palette, which features colour-coded categories. SCRATCH VERSIONS At the time this book was written, Raspbian came with two versions of Scratch: the original Scratch and the updated Scratch 2, both included in the Programming section of the Raspbian menu. This chapter is written for Scratch 2. Make sure you don’t load the original Scratch by mistake or you’re likely to get very confused! Sadly, Scratch 2 won’t run on the Pi Zero, Model A, A+, B, or B+. Blocks – Pre-written chunks of program code, blocks allow you to build your program step-by-step. Scripts Area – The scripts area is where your program is built by dragging-and-dropping blocks from the blocks palette. G A B C E G F D
  • 56. THE OFFICIAL RASPBERRY PI BEGINNER'S GUIDE56 Your first Scratch program: Hello, World! Scratch 2 loads like any other program on the Pi: click on the raspberry icon to load the Raspbian menu, move the cursor to the Programming section, and click on Scratch 2. After a few seconds, the Scratch 2 user interface will load. Where most programming languages need you to tell the computer what to do through written instructions, Scratch is different. Start by clicking on the Looks category in the blocks palette, found in the centre of the Scratch window. This brings up the blocks under that category, coloured purple. Find the say Hello! block, click and hold the left mouse button on it, and drag it over to the scripts area at the right-hand side of the Scratch window before letting go of the mouse button (Figure 4-1). 5Figure 4-1: Drag and drop the block into the scripts area Look at the shape of the block you’ve just dropped: it has a hole at the top, and a matching part sticking out at the bottom. Like a jigsaw piece, this shows you that the block is expecting to have something above it and something below it. For this program, that something above is a trigger. Click on the Events category of the blocks palette, coloured light brown, then click and drag the when clicked block – known as a hat block – onto the scripts area. Position it so that
  • 57. Chapter 4 Programming with Scratch 57 THE OFFICIAL RASPBERRY PI BEGINNER’S GUIDE the bit sticking out of the bottom connects into the hole at the top of your say Hello! block until you see a white outline, then let go of the mouse button. You don’t have to be precise; if it’s close enough, the block will snap into place just like a jigsaw piece. If it doesn’t, click and hold on it again to adjust its position until it does. when clicked say Hello! Your program is now complete. To make it work, known as running the program, click on the green flag icon at the top of the stage area. If all has gone well, the cat sprite on the stage will greet you with a cheery ‘Hello!’ (Figure 4-2) – your first program is a success! 5Figure 4-2: Click the green flag above the stage and the cat will say ‘Hello’
  • 58. THE OFFICIAL RASPBERRY PI BEGINNER'S GUIDE58 Before moving on, name and save your program. Click on the File menu, then Save Project. Type in a name and click the Save button (Figure 4-3). 5Figure 4-3: Save your program with a memorable name Next steps: sequencing While your program has two blocks, it only has one real instruction: to say ‘Hello!’ every time the flag is clicked and the program runs. To do more, you need to know about sequencing. Computer programs, at their simplest, are a list of instructions, just like a recipe. Each instruction follows on from the last in a logical progression known as a linear sequence. Start by clicking and dragging the say Hello! block from the scripts area back to the blocks palette (Figure 4-4). This deletes the block, removing it from your program and leaving just the trigger block, when clicked . WHAT CAN IT SAY? Some blocks in Scratch can be changed. Try clicking on the word ‘Hello!’ and typing something else, then click the green flag again. What happens on the stage?
  • 59. Chapter 4 Programming with Scratch 59 THE OFFICIAL RASPBERRY PI BEGINNER’S GUIDE 5Figure 4-4: To delete a block, simply drag it out of the scripts area Click on the Motion category in the blocks palette, then click and drag the move 10 steps block so it locks into place under the trigger block on the scripts area. As the name suggests, this tells your sprite – the cat – to move a number of steps in the direction it’s currently facing. when clicked move 10 steps Add more instructions to your program to create a sequence. Click on the Sound palette, colour-coded pink, then click and drag the play sound meow until done block so it locks underneath the move 10 steps block. Keep going: click back on the Motion category and drag another move 10 steps block underneath your Sound block, but this time click on the ‘10’ to select it and type ‘-10’ to create a move -10 steps block. when clicked move 10 steps play sound meow until done move -10 steps
  • 60. THE OFFICIAL RASPBERRY PI BEGINNER'S GUIDE60 Click on the green flag above the stage to run the program. You’ll see the cat move to the right, make a meow sound – make sure you’ve got speakers or headphones connected to hear it – then move back to the start again. Click the flag again, and the cat will repeat its actions. Congratulations: you’ve created a sequence of instructions, which Scratch is running through one at a time, top to bottom. While Scratch will only run one instruction at a time from the sequence, it does so very quickly: try deleting the play sound meow until done block by clicking and dragging the bottom move -10 steps block to detach it, dragging the play sound meow until done block to the blocks palette, then replacing it with the simpler play sound meow block before dragging your move -10 steps block back onto the bottom of your program. when clicked move 10 steps play sound meow move -10 steps Click the green flag to run your program again, and the cat sprite doesn’t seem to move. The sprite is moving, in fact, but it moves back again so quickly that it appears to be standing still. This is because using the play sound meow block doesn’t wait for the sound to finish playing before the next step; because the Raspberry Pi ‘thinks’ so quickly, the next instruction runs before you can ever see the cat sprite move. There’s another way to fix this, beyond using the play sound meow until done block: click on the Control category of the blocks palette, colour-coded gold, then click and drag a wait 1 secs block between the play sound meow block and the bottom move -10 steps block. when clicked move 10 steps play sound meow wait 1 secs move -10 steps
  • 61. Chapter 4 Programming with Scratch 61 THE OFFICIAL RASPBERRY PI BEGINNER’S GUIDE Click the green flag to run your program one last time, and you’ll see that the cat sprite waits for a second after moving to the right before moving back to the left again. This is known as a delay, and is key to controlling how long your sequence of instructions takes to run. Looping the loop The sequence you’ve created so far runs only once: you click the green flag, the cat sprite moves and meows, and then the program stops until you click the green flag again. It doesn’t have to stop, though, because Scratch includes a type of Control block known as a loop. Click on the Control category in the blocks palette, colour-coded gold, and find the forever block. Click and drag this into the scripts area, then drop it underneath the when clicked block and above the first move 10 steps block. when clicked forever move 10 steps play sound meow wait 1 secs move -10 steps Notice how the C-shaped forever block automatically grows to surround the other blocks in your sequence. Click the green flag now, and you’ll quickly see what the forever block does: instead of your program running once and finishing, it will run over and over again – quite literally forever. In programming, this is known as an infinite loop – literally, a loop that never ends. If the sound of constant meowing is getting a little much, click the red octagon next to the green flag above the stage area to stop your program. To change the loop type, click and CHALLENGE: ADD MORE STEPS Try adding more steps to your sequence, and changing the values in the existing steps. What happens when the number of steps in one move block doesn’t match the number of steps in another? What happens if you try to play a sound while another sound is still playing?
  • 62. THE OFFICIAL RASPBERRY PI BEGINNER'S GUIDE62 drag the first move 10 steps block and pull it and the blocks beneath it out of the forever block, then drop them underneath the when clicked block. Click and drag the forever block to the blocks palette to delete it, then click and drag the repeat 10 block under the when clicked block so it goes around the other blocks. when clicked repeat 10 move 10 steps play sound meow wait 1 secs move -10 steps Click the green flag to run your new program. At first, it seems to be doing the same thing as your original version: repeating your sequence of instructions over and over again. This time, though, rather than continuing forever, the loop will finish after ten repetitions. This is known as a definite loop: you define when it will finish. Loops are powerful tools, and most programs – especially games and sensing programs – make heavy use of both infinite and definite loops. Variables and conditionals The final concepts to understand before beginning to code Scratch programs in earnest are closely related: variables and conditionals. A variable is, as the name suggests, a value which can vary – in other words, change – over time and under control of the program. A variable has two main properties: its name, and the value it stores. That value doesn’t have to be a number, either: it can be numbers, text, true-or-false, or completely empty – known as a null value. Variables are powerful tools. Think of the things you have to track in a game: the health of a character, the speed of moving object, the level currently being played, and the score. All of these are tracked as variables. WHAT HAPPENS NOW? What happens if you change the number in the loop block to make it larger? What happens if it’s smaller? What happens if you put the number 0 in the loop block?
  • 63. Chapter 4 Programming with Scratch 63 THE OFFICIAL RASPBERRY PI BEGINNER’S GUIDE First, click the File menu and save your existing program by clicking on Save Project. Next, click File and then New to start a new, blank project. Click on the Data category in the blocks palette, then the ‘Make a Variable’ button. Type ‘loops’ as the variable name (Figure 4-5), then click the OK button to make a series of blocks appear in the blocks palette. 5Figure 4-5: Give your new variable a name Click and drag the set loops to 0 block to the scripts area. This tells your program to initialise the variable with a value of 0. Next, click on the Looks category of the blocks palette and drag the say Hello! for 2 secs block under your set loops to 0 block. set loops to 0 say Hello! for 2 secs As you found earlier, the say Hello! blocks cause the cat sprite to say whatever is written in them. Rather than writing the message in the block yourself, though, you can use a variable instead. Click back onto the Data category in the blocks palette, then click and drag the rounded loops block – known as a reporter block and found at the top of the list, with a
  • 64. THE OFFICIAL RASPBERRY PI BEGINNER'S GUIDE64 tick‑box next to it – over the word ‘Hello!’ in your say Hello! for 2 secs block. This creates a new, combined block: say loops for 2 secs . set loops to 0 say loops for 2 secs Click on the Events category in the blocks palette, then click and drag the when clicked block to place it on top of your sequence of blocks. Click the green flag above the stage area, and you’ll see the cat sprite say ‘0’ (Figure 4-6) – the value you gave to the variable ‘loops’. 5Figure 4-6: This time the cat will say the value of the variable Variables aren’t unchanging, though. Click on the Data category in the blocks palette, then click and drag the change loops by 1 block to the bottom of your sequence. Next, click on the Control category, then click and drag a repeat 10 block and drop it so that it starts directly beneath your set loops to 0 block and wraps around the remaining blocks in your sequence.
  • 65. Chapter 4 Programming with Scratch 65 THE OFFICIAL RASPBERRY PI BEGINNER’S GUIDE when clicked set loops to 0 repeat 10 say loops for 2 secs change loops by 1 Click the green flag again. This time, you’ll see the cat count upwards from 0 to 9. This works because your program is now changing, or modifying, the variable itself: every time the loop runs, the program adds one to the value in the ‘loops’ variable (Figure 4-7). 5Figure 4-7: Thanks to the loop, the cat now counts upwards COUNTING FROM ZERO Although the loop you’ve created runs ten times, the cat sprite only counts up to nine. This is because we’re starting with a value of zero for our variable. Including zero and nine, there are ten numbers between zero and nine – so the program stops before the cat ever says ‘10’. To change this you could set the variable’s initial value to 1 instead of 0.
  • 66. THE OFFICIAL RASPBERRY PI BEGINNER'S GUIDE66 You can do more with a variable than modify it. Click and drag the say loops for 2 secs block to break it out of the repeat 10 block and drop it below the repeat 10 block. Click and drag the repeat 10 block to the blocks palette to delete it, then replace it with a repeat until block, making sure the block is connected to the bottom of the say loops for 2 secs block and surrounds both of the other blocks in your sequence. Click on the Operators category in the blocks palette, colour-coded green, then click and drag the diamond-shaped n = n block and drop it on the matching diamond-shaped hole in the repeat until block. when clicked set loops to 0 repeat until = say loops for 2 secs change loops by 1 This Operators block lets you compare two values, including variables. Click on the Data category in the blocks palette, drag the loops reporter block into the first empty square in the n = n Operators block, then click on the second empty square and type the number ‘10’. when clicked set loops to 0 repeat until loops = 10 say loops for 2 secs change loops by 1 Click on the green flag above the stage area, and you’ll find the program works the same way as before: the cat sprite counts from 0 up to 9 (Figure 4-8) and then the program stops.
  • 67. Chapter 4 Programming with Scratch 67 THE OFFICIAL RASPBERRY PI BEGINNER’S GUIDE This is because the repeat until block is working in exactly the same way as the repeat 10 block, but rather than counting the number of loops itself, it’s comparing the value of the ‘loops’ variable to the value you typed to the right of the block. When the ‘loops’ variable reaches 10, the program stops. 5Figure 4-8: Using a ‘repeat until’ block with a comparitive operator This is known as a comparative operator: it literally compares two values. Click on the Operators category of the blocks palette, and find the two other diamond-shape blocks above and below the one with the ‘=’ symbol. These are also comparative operators: ‘’ compares two values and is triggered when the value of the left is smaller than the one on the right, and ‘’ triggers when the value on the left is bigger than the one on the right. Click on the Control category of the blocks palette, find the if then block, then click and drag it to the scripts area before dropping it directly beneath the say loops for 2 secs block. It will automatically surround the change loops by 1 block, so click and drag on that to move it so it connects to the bottom of your if then block instead. Click on the Looks category of the blocks palette, then click and drag a say Hello! for 2 secs block to drop it inside your if then block. Click on the Operators category of the blocks palette, then click and drag the n  n   block into the diamond-shape hole in your if then block.
  • 68. THE OFFICIAL RASPBERRY PI BEGINNER'S GUIDE68 when clicked set loops to 0 repeat until loops = 10 say loops for 2 secs if then say Hello! for 2 secs change loops by 1 The if then block is a conditional block, which means the blocks inside it will only run if a certain condition is met. Click on the Data category of the blocks palette, drag and drop the loops reporter block into the first empty square in your n  n block, then click on the second empty square and type the number ‘5’. Finally, click on the word ‘Hello!’ in your say Hello! for 2 secs block and type ‘That’s high!’. when clicked set loops to 0 repeat until loops = 10 say loops for 2 secs if loops 5 then say That's high! for 2 secs change loops by 1
  • 69. Chapter 4 Programming with Scratch 69 THE OFFICIAL RASPBERRY PI BEGINNER’S GUIDE Click on the green flag. At first, the program will work as before with the cat sprite counting upwards from zero. When the number reaches 6, the first number which is greater than 5, the if then block will begin to trigger and the cat sprite will comment on how high the numbers are getting (Figure 4-9). Congratulations: you can now work with variables and conditionals! 5Figure 4-9: The cat makes a comment when the number reaches 6 Project 1: Astronaut Reaction Timer Now you understand how Scratch works, it’s time to make something a little more interactive: a reaction timer, designed to honour British ESA astronaut Tim Peake and his time aboard the International Space Station. Save your existing program, if you want to keep it, then open a new project by clicking on File and New. Before you begin, give it a name by clicking on File and Save Project: call it ‘Astronaut Reaction Timer’. CHALLENGE: HIGH AND LOW How could you change the program so the cat sprite comments on how low the numbers below 5 are instead? Can you change it so that the cat will comment on both high and low numbers? Experiment with the if then else block to make this easier! ONLINE PROJECT This project is also available online at rpf.io/astronaut-game
  • 70. THE OFFICIAL RASPBERRY PI BEGINNER'S GUIDE70 This project relies on two images – one as a stage background, one as a sprite – which are not included in Scratch’s built-in resources. To download them, click on the raspberry icon to load the Raspbian menu, move the mouse pointer to Internet, and click on Chromium Web Browser. When the browser has loaded, type rpf.io/astronaut-backdrop into the address bar, followed by the ENTER key. Right-click on the picture of space and click on ‘Save image as…’, then choost the Downloads folder and click on the Save button (Figure 4-10). Click back into the address bar, and type rpf.io/astronaut-sprite followed by the ENTER key. 5Figure 4-10: Save the background image Again, right-click on the picture of Tim Peake and click on ‘Save image as…’, then choose the Downloads folder and click on the Save button. With those two images saved, you can close Chromium or leave it open and use the taskbar to switch back to Scratch 2. Start by right-clicking on the cat sprite on the stage and clicking Delete to remove it. Find the stage controls at the bottom-left of the Scratch 2 window and click on the upload backdrop icon . Find the file Space-background.png in the Downloads folder, click on it to select it, then click OK. The plain white stage background will change to the picture of space, and the scripts area will be replaced by the backdrops area (Figure 4-11). Here you can draw over the backdrop, but for now just click on the tab marked Scripts at the top of the Scratch 2 window. USER INTERFACE If you’ve been following this chapter from the start, you should be familiar with the Scratch 2 user interface. The following project instructions will rely on you knowing where things are; if you forget where to find something, look back at the picture of the user interface at the start of this chapter for a reminder.
  • 71. Chapter 4 Programming with Scratch 71 THE OFFICIAL RASPBERRY PI BEGINNER’S GUIDE 5Figure 4-11: The space background appears on the stage Upload your new sprite by clicking the upload sprite icon , next to the words ‘New sprite:’ at the top of the sprites pane. Find the file Astronaut-Tim.png in the Downloads folder, click to select it, then click OK. The sprite appears on the stage automatically, but might not be in the middle: click and drag it with the mouse and drop it so it’s near the lower middle (Figure 4-12). 5Figure 4-12: Drag the astronaut sprite to the lower middle of the stage With your new background and sprite in place, you’re ready to create your program. Start by creating a new variable called ‘time’, making sure that ‘For all sprites’ is selected before clicking OK. Click on your sprite – either on the stage or in the sprite pane – to select it,
  • 72. THE OFFICIAL RASPBERRY PI BEGINNER'S GUIDE72 then add a when clicked block from the Events category to the scripts area. Next, add a say Hello! for 2 secs block from the Looks category, then click on it to change it to say ‘Hello! British ESA Astronaut Tim Peake here. Are you ready?’ when clicked say Hello! British ESA Astronaut Tim Peake here. Are you ready? for 2 secs Add a wait 1 secs block from the Control category, then a say Hello! block. Change this block to say ‘Hit Space!’, then add a reset timer block from the Sensing category. This controls a special variable built into Scratch for timing things, and will be used to time how quickly you can react in the game. when clicked say Hello! British ESA Astronaut Tim Peake here. Are you ready? for 2 secs wait 1 secs say Hit Space! reset timer Add a wait until Control block, then drag a key space pressed? Sensing block into its white space. This will pause the program until you press the SPACE key on the keyboard, but the timer will continue to run – counting exactly how long between the message telling you to ‘Hit Space!’ and you actually hitting the SPACE key. when clicked say Hello! British ESA Astronaut Tim Peake here. Are you ready? for 2 secs wait 1 secs say Hit Space! reset timer wait until key space pressed? You now need Tim to tell you how long you took to press the SPACE key, but in a way that’s easy to read. To do this, you’ll need a join Operators block. This takes two values, including variables, and joins them together one after the other – known as concatenation.
  • 73. Chapter 4 Programming with Scratch 73 THE OFFICIAL RASPBERRY PI BEGINNER’S GUIDE Start with a say Hello! block, then drag and drop a join Operators block over the word ‘Hello!’. Fill in the first box with ‘Your reaction time was ’, making sure to add a blank space at the end, then drag another join block into the second box. Drag a timer reporting block from the Sensing category into what is now the middle box, and type ‘ seconds.’ into the last box – making sure to include a blank space at the start. when clicked say Hello! British ESA Astronaut Tim Peake here. Are you ready? for 2 secs wait 1 secs say Hit Space! reset timer wait until key space pressed? say join Your reaction time was join timer seconds. Finally, drag a set time to 0 Data variables block onto the end of your sequence, then replace the ‘0’ with a timer reporting block. Your game is now ready to test by clicking on the green flag above the stage. Get ready, and as soon as you see the message ‘Hit Space!’, press the SPACE key as quickly as you can (Figure 4-13) – see if you can beat our high score! 5Figure 4-13: Time to play the game!
  • 74. THE OFFICIAL RASPBERRY PI BEGINNER'S GUIDE74 You can extend this project further by having it calculate roughly how far the International Space Station has travelled in the time it took you to press the SPACE key, based on the station’s published speed of seven kilometres per second. First, create a new variable called ‘distance’. Notice how the blocks in the Data category automatically change to show the new variable, but the existing time variable blocks in your program remain the same. Add a set distance to 0 block, then drag a ● * ● Operators block – indicating multiplication – over the ‘0’. Drag a time reporting block over the first blank space, then type in the number ‘7’ into the second space. When you’re finished, your combined block reads set distance to time * 7 . This will take the time it took you to press the SPACE key and multiply it by seven, to get the distance in kilometres the ISS has travelled. when clicked say Hello! British ESA Astronaut Tim Peake here. Are you ready? for 2 secs wait 1 secs say Hit Space! reset timer wait until key space pressed? say join Your reaction time was join timer seconds. set time to timer set distance to time * 7 Add a wait 1 secs block and change it ‘4 secs’. Finally, drag another say Hello! block onto the end of your sequence and add two join blocks, just as you did before. In the first white space, type ‘In that time the ISS travels around ’, remembering to include the space at the end, and in the last white space type ‘ kilometres.’, again remembering the space at the start.
  • 75. Chapter 4 Programming with Scratch 75 THE OFFICIAL RASPBERRY PI BEGINNER’S GUIDE when clicked say Hello! British ESA Astronaut Tim Peake here. Are you ready? for 2 secs wait 1 secs say Hit Space! reset timer wait until key space pressed? say join Your reaction time was join timer seconds. set time to timer set distance to time * 7 wait 4 secs say join In that time the ISS travels around join kilometres. Finally, drag a round Operators block into the middle blank space, then drag a distance reporting block into the new blank space it creates. The round block rounds numbers up or down to their nearest whole number, so instead of a hyper-accurate but hard-to-read number of kilometres you’ll get an easy-to-read whole number. when clicked say Hello! British ESA Astronaut Tim Peake here. Are you ready? for 2 secs wait 1 secs say Hit Space! reset timer wait until key space pressed? say join Your reaction time was join timer seconds. set time to timer set distance to time * 7 wait 4 secs say join In that time the ISS travels around join round distance kilometres.
  • 76. THE OFFICIAL RASPBERRY PI BEGINNER'S GUIDE76 Click the green flag to run your program, and see how far the ISS travels in the time it takes you to hit the SPACE key. Remember to save your program when you’ve finished, so you can easily load it again in the future without having to start from the beginning! 5Figure 4-14: Tim tells you how far the ISS has travelled Project 2: Synchronised Swimming Most games use more than a single button, and this project demonstrates that by offering two-button control using the ← and → keys on the keyboard. CHALLENGE: WHO’S FAST? As well as astronaut, what other professions require split-second reflexes? Can you draw your own sprites and backgrounds to show one of these professions? ONLINE PROJECT This project is also available online at rpf.io/synchro-swimming
  • 77. Chapter 4 Programming with Scratch 77 THE OFFICIAL RASPBERRY PI BEGINNER’S GUIDE Create a new project and save it as ‘Synchronised Swimming’. Click on the Stage in the stage control section, then click the Backdrops tab. Click on a water-like blue colour from the palette, click on the fill with colour icon and click on the white backdrop (Figure 4-15). 5Figure 4-15: Fill the background with a blue colour Right-click the cat sprite and click ‘delete’. In the sprite area, click the ‘choose sprite from library’ icon to see a list of built-in sprites. Click on the Animals category, then ‘Cat1 Flying’ (Figure 4-16), then OK. This sprite also serves well for swimming projects. Click the new sprite, then drag two when space key pressed Events blocks into the scripts area. Click on the small down‑arrow next to the word ‘space’ on the first block and choose ‘left arrow’ from the list of possible options. Drag a turn  15 degrees Motion block under your when left arrow pressed block, then do the same with your5Figure 4-16: Choose a sprite from the library
  • 78. THE OFFICIAL RASPBERRY PI BEGINNER'S GUIDE78 second Events block except choosing ‘right arrow’ from the list and using a turn  15 degrees Motion block. when left arrow key pressed turn 15 degrees when right arrow key pressed turn 15 degrees Press the ← or → key to test your program. You’ll see the cat sprite turning as you do, matching the direction you’re choosing on the keyboard. Notice how you didn’t need to click on the green flag this time; this is because the Events trigger blocks you have used are active at all times, even when the program isn’t ‘running’ in the normal sense. Do the same steps twice again, but this time choosing ‘up arrow’ and ‘down arrow’ for the Events trigger blocks, then move 10 steps and move -10 steps for the Motion blocks. Press the arrow keys now and you’ll see your cat can turn around and swim forwards and backwards too! when left arrow key pressed turn 15 degrees when right arrow key pressed turn 15 degrees when up arrow key pressed move 10 steps when down arrow key pressed move -10 steps To make the cat sprite’s motion more realistic, you can change how it appears – known in Scratch terms as its costume. Click on the cat sprite, then click on the Costumes tab above the blocks palette. Click on the ‘cat1 flying-a’ costume and click on the round X icon that appears
  • 79. Chapter 4 Programming with Scratch 79 THE OFFICIAL RASPBERRY PI BEGINNER’S GUIDE at its top-right corner to delete it. Next, click on the ‘cat1 flying-b’ costume and use the name box at the top to rename it to ‘right’ (Figure 4-17). 5Figure 4-17: Rename the costume as ‘right’ Right-click on the newly renamed ‘right’ costume and click ‘duplicate’ to create a copy. Click on this copy to select it, click on the flip left-right icon , then rename it to ‘left’ (Figure 4-18). You’ll finish with two ‘costumes’ for your sprite, which are exact mirror images: one called ‘right’ with the cat facing right, and one called ‘left’ with the cat facing left. 5Figure 4-18: Duplicate the costume, flip it, and name it ‘left’
  • 80. THE OFFICIAL RASPBERRY PI BEGINNER'S GUIDE80 Click on the Scripts tab above the costume area, then drag two switch costume to left Looks blocks under your left arrow and right arrow Events blocks, changing the one under the right arrow block to read switch costume to right . Try the arrow keys again; the cat now seems to turn to face the direction it’s swimming. when left arrow key pressed switch costume to left turn 15 degrees when right arrow key pressed switch costume to right turn 15 degrees when up arrow key pressed move 10 steps when down arrow key pressed move -10 steps
  • 81. Chapter 4 Programming with Scratch 81 THE OFFICIAL RASPBERRY PI BEGINNER’S GUIDE For Olympic-style synchronised swimming, though, we need more swimmers, and we need a way to reset the cat sprite’s position. Add a when clicked Events block, then underneath add a go to x: 0 y: 0 Motion block – changing the values if necessary – and a point in direction 90 Looks block. Now, when you click the green flag, the cat will be moved to the middle of the stage and pointing to the right. when left arrow key pressed switch costume to left turn 15 degrees when right arrow key pressed switch costume to right turn 15 degrees when up arrow key pressed move 10 steps when down arrow key pressed move -10 steps when clicked go to x: 0 y: 0 point in direction 90
  • 82. THE OFFICIAL RASPBERRY PI BEGINNER'S GUIDE82 To create more swimmers, add a repeat 6 block – changing from the default value of ‘10’ – and add a create clone of myself Control block inside it. To make it so the swimmers aren’t all swimming in the same direction, add a turn  60 degrees block above the create clone block but still inside the repeat 6 block. Click the green flag, and try the arrow keys now to see your swimmers come to life! when left arrow key pressed switch costume to left turn 15 degrees when right arrow key pressed switch costume to right turn 15 degrees when up arrow key pressed move 10 steps when down arrow key pressed move -10 steps when clicked go to x: 0 y: 0 point in direction 90 repeat 6 turn 60 degrees create clone of myself
  • 83. Chapter 4 Programming with Scratch 83 THE OFFICIAL RASPBERRY PI BEGINNER’S GUIDE To complete the Olympic feel, you’ll need to add some music. Click on the Sounds tab above the blocks palette, then click the ‘choose new sound from library’ icon . Click on the Music Loops category, then click on the small play icons (Figure 4-19)until you find some music you like – we’ve picked ‘dance around’. Click on the OK button to choose the music, then click on the Scripts tab to open the scripts area again. 5Figure 4-19: Select a music loop from the sound library Add another when clicked Events block to your scripts area, then add a forever Control block. Inside this Control block, add a play sound dance around until done block – remembering to look for the name of whatever piece of music you chose – and click the green flag to test your new program. If you want to stop the music, click the red octagon to stop the program and silence the sound!
  • 84. THE OFFICIAL RASPBERRY PI BEGINNER'S GUIDE84 when left arrow key pressed switch costume to left turn 15 degrees when right arrow key pressed switch costume to right turn 15 degrees when up arrow key pressed move 10 steps when down arrow key pressed move -10 steps when clicked go to x: 0 y: 0 point in direction 90 repeat 6 turn 60 degrees create clone of myself when clicked forever play sound dance around until done Finally, you can simulate a full dancing routine by adding a new event trigger to your program. Add a when space key pressed Events block, then a switch costume to right block. Underneath this, add a repeat 36 block – remembering to change the value from the default – and inside this a turn  10 degrees block and a move 10 steps block.
  • 85. Chapter 4 Programming with Scratch 85 THE OFFICIAL RASPBERRY PI BEGINNER’S GUIDE when left arrow key pressed switch costume to left turn 15 degrees when right arrow key pressed switch costume to right turn 15 degrees when up arrow key pressed move 10 steps when down arrow key pressed move -10 steps when clicked go to x: 0 y: 0 point in direction 90 repeat 6 turn 60 degrees create clone of myself when clicked forever play sound dance around until done when space key pressed switch costume to right repeat 36 turn 10 degrees move 10 steps Click the green flag to start the program, then press the SPACE key to try out the new routine (Figure 4-20, overleaf)! Don’t forget to save your program when you’re finished.
  • 86. THE OFFICIAL RASPBERRY PI BEGINNER'S GUIDE86 5Figure 4-20: The finished synchronised swimming routine Project 3: Archery Game Now you’re getting to be a bit of an expert at Scratch, it’s time to work on something a little more challenging: a game of archery, where the player has to hit a target with a randomly swaying bow and arrow. Start by opening the Chrome Web Browser and typing rpf.io/archery-resources followed by the ENTER key. The resources for the game only take a few seconds to download. Switch back to Scratch 2 and click on the File menu followed by Load Project. Click on ‘pi’ in the Places pane at the ONLINE PROJECT This project is also available online at rpf.io/archery CHALLENGE: CUSTOM ROUTINE Can you create your own synchronised swimming routine using loops? What would you need to change if you wanted more swimmers, or fewer swimmers? Can you add multiple swimming routines which can be triggered using different keys on the keyboard?
  • 87. Chapter 4 Programming with Scratch 87 THE OFFICIAL RASPBERRY PI BEGINNER’S GUIDE left-hand side of the window, then the ‘Downloads’ folder, and click on ArcheryResources.sb2 followed by the Open button. You’ll be asked if you want to replace the contents of your current project: if you haven’t saved your changes, click Cancel and save them, otherwise click OK. 5Figure 4-21: Resources project loaded for the archery game The project you’ve just loaded contains a backdrop and a sprite (Figure 4-21), but none of the actual code to make a game: adding that in is your job. Start by adding a when clicked block, then a broadcast message1 block. Click on the down arrow at the end of the block and then ‘New Message’, and type in ‘new arrow’ before clicking the OK button. Your block now reads broadcast new arrow . when clicked broadcast new arrow A broadcast is a message from one part of your program which can be received by any other part of your program. To have it actually do something, add a when I receive message1 block, and again change it to read when I receive new arrow . This time you can just click on the down arrow and choose ‘new arrow’ from the list; you don’t have to create the message again.
  • 88. THE OFFICIAL RASPBERRY PI BEGINNER'S GUIDE88 Below your when I receive new arrow block, add a go to x: -150 y: -150 block and a set size to 400 % block. Remember that these aren’t the default values for those blocks, so you’ll need to change them once you’ve dragged them onto the scripts area. Click on the green flag to see what you’ve done so far: the arrow sprite, which the player uses to aim at the target, will jump to the bottom-left of the stage and quadruple in size. when clicked broadcast new arrow when I receive new arrow go to x: -150 y: -150 set size to 400 % To give the player a challenge, add movement simulating swaying as the bow is drawn and the archer takes aim. Drag a forever block, followed by a glide 1 secs to x: -150 y: -150 block. Edit the first white box to say ‘0.5’ instead of ‘1,’ then put a pick random -150 to 150 Operators block in each of the other two white boxes. This means the arrow will drift around the stage in a random direction, for a random distance – making it far harder to hit the target! when clicked broadcast new arrow when I receive new arrow go to x: -150 y: -150 set size to 400 % forever glide 0.5 secs to x: pick random -150 to 150 y: pick random -150 to 150 Click the green flag again, and you’ll see what that block does: your arrow sprite is now drifting around the stage, covering different parts of the target. At the moment, though, you have no way to loose the arrow at the target. Drag a when space key pressed block into your scripts area, followed by a stop all Control block. Click the down arrow at the end of the block and change it to a stop other scripts in sprite block.