Juniors can do \"IT\" - Ideas for the Implementation of ICT with Juniors
•
4 gefällt mir•2,284 views

Presentation by Rachel Boyd for ULearn08 Conference October 2008, Christchurch, New Zealand http://rachelboyd.wikispaces.com/ictwithjuniors

Empfohlen
Empfohlen
Weitere ähnliche Inhalte
Andere mochten auch
Andere mochten auch (10)
Ähnlich wie Juniors can do \"IT\" - Ideas for the Implementation of ICT with Juniors
Ähnlich wie Juniors can do \"IT\" - Ideas for the Implementation of ICT with Juniors (20)
Mehr von Rachel Evans Boyd
Mehr von Rachel Evans Boyd (20)
Kürzlich hochgeladen
Kürzlich hochgeladen (20)
Juniors can do \"IT\" - Ideas for the Implementation of ICT with Juniors
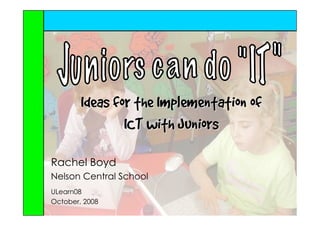
- 1. Ideas for the Implementation of ICT with Juniors Rachel Boyd Nelson Central School ULearn08 October, 2008
- 2. A smorgasbord of simple ICT ideas you can easily implement in your junior classroom.
- 3. Tools of the trade This workshop will focus on ideas for the implementation of ICT with juniors using three main tools:
- 7. The Digital Camera Access to a digital camera is something most junior teachers have. Don’t be afraid to let the students use them! They are amazing tools provided students are taught how to use and care for the camera correctly. It is an essential & very useful tool in the junior classroom.
- 8. Digital trip books WALT take effective photos to show an experience A digital camera is a must on class trips. Ensure that students know how to properly use the camera and allow one or two to be the “trip photographer” while there.
- 9. Portrait Weaving In pairs, have students take portraits shots of each other. Print the photos and use them for weaving activities. Students could even WALT use our weave their faces digital photos to together! enhance our artwork
- 10. Introducing... WALT to introduce ourselves using text and a speech bubble In pairs, students take photos of each other. In a programme like Comic Life, PowerPoint or Word they add speech bubbles to introduce themselves to others.
- 11. WALT take interesting photos using the ‘macro’ Macro Photos function on the digital camera Teach students how to use the ‘macro’ or close up function on the camera. Get students to go exploring around the school in pairs taking photos of interesting things and textures. You could even hold a macro photography competition!
- 12. WALT take interesting photos using the ‘macro’ What am I? function on the digital camera Using the macro function, students take close up photos of parts of objects within the classroom. Students write a series of “What am I?” prompts to accompany their photos and see if other class members can guess the object.
- 13. Ant eyes http://mic-tiritea.wikispaces.com/Junior+Goals+and+Examples WALT take photos from a different perspective In small groups, students imagine they are an ant and take photos from the ant’s perspective.
- 14. WALT identify and describe words & things that start Letter of the Week http://mic-whakarongo.wikispaces.com/Junior+Goals+and+Examples with our letter of the week Students plan and then take photos in pairs or small groups to depict the letter of the week. These can then be put together in a programme like Comic Life, Word or PowerPoint to Older classes could adapt this and take show their photos to show blend understanding. knowledge.
- 15. Digital Portrait Flip Books A great fun opportunity for students to use and enhance their http://www.userfr.co.nz/slideshow.asp?id=1234 photography skills. Also great for use at the start of the year. WALT carefully take a structured photograph of our buddy Students take either portrait or full body photos in pairs. Print the pictures, staple into a book and carefully cut to create a flip book of all students in your class.
- 16. Maori Greetings http://mic-whakarongo.wikispaces.com/Junior+Goals+and+Examples In small groups, students plan and take photos of what each Maori greeting would look like. In a programme like Comic Life, Word or PowerPoint they add speech bubbles to show their understanding. WALT correctly use Maori Greetings
- 17. Speech Bubbles WALT write speech & thought bubbles to describe Using photos taken on a trip, or by a buddy, students add speech/thought bubbles using Comic Life, PowerPoint or Word to describe thoughts and feelings.
- 18. Personality Plus WALT take interesting shots to show our personality In pairs, students take a variety of photos around the school in an attempt to capture and show their personality. Review on the computer and choose the best photo.
- 19. Digital Collage Students WALT use our digital photos in creative ways In pairs, students take a front on close up shot. Print and carefully cut out. Students combine with cut out collage body/clothes pieces to create an artwork.
- 20. WALT show Photo Symmetry symmetry by sketching half of our face In pairs, students take a front on close up shot. Print and guillotine in half. Using one half of the photo, students can then sketch the other half of their face (or their buddy’s face).
- 21. Photographic Artworks WALT use our digital photos to The blue screening effect! enhance our artwork In pairs, students take photos of each other in poses to suit the artwork they are doing. The photo must include the subjects’ head right down to, and including, their toes. Print, cut out and glue onto artworks to put students “in the picture”.
- 22. Photographic Pop Art WALT colour our photographs in the pop art style of Andy Warhol In pairs, students take close up portrait shots. Print, photocopy & colour in pop art style using either dye or paint!
- 23. Inspiration Mind Mapping Software Kidspiration Mind mapping/concept mapping software is excellent for use in the junior school. They allow junior students to show their ideas and understandings without using a lot of words. They are also very useful for facilitating higher order thinking. If you don’t have Inspiration or Kidspiration, try some of the web2 free online programmes below. Mindomo Mind42 Bubbl.us Mindmeister http://www.mindomo.com http://www.mind42.com http://bubbl.us/ http://www.mindmeister.com/
- 24. Digital All about Me WALT communicate visually who we are & what we like Students create a mindmap or diagram showing pictures/words about themselves and what they like doing.
- 25. Favourite Animals WALT show visually what our favourite animals are Instead of using words, students can insert pictures/stamps from the library to show what their favourite things are.
- 26. Buddy Venn Diagram WALT compare and contrast ourselves with our buddy Using a Venn Diagram, students discuss with a buddy and compare and contrast the similarities and differences between them.
- 27. Holidays Double Bubble Map WALT compare and contrast what we did in the holidays with our buddy NB: There is a template for the double bubble map available in Inspiration under - Templates: Thinking Skills: Comparison Map Students discuss what they did in the holidays and map the similarities and differences using a double bubble map.
- 28. Digital Paint Programmes Paint programmes on the computer are something most teachers have access to. They are excellent for use with juniors. There are many programmes that you can use, some pre-installed, some free to download and others that you pay for. Kid Pix ArtRage MS Paint Tux Paint
- 29. Digital Quilt WALT use the line drawing and fill bucket tools to create an artwork Students use the straight line and fill bucket tools to create a digital quilt masterpiece.
- 30. Showing Maths Concepts WALT show visually maths addition problems and their answers Student plan and visually represent given maths addition or subtraction problems. Print and make into a class book or flashcards for practice time.
- 31. WALT choose All about me Quilt stamps/pictures that represent us Using the picture/stamp libraries, students can choose and insert pictures/stamps that represent themselves.
- 32. Alphabet Book WALT identify and describe letters of the alphabet Give students a letter of the alphabet and let them draw a picture and add text to represent their letter. Combine the class’ contributions into an alphabet book.
- 33. Symmetry Drawings WALT draw objects that show symmetry Students use the line tool to draw a line down the middle of their screen. They then draw a picture to show their understanding of symmetry.
- 34. Mondrian Masterpieces WALT create an artwork in the style of Piet Mondrian After investigating & learning about mondrian art, students use bold lines and the fill bucket to create their own mondrian masterpieces.
- 35. Letter of the Week http://mic-whakarongo.wikispaces.com/Junior+Goals+and+Examples WALT identify and describe words & things that start with our letter of the week Using a drawing programme, students draw and label items that begin with the letter of the week.
- 36. Fantastic Shape Art Using the shapes tool, students add shapes to create a picture and show their understanding of different shapes. They use the fill function to colour the shapes. WALT identify and use different shapes to make a picture
- 37. WALT retell a story Digital Big Book creatively Take a favourite or well known big book and make it digital! Students can draw a picture of each part and even add the text. Put each students’ work together to make the whole book.
- 38. Illustrate a song http://mic-parkland.wikispaces.com/Junior+School+Goals+and+Examples WALT respond visually to a song Greedy Cat: Kiwi Kids Song Students respond to a song by drawing pictures. These can be made into a book or put into a movie with the song playing.
- 39. How Sealord process Fish Digital Diagrams WALT display our understanding visually Students create visual diagrams to show their understanding of a concept/process without having to do lots of writing.
- 40. Displaying word processing Bring students’ word processing alive by getting them to create a matching artwork and displaying it as an opening “door” to their story.
- 41. Tips for working with Juniors • Demonstrate using a data projector • Pair up students to work as buddies • C3B4ME - the essential when working with a class of junior students. • Take developmental equipment/games for fast finishers when working in a computer suite or with pods. • Have class experts • Enlist parent help if possible
- 43. More? Information, links to articles, resources, tutorials and ideas can be found on: http://rachelboyd.wikispaces.com/
- 44. Thanks! Feel free to contact me if I can be of any assistance. I’d love to see Rachel Boyd, how you’re getting on! Nelson Central School rachelboydsemail@gmail.com