SlideShare ist ein Scribd-Unternehmen logo
1 von 8
Downloaden Sie, um offline zu lesen
Composting in the School Garden 
Farmers, gardeners, homeowners and schools all over Massachusetts are recycling food and yard wastes at the 
source, reducing the waste flow, protecting the environment and utilizing this valuable soil amendment. Adding 
a composting program to your school garden is also a way to teach first hand about soil science, decomposition 
and environmental sustainability. This guide provides an introduction to the science, how-to and options for 
school composting. 
Decomposition is a natural biochemical process in which bacteria, fungi and other microscopic organisms 
convert organic wastes into nutrients that can be used by plants and animals. 
Composting is a controlled process that manages the natural recycling systems 
of decomposition, creating optimal conditions for it to occur. The result is a 
dark, crumbly, nutrient-rich, soil-like substance called humus, or compost. 
The Benefits of Composting 
Compost is a valuable resource that can be used as a supplement to enrich 
the soil with nutrients, increase moisture retention, improve soil structure and 
provide a good environment for beneficial soil organisms. 
Composting also helps protect the environment. The Environmental Protection 
Agency estimates that 25 percent of the solid wastes that Americans generate is food scraps and yard wastes that 
could be recycled through composting. These useful materials are too often sent to landfills and incinerators or 
go down the drain through the garbage disposal. 
This trash clogs the landfills taking up limited space. Landfill wastes can cause water pollution and production 
of methane gas from anaerobic decomposition. Incineration reduces the volume of wastes, but produces flue 
gases that permeate the atmosphere and toxic ash that must be buried. 
Use of the garbage disposal for food wastes places unnecessary burdens on the water supply, requiring about 
eight gallons of water to dilute a pound of wastes. Wastewater treatment plants then require more chemicals, 
produce more sludge, and consume more energy to process the increased volumes of water. 
Composting also provides an opportunity to observe nature at work and demonstrate interconnections. 
Classroom discussion can center on soil science, waste reduction and management, decomposition, watershed 
protection, pollution prevention, bio-diversity, nutrition and more. 
Organic Waste Decomposition 
Many different soil organisms called decomposers digest the organic wastes. Most are microorganisms, too 
small to be seen by the human eye. Other macroorganisms are large enough to easily be seen. Each organism 
has a role in the web of the compost pile. Energy flows from organism to organism as one is eaten by the 
next. Heat builds up in the pile as a byproduct of the microbial work. 
Naturally occurring bacteria start the process. They are the most numerous organisms and do 
the majority of the work. It is estimated that a tablespoon of soil contains billions of bacteria. 
Fungi and protozoans take over during the next stage of decomposition, when the organic 
material has been changed to a more digestible form. 
Later in the cycle, earthworms, nematodes, millipedes, slugs, land snails, and springtails do their 
part, eating the level one organisms. In turn, other organisms will eat them, primarily centipedes, 
mites, beetles, pseudoscorpions, spiders and earwigs. Some organisms, like the earthworm, also 
consume organic residue.
How Does it Work 
Successful composting occurs when the decomposers are provided with the optimum 
conditions to flourish. They need food, air, water, space and a habitable temperature. 
Food: All organic material contains both carbon and nitrogen in varying amounts. 
The microorganisms need carbon for energy and nitrogen to grow and 
reproduce. They are most productive when the ratio of carbon to nitrogen is 30:1 
“Brown” woody material is high in carbon. It is mixed or layered with damp, 
“green” material, such as vegetable scraps and grass clippings, which is high in 
nitrogen. A recipe of three parts “brown” material to one part “green” material (by 
volume), will result in an overall carbon to nitrogen ratio of 30:1. 
Air: Compost micro-organisms are aerobic and need oxygen. The rate of 
decomposition is increased by addition of air to the pile. 
Moisture: The micro-organisms in the compost pile thrive in damp but not soggy 
conditions. Fifty percent moisture is ideal. If material is not damp 
enough, the composting process will stop. If leaves rustle, they’re too 
dry. If the material is too wet, the air spaces will fill with water resulting 
in anaerobic conditions and odor. 
Volume and Temperature: Bacteria give off metabolic heat. As populations 
increase, more heat is produced and trapped in the center of the pile causing the 
temperature to rise. This creates a good environment for other heat-loving organisms 
to multiply. The most efficient decomposing bacteria thrive in temperatures between 
100-160 degrees F. As temperatures reach 105-170 degrees F, thermophilic bacteria 
speed decomposition and heat up the compost even more, killing most weed seeds 
and plant pathogens. The pile should be large enough to maintain heat. 
Compost is a great resource that will improve the fertility of the soil by holding 
nutrients until plants can use them. It also improves the structure of the soil by 
loosening and aerating it, while improving the water holding capacity. 
Developing your Composting Program 
The tested strategies below will help to plan the size and type of program. 
* First investigate the need and goals for your composting program. 
Autumn leaves are “brown” 
compost materials. 
Food scraps are “green” 
compost materials. 
Untreated grass clippings are 
“green” compost materials. 
Will your compost be primarily for the school garden, for other classroom food scraps and/or other 
school meals such as lunch in the cafeteria? 
How much waste is produced currently? 
Do a waste audit to determine quantity of each type - trash, recyclables and compostables. 
Where does it go now? 
Could a waste reduction education program reduce some of these materials? 
Can alternative compostable or recyclable food service items reduce some trash? 
* Meet with the school administration, faculty, cafeteria staff, custodians and interested parents. Gain their 
support and build ownership. Form a planning committee and divide the tasks. 
* Identify interests and knowledge. Introduce the topics of separation, recycling and composting and the 
educational benefit. Survey students and teachers to assess their knowledge, interest and cooperation. Plan a 
school wide education strategy. Get students involved in the planning and daily maintenance.
Make a plan. Design the waste separation and collection system. How will collection be 
best monitored to assure success? Define tasks and time requirements. Address container and 
sanitary concerns. What permits and approvals are required? 
Determine how the compost, recyclables and trash will be handled. If composting on 
site, design compost bins that take into account your size needs. Introduce any accompanying 
educational opportunities that support curricula. Plan division of tasks, maintenance and use of 
finished compost. 
Building the Compost Pile 
Select a bin that is appropriate for your setting. There are many commercial containers available; others can be 
made from easy-to-find materials. Bin designs include 1, 2 and 3 bin systems made out of wood or bricks, and 
barrel turners. Some towns distribute compost bins funded by Massachusetts DEP. In an urban setting, choose a 
rodent-proof bin with a floor, tight fitting lid and no openings wider than ½ inch. 
A minimum of one cubic yard is recommended (3’ by 3’ by 3’.) Piles wider or taller than 5 feet do not allow 
enough air to reach the microorganisms at the center. Piles smaller than one cubic yard will freeze in the winter, 
although the organisms will revive in the spring and composting will resume. 
Choose a location for your bin. It should be easy to reach in summer and winter. A shady location is 
preferable. In the sun, it will tend to dry out quickly, requiring more water. 
Prepare the bin by layering “green” and “brown” materials. Sprinkle a few shovelfuls of soil between the 
layers, approximately every 12”, to get the microorganism started. Moisten the pile, so the materials feel like a 
“wet sponge.” 
“Green” materials are nitrogen rich. These wet materials include: fruit and vegetable scraps; coffee; tea bags; 
crushed egg shells; bread and grain; green grass clippings; fresh garden cuttings, annual weeds without seeds; 
animal manures (horse, cow, rabbit, chicken, goat and gerbil) and seaweed. 
“Brown” materials are carbon rich. They include fall leaves; straw; hay; salt marsh hay; shredded paper; 
paper towels and plates; coffee filters; used potting soil; sawdust; chipped brush; wood chips; pine needles and 
thin layers of wood ash. Chop or shred materials to increase the surface area and speed the process. Gather these 
materials from the school yard or obtain from other local sources. Keep a pile of these next to your compost bin 
and use these materials to cover “green” materials. 
Once the bin is set up, you can begin to add fresh materials regularly. Each time you add kitchen scraps and 
other “green” materials, cover them with three times as much “brown” 
material to maintain the ideal 30:1 carbon to nitrogen ratio. A compost 
mix too high in carbon will take longer to decompose. A compost mix too 
high in nitrogen can get sloppy and smelly. If in doubt, it is better to err 
on the carbon-rich side, which reduces the likelihood of odors. 
Anything that was once alive is organic and will decompose. For public 
health and safety reasons, do not compost: meat; bones; fat; grease; oils; 
peanut butter; dairy products; foods cooked with butter or sauce; diseased 
plants, dog and cat manure. Other things that are not good for a small 
compost pile include weeds gone to seed, weeds that spread by roots and 
runners, sticks, banana skins, beech, birch and shiny leaves like magnolia 
and holly which are slow to decompose.
Turn or stir the material in the bin occasionally to introduce more air supply 
and speed up the process. Two piles will permit you to add fresh materials to one, 
while you turn and finish the compost in the other bin. Turning the pile with a 
pitchfork or inserting air tubes such as PVC pipes with air holes drilled into them 
into the center increases aeration. An odor like rotten eggs indicates anaerobic 
decomposition. A healthy compost pile does not smell! 
With frequent turning compost can be ready in about 3 months. Composted 
plants and leaves from the fall could be ready for spring soil amendment. Once 
the compost stops heating up and the original ingredients have transformed into 
dark, rich, crumbly, sweet smelling humus, the compost is finished. 
School compost often benefits from sifting before use, to take out anything that is not fully decomposed. 
Make a sifter using half inch hardware cloth (wire mesh) stapled onto a wooden frame that will fit over your 
wheelbarrow or cart. Shovel compost directly through the screen into your cart and transport to the garden. 
There are many ways to use finished compost in the school garden: To use compost as a soil amendment, 
shovel compost about four inches deep onto vegetable beds and dig in before planting. You can blend your own 
seed starting mix by blending compost, peat moss, packaged soil and perlite, or a potting mix for older plants 
with equal parts compost and packaged soil. Make a compost tea to fertilize your plants. Soak a burlap sack full 
of compost in a bucket and seep several days until the “tea” is a light brown color, water your plants with this 
nutrient-rich solution. Mulch plants, shrubs and trees with an inch or more of compost. Top-dress lawns with a 
mixture of finely sifted compost and sand. 
Avoid Attracting Pests to your Compost Pile: A well designed and maintained compost system will not attract 
unwanted insects and animals. Line the bottom and sides inside your bin with brown materials. Enforce burying 
green materials in the center of your pile with a cover of at least several inches of brown 
material. Make sure your bin has wire mesh or other rodent - proof design. Line your 
compost bin with bricks. Consider attaching mesh to the bottom of your bin to prevent 
burrowing. Have a secure lid. Some schools with high animal pressure, may need to 
have their compost bin off-site, inside a fortified area such as a courtyard, or to compost 
indoors, in worm bins. 
If you don’t have enough space to compost outside at your school, you can compost right 
in the classroom using a worm bin, with vermicomposting. 
Vermicomposting 
Vermicomposting is composting with earthworms. Earthworms speed up the composting process, aerate the 
organic material, and enhance the finished compost with nutrients and enzymes from their digestive tracts. 
Red worms (Eisenia foetida) are best suited for worm composting. Also known as “red wigglers,” these are 
the worms typically used for fishing. They are smaller than common garden earthworms and red brown in color. 
Originally native to Europe, redworms have naturalized in the U.S., thriving in decomposing organic material 
such as leaf piles and compost heaps. They are surface feeders and eat many of the same foods as humans. 
Redworms are efficient processors of organic wastes, eating and 
expelling an amount equal to their own weight every day. They are also a 
good indicator of fertile soil with a high organic content and a lack of toxic 
substances. Redworms adapt well to changes in temperature, although they 
prefer a range between 40 and 80 degrees Fahrenheit.
They are also extremely prolific. Fertilized eggs will develop in a cocoon in about three weeks. Two or more 
young may emerge. In three months the worms become sexually mature and will start breeding. 
You can purchase worms from a commercial vendor. Many are available on-line, and you may be able to find 
a local source in the phone book under “Fishing Bait” You can also collect redworms from decaying leaves, 
manure piles or compost piles. A pound of worms is enough to start most bins. 
Building the Worm Bin 
You can order a special worm bin from a supplier or make your own from wood. The easiest and least 
expensive method is to convert a large plastic storage container. Select an opaque container with a lid, as 
worms prefer darkness. A deep bin (15 inches or more) is preferable, allowing more room for layering and 
burying fresh material. The larger the container, the more material you will be able to compost. 
Drill ⅛ inch holes in the sides and cover of the container, 
approximately three inches apart, starting four inches from the bottom. 
You may also choose to drill holes in the bottom. You will then need 
a tray to catch excess moisture. If you don’t provide bottom drainage 
holes, add extra dry material if the bins starts to develop puddles. 
Next fill the bin with bedding. This is organic material that provides 
enough air space for the worms to survive and breed. Bedding can also 
be used to cover food scraps. The worms eat the bedding along with kitchen scraps to make the compost. Many 
high carbon bedding materials may be used, such as chopped dry leaves, shredded paper, ground cardboard or 
peat moss mixed with vermiculite. Bedding can be a combination of materials. Fill the bin about 3/4 full. 
Add water to the bedding material until the moisture content is 50 percent (as damp as a wrung out sponge). 
It is important to keep the bedding this damp or the worms will die. Mix a few handfuls of soil or finished 
compost with the bedding. Site the bin in a location where it will stay between 55-75 degrees F. At lower 
temperatures worms will stop reproducing; they will die at higher temperatures. 
Add 1-2 pounds of redworms, based on the size of the container. There can be as many as 500-2000 worms in 
a pound depending on the size of the worms. Add only small amounts of food scraps until the worm population 
increases to handle more (3-4 months). The worms will begin to reproduce after just a few weeks. Also, the 
worms can’t eat the food until it starts to decompose; be patient. 
Worms will eat any type of kitchen waste including vegetables, fruits, tea bags, coffee grounds and crushed 
eggshells. Do not add meat or meat byproducts. Bury the food scraps enough that they are 
always covered by bedding. This prevents development of odors and fruit flies. Don’t add more 
food scraps than the worms eat in several days. Chop the food scraps for faster decomposition. 
Worms do not like to be disturbed. Bury fresh food just once a week. There is no need to turn 
the compost in the bin. Air holes in the sides and the tunneling action of the worms provide 
enough circulation. 
Turning the garbage into castings as long as they have food, space proper temperatures and 
moisture. After about two-to-three months, the container will start getting full; much of the 
materials in it will look like soil. It’s time to harvest. Move the finished compost to one side of 
the bin and add fresh bedding to the vacant side. Put new food wastes into the fresh bedding only. The worms 
will move from the finished compost in search of new food. After a few weeks, remove the lid under a bright 
light source. The worms will burrow away from it. Scoop out the finished compost a few layers at a time. Add 
fresh bedding. Worm compost is more thoroughly digested than most other composts making it desirable.
Fruit flies may be found in and around the bin. They are not harmful; but can be a nuisance. The larvae travel 
on the skins of fruits, especially bananas. Make a simple, non-toxic trap by placing a banana peel inside a clear 
plastic container. Make three or four holes all the way through the cover with a standard toothpick. Place the 
plastic container near the worm bin. Within 24 hours, 99% of the fruit flies will be trapped inside the container 
and can be released outdoors. 
In the Cafeteria & On-Site Composting 
Once you’ve determined that a cafeteria composting program is the goal, it is time to get started. 
Use the information collected during the waste audit to determine type and size of the program. It will also help 
determine the number of collection containers needed in the cafeteria, and compost bins required outside. 
Multiple bins are recommended, so new material is added to just one at a time. 
Work with the cafeteria and custodial staff to determine type and location of each 
of the collection containers - trash, recycling and compost. Make a plan for 
managing each collected material, including cleaning and storing containers. 
Develop signage for individual bins and to demonstrate sorting of each type of 
material. Make a master list of any possible waste that may come into the cafeteria 
and the sorting category. 
Recruit compost monitors and offer group training. Assign monitors to all lunches 
and post the monitor list in the cafeteria as a reminder. 
Plan for managing collected materials following the lunch, including the disposal of trash, transferring 
recyclables and taking compostables to the bin. 
Once compost is ready, complete the cycle through gardening. Harvest finished compost after three or more 
months and plant a garden. If your school is too large to implement on-site composting, try developing a plan 
for off-site composting. 
Composting Activity Ideas 
* It‘s estimated that an average American produces 1,600 pounds of trash a year. Ask student to think about 
how much garbage they produce over the course of a day, week, year, lifetime. Make a list of all the things 
that they threw out yesterday, this past week. How many of these were recyclable or compostable? 
* Monitor your wastes. Keep a log of what is composted and when. Record the amount of wastes composted, 
the temperature of the pile, moisture content and other observations. 
* Ask each student to research one decomposer organism in depth and make a five 
minute presentation. 
* Investigate the carbon: nitrogen ratio in the pile. Ask students 
to calculate the materials that would result in an ideal ratio of 30:1 
for your compost. 
* A large percentage of the waste stream is made up of “trashed” packaging 
materials, from single-serving cans and bottles to the cardboard, plastic, and styrofoam 
that wrap merchandise. Ask students to design and present packaging for a product that 
will reduce these wastes for one item.
* Explain how worms improve the soil. How are they a good solution to our organic waste problem? What 
impact do they have on the natural environment? 
* Worms offer lessons in life cycles. Find cocoons and young worm populations in the bin. Ask students to 
monitor a worm from cocoon to adulthood. What foods do they like to eat? Which are less popular? Study the 
anatomy to find the anterior and posterior end, circular and long muscles and setae. How do these help them 
move through the soil? 
* Make a worm column or worm observation chamber and trace the tunnels the 
worms make in the soil. 
* Discuss anaerobic and aerobic decomposition. Set up an experiment to watch 
food scraps deteriorate in and outside of a worm bin. 
* Collect several samples from various stages of compost. Feel, smell, and look at 
the “rotting” materials. Use a microscope to examine the materials. What do you see? 
What words would you use to describe these materials? 
* Can you identify any of the decomposer organisms? 
Composting Resources 
Organizations 
Massachusetts Department of Environmental Protection 
Bureau of Waste Prevention 
One Winter St. 6th Floor Boston, MA 02108 
Ann McGovern (617) 292-5834 
ann.mcgovern@state.ma.us 
http://www.mass.gov/dep/recycle/reduce/composti.htm 
The Green Team: An Environmental Club for Massachusetts Schools 
Sponsored by Massachusetts DEP 
http://www.thegreenteam.org/ 
* Composting Lesson Plans & Materials 
Massachusetts Department of Agricultural Resources www.mass.gov/agr/ 
Environmental Protection Agency http://www.epa.gov/osw/conserve/rrr/composting/index.htm 
Compost Bin Designs: 
University of Wisconsin Cooperative Extension 
http://www4.uwm.edu/shwec/composter/how-to-build-a-compost-bin.cfm 
Their “Master Composter” program provides blueprints for different kinds of composting bins. 
Curriculum & Resources Websites 
Association of Vermont Recyclers: Curriculum www.vtrecyclers.org/wastekit/compost.htm 
Composting in NH Schools Manual www.schoolrecycling.net/composting.htm 
Cornell University - Composting at School http://compost.css.cornell.edu/schools.html
National Institute of Environmental Health http://kids.niehs.nih.gov/explore/reduce/worms.htm 
National Sustainable Agriculture Information Service http://attra.ncat.org/soils.html 
School Ground Transformation www.schoolgrounds.ca/projects.html 
Montpelier High School compost awareness video available on YouTube: 
http://montpelier-vt.blogspot.com/2007_08_28_archive.html 
Mansfield, CT School-wide Composting Program 
http://www.ct.gov/dep/lib/dep/compost/compost_pdf/schmanual.pdf 
Books 
Let It Rot: The Gardener’s Guide to Composting, by Kathleen Bond Borie, Storey Pub. 
The Rodale Guide to Composting, by Deborah Martin, 1992, Rodale Press. 
The Wonderful World of Wigglers, by Julia Hand, 1995. Foodworks, VT. 
The Worm Book: Complete Guide to Gardening and Composting with Worms, by Loren Nancarrow. 
Worms Eat My Garbage, by Mary Appelhof, 1997. Flower Press. 
Information for this composting resource was taken from the resources above and from handouts from MAC workshops 
hosted by Greater Lowell Regional High School, Hubbardston Center School & South Hadley High School. A special 
thanks to Ann McGovern from Massachusetts Department of Environmental Protection. 
P. O. Box 345 Seekonk, MA 02771 
www.aginclassroom.org 
Please Visit the Massachusetts Agriculture in the Classroom Website 
to tell us how you used this Composting Resource for the School Garden. 
This Composting Resource for the School Garden was funded by the 
Massachusetts Department of Agricultural Resources through a 2011 
Specialty Crops Grant from the USDA

Weitere ähnliche Inhalte

Was ist angesagt?

EoP: The Skin of the World
EoP: The Skin of the WorldEoP: The Skin of the World
EoP: The Skin of the Worldbenkessler
 
Creating a Sustainable Garden
Creating a Sustainable Garden Creating a Sustainable Garden
Creating a Sustainable Garden ccmg2014
 
Starting a Worm Farm
Starting a Worm FarmStarting a Worm Farm
Starting a Worm Farmx3G9
 
Home Composting
Home CompostingHome Composting
Home Compostingcemremos
 
Tips for a Sustainable Garden - Scholastic Australia
Tips for a Sustainable Garden - Scholastic AustraliaTips for a Sustainable Garden - Scholastic Australia
Tips for a Sustainable Garden - Scholastic Australiasodj49v
 
An introduction to home composting
An introduction to home compostingAn introduction to home composting
An introduction to home compostingLeicsRecycling
 
Microbial enrichment of vermicompost through earthworm for agricultural waste...
Microbial enrichment of vermicompost through earthworm for agricultural waste...Microbial enrichment of vermicompost through earthworm for agricultural waste...
Microbial enrichment of vermicompost through earthworm for agricultural waste...SHAKTI SWARUP
 
Composting at Home: Introduction to the Basics
Composting at Home: Introduction to the BasicsComposting at Home: Introduction to the Basics
Composting at Home: Introduction to the BasicsVirginia Streeter
 
Research Paper on Vermiculture and Vermicomposting
Research Paper on Vermiculture and VermicompostingResearch Paper on Vermiculture and Vermicomposting
Research Paper on Vermiculture and Vermicompostingx3G9
 
EoP: Designing for Place
EoP: Designing for PlaceEoP: Designing for Place
EoP: Designing for Placebenkessler
 
Schools#2 Cafeteria Composting Programs - Holly Hill Farm
Schools#2 Cafeteria Composting Programs - Holly Hill FarmSchools#2 Cafeteria Composting Programs - Holly Hill Farm
Schools#2 Cafeteria Composting Programs - Holly Hill FarmMassRecycle 2011 Conference
 
On Site Composting - McGovern
On Site Composting - McGovernOn Site Composting - McGovern
On Site Composting - McGovernMassRecycle .
 
Composting: A Tour of Techniques From Manure to Obscure
Composting: A Tour of Techniques From Manure to ObscureComposting: A Tour of Techniques From Manure to Obscure
Composting: A Tour of Techniques From Manure to ObscureBen Capozzi
 
Dr. Elaine Ingham - Building Soil Health
Dr. Elaine Ingham - Building Soil HealthDr. Elaine Ingham - Building Soil Health
Dr. Elaine Ingham - Building Soil HealthDiegoFooter
 
Organic Vegetable Growing From the Ground Up with Alyson Chisholm
Organic Vegetable Growing From the Ground Up with Alyson ChisholmOrganic Vegetable Growing From the Ground Up with Alyson Chisholm
Organic Vegetable Growing From the Ground Up with Alyson Chisholmacornorganic
 

Was ist angesagt? (20)

EoP: The Skin of the World
EoP: The Skin of the WorldEoP: The Skin of the World
EoP: The Skin of the World
 
Creating a Sustainable Garden
Creating a Sustainable Garden Creating a Sustainable Garden
Creating a Sustainable Garden
 
Starting a Worm Farm
Starting a Worm FarmStarting a Worm Farm
Starting a Worm Farm
 
Home Composting
Home CompostingHome Composting
Home Composting
 
Rasadnita new alchemycompost
Rasadnita new alchemycompostRasadnita new alchemycompost
Rasadnita new alchemycompost
 
Tips for a Sustainable Garden - Scholastic Australia
Tips for a Sustainable Garden - Scholastic AustraliaTips for a Sustainable Garden - Scholastic Australia
Tips for a Sustainable Garden - Scholastic Australia
 
An introduction to home composting
An introduction to home compostingAn introduction to home composting
An introduction to home composting
 
Microbial enrichment of vermicompost through earthworm for agricultural waste...
Microbial enrichment of vermicompost through earthworm for agricultural waste...Microbial enrichment of vermicompost through earthworm for agricultural waste...
Microbial enrichment of vermicompost through earthworm for agricultural waste...
 
Composting at Home: Introduction to the Basics
Composting at Home: Introduction to the BasicsComposting at Home: Introduction to the Basics
Composting at Home: Introduction to the Basics
 
Research Paper on Vermiculture and Vermicomposting
Research Paper on Vermiculture and VermicompostingResearch Paper on Vermiculture and Vermicomposting
Research Paper on Vermiculture and Vermicomposting
 
EoP: Designing for Place
EoP: Designing for PlaceEoP: Designing for Place
EoP: Designing for Place
 
Schools#2 Cafeteria Composting Programs - Holly Hill Farm
Schools#2 Cafeteria Composting Programs - Holly Hill FarmSchools#2 Cafeteria Composting Programs - Holly Hill Farm
Schools#2 Cafeteria Composting Programs - Holly Hill Farm
 
Compost whately grades 4 6 for bill obear
Compost whately grades 4 6 for bill obearCompost whately grades 4 6 for bill obear
Compost whately grades 4 6 for bill obear
 
On Site Composting - McGovern
On Site Composting - McGovernOn Site Composting - McGovern
On Site Composting - McGovern
 
"Composting 101" Presentation
"Composting 101" Presentation"Composting 101" Presentation
"Composting 101" Presentation
 
Composting: A Tour of Techniques From Manure to Obscure
Composting: A Tour of Techniques From Manure to ObscureComposting: A Tour of Techniques From Manure to Obscure
Composting: A Tour of Techniques From Manure to Obscure
 
Dr. Elaine Ingham - Building Soil Health
Dr. Elaine Ingham - Building Soil HealthDr. Elaine Ingham - Building Soil Health
Dr. Elaine Ingham - Building Soil Health
 
Organic Vegetable Growing From the Ground Up with Alyson Chisholm
Organic Vegetable Growing From the Ground Up with Alyson ChisholmOrganic Vegetable Growing From the Ground Up with Alyson Chisholm
Organic Vegetable Growing From the Ground Up with Alyson Chisholm
 
Practical Tips for Organic Gardeners
Practical Tips for Organic GardenersPractical Tips for Organic Gardeners
Practical Tips for Organic Gardeners
 
Composting
CompostingComposting
Composting
 

Ähnlich wie Composting in the School Garden

Composting Troubleshooting Common Issues and Solutions
Composting Troubleshooting Common Issues and SolutionsComposting Troubleshooting Common Issues and Solutions
Composting Troubleshooting Common Issues and SolutionsTriuPhm16
 
Solid Waste Compost Plant - DCC Infra
Solid Waste Compost Plant - DCC InfraSolid Waste Compost Plant - DCC Infra
Solid Waste Compost Plant - DCC InfraDCC Infra Pvt Ltd
 
Washington compost-guide
Washington compost-guideWashington compost-guide
Washington compost-guidepankaj garg
 
Vermiculture techniques and advantages
Vermiculture techniques and advantagesVermiculture techniques and advantages
Vermiculture techniques and advantagesSabin Dhakal
 
Compost guide
Compost guideCompost guide
Compost guidesopheak93
 
Food Waste To Compost
Food Waste To CompostFood Waste To Compost
Food Waste To Composttjl
 
First Review Group 1 PPT.pptx with slide
First Review Group 1 PPT.pptx with slideFirst Review Group 1 PPT.pptx with slide
First Review Group 1 PPT.pptx with slideMonika860882
 
A Beginner's Guide to Composting at Home: Easy and Effective Tips by Joshua V...
A Beginner's Guide to Composting at Home: Easy and Effective Tips by Joshua V...A Beginner's Guide to Composting at Home: Easy and Effective Tips by Joshua V...
A Beginner's Guide to Composting at Home: Easy and Effective Tips by Joshua V...Joshua Vandervoort
 
Composting and Worm Farming Workshop Manual
Composting and Worm Farming Workshop ManualComposting and Worm Farming Workshop Manual
Composting and Worm Farming Workshop Manualx3G9
 

Ähnlich wie Composting in the School Garden (20)

Composting Troubleshooting Common Issues and Solutions
Composting Troubleshooting Common Issues and SolutionsComposting Troubleshooting Common Issues and Solutions
Composting Troubleshooting Common Issues and Solutions
 
Vermicompost
VermicompostVermicompost
Vermicompost
 
Edible School Garden Educational Handout
Edible School Garden Educational HandoutEdible School Garden Educational Handout
Edible School Garden Educational Handout
 
Solid Waste Compost Plant - DCC Infra
Solid Waste Compost Plant - DCC InfraSolid Waste Compost Plant - DCC Infra
Solid Waste Compost Plant - DCC Infra
 
Washington compost-guide
Washington compost-guideWashington compost-guide
Washington compost-guide
 
Teacher Worm Composting Guide
Teacher Worm Composting Guide  Teacher Worm Composting Guide
Teacher Worm Composting Guide
 
Vermiculture techniques and advantages
Vermiculture techniques and advantagesVermiculture techniques and advantages
Vermiculture techniques and advantages
 
Vegan Gardening on Clay Soils
Vegan Gardening on Clay SoilsVegan Gardening on Clay Soils
Vegan Gardening on Clay Soils
 
2014 revised master gardener soils class
2014 revised master gardener soils class2014 revised master gardener soils class
2014 revised master gardener soils class
 
FYN Principle #7 - Recycle
FYN Principle #7 - RecycleFYN Principle #7 - Recycle
FYN Principle #7 - Recycle
 
Starting a Worm Farm
Starting a Worm FarmStarting a Worm Farm
Starting a Worm Farm
 
Compost guide
Compost guideCompost guide
Compost guide
 
Insa Riepens: Composting What Why How
Insa Riepens: Composting What Why HowInsa Riepens: Composting What Why How
Insa Riepens: Composting What Why How
 
Ag 467
Ag 467Ag 467
Ag 467
 
Food Waste To Compost
Food Waste To CompostFood Waste To Compost
Food Waste To Compost
 
First Review Group 1 PPT.pptx with slide
First Review Group 1 PPT.pptx with slideFirst Review Group 1 PPT.pptx with slide
First Review Group 1 PPT.pptx with slide
 
Composting
CompostingComposting
Composting
 
A Beginner's Guide to Composting at Home: Easy and Effective Tips by Joshua V...
A Beginner's Guide to Composting at Home: Easy and Effective Tips by Joshua V...A Beginner's Guide to Composting at Home: Easy and Effective Tips by Joshua V...
A Beginner's Guide to Composting at Home: Easy and Effective Tips by Joshua V...
 
A Permaculture School Garden
A Permaculture School GardenA Permaculture School Garden
A Permaculture School Garden
 
Composting and Worm Farming Workshop Manual
Composting and Worm Farming Workshop ManualComposting and Worm Farming Workshop Manual
Composting and Worm Farming Workshop Manual
 

Mehr von School Vegetable Gardening - Victory Gardens

Mehr von School Vegetable Gardening - Victory Gardens (20)

Behind Enemy Lines - Marthe Cohn - One Woman against Nazi Germany
Behind Enemy Lines - Marthe Cohn - One Woman against Nazi GermanyBehind Enemy Lines - Marthe Cohn - One Woman against Nazi Germany
Behind Enemy Lines - Marthe Cohn - One Woman against Nazi Germany
 
Classical Art School Gardening Posters
Classical Art School Gardening PostersClassical Art School Gardening Posters
Classical Art School Gardening Posters
 
One Teacher Saves her School & her Students
One Teacher Saves her School & her StudentsOne Teacher Saves her School & her Students
One Teacher Saves her School & her Students
 
Coconut Oil helps Heal Children's ADHD - ADD Disease, Autism & Alzheimer Disease
Coconut Oil helps Heal Children's ADHD - ADD Disease, Autism & Alzheimer DiseaseCoconut Oil helps Heal Children's ADHD - ADD Disease, Autism & Alzheimer Disease
Coconut Oil helps Heal Children's ADHD - ADD Disease, Autism & Alzheimer Disease
 
One Teacher Makes Students into Champions
One Teacher Makes Students into ChampionsOne Teacher Makes Students into Champions
One Teacher Makes Students into Champions
 
Good Books help Students Excel in Life & School
Good Books help Students Excel in Life & SchoolGood Books help Students Excel in Life & School
Good Books help Students Excel in Life & School
 
Greening & Restoring the Sahara Desert with the Groasis Waterboxx
Greening & Restoring the Sahara Desert with the Groasis WaterboxxGreening & Restoring the Sahara Desert with the Groasis Waterboxx
Greening & Restoring the Sahara Desert with the Groasis Waterboxx
 
Groasis Waterboxx Lets Trees Grow Up in Unfriendly Places
Groasis Waterboxx Lets Trees Grow Up in Unfriendly PlacesGroasis Waterboxx Lets Trees Grow Up in Unfriendly Places
Groasis Waterboxx Lets Trees Grow Up in Unfriendly Places
 
Explanation of the Groasis Technology for Growing Food in Desert Regions
Explanation of the Groasis Technology for Growing Food in Desert RegionsExplanation of the Groasis Technology for Growing Food in Desert Regions
Explanation of the Groasis Technology for Growing Food in Desert Regions
 
Groasis Waterboxx & the Agua, Vida Naturaleza Project for Growing Food in Des...
Groasis Waterboxx & the Agua, Vida Naturaleza Project for Growing Food in Des...Groasis Waterboxx & the Agua, Vida Naturaleza Project for Growing Food in Des...
Groasis Waterboxx & the Agua, Vida Naturaleza Project for Growing Food in Des...
 
Groasis Waterboxx Handbook on Planting Instructions for Trees & Crops in Dese...
Groasis Waterboxx Handbook on Planting Instructions for Trees & Crops in Dese...Groasis Waterboxx Handbook on Planting Instructions for Trees & Crops in Dese...
Groasis Waterboxx Handbook on Planting Instructions for Trees & Crops in Dese...
 
Groasis Waterboxx Manual for Growing Vegetables in Arid Lands
Groasis Waterboxx Manual for Growing Vegetables in Arid LandsGroasis Waterboxx Manual for Growing Vegetables in Arid Lands
Groasis Waterboxx Manual for Growing Vegetables in Arid Lands
 
Water Saving Measures of Using the Groasis Waterboxx in Organic Gardening in ...
Water Saving Measures of Using the Groasis Waterboxx in Organic Gardening in ...Water Saving Measures of Using the Groasis Waterboxx in Organic Gardening in ...
Water Saving Measures of Using the Groasis Waterboxx in Organic Gardening in ...
 
Making a Week’s Worth of Rain Last the Whole Year
Making a Week’s Worth of Rain Last the Whole YearMaking a Week’s Worth of Rain Last the Whole Year
Making a Week’s Worth of Rain Last the Whole Year
 
Using the Groasis Waterboxx to Plant New Trees in Desert Regions
Using the Groasis Waterboxx to Plant New Trees in Desert RegionsUsing the Groasis Waterboxx to Plant New Trees in Desert Regions
Using the Groasis Waterboxx to Plant New Trees in Desert Regions
 
Greening the World - Desert Restoration, Reduce CO2, Feed the People & Create...
Greening the World - Desert Restoration, Reduce CO2, Feed the People & Create...Greening the World - Desert Restoration, Reduce CO2, Feed the People & Create...
Greening the World - Desert Restoration, Reduce CO2, Feed the People & Create...
 
Groasis Technology Compared to Drip Irrigation
Groasis Technology Compared to Drip IrrigationGroasis Technology Compared to Drip Irrigation
Groasis Technology Compared to Drip Irrigation
 
Groasis Waterboxx - Palm Springs Students Test New Planter Designed to Fight ...
Groasis Waterboxx - Palm Springs Students Test New Planter Designed to Fight ...Groasis Waterboxx - Palm Springs Students Test New Planter Designed to Fight ...
Groasis Waterboxx - Palm Springs Students Test New Planter Designed to Fight ...
 
Groasis Waterboxx Handbook for Planting Methods & Sample of Crop Test Results...
Groasis Waterboxx Handbook for Planting Methods & Sample of Crop Test Results...Groasis Waterboxx Handbook for Planting Methods & Sample of Crop Test Results...
Groasis Waterboxx Handbook for Planting Methods & Sample of Crop Test Results...
 
Groasis Waterboxx Technology Offers Possible Cure for the Deserts
Groasis Waterboxx Technology Offers Possible Cure for the DesertsGroasis Waterboxx Technology Offers Possible Cure for the Deserts
Groasis Waterboxx Technology Offers Possible Cure for the Deserts
 

Kürzlich hochgeladen

Advanced Views - Calendar View in Odoo 17
Advanced Views - Calendar View in Odoo 17Advanced Views - Calendar View in Odoo 17
Advanced Views - Calendar View in Odoo 17Celine George
 
Z Score,T Score, Percential Rank and Box Plot Graph
Z Score,T Score, Percential Rank and Box Plot GraphZ Score,T Score, Percential Rank and Box Plot Graph
Z Score,T Score, Percential Rank and Box Plot GraphThiyagu K
 
Paris 2024 Olympic Geographies - an activity
Paris 2024 Olympic Geographies - an activityParis 2024 Olympic Geographies - an activity
Paris 2024 Olympic Geographies - an activityGeoBlogs
 
Mixin Classes in Odoo 17 How to Extend Models Using Mixin Classes
Mixin Classes in Odoo 17  How to Extend Models Using Mixin ClassesMixin Classes in Odoo 17  How to Extend Models Using Mixin Classes
Mixin Classes in Odoo 17 How to Extend Models Using Mixin ClassesCeline George
 
Unit-IV; Professional Sales Representative (PSR).pptx
Unit-IV; Professional Sales Representative (PSR).pptxUnit-IV; Professional Sales Representative (PSR).pptx
Unit-IV; Professional Sales Representative (PSR).pptxVishalSingh1417
 
Seal of Good Local Governance (SGLG) 2024Final.pptx
Seal of Good Local Governance (SGLG) 2024Final.pptxSeal of Good Local Governance (SGLG) 2024Final.pptx
Seal of Good Local Governance (SGLG) 2024Final.pptxnegromaestrong
 
PROCESS RECORDING FORMAT.docx
PROCESS      RECORDING        FORMAT.docxPROCESS      RECORDING        FORMAT.docx
PROCESS RECORDING FORMAT.docxPoojaSen20
 
Grant Readiness 101 TechSoup and Remy Consulting
Grant Readiness 101 TechSoup and Remy ConsultingGrant Readiness 101 TechSoup and Remy Consulting
Grant Readiness 101 TechSoup and Remy ConsultingTechSoup
 
Basic Civil Engineering first year Notes- Chapter 4 Building.pptx
Basic Civil Engineering first year Notes- Chapter 4 Building.pptxBasic Civil Engineering first year Notes- Chapter 4 Building.pptx
Basic Civil Engineering first year Notes- Chapter 4 Building.pptxDenish Jangid
 
SECOND SEMESTER TOPIC COVERAGE SY 2023-2024 Trends, Networks, and Critical Th...
SECOND SEMESTER TOPIC COVERAGE SY 2023-2024 Trends, Networks, and Critical Th...SECOND SEMESTER TOPIC COVERAGE SY 2023-2024 Trends, Networks, and Critical Th...
SECOND SEMESTER TOPIC COVERAGE SY 2023-2024 Trends, Networks, and Critical Th...KokoStevan
 
Measures of Dispersion and Variability: Range, QD, AD and SD
Measures of Dispersion and Variability: Range, QD, AD and SDMeasures of Dispersion and Variability: Range, QD, AD and SD
Measures of Dispersion and Variability: Range, QD, AD and SDThiyagu K
 
Gardella_PRCampaignConclusion Pitch Letter
Gardella_PRCampaignConclusion Pitch LetterGardella_PRCampaignConclusion Pitch Letter
Gardella_PRCampaignConclusion Pitch LetterMateoGardella
 
Ecological Succession. ( ECOSYSTEM, B. Pharmacy, 1st Year, Sem-II, Environmen...
Ecological Succession. ( ECOSYSTEM, B. Pharmacy, 1st Year, Sem-II, Environmen...Ecological Succession. ( ECOSYSTEM, B. Pharmacy, 1st Year, Sem-II, Environmen...
Ecological Succession. ( ECOSYSTEM, B. Pharmacy, 1st Year, Sem-II, Environmen...Shubhangi Sonawane
 
1029-Danh muc Sach Giao Khoa khoi 6.pdf
1029-Danh muc Sach Giao Khoa khoi  6.pdf1029-Danh muc Sach Giao Khoa khoi  6.pdf
1029-Danh muc Sach Giao Khoa khoi 6.pdfQucHHunhnh
 
Holdier Curriculum Vitae (April 2024).pdf
Holdier Curriculum Vitae (April 2024).pdfHoldier Curriculum Vitae (April 2024).pdf
Holdier Curriculum Vitae (April 2024).pdfagholdier
 
APM Welcome, APM North West Network Conference, Synergies Across Sectors
APM Welcome, APM North West Network Conference, Synergies Across SectorsAPM Welcome, APM North West Network Conference, Synergies Across Sectors
APM Welcome, APM North West Network Conference, Synergies Across SectorsAssociation for Project Management
 

Kürzlich hochgeladen (20)

Advanced Views - Calendar View in Odoo 17
Advanced Views - Calendar View in Odoo 17Advanced Views - Calendar View in Odoo 17
Advanced Views - Calendar View in Odoo 17
 
Z Score,T Score, Percential Rank and Box Plot Graph
Z Score,T Score, Percential Rank and Box Plot GraphZ Score,T Score, Percential Rank and Box Plot Graph
Z Score,T Score, Percential Rank and Box Plot Graph
 
Paris 2024 Olympic Geographies - an activity
Paris 2024 Olympic Geographies - an activityParis 2024 Olympic Geographies - an activity
Paris 2024 Olympic Geographies - an activity
 
Código Creativo y Arte de Software | Unidad 1
Código Creativo y Arte de Software | Unidad 1Código Creativo y Arte de Software | Unidad 1
Código Creativo y Arte de Software | Unidad 1
 
Mehran University Newsletter Vol-X, Issue-I, 2024
Mehran University Newsletter Vol-X, Issue-I, 2024Mehran University Newsletter Vol-X, Issue-I, 2024
Mehran University Newsletter Vol-X, Issue-I, 2024
 
Mixin Classes in Odoo 17 How to Extend Models Using Mixin Classes
Mixin Classes in Odoo 17  How to Extend Models Using Mixin ClassesMixin Classes in Odoo 17  How to Extend Models Using Mixin Classes
Mixin Classes in Odoo 17 How to Extend Models Using Mixin Classes
 
Unit-IV; Professional Sales Representative (PSR).pptx
Unit-IV; Professional Sales Representative (PSR).pptxUnit-IV; Professional Sales Representative (PSR).pptx
Unit-IV; Professional Sales Representative (PSR).pptx
 
Seal of Good Local Governance (SGLG) 2024Final.pptx
Seal of Good Local Governance (SGLG) 2024Final.pptxSeal of Good Local Governance (SGLG) 2024Final.pptx
Seal of Good Local Governance (SGLG) 2024Final.pptx
 
PROCESS RECORDING FORMAT.docx
PROCESS      RECORDING        FORMAT.docxPROCESS      RECORDING        FORMAT.docx
PROCESS RECORDING FORMAT.docx
 
Grant Readiness 101 TechSoup and Remy Consulting
Grant Readiness 101 TechSoup and Remy ConsultingGrant Readiness 101 TechSoup and Remy Consulting
Grant Readiness 101 TechSoup and Remy Consulting
 
Basic Civil Engineering first year Notes- Chapter 4 Building.pptx
Basic Civil Engineering first year Notes- Chapter 4 Building.pptxBasic Civil Engineering first year Notes- Chapter 4 Building.pptx
Basic Civil Engineering first year Notes- Chapter 4 Building.pptx
 
Advance Mobile Application Development class 07
Advance Mobile Application Development class 07Advance Mobile Application Development class 07
Advance Mobile Application Development class 07
 
SECOND SEMESTER TOPIC COVERAGE SY 2023-2024 Trends, Networks, and Critical Th...
SECOND SEMESTER TOPIC COVERAGE SY 2023-2024 Trends, Networks, and Critical Th...SECOND SEMESTER TOPIC COVERAGE SY 2023-2024 Trends, Networks, and Critical Th...
SECOND SEMESTER TOPIC COVERAGE SY 2023-2024 Trends, Networks, and Critical Th...
 
Measures of Dispersion and Variability: Range, QD, AD and SD
Measures of Dispersion and Variability: Range, QD, AD and SDMeasures of Dispersion and Variability: Range, QD, AD and SD
Measures of Dispersion and Variability: Range, QD, AD and SD
 
Gardella_PRCampaignConclusion Pitch Letter
Gardella_PRCampaignConclusion Pitch LetterGardella_PRCampaignConclusion Pitch Letter
Gardella_PRCampaignConclusion Pitch Letter
 
Ecological Succession. ( ECOSYSTEM, B. Pharmacy, 1st Year, Sem-II, Environmen...
Ecological Succession. ( ECOSYSTEM, B. Pharmacy, 1st Year, Sem-II, Environmen...Ecological Succession. ( ECOSYSTEM, B. Pharmacy, 1st Year, Sem-II, Environmen...
Ecological Succession. ( ECOSYSTEM, B. Pharmacy, 1st Year, Sem-II, Environmen...
 
Mattingly "AI & Prompt Design: Structured Data, Assistants, & RAG"
Mattingly "AI & Prompt Design: Structured Data, Assistants, & RAG"Mattingly "AI & Prompt Design: Structured Data, Assistants, & RAG"
Mattingly "AI & Prompt Design: Structured Data, Assistants, & RAG"
 
1029-Danh muc Sach Giao Khoa khoi 6.pdf
1029-Danh muc Sach Giao Khoa khoi  6.pdf1029-Danh muc Sach Giao Khoa khoi  6.pdf
1029-Danh muc Sach Giao Khoa khoi 6.pdf
 
Holdier Curriculum Vitae (April 2024).pdf
Holdier Curriculum Vitae (April 2024).pdfHoldier Curriculum Vitae (April 2024).pdf
Holdier Curriculum Vitae (April 2024).pdf
 
APM Welcome, APM North West Network Conference, Synergies Across Sectors
APM Welcome, APM North West Network Conference, Synergies Across SectorsAPM Welcome, APM North West Network Conference, Synergies Across Sectors
APM Welcome, APM North West Network Conference, Synergies Across Sectors
 

Composting in the School Garden

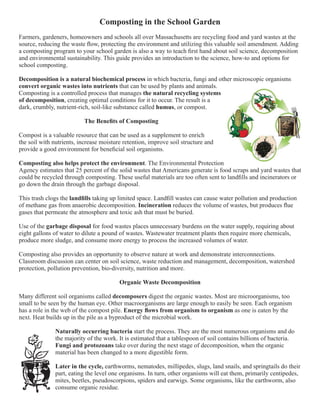
  • 1. Composting in the School Garden Farmers, gardeners, homeowners and schools all over Massachusetts are recycling food and yard wastes at the source, reducing the waste flow, protecting the environment and utilizing this valuable soil amendment. Adding a composting program to your school garden is also a way to teach first hand about soil science, decomposition and environmental sustainability. This guide provides an introduction to the science, how-to and options for school composting. Decomposition is a natural biochemical process in which bacteria, fungi and other microscopic organisms convert organic wastes into nutrients that can be used by plants and animals. Composting is a controlled process that manages the natural recycling systems of decomposition, creating optimal conditions for it to occur. The result is a dark, crumbly, nutrient-rich, soil-like substance called humus, or compost. The Benefits of Composting Compost is a valuable resource that can be used as a supplement to enrich the soil with nutrients, increase moisture retention, improve soil structure and provide a good environment for beneficial soil organisms. Composting also helps protect the environment. The Environmental Protection Agency estimates that 25 percent of the solid wastes that Americans generate is food scraps and yard wastes that could be recycled through composting. These useful materials are too often sent to landfills and incinerators or go down the drain through the garbage disposal. This trash clogs the landfills taking up limited space. Landfill wastes can cause water pollution and production of methane gas from anaerobic decomposition. Incineration reduces the volume of wastes, but produces flue gases that permeate the atmosphere and toxic ash that must be buried. Use of the garbage disposal for food wastes places unnecessary burdens on the water supply, requiring about eight gallons of water to dilute a pound of wastes. Wastewater treatment plants then require more chemicals, produce more sludge, and consume more energy to process the increased volumes of water. Composting also provides an opportunity to observe nature at work and demonstrate interconnections. Classroom discussion can center on soil science, waste reduction and management, decomposition, watershed protection, pollution prevention, bio-diversity, nutrition and more. Organic Waste Decomposition Many different soil organisms called decomposers digest the organic wastes. Most are microorganisms, too small to be seen by the human eye. Other macroorganisms are large enough to easily be seen. Each organism has a role in the web of the compost pile. Energy flows from organism to organism as one is eaten by the next. Heat builds up in the pile as a byproduct of the microbial work. Naturally occurring bacteria start the process. They are the most numerous organisms and do the majority of the work. It is estimated that a tablespoon of soil contains billions of bacteria. Fungi and protozoans take over during the next stage of decomposition, when the organic material has been changed to a more digestible form. Later in the cycle, earthworms, nematodes, millipedes, slugs, land snails, and springtails do their part, eating the level one organisms. In turn, other organisms will eat them, primarily centipedes, mites, beetles, pseudoscorpions, spiders and earwigs. Some organisms, like the earthworm, also consume organic residue.
  • 2. How Does it Work Successful composting occurs when the decomposers are provided with the optimum conditions to flourish. They need food, air, water, space and a habitable temperature. Food: All organic material contains both carbon and nitrogen in varying amounts. The microorganisms need carbon for energy and nitrogen to grow and reproduce. They are most productive when the ratio of carbon to nitrogen is 30:1 “Brown” woody material is high in carbon. It is mixed or layered with damp, “green” material, such as vegetable scraps and grass clippings, which is high in nitrogen. A recipe of three parts “brown” material to one part “green” material (by volume), will result in an overall carbon to nitrogen ratio of 30:1. Air: Compost micro-organisms are aerobic and need oxygen. The rate of decomposition is increased by addition of air to the pile. Moisture: The micro-organisms in the compost pile thrive in damp but not soggy conditions. Fifty percent moisture is ideal. If material is not damp enough, the composting process will stop. If leaves rustle, they’re too dry. If the material is too wet, the air spaces will fill with water resulting in anaerobic conditions and odor. Volume and Temperature: Bacteria give off metabolic heat. As populations increase, more heat is produced and trapped in the center of the pile causing the temperature to rise. This creates a good environment for other heat-loving organisms to multiply. The most efficient decomposing bacteria thrive in temperatures between 100-160 degrees F. As temperatures reach 105-170 degrees F, thermophilic bacteria speed decomposition and heat up the compost even more, killing most weed seeds and plant pathogens. The pile should be large enough to maintain heat. Compost is a great resource that will improve the fertility of the soil by holding nutrients until plants can use them. It also improves the structure of the soil by loosening and aerating it, while improving the water holding capacity. Developing your Composting Program The tested strategies below will help to plan the size and type of program. * First investigate the need and goals for your composting program. Autumn leaves are “brown” compost materials. Food scraps are “green” compost materials. Untreated grass clippings are “green” compost materials. Will your compost be primarily for the school garden, for other classroom food scraps and/or other school meals such as lunch in the cafeteria? How much waste is produced currently? Do a waste audit to determine quantity of each type - trash, recyclables and compostables. Where does it go now? Could a waste reduction education program reduce some of these materials? Can alternative compostable or recyclable food service items reduce some trash? * Meet with the school administration, faculty, cafeteria staff, custodians and interested parents. Gain their support and build ownership. Form a planning committee and divide the tasks. * Identify interests and knowledge. Introduce the topics of separation, recycling and composting and the educational benefit. Survey students and teachers to assess their knowledge, interest and cooperation. Plan a school wide education strategy. Get students involved in the planning and daily maintenance.
  • 3. Make a plan. Design the waste separation and collection system. How will collection be best monitored to assure success? Define tasks and time requirements. Address container and sanitary concerns. What permits and approvals are required? Determine how the compost, recyclables and trash will be handled. If composting on site, design compost bins that take into account your size needs. Introduce any accompanying educational opportunities that support curricula. Plan division of tasks, maintenance and use of finished compost. Building the Compost Pile Select a bin that is appropriate for your setting. There are many commercial containers available; others can be made from easy-to-find materials. Bin designs include 1, 2 and 3 bin systems made out of wood or bricks, and barrel turners. Some towns distribute compost bins funded by Massachusetts DEP. In an urban setting, choose a rodent-proof bin with a floor, tight fitting lid and no openings wider than ½ inch. A minimum of one cubic yard is recommended (3’ by 3’ by 3’.) Piles wider or taller than 5 feet do not allow enough air to reach the microorganisms at the center. Piles smaller than one cubic yard will freeze in the winter, although the organisms will revive in the spring and composting will resume. Choose a location for your bin. It should be easy to reach in summer and winter. A shady location is preferable. In the sun, it will tend to dry out quickly, requiring more water. Prepare the bin by layering “green” and “brown” materials. Sprinkle a few shovelfuls of soil between the layers, approximately every 12”, to get the microorganism started. Moisten the pile, so the materials feel like a “wet sponge.” “Green” materials are nitrogen rich. These wet materials include: fruit and vegetable scraps; coffee; tea bags; crushed egg shells; bread and grain; green grass clippings; fresh garden cuttings, annual weeds without seeds; animal manures (horse, cow, rabbit, chicken, goat and gerbil) and seaweed. “Brown” materials are carbon rich. They include fall leaves; straw; hay; salt marsh hay; shredded paper; paper towels and plates; coffee filters; used potting soil; sawdust; chipped brush; wood chips; pine needles and thin layers of wood ash. Chop or shred materials to increase the surface area and speed the process. Gather these materials from the school yard or obtain from other local sources. Keep a pile of these next to your compost bin and use these materials to cover “green” materials. Once the bin is set up, you can begin to add fresh materials regularly. Each time you add kitchen scraps and other “green” materials, cover them with three times as much “brown” material to maintain the ideal 30:1 carbon to nitrogen ratio. A compost mix too high in carbon will take longer to decompose. A compost mix too high in nitrogen can get sloppy and smelly. If in doubt, it is better to err on the carbon-rich side, which reduces the likelihood of odors. Anything that was once alive is organic and will decompose. For public health and safety reasons, do not compost: meat; bones; fat; grease; oils; peanut butter; dairy products; foods cooked with butter or sauce; diseased plants, dog and cat manure. Other things that are not good for a small compost pile include weeds gone to seed, weeds that spread by roots and runners, sticks, banana skins, beech, birch and shiny leaves like magnolia and holly which are slow to decompose.
  • 4. Turn or stir the material in the bin occasionally to introduce more air supply and speed up the process. Two piles will permit you to add fresh materials to one, while you turn and finish the compost in the other bin. Turning the pile with a pitchfork or inserting air tubes such as PVC pipes with air holes drilled into them into the center increases aeration. An odor like rotten eggs indicates anaerobic decomposition. A healthy compost pile does not smell! With frequent turning compost can be ready in about 3 months. Composted plants and leaves from the fall could be ready for spring soil amendment. Once the compost stops heating up and the original ingredients have transformed into dark, rich, crumbly, sweet smelling humus, the compost is finished. School compost often benefits from sifting before use, to take out anything that is not fully decomposed. Make a sifter using half inch hardware cloth (wire mesh) stapled onto a wooden frame that will fit over your wheelbarrow or cart. Shovel compost directly through the screen into your cart and transport to the garden. There are many ways to use finished compost in the school garden: To use compost as a soil amendment, shovel compost about four inches deep onto vegetable beds and dig in before planting. You can blend your own seed starting mix by blending compost, peat moss, packaged soil and perlite, or a potting mix for older plants with equal parts compost and packaged soil. Make a compost tea to fertilize your plants. Soak a burlap sack full of compost in a bucket and seep several days until the “tea” is a light brown color, water your plants with this nutrient-rich solution. Mulch plants, shrubs and trees with an inch or more of compost. Top-dress lawns with a mixture of finely sifted compost and sand. Avoid Attracting Pests to your Compost Pile: A well designed and maintained compost system will not attract unwanted insects and animals. Line the bottom and sides inside your bin with brown materials. Enforce burying green materials in the center of your pile with a cover of at least several inches of brown material. Make sure your bin has wire mesh or other rodent - proof design. Line your compost bin with bricks. Consider attaching mesh to the bottom of your bin to prevent burrowing. Have a secure lid. Some schools with high animal pressure, may need to have their compost bin off-site, inside a fortified area such as a courtyard, or to compost indoors, in worm bins. If you don’t have enough space to compost outside at your school, you can compost right in the classroom using a worm bin, with vermicomposting. Vermicomposting Vermicomposting is composting with earthworms. Earthworms speed up the composting process, aerate the organic material, and enhance the finished compost with nutrients and enzymes from their digestive tracts. Red worms (Eisenia foetida) are best suited for worm composting. Also known as “red wigglers,” these are the worms typically used for fishing. They are smaller than common garden earthworms and red brown in color. Originally native to Europe, redworms have naturalized in the U.S., thriving in decomposing organic material such as leaf piles and compost heaps. They are surface feeders and eat many of the same foods as humans. Redworms are efficient processors of organic wastes, eating and expelling an amount equal to their own weight every day. They are also a good indicator of fertile soil with a high organic content and a lack of toxic substances. Redworms adapt well to changes in temperature, although they prefer a range between 40 and 80 degrees Fahrenheit.
  • 5. They are also extremely prolific. Fertilized eggs will develop in a cocoon in about three weeks. Two or more young may emerge. In three months the worms become sexually mature and will start breeding. You can purchase worms from a commercial vendor. Many are available on-line, and you may be able to find a local source in the phone book under “Fishing Bait” You can also collect redworms from decaying leaves, manure piles or compost piles. A pound of worms is enough to start most bins. Building the Worm Bin You can order a special worm bin from a supplier or make your own from wood. The easiest and least expensive method is to convert a large plastic storage container. Select an opaque container with a lid, as worms prefer darkness. A deep bin (15 inches or more) is preferable, allowing more room for layering and burying fresh material. The larger the container, the more material you will be able to compost. Drill ⅛ inch holes in the sides and cover of the container, approximately three inches apart, starting four inches from the bottom. You may also choose to drill holes in the bottom. You will then need a tray to catch excess moisture. If you don’t provide bottom drainage holes, add extra dry material if the bins starts to develop puddles. Next fill the bin with bedding. This is organic material that provides enough air space for the worms to survive and breed. Bedding can also be used to cover food scraps. The worms eat the bedding along with kitchen scraps to make the compost. Many high carbon bedding materials may be used, such as chopped dry leaves, shredded paper, ground cardboard or peat moss mixed with vermiculite. Bedding can be a combination of materials. Fill the bin about 3/4 full. Add water to the bedding material until the moisture content is 50 percent (as damp as a wrung out sponge). It is important to keep the bedding this damp or the worms will die. Mix a few handfuls of soil or finished compost with the bedding. Site the bin in a location where it will stay between 55-75 degrees F. At lower temperatures worms will stop reproducing; they will die at higher temperatures. Add 1-2 pounds of redworms, based on the size of the container. There can be as many as 500-2000 worms in a pound depending on the size of the worms. Add only small amounts of food scraps until the worm population increases to handle more (3-4 months). The worms will begin to reproduce after just a few weeks. Also, the worms can’t eat the food until it starts to decompose; be patient. Worms will eat any type of kitchen waste including vegetables, fruits, tea bags, coffee grounds and crushed eggshells. Do not add meat or meat byproducts. Bury the food scraps enough that they are always covered by bedding. This prevents development of odors and fruit flies. Don’t add more food scraps than the worms eat in several days. Chop the food scraps for faster decomposition. Worms do not like to be disturbed. Bury fresh food just once a week. There is no need to turn the compost in the bin. Air holes in the sides and the tunneling action of the worms provide enough circulation. Turning the garbage into castings as long as they have food, space proper temperatures and moisture. After about two-to-three months, the container will start getting full; much of the materials in it will look like soil. It’s time to harvest. Move the finished compost to one side of the bin and add fresh bedding to the vacant side. Put new food wastes into the fresh bedding only. The worms will move from the finished compost in search of new food. After a few weeks, remove the lid under a bright light source. The worms will burrow away from it. Scoop out the finished compost a few layers at a time. Add fresh bedding. Worm compost is more thoroughly digested than most other composts making it desirable.
  • 6. Fruit flies may be found in and around the bin. They are not harmful; but can be a nuisance. The larvae travel on the skins of fruits, especially bananas. Make a simple, non-toxic trap by placing a banana peel inside a clear plastic container. Make three or four holes all the way through the cover with a standard toothpick. Place the plastic container near the worm bin. Within 24 hours, 99% of the fruit flies will be trapped inside the container and can be released outdoors. In the Cafeteria & On-Site Composting Once you’ve determined that a cafeteria composting program is the goal, it is time to get started. Use the information collected during the waste audit to determine type and size of the program. It will also help determine the number of collection containers needed in the cafeteria, and compost bins required outside. Multiple bins are recommended, so new material is added to just one at a time. Work with the cafeteria and custodial staff to determine type and location of each of the collection containers - trash, recycling and compost. Make a plan for managing each collected material, including cleaning and storing containers. Develop signage for individual bins and to demonstrate sorting of each type of material. Make a master list of any possible waste that may come into the cafeteria and the sorting category. Recruit compost monitors and offer group training. Assign monitors to all lunches and post the monitor list in the cafeteria as a reminder. Plan for managing collected materials following the lunch, including the disposal of trash, transferring recyclables and taking compostables to the bin. Once compost is ready, complete the cycle through gardening. Harvest finished compost after three or more months and plant a garden. If your school is too large to implement on-site composting, try developing a plan for off-site composting. Composting Activity Ideas * It‘s estimated that an average American produces 1,600 pounds of trash a year. Ask student to think about how much garbage they produce over the course of a day, week, year, lifetime. Make a list of all the things that they threw out yesterday, this past week. How many of these were recyclable or compostable? * Monitor your wastes. Keep a log of what is composted and when. Record the amount of wastes composted, the temperature of the pile, moisture content and other observations. * Ask each student to research one decomposer organism in depth and make a five minute presentation. * Investigate the carbon: nitrogen ratio in the pile. Ask students to calculate the materials that would result in an ideal ratio of 30:1 for your compost. * A large percentage of the waste stream is made up of “trashed” packaging materials, from single-serving cans and bottles to the cardboard, plastic, and styrofoam that wrap merchandise. Ask students to design and present packaging for a product that will reduce these wastes for one item.
  • 7. * Explain how worms improve the soil. How are they a good solution to our organic waste problem? What impact do they have on the natural environment? * Worms offer lessons in life cycles. Find cocoons and young worm populations in the bin. Ask students to monitor a worm from cocoon to adulthood. What foods do they like to eat? Which are less popular? Study the anatomy to find the anterior and posterior end, circular and long muscles and setae. How do these help them move through the soil? * Make a worm column or worm observation chamber and trace the tunnels the worms make in the soil. * Discuss anaerobic and aerobic decomposition. Set up an experiment to watch food scraps deteriorate in and outside of a worm bin. * Collect several samples from various stages of compost. Feel, smell, and look at the “rotting” materials. Use a microscope to examine the materials. What do you see? What words would you use to describe these materials? * Can you identify any of the decomposer organisms? Composting Resources Organizations Massachusetts Department of Environmental Protection Bureau of Waste Prevention One Winter St. 6th Floor Boston, MA 02108 Ann McGovern (617) 292-5834 ann.mcgovern@state.ma.us http://www.mass.gov/dep/recycle/reduce/composti.htm The Green Team: An Environmental Club for Massachusetts Schools Sponsored by Massachusetts DEP http://www.thegreenteam.org/ * Composting Lesson Plans & Materials Massachusetts Department of Agricultural Resources www.mass.gov/agr/ Environmental Protection Agency http://www.epa.gov/osw/conserve/rrr/composting/index.htm Compost Bin Designs: University of Wisconsin Cooperative Extension http://www4.uwm.edu/shwec/composter/how-to-build-a-compost-bin.cfm Their “Master Composter” program provides blueprints for different kinds of composting bins. Curriculum & Resources Websites Association of Vermont Recyclers: Curriculum www.vtrecyclers.org/wastekit/compost.htm Composting in NH Schools Manual www.schoolrecycling.net/composting.htm Cornell University - Composting at School http://compost.css.cornell.edu/schools.html
  • 8. National Institute of Environmental Health http://kids.niehs.nih.gov/explore/reduce/worms.htm National Sustainable Agriculture Information Service http://attra.ncat.org/soils.html School Ground Transformation www.schoolgrounds.ca/projects.html Montpelier High School compost awareness video available on YouTube: http://montpelier-vt.blogspot.com/2007_08_28_archive.html Mansfield, CT School-wide Composting Program http://www.ct.gov/dep/lib/dep/compost/compost_pdf/schmanual.pdf Books Let It Rot: The Gardener’s Guide to Composting, by Kathleen Bond Borie, Storey Pub. The Rodale Guide to Composting, by Deborah Martin, 1992, Rodale Press. The Wonderful World of Wigglers, by Julia Hand, 1995. Foodworks, VT. The Worm Book: Complete Guide to Gardening and Composting with Worms, by Loren Nancarrow. Worms Eat My Garbage, by Mary Appelhof, 1997. Flower Press. Information for this composting resource was taken from the resources above and from handouts from MAC workshops hosted by Greater Lowell Regional High School, Hubbardston Center School & South Hadley High School. A special thanks to Ann McGovern from Massachusetts Department of Environmental Protection. P. O. Box 345 Seekonk, MA 02771 www.aginclassroom.org Please Visit the Massachusetts Agriculture in the Classroom Website to tell us how you used this Composting Resource for the School Garden. This Composting Resource for the School Garden was funded by the Massachusetts Department of Agricultural Resources through a 2011 Specialty Crops Grant from the USDA