Sowing Seed ~ Teacher Guide, Organic Gardening ~ United Kingdom

Sowing Seed - Gardening Guides for Students + Teachers + Organic School Gardens ` For more information, Please see websites below: ` Organic Edible Schoolyards & Gardening with Children http://scribd.com/doc/239851214 ` Double Food Production from your School Garden with Organic Tech http://scribd.com/doc/239851079 ` Free School Gardening Art Posters http://scribd.com/doc/239851159` ` Companion Planting Increases Food Production from School Gardens http://scribd.com/doc/239851159 ` Healthy Foods Dramatically Improves Student Academic Success http://scribd.com/doc/239851348 ` City Chickens for your Organic School Garden http://scribd.com/doc/239850440 ` Simple Square Foot Gardening for Schools - Teacher Guide http://scribd.com/doc/239851110

Empfohlen
Empfohlen
Weitere ähnliche Inhalte
Mehr von School Vegetable Gardening - Victory Gardens
Mehr von School Vegetable Gardening - Victory Gardens (20)
Kürzlich hochgeladen
Kürzlich hochgeladen (20)
Sowing Seed ~ Teacher Guide, Organic Gardening ~ United Kingdom
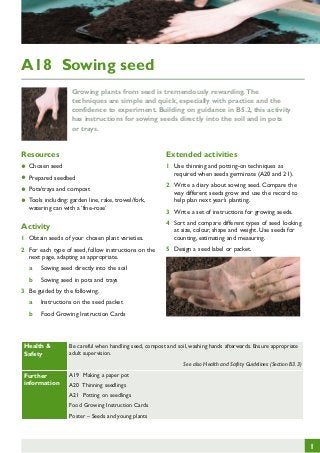
- 1. A18 Sowing seed Growing plants from seed is tremendously rewarding. The techniques are simple and quick, especially with practice and the confidence to experiment. Building on guidance in B5.2, this activity has instructions for sowing seeds directly into the soil and in pots or trays. Resources • Chosen seed • Prepared seedbed • Pots/trays and compost Tools including: garden line, rake, • watering can with a ‘fine-rose’ trowel/fork, Activity 1 Obtain seeds of your chosen plant varieties. 2 For each type of seed, follow instructions on the next page, adapting as appropriate. a Extended activities 1 Use thinning and potting-on techniques as required when seeds germinate (A20 and 21). 2 Write a diary about sowing seed. Compare the way different seeds grow and use the record to help plan next year’s planting. 3 Write a set of instructions for growing seeds. 4 Sort and compare different types of seed looking at size, colour, shape and weight. Use seeds for counting, estimating and measuring. 5 Design a seed label or packet. Sowing seed directly into the soil b Sowing seed in pots and trays 3 Be guided by the following. a Instructions on the seed packet b Food Growing Instruction Cards Health & Safety Be careful when handling seed, compost and soil, washing hands afterwards. Ensure appropriate adult supervision. See also Health and Safety Guidelines (Section B3.3) Further information A19 Making a paper pot A20 Thinning seedlings A21 Potting on seedlings Food Growing Instruction Cards Poster – Seeds and young plants 1
- 2. Instructions for sowing seed into the soil 1 Prepare the soil Use bare soil that has been dug and organic matter added as required (See B4.4 and A9). Rake the loose soil, breaking up the lumps and removing the biggest stones. Aim for a fine ‘tilth’ on the surface, a fine crumbly layer of soil. 2 Create a shallow ‘drill’ or holes in the soil. P DSC_3248 – 53 Wide drill P DSC_3266 - 7 Narrow drill Using a rake • If helpful, use a garden line or a cane to mark out a straight row • Adjust space between rows according to the final size of each crop • If the soil is dry, water the drill before sowing, adding a little moist compost in heavy clay soils (see A9) 3 Sow seed evenly at the recommended depth and distance apart. Place large seeds individually, making a small hole with a dibber or trowel if needed. Tap small seeds off the palm of your hand. Also sprinkle seeds by taking a pinch between finger and thumb. • Generally, cover large seeds with soil no deeper than twice their size. Outside, small seeds should be covered very lightly with fine soil. Very small seeds are best started in pots and tray (next page). 2
- 3. 4 Cover the seed with fine soil and tamp it down gently with your hands or back of the rake so the seed and soil make good contact. DSC_3259 – 63 (wide drill covering) 5 Label the row with the date of sowing, crop and variety name For some crops, sow again every two to four weeks for a ‘succession’ of harvests during the season, eg carrots, lettuce, radish, salad onion etc. See Food Growing Instruction Cards. 6 Once seeds have germinated (typically one-three weeks), either P Thin (B5.3/A20) Top tip When to sow outdoors Transplant (B5.5/A22) J Wait until the recommended month for sowing (see seed packets and Food Growing Instruction Cards). You can also check the soil temperature using a soil thermometer. sowing – warm enough grow. For an earlier start, • Spring up the soilusuallyplastic sheeting to start sowing when weeds start toSilver and Gold Booklet). warm with for a few weeks before sowing (see Summer sowing - if soil temperature is too high (eg for lettuce), water the ground to cool it down • before sowing and cover with sacking. sowing - take advantage of the warm soil • Autumn areas). They will have a headstart in spring.to sow overwintering crops such as broad beans (in mild 3
- 4. Instructions for sowing seed in pots and trays 1 Fill the container with organic, peat-free seed compost. This compost will have all the nutrients the seedlings need to germinate and grow for a few weeks, without adding extra fertiliser. 2 Firm the surface of the compost with something flat, like the bottom of another pot, or tap the container on the bench to settle the compost. Do not press the compost down hard as this squeezes out too much air and the seedlings won’t grow well. 3 Sow larger seeds individually, covering with compost no deeper than twice the size of the seed. 4 Tap smaller seeds off the palm of your hand. Also sprinkle seeds by taking a pinch between finger and thumb. You can also mix small seeds with the same bulk of fine sand and then sow (for more even distribution). 5 Water using a watering can with a fine-rose end or stand the container in a tray of water and allow the water to soak up from below until the surface is just damp. Do not saturate as this also reduces the air in the compost. Leave to drain. 4
- 5. 6 Cover seed with sieved compost and firm lightly so the seed and compost make good contact. Leave very small seeds uncovered or use a thin layer of vermiculite(very fine mineral rock). 7 Label each container (or group of pots) with the date of sowing, crop and variety name. For some crops, sow again every two to four weeks for a ‘succession’ of harvests during the season, eg carrots, lettuce, radish, salad onion. See Food Growing Instruction Cards. 8 Lightly water again, if needed, using a watering can with a fine-rose end. 9 Once seeds have germinated (typically one-three weeks), thin (B5.3/A20) or pot-on (B5.4/A21) as required. Notes The method is the same for whichever type of pot or tray you use, whether bought or a recycled container, eg margarine tubs with added drainage holes. • Individual pots are useful for larger seeds. Seed-trays are good for getting as many seedlings as possible • Seedlings will need potting-on (A21) before transplanting. or if unsure of the likely germination rate. Trays divided in modules are available different sizes • transplanted (A22) with minimum rootindisturbance.Youand suit most seeds. Seedlings can then be can also make your ownpaper pots (A19). • Seed can sometimes be sown directly into larger containers. J Top tip The right conditions Place your pot or tray in a location with enough warmth and shelter. Keep moist and in a light position for even and fast growth. Greenhouse (Silver and Gold booklet) Windowsill (B4.7/A13) Outdoors (B5.2) Seedlings deprived of light 5