Guia de instalacion de sensor cuenta personas SpotONE
•
0 gefällt mir•1,611 views

Guía de instalación de los sensores cuenta-personas SpotONE, con comunicación inalámbrica y tecnología infra-roja o térmica, para poder controlar el flujo de personas por pasos anchos y estrechos.

Empfohlen
Weitere ähnliche Inhalte
Was ist angesagt?
Was ist angesagt? (11)
Ähnlich wie Guia de instalacion de sensor cuenta personas SpotONE
Ähnlich wie Guia de instalacion de sensor cuenta personas SpotONE (20)
Mehr von NextPoints
Mehr von NextPoints (13)
Kürzlich hochgeladen
Kürzlich hochgeladen (20)
Guia de instalacion de sensor cuenta personas SpotONE
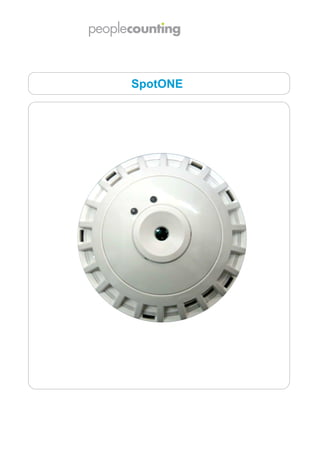
- 1. SpotONE
- 2. TABLE OF CONTENTS 1.Introduction and Software Installation……………………………………….. .... … 3 2.Counter Configuration………………………………………………………….. ... … 12 3.IP Configuration………………………………………………………….. ............ … 15 4.Client Configuration………………………………………………………….. ....... … 17 5.Connections………………………………………………………….. .................. … 18 6.Password………………………………………………………….. ...................... … 18 7.Setup Tool…………………………………………………………....................... … 19 8.FAQ………………………………………………………….. .............................. … 74 9.Appendix A Counter Setup…………………………………………………………… 85 10.Appendix B IP Connection Problems……………………………………………… 86 11.Appendix C Firmware Versions…………………………………………………….. 90 12.Appendix D Glossary………………………………………………………………… 91 2
- 3. 1. START 1.1 Introduction Before use, the SpotONE must be configured to work in their installed location. The standard set-up tool is a laptop computer, connected to the counter via either IP or serial, dependant on the model of counter to be configured. IP enabled models support both serial and IP connection, but relay enabled models support setup via serial only. For configuration using a serial connection, the installed version of the setup tool must be used, but for configuration over IP the installed version of the setup tool, or a compatible Internet browser running the Microsoft Silverlight Add-on can be used. Counter Type Setup Connection Setup Software Method IP Enabled Counter IP or Serial Installed version or web browser RelayEnabled Counter Serial only Installed version only All configuration options are loaded into a non-volatile storage area within the unit and are maintained, even after power down. Hardware Installation Detach the counter head from its base by twisting anticlockwise slightly then pulling apart to expose the mounting holes on the base. Select a suitable location for mounting the counter base. Ensure that the ‘Traffic Flow Direction Arrows’ of all units are all pointing in the same direction, preferably in the direction of traffic flow . A 3-5cm hole in the ceiling should be provided for cable access. If mounting on solid ceilings, a number of alternative cut-out areas are provided in the base perimeter to allow for wiring access. The slot in the base marked for serial connection should not be used for this. Install the base using mounting holes provided. These holes allow for a limited amount of movement of the base – once aligned correctly secure the base using the locking screw position. 3
- 4. The IP base interface board allows for IP and serial connection for configuration purposes. If removed from the base the board must be re-inserted ‘serial connector’ first, and clipped in place. Ensure the interface board is properly seated inside the base Power is supplied via the dedicated power terminal block (10 – 28V dc) or via the (silver) IP connector when the SpotONE Power Injector accessory Power over Ethernet (PoE) is not supported. ENSURE POWER IS OFF before connecting the power and data cables to the base boards. Do not exceed the maximum number of units and maximum cable length of 100m for IP connections. Once connections are made the counter ‘head’ can be ‘hot-plugged’ onto the base. If CAN nodes are to be utilized, then this is via RJ45 patch lead connections (straight through configuration) from the (black) RJ45 CAN connector on the IP counter board to an RJ45 CAN connector of the node (either one). There can be maximum number of 7 nodes connected to each IP Master (providing power requirements are met; connected in a ‘daisychain’ style. The last CAN node must be terminated correctly by inserting the included RJ45 terminator connectorinto the last free RJ45 socket. Consequently, there should be no RJ45 sockets which do not contain either a cable, or the RJ45 terminator. If using only the IP master counter then it must have the RJ45 terminator inserted. The button cell battery, supplied, must now be inserted into the battery holder on the underside of the master unit. This will keep the time and date if power fails and is required for correct time stamped count data. Insert the battery with the + side down. 4
- 5. After making all connections, the counter head can then be installed onto its base. To do this push the counter head up into the base and turn anticlockwise until the tabs engage into position and then turn clockwise a few degrees to lock. Power can then be applied and the counter will begin its warm up routine. The ‘Link Indicator’ on your network switch or hub should now illuminate. If it does not, ensure that the connection cable is the correct type - ‘straight through’ type and not ‘crossover’ type. Also, if connected to a managed switch ensure that it is not locked to 100Mpbs as this can prevent a connection from being established. Change to 10Mbps or enable auto negotiation. Configuration All counters require configuring before use. Connecting to the IP master counter allows configuring of all counters connected to that master via the CAN bus. 5
- 6. Mounting The vertical sensor can be attached with screws. Fasteners are not included. Mount the sensor within the distances as shown in the figures below. Make sure the sensor is mounted on a horizontal (straight) ceiling. This is to prevent false counts. Contact your dealer if your ceiling is higher than 4.8 meters, other heights/sensors are optional. Mounting height vertical sensor A: Mounting height (m) B: Detection area (m) C: 2nd sensor (m) Min. 2.2 Min. 1.98 Max. 1.79 Max. 4.8 Max. 4.52 Min. 4.33 Mounting height vertical sensor 5.00 4.50 Detection area (m) 4.00 3.50 3.00 2.50 2.00 1.50 2.00 2.25 2.50 2.75 3.00 3.25 3.50 3.75 4.00 4.25 Mounting height (m) 6
- 7. 1.2 Software Installation Internet Browser Setup Tool The setup software is actually served as web pages directly from the counter via IP, so no setup software installation is required when configuring through your Internet Browser. However, the main configuration web pages are served using the Silverlight add-on, which must be installed and enabled. When first connecting to a counter you will be given the download link for Silverlight to install but this will require a connection to the Internet. It is therefore advisable to install the add-on before attending site where an internet connection may not be available. The Silverlight installation files can also be downloaded directly from the below link: http://www.microsoft.com/silverlight Once installed the setup pages can be accessed and displayed in most common Internet browsers, see next section for list of compatible browsers. A serial version of the setup software is available if required, see above. Note that the serial version setup software is the only way to change/recover a forgotten IP address or password. Installed Version Setup Tool The installed version of the setup software uses the very latest software advances introduced by Microsoft in the .Net framework version 4.0. As such, there are a number of pre-requisites required before you can install this version of the setup tool. It is suggested that the IP version via your preferred Internet browser is a much simpler method for configuring the IP enabled models in the range, but for relay enabled counters this is the only way that they can be configured. Firstly, you must install the Microsoft .Net v4.0 update which should be included with the main setup software executable. If not you can download and install directly from the Microsoft website. It is strongly recommended that you utilise the Windows Update function to ensure that all the required patches and Windows bug fixes are installed correctly prior to installing the .Net 4.0 upgrade. Once .Net 4.0 is installed, you can then proceed with the main setup software installation. Just double click the installer to begin the process and follow the prompts. At this stage, the existence of .Net 4.0 will be checked and if not present, the installation will abort. 7
- 8. Compatible Internet Browsers for IP Configuration Any internet browser which works with the Silverlight v4.0 add-on can be used to configure the range of IP enabled counters. Browsers are adding support for Silverlight all the time, but at the time of writing, the known compatible browsers are listed below. Silverlight for Linux is also available, but this is known as Moonlight. Silverlight Compatible Computers: Minimal Requirements Mac OS 10.4.8+ (PowerPC) supports Silverlight v1.0 only, therefore can not be used to configure SpotONE counters. 8
- 9. 1.3 Connecting to the Counter Counter Configuration via Web Browser This is a simple case of running your preferred Internet browser software and connecting to the counter via its IP address (not available for relay units). Simply enter the IP address in the address bar of your Internet browser. By default, a new IP enabled counter will have an address of 192.168.0.10. Figure 1.3.1 Figure 1.3.3 Figure 1.3.2 When connected to the counter for the first time, you must enter a valid user name and password before you can access the counter settings: The default username is ‘admin’ and the default password is ‘installer’. The password can be changed later, as part of the counter setup, if required. This will prevent un-authorised changes to the counters configuration. Un-authorised changes to the count line and/or counting parameters may cause count inaccuracies. Remember that configuration through a web browser is only possible on IP enabled counters via IP connection. 9
- 10. Note: Your laptop must be on the same IP range as the counters IP address in order to communicate with it. This is set by the IP address and subnet mask parameters but is beyond the scope of this document. If you do not know how to do this, contact your network administrator or IT Support. Once you enter the correct user name and password, you will be greeted with the welcome screen: Figure 1.3.4 10
- 11. The welcome screen does not require the Microsoft Silverlight add-on to be installed; a link is provided in this page so that you can download Silverlight and proceed with the configuration of the counter – which does require Silverlight. Also, IP Configuration, Client Configuration, Connections, and Password pages do not require the Silverlight add-on. The current connection details (circled above) is described in section 2.3 Counter Configuration via Setup Tool Executable To run the software simply select from the Windows Start menu or double click the desktop icon, as appropriate. The main window will open and you will be given the choice to connect via IP or via serial connection. Simply select the COM port number or enter the IP address and click ‘Connect’ The main ground view window will then open. This is shown in the later sections 0 onwards. All features of the serial version setup tool are identical to the embedded software accessible via IP through an Internet Browser. The only differences are those shown in sections 3.2.1 and 7.13. Figure 1.3.5 Configuration of the IP enabled counter using the executable version of the setup tool can be via a serial lead connection, or via an IP connection. Configuration of relay enabled counters using the executable version of the setup tool is via serial lead connection only. The main options for configuring a counter using the setup tool executable are detailed in section 0. 11
- 12. 1.4 Settling Time An adequate settling time should be allowed after applying power to the counter to allow it to adjust to its installed environment. The two LEDs will flash alternately until the counter has stabilised and is fully operational. Typical settling time is between 45 seconds and 2 minutes, dependant on the temperature difference between where the counter has been stored and where it is installed. For example, if a counter is installed shortly after being moved from a cold place then it will take approx 2 minutes, but if the counter is merely rebooted then it will take much less time. If the counter is still settling when you connect to it, you will be able to configure all IP settings or relay settings, but configuration of the main counter functionality may be a little restricted until the settling time has elapsed and the counters field of view is accessible. 2 COUNTER CONFIGURATION 2.1 Introduction Counters require a number of different settings before they will function correctly and provide valid count data for use in a complete system offering. Firstly, if they are IP enabled devices, they must be configured to communicate on the IP network. This involves entering a unique network IP address and other relevant network details. Relay enabled units must be configured with the correct relay pulse settings so that they interface correctly with the relay accepting logging unit that they are connected to. All counters must also be configured so that they count correctly, and accurately. This is done by configuring the virtual counting lines within the counters field of view and choosing the correct count mode as well as other counting parameters. The way these settings are made is sometimes different depending on the connection method type (serial or IP) and method (web browser or executable software version) employed. See below for more details. The following sections detail configuration of the IP counter via an IP connection, and using an Internet Browser. For details of configuring the Relay enabled units, see section 7.18. 12
- 13. 2.2 The Web Browser Navigation Menu The navigation menu allows you to configure various settings within the counter: Selecting Home takes This is where you can you back to the Welcome modify the IP screen parameters Here you can configure a This shows if someone connection for the else if currently counter to connect to connected to, or after predetermined time configuring, the counter interval This starts the main This allows you to counter configuration. change the password This will require the from it’s default value Silverlight add-on. Figure 2.2.1 2.3 The Web Browser Current Connection This section is included for information only. Figure 2.3.1 The current connection stated is any other connection. E.g. if you have your logging application currently connected to the counter in order to retrieve count data, then it will display the IP address of the connected device here. Alternatively, another user may be accessing the line setup pages and their machines IP address will be displayed here (as in Figure 2.3.2). 13
- 14. Figure 2.3.2 The characters in the brackets state your connection type to the counter. Valid connection speeds can be 10M or 100M; valid connection types can be full duplex (F) or half duplex (H), with Auto negotiation (A), or manual negotiation (M). The connection shown above is therefore a 10M connection with full duplex, auto negotiation. This information is only available when connected via IP to the IP enabled counter using an Internet Browser. Note: The counter prefers to connect at 10M whenever possible. For this reason, if the counter is directly connected to a managed switch, it is advisable to not lock that switch to 100M speed. 14
- 15. 3 IP CONFIGURATION This section allows you to configure a different IP address, as well as subnet mask, gateway address and DNS settings. 3.1 The Default IP Settings The default settings are as follows: Figure 3.1.1 Note: The SpotONE uses port 4505 for data retrieval. Please make sure this port is set in the data retrieval software AND set correctly in the internal NAT forwarding in the router! 15
- 16. 3.2 Changing IP Settings If you change the IP address then you may have to reconnect to the counter. Ensure that your laptop is on the same IP range or you will not be able to connect successfully. If you change any of the IP settings, the web application will apply the settings and then will redirect to the new IP address. Figure 3.2.2 Figure 3.2.1 If you change the IP address of the counter, but the new IP address is not accessible to your laptop then the redirection will fail. Simply adjust your laptops IP address/subnet mask so that it is on the new range and refresh your browser to connect again. Note: If you change the IP address and then forget what it is, you will not be able to connect to the counter in order to change the IP address to something else! If this happens you must use the serial setup tool software to recover from this situation. See section 7.17 for details of this procedure. 3.2.1 Changing IP Settings via Setup Tool Executable To change the IP settings using the executable version of the Setup Tool, see section 7.13. 16
- 17. 4 CLIENT CONFIGURATION This section allows you to configure a host that the counter connects to. Port details are also required as well as the reconnect time in seconds. 4.1 Client Connection Configuration Figure 4.1.1 Once enabled, you can configure an IP Address or a Hostname. In this mode, an IP enabled counter will initiate a connection out rather than waiting for a connection to come in to it. This may be required if a Firewall prevents an external connection in to the counter, for example. Once a connection has been established out through the firewall, by the counter, Setviewer must retrieve count data. 17
- 18. 5 CONNECTIONS This section allows you to see if there are existing outgoing connections from an IP enabled counter, for example, if you cannot connect to it. If necessary you can force a connection to close, but this function should be used with care. Note you cannot force a ‘setup’ connection to close. 6 PASSWORD This section allows you to change the default password that you have to enter in order to access the IP counters settings via an Internet Browser connection. Without a valid username and password, you cannot enter the settings of the counter in this way, but you can still connect via the executable version if required. 6.1 Change Password Figure 6.1.1 18
- 19. On this configuration page, you can change the password to whatever you want. The default username and password are: Username: admin Password: installer Figure 6.1.2 Note: If you change the password and then forget what it is, you will not have access to connect to the counter in order to change it to something else. If this happens, you must use the serial setup tool software to recover from this situation. See section 7.17 for details of this procedure. 7 Setup Tool This is the main part of the overall configuration of the counter where the counting functionality is defined. Both the web browser accessed version, and executable version of the setup tool function identically. To enter this configuration phase select ‘Setup Tool’ from the Navigation menu in the web browser. Connecting using the setup tool executable will go straight to this section. 7.1 Connection When you select ‘Setup Tool’ from the Navigation menu, through your web browser, it must first download the Silverlight application from the counter. A download percentage animation will be displayed while this occurs (Figure 7.1.1). If you Figure 7.1.1 have a slow connection this may take a few seconds. 19
- 20. If configuring the counter using the setup tool executable version, this step is not performed. Once the Silverlight application has downloaded, it will run and establish a connection to the counter processor through the IP connection. There maybe a slight pause, but you should see the following animation whilst the connection is established, this just takes a few seconds (Figure 7.1.2). You may also see this again if the number of connected counters changes; e.g. if you are connected to an IP master in the setup software and you connect a node unit to it. The software will reconnect and re-run the wizard. Note if you power down the master the software may not Figure 7.1.2 reconnect automatically. In these cases, you must close your Internet browser and restart it. 7.2 Configuration Wizard Once a connection has been established, the main ‘Configuration Wizard’ will open and the counter network will be examined: Figure 7.1.3 20
- 21. The Configuration Wizard runs at various stages throughout the setup of the counters. Its primary purpose is to check the settings in each counter to ensure that they are not configured in a way that renders them useless or in-accurate. 7.3 Configuring Valid Comms IDs If the connected counter(s) have already been configured and the settings are valid then the configuration wizard will report the number of units found: On this first page of the wizard, you can also specify if the heights and lengths used during configuration are Metric (centimetres) or Imperial (inches). Figure 7.2.1 You are also given the option of restoring a previously saved set of counter configurations if required. Click Restore if you want to do this. See section 7.15.2 But, if the counters are new and have never been configured before, then the first thing that must be done is to set a valid ID in each of the connected counters: Figure 7.3.2 21
- 22. Note: You will not be allowed to proceed with the configuration wizard until a valid Comms ID is entered. Valid IDs are between 1 and 120. See Figure 7.3.3 below. All new units are shipped with the Comms ID of 127: You must enter a unique Comms ID of between 1 and 120 for each counter. The default unit of a new device is 127 which must be changed. Figure 7.3.4 Figure 7.3.3 Once you have entered a valid Comms ID, select the Next button. If you have more than one counter connected, then enter a unique Comms IDs for each unit. You will not be allowed to continue through the Configuration Wizard until all connected units have unique and valid Comms IDs (Figure 7.3.3). 22
- 23. Note the message ‘Find the device with LEDs flashing’ – this is so that you know which unit you are currently configuring. This is helpful when two or more units are connected in a wide opening network as units will not necessarily be displayed in the order that they were installed on the ceiling. The Comms ID is used by the counters when they pass target information to the master counter, section 7.6 for more details. The configured IDs will be checked to make sure they are valid and unique: Figure 7.3.6 Figure 7.3.5 23
- 24. …The number of connected counters will then be displayed… Figure 7.3.8 Figure 7.3.7 The IDs will then be saved into each unit. 7.4 Configuring Relay Master and Node Units If configuring relay units, an extra step may be required in order to ‘tell’ units whether they are to operate as masters or nodes. This step is necessary because all relay counters are one part number and they are set in software to be masters or nodes at time of installation. IP units do not require this step as the hardware is different for master and node units. This step is also only required when previously un-configured units are detected. When one counter is installed as a single unit over a doorway or entrance, it must be configured as a master unit. 24
- 25. All un-configured units will be shown in red in the Configuration Wizard. Figure 7.4.1 Move any un-configured units to the master or node sections of the Wizard, by simple left click drag and drop method. Then click ‘Next’ to continue. When more than one unit are installed together, as a wide opening network, only one of the units must be the master and the other unit(s) must all be configured as nodes. Remember that the master unit will output the count total for that entrance so you must ensure that the unit which is connected to your logging unit is always configured as the master. 25
- 26. Figure 7.4.3 Figure 7.4.2 There should only ever be one master configured on a wide opening network. All other units must be configured as nodes. Remember that this step is only required when configuring relay enabled units, and only needs to be performed once when first installed. Remember to look for the flashing LEDs on the units so that you know which one you are currently configuring. 26
- 27. 7.5 Configuring Valid X and Y Coordinates Once all units have correctly configured Comms IDs (and, if relay units, are also configured as master or node correctly, see previous section) they must all be positioned on the ground plan view. This allows the installer to configure multiple units positioned across a wide entrance or doorway so that each knows where it is in relation to its neighbouring counters. See section 7.6 for details of the ground plane view. All new and un-configured units will have X and Y ground plane coordinates of 0, 0. Figure 7.5.1 Two Counters Figure 7.5.2 One Counter If you are configuring a single unit then X and Y coordinates of 0, 0 is a valid installation and therefore you will be taken straight to the summary page of the wizard: But, if you have two or more units connected across a wide doorway or entrance then both units cannot be set to 0, 0 and therefore you will be required to change them. 27
- 28. The units will be considered too close together. This is because, on the ground plane view, both units will be set as being in exactly the same place (0, 0) which is not possible and therefore not allowed by the setup tool: Click ‘Next’ to configure the first unit. Now you must enter valid X and Y coordinates and the height of each counter (you cannot change the Comms IDs here): Figure 7.5.4 Figure 7.5.3 Usually you can leave the left most unit at position 0, 0 and reference the other unit(s) from this point, but you must remember that units will not necessarily be displayed in the order that they were installed on the ceiling, so pay attention to the ‘Find the device with LEDs flashing’ message. See section 7.7 for more details of how this should be configured. Click ‘Next’ to step through all the connected units and configure each one. 28
- 29. Remember: The units do not know their own position on the ceiling until you enter the X and Y coordinates. Because of this, it is essential that you look for the flashing LEDs on the units (as directed in the wizard) so that you know which one you are currently configuring. In order to correctly identify each target, as it disappears from one counters field of view and re-appears in another’s, you must specify X and Y coordinates that identify each counters physical location on the ceiling. See section 7.7 for more details. Once all the units have configured with valid X and Y coordinates, a summary page will be shown: Figure 7.5.6 Figure 7.5.5 Check the list to ensure everything looks correct, then click ‘Finish’ to exit the Configuration Wizard. 29
- 30. Whilst on this page you can highlight a unit and the corresponding unit on the ceiling will flash its LEDs. This is useful for ensuring the units have been configured the right way around. When you click the ‘Finish’ button, you will get your first look at the ground plane view, see next section. 7.6 The Main ‘Ground Plane’ View This is the ‘ground plane’ view: Figure 7.6.1 Here we have one counter. Note that the two count lines are positioned directly on top of each over by default. If the counter is warmed up and people are walking underneath it, you will see targets moving around the counter view: Figure 7.6.2 30
- 31. Remember: The counter requires a certain amount of settling time after power on to adjust to its installed environment. If the counter has not yet settled you will see an Hour Glass animation in place of the field of view. The Ground Plane in Detail Click here to This is the main This is the view These are the access the menu ground plane from the count line totals view counter Two count lines are provided. Here they are on top of each Note the direction arrows at the end of Click here to access the advanced menu Click here to access the zoom controls These targets denote Various Click here to This is the people in the field of view status access each version of the – a single person (yellow messages counters web SetupTool target) and a couple (blue will be settings firmware Figure 7.6.3 31
- 32. 7.7 More on ‘Ground Planes’ The ground plane view does not really come into play until the master has node units connected to it. This Counter One Counter Two would be the case when a single unit could not cover a Master Node wide entrance, for example. In this case, counters are positioned next to each other, with a certain amount of overlap between units, see Figure 7.7.1. During operation, the node units send details of every target seen to the master, and the master counter Figure 7.7.1 effectively handles the entire target tracking and counting process. So, if a person walks from one counter’s field of view to a neighbouring counters field of view, the master is able to oversee this and associate the new target with the old target. Tracking between counters is therefore seamless to the installer/user and works as if, simply, one counter with a large field of view, see Figure 7.7.2. Figure 7.7.2 For this to operate correctly the master needs to know where each counter is physically located in relation to its neighbouring counters. This is all done via the ground plane and the X and Y coordinates that you must enter. 2.5m 2.5m If we take an example of Master Node three counters installed, in a Unit Unit Node Unit straight line, each 2.5m from 3.5m the next (Figure 7.7.3), we would see the following Configuration Wizard: Figure 7.7.3 Notice that the three counters have been detected correctly. This means that the wiring between the units must be correct. As this is a new master and has previously never been connected to any node units, it recognises the two connected nodes and reports an ‘Invalid Node Configuration’. In 32
- 33. this case, this is perfectly normal and simply means that the two nodes must now be configured. Notice also that the two nodes have IDs of 127 which will need to be changed as part of the configuration process. This will probably apply to the master too (see next step). Click ‘Next’ to continue. Clicking through the Configuration Wizard, the master unit is seen first (in this example) indicated by its LEDs flashing. We must now enter the required details. Figure 7.7.4 Figure 7.7.5 Measure the height to the ceiling as accurately as possible – never estimate the height, use a tape measure – and enter it here. This unit is positioned on the left out of the three so we can leave the X and Y coordinates as 0 and reference the other units from here. Lastly enter a valid Comms ID. Convention is to label left to right starting with 1, but valid IDs can be anything from 1 to 120 -we will enter 1 here (as it’s the left unit). 33
- 34. During the Configuration Wizard process, the counters could be shown in any order, not necessarily the order in which they are positioned on the ceiling. Remember that part of the configuration is to tell each counter where it is! For this reason, it is very important that you look for the flashing LEDs so that you know which particular unit you are currently configuring. When all required information is entered, click ‘Next’. Now we must enter the details of the second counter. In this case, the second counter to be detected is actually positioned on the far right so we must configure as such (remember to check which counter has its LEDs flashing): Figure 7.7.6 All the heights are the same so we can enter this again. This time the X value must be set. All the units are 250cm from each other but on the ground plane, this makes this unit 500cm from the master. We will stick with convention and enter 3 as the Comms ID, as this is the third unit. Again, we click ‘Next’. 34
- 35. Now the last (middle, in this case) unit will be shown: The height is the same as the others. The X coordinate should be 250. As all the units are in line with each other, the Y coordinate stays as 0. And we will stick with convention and give this unit a Comms Figure 7.7.7 ID of 2. The last counter is now configured, so we click ‘Next’. Figure 7.7.8 Figure 7.7.9 35
- 36. The configuration wizard will do a final check to make sure that all the units’ settings make sense. This includes checks to make sure the units have not been configured too far apart or in the same place! Clicking ‘Next’ again will save all the settings and then a summary of settings will be shown. At this stage, you can click on each individual group of counter settings and the corresponding counter will flash the identification sequence, on the ceiling, using its LEDs. Click ‘Finish’ and the ground plane view will be shown… In order to see all the units it may be necessary to use the ‘Zoom’ control to zoom out, and reposition the view, see sections 7.8 and 7.9 for details. Figure 7.7.10 Now if someone walks across all three fields of view (left to right, or right to left) – and everything is installed and configured correctly – you will see a single target moving smoothly across the ground plane. If someone walks across the ground plane (left to right), and they are shown on the middle unit then the left unit then the right unit (for example), then this is a clear indication that the units have been configured with the wrong X and Y coordinates. 36
- 37. Remember that the ground plane coordinates are necessary so that you can tell the units where they are positioned on the ceiling. Convention is to set one of the counter positions as 0,0 and reference all other units from that point, as we did in the example above. If we do that then we get the ground plane view as shown below in Figure 7.7.11. 0,0 250,0 500,0 Figure 7.7.11 This is not the only way to configure the ground plane: As long as the relative positions are correct, the units X and Y values can be configured in any number of ways. Our example shown in Figure 7.7.11 is actually functionally identical to those shown below in Figure 7.7.13, Figure 7.7.12 and Figure 7.7.14. -250,0 0,0 250,0 -500,0 -250,0 0,0 Figure 7.7.13 Figure 7.7.12 250,400 500,400 750,400 Notice that all units are 250cm from each other (in this case). Figure 7.7.14 37
- 38. In some cases, it may be necessary to position units out of alignment with each other, for example if there are obstacles on the ceiling which prevent a straight line installation. This is acceptable as long as the amount of overlap between units is still maintained and the units are told their relative positions. In these cases, you must specify the relevant X and Y coordinates to include the offset amount, so that each unit knows where it has been installed. In the example shown below, the middle unit is installed 1m in front of the left and right units (Figure 7.7.15). 250,100 0,0 500,0 Figure 7.7.15 7.8 Moving Around the Ground Plane View If your counter(s) is/are not fully viewable then it is very easy to centralise the ground plane view and zoom in or out to get the view that you want (see section 7.9). Here the edge of the third counter is off the edge of the window: Figure 7.8.1 38
- 39. By clicking and dragging on the background, we can move the whole ground plane around to a better position: Click and drag Figure 7.8.2 7.9 Zoom Control The zoom control allows the installer to adjust the ground plane view by literally zooming in or out. This should be used in conjunction with dragging the ground plane in order to centralise all counters and view them all at once, as required. To activate the zoom control simply click the button marked ‘Zoom’ to make it appear and then click and drag the slider position – up to zoom in, down to zoom out – release when ok. You can leave the zoom control shown on screen or you can click the ‘Zoom’ button a second time to hide it. Figure 7.9.1 Figure 7.9.2 – Minimum Zoom 39
- 40. Figure 7.9.3 – Maximum Zoom 7.10 Positioning the Count Lines The count lines are positioned using the mouse in an intuitive drag and drop style. The different methods of positioning and shaping the lines are detailed below. Some manipulation of the count lines may take a few seconds whilst the settings are verified and saved. During these times, the ‘Countline Action’ status at the bottom of the screen will change and you may notice a slight pause where you are unable to make more changes: Figure 7.10.1 • Moving a Whole Line. If you move your mouse pointer onto the straight part of the line, you can then left click on the line and, with the mouse button still depressed, you can move the line around. Release the mouse button to drop the line in position. • Using Drag Points to Manipulate the Count Lines. The purple points on the ends of the lines are called drag points. If you move your mouse pointer on to a drag point, you can left click the drag point, and, with the mouse button still depressed, you can move the end of the line around. Release the mouse button to drop the drag point in position. • Creating Extra Drag Points The smaller points in the middle of the lines can be turned into drag points too, for when you want to shape the lines around an obstacle or in order to ensure people cross the lines no matter which direction they are travelling. To create an extra drag point simply click on the small point and it will turn into a drag point which can then be positioned as detailed above. 40
- 41. • Shaping The Count Lines Using Extra Drag Points By creating extra drag points along the length of a line, it is possible to deform and manipulate the lines for any installation requirement: You can have up to 16 drag points on each count line (one at both end, and fourteen in-between) creating fifteen linked line sections. Each count line will still function as one complete count line, but now, all sorts of configurations become possible. This means that the way people move into and out of a scene can be assessed and the count lines can be configured to accommodate the traffic movement to provide the highest count accuracy. • Deleting Drag Points To delete a drag point, just click the mouse pointer on the drag point that you want to delete whilst holding down the CTRL key on your keyboard. By careful and clever use of count line configurations, many counting options become possible. After every line movement, or modification, the changes are verified and saved. There maybe a small delay whilst this process takes place, especially if multiple drag points are created quickly. 7.11 SpotONE Dual View Counters The ‘SpotONE Dual View’ version of the IP enabled counter includes the ability to view the area directly below the counter as a video image alongside the field of view provided on the ground plane view. This is provided by a dedicated CCTV module incorporated into the counter base (it is not a plug in unit). Figure 7.11.1 A SpotONE Dual View equipped counter will be discovered and shown by the Configuration Wizard: Figure 7.11.2 41
- 42. All IP enabled units are configured exactly the same, with the only difference between a SpotONE Dual View unit and a standard SpotONE unit being shown on the ground plane view. Here, in the middle of the SpotONE Dual View’s field of view, is a camera symbol. Clicking on this camera symbol will reveal the live video view window: Figure 7.11.3 The SpotONE Dual View counter therefore enabled true remote configuration if required. All other settings should be implemented as described in the rest of this document. 7.12 The Main Menu The main menu is accessed by clicking the logo in the top left hand corner of the screen. Note that the image cycles through being the logo and the word ‘Menu’. Figure 7.12.1 42
- 43. Clicking on the button shows the available options: Figure 7.12.2 And clicking on each option gives you the sub menu options if available. Figure 7.12.3 For details of the Global functions, see section 7.14. Figure 7.12.4 For details of the Backup and Restore functions, see section 0. Figure 7.12.5 43
- 44. For details of the Lines functions, see section 7.16. Figure 7.12.6 Selecting the ‘Run Wizard’ function allows you to go through the Configuration Wizard again. This is handy if you have made a mistake in the configuration and you would like to start again. Figure 7.12.7 The ‘Permanent All’ function goes through every setting on every counter and ensures that it is written to that counter’s flash memory. It is recommended that this is done as a last step in the configuration process to ensure that any settings made are stored correctly. Failure to make Permanent any settings will mean that the settings will be lost if powered down or reset. See section 7.13 for details of additional menu options in the serial version of the Setup Tool software. 44
- 45. 7.13 The Main Menu in the Setup Tool Executable In the serial version, there is an additional entry on the main menu dependant on the type of counter connected. This additional option is not available in the embedded version. For IP connected units the additional option is IP Configuration (see section 7.17): Figure 7.13.1 For relay connected units the additional option is Relay Configuration (see section 7.18): Figure 7.13.2 7.14 Global Global settings are those that are common to all counters on a local CAN network. I.e. the site name and number would normally be identical on all units, and, if the battery backup is installed, so too would the date and time settings. 7.14.1 Global Settings Figure 7.13.1 The Global settings window allows the installer to change settings which are common to all counters which are connected together on the CAN network (not individual IP counters on the same IP network). I.e. anything that affects the whole ‘door’ installation. It is recommended that these settings are not left as default, regardless of whether they are actually made use of in your organisation. The reason for this is that some of these settings are used elsewhere, for example, the Site Name is used by default as the Backup Figure 7.14.2 45
- 46. file name (although this can be changed). These settings also may also make subsequent engineer visits easier when it comes to identifying the correct counters to work on. The IP enabled counters have a battery backed up time and date function, which is used for count log entry time stamping. These time stamped entries can then be retrieved at a later date. In order for the count logging functionality to work correctly, the correct time and date must be set here. Also each IP master must have its button cell battery inserted which will keep the time and date if power ever fails to the counters, Note that the date and time displayed in this window is based on your PCs timezone setting, but the time itself is always stored in UTC format Figure 7.14.3 within the counter. 7.14.2 Errors and Warnings Here you can see status messages and possible problems from each unit. Figure 7.14.5 If there are errors or warnings available, you can click on the counter’s ID to view the specific messages relating to that particular unit… Figure 7.14.4 46
- 47. Here we can see the errors from Counter ID 2. You can clear all errors using the ‘Reset All’ button. Also, with a counter highlighted, you can go straight to that counter’s individual settings by clicking the ‘Unit settings’ button. Note that you must set the internal clock of the counter in order to provide accurate time stamp logging of error details. Clicking the ‘Save’ button allows the error log to be saved to a file. This can then be emailed to us whenever Figure 7.14.6 technical support is required. These details may be required to provide technical support. Always have these error messages to hand when contacting us for technical support. 7.15 Backup/Restore/Compare It is advisable to save counter settings using the Back/Restore functionality. This is recommended for three reasons; firstly, it makes it very easy to know what settings have been made at a particular site if the settings are available on your laptop, in case of problems/questions etc. Secondly, it can speed up the installation process as identically installed counters can simply have the same previously saved settings put straight into them (only the IP settings will Figure 7.15.1 need changing in these cases), lastly, all support requests to us MUST be accompanied by the settings file. We cannot provide technical support without it. 47
- 48. Saved settings can also be compared against a counters current configuration and any differences will be high lighted, using the ‘Compare’ function. 7.15.1 Backup To save a counter’s settings simply select the Backup button. The backup procedure is extremely simple: Figure 7.15.2 First the settings are retrieved form the counters. Note that all counters on a Figure 7.15.3 wide opening network will be saved together in one file. Simply select the required folder, enter a valid filename, and then click Save. Figure 7.15.5 Figure 7.15.4 Backup files are always saved with an .irb extension. If you ever lose a file you can use the Windows file search function to search for this extension. 48
- 49. 7.15.2 Restore To restore settings back into a counter you can select the Restore icon. The Restore option is also available when you first connect to a counter and the Configuration Wizard is run. To restore settings all you need is the previously backed up file. Figure 7.15.6 The first thing that happens is that the existing counter(s) are checked. Click ‘Next’ and the Restore Units window will open: Figure 7.15.7 Figure 7.15.8 49
- 50. Click the Open File button to select the backup file to restore. Figure 7.15.9 When the file is Opened, the ‘Restore Units’ window will update to display the contents of the file on a separate ground plane view: Figure 7.15.10 Clicking ‘Next’ will then show the unit(s) on the ceiling as well: 50
- 51. Notice that the type of lens is displayed to the ground plane view from both the restore file and from the counter installed on the ceiling; 60° or 40°. Settings can only be restored to counters with the same lens types. Figure 7.15.11 Next, highlight the counter on the ceiling that needs the settings by left clicking it. 51
- 52. The unit on then ceiling will start flashing its LEDs - confirm it is the correct one (more relevant when there is more than one unit on the ceiling, see below) - then left click the corresponding counter from the file: Figure 7.15.12 Then click the ‘Restore’ button. Confirm the message to begin restoring the settings to the counter. Figure 7.15.13 Restoring of settings takes a few seconds: Figure 7.15.14 Figure 7.15.15 52
- 53. Once the settings have been restored, the Restore window can be closed and the Configuration Wizard will run through in order to check the new settings. Where a settings file contains more than one unit, care must be taken to restore the right settings to the right physical unit. Figure 7.15.16 Note: The counters coloured yellow correspond to the IP master in each network. Settings from a master can only be restored to another master. Note: When restoring counter settings, you must click on a unit on the ceiling ground plane to select it. When doing this on a wide opening network with multiple counters, it is extremely important that you also check which counter is flashing its LEDs to verify that it is the correct one as expected. 53
- 54. Extra care should be taken when using a settings file which contains more or less units than are mounted on the ceiling! Where a settings file contains settings from multiple counters on a wide opening network, you are only able to restore settings from the file to the same type of counter. For example, master settings can only be restored into a master unit; node settings can only be restored to a node counter. Also, any settings backed up from 60 degree units or 40 degree units, can only be restored back to counters with the same lens. Figure 7.15.17 Hint: You can use the backup and restore functions to quickly setup identically installed entrances. Hint: The restore function also allows you to pre-configure a unit from an existing network if ever it needs to be replaced out in the field. All you need is the original backup file. Restore each counter separately in the same way as required, until complete, then select ‘Close’ to exit the Restore Wizard; the configuration wizard will run again to verify the settings and save them into each unit. Note: The configuration wizard always runs after changes are made to the counter setup, including running after restoring settings. 54
- 55. 7.15.3 Compare The Compare option allows the current settings in a counter to be compared with a backup file and any differences are highlighted. Figure 7.15.18 First, the current settings are retrieved Figure 7.15.19 from the currently connected counter. Next select the saved backup file to compare against. Figure 7.15.20 The list of available units to compare will be listed down the left (only 1 unit in this case). Click the unit that you want to compare to see the differences, if any. Figure 7.15.21 55
- 56. If the settings in the counter are the same as those saved in the backup file, all entries will be green. Figure 7.15.22 But any differences will be highlighted in red. Here we can see that the count lines have been modified since the backup file was created. Figure 7.15.23 56
- 57. 7.16 Lines The lines menu option allows you to manipulate the two count lines in some way. You can reset the lines to remove any additional drag points (leaving just the two end points) and you can change the direction of each line. Both options are very handy when the lines have many drag points on them. Figure 7.16.1 7.16.1 Reset Lines This option clears all added drag points except the two ends. Figure 7.16.2 Figure 7.16.3 57
- 58. 7.16.2 Flip Lines This is an easy way of changing the direction of the line. Note that the arrows on the end of each line indicate the direction that it must be crossed in order to be recognised as a valid crossing. Note that not every line crossing is treated as a count increment dependant on the count mode and the track of the target. See section 7.19.2 for more details of count modes. Figure 7.16.4 Line 2 Flipped Line 1 Line 1 & 2 Flipped Flipped Figure 7.16.5 58
- 59. Another way of swapping the count direction is to grab a count line end point and rotate it 180° around the first the other point. Bu t this is not possible when there are lots of grab points in-between. Figure 7.16.6 Figure 7.16.7 7.17 IP Configuration This option is only available in the executable version of the setup tool when connected to an IP enabled unit via serial connection. Figure 7.17.1 By selecting this option, the IP settings will be displayed and you can make changes to the settings as required. This is also the only way to access and reset the password if changed and subsequently forgotten. Figure 7.17.2 59
- 60. Note: If you forget the IP address of any IP enabled counter then you will not be able to connect to it via an Internet Browser. Accessing the counter via serial connection, through the executable version of the setup tool, is the only way to retrieve the IP Address if this occurs. Note: If you forget the Internet browser setup password of any IP enabled counter then you will not be able to connect to it via an Internet Browser. Accessing the counter via serial connection, through the executable version of the setup tool, is the only way to retrieve the IP Address if this occurs. 7.18 Relay Configuration A very important configuration step with any relay enabled counter is to configure the relay outputs so that it is interfaced correctly with your logging equipment. Failure to configure the settings correctly can lead to incorrect or missing data. Figure 7.18.1 Various relay configurations are available which should mean that the SpotONE range of relay enabled counters can interface with every logging device on the market: Figure 7.18.2 60
- 61. The heartbeat section at the bottom of the Relay Configuration screen is intended to be used as an early fault warning system. When configured, the counter will continually output a relay pulse of specified width, after the specified period. This means that the logging equipment should expect an incoming heartbeat pulse and should not recognize this pulse as a count totals - the heartbeat pulse can be configured differently to standard count pulses if required in order to achieve this. The intended use of this pulse is so that, if ever the heartbeat pulse stopped being received by the logging equipment, it would ‘know’ straight away that there was a problem of some kind, and an alert could be raised to call an engineer or investigate further. Not all loggers support this functionality. If the heartbeat functionality is enabled, and the logger does not support it, then the logger will simply report an extra count or two all through the night, every 5mins (or whatever the ‘Period’ setting is set to). 7.19 Advanced Menu The advanced menu is accessed by clicking on the word ‘Advanced’ in the bottom left hand corner of the ground plane view, immediately above the ‘Zoom’ control button. Note, if the zoom slider control is shown it will obscure the Advanced button, therefore you will need to close the Zoom control to see it. The full set of advanced options will then be shown: Figure 7.19.1 Figure 7.19.2 61
- 62. Note: If the ‘Zoom’ slider control is shown it will obscure the ‘Advanced’ button, therefore you will need to close the Zoom control to see it. Once the Advanced menu is fully visible, you can still overlay the Zoom control slider on top if required. 7.19.1 Discrimination Sensitivity This is all to do with identifying individuals based on the thermal ‘signature’ seen by the counter. Sometimes a single person can be seen as more than one ‘object’, this is more likely to happen at very low heights where a person’s arms and legs may be seen as separate thermal objects. Other times people who walk very close together can be seen as only one object, this is more likely to happen at very high heights when the counter may be far enough away from the people to be not able to separate a two people walking side by side. By adjusting the ‘Discrimination Sensitivity’ slider, you can affect how the counter groups thermal objects together. If you raise the sensitivity then the counter is more likely to keep separate any group of targets so that they are counted separately. It is also more likely to treat a large target as a couple and count that one target as two people (see section 7.19.2 to turn off this feature manually). If you lower the sensitivity then the counter is more likely to treat a group of thermal objects as a single target. You cannot see the thermal ‘objects’ as seen by the counter. But, you can see the targets, which are how the counter has interpreted the objects. Adjusting the Discrimination sensitivity affects the interpretation behaviour. You should always perform extensive walk tests at every counter installation to ensure advanced settings such as these are configured correctly. 7.19.2 Large Target Couple Counting Depending on the Discrimination Sensitivity setting and what the counter is seeing, occasionally a single target will be counted as two. This is when the counter considers the target to be two people walking close together – a couple. The couple counting algorithm works by comparing the size of a target with an internal table of sizes that it would expect to see at the installed height. If the target is larger than expected, and the right shape, then it is deemed to be two people, and will then generate two count increments if it crosses a line instead of the usual one increment. 62
- 63. This all happens automatically and its effect can be altered by adjusting the Discrimination sensitivity as explained above (section 7.19.1), however, to completely disable this functionality you can switch it off here by removing the tick from the tick box. This would only normally be necessary if this feature was causing significant over counting. Incorrectly disabling this feature could lead to under counting in some circumstances. You should always perform extensive walk tests at every counter installation to ensure advanced settings such as these are configured correctly. 7.19.3 Count Mode There are two main counting modes, each with an extra option, which can be turned ON or OFF. This gives a total of four, distinct, count modes. In most cases, the default count mode will be the optimum mode, but in some cases, it may be necessary to change the count mode depending on; the installed environment and how people walk through it, your chosen count line settings, and what you want to count. Some of the count modes treat specific walking patterns differently and it is up to you to decide whether a certain trajectory through the field of view, and over the count line(s), should be counted or not, by selecting the appropriate count mode. Careful placement and setup of the count lines is required in conjunction with selecting the appropriate count mode. Some count line/count mode combinations will result in poor count accuracy in some cases, dependant on walking patterns and your own established, and accepted, count parameters, see below for more details. Immediate Vs Deferred With a simple straight line setup both ‘Immediate’ and ‘Deferred’ modes give the same output in the following example: X 10 10 Immediate Deferred X 63
- 64. Only the point at which the count is given is different, indicated by the ‘X’. In Immediate mode, the count is given at the same time that the person is seen to cross the count line, i.e. immediately. In Deferred mode, the count is given once the person is seen to leave the field of view. For other line arrangements, the mode can make more of a difference, especially when the walking behaviour of people is not as straight forward as a simple straight IN or straight OUT, see below. Note: A target is deemed to have left the field of view if it physically leaves the field of view by walking out, or if the counter looses the target, for example if that person stops and stands still for a long enough time. Each of the four different count modes (including mode options) will count a person who turns around in the field of view differently to the other three modes: Immediate Immediate Deferred Deferred (Anti-Dither ON) (Anti-Dither OFF) (U-Turns ON) (U-Turns OFF) 10 11 11 00 X X X XX Notice with the ‘Deferred’ mode selected, and ‘U-Turns OFF’, it is possible to ignore people who turn around within the field of view and leave the way they came from. This may be advantageous in some situations and with some customer requirements. It should be noted that this ‘walking U-Turn behaviour’ could create inconsistencies between IN and OUT counting totals if ‘Immediate’ mode with ‘Anti-Dither ON’ is selected. 64
- 65. In some cases, it may be advantageous to count every line crossing regardless of whether the counts were from the same person, perhaps in a security installation, for example. Here you would need to select ‘Immediate’ Mode with ‘Anti-Dither OFF’: Immediate Immediate Deferred Deferred (Anti-Dither ON) (Anti-Dither OFF) (U-Turns ON) (U-Turns OFF) X X 10 21 10 10 X X X X In most cases it is preferable, and advisable, to place the two count lines on top of each other, in the same position. By doing this, the effect of dithering behaviour, as shown above, will be reduced. This can also help where other issues are causing IN/OUT data inconsistencies, for example with cross traffic and people stopping in the field of view. Sometimes the count lines must be kept separate due to unusual behaviour of people at a specific location or due to initialisation requirements for either, or both, directions of traffic. When lines are separate, the count modes can have more of an effect on the counts, especially with regards to IN/OUT inconsistencies, see over. Consider the example to the right; here people can enter and leave through an automatic door, but count lines have been positioned away from the door to provide better initialisation in the IN direction. This means people already ‘in’ could be counted again if they walk through the counters field of view. This behaviour is treated differently in each count mode: 65
- 66. Immediate Immediate Deferred Deferred (Anti-Dither ON) (Anti-Dither OFF) (U-Turns ON) (U-Turns OFF) 00 10 10 00 X X In the above case, ‘Immediate’, with ‘Anti-Dither ON’, or ‘Deferred’, with ‘U-Turns OFF’, would be better options than either of the other two to prevent counting people who walk through the field of view without going OUT. Note: the counting modes rely on being able to consistently track a person through the field of view. If a person stops long enough to be lost from view then it is possible that all modes will count that person once they are seen again and cross a count line. 7.19.4 LEDs The counters have two built-in LEDs, which serve four purposes. Firstly, they can show the status of the counter, including error states. This is all handled automatically by the counter to assist with installation and fault finding/diagnosis. Both errors and a counter which is warming up are indicated depending on the flash sequence. The second use is to indicate which counter (from the network) you are currently configuring. This is used whenever you run the configuration wizard, or manually change the settings on a counter, to ensure that the intended counter is the one being configured. The third use of the LEDs is as a visual indication of a valid count increment. If someone crosses line 1, the green line, then the green LED will flash. If someone crosses line 2, the red line, then the red LED will flash. Depending on the count mode selected, the appropriate LED flash(es) could occur immediately the line is crossed, or later when the target leaves the field of view, see section 7.19.2 for more details of count modes. Lastly the LEDs will briefly flash together as a ‘heart beat’ function to show that the counters are working correctly (and are not dead or powered off) without the need to connect to the network. This occurs every 10 seconds. 66
- 67. Note: When a counter is first powered on, it must warm up, or settle, to the installed temperature. This will be indicated by alternate flashes of the LEDs. Note: The LEDs will flash to indicate a count increment; depending on the count mode selected this may or may not correspond with the line crossing. Note: The LEDs not only flash to indicate a line being crossed, but will also flash a set routine to indicate various error conditions. Note: The LEDs will also flash briefly to indicate correctly functionality. Both will flash together to indicate a ‘heart beat’ function. For more details of the various LED error flash sequences please see the separate document, IPU40185 IP Counter LED Error codes. 7.19.5 Deferred Initialisation This option is included to help with problems associated with a rapidly cooling or rapidly heating floor being detected as a target. This can happen when the floor is hot – perhaps heated by the sun – but then when a door opens, a cold wind rushes in and blows across the floor sufficiently for it to be cooled rapidly and be detected by the counter as a temperature change. A target is then seen to be initialised which then travels across the floor as the wind blows over it. Obviously, a target such as this could cross a count line and add to the count total giving count inaccuracies. To help avoid this you can switch on the ‘Deferred Initialisation’ option. With this switched on, an extra initialisation step is involved before a target is created. This extra step ensures that these ‘Ghost’ targets are not seen and therefore are not counted. This option should NOT be enabled unless this problem is observed, because, as the name suggests, the initialisation of a target occurs much later and this could mean that valid targets have crossed the count line before being recognised as such – meaning that they are not counted at all. This could lead to under counting if enabled when not required. 67
- 68. 7.19.6 Display Path Map Data The display map is intended to assist with both, the configuration of count lines, and the diagnosis of count inaccuracies caused by incorrect line placement. When enabled the main ground plane view will change to show a graduated coloured map superimposed over the top. This indicates the paths most walked through the counters field of view. The darker the colour the more people will have walked there. When first enabled, and depending on what the counter has ‘seen’ since power up, the display may look very confusing, especially if installers have been working on ladders directly underneath the Figure 7.19.3 counter. If this is the case, it may be a good idea to reset the path mapping and allow the path map to build up again. The path map will update once every 2 seconds to show recent movement during that time through the field of view. As people walk through the field of view, a blue trail will be displayed where those people have walked. Initialisatio n area Figure 7.19.4 The light blue rectangle area, highlighted above, shows where the target was initialised within the field of view. 68
- 69. As more people walk through the field of view, in both directions, more and more paths will be overlaid, and new areas of initialisation will be shown: Figure 7.19.5 Dependant on how busy the entrance is where the counter is located, over time, a definite route through the field of view will be built up, showing where people were initialised, and where the walked. From Figure 7.19.6, above, we can deduce that people walking in both directions are being initialised in plenty of time before reaching the counting lines. If any of the initialisation areas were very close, or on, the count lines, then it would probably be wise to move one, or both of the count lines, in order to improve initialisation and ensure no one could be missed. Figure 7.19.6 Remember that a person must be initialised before reaching the count line. If people are initialised after a count line then they will not be counted. 69
- 70. Over a period of time the path map will build up to show the most walked routes through the ground plane. Figure 7.19.7 Figure 7.19.8 Any less used routes will also gradually fade if not used repeatedly. The path mapping functionality is very useful, and extremely easy to use, for diagnosing count inaccuracies. This is because the vast majority of under count issues are caused by having the count line in wrong place, and the path mapping will show this, see below. In this example, a counter has been reported as under counting, and its current line configuration is shown in Figure 7.19.9. On first inspection everything looks ok… Figure 7.19.9 Figure 7.19.10 70
- 71. But when the path mapping is enabled (Figure 7.19.10) we can see that the two count lines to not fully cover the paths that people take through the field of view. Therefore, we must extend the count lines to improve count accuracy, as shown in Figure 7.19.11. Figure 7.19.11 7.20 Individual Counter Settings Each counter on a network can be individually selected in order to modify that unit’s settings, for example to change the X,Y coordinates or modify the height setting. In order to do this you must simply click on the cog symbol in the lower right corner of the particular counter’s field of view, the device settings window will then appear: Figure 7.20.1 Figure 7.20.2 71
- 72. Here you can change the mounting height, the X and Y coordinates, the Comms ID, etc: These highlighted settings MUST be configured for the counter to function correctly. Figure 7.20.3 Here you can see details about the counter, for example, serial number, type of unit (IP, node, relay, etc), lens version (60, 40, 20 etc), as well as the firmware loaded into that unit (processor firmware). Figure 7.20.4 Here you can see any errors or warning messages. A ‘set’ error means that the error has occurred, and a ‘Clear’ error means that the error has been fixed. Figure 7.20.5 When settings are made you must select the ‘Program’ button to send the new settings up to the counter and then ‘Permanent’ to ensure that they are not lost if power fails. Always remember to make any changes made ‘Permanent’ before you leave site as the counters will function ok until there is a power failure at which point units will return to their last Permanent settings. You can select the ‘Permanent All’ option from the main menu at any time. 72
- 73. Note that some settings are common to all units, such as the Site Name and Site ID for example. If you change these settings and then subsequently change the Global values for these settings, the global values will overwrite the individual settings, see section 7.14.1 for details of the Global settings. Important: You should always select the ‘Permanent’ option to store settings. 7.20.1 Default Selecting the ‘Default’ button from the Counter Settings dialog will reset the currently connected counter to factory defaults. This will result in the loss of any changes made to; the X and Y coordinates, the mounting height and all text descriptions, e.g., for Unit descriptor, Device ID, etc. The Comms ID will also be reset to 127 and therefore you will not be able to continue out of the Counter Settings dialog until a valid ID is entered. Note: if you reset a counter to default settings, you will not be able to leave the counter setting dialog until a valid Comms ID is entered. If part of a wide opening network of counters you will also not be able to exit from this dialog until valid X and Y coordinates are entered, because of this you cannot make the default settings permanent. Therefore if you reset a counter to defaults but then exit from the tool, firstly, the counter will be in a non functioning state whilst still powered up, but, secondly, when power is reset, the counter will revert to its settings prior the defaults operation. 7.21 Reset Counts Count totals are stored in the counter’s internal memory and will not be lost while the counter is still powered. If you want to reset the counts to zero, the ‘Reset Counts’ option should be used. This option does not affect the stored count log entries in flash memory. Figure 7.21.1 Remember: Counts will also be reset to zero if a unit is powered down. 73
- 74. 7.22 Disconnecting When a counter, or counter network, is configured, you can simply close your Internet Browser and disconnect from the network. However, before you do that you must select the ‘Permanent All’ option from the main menu to ensure that not all settings are lost if there is a power failure. Important: Any settings which are not made permanent will be lost following a power failure. Always select ‘Permanent All’ from the main menu before closing your Internet Browser to ensure that this cannot happen. 8 F.A.Q. Q. When I attempt to connect to a unit, my Internet Browser takes a long time before displaying the error ‘Connection to A.B.C.D Failed Connection timed out’, what is wrong? A. Make sure that power is on and you are connected to the network. If all is ok then this is probably because the IP address of the counter is not on the same range as the laptop you are using to connect to it. Contact your network administrator or IT department for assistance with changing your laptops network details. Q. When I connect to a unit, I get the Welcome page but cannot get a connection through the SetupTool. Why not? A. This could be caused by a number of reasons: a. Check to see if anyone else is already connected by selecting ‘Connections’ option from the Welcome screen. b. Wait 30 seconds and try again. c. Check that your laptop’s IP address is in Figure 7.7.22.1 the same range as that of the counters. Check with your network administrator or IT department for assistance with this. d. Delete your ‘Browsing History’ and ‘Temporary Internet Files’ including ‘Files and settings stored by add-ons’ and try again to confirm that you can still get the welcome screen. 74
- 75. Q. How do I refresh my cached web pages? A. To force a refresh simply hit the ‘Refresh’ option from within your browser; in Internet Explorer, you can simply hit the function key, ‘F5’. (‘Ctrl-F5’ will force a hard refresh if ‘F5’ does not do anything). Q. How do I delete my ‘Browsing History’? A. Sometimes this is required if caching problems mean that the new pages from the new firmware aren’t shown. To do this in Internet Explorer, select ‘Delete Browsing History’ from the ‘Tools’ menu. Ensure all of the tick boxes are selected and then click the ‘Delete’ button. In older versions of Internet Explorer, ensure that ‘Temporary Internet Files’ including ‘Files and settings stored by add-ons’ are selected. Q. When I successfully connect to a counter the egg timer displays for ages, why isn’t it working? A. This may be a stabilization issue. Typically, counters will settle in about 2 minutes, but, due to microscopic differences in the array material from one counter to another, some counters may take slightly longer to settle than others. This is more likely to occur if the counter is moved from one temperature environment to another, for example, from a cold car to a centrally heated building. However, once settled, the unit can be powered down and back up again, and subsequent settling will take considerably less time. Q. I’ve tried all the above connection problem suggestions but to no avail. I can connect to the Welcome page, but not the Setup Tool, when I try I get a prompt to download a file and it won’t work. Help!? A. This could be because you have a ‘download manager’ installed on your computer which is grabbing the Silverlight ‘asset’ download and trying to manage it for you. Most download managers will allow you to cancel the download and it will be passed back to your browser to manage, and all should work. Software such as ‘Internet Download Manager’ will still fail if you select the cancel option, but the subsequent dialog allows you to disable auto download for the current web site. Select this and then refresh your browser, and it should work correctly. 75
- 76. Q. My Internet Browser won’t connect at all but it was working previously, what’s changed? A. This could be a network issue or a problem with your Internet settings. Firstly, make sure that the counter is powered up and connected correctly. If you are connected directly to the counter, and not via a hub/switch, then you must use a crossover Ethernet cable. Next check your laptop IP settings – it needs to be on the same IP range as the counter. If you have changed the IP address of the counter, you may need to change your laptops IP address also so that it is on the new IP range. Lastly, you can clear your Internet browser history and settings which should fix most software problems. To do this in Internet Explorer; select ‘Tools’ from the menu, then ‘Delete Browsing History’, then ‘Delete All’, ensure the tick box is selected so that add-on settings are also deleted and click ‘Yes’. Q. When I connected to my IP master counter, the Configuration Wizard reported an ‘Invalid Node Configuration’, what does this mean? A. This can sometimes happen when the master detects a different number of nodes than expected. This can happen for a number of reasons: a. A new master which has never been configured will be expecting no nodes. If you connect any nodes to it, it will detect them and report the change. This is perfectly normal in this case. Simply confirm that the number of nodes is correct and continue with the setup process. b. If you change the number of units at an entrance, for example adding an extra unit for better coverage or removing a unit because the entrance has been made smaller, then the master will report the change. If the change is correct then simply continue with the setup process and make any required changes to lines etc. Figure 7.7.22.2 c. If the master loses communication with a node, then it will report it here. In this case, you should investigate further to find the cause of the problem. A damaged patch lead or intermittent power supply could cause a master to lose comms with a node. If the master recognises a new unit then it too should be investigated as it may indicate an intermittent communication, caused by a loose patch lead, for example. 76