
Empfohlen
Empfohlen
Weitere ähnliche Inhalte
Andere mochten auch
Andere mochten auch (20)
Ähnlich wie ProTrack CMMS Overview
Ähnlich wie ProTrack CMMS Overview (20)
Kürzlich hochgeladen
Kürzlich hochgeladen (20)
ProTrack CMMS Overview
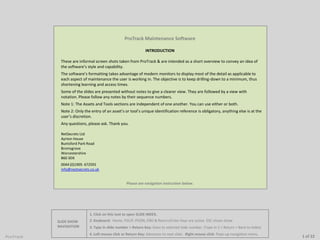
- 1. ProTrack Maintenance Software INTRODUCTION These are informal screen shots taken from ProTrack & are intended as a short overview to convey an idea of the software’s style and capability. The software’s formatting takes advantage of modern monitors to display most of the detail as applicable to each aspect of maintenance the user is working in. The objective is to keep drilling-down to a minimum, thus shortening learning and access times. Some of the slides are presented without notes to give a clearer view. They are followed by a view with notation. Please follow any notes by their sequence numbers. Note 1: The Assets and Tools sections are independent of one another. You can use either or both. Note 2: Only the entry of an asset’s or tool’s unique identification reference is obligatory, anything else is at the user’s discretion. Any questions, please ask. Thank you. NetSecrets Ltd Ayrton House Buntsford Park Road Bromsgrove Worcestershire B60 3DX 0044 (0)1905 672591 info@nestsecrets.co.uk Please see navigation instruction below. 1. Click on this text to open SLIDE INDEX. SLIDE SHOW NAVIGATION ProTrack 2. Keyboard: Home, PGUP, PGDN, END & Return/Enter keys are active. ESC closes show. 3. Type in slide number > Return Key: Goes to selected slide number. (Type in 2 > Return = Back to Index) 4. Left mouse click or Return Key: Advances to next slide. Right mouse click: Pops-up navigation menu. 1 of 22
- 2. ProTrack Maintenance Software SLIDE INDEX NOTE: Click on any slide content title below to open it. See note 1 below for return to index. Slide Content Slide Content 1. Introduction 12. PM Work Ticket 1/2 2. Index to slides 13. PM Work Ticket 2/2 3. Menu 14. Open Repairs Report 4. Status Overview & Shortcuts 1/2 15. PM Work Due Report 5. Status Overview & Shortcuts 2/2 16. Asset Register 6. Repair Report 1/4 17. Asset v Tool Entry Comparison 7. Repair Report 2/4 18. Parts Control 1/1 8. Repair Report 3/4 (On-site Work) 19. Parts Control 2/2 9. Repair Report 4/4 (Off-site Work) 20. Asset Usage Updating 10. PM Planning & Control 1/2 21. Uploading Your Set-up Data. 11. PM Planning & Control 2/2 22. Remote Fault Reporting NOTE: Click on any slide content title above to open it. See note 1 below for return to index. SLIDE SHOW NAVIGATION ProTrack 1. Click on this text to open SLIDE INDEX. 2. Keyboard: Home, PGUP, PGDN, END & Return/Enter keys are active. ESC closes show. 3. Type in slide number > Return Key: Goes to selected slide number. (Type in 2 > Return = Back to Index) 4. Left mouse click or Return Key: Advances to next slide. Right mouse click: Pops-up navigation menu. 2 of 22
- 3. Assets Menu (As seen at Administrator permission level): Selecting SHOW TOOLS takes the user to the equivalent Tools Menu if used. 1. DIRECT BARCODE ACCESS: With this window or the Status Overview open, a barcode reader may be used to read, e.g. an issued PM, or Repair Report Work Ticket number to take the user directly to the specific PM Reset or Repair Report window, for editing and/or closing administration work. 2. DATA MINING: When the operating software is completed, a series of reports will be created to allow the user to interrogate the database for reporting & analysis purposes. There will be some built-in flexibility, but early user development input would be welcome. 1. Click on this text to return to SLIDE INDEX. SLIDE SHOW NAVIGATION ProTrack 2. Keyboard: Home, PGUP, PGDN, END & Return/Enter keys are active. ESC closes show. 3. Type in slide number > Return Key: Goes to selected slide number. (Type in 2 > Return = Back to Index) 4. Left mouse click or Return Key: Advances to next slide. Right mouse click: Pops-up navigation menu. 3 of 22
- 4. Status Overview & Shortcuts 1/2: Gives overview of the maintenance status & provides shortcuts to critical forms. 1 1. Click on this text to return to SLIDE INDEX. SLIDE SHOW NAVIGATION ProTrack 2. Keyboard: Home, PGUP, PGDN, END & Return/Enter keys are active. ESC closes show. 3. Type in slide number > Return Key: Goes to selected slide number. (Type in 2 > Return = Back to Index) 4. Left mouse click or Return Key: Advances to next slide. Right mouse click: Pops-up navigation menu. 4 of 22
- 5. Status Overview & Shortcuts 2/2: Gives overview of the maintenance status & provides shortcuts to critical forms. 1. Shortcut: A double click in any of these boxes takes the user to the relevant form. 3. Shortcut: Enter data via a drop-down list & select GO TO to be taken to the relevant form. 4. Automatic Asset/Tool Usage Updating: For users with Real Time Management systems. (See Slide 20). 1 2. Shortcut: Shows number of flagged running logs, e.g. Shift change-over messages. 1. Click on this text to return to SLIDE INDEX. SLIDE SHOW NAVIGATION ProTrack 2. Keyboard: Home, PGUP, PGDN, END & Return/Enter keys are active. ESC closes show. 3. Type in slide number > Return Key: Goes to selected slide number. (Type in 2 > Return = Back to Index) 4. Left mouse click or Return Key: Advances to next slide. Right mouse click: Pops-up navigation menu. 5 of 22
- 6. Asset Repair Report 1/4: Used to record & control a repair. 1. Click on this text to return to SLIDE INDEX. SLIDE SHOW NAVIGATION ProTrack 2. Keyboard: Home, PGUP, PGDN, END & Return/Enter keys are active. ESC closes show. 3. Type in slide number > Return Key: Goes to selected slide number. (Type in 2 > Return = Back to Index) 4. Left mouse click or Return Key: Advances to next slide. Right mouse click: Pops-up navigation menu. 6 of 22
- 7. Asset Repair Report 2/4: Used to record & control a repair. 1. Self-generated, unique Work Ticket #. 2. Status Flags. 3. Check to flag a Health & Safety issue in the top ribbon. 4. Fault, Cause & Fix Report Boxes: All expandable on screen & searchable via the filter. User created pre-defined text may be entered to save time. 5. Tracer: Each user automatically leaves a tracer text. 7. Labour Cost Types/Rates: Endlessly customisable for internal labour and/or vendor costs, on or off-site repair work costs. List is expandable on screen via SUMMARY. 8. Parts Cost: Add as many parts as were needed for the repair. Stock level is automatically adjusted on closure. List is expandable & printable via the SUMMARY button. 6. Failure Mode: Track up to 28 user customisable Failure Modes. Also searchable. 9. Stamp Time: Times of opening & closing of a report on the system. 10. 3 stage filter: To isolate information specific to search criteria entered, e.g. All Open repairs, or all Down repairs, or all on Model: XYZ123, or all repairs that used Part # ABC123, or had Failure Mode X, etc. The 3 stages can be used in combination. 11. Linked to User Files: e.g. Asset drawings, manuals, documents, pictures, etc. 12. Send asset specific messages directly from the form. 1. Click on this text to return to SLIDE INDEX. SLIDE SHOW NAVIGATION ProTrack 2. Keyboard: Home, PGUP, PGDN, END & Return/Enter keys are active. ESC closes show. 3. Type in slide number > Return Key: Goes to selected slide number. (Type in 2 > Return = Back to Index) 4. Left mouse click or Return Key: Advances to next slide. Right mouse click: Pops-up navigation menu. 7 of 22
- 8. Asset Repair Report 3/4: Showing use of Labour & Service Costs pop-up to record, e.g. the cost of an on-site service engineer. 1. User Customisable Cost Types (On-Site): Used, e.g. for a visiting service engineer. Still in the Repair Report form, the Cost Types are user customisable and can have either ON-S or OFF-S assigned to them as appropriate and called up here when needed. Facilitates the entry of all aspects of a repair report within a single form. 2. On-site Repair Tracking: This form pops-up via the ON-S (On-site) button. It allows the recording and tracking of external labour used on-site. All labour Cost Types are catered for within the Labour & Service Costs subform. All are user customisable & as many as you need to cover the repair. See how Off-site repairs are covered in the next slide. 1. Click on this text to return to SLIDE INDEX. SLIDE SHOW NAVIGATION ProTrack 2. Keyboard: Home, PGUP, PGDN, END & Return/Enter keys are active. ESC closes show. 3. Type in slide number > Return Key: Goes to selected slide number. (Type in 2 > Return = Back to Index) 4. Left mouse click or Return Key: Advances to next slide. Right mouse click: Pops-up navigation menu. 8 of 22
- 9. Asset Repair Report 4/4: Shows use of Labour & Service Costs pop-up to record, e.g. the cost of off-site work carried out by a service provider. 1. User Customisable Cost Types (Off-site): Used for tracking equipment sent off site for service work. Still in the Repair Report form, the Cost Types are user customisable and can have either ON-S or OFF-S assigned to them as appropriate and called up here when needed. Facilitates the entry of all aspects of a repair report within a single form. 2. Off-site Repair Tracking: This form pops-up via the OFF-S (Off-site) button. It facilitates the recording and tracking of equipment sent off-site for repair, e.g. motors, gearboxes, heaters, ball-screws, PCBs, parts for reclamation, etc. This can be printed-out and sent with the goods to the service provider. 1. Click on this text to return to SLIDE INDEX. SLIDE SHOW NAVIGATION ProTrack 2. Keyboard: Home, PGUP, PGDN, END & Return/Enter keys are active. ESC closes show. 3. Type in slide number > Return Key: Goes to selected slide number. (Type in 2 > Return = Back to Index) 4. Left mouse click or Return Key: Advances to next slide. Right mouse click: Pops-up navigation menu. 9 of 22
- 10. PM Planning & Control 1/2: Set-up & control of the preventative maintenance plan for each asset. The plan overview flows from left to right from PM Titles to Resetting. 1. Click on this text to return to SLIDE INDEX. SLIDE SHOW NAVIGATION ProTrack Return to PM WORK DUE: Report: Slide 15. 2. Keyboard: Home, PGUP, PGDN, END & Return/Enter keys are active. ESC closes show. 3. Type in slide number > Return Key: Goes to selected slide number. (Type in 2 > Return = Back to Index) 4. Left mouse click or Return Key: Advances to next slide. Right mouse click: Pops-up navigation menu. 10 of 22
- 11. PM Planning & Control 2/2: Set-up & control of the preventative maintenance plan for each asset. The plan overview flows from left to right from PM Titles to Resetting. 1. Crossover info. The s. Asset’s repair status. 2. PM Plan: PM Schedules, Cost, Status & Reset, at a glance, reading from left to right. 3. Add PM Kit if required. 4. Opens the Task List/Work Ticket. (See next slide). 5. PM Reset selected here. 6. Opens pop-up history of PMs to aid refinement of cost estimates. 7. Opens pop-up showing max. of 10 PM schedules per asset. 10. Crossover info. from Repairs. 8. Used to stagger start up or synchronise with an existing plan. 9. Active for manual updates of Hours or Cycles based PMs, only. (See note 2c in Slide 17 ref. automatic update). 11. Opens the ‘Open Repairs: Report’. (See Slide 14). 12. 3 stage filter for searches. 1. Click on this text to return to SLIDE INDEX. SLIDE SHOW NAVIGATION ProTrack 2. Keyboard: Home, PGUP, PGDN, END & Return/Enter keys are active. ESC closes show. 3. Type in slide number > Return Key: Goes to selected slide number. (Type in 2 > Return = Back to Index) 4. Left mouse click or Return Key: Advances to next slide. Right mouse click: Pops-up navigation menu. 11 of 22
- 12. PM Work Ticket Creation 1/2: Used to set-up the Task List for each individual PM. Also allows its customisation and assignation to a particular technician &/or company. 1. Click on this text to return to SLIDE INDEX. SLIDE SHOW NAVIGATION ProTrack 2. Keyboard: Home, PGUP, PGDN, END & Return/Enter keys are active. ESC closes show. 3. Type in slide number > Return Key: Goes to selected slide number. (Type in 2 > Return = Back to Index) 4. Left mouse click or Return Key: Advances to next slide. Right mouse click: Pops-up navigation menu. 12 of 22
- 13. PM Work Ticket Creation 2/2: Used to set-up the Task List for each individual PM. Also allows its customisation and assignation to a particular technician &/or company. 1. Task List Creation: User entry of as many individual tasks as needed for each PM. 3. Insert Task Lists: From other PMs, e.g. as a starter template. 4. Used to customise the print-out for, e.g. QC manual use. 2. Pre-defined text: A feature across the software. Repetitive, user defined text may be inserted via a dropdown list into most of the text entry boxes. The text boxes are expandable via a double click. 5. External Files: Links to relevant user drawings, manuals, pictures, etc 6. Assign PM: To either External or Internal labour. 7. 2 x Print-out Options. 1. Click on this text to return to SLIDE INDEX. SLIDE SHOW NAVIGATION ProTrack 2. Keyboard: Home, PGUP, PGDN, END & Return/Enter keys are active. ESC closes show. 3. Type in slide number > Return Key: Goes to selected slide number. (Type in 2 > Return = Back to Index) 4. Left mouse click or Return Key: Advances to next slide. Right mouse click: Pops-up navigation menu. 13 of 22
- 14. Open Repairs Report: Overview of all asset repairs that remain open on the system. 1. Critical status flagging. 2. Interactive: Reports are interactive. VIEW takes user to the specific Repair Report. 3. Filter: Used to isolate data specific to repairs common to your filter settings. 1. Click on this text to return to SLIDE INDEX. SLIDE SHOW NAVIGATION ProTrack Return to PM PLANNING & CONTROL: Slide 11. 2. Keyboard: Home, PGUP, PGDN, END & Return/Enter keys are active. ESC closes show. 3. Type in slide number > Return Key: Goes to selected slide number. (Type in 2 > Return = Back to Index) 4. Left mouse click or Return Key: Advances to next slide. Right mouse click: Pops-up navigation menu. 14 of 22
- 15. PM Work Due Report: Displays all PMs that have become due in accordance with the user’s plan. 1. Colour Coded Flagging: Red = Overdue, Amber = Due. 2. Filter: Used to isolate PMs Due against PM Alert Status, &/or Asset Repair Status, &/or Client, &/or Location. 3. Interactive: Reports are interactive. VIEW takes user to the asset’s PM Planning & Control window. (See Slide 10). 1. Click on this text to return to SLIDE INDEX. SLIDE SHOW NAVIGATION ProTrack 2. Keyboard: Home, PGUP, PGDN, END & Return/Enter keys are active. ESC closes show. 3. Type in slide number > Return Key: Goes to selected slide number. (Type in 2 > Return = Back to Index) 4. Left mouse click or Return Key: Advances to next slide. Right mouse click: Pops-up navigation menu. 15 of 22
- 16. ASSET REGISTER: Asset entry form with Manufacturer, Location & Owner creation , ‘as you go’. 2. MANUFACTURERS: This form interchanges with the OWNERS form via user selection from the Asset Details form, left. 1. Asset entry form. Compared with Tools on next slide. 1. Click on this text to return to SLIDE INDEX. SLIDE SHOW NAVIGATION ProTrack 2. Keyboard: Home, PGUP, PGDN, END & Return/Enter keys are active. ESC closes show. 3. Type in slide number > Return Key: Goes to selected slide number. (Type in 2 > Return = Back to Index) 4. Left mouse click or Return Key: Advances to next slide. Right mouse click: Pops-up navigation menu. 16 of 22
- 17. ASSET v TOOL ENTRY COMPARISON ASSET REGISTER TOOL REGISTER 1a. ASSETS: Each asset entry is made here. Only the Asset ID is obligatory, the rest is optional. 2a. TOOLS: Shown here for comparison. This shows the main difference between the Tools & Assets entries. Otherwise the tracking of tools, in repairs and planned maintenance activities, is identical to assets with the exception of the elapsed units. See 2c. 1b. The Manufacturer entry form can be accessed from here & pops-up to the right of this form (see previous slide) to allow manufacturer creation ‘as you go’. Name can then be entered via the drop-down list below. 2b. TOOLS: The software was is written to cover Asset and mould tool maintenance. Users have also used the Tools section to track other complex tooling such as press-tools. 1c. Likewise with Locations. 1d. Likewise with Owners. Owners can be the client or a user company technician who has been assigned this asset, e.g. a specialist. 2c. Elapsed Units: Whereas Assets are tracked against Days or Hours run, Tools are tracked against Days or Cycles run. Update via RTM: If you run a Real Time Monitoring system, updates for Hours &/or Cycles run, can be effected automatically via a suitably formatted output file from your RTM system. 1e. User text entry. Anything the user wishes to make a note of, e.g. Asset warranty details, date of commissioning, etc. Double click expands the box. 1. Click on this text to return to SLIDE INDEX. SLIDE SHOW NAVIGATION ProTrack Return to PLANNING & & CONTROL: Slide 11 Return to PMPM PLANNINGCONTROL 2/2:Slide 11. 2. Keyboard: Home, PGUP, PGDN, END & Return/Enter keys are active. ESC closes show. 3. Type in slide number > Return Key: Goes to selected slide number. (Type in 2 > Return = Back to Index) 4. Left mouse click or Return Key: Advances to next slide. Right mouse click: Pops-up navigation menu. 17 of 22
- 18. Parts Control 1/2: Part Details, Stock Status, Parts Restocking entry & Part Suppliers in a single view. 1. Click on this text to return to SLIDE INDEX. SLIDE SHOW NAVIGATION ProTrack 2. Keyboard: Home, PGUP, PGDN, END & Return/Enter keys are active. ESC closes show. 3. Type in slide number > Return Key: Goes to selected slide number. (Type in 2 > Return = Back to Index) 4. Left mouse click or Return Key: Advances to next slide. Right mouse click: Pops-up navigation menu. 18 of 22
- 19. Parts Control 2/2: Part Details, Stock Status, Parts Restocking entry & Part Suppliers in a single view. 2. Restocking Option: If you use this form instead of just editing the Stock Level, you will be able to produce a report of purchases against each supplier. 3. Notes may be entered directly or via the pre-defined text list. Part specifications may be pasted in. Box may be expanded via a double-click. 1. Set threshold at which the part appears in the Stock Alert report. 4. Three stage filter isolates all parts in common with your filter settings. 5. NOTE: Though not rudimentary, this is not a full stock control system. Stock levels are controlled automatically and costs are accurate enough for maintenance management needs, but not for official accountancy ledgers, mainly because each stock item is valued at its latest price entry. 1. Click on this text to return to SLIDE INDEX. SLIDE SHOW NAVIGATION ProTrack 2. Keyboard: Home, PGUP, PGDN, END & Return/Enter keys are active. ESC closes show. 3. Type in slide number > Return Key: Goes to selected slide number. (Type in 2 > Return = Back to Index) 4. Left mouse click or Return Key: Advances to next slide. Right mouse click: Pops-up navigation menu. 19 of 22
- 20. Assets Auto Update window: Used to set up the auto updating of ProTrack from a Real Time Management System. NOTE: In Hours for Assets, or Cycles for Tools, the user may effect a manual update now or set up automatic updates via a suitably formatted file from a Real Time Monitoring system. 1. Click on this text to return to SLIDE INDEX. SLIDE SHOW NAVIGATION ProTrack Return to STATUS OVERVIEW & SHORTCUTS: Slide 5. Slide 5 2. Keyboard: Home, PGUP, PGDN, END & Return/Enter keys are active. ESC closes show. 3. Type in slide number > Return Key: Goes to selected slide number. (Type in 2 > Return = Back to Index) 4. Left mouse click or Return Key: Advances to next slide. Right mouse click: Pops-up navigation menu. 20 of 22
- 21. Data Uploading: Used to rapidly upload bulk data, e.g. your asset details into ProTrack’s Asset Register, or your spare part numbers & details into the Parts Control form. Saves time against entering data form by form, field by field. 1. Select the ProTrack target form. 2. Select ‘EDIT’. 3. Browse for & select your data source file. 4. Tell ProTrack your source file’s format. 5. View your data source file within ProTrack if you wish. 6. Match your source file column headers to the target form’s column headers. Headers need not be identical so long as you match the correct data to the target column. 7. Select , ‘DO UPLOAD’, to enter the data from source to target. 1. Click on this text to return to SLIDE INDEX SLIDE SHOW NAVIGATION ProTrack 2. Keyboard: Home, PGUP, PGDN, END & Return/Enter keys are active. ESC closes show. 3. Type in slide number > Return Key: Goes to selected slide number. (Type in 2 > Return = Back to Index) 4. Left mouse click or Return Key: Advances to next slide. Right mouse click: Pops-up navigation menu. 21 of 22
- 22. Remote Fault Reporting: Sits outside the main software. 1. Make a fault report with the minimum of training: Available only with network versions, this form sits outside the main software on client PCs. It guides people with no access to the main software and minimum training, to make a step-by-step fault report on an Asset or Tool. On submission, a Repair Report is created within the main software, which also appears in the Open Repairs: Report form. The Repair Report will display the reporter’s identity & indicate it as being a Remote Fault Report. 2. Step by Step: As each of the 4 report steps is completed, the reporter selects the TAB key to activate & highlight the next step. 3. Assets or Tools: Faults may be reported on Assets or Tools. 4. Status: The Asset’s or Tool’s status, (Down &/or Health & Safety issue), may be reported. 5. Pre-defined Text: User created predefined text may be pre-loaded and made available to the reporter, here. 6. Communication: If key personnel need to be informed, they may be contacted by Email or SMS messaging service directly from this window. 7. Submission is acknowledged. This is the final slide. (Return to slide 1) 1. Click on this text to return to SLIDE INDEX SLIDE SHOW NAVIGATION ProTrack 2. Keyboard: Home, PGUP, PGDN, END & Return/Enter keys are active. ESC closes show. 3. Type in slide number > Return Key: Goes to selected slide number. (Type in 2 > Return = Back to Index) 4. Left mouse click or Return Key: Advances to next slide. Right mouse click: Pops-up navigation menu. 22 of 22