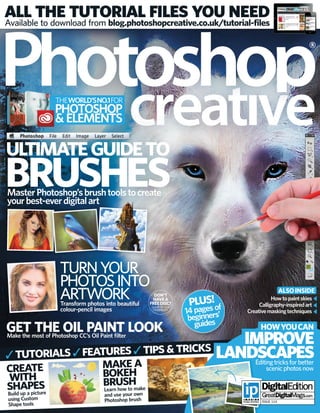
1. MAKE A
BOKEH
BRUSH
Learn how to make
and use your own
Photoshop brush
TUTORIALS FEATURES TIPS & TRICKS
IMPROVE
LANDSCAPESEditingtricksforbetter
scenicphotosnowCREATE
WITH
SHAPES
Build up a picture
using Custom
Shape tools
ALSOINSIDE
Howtopaintskies
Calligraphy-inspiredart
Creativemaskingtechniques
HOWYOUCANGET THE OIL PAINT LOOKMake the most of Photoshop CC’s Oil Paint filter
BRUSHESMasterPhotoshop’sbrushtoolstocreate
yourbest-everdigitalart
ULTIMATEGUIDETO
TURNYOUR
PHOTOSINTO
ARTWORKTransform photos into beautiful
colour-pencil images 14 pages of
beginners’
guides
PLUS!
DON’T
HAVEA
FREEDISC?
Speaktoyour
newsagent
ALL THE TUTORIAL FILES YOU NEED
Available to download from blog.photoshopcreative.co.uk/tutorial-files
ISSUE 114
3. April Madden Editor
april.madden@imagine-publishing.co.uk
NEXT ISSUE ON SALE 26 JUNE 2014!
A quick look around the internet will
reveal that Photoshop is one of the most
powerful digital painting tools out there.
You can create a huge range of effects
with Photoshop’s default brushes, not to
mention the plethora of free add-ons that
you can pick up. This issue, we show you how to get to
grips with Photoshop’s brushes and start producing
beautiful paintings of your own.
The great thing about brushes is that they’re not just
for painting projects. They can add light effects to
photos, help you to retouch portraits, and smooth over
the joins to create flawless composites. You don’t have
to be a painter to get the most from brushes, but after
reading our creative and inspirational guides you might
just want to give it a whirl! Happy Photoshopping!
01Use CC’s Oil Paint filter
Filter techniques to help you get the look of an oil
painting in Photoshop CC or CS6
02Illustrate with shapes
Discover how creating and manipulating simple
shapes can lead to incredible artwork
03Amazing photo effects
Create artwork that really stands out using
Photoshop’s Calculations and Transform tools
04Easy ways to paint skies
Grab your brushes and discover these fail-safe
techniques for painting perfect clouds
05Combine two scenes
Merge photos for a creative effect that combines
day and night in one imaginative image
Discover the latest artwork
from the Gallery on page 6
Join thousands of like-minded creatives
search for photoshopcreative
Tweet us your Photoshop questions
follow us @pshopcreative
Free step-by-step tutorials online
photoshopcreative.co.uk
3WorldMags.netWorldMags.net
WorldMags.net
6. Welcome to an inspirational round-up of great Photoshop
artwork created by none other than your fellow readers
READERS’IMAGES
IMAGE
OFTHE
MONTH
Adriana
Musetti
Dávila
www.photoshop
creative.co.uk/user/
Adriana_Musetti_Dávila
“Since my foundations as an
artist is in traditional art, I like to
use the same methods. On top
of a neutral layer, I proceeded to
do a background with quick and
spontaneous brushwork.”
Ray
Pennington
www.photoshop
creative.co.uk/user/
rayman4210
“I tried to show her in a setting of
heat and fire. I used textures for
her skin, hair and background.
Some colour and shadows were
also used. Always remember
if you can imagine it, you can
make it in Photoshop.”
Photoshop Creative6 WorldMags.netWorldMags.net
WorldMags.net
7. Alternatively,youcanemail:
pcr@imagine-publishing.co.uk
Create your own gallery online
photoshopcreative.co.uk
Upload your images to Facebook
PhotoshopCreative
Tweet us your creative artwork
@PshopCreative
Get in touch Sendusyourimagesnowforthechancetoappearinfuturegalleries
Welison
Alexandre
www.photoshop
creative.co.uk/
user/Welison_
Alexandre
“I used lighting effects with
blending modes, and added
leaves to give movement.”
LuisAraujo
www.photoshop
creative.co.uk/
user/luisaraujoo
“I have been
using Photoshop for around
four years. This image shows
a lunatic living by the train
tracks. He believes the train
will break at any time, so every
time a train approaches he
holds up a spanner and starts
screaming ‘The train is going
to break!’”
LisaDavies
www.photoshop
creative.co.uk/
user/Lisa90
“I used galaxy
pictures for the sky and
reflection, the Dodge tool
for the glow, and Curves and
Channel Mixer for colours.”
7WorldMags.netWorldMags.net
WorldMags.net
8. RogérioSousa
www.photoshopcreative.co.uk/
user/Rogerio32
“This work represents my
introduction to Photoshop.
My passion started when I went to install
Photoshop CS6 Extended and saw the cover
of the program, changing my life.”
CésarOliveira
www.photoshopcreative.co.uk/
user/blogcesaroliveira@gmail.c
“This manipulation was created
by merging four images. After
joining the images, I worked on highlights and
shadows, and finally unified colours by using
adjustment layers such as Photo Filter.”
PauloBraga
www.photoshop
creative.co.uk/user/
PauloBraga
“I replaced the sky in
this landscape with a brighter one,
and then placed in two castles,
adjusting Color Balance and
Saturation. After the landscape was
ready, I added in the woman figure
and a lens flare.”
“I started off with a snowy
background, using Hue/Saturation,
Levels and Curves adjustments.
I managed to edit the wolf by
applying adjustments to the
shadows and also applying a
Gaussian Blur to the background.”
Photoshop Creative8 WorldMags.netWorldMags.net
WorldMags.net
9. Alternatively,youcanemail:
pcr@imagine-publishing.co.uk
Create your own gallery online
PhotoshopCreative.co.uk
Upload your images to Facebook
PhotoshopCreative
Tweet us your creative artwork
@PshopCreative
Get in touch Sendusyourimagesnowforthechancetoappearinfuturegalleries
Anna
Przybylska
www.photoshop
creative.co.uk/
user/zwyklaania
“This is very simple
photomanipulation, as I used
only five elements and three
brushes for skin, hair and glitter.
I added the glow of the sun,
used a lens flare and an orange
Photo Filter adjustment.”
Achraf
Baznani
www.photoshop
creative.co.uk/user/
abphotographe
“I used a selection tool to cut
out the model and put it on
the camera. A third layer was
added for the lens reflection.”
“I adjusted the size of the coin
to make it sit in my hands. After
I adjusted the colours. I wanted
to provide an idea of how
money dominates our life.”
9Photoshop CreativeWorldMags.netWorldMags.net
WorldMags.net
13. WHAT
YOU’LL
LEARN
PAINTA
STILLLIFE
You can paint a
stunning still life with
textures and brushes
REALISTIC
EYES
Learn the techniques
behind painting an eye
from scratch
PAINTFROM
PHOTOS
Get started by mixing
brushes with filters to
transform a photo
PAINTA
SCENE
Create an entire scene
with brushes and
lighting techniques
PAINTVIVID
SUNSETS
Mix paint and colours
to form a beautiful
sunset from scratch
Grabbackgroundbrushes,skincolourswatches,startingsketchesandmoretotrythesepaintings.Headtoblog.photoshopcreative.co.uk/tutorial-filesto
download
FREERESOURCES!
Photoshop Creative 13WorldMags.netWorldMags.net
WorldMags.net
22. UseCC’sOil
Learnsomecreativedigitaltechniquestomimicthe
appearanceofanactualoilpainting
T
he artistic community frequently maligns
Photoshop’s filters, because it’s usually
obvious that an image was created by a
machine rather than a human. The problem is that
most filters cannot make the multitude of decisions
regarding things like brush weight and direction that a
human can. We make these decisions based on the
context of the image; filters just see a series of pixels
and treat them as such.
Yet Photoshop’s Oil Paint filter brings things a step
closer in that there is some edge-detection built into
the algorithm. This still doesn’t grant perfect hand-
painted results, but it’s a lot better than the previous
filter attempts. In this tutorial we will show you a
technique for using the Oil Paint filter to yield results
that are strikingly similar to a painting created by hand.
The basic technique of the method is to isolate
elements of the painting and use different
Oil Paint settings on each element,
thereby giving the illusion of the
hand-painted effect.
Photoshop Creative22 WorldMags.netWorldMags.net
WorldMags.net
23. Onthedisc
Unleash your inner
artist with the start files
Whatyou’lllearn
Createdigital artwith
theOilPaint filter,masks
andlayerstyles
Timetaken
1hour
PhotoshopCS6and
PhotoshopCC
Exper
Kirk
Nelson
“Asadigitalartistwitha
backgroundintraditionalart,
I’malwaysinterestedindigital
techniquesthatsimulatethe
traditionalones–especially
waysofgettingfiltersto
appearnot-so-filtery.
I’manAdobeCertified
Expert(ACE)andhave15
yearsindustryexperience
andworkasagraphicsartist
intheDCarea.Justyour
friendlyneighbourhood
graphicsgeek!”
Start
images
What do y
Sea
Photoshop Creative 23WorldMags.netWorldMags.net
WorldMags.net
29. Show your photo art to the world
Tweet us @PshopCreative
E
ver wanted to turn a photograph into a
sketch? It’s now easier than ever to do just
that, with help from of a plug-in by AKVIS
called Draw. In the following steps we’ll being
showing you how easy it is to use this plug-in
alongside some of Photoshop’s existing Filter
Gallery options, such as Oil Paint and Stamp, in
order to create an authentic hand-drawn sketch like
our example. You’ll be guided through how to use
various blend modes to soften details, and we’ll
also be covering the importance of merging layers
to create unique effects that you can tweak until
you have the perfect image for you. Applying tools
such as the Brush and Pen provide the control
required to adapt the image after the plug-in has
done the hard work.
If the tutorial has whetted your appetite, you
can download a free 10-day trial of AKVIS Draw
from http://akvis.com. If you like what you see,
you can purchase your own copy of the plug-in to
use over and over again. Prices start at $49 (that’s
around £30).
Turn
aphoto
intoasketchCreatefunsketchesthatlookhand-drawn
usingAKVIS’splug-inandPhotoshop
Attentiontodetail
03 Nowtoadjustthesliders.Eachone
controlsaspectsofthesketch,so
thefirstthingweneedtodoisadjustthe
LevelOfDetailsliderto88andtheHatching
Intensityto50.You’llbeabletoseehowthe
imagechangesasyouadjusteachslider.
Originalcolours
02 Whenthephotoloadsupitwill
previewasketchedimagewith
variousgenericsettings.Adjustthese
settingstoaddmoredetail.UnticktheThick
Strokesoption,andalsomakesurethat
OriginalColorsisdeselected.
Setthescene
01 Opentheimageandduplicatethe
Backgroundlayersothatyouhavean
originalimagetoworkfrom.Namethenew
layerSketchandwithitselected,goto
Filter>AKVIS>DrawandpressContinue.This
openstheimageupintheplug-in.
Essentials
Workswith
Whatyou’lllearn
HowtousetheAKVIS
Drawplug-intocreate
sketchesfromphotos
Timetaken
1hour
PhotoshopCSandabove,
andPhotoshopCC
Expert
Charli
Edwards
“Iloveusingmixedmediain
myartwork,andIfoundthe
AKVISplug-inisagreattool
toaddsketchedelementsto
mywork.I’maprofessional
digitaldesignerwhohasused
Photoshopforover10years.”
Start
image
Onthedisc
Start image for you to
practise on
Photoshop Creative 29WorldMags.netWorldMags.net
WorldMags.net
31. Show your photo art to the world
Tweet us @PshopCreative
Combine Photoshop with a plug-in for sketch perfection
Whatyou’lllearn Createdigitalphotoart
Cleartheblinds
13Thelinesleftbehindbytheoriginal
blindsdoesn’taddanything,sowe’re
goingtocleantheimageupbyremoving
them.HidetheSketchlayerandusethePen
tooltodrawaroundthegirlandsofa.Ctrl/
right-clickandselectMakeSelection.Set
FeatherRadiusto0.5pxandclickOK.
Finishingtouches
14 UsethePaintBuckettool(G)tofill
theareawithalilaccolour.Onthe
Sketchlayer,deselectthearea(Cmd/Ctrl+D),
andthenmergethemtogether.Double-click
themergedlayerandapplyaPattern
Overlay.SelecttheItalianCanvasoption
fromtheArtistsBrushesCanvaspresets.
SettoSoftLight,Opacityof48%andaScale
of55%toaddatexture.
Mergethelayers
12Tidyupthelayersbymergingthetop
three(pressCmd/Ctrl+Emultiple
times).Setthemergedlayerblendingmode
toScreenandiftherearetoomany
highlights,useanErasertoremove.Zoomin
andouttoseethefullcompositionand
ensurecoloursarebalanced.
SIMPLIFYINGFEATURES
Toomuchdetailinthefacemakesthesketch
looklikeaphoto.Takeyourtimetoremove
details,oraddflatcolourtoareas,togetthe
perfectbalance.
REMOVEBACKGROUNDS
Thebeautyofasketchisthatitcan
besimple.Don’tbeafraidtoremove
thedetailsyoudon’twant,likethe
blindsbehindthesofa.
SOFTCOLOURS
AKVISmakesimageslooklikepencilsketches.To
makethislookrealistic,usetheScreenblending
mode,asitkeepscolourslightandsoft.Toomuch
contrastmakestheimagemessy.
TIDYINGUP
Themodel’slegscaneasilybecomemessyifyou’re
tooliberalwiththesettingsinAKVISDraw.Forfewer
marks,builduplayersofdetailbyrunningtheimage
throughDrawandmaskingcertainareasout.
SOFTBRUSHES
Usingasoftbrushenablesyou
tosoftenedgesanderaseareas
ofunnecessarydetailwithout
causingbluntlines.Afterall,a
sketchissupposedtobealittle
rougharoundtheedges!
Photoshop Creative 31WorldMags.netWorldMags.net
WorldMags.net
32. B
okeh is the word given to the out of focus
part of a photograph. The shape and size of
the bokeh is determined by the type of lens
used and the aperture, but they are usually circles
of light. The wider the aperture is, the more
defined the bokeh effect is. Bokeh is more
noticeable in the highlights of a photo and at times
like Christmas it makes for a beautiful look.
But there is no need to worry about aperture
settings; we can simulate the bokeh effect from
inside of Photoshop. The bonus to this is we can
have the bokeh on a separate layer so we can
always come back and edit the effects at a later
date. This tutorial reveals how to make a bokeh
brush and apply it to a photograph. The techniques
used in this tutorial can be applied to many other
situations like retouching a portrait, compositing
and graphic artwork. Being able to create custom
brushes is a must-have for retouching work, so let’s
discover how to create a custom bokeh brush.
Master
bokeheffectsLearntocreateabokehbrushandapplyitontoaphoto
Onthedisc
Spot this start image in
the Tutorial Files
Startimage
Essentials
Workswith
Whatyou’lllearn
Create a brush to
simulate the bokeh effect
found in photography
Timetaken
1hours
PhotoshopCS3andabove
andPhotoshopCC
Exper
Stewart
Wood
“IlovebokehandIoften
overlayabokehtextureonto
myphotostogivethema
littlemoremagic.Ispecialise
inportraitsandcomposites
andbeingabletoaddextra
effectslikebokehtomy
imagesisgreat.Evenbetter
thanthatisbeingableto
createcustombrushes.”
Tutorial Masterbokeheffects
FREEON
YOURDISC!Takethistutorialfurtherbyblending
inoneofthestunning bokehtextures
courtesyofwww.123Creative.com.
Thereare24tochoosefrom,andthey
canbeusedtakethisbokehimageto
newheights.Justloadupyourfree
discandheadtotheResource
sectiontofindyourbokeh
goodies!
Photoshop Creative32 WorldMags.netWorldMags.net
WorldMags.net
37. Share your shapely creations
Search for photoshopcreative
P
hotoshop can be used for more than just
editing photos; it’s also an incredible tool for
creating your own art. This tutorial will guide
you through using custom shapes in creative ways
by layering, combining and using the Pen tool to
fine-tune your creations. All the shapes are initially
laid down as vectors, which allows for smooth,
clean lines and the ability to scale and transform
each shape multiple times without losing quality.
Vectors are calculated using points and
algorithms in real time by Photoshop and are
essentially re-drawn each time they’re adjusted. If
you have visions of your computer groaning under
the weight of hefty files, don’t worry; they’re much
easier on the hard drive than high-resolution
photos. Another advantage of using shapes and
layers is that you can copy and paste assets to use
them throughout your project, saving you a lot of
time going through similar actions.
After the shapes are all done, we’ll call upon
brushes to give the image more of an organic feel.
So, without further ado, let’s get started!
Illustrate
with
shapesUsecustomshapesandsimplebrushestocreateanewworld
Loadbrushes
03 SelecttheBrushtool(B)andclick
thedrop-downarrownexttothe
preview.Ontherightisasmallcog;clickit
andselectLoadBrushes.Locatethe
‘TheShoreways_brushes_paint.abr’withthe
suppliedfiles,anddouble-clicktoload.
Createyourgradient
02 Selectathree-colourgradientfrom
thepresetsandusethecolour-stop
indicatorstoselectanavy,creamandlight
blue.HitOK.CheckthestyleissettoLinear,
90degrees,Scale100%andhitOK.Createa
newlayerontopofthisone.
Preparethebackground
01 Createanewportraitcanvasusing
File>New.Thisimageisgoingtofade
fromdaytonight,sofrominsidethe
adjustmentlayericoninyourLayerspalette
addaGradientFilllayer.Double-clickthe
drop-downtoopentheGradientEditor.
Essentials
Workswith
Whatyou’lllearn
Controlandcombine
customshapes,thePen
tool and custom brushes
Timetaken
2hours
WorkswithPhotoshopCC
andabove
Exper
Jenni
Sanders
“ThePenisoneofmy
favouritetoolsinPhotoshop.
It’sverypowerfulandallows
foradjustmentswithout
losingquality.
Myfirstexperiencewith
photomanipulationwas
watchingmydadcloneout
holidaymakersfromour
familybeachphotographs.
FromthatmomentIwas
completelyhooked.”
Onthedisc
Start files to get you
started with shapes
Photoshop Creative 37WorldMags.netWorldMags.net
WorldMags.net
40. Our favourite places to go on
the web for free photos
I
f photography is not your first love then you’ll be pleased to know
that there are plenty of ways to get quality images free of charge.
Stock websites offer up a huge selection of user-generated and
professional images, that can help you out in times of need when
creating art in Photoshop. Here’s our pick of the best.
Thebestfre
stocksites
Join Simon Skellon on his journey
for premium free stock
TOP5
01FREERANGESTOCK
Likemanyfreestocksites,youhavetosignupfirsttobeableto
downloadfiles.CreatingaprofileatFreerangeStockwon’tcostyou
anything,andonceyou’reinyoucangetdownloadinginstantly.
BrowseimagesusingFreerange’sin-housecollection,ortheuser-
submittedimagesformorevariety.Imagesarefoundundereither
mostpopularornewest,andresolutionscanvary.
02 FREEDIGITALPHOTOS
Thiswebsiteworksslightlydifferentlytoothers,witharangeofimages
availableforfreeatasmallresolutionunderthestandardlicence.The
higherupyougointermsofresolutionthenthemoreexpensive
imagesbecome.ThismakesFreeDigitalPhotosidealforgrabbing
imagesaspartofawebsiteorsmallerprints.
03FREEIMAGES
ThiswasknownasStockXchnge,butwithanewnameandsimilar
features,freeimagesisstillagreatplacetogoforhigh-resolution
imageswithouthavingtopay.Thewebsitehasgrownovertheyearsto
provideahugeselectionofimages,fromcasualeverydayshotstothe
morehigh-end,studioimages.It’seasytonavigate;makingitabreeze
tofindtherequiredimage.
04STOCKVAULT
Stockvaultmakesiteasytofindwhatyouneed,withcategories
includingNature,GraphicsandPeople.Allimagesarehigh-resolution,
excellentqualityandfree,ofcourse!Commercialuseandfree
distributionisn’tpermittedhowever,buttherearelotsofoptionsfor
usingathomeforyourownPhotoshopcompositions.Agreatwebsite
andamust-haveforthebookmarks.
05MORGUEFILE
Puttingitsgruesomenameasideforonemoment,thisisahandy
placetogoforthatlast-minutefreeimage.Thequalityofimagescan
varyquitedrastically,sohuntingforthebest-lookingonescantake
yousometime!
01
02
FREERANGE
STOCK
Enjoyexcellent
freeimagesfrom
freerangestock.com.
FREEDIGITALPHOTOS
It’sonlysmallresolution
imagesthatarefreefrom
freedigitalphotos.netbut
theycanstillbeuseful.
Photoshop Creative40 WorldMags.netWorldMags.net
WorldMags.net
42. TutorialImprovealandscapephoto
W
hen shooting at a location,
you can attempt to avoid
capturing ugly objects simply
by repositioning yourself for a clearer
view of the main subject. However, this
may not be possible when shooting
wide-angled views of a landscape scene,
or if you are looking at a busy scene with
not much room for manoeuvre.
But it isn’t always obvious problems
like dustbins or street signs that can ruin
an image. In our example here, the start
file is pretty good but it can still be made
much better. The beautiful scene is
ruined by the man-made objects such as
the buildings, roads and bridge. In this
tutorial we’ll focus on what the Content-
Aware Fill options can do to remove any
unwanted objects. But even though this
works well, it may not get the job done
completely. We’ll also need to use the
Clone Stamp tool to clean up other parts
of the image for best results.
The skill that’s most required for doing
a project like this is patience. As good as
Photoshop is, it can take a lot of work to
get the job done. This is where you need
to figure out which tools are the right
choice for the task ahead. Once you’ve
mastered the skills shown in this tutorial,
you should be able to confidently tackle
other retouching challenges that are too
complex for the Clone Stamp tool to
handle alone.
Improvea
landscapephotoTakeyourlandscapephotographsfurtherbycombiningandretouching
imagesforanewandenhancedcomposition
Openanimage
01 GotoFile>Open(Cmd/Ctrl+O)andselect
‘Landscape.jpg’fromthesuppliedresources.
SelecttheRulertool(I)byclickingandholdingthe
Eyedroppertooltorevealthesub-menu.
Photoshop Creative42 WorldMags.netWorldMags.net
WorldMags.net
43. Share your landscape transformations
Search for photoshopcreative
Onthedisc
Practice with the
supplied start files
Essentials
Workswith
Whatyou’lllearn
Useretouchingtools
andContent-AwareFillto
removeobjects
Timetaken
2hours
PhotoshopCS3andabove
andPhotoshopCC
Content-AwareFill
03 Duplicatethelayer(Cmd/Ctrl+J)andselecttheLassotool(L).
Selectthetopemptyareacreatedwhenwestraightenedthe
image.GotoEdit>Fill(ShiftF5)andintheUseoptions,selectContent-
AwareFill.ThenclickOKtofillthearea.
Expert
Stewart
Wood
“Iwasthrustintotheworld
ofPhotoshopabouteight
yearsago.Backthenwehad
toremoveunwantedobjects
thehardway!Ispecialisein
portraitsandcomposites,
andbeingabletoremove
unwantedobjectsquicklyin
Photoshopisatimesaverfor
allphotographers.”
Start
images
Straightentheimage
02 WiththeRulertoolselected,dragoutalinealongthe
topofthebridge.SelectStraightenLayerfromthe
Optionsbaratthetoptostraightentheimage.Renamethis
layerBasebydouble-clickingonthelayer’sname.
Photoshop Creative 43WorldMags.netWorldMags.net
WorldMags.net
46. Tutorial Amazingphotoeffects
Start
images
M
aking an interesting out-of-bounds
effect is a really good way to learn
some of the basic tools in
Photoshop; and some of the more complex
ones, too. With some basic editing skills and
creative ideas, it’s possible to make an image
jump out of the screen in no time at all.
In this tutorial we’re going to show you
how to achieve this effect and much more.
You’ll create a complete surreal scenario,
flooding an art gallery using some powerful
tools and tricks with Photoshop’s Transform
options. The major technique here is the
Calculations command, which enables you to
combine two different channels to create
selections, or a complex mask, based upon
the colour values within the image. This is
the best way to create selections for most
images, especially the ones with lots of
contrast between the Foreground and
Background colours.
We’ll guide you through in stages to show
you all the techniques involved such as the
Dodge and Burn tools and the Levels
adjustment to create a compelling image. In
the free resources supplied, you’ll find all the
files and images you need to recreate this
image, so open them up and get started!
UsestockimageswiththeCalculationsandTransform
toolstocreateaneye-catchingcomposition
Onthedisc
The files you need to
follow along
Essentials
Workswith
Whatyou’lllearn
UseCalculationsand
Transformtoolsfortricky
selectionsandmasks
Timetaken
2hours
PhotoshopCSandabove,
andPhotoshopCC
Amazing
photo
effects
Exper
Daniel
Sinoca
“Learnanewphototrick
tocreateanout-of-bound
imageusingtheCalculations
command.Themethodsin
thistutorialwillhelpyoumake
complexselectionsquickly
andeasily.Istartedtoget
involvedinthedigitalworld
morethantenyearsagoand
enjoyworkingasafreelance
artist,creatingallkindsof
multimediaprojects.”
Photoshop Creative46 WorldMags.netWorldMags.net
WorldMags.net
51. RETOUCHING DIGITAL PAINTING EXPERT TRICKSGRAPHICAL ART
IMAGE IS EVERYTHINGwww.advancedphotoshop.co.uk
Available
from all good
newsagents and
supermarkets
PHOTOMANIPULATION
BUY YOUR ISSUE TODAY
Print edition available at www.imagineshop.co.uk
Digital edition available at www.greatdigitalmags.com
facebook.com/AdvancedPhotoshop twitter.com/advancedpshop
Available on the following platforms
ON SALE NOW
>3DvsPhotoshop >20ofthebestplug-ins>Createphotorealeffects
WorldMags.netWorldMags.net
WorldMags.net
53. Show us your best sky work
Search for photoshopcreative
D
igital painting is great fun but can be a real
time-sink, especially when you’re a
beginner. Who hasn’t been envious of the
seemingly effortless ease displayed in a speed-
painting video? Well the good news is that you can
speed up your painting process, simply by learning
some easy-to-use techniques.
One of the biggest obstacles to speedy painting
is the fear of the blank canvas. It throws up
questions like ‘where do I put my first brush
stroke?’ and ‘how do I render this material?’. This
tutorial is designed to show how, with a few simple
tweaks of Photoshop’s brushes, you can create
tools that will help you overcome these obstacles
by quickly filling large areas with marks that
suggest tone and structure. In particular, we will
show you how to quickly block in a large, cloudy
sky with one simple brush and refine it with
another that you will make yourself. The tutorial
demonstrates that making the correct initial marks
gives you a strong foundation on which to develop
your creativity, so let’s get started!
Easy
waysto
paintskieCloudscanbesimple…andcomplicated!Here’show
toquicklypaintthem
Startwiththumbnails
01Whetheryouwork100%digitallyorstartoffwithpencilandpaper,
itisalwaysadvisabletobeginwiththumbnailsketches.Sketchout
severalideasandlayoutsbeforeyoudoanyseriouswork.Itmaybe
tediousbutitcouldsaveyouhoursofwastedtime.
Attackthecastle
02 Dependingonyourskilllevel,eithersketchoutthe
castleusingreferencepicturesforinspirationor,asis
thecasehere,builda3Dmodel.Arrangebasiccylinders,cubes
andspheres,etc,andusethemasaguide.GoogleSketchupis
idealorevenPhotoshop,ifyouhavetheExtendedversion.
Onthedisc
Base image for you to
paint over
Essentials
Workswith
Whatyou’lllearn
Customiseexisting
brushesand create your
owntopaintskies
Timetaken
6hours
PhotoshopCSandabove,
PhotoshopCC
Expert
“Ihavebeencreatingdigital
illustrationsprofessionally
foralmosttenyears.Being
abletoexploitthealmost
infinitevariationoftoolsin
Photoshop,Painterandmany
otherprogramsensuresthat
workcanbecreatedquickly
andconfidently.”
Photoshop Creative
Start
images
Joe
Cummings
53WorldMags.netWorldMags.net
WorldMags.net
56. Tutorial Combinetwoscenes
Combine
twoscenesNotanearlybirdoranightowl?Combinedayandnightintoonescene
T
here are apparently two types of
people in the world: morning people
and night people. Confusingly, I don’t
seem to fall into either category – I am
strictly a lunchtime person. I’d like to think
that my body just naturally peaks at this time
but I fear that it’s probably the promise of
debauched lunchtime sustenance that
motivates me to frenzied action. With that in
mind, we are going to create a scene that is
set neither in the morning nor the night – but
both. One of the brilliant things about being a
Photoshop artist is that we have been given
the ability – nay, the power – to change lush
verdant fields into arid deserts and sun-burnt
days into moon-kissed nights and this is
where the inspiration for this image comes
from. Using Photoshop’s powerful Content-
Aware Fill command, some clever Blending
Options settings and some ingenuity, we are
going to create a mind-bending visual
oxymoron, fusing the night with the day, the
lush with the barren. And so, as lunchtime
approaches as I write this, let’s get started.
Photoshop Creative56 WorldMags.netWorldMags.net
WorldMags.net
60. To help celebrate the
latest cinema release of
Godzilla, we teamed up
with Warner Bros to
challenge you to create an
inspiring fan poster for the
film – and the results are
in! Hand-picked by the
director himself, and
chosen from over 190
entries, the winning poster
was created by Laurie
Greasley, and will be
displayed in cinemas
across the UK.
The film’s director,
Gareth Edwards, shares
with us what drew him to
this particular poster: “I
thought this was a very
clever idea that was
completely on-theme; the
idea of Godzilla being a
metaphor for radiation
and, like our film,
something that starts in
Japan and heads to
America.” He goes on to
add, “the use of natural
ocean currents to create
a fiery iconic image that
just looks really cool, feels
very complementary to
our movie.”
Head to www.tinyurl.
com/Godzilla-Posters to
see all the posters entered
into this competition.
LewisMoorhead
I decided to incorporate the claw with
the eye of Godzilla poking through.
I wanted it to be professional but
alternative to the movie shots. I hope
I did a good job.
POSTERCHALLENGE
WINNER
LaurieGreasley
In 2011, I was living in Japan only 60
miles south of Fukushima Daiichi
on the coast. After the disasters,
I would see these hair-raising
graphics of the radiation levels in
the Pacific Ocean. When I read that
Gareth Edwards was trying to keep
the Godzilla movie contemporary,
I remembered the graphics and
thought it would be a strong theme
to use in the poster.”
Photoshop Creative60
GODZILLAPOSTER
COMPETITION
Checkoutthewinnerof
ourGodzilla
competition,andalsoa
round-upofsomeof
thebestentries
WorldMags.netWorldMags.net
WorldMags.net
61. MarkButton
Godzilla is clearly the main attraction
here, but as with many large-scale
films, there should also be a focus on
the characters. So, I tried to wrap it all
up with a little hint at the destruction
around them. Illustrated with pencil
and coloured digitally.
GlenStone
I’ve always been a fan of sci-fi
movies and when his debut
feature Monsters came out,
Gareth Edwards really took the
genre and shook it up. So when I
heard he was making the Godzilla
remake I was over the moon.
JoshuaDunlop
I wanted to portray the film’s
saturated colour schemes which
match the wake of destruction that
Godzilla causes. I wanted the iconic
red flares from the paratroopers
to really pop against the sky and
balance well with the logo.
EdwardPirrie
The idea to have
Godzilla reflected in
the building beside him
came from a similar
scene in The Return
Of Godzilla from 1984,
which was the first
Godzilla movie I saw as
a child, and that imagery
haunted me for a long
while afterwards.
61Photoshop CreativeWorldMags.netWorldMags.net
WorldMags.net
63. Get more typographical inspiration
Search for photoshopcreative
I
n this tutorial we will learn how to incorporate
beautiful calligraphy into a piece of artwork.
Sometimes a poem or quotation can inspire or
add to the emotion of a piece, but it is not always
easy to insert such an element into a painting. For
this tutorial we will learn how to mix a portrait with
a famous poem and use Photoshop and Corel
Painter in addition to traditional lettering tools to
create a finished piece. You can use any kind of
lettering or script such as italics, modern block
writing, traditional Copperplate script, or even
textura or graffiti – as long as you feel the script
will match the feeling of the words and the art
piece. Treat this tutorial as an inspirational guide
rather than a step-by-step process; you can
incorporate your own art style along the way!
Stunning
lettering
techniquesLearnhowtoincorporatebeautifulcalligraphyor
penmanshipinyourartandbreathelifeintoportraits
Createthesketch
01 First,createasimplesketchofyourportrait.Don’tworryaboutthe
letteringfornow;justlayitoutasifitisgoingtobearegularart
piece.Keepanaturalbalancedcompositionandplentyofspaceforitto
breathe.Keepyourlinessmooth,lightandclean.
Chooseyourcolours
02 Forthisportrait,adarkbackgroundwasusedto
contrastwiththeletteringoverit.UsingtheGradient
toolandalargeacrylicbrush,colourtheskinneutralandapplya
softhalo. Justplayaroundandseewhatlooksgood.It’sokayto
changeyourmindlater!
Onthedisc
Line art and calligraphy
to experiment with
Essentials
Workswith
Whatyou’lllearn
Thefundamentalsof
dipnib letteringandhow
touseitinyourartwork
Timetaken
10-15hours
PhotoshopCSandabove
Expe
Schin
Loong
“Iamafantasyillustrator
andcalligrapher.Istarted
drawingasachildafterbeing
influencedbycartoonsand
comicsandenjoypainting
portraitsofwomen.Ikeepan
artwebsiteatschin-art.com
andblogaboutcalligraphyat
openinkstand.com.”
Photoshop Creative
Start
images
63WorldMags.netWorldMags.net
WorldMags.net
66. SPECIALOFFER
FORUSAREADERS!
Subscribetodayandpay
just$120for13issues*
Geteachissueforaslittleas
$9.23percopy
Overalla40%savingagainst
purchasingonthenewsstand**
Receivethemagbeforeit
appearsintheshops
Money-backguaranteeonany
unmailedissues
This is a US subscription offer. You will actually be charged £80 sterling for an annual subscription. This is equivalent to $120 at the time of writing, although the exchange rate may
vary. Your subscription will start from the next available issue and run for 13 issues. The five free issues refers to the USA newsstand price of $15.50 for 13 issues being $201.50,
compared with $120 for a subscription. This offer expires 30 September 2014. Imagine Publishing reserves the right to limit this type of offer to one per household.
Toordersecurelyonline,visitthewebsitebelow
andentertheoffercodeUSA
www.imaginesubs.co.uk/pcr
Toorderbyphone,callthenumberbelow
andquotetheoffercodeUSA
+44(0)1795592871
*Terms and conditions
SourceCode:USA**Based on 13-issue subscription price vs 13 issues of newsstand at $15.50 which is $201.50
Subscribetodayandget5issuesfree!
Exclusive
subscriberbenefits
Non-USreadersturn topage 88
WorldMags.netWorldMags.net
WorldMags.net
67. Start
image
TheeasywaytolearnAdobePhotoshop
SimpleguidesForPhotoshop&PhotoshopElement
The Healing Brush tool...................................................................68
Get creative with Blur filters.....................................................70
Use layers for monochrome.....................................................74
Blending techniques in Elements......................................76
Essential editing guides
Step-by-steps…
Blend in
ElementsMerge images with
layer masks and more
Photo fixes…
Discover how to create and work with
luminosity masks in our guide on p80
Creativecolour…
CREAT
SELECTIONS
Essential
toolguides
14pagesof
essential
guides
WorldMags.netWorldMags.net
WorldMags.net
68. Photoshop forBeginners
SMALLFIXES
Isolatedblemishescanbe
sortedwithoneclick.
GOLARGE
Forlargerareas,it’s
possibletobrush
overtheproblem
partstoerasethem.
Photoshop Creative68
The Healing Brush is a tool that’s been designed for
quickly retouching portraits and removing distracting
objects in photos. Put simply, it works by copying and
pasting pixels over each other, but unlike basic copying
and pasting, there’s a bit more to consider when it
comes to the Healing Brush.
Working with a subject such as a portrait, a balanced
blend of new pixels over old is needed for realistic
results. We want to avoid making people look overly
retouched, because even the smallest out-of-place pixel
will look strange to the human eye. Adapting the tool’s
settings is vital for producing the best results and here
we show you exactly how to do that. Follow the steps
opposite to find out more about using the tool and its
options, plus how to retouch small spots or large
blemishes without leaving any traces.
Before
The Healing Brush tool
Healskinandretouchfacesusingthispowerfultool
Toolfocus…
Onthedisc
Try out this technique on
the supplied image
WorldMags.netWorldMags.net
WorldMags.net
69. Set up your layers
01 Load up this image into Elements.
Start off by adding a new layer above
the Background by clicking on the first button
along the top of the Layers panel. Go to the
Window menu and load up the History panel.
This will come in handy later on.
Adjust and sample
03 To use the Healing Brush tool to
remove blemishes, locate an area to
remove. Adjust the size of the brush so it
covers the area completely (pressing the
square bracket keys will do this quickly). Hold
down Opt/Alt and click over an area close to
the blemish to sample the ‘good’ pixels.
Digital cover-up
04 Now ‘good’ pixels have been sampled, click over the blemish to
remove it. A few clicks might be required to completely cover up
larger blemishes. The tool will blend in pixels to create realistic skin.
Hold the Space Bar to pan across to another area of the face.
Larger areas
05 For larger blemishes, the Healing Brush tool enables you to
‘paint’ over the area. For this, tick Aligned in the Tool Options bar
for best results. Also, increase the size of the brush, and then Opt/
Alt-click to sample new pixels and carefully dab over the blemish.
Sample All Layers
02 Press J to go to the Healing Brush tool
(if the Spot Healing tool loads, press J
once more). In the Tool Options panel, tick
Sample All Layers so edits to the new layer are
made using pixels from the Background layer.
Photoshop Creative 69
Healawayblemishes Smoothoutskinandremovespotsforaclearcomplexion
AtaglanceThebest optionsfortheHealingBrush
MODES
Modecontainstheblending
optionsforchanginghowthe
newpixelsappear.SetMode
toMultiplytoadapttothe
lightnessofthenewarea.
CLONEPREVIEW
TheHealingBrush
showsyouapreview
oftheareabeing
retouched.This
previewcaneasilybe
hiddenbyuntickingthe
ShowOverlayboxin
CloneOverlay.
CLIPPED PREVIEW
Choosewhetheryouwant
toviewthewholeimage
whilehealingpixelsorjust
theareaselected.
ANGLE
IfRoundnessissettoless
than100%,changethe
Anglesettingtocreatemore
accuratehealingaroundthe
shapeofthesubject.
BETTERHEALING
It’sbesttosetHardness
to0%tocreateasoftedge
betweenthenewand
existingpixels.
SAMPLED ORPATTERN
SettoSampled,theHealing
Brushtoolpicksupthepixelson
thephoto.SettoPatternandyou
canapplytextureandpatterns.
WorldMags.netWorldMags.net
WorldMags.net
70. Photoshop forBeginners
Photoshop Creative70
Get creative with the
Blur filters in Photoshop
Learnthebasicskillsforaddingblureffects
toimagesinPhotoshopCS6,CCandElements
Photoshop offers you a whole host of built-in filters, ranging from
colourisation filters, artistic ones, sharpening effects and ways to
distort images, too. But in this tutorial we’ll be focusing all our
concentration on the Blur filters.
First introduced into the Photoshop family with CS6, the Iris, Field
and Tilt-Shift blur filters have been added to the collection of ways for
you to edit photos simply and effectively. It might seem strange to
say that you can improve the look of an image by making it appear
blurrier, but by doing this you can shift the focus onto the main
subject when it might not have been clear before.
The tilt-shift effect, also known as ‘miniaturise’, can make an aerial
view look like a toy town. The Field Blur filter is used to improve the
depth of field, and the Iris Blur gives you even more room to create
stylish blurred effects to transform a normal image.
Onthedisc
Test your skills with the
images supplied
Startimage
CreativeProject…
WorldMags.netWorldMags.net
WorldMags.net
71. Photoshop Creative 71
Find the filter
01 In Photoshop CS6 or CC go to
Filters>Blur>Field Blur. The easiest way
to keep track of how much blur you add is to
check the Preview box in the top bar. In
Elements, select Guided mode, and under
Photo Effects locate Depth of Field.
Place your pins
02 In CS or CC, click on the parts of the
image you wish to control. It’s best to
place a pin over the main subject so you can
lower the amount of blur. If working in
Elements, simply select with one pin, or use
the Quick Selection tool to choose which
parts to keep in focus.
Control the blur
03 To increase the amount of blur, click
on a pin and adjust the outer circle by
dragging it clockwise to boost the effect. Drag
it counter-clockwise to reduce the blur. Hit OK
to confirm. In Elements, use the Blur section
of the Guided effects to control the areas
outside of the selection.
TECHNIQUE 1
FieldBlur
effects
Improveanimage’sdepth of
field withthisBlurfilter
The Field Blur filter enables you to
select part of the image to make it
the focus area, and by dropping pins
onto the image you can control
what stays in focus and what
becomes blurry. In this example,
we’ll show you how to make the
castle the main focal point of the
image, rather than the rolling
f g d l d
DepthoffieldCreateacentralpointinyourimagebyblurringtherest
Startimage
FORCEAFOCALPOINT
Byblurringtheforeground
inanimage,youcanpusha
viewer’seyetowardsthepart
youwanttohighlight.
WorldMags.netWorldMags.net
WorldMags.net
72. Photoshop Creative72
PhotoshopforBeginne
TECHNIQUE 3
Workwiththe
IrisBlur
Blur thebackground to
createamoreengaging
portraitimage
The Iris Blur filter takes the Field
Blur to the next level. When placing
your pins you can control the shape
of the area that it affects, choosing
how much of the edge blur to
apply. This puts the focused point
exactly on the subject you want,
and looks great on a portrait image
– especially if there’s a busy
background behind the subject.
Improveportra UsetheIrisBlurtomakeyoursubjectstandout
Blur amount
04 Using the dial on the centre point, or
the sliders in the right-hand panel, you
can change the amount of blur that’s applied
to the unpinned areas. Make sure Preview is
turned on by checking the box along the top.
Get started
01 The Iris Blur filter comes under the
Filter menu and with the Blur set. This
is separated into its own section. There’s no
option like this in Elements but the Gaussian
Blur filter can work in similar ways.
More pins!
05 Chances are that you don’t want just
one area to be edited, so feel free to
drop in as many pins as you like onto your
image. Here we’ve highlighted the areas of the
model’s lower body and shoulders.
Place your first pin
02 As with the Field Blur, pins control the
blurred areas. Simply click on the part
of the image you wish to be in focus and a
large oval boundary will appear. This controls
the size and softness of the blurred parts.
Let it render
06 Once you’ve positioned your pins, and
the blurry areas are in the right
position, click OK in the top bar. This will apply
the filter’s effect to your image. Be patient; it
can take some time to render.
Adjust the blur
03 By clicking and dragging on different
points of the oval, you can change its
shape. The square dots on the outer circle
control the width; click and drag to alter. The
inner, larger dots control the edge blur.
EMPHASISETHE
SUBJECT
Byblurringthe
backgroundyoucan
bringyourportrait
subjecttothefore.
BACKGROUNDBEGONE
Eradicatebusybackgrounds
withtheIrisBlurfilterand
improveyourportraits.
WorldMags.netWorldMags.net
WorldMags.net
73. Photoshop Creative 73
TECHNIQUE 4
Tilt-shift focus
Easilyapplyafun,toy-town
effectto images
The Tilt-Shift filter creates a
surreal effect and gives you the
opportunity to make a picture
look as if it’s been photographed
as a miniature version of itself.
The angle of the image you use is
important with this, as too low
down and the effect won’t work.
But add some elevation and you
can create a great-looking image
that appears far more complex
than it actually is.
Startimage
Place your pin
01 Go Filter>Blur>Tilt-Shift. Click and drag
until the blur is over the focal point.
Add multiple pins to keep complete control
over the image. In Elements’ Guided mode, go
to Photo Effects>Tilt-Shift>Add Tilt-Shift.
Extend focus area
02 By clicking and dragging the solid inner
lines you can control how much of the
central area is in focus. In Elements, select
Modify Focus Area and draw a line over where
you want that point to be.
Control the blur
03 To control the blur, click and drag on
the dashed outer lines. This enables
you to add or take away the blur from the
edges. To increase the blur, use the slider in
the sidebar. In Elements, click Refine Effect.
Add more pins
04 You can keep adding pins and
repeating the process until the image
is blurred either side of the main area. Click
OK and your image will render, giving you a
great result. In Elements, click Done.
TOYWITH IMAGES
UsetheTilt-Shiftfiltertomake
ordinaryimagesinfinitely
moreinteresting.
Goingsmall Thecontrolsforyourminiaturemasterpiece
ROTATION
Ifyouwantyourtilt-
shifttobehorizontal
ordiagonal,clickand
dragonthisdotto
positionit.
TOPINOR
NOTTOPIN?
Usethepinto
selectthemain
focalpointof
yourimage–it
fallsbetweenthe
middleofthetwo
solidlines.
OUTERBLUR
Clickanddragthisline
todeterminewherethe
blurrededgescomeinto
theblurgradientonthe
innersection.
WorldMags.netWorldMags.net
WorldMags.net