SlideShare ist ein Scribd-Unternehmen logo
1 von 62
Downloaden Sie, um offline zu lesen
Beginner’s Guide to 
SolidWorks 2013 - 
Level I 
Parts, Assemblies, Drawings, Simulation Xpress 
Alejandro Reyes MSME, CSWP, CSWI 
® 
SDC Better Textbooks. Lower Prices. P U B L I C AT I O N S 
www.SDCpublications.com 
Schroff Development Corporation
Visit the following websites to learn more about this book:
Special Features: Sweep, Loft and Wrap 
There are times when we need to design components that cannot be 
easily defined by prismatic shapes. For those features that have ‘curvy’ shapes 
we can use Sweep and Loft features, which let us create almost any shape we 
can think of. These are the features that allow us to design consumer products, 
which, more often than not, have to be attractive and appealing, making 
extensive use of curvature and organic shapes. These products include things 
like your remote control, a computer mouse, coffee maker, perfume bottles, 
telephones, etc., and many times the success or failure of these products in the 
market can be directly attributed to their appearance. They have to look nice, 
‘feel’ right, and of course perform the task that they were intended for. Sweeps 
and Lofts are also prevalent in the automotive and aerospace industry where 
cosmetics, aerodynamics and ergonomics are a very important part of the design 
process. 
Sweeps and Lofts have many different options that allow us to create from 
simple to extremely complex shapes. In light of the vast number of variations and 
possibilities for these features, we’ll keep these examples as simple as possible 
without sacrificing functionality, to give the reader a good idea as to what can be 
achieved. 
Sweeps and Lofts are usually referred to as advanced features, since they 
usually require more work to complete, and a better understanding of the basic 
concepts of solid modeling. Having said that, these exercises will assume that 
any command that we have done more than a couple of times up to this point, 
like creating a sketch, are already understood and we’ll simply direct the reader 
to create it providing the necessary details. This way we’ll be able to focus more 
on the specifics of the new features. 
The Wrap feature is a special tool that helps us, as the name implies, to 
'wrap' a sketch around a surface, this tool helps us create features like cylindrical 
cams, slots on cylinders or cylindrical surfaces, etc. 
181
Beginner’s Guide to SolidWorks 2013 – Level I 
These are some examples of designs made with advanced modeling techniques. 
182
Special Features: Sweep, Loft and Wrap 
183 
Sweep: Cup and Springs
Beginner’s Guide to SolidWorks 2013 – Level I 
184 
Notes:
Special Features: Sweep, Loft and Wrap 
For this exercise we are going to make a simple cup. In this exercise we 
will learn a new option when creating features called “Thin Feature”, the Sweep 
feature, a new Fillet option to create a Full Round fillet, and a review of auxiliary 
Planes. The sequence of features to complete the cup is: 
Revolve Thin Create Path Sketch Auxiliary Plane Create Profile Path 
Make Sweep Cut inside of Cup Full Round Fillet Handle Fillet 
149. – For the first feature we will create a “Revolved Feature” using the “Thin 
Feature" option. This option makes a feature with a specified thickness based on 
the sketch that was drawn. Select the "Front Plane" and create the following 
sketch. Notice the sketch is an open profile with two lines, an arc and a 
centerline. (Remember to make the diameter dimension about the centerline.) 
185
Beginner’s Guide to SolidWorks 2013 – Level I 
150. - After selecting the “Revolve Boss/Base” command we get a warning 
telling us about the sketch being open. Since we want a thin revolved feature, 
select “No." 
In the “Revolve” options, “Thin Feature” is automatically activated. Since 
we want the dimensions we added to be external dimensions, select the 
“Reverse Direction” option to add the material inside the cup. Notice the preview 
showing the change. 
In the value box we typed 3/16; we can add a fraction and SolidWorks 
changes it to the corresponding decimal value when we click OK. We can 
also type simple mathematic expressions including addition, subtraction, 
multiplication and division in any value box where we can type a value. 
186
Special Features: Sweep, Loft and Wrap 
187 
Our thin feature now looks like this: 
151. - Select the "Front Plane" and create the following sketch using an ellipse. 
Be sure to add a “Vertical” geometric relation between the top and bottom points 
of the ellipse to fully define it. Select the “Ellipse” command from the Sketch tab 
in the CommandManager or from the menu “Tools, Sketch Entities, Ellipse." 
Add the corresponding dimensions to and from the ellipse points at the major and 
minor axes. To draw an ellipse select the center point, then one axis and then the 
other axis.
Beginner’s Guide to SolidWorks 2013 – Level I 
Exit the sketch and rename it "Path." We will not use the sketch for a feature just 
yet. 
152. - Create an Auxiliary plane parallel to the "Right Plane" using the center of 
the ellipse as a second reference as shown. 
188
Special Features: Sweep, Loft and Wrap 
153. - Select the plane just created and draw the next sketch. Start the center of 
the new ellipse at the top point of the previous sketch's ellipse. Add a coincident 
relation if needed. Remember to add a horizontal relation between the points of 
the major (or vertical to the minor) axis. Exit the sketch and rename it "Profile." 
189
Beginner’s Guide to SolidWorks 2013 – Level I 
154. - Select the “Sweep” icon from the Features tab in the CommandManager. 
The sweep is a feature that requires a minimum of two sketches: one for the 
sweep profile and one for the path (the path can also be a model edge or a user 
defined curve.) 
In the “Sweep” properties, select the "Profile" sketch in the Profile 
selection box, and the "Path" sketch in the Path selection box. Optionally, a 
Sweep can have guide curves and other parameters to better control the 
resulting shape, but in this case we are using only the basic options. Notice the 
preview and click OK when done. Hide the auxiliary planes using the 
“Hide/Show Items” toolbar if so desired. 
190
Special Features: Sweep, Loft and Wrap 
155. - Notice the sweep is also inside the cup. We will make a cut to fix this. 
Create a sketch in the flat face at the top of the cup. Select the inside edge at the 
top and use “Convert Entities” from the Sketch tab to convert the edge to sketch 
geometry. Select the “Extruded Cut” icon and use the “Up to next” end condition 
from the drop down selection list. This end condition will make the cut until it finds 
the next face (the bottom) effectively cutting the part of the handle inside the cup. 
191
Beginner’s Guide to SolidWorks 2013 – Level I 
156. - Now we need to round the flat face at the top lip of the cup. To do this we’ll 
add a “Fillet” using the “Full Round Fillet” option. The full round will essentially 
remove the flat face at the top, and replace it with a rounded face. 
Before After 
We need to select three faces, the middle face will be the one replaced by the 
fillet. After selecting the Fillet command, select the "Full round fillet" option to 
reveal the selection boxes. With the first selection box active select the outside 
face of the cup. Click inside the second selection box and select the top flat face 
192
Special Features: Sweep, Loft and Wrap 
of the cup. Click inside the third selection box and select the inside face of the 
cup. Note the selected faces are color coded. When done selecting faces click 
OK to apply the fillet. 
157. - To finish the cup add a fillet to round the edges where the handle meets 
the cup. Select the fillet command with the “Constant Radius” option, select the 
handle's surface and change the radius to 0.25″. Click OK to finish. 
193
Beginner’s Guide to SolidWorks 2013 – Level I 
158. - Save the finished part as ‘Cup’ and close. 
194
Special Features: Sweep, Loft and Wrap 
In the next exercise we are going to show how to make a simple and a 
variable pitch spring. In order to make these springs we’ll have to learn how to 
make simple and variable pitch helixes to be used for the sweep paths. The 
sequence of features to complete the springs are: 
Simple Spring 
Draw circle Make Helix Draw Spring Profile 
195 
Sketch Make Sweep 
Variable Pitch Spring 
Draw circle Make Variable Pitch 
Helix 
Make Spring Profile 
sketch 
Make Sweep and cut 
ends 
Simple Spring 
159. - In order to make a helix, first we need to make a sketch with a circle. This 
circle is going to be the helix’s diameter. Select the "Front Plane" and make a 
sketch using the following dimensions. Exit the sketch when done. 
If we don't exit the sketch, we'll only have the "Helix and Spiral" option from 
the "Curves" command.
Beginner’s Guide to SolidWorks 2013 – Level I 
160. - In the Features tab select “Curves, Helix and Spiral” from the drop-down 
icon or the menu "Insert, Curve, Helix/Spiral." If asked to select a plane or a 
sketch, select the sketch we just drew. 
If we select the “Helix and Spiral” command before exiting the sketch, 
SolidWorks will use that sketch automatically for the helix. 
161. - The helix can be defined by the combination of any two parameters 
between Pitch, Revolutions and Height and the third parameter is calculated. 
For this example we'll select “Pitch and Revolution” from the “Defined By:” 
drop down menu, and make the pitch 0.325" and 6 Revolutions. The “Start 
Angle” value defines where the helix will start. By making it 90 degrees it will start 
at the top, coincident with the "Front Plane." If we had made it 0 degrees, it would 
be coincident to the "Top Plane" instead (Feel free to explore the options.) 
Note the Helix command has options to make it Counterclockwise, 
Clockwise, Tapered, Variable pitch and reversed (going right or left.) 
196
Special Features: Sweep, Loft and Wrap 
162. - Once the Helix is done, we need to make the profile sketch for the sweep. 
Switch to a Right view, and add a new sketch in the "Right Plane" as shown. 
Make the circle close to the Helix… 
… and add a “Pierce” geometric relation between the center of the circle and the 
helix. This way the path will start at the beginning of the helix. This relation will 
make the sketch fully defined. Exit the Sketch when done. 
A pierce relation is done between an element that is oblique or 
perpendicular to the sketch plane and a point in the sketch. Think of it as a 
needle piercing through a fabric, the sketch being the fabric and the helix 
(or curve, model edge or another sketch) the needle. 
197
Beginner’s Guide to SolidWorks 2013 – Level I 
163. - Select the Sweep command and make the sweep using the last sketch as 
a profile and the Helix as a Path. Note the Preview and click OK to finish. 
Save as 'Spring' and close the finished spring. 
198
Special Features: Sweep, Loft and Wrap 
Variable Pitch Spring 
164. - For the variable pitch spring we’ll start the same way and make the 
following sketch in the "Front Plane." This will be the spring’s outside diameter. 
165. - While still editing the sketch, in the 
Features tab from the “Curves” drop down icon 
select “Helix and Spiral”; notice it is the only 
option available. 
166. - In the Helix/Spiral command select “Pitch and Revolution” from the 
“Defined by:” selection box and “Variable Pitch” in the Parameters box. After 
selecting it we are presented with a table, fill in the values for the helix with the 
following values. Click OK when finished to build the helix. 
199
Beginner’s Guide to SolidWorks 2013 – Level I 
167. - After the helix is complete add a new sketch in the "Right Plane." Draw the 
circle first, then add a center rectangle; trim and dimension as needed. 
168. - Add a centerline from the center to the top line (make sure it is coincident.) 
Select the endpoint of the centerline and the helix to add a “Pierce” geometric 
relation to make the sketch fully defined. Exit the sketch and optionally rename 
it 'Profile'. 
The Pierce relation allows us to fix the profile to the path, and can be 
added to any part of the sketch. We chose to add it to the top because the 
original sketch used for the helix is the spring's outside diameter. 
169. - Just as we did before, select the "Sweep" command, add the path and 
profile as shown and click OK to finish. 
200
Special Features: Sweep, Loft and Wrap 
170. – To finish we’ll make a cut to flatten the sides of the spring. Change to a 
Right view and add a sketch in the "Right Plane." Draw a single line starting at 
the midpoint of the indicated edge and long enough to cross the part. 
171. - Select the “Extruded Cut” command. When we 
use an open sketch to make a cut, the "Through All" 
option is automatically selected in both directions. One 
side of the model is cut using the open sketch. The 
small arrow located at the center of the line indicates 
which side of the model will be cut. Use the “Flip side 
to cut” option to cut the left side, otherwise the biggest 
part of the spring will be cut. Click OK to complete the 
cut extrude and repeat it in the right side. Note the 
cutting plane is shown in the graphics area. 
When using an open sketch to cut a model, we can only use a single open 
profile. If we have multiple open profiles we cannot make the Cut Extrude. 
201
Beginner’s Guide to SolidWorks 2013 – Level I 
Save the model as 'Variable Pitch Spring'. 
A note about threads 
Threads can be added to a model either by adding a Sweep or a Cut 
Sweep with a helix. When modeling screws and fasteners in general, it is 
almost always unnecessary to add a helical thread, as it consumes a 
large amount of computing resources, and a simple representation of it 
usually suffices (as a Revolved Boss/Cut or Cosmetic Thread.) It is strongly 
advised to only add threads when required by the model, as in the following 
bottle exercise. 
202
Special Features: Sweep, Loft and Wrap 
For the next exercise we'll build the following bottle using a sweep feature 
203 
with guide curves. 
This bottle will be made using a Sweep feature for the body and one for the 
thread. For the body we'll make a sweep with two guide curves, so we need to 
make four sketches: Path, Guide Curve 1, Guide Curve 2 and Profile, in that 
order. The reason to make the Profile last is that it has to pierce the Path and 
both Guide Curves. 
172. - Open a new part, set dimensions to inches and three decimal places. 
Make the Path sketch in the "Front Plane" and Exit the sketch. Rename 'Path'.
Beginner’s Guide to SolidWorks 2013 – Level I 
173. - Add a second sketch in the "Front Plane." Make arcs and lines tangent to 
each other, add centerlines as reference for tangency. All arcs are equal. Exit 
sketch and rename 'Guide 1'. 
204
Special Features: Sweep, Loft and Wrap 
174. - Add third sketch to "Right Plane." Add geometric relations to previous 
sketches to maintain design intent. Make the topmost endpoint Horizontal to the 
topmost endpoint of the 'Path' sketch. Arcs are equal size and tangent. Make the 
indicated endpoints horizontal. Only geometric relations and two dimensions are 
needed to fully define the sketch. Exit the sketch and rename it 'Guide 2'. 
Right view View between front and right 
175. - Add a new sketch in the "Top Plane", make an ellipse adding Pierce 
relations between the ellipse's major and minor axes to 'Guide 1' and 'Guide 2'. 
Exit the sketch and rename it 'Profile'. 
205
Beginner’s Guide to SolidWorks 2013 – Level I 
176. - Select the "Sweep Boss/Base" icon, add the 'Path' sketch to the "Path" 
selection box and the 'Profile' sketch to the "Profile" selection box. Expand the 
"Guide Curves" selection box and add both guides to it. Click OK to finish. 
177. - Add a sketch on the top face using "Convert Entities" and extrude it 1". 
178. - Add a 0.375" fillet at the bottom of the bottle. 
206
Special Features: Sweep, Loft and Wrap 
179. - Add a 0.050" shell to the part, remove the top face. 
180. - Add auxiliary plane parallel to the topmost face 0.125" below it. 
181. - Add sketch to this plane, use Convert Entities to project top outside edge, 
and make a Helix with a 0.2" pitch, 2.5 turns. Start helix at 0 degrees. 
182. - Add the following sketch to the "Right Plane." Be sure to add a Pierce 
relation between the profile and the helix. Exit the sketch and make a sweep 
feature using the helix and this profile. 
207
Beginner’s Guide to SolidWorks 2013 – Level I 
183. - Add a sketch on the front face of the thread, use Convert Entities and 
make a 120 degrees "Revolved Boss." Add a second one at the other end of the 
thread. 
184. - Add a 0.02" fillet to the thread as a finishing touch. You may need to select 
multiple edges. 
208
Special Features: Sweep, Loft and Wrap 
Engine Project Parts: Make the following components to build the engine. Save 
the parts using the name provided. High resolution images at mechanicad.com. 
209
Beginner’s Guide to SolidWorks 2013 – Level I 
210
Special Features: Sweep, Loft and Wrap 
211 
Loft: Bottle
Beginner’s Guide to SolidWorks 2013 – Level I 
212 
Notes:
Special Features: Sweep, Loft and Wrap 
The “Loft” feature requires at least two different sketches and/or faces 
and optionally guide curves to more accurately define the final shape. The Loft 
helps us design complex shapes with more control over the cross section. In this 
exercise we will make a bottle using a loft with four different sketches. 
185. - Make a new part and create three auxiliary planes using the “Plane” 
command. Select the "Top Plane" as reference, change the number of planes to 
3 and space them 2.5″ as shown. Click OK when done. 
186. - For clarity, select the "Top Plane" in the FeatureManager and show it 
using the “Hide/Show” command from the pop-up toolbar. 
213
Beginner’s Guide to SolidWorks 2013 – Level I 
187. - Switch to a Top view, select the "Top Plane" and draw the following sketch 
using the “Center Rectangle” and “Sketch Fillet” tools. Exit the sketch when 
finished. 
188. - Still in the Top view, select 'Plane1' from the FeatureManager and create 
the second sketch. Use the "Center Rectangle" tool; be sure to start in the origin 
and make the rectangle's corner coincident to the previous sketch's diagonal line. 
Add a 2.5″ width dimension and the 0.5″ “Sketch Fillet” to fully define the sketch. 
Exit the second sketch when finished. 
Turn off the display of Planes for clarity with “Hide/Show Items." 
214
Special Features: Sweep, Loft and Wrap 
189. - For the third profile, select 'Plane2' from the FeatureManager and create a 
new sketch in it. This sketch will be exactly the same as the first one. To help us 
save time and maintain design intent, we'll use the “Convert Entities” tool. In the 
“Convert Entities” selection box, select the entire Sketch1 from the fly-out 
FeatureManager and click OK to project Sketch1 in the new sketch. Exit the 
sketch when done. 
190. - For the last profile select 'Plane3' from the FeatureManager and create a 
new sketch. Draw a circle and add a geometric relation to make it “Tangent” to 
the horizontal line in 'Sketch2' as indicated. This relation will fully define the 
sketch. Exit the sketch to finish. 
215
Beginner’s Guide to SolidWorks 2013 – Level I 
191. - The finished sketches will look like this with the planes visible: 
192. - Now we are ready, select the “Loft” icon from the Features tab. The loft 
feature requires two or more sketches and/or faces, and we'll use the four 
sketches we just made to build the bottle. 
We will select the profiles starting with the first one we made at the bottom 
and finishing with the last one at the top. It is important to select the sketches 
thinking that where we select the profile will affect the result. Click in the graphics 
area near the indicated ‘dots’, this line indicates the segment of one profile that 
will be connected to the next profile. If we select points randomly in the profiles, 
the loft could twist and produce undesirable results. Optionally, guide curves can 
be added to improve control of the resulting shape. 
216
Special Features: Sweep, Loft and Wrap 
From the “Start/End Conditions” select “Normal to Profile” for both the 
“Start” and “End” constraint. Notice the difference in the preview after selecting 
the start and end constraints. Click OK when done. 
193. - Add a 0.25″ radius fillet in the bottom edge of the part to round it off. 
217
Beginner’s Guide to SolidWorks 2013 – Level I 
Finish the part using the “Shell” tool; select the top face to remove it and 
218 
make the wall thickness 0.125″. 
Image shown using Real View
Special Features: Sweep, Loft and Wrap 
194. - To view the inside of the part, select the “Section View” icon from the 
View toolbar or the menu "View, Display, Section View." We can define which 
plane to cut the model with, the depth of the cut and optionally add a second or 
third section. If we click OK in the Section View, the model will be displayed as 
cut, but this is only for display purposes; the part is not actually cut. To turn off 
the Section View, select its icon or menu command again. This section view can 
be used along with the “Measure” tool to inspect the part. 
We can also change the depth of the cut by dragging the arrow in the 
center of the plane. 
219
Beginner’s Guide to SolidWorks 2013 – Level I 
Save the part as 'Bottle Loft' and close. 
220
Special Features: Sweep, Loft and Wrap 
Wrap Feature 
The wrap feature helps us create cylindrical cams or slots on cylindrical surfaces 
using a sketch on a plane tangent to the surface we want to make the wrap on. 
195. – Make a new part, set units to inches with three decimal places; add this 
sketch on the "Front Plane" and extrude it 3". 
196. – The next step is to make the sketch that will be used for the wrap feature. 
For the sketch plane we have an option of using the "Top Plane", "Right Plane" 
or create a new plane tangent to the cylinder's surface. For this example we'll 
use the "Top Plane." Draw the following profile first making sure its symmetrical 
about the centerline. All arcs are equal radii. The top dimension's value is 
entered as 1.5 * pi, since we want the sketch to wrap completely around the 
cylinder. SolidWorks automatically calculates the resulting value for us. 
221
Beginner’s Guide to SolidWorks 2013 – Level I 
197. - The sketch so far is the centerline of the slot we are going to wrap around 
the cylinder. Select the "Offset" command and turn on the options: 
"Select chain" to automatically select the entire centerline picking only one 
segment, "Bi-directional" to make the offset in both directions, "Make base 
construction" to make the selected line (or chain) construction geometry, and 
after selecting a segment of the sketch the "Cap ends" option is enabled letting 
us choose to cap the offset with Arcs or Lines. Making the offset 0.25" will give us 
a 0.5" wide slot. Click OK to complete the offset and exit the sketch. Note how 
the original sketch is now construction geometry and we have a closed profile. 
Exit the sketch when done. 
198.- Select the "Wrap" feature from the Features tab or the menu "Insert, 
Features, Wrap." If the sketch is not pre-selected, select the sketch from the 
graphics area. 
222
Special Features: Sweep, Loft and Wrap 
199.- Select the "Deboss" option to make a cut in the part (The "Emboss" option 
will add material and the "Scribe" will split the face.) Select the cylinder's face in 
the "Face for Wrap Feature" selection box and make the depth 0.1". Click OK to 
finish. 
200. – Add a 0.02" fillet to finish the part. Save as 'Cylindrical Cam'. 
223
Beginner’s Guide to SolidWorks 2013 – Level I 
Exercises: Build the following parts using the knowledge acquired in this lesson. 
Try to use the most efficient method to complete the model. 
Eccentric Coupler 
Notes: 
• Both circles are centered horizontally (Right view.) 
• Add a guide sketch at the bottom. 
• Set the Start and End Conditions for the loft to “Normal to Profile." 
• Make as Thin Feature or Shell it after making the loft feature. 
HINTS: 
• Draw the 1" circle in the "Right Plane." 
• Make an Auxiliary Plane 6" parallel to 
224 
the "Right Plane." 
• Draw a 2" circle in the Auxiliary Plane. 
• Draw a sketch in the "Front Plane" to 
make the guide curve. 
• Select the guide sketch in the "Guide 
Curves" selection box. 
Guide sketch
Special Features: Sweep, Loft and Wrap 
Bent Coupler 
Build the following part using a Loft feature and a shell. The part is 0.15″ thick. 
Notes: 
• Add a guide sketch along the right side of the part. 
• Start and End Conditions “Normal to Profile." 
• Make as Thin Feature or Shell after loft. 
HINTS: 
• Make Rectangular sketch first. 
• Make Guide sketch. 
• Make Auxiliary Plane perpendicular 
225 
to Guide sketch at the end point. 
• Make circular sketch in Auxiliary 
Plane. 
• Make Loft using Guide sketch as a 
guide curve. 
• Shell the part. 
Guide sketch
Beginner’s Guide to SolidWorks 2013 – Level I 
Challenge Exercises: Build the 'Worm Gear' and 'Offset Shaft' complete gears 
using the knowledge learned so far with the information given. High resolution 
images at mechanicad.com. 
DISCLOSURE: The gears modeled in this tutorial are not intended for 
manufacturing, nor is this tutorial meant to be a gear design guide. Its sole 
purpose is to show the reader how to apply the learned knowledge using a 
simplified version of the gears. 
• Offset Shaft: Add the following sketch in the "Front Plane", Exit the 
sketch. Rename it "Gear Width." This is be the length of the full size helix. 
• Build two reference planes parallel to the "Right Plane", one at each end 
226 
of the "Gear Width" sketch.
Special Features: Sweep, Loft and Wrap 
• Add the gear's profile sketch in the "Front Plane", at the left side of the 
"Gear Width" sketch. Exit the sketch and rename "Thread Profile." 
• In the plane located at the left of the 
"Gear Width" sketch add a new sketch, 
use the "Convert Entities" drop down 
icon to select "Intersection Curve", this 
command will create sketch entities at the 
intersection of the selected surface(s) and 
the current sketch plane. This tool is 
particularly useful when we have irregular 
surfaces intersecting the sketch plane. In 
this case it works the same as "Convert Entities", but for oblique surfaces 
it’s the best option to obtain the intersection of the surface and the sketch 
plane. 
227
Beginner’s Guide to SolidWorks 2013 – Level I 
• Make the Helix 1" Height with a 0.25" Pitch 
• Make the first sweep using the profile and the first helix. 
• In the plane at the right of the "Gear Width" sketch add a sketch to start a 
second Helix using "Convert Entities", and make the helix activating the 
"Taper Helix" option with a 7deg taper. 
228
Special Features: Sweep, Loft and Wrap 
• Add a sketch at the flat end of the thread using "Convert Entities" to use 
as the profile for the tapered helix (Rear view), and make the sweep. 
229
Beginner’s Guide to SolidWorks 2013 – Level I 
• Repeat a helix and sweep for the other side 
• Add a 0.015" fillet to round the edges of the thread. Save as 'Offset Shaft 
230 
Gear' and close.
Special Features: Sweep, Loft and Wrap 
• Worm Gear: Create a parallel plane 0.95" above to the "Top Plane." 
• Add the following sketch in the plane made in the previous step, exit the 
231 
sketch and rename it "Path."
Beginner’s Guide to SolidWorks 2013 – Level I 
• Add a new auxiliary plane perpendicular to the "Path" sketch. Rename it 
232 
"Profile Plane." 
• Add this sketch in the "Right Plane" and make a revolved cut.
Special Features: Sweep, Loft and Wrap 
• In the "Profile Plane" add the following sketch. This will be the gear cut 
profile. Locate the sketch using the "Path" sketch at the indicated point. 
Exit the sketch and rename "Gear Profile" 
• Make a "Cut Sweep" using the "Path" and "Gear Profile" sketches (We 
can also make a "Cut Extrude" in this case works the same.) 
• Add a 0.015" fillet at the bottom of the sweep cut. 
233
Beginner’s Guide to SolidWorks 2013 – Level I 
• Make 22 copies of the Cut-Sweep and the previous fillet. Add a 0.015" 
fillet to the "Cut-Revolve1" and "Cut-Revolve3" to finish the gear. 
Save as 'Worm Gear Complete' and close. 
234
Special Features: Sweep, Loft and Wrap 
Engine Project Parts: Make the following components to build the engine. Save 
the parts using the name provided. High resolution images at mechanicad.com. 
Hint: Make a revolved boss with the option "Thin Feature." 
235
Beginner’s Guide to SolidWorks 2013 – Level I 
Final Parts for the Engine Project: The following components are the last 
required to complete the engine. Save the parts using the name provided. 
A help sheet with a sequence of features is located in the Appendix for each of 
the last three parts. High resolution images at mechanicad.com. 
Crank Case Top (2 Pages) 
236
Special Features: Sweep, Loft and Wrap 
237
Beginner’s Guide to SolidWorks 2013 – Level I 
238
Special Features: Sweep, Loft and Wrap 
239
Beginner’s Guide to SolidWorks 2013 – Level I 
Extra Credit: Visit our web site to download details for the Gas Grill project as 
well as the finished parts for this book, higher resolution images of the exercises 
and some extra topics not covered in the book. Build these components and after 
the Assembly lesson make the Gas Grill assembly. 
http://mechanicad.com/download.html 
240

Weitere ähnliche Inhalte

Was ist angesagt? (20)

Milling machine
Milling machineMilling machine
Milling machine
 
Project report on AutoCAD | ZENUS INFOTECH INDIA PVT. LTD.
Project report on AutoCAD | ZENUS INFOTECH INDIA PVT. LTD.Project report on AutoCAD | ZENUS INFOTECH INDIA PVT. LTD.
Project report on AutoCAD | ZENUS INFOTECH INDIA PVT. LTD.
 
Autocad ppt
Autocad pptAutocad ppt
Autocad ppt
 
Solidworks
SolidworksSolidworks
Solidworks
 
Basics of autocad
Basics of autocadBasics of autocad
Basics of autocad
 
detailing for steel construction
detailing for steel constructiondetailing for steel construction
detailing for steel construction
 
Autocade 2D complete course
Autocade 2D complete course Autocade 2D complete course
Autocade 2D complete course
 
AUTO-CAD Mechanical project PPT by Bittu kumar
AUTO-CAD Mechanical project PPT by Bittu kumarAUTO-CAD Mechanical project PPT by Bittu kumar
AUTO-CAD Mechanical project PPT by Bittu kumar
 
Tipos De Uniones
Tipos De UnionesTipos De Uniones
Tipos De Uniones
 
Dibujo tecnico
Dibujo tecnicoDibujo tecnico
Dibujo tecnico
 
Jig dan fixture
Jig dan fixtureJig dan fixture
Jig dan fixture
 
Catia Software Summer training
Catia Software Summer training Catia Software Summer training
Catia Software Summer training
 
PRESENTACIÓN DE AUTOCAD.pptx
PRESENTACIÓN DE AUTOCAD.pptxPRESENTACIÓN DE AUTOCAD.pptx
PRESENTACIÓN DE AUTOCAD.pptx
 
Autocad en 3 d
Autocad en 3 dAutocad en 3 d
Autocad en 3 d
 
NX_CAD
NX_CADNX_CAD
NX_CAD
 
Auto-CAD
Auto-CADAuto-CAD
Auto-CAD
 
SolidWorks Design Automation Using the SolidWorks API, Microsoft Excel and VBA
SolidWorks Design Automation Using the SolidWorks API, Microsoft Excel and VBASolidWorks Design Automation Using the SolidWorks API, Microsoft Excel and VBA
SolidWorks Design Automation Using the SolidWorks API, Microsoft Excel and VBA
 
Buku belajar inventor
Buku belajar inventorBuku belajar inventor
Buku belajar inventor
 
Prácticas Autocad
Prácticas AutocadPrácticas Autocad
Prácticas Autocad
 
Autocad
AutocadAutocad
Autocad
 

Andere mochten auch

Solid works practicas esime azcapo
Solid works practicas esime azcapoSolid works practicas esime azcapo
Solid works practicas esime azcapoSicea Ingenieria
 
ejercicios-solidwork-1
ejercicios-solidwork-1ejercicios-solidwork-1
ejercicios-solidwork-1Cristian Artos
 
solid-works-para-dibujo-y-diseno-mecanico
solid-works-para-dibujo-y-diseno-mecanicosolid-works-para-dibujo-y-diseno-mecanico
solid-works-para-dibujo-y-diseno-mecanicoCuitlahuac Huerta Rdz
 
Manual solidworks
Manual solidworksManual solidworks
Manual solidworksmonique33
 
SolidWorks Advanced Customization Techniques
SolidWorks Advanced Customization TechniquesSolidWorks Advanced Customization Techniques
SolidWorks Advanced Customization Techniquesfcsuper
 
Solid works 2012
Solid works 2012Solid works 2012
Solid works 2012Long Nhu
 
Tutorial solidworks stress analysis pada rangka meja
Tutorial solidworks  stress analysis pada rangka mejaTutorial solidworks  stress analysis pada rangka meja
Tutorial solidworks stress analysis pada rangka mejaZul Abidin
 
Solid works a step-by-step project based approach utilizing 3 d solid modeling
Solid works  a step-by-step project based approach utilizing 3 d solid modelingSolid works  a step-by-step project based approach utilizing 3 d solid modeling
Solid works a step-by-step project based approach utilizing 3 d solid modelingمحمد ماجيك
 
Giáo trình đào tạo Thiết kế cơ khí Solidworks 2016
Giáo trình đào tạo Thiết kế cơ khí Solidworks 2016Giáo trình đào tạo Thiết kế cơ khí Solidworks 2016
Giáo trình đào tạo Thiết kế cơ khí Solidworks 2016Trung tâm Advance Cad
 
Manual de dibujo técnico
Manual de dibujo técnicoManual de dibujo técnico
Manual de dibujo técnicoROBERTO ADAN
 

Andere mochten auch (20)

Buku soliworks
Buku soliworksBuku soliworks
Buku soliworks
 
Solidworks Mechanical Design
Solidworks Mechanical DesignSolidworks Mechanical Design
Solidworks Mechanical Design
 
Solidworks
SolidworksSolidworks
Solidworks
 
Solid works practicas esime azcapo
Solid works practicas esime azcapoSolid works practicas esime azcapo
Solid works practicas esime azcapo
 
ejercicios-solidwork-1
ejercicios-solidwork-1ejercicios-solidwork-1
ejercicios-solidwork-1
 
solid-works-para-dibujo-y-diseno-mecanico
solid-works-para-dibujo-y-diseno-mecanicosolid-works-para-dibujo-y-diseno-mecanico
solid-works-para-dibujo-y-diseno-mecanico
 
Manual solidworks
Manual solidworksManual solidworks
Manual solidworks
 
Sanjeev kumar solidworks
Sanjeev kumar solidworksSanjeev kumar solidworks
Sanjeev kumar solidworks
 
SolidWorks Advanced Customization Techniques
SolidWorks Advanced Customization TechniquesSolidWorks Advanced Customization Techniques
SolidWorks Advanced Customization Techniques
 
106616303 dibujo-tecnico-spencer-novac-0001
106616303 dibujo-tecnico-spencer-novac-0001106616303 dibujo-tecnico-spencer-novac-0001
106616303 dibujo-tecnico-spencer-novac-0001
 
Solid works 2012
Solid works 2012Solid works 2012
Solid works 2012
 
SOLIDWORKS 2015 Overview
SOLIDWORKS 2015 OverviewSOLIDWORKS 2015 Overview
SOLIDWORKS 2015 Overview
 
Tutorial solidworks stress analysis pada rangka meja
Tutorial solidworks  stress analysis pada rangka mejaTutorial solidworks  stress analysis pada rangka meja
Tutorial solidworks stress analysis pada rangka meja
 
Solid works a step-by-step project based approach utilizing 3 d solid modeling
Solid works  a step-by-step project based approach utilizing 3 d solid modelingSolid works  a step-by-step project based approach utilizing 3 d solid modeling
Solid works a step-by-step project based approach utilizing 3 d solid modeling
 
solidworks
solidworkssolidworks
solidworks
 
Giáo trình đào tạo Thiết kế cơ khí Solidworks 2016
Giáo trình đào tạo Thiết kế cơ khí Solidworks 2016Giáo trình đào tạo Thiết kế cơ khí Solidworks 2016
Giáo trình đào tạo Thiết kế cơ khí Solidworks 2016
 
SOLIDWORKS 2017 Launch
SOLIDWORKS 2017 LaunchSOLIDWORKS 2017 Launch
SOLIDWORKS 2017 Launch
 
Dibujos técnicos
Dibujos técnicosDibujos técnicos
Dibujos técnicos
 
Solulibro
SolulibroSolulibro
Solulibro
 
Manual de dibujo técnico
Manual de dibujo técnicoManual de dibujo técnico
Manual de dibujo técnico
 

Ähnlich wie SW 2013 beginners guide

Lesson loft
Lesson loftLesson loft
Lesson loftMr_Burns
 
Solidworks 2012-basic-tutorials compress
Solidworks 2012-basic-tutorials compressSolidworks 2012-basic-tutorials compress
Solidworks 2012-basic-tutorials compressMahdi Zatout
 
revit architecture basics
revit architecture basicsrevit architecture basics
revit architecture basicsali lemssefer
 
Nx basics 2014 unfnished
Nx basics 2014 unfnishedNx basics 2014 unfnished
Nx basics 2014 unfnishedMiguele Davila
 
Lesson revolve
Lesson revolveLesson revolve
Lesson revolveMr_Burns
 
Solidworks tips - First edition.pdf
Solidworks tips - First edition.pdfSolidworks tips - First edition.pdf
Solidworks tips - First edition.pdfZaheerAhmed905221
 
Intro to AutoCAD
Intro to AutoCADIntro to AutoCAD
Intro to AutoCADDUSPviz
 
AiM Spinner Design Tutorial in Solidworks
AiM Spinner Design Tutorial in SolidworksAiM Spinner Design Tutorial in Solidworks
AiM Spinner Design Tutorial in Solidworksdsp39
 
Solid works tutorial08_bearingpuller_english_08_lr
Solid works tutorial08_bearingpuller_english_08_lrSolid works tutorial08_bearingpuller_english_08_lr
Solid works tutorial08_bearingpuller_english_08_lrAkira Tamashiro
 
Beginners guide to solid works 2006
Beginners guide to solid works 2006Beginners guide to solid works 2006
Beginners guide to solid works 2006Adrián Suárez
 
3D exercise by gonzalochris
3D exercise by gonzalochris3D exercise by gonzalochris
3D exercise by gonzalochrisChris Gonzalo
 
Lesson 7 123 design
Lesson 7 123 designLesson 7 123 design
Lesson 7 123 designCDI Aljeer
 

Ähnlich wie SW 2013 beginners guide (20)

Lesson loft
Lesson loftLesson loft
Lesson loft
 
Fusion 360 training course
Fusion 360 training courseFusion 360 training course
Fusion 360 training course
 
Custom wheel (1)
Custom wheel (1)Custom wheel (1)
Custom wheel (1)
 
Autodesk AutoCAD 2016
Autodesk AutoCAD 2016 Autodesk AutoCAD 2016
Autodesk AutoCAD 2016
 
Solidworks 2012-basic-tutorials compress
Solidworks 2012-basic-tutorials compressSolidworks 2012-basic-tutorials compress
Solidworks 2012-basic-tutorials compress
 
Nava 01
Nava 01Nava 01
Nava 01
 
revit architecture basics
revit architecture basicsrevit architecture basics
revit architecture basics
 
Nx basics 2014 unfnished
Nx basics 2014 unfnishedNx basics 2014 unfnished
Nx basics 2014 unfnished
 
Nx basics 2014
Nx basics 2014 Nx basics 2014
Nx basics 2014
 
Lesson revolve
Lesson revolveLesson revolve
Lesson revolve
 
Solidworks tips - First edition.pdf
Solidworks tips - First edition.pdfSolidworks tips - First edition.pdf
Solidworks tips - First edition.pdf
 
H sandal
H sandalH sandal
H sandal
 
Intro to AutoCAD
Intro to AutoCADIntro to AutoCAD
Intro to AutoCAD
 
AiM Spinner Design Tutorial in Solidworks
AiM Spinner Design Tutorial in SolidworksAiM Spinner Design Tutorial in Solidworks
AiM Spinner Design Tutorial in Solidworks
 
Solid works tutorial08_bearingpuller_english_08_lr
Solid works tutorial08_bearingpuller_english_08_lrSolid works tutorial08_bearingpuller_english_08_lr
Solid works tutorial08_bearingpuller_english_08_lr
 
Rhinoceros.pdf
Rhinoceros.pdfRhinoceros.pdf
Rhinoceros.pdf
 
Unit Work Planes
Unit Work PlanesUnit Work Planes
Unit Work Planes
 
Beginners guide to solid works 2006
Beginners guide to solid works 2006Beginners guide to solid works 2006
Beginners guide to solid works 2006
 
3D exercise by gonzalochris
3D exercise by gonzalochris3D exercise by gonzalochris
3D exercise by gonzalochris
 
Lesson 7 123 design
Lesson 7 123 designLesson 7 123 design
Lesson 7 123 design
 

Mehr von Rahman Hakim

Asmaul husna detailed meaning
Asmaul husna detailed meaningAsmaul husna detailed meaning
Asmaul husna detailed meaningRahman Hakim
 
NASA Rockets guide
NASA Rockets guideNASA Rockets guide
NASA Rockets guideRahman Hakim
 
Operations management chase_jacobs_aquilano
Operations management chase_jacobs_aquilanoOperations management chase_jacobs_aquilano
Operations management chase_jacobs_aquilanoRahman Hakim
 
Solid works motion_tutorial_2010
Solid works motion_tutorial_2010Solid works motion_tutorial_2010
Solid works motion_tutorial_2010Rahman Hakim
 
Sw flowsimulation 2009 tutorial
Sw flowsimulation 2009 tutorialSw flowsimulation 2009 tutorial
Sw flowsimulation 2009 tutorialRahman Hakim
 
Mit2 092 f09_lec23
Mit2 092 f09_lec23Mit2 092 f09_lec23
Mit2 092 f09_lec23Rahman Hakim
 
Mit2 092 f09_lec19
Mit2 092 f09_lec19Mit2 092 f09_lec19
Mit2 092 f09_lec19Rahman Hakim
 
Mit2 092 f09_lec20
Mit2 092 f09_lec20Mit2 092 f09_lec20
Mit2 092 f09_lec20Rahman Hakim
 
Mit2 092 f09_lec21
Mit2 092 f09_lec21Mit2 092 f09_lec21
Mit2 092 f09_lec21Rahman Hakim
 
Mit2 092 f09_lec18
Mit2 092 f09_lec18Mit2 092 f09_lec18
Mit2 092 f09_lec18Rahman Hakim
 
Mit2 092 f09_lec16
Mit2 092 f09_lec16Mit2 092 f09_lec16
Mit2 092 f09_lec16Rahman Hakim
 
Mit2 092 f09_lec15
Mit2 092 f09_lec15Mit2 092 f09_lec15
Mit2 092 f09_lec15Rahman Hakim
 
Mit2 092 f09_lec13
Mit2 092 f09_lec13Mit2 092 f09_lec13
Mit2 092 f09_lec13Rahman Hakim
 
Mit2 092 f09_lec12
Mit2 092 f09_lec12Mit2 092 f09_lec12
Mit2 092 f09_lec12Rahman Hakim
 
Mit2 092 f09_lec11
Mit2 092 f09_lec11Mit2 092 f09_lec11
Mit2 092 f09_lec11Rahman Hakim
 
Mit2 092 f09_lec10
Mit2 092 f09_lec10Mit2 092 f09_lec10
Mit2 092 f09_lec10Rahman Hakim
 
Mit2 092 f09_lec07
Mit2 092 f09_lec07Mit2 092 f09_lec07
Mit2 092 f09_lec07Rahman Hakim
 
Mit2 092 f09_lec06
Mit2 092 f09_lec06Mit2 092 f09_lec06
Mit2 092 f09_lec06Rahman Hakim
 

Mehr von Rahman Hakim (20)

Asmaul husna detailed meaning
Asmaul husna detailed meaningAsmaul husna detailed meaning
Asmaul husna detailed meaning
 
NASA Rockets guide
NASA Rockets guideNASA Rockets guide
NASA Rockets guide
 
Rockets nasa
Rockets nasaRockets nasa
Rockets nasa
 
Operations management chase_jacobs_aquilano
Operations management chase_jacobs_aquilanoOperations management chase_jacobs_aquilano
Operations management chase_jacobs_aquilano
 
Master cam x2 5ax
Master cam x2 5axMaster cam x2 5ax
Master cam x2 5ax
 
Solid works motion_tutorial_2010
Solid works motion_tutorial_2010Solid works motion_tutorial_2010
Solid works motion_tutorial_2010
 
Sw flowsimulation 2009 tutorial
Sw flowsimulation 2009 tutorialSw flowsimulation 2009 tutorial
Sw flowsimulation 2009 tutorial
 
Mit2 092 f09_lec23
Mit2 092 f09_lec23Mit2 092 f09_lec23
Mit2 092 f09_lec23
 
Mit2 092 f09_lec19
Mit2 092 f09_lec19Mit2 092 f09_lec19
Mit2 092 f09_lec19
 
Mit2 092 f09_lec20
Mit2 092 f09_lec20Mit2 092 f09_lec20
Mit2 092 f09_lec20
 
Mit2 092 f09_lec21
Mit2 092 f09_lec21Mit2 092 f09_lec21
Mit2 092 f09_lec21
 
Mit2 092 f09_lec18
Mit2 092 f09_lec18Mit2 092 f09_lec18
Mit2 092 f09_lec18
 
Mit2 092 f09_lec16
Mit2 092 f09_lec16Mit2 092 f09_lec16
Mit2 092 f09_lec16
 
Mit2 092 f09_lec15
Mit2 092 f09_lec15Mit2 092 f09_lec15
Mit2 092 f09_lec15
 
Mit2 092 f09_lec13
Mit2 092 f09_lec13Mit2 092 f09_lec13
Mit2 092 f09_lec13
 
Mit2 092 f09_lec12
Mit2 092 f09_lec12Mit2 092 f09_lec12
Mit2 092 f09_lec12
 
Mit2 092 f09_lec11
Mit2 092 f09_lec11Mit2 092 f09_lec11
Mit2 092 f09_lec11
 
Mit2 092 f09_lec10
Mit2 092 f09_lec10Mit2 092 f09_lec10
Mit2 092 f09_lec10
 
Mit2 092 f09_lec07
Mit2 092 f09_lec07Mit2 092 f09_lec07
Mit2 092 f09_lec07
 
Mit2 092 f09_lec06
Mit2 092 f09_lec06Mit2 092 f09_lec06
Mit2 092 f09_lec06
 

Kürzlich hochgeladen

Interactive Powerpoint_How to Master effective communication
Interactive Powerpoint_How to Master effective communicationInteractive Powerpoint_How to Master effective communication
Interactive Powerpoint_How to Master effective communicationnomboosow
 
1029-Danh muc Sach Giao Khoa khoi 6.pdf
1029-Danh muc Sach Giao Khoa khoi  6.pdf1029-Danh muc Sach Giao Khoa khoi  6.pdf
1029-Danh muc Sach Giao Khoa khoi 6.pdfQucHHunhnh
 
BAG TECHNIQUE Bag technique-a tool making use of public health bag through wh...
BAG TECHNIQUE Bag technique-a tool making use of public health bag through wh...BAG TECHNIQUE Bag technique-a tool making use of public health bag through wh...
BAG TECHNIQUE Bag technique-a tool making use of public health bag through wh...Sapna Thakur
 
The byproduct of sericulture in different industries.pptx
The byproduct of sericulture in different industries.pptxThe byproduct of sericulture in different industries.pptx
The byproduct of sericulture in different industries.pptxShobhayan Kirtania
 
Separation of Lanthanides/ Lanthanides and Actinides
Separation of Lanthanides/ Lanthanides and ActinidesSeparation of Lanthanides/ Lanthanides and Actinides
Separation of Lanthanides/ Lanthanides and ActinidesFatimaKhan178732
 
Advanced Views - Calendar View in Odoo 17
Advanced Views - Calendar View in Odoo 17Advanced Views - Calendar View in Odoo 17
Advanced Views - Calendar View in Odoo 17Celine George
 
Grant Readiness 101 TechSoup and Remy Consulting
Grant Readiness 101 TechSoup and Remy ConsultingGrant Readiness 101 TechSoup and Remy Consulting
Grant Readiness 101 TechSoup and Remy ConsultingTechSoup
 
Accessible design: Minimum effort, maximum impact
Accessible design: Minimum effort, maximum impactAccessible design: Minimum effort, maximum impact
Accessible design: Minimum effort, maximum impactdawncurless
 
CARE OF CHILD IN INCUBATOR..........pptx
CARE OF CHILD IN INCUBATOR..........pptxCARE OF CHILD IN INCUBATOR..........pptx
CARE OF CHILD IN INCUBATOR..........pptxGaneshChakor2
 
Nutritional Needs Presentation - HLTH 104
Nutritional Needs Presentation - HLTH 104Nutritional Needs Presentation - HLTH 104
Nutritional Needs Presentation - HLTH 104misteraugie
 
Ecosystem Interactions Class Discussion Presentation in Blue Green Lined Styl...
Ecosystem Interactions Class Discussion Presentation in Blue Green Lined Styl...Ecosystem Interactions Class Discussion Presentation in Blue Green Lined Styl...
Ecosystem Interactions Class Discussion Presentation in Blue Green Lined Styl...fonyou31
 
JAPAN: ORGANISATION OF PMDA, PHARMACEUTICAL LAWS & REGULATIONS, TYPES OF REGI...
JAPAN: ORGANISATION OF PMDA, PHARMACEUTICAL LAWS & REGULATIONS, TYPES OF REGI...JAPAN: ORGANISATION OF PMDA, PHARMACEUTICAL LAWS & REGULATIONS, TYPES OF REGI...
JAPAN: ORGANISATION OF PMDA, PHARMACEUTICAL LAWS & REGULATIONS, TYPES OF REGI...anjaliyadav012327
 
Measures of Central Tendency: Mean, Median and Mode
Measures of Central Tendency: Mean, Median and ModeMeasures of Central Tendency: Mean, Median and Mode
Measures of Central Tendency: Mean, Median and ModeThiyagu K
 
Mastering the Unannounced Regulatory Inspection
Mastering the Unannounced Regulatory InspectionMastering the Unannounced Regulatory Inspection
Mastering the Unannounced Regulatory InspectionSafetyChain Software
 
1029 - Danh muc Sach Giao Khoa 10 . pdf
1029 -  Danh muc Sach Giao Khoa 10 . pdf1029 -  Danh muc Sach Giao Khoa 10 . pdf
1029 - Danh muc Sach Giao Khoa 10 . pdfQucHHunhnh
 
Organic Name Reactions for the students and aspirants of Chemistry12th.pptx
Organic Name Reactions  for the students and aspirants of Chemistry12th.pptxOrganic Name Reactions  for the students and aspirants of Chemistry12th.pptx
Organic Name Reactions for the students and aspirants of Chemistry12th.pptxVS Mahajan Coaching Centre
 
Introduction to Nonprofit Accounting: The Basics
Introduction to Nonprofit Accounting: The BasicsIntroduction to Nonprofit Accounting: The Basics
Introduction to Nonprofit Accounting: The BasicsTechSoup
 
Paris 2024 Olympic Geographies - an activity
Paris 2024 Olympic Geographies - an activityParis 2024 Olympic Geographies - an activity
Paris 2024 Olympic Geographies - an activityGeoBlogs
 
Web & Social Media Analytics Previous Year Question Paper.pdf
Web & Social Media Analytics Previous Year Question Paper.pdfWeb & Social Media Analytics Previous Year Question Paper.pdf
Web & Social Media Analytics Previous Year Question Paper.pdfJayanti Pande
 

Kürzlich hochgeladen (20)

Interactive Powerpoint_How to Master effective communication
Interactive Powerpoint_How to Master effective communicationInteractive Powerpoint_How to Master effective communication
Interactive Powerpoint_How to Master effective communication
 
1029-Danh muc Sach Giao Khoa khoi 6.pdf
1029-Danh muc Sach Giao Khoa khoi  6.pdf1029-Danh muc Sach Giao Khoa khoi  6.pdf
1029-Danh muc Sach Giao Khoa khoi 6.pdf
 
BAG TECHNIQUE Bag technique-a tool making use of public health bag through wh...
BAG TECHNIQUE Bag technique-a tool making use of public health bag through wh...BAG TECHNIQUE Bag technique-a tool making use of public health bag through wh...
BAG TECHNIQUE Bag technique-a tool making use of public health bag through wh...
 
The byproduct of sericulture in different industries.pptx
The byproduct of sericulture in different industries.pptxThe byproduct of sericulture in different industries.pptx
The byproduct of sericulture in different industries.pptx
 
Separation of Lanthanides/ Lanthanides and Actinides
Separation of Lanthanides/ Lanthanides and ActinidesSeparation of Lanthanides/ Lanthanides and Actinides
Separation of Lanthanides/ Lanthanides and Actinides
 
Advanced Views - Calendar View in Odoo 17
Advanced Views - Calendar View in Odoo 17Advanced Views - Calendar View in Odoo 17
Advanced Views - Calendar View in Odoo 17
 
Grant Readiness 101 TechSoup and Remy Consulting
Grant Readiness 101 TechSoup and Remy ConsultingGrant Readiness 101 TechSoup and Remy Consulting
Grant Readiness 101 TechSoup and Remy Consulting
 
Accessible design: Minimum effort, maximum impact
Accessible design: Minimum effort, maximum impactAccessible design: Minimum effort, maximum impact
Accessible design: Minimum effort, maximum impact
 
Advance Mobile Application Development class 07
Advance Mobile Application Development class 07Advance Mobile Application Development class 07
Advance Mobile Application Development class 07
 
CARE OF CHILD IN INCUBATOR..........pptx
CARE OF CHILD IN INCUBATOR..........pptxCARE OF CHILD IN INCUBATOR..........pptx
CARE OF CHILD IN INCUBATOR..........pptx
 
Nutritional Needs Presentation - HLTH 104
Nutritional Needs Presentation - HLTH 104Nutritional Needs Presentation - HLTH 104
Nutritional Needs Presentation - HLTH 104
 
Ecosystem Interactions Class Discussion Presentation in Blue Green Lined Styl...
Ecosystem Interactions Class Discussion Presentation in Blue Green Lined Styl...Ecosystem Interactions Class Discussion Presentation in Blue Green Lined Styl...
Ecosystem Interactions Class Discussion Presentation in Blue Green Lined Styl...
 
JAPAN: ORGANISATION OF PMDA, PHARMACEUTICAL LAWS & REGULATIONS, TYPES OF REGI...
JAPAN: ORGANISATION OF PMDA, PHARMACEUTICAL LAWS & REGULATIONS, TYPES OF REGI...JAPAN: ORGANISATION OF PMDA, PHARMACEUTICAL LAWS & REGULATIONS, TYPES OF REGI...
JAPAN: ORGANISATION OF PMDA, PHARMACEUTICAL LAWS & REGULATIONS, TYPES OF REGI...
 
Measures of Central Tendency: Mean, Median and Mode
Measures of Central Tendency: Mean, Median and ModeMeasures of Central Tendency: Mean, Median and Mode
Measures of Central Tendency: Mean, Median and Mode
 
Mastering the Unannounced Regulatory Inspection
Mastering the Unannounced Regulatory InspectionMastering the Unannounced Regulatory Inspection
Mastering the Unannounced Regulatory Inspection
 
1029 - Danh muc Sach Giao Khoa 10 . pdf
1029 -  Danh muc Sach Giao Khoa 10 . pdf1029 -  Danh muc Sach Giao Khoa 10 . pdf
1029 - Danh muc Sach Giao Khoa 10 . pdf
 
Organic Name Reactions for the students and aspirants of Chemistry12th.pptx
Organic Name Reactions  for the students and aspirants of Chemistry12th.pptxOrganic Name Reactions  for the students and aspirants of Chemistry12th.pptx
Organic Name Reactions for the students and aspirants of Chemistry12th.pptx
 
Introduction to Nonprofit Accounting: The Basics
Introduction to Nonprofit Accounting: The BasicsIntroduction to Nonprofit Accounting: The Basics
Introduction to Nonprofit Accounting: The Basics
 
Paris 2024 Olympic Geographies - an activity
Paris 2024 Olympic Geographies - an activityParis 2024 Olympic Geographies - an activity
Paris 2024 Olympic Geographies - an activity
 
Web & Social Media Analytics Previous Year Question Paper.pdf
Web & Social Media Analytics Previous Year Question Paper.pdfWeb & Social Media Analytics Previous Year Question Paper.pdf
Web & Social Media Analytics Previous Year Question Paper.pdf
 

SW 2013 beginners guide

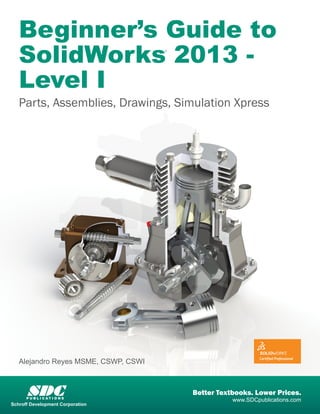
  • 1. Beginner’s Guide to SolidWorks 2013 - Level I Parts, Assemblies, Drawings, Simulation Xpress Alejandro Reyes MSME, CSWP, CSWI ® SDC Better Textbooks. Lower Prices. P U B L I C AT I O N S www.SDCpublications.com Schroff Development Corporation
  • 2. Visit the following websites to learn more about this book:
  • 3. Special Features: Sweep, Loft and Wrap Special Features: Sweep, Loft and Wrap There are times when we need to design components that cannot be easily defined by prismatic shapes. For those features that have ‘curvy’ shapes we can use Sweep and Loft features, which let us create almost any shape we can think of. These are the features that allow us to design consumer products, which, more often than not, have to be attractive and appealing, making extensive use of curvature and organic shapes. These products include things like your remote control, a computer mouse, coffee maker, perfume bottles, telephones, etc., and many times the success or failure of these products in the market can be directly attributed to their appearance. They have to look nice, ‘feel’ right, and of course perform the task that they were intended for. Sweeps and Lofts are also prevalent in the automotive and aerospace industry where cosmetics, aerodynamics and ergonomics are a very important part of the design process. Sweeps and Lofts have many different options that allow us to create from simple to extremely complex shapes. In light of the vast number of variations and possibilities for these features, we’ll keep these examples as simple as possible without sacrificing functionality, to give the reader a good idea as to what can be achieved. Sweeps and Lofts are usually referred to as advanced features, since they usually require more work to complete, and a better understanding of the basic concepts of solid modeling. Having said that, these exercises will assume that any command that we have done more than a couple of times up to this point, like creating a sketch, are already understood and we’ll simply direct the reader to create it providing the necessary details. This way we’ll be able to focus more on the specifics of the new features. The Wrap feature is a special tool that helps us, as the name implies, to 'wrap' a sketch around a surface, this tool helps us create features like cylindrical cams, slots on cylinders or cylindrical surfaces, etc. 181
  • 4. Beginner’s Guide to SolidWorks 2013 – Level I These are some examples of designs made with advanced modeling techniques. 182
  • 5. Special Features: Sweep, Loft and Wrap 183 Sweep: Cup and Springs
  • 6. Beginner’s Guide to SolidWorks 2013 – Level I 184 Notes:
  • 7. Special Features: Sweep, Loft and Wrap For this exercise we are going to make a simple cup. In this exercise we will learn a new option when creating features called “Thin Feature”, the Sweep feature, a new Fillet option to create a Full Round fillet, and a review of auxiliary Planes. The sequence of features to complete the cup is: Revolve Thin Create Path Sketch Auxiliary Plane Create Profile Path Make Sweep Cut inside of Cup Full Round Fillet Handle Fillet 149. – For the first feature we will create a “Revolved Feature” using the “Thin Feature" option. This option makes a feature with a specified thickness based on the sketch that was drawn. Select the "Front Plane" and create the following sketch. Notice the sketch is an open profile with two lines, an arc and a centerline. (Remember to make the diameter dimension about the centerline.) 185
  • 8. Beginner’s Guide to SolidWorks 2013 – Level I 150. - After selecting the “Revolve Boss/Base” command we get a warning telling us about the sketch being open. Since we want a thin revolved feature, select “No." In the “Revolve” options, “Thin Feature” is automatically activated. Since we want the dimensions we added to be external dimensions, select the “Reverse Direction” option to add the material inside the cup. Notice the preview showing the change. In the value box we typed 3/16; we can add a fraction and SolidWorks changes it to the corresponding decimal value when we click OK. We can also type simple mathematic expressions including addition, subtraction, multiplication and division in any value box where we can type a value. 186
  • 9. Special Features: Sweep, Loft and Wrap 187 Our thin feature now looks like this: 151. - Select the "Front Plane" and create the following sketch using an ellipse. Be sure to add a “Vertical” geometric relation between the top and bottom points of the ellipse to fully define it. Select the “Ellipse” command from the Sketch tab in the CommandManager or from the menu “Tools, Sketch Entities, Ellipse." Add the corresponding dimensions to and from the ellipse points at the major and minor axes. To draw an ellipse select the center point, then one axis and then the other axis.
  • 10. Beginner’s Guide to SolidWorks 2013 – Level I Exit the sketch and rename it "Path." We will not use the sketch for a feature just yet. 152. - Create an Auxiliary plane parallel to the "Right Plane" using the center of the ellipse as a second reference as shown. 188
  • 11. Special Features: Sweep, Loft and Wrap 153. - Select the plane just created and draw the next sketch. Start the center of the new ellipse at the top point of the previous sketch's ellipse. Add a coincident relation if needed. Remember to add a horizontal relation between the points of the major (or vertical to the minor) axis. Exit the sketch and rename it "Profile." 189
  • 12. Beginner’s Guide to SolidWorks 2013 – Level I 154. - Select the “Sweep” icon from the Features tab in the CommandManager. The sweep is a feature that requires a minimum of two sketches: one for the sweep profile and one for the path (the path can also be a model edge or a user defined curve.) In the “Sweep” properties, select the "Profile" sketch in the Profile selection box, and the "Path" sketch in the Path selection box. Optionally, a Sweep can have guide curves and other parameters to better control the resulting shape, but in this case we are using only the basic options. Notice the preview and click OK when done. Hide the auxiliary planes using the “Hide/Show Items” toolbar if so desired. 190
  • 13. Special Features: Sweep, Loft and Wrap 155. - Notice the sweep is also inside the cup. We will make a cut to fix this. Create a sketch in the flat face at the top of the cup. Select the inside edge at the top and use “Convert Entities” from the Sketch tab to convert the edge to sketch geometry. Select the “Extruded Cut” icon and use the “Up to next” end condition from the drop down selection list. This end condition will make the cut until it finds the next face (the bottom) effectively cutting the part of the handle inside the cup. 191
  • 14. Beginner’s Guide to SolidWorks 2013 – Level I 156. - Now we need to round the flat face at the top lip of the cup. To do this we’ll add a “Fillet” using the “Full Round Fillet” option. The full round will essentially remove the flat face at the top, and replace it with a rounded face. Before After We need to select three faces, the middle face will be the one replaced by the fillet. After selecting the Fillet command, select the "Full round fillet" option to reveal the selection boxes. With the first selection box active select the outside face of the cup. Click inside the second selection box and select the top flat face 192
  • 15. Special Features: Sweep, Loft and Wrap of the cup. Click inside the third selection box and select the inside face of the cup. Note the selected faces are color coded. When done selecting faces click OK to apply the fillet. 157. - To finish the cup add a fillet to round the edges where the handle meets the cup. Select the fillet command with the “Constant Radius” option, select the handle's surface and change the radius to 0.25″. Click OK to finish. 193
  • 16. Beginner’s Guide to SolidWorks 2013 – Level I 158. - Save the finished part as ‘Cup’ and close. 194
  • 17. Special Features: Sweep, Loft and Wrap In the next exercise we are going to show how to make a simple and a variable pitch spring. In order to make these springs we’ll have to learn how to make simple and variable pitch helixes to be used for the sweep paths. The sequence of features to complete the springs are: Simple Spring Draw circle Make Helix Draw Spring Profile 195 Sketch Make Sweep Variable Pitch Spring Draw circle Make Variable Pitch Helix Make Spring Profile sketch Make Sweep and cut ends Simple Spring 159. - In order to make a helix, first we need to make a sketch with a circle. This circle is going to be the helix’s diameter. Select the "Front Plane" and make a sketch using the following dimensions. Exit the sketch when done. If we don't exit the sketch, we'll only have the "Helix and Spiral" option from the "Curves" command.
  • 18. Beginner’s Guide to SolidWorks 2013 – Level I 160. - In the Features tab select “Curves, Helix and Spiral” from the drop-down icon or the menu "Insert, Curve, Helix/Spiral." If asked to select a plane or a sketch, select the sketch we just drew. If we select the “Helix and Spiral” command before exiting the sketch, SolidWorks will use that sketch automatically for the helix. 161. - The helix can be defined by the combination of any two parameters between Pitch, Revolutions and Height and the third parameter is calculated. For this example we'll select “Pitch and Revolution” from the “Defined By:” drop down menu, and make the pitch 0.325" and 6 Revolutions. The “Start Angle” value defines where the helix will start. By making it 90 degrees it will start at the top, coincident with the "Front Plane." If we had made it 0 degrees, it would be coincident to the "Top Plane" instead (Feel free to explore the options.) Note the Helix command has options to make it Counterclockwise, Clockwise, Tapered, Variable pitch and reversed (going right or left.) 196
  • 19. Special Features: Sweep, Loft and Wrap 162. - Once the Helix is done, we need to make the profile sketch for the sweep. Switch to a Right view, and add a new sketch in the "Right Plane" as shown. Make the circle close to the Helix… … and add a “Pierce” geometric relation between the center of the circle and the helix. This way the path will start at the beginning of the helix. This relation will make the sketch fully defined. Exit the Sketch when done. A pierce relation is done between an element that is oblique or perpendicular to the sketch plane and a point in the sketch. Think of it as a needle piercing through a fabric, the sketch being the fabric and the helix (or curve, model edge or another sketch) the needle. 197
  • 20. Beginner’s Guide to SolidWorks 2013 – Level I 163. - Select the Sweep command and make the sweep using the last sketch as a profile and the Helix as a Path. Note the Preview and click OK to finish. Save as 'Spring' and close the finished spring. 198
  • 21. Special Features: Sweep, Loft and Wrap Variable Pitch Spring 164. - For the variable pitch spring we’ll start the same way and make the following sketch in the "Front Plane." This will be the spring’s outside diameter. 165. - While still editing the sketch, in the Features tab from the “Curves” drop down icon select “Helix and Spiral”; notice it is the only option available. 166. - In the Helix/Spiral command select “Pitch and Revolution” from the “Defined by:” selection box and “Variable Pitch” in the Parameters box. After selecting it we are presented with a table, fill in the values for the helix with the following values. Click OK when finished to build the helix. 199
  • 22. Beginner’s Guide to SolidWorks 2013 – Level I 167. - After the helix is complete add a new sketch in the "Right Plane." Draw the circle first, then add a center rectangle; trim and dimension as needed. 168. - Add a centerline from the center to the top line (make sure it is coincident.) Select the endpoint of the centerline and the helix to add a “Pierce” geometric relation to make the sketch fully defined. Exit the sketch and optionally rename it 'Profile'. The Pierce relation allows us to fix the profile to the path, and can be added to any part of the sketch. We chose to add it to the top because the original sketch used for the helix is the spring's outside diameter. 169. - Just as we did before, select the "Sweep" command, add the path and profile as shown and click OK to finish. 200
  • 23. Special Features: Sweep, Loft and Wrap 170. – To finish we’ll make a cut to flatten the sides of the spring. Change to a Right view and add a sketch in the "Right Plane." Draw a single line starting at the midpoint of the indicated edge and long enough to cross the part. 171. - Select the “Extruded Cut” command. When we use an open sketch to make a cut, the "Through All" option is automatically selected in both directions. One side of the model is cut using the open sketch. The small arrow located at the center of the line indicates which side of the model will be cut. Use the “Flip side to cut” option to cut the left side, otherwise the biggest part of the spring will be cut. Click OK to complete the cut extrude and repeat it in the right side. Note the cutting plane is shown in the graphics area. When using an open sketch to cut a model, we can only use a single open profile. If we have multiple open profiles we cannot make the Cut Extrude. 201
  • 24. Beginner’s Guide to SolidWorks 2013 – Level I Save the model as 'Variable Pitch Spring'. A note about threads Threads can be added to a model either by adding a Sweep or a Cut Sweep with a helix. When modeling screws and fasteners in general, it is almost always unnecessary to add a helical thread, as it consumes a large amount of computing resources, and a simple representation of it usually suffices (as a Revolved Boss/Cut or Cosmetic Thread.) It is strongly advised to only add threads when required by the model, as in the following bottle exercise. 202
  • 25. Special Features: Sweep, Loft and Wrap For the next exercise we'll build the following bottle using a sweep feature 203 with guide curves. This bottle will be made using a Sweep feature for the body and one for the thread. For the body we'll make a sweep with two guide curves, so we need to make four sketches: Path, Guide Curve 1, Guide Curve 2 and Profile, in that order. The reason to make the Profile last is that it has to pierce the Path and both Guide Curves. 172. - Open a new part, set dimensions to inches and three decimal places. Make the Path sketch in the "Front Plane" and Exit the sketch. Rename 'Path'.
  • 26. Beginner’s Guide to SolidWorks 2013 – Level I 173. - Add a second sketch in the "Front Plane." Make arcs and lines tangent to each other, add centerlines as reference for tangency. All arcs are equal. Exit sketch and rename 'Guide 1'. 204
  • 27. Special Features: Sweep, Loft and Wrap 174. - Add third sketch to "Right Plane." Add geometric relations to previous sketches to maintain design intent. Make the topmost endpoint Horizontal to the topmost endpoint of the 'Path' sketch. Arcs are equal size and tangent. Make the indicated endpoints horizontal. Only geometric relations and two dimensions are needed to fully define the sketch. Exit the sketch and rename it 'Guide 2'. Right view View between front and right 175. - Add a new sketch in the "Top Plane", make an ellipse adding Pierce relations between the ellipse's major and minor axes to 'Guide 1' and 'Guide 2'. Exit the sketch and rename it 'Profile'. 205
  • 28. Beginner’s Guide to SolidWorks 2013 – Level I 176. - Select the "Sweep Boss/Base" icon, add the 'Path' sketch to the "Path" selection box and the 'Profile' sketch to the "Profile" selection box. Expand the "Guide Curves" selection box and add both guides to it. Click OK to finish. 177. - Add a sketch on the top face using "Convert Entities" and extrude it 1". 178. - Add a 0.375" fillet at the bottom of the bottle. 206
  • 29. Special Features: Sweep, Loft and Wrap 179. - Add a 0.050" shell to the part, remove the top face. 180. - Add auxiliary plane parallel to the topmost face 0.125" below it. 181. - Add sketch to this plane, use Convert Entities to project top outside edge, and make a Helix with a 0.2" pitch, 2.5 turns. Start helix at 0 degrees. 182. - Add the following sketch to the "Right Plane." Be sure to add a Pierce relation between the profile and the helix. Exit the sketch and make a sweep feature using the helix and this profile. 207
  • 30. Beginner’s Guide to SolidWorks 2013 – Level I 183. - Add a sketch on the front face of the thread, use Convert Entities and make a 120 degrees "Revolved Boss." Add a second one at the other end of the thread. 184. - Add a 0.02" fillet to the thread as a finishing touch. You may need to select multiple edges. 208
  • 31. Special Features: Sweep, Loft and Wrap Engine Project Parts: Make the following components to build the engine. Save the parts using the name provided. High resolution images at mechanicad.com. 209
  • 32. Beginner’s Guide to SolidWorks 2013 – Level I 210
  • 33. Special Features: Sweep, Loft and Wrap 211 Loft: Bottle
  • 34. Beginner’s Guide to SolidWorks 2013 – Level I 212 Notes:
  • 35. Special Features: Sweep, Loft and Wrap The “Loft” feature requires at least two different sketches and/or faces and optionally guide curves to more accurately define the final shape. The Loft helps us design complex shapes with more control over the cross section. In this exercise we will make a bottle using a loft with four different sketches. 185. - Make a new part and create three auxiliary planes using the “Plane” command. Select the "Top Plane" as reference, change the number of planes to 3 and space them 2.5″ as shown. Click OK when done. 186. - For clarity, select the "Top Plane" in the FeatureManager and show it using the “Hide/Show” command from the pop-up toolbar. 213
  • 36. Beginner’s Guide to SolidWorks 2013 – Level I 187. - Switch to a Top view, select the "Top Plane" and draw the following sketch using the “Center Rectangle” and “Sketch Fillet” tools. Exit the sketch when finished. 188. - Still in the Top view, select 'Plane1' from the FeatureManager and create the second sketch. Use the "Center Rectangle" tool; be sure to start in the origin and make the rectangle's corner coincident to the previous sketch's diagonal line. Add a 2.5″ width dimension and the 0.5″ “Sketch Fillet” to fully define the sketch. Exit the second sketch when finished. Turn off the display of Planes for clarity with “Hide/Show Items." 214
  • 37. Special Features: Sweep, Loft and Wrap 189. - For the third profile, select 'Plane2' from the FeatureManager and create a new sketch in it. This sketch will be exactly the same as the first one. To help us save time and maintain design intent, we'll use the “Convert Entities” tool. In the “Convert Entities” selection box, select the entire Sketch1 from the fly-out FeatureManager and click OK to project Sketch1 in the new sketch. Exit the sketch when done. 190. - For the last profile select 'Plane3' from the FeatureManager and create a new sketch. Draw a circle and add a geometric relation to make it “Tangent” to the horizontal line in 'Sketch2' as indicated. This relation will fully define the sketch. Exit the sketch to finish. 215
  • 38. Beginner’s Guide to SolidWorks 2013 – Level I 191. - The finished sketches will look like this with the planes visible: 192. - Now we are ready, select the “Loft” icon from the Features tab. The loft feature requires two or more sketches and/or faces, and we'll use the four sketches we just made to build the bottle. We will select the profiles starting with the first one we made at the bottom and finishing with the last one at the top. It is important to select the sketches thinking that where we select the profile will affect the result. Click in the graphics area near the indicated ‘dots’, this line indicates the segment of one profile that will be connected to the next profile. If we select points randomly in the profiles, the loft could twist and produce undesirable results. Optionally, guide curves can be added to improve control of the resulting shape. 216
  • 39. Special Features: Sweep, Loft and Wrap From the “Start/End Conditions” select “Normal to Profile” for both the “Start” and “End” constraint. Notice the difference in the preview after selecting the start and end constraints. Click OK when done. 193. - Add a 0.25″ radius fillet in the bottom edge of the part to round it off. 217
  • 40. Beginner’s Guide to SolidWorks 2013 – Level I Finish the part using the “Shell” tool; select the top face to remove it and 218 make the wall thickness 0.125″. Image shown using Real View
  • 41. Special Features: Sweep, Loft and Wrap 194. - To view the inside of the part, select the “Section View” icon from the View toolbar or the menu "View, Display, Section View." We can define which plane to cut the model with, the depth of the cut and optionally add a second or third section. If we click OK in the Section View, the model will be displayed as cut, but this is only for display purposes; the part is not actually cut. To turn off the Section View, select its icon or menu command again. This section view can be used along with the “Measure” tool to inspect the part. We can also change the depth of the cut by dragging the arrow in the center of the plane. 219
  • 42. Beginner’s Guide to SolidWorks 2013 – Level I Save the part as 'Bottle Loft' and close. 220
  • 43. Special Features: Sweep, Loft and Wrap Wrap Feature The wrap feature helps us create cylindrical cams or slots on cylindrical surfaces using a sketch on a plane tangent to the surface we want to make the wrap on. 195. – Make a new part, set units to inches with three decimal places; add this sketch on the "Front Plane" and extrude it 3". 196. – The next step is to make the sketch that will be used for the wrap feature. For the sketch plane we have an option of using the "Top Plane", "Right Plane" or create a new plane tangent to the cylinder's surface. For this example we'll use the "Top Plane." Draw the following profile first making sure its symmetrical about the centerline. All arcs are equal radii. The top dimension's value is entered as 1.5 * pi, since we want the sketch to wrap completely around the cylinder. SolidWorks automatically calculates the resulting value for us. 221
  • 44. Beginner’s Guide to SolidWorks 2013 – Level I 197. - The sketch so far is the centerline of the slot we are going to wrap around the cylinder. Select the "Offset" command and turn on the options: "Select chain" to automatically select the entire centerline picking only one segment, "Bi-directional" to make the offset in both directions, "Make base construction" to make the selected line (or chain) construction geometry, and after selecting a segment of the sketch the "Cap ends" option is enabled letting us choose to cap the offset with Arcs or Lines. Making the offset 0.25" will give us a 0.5" wide slot. Click OK to complete the offset and exit the sketch. Note how the original sketch is now construction geometry and we have a closed profile. Exit the sketch when done. 198.- Select the "Wrap" feature from the Features tab or the menu "Insert, Features, Wrap." If the sketch is not pre-selected, select the sketch from the graphics area. 222
  • 45. Special Features: Sweep, Loft and Wrap 199.- Select the "Deboss" option to make a cut in the part (The "Emboss" option will add material and the "Scribe" will split the face.) Select the cylinder's face in the "Face for Wrap Feature" selection box and make the depth 0.1". Click OK to finish. 200. – Add a 0.02" fillet to finish the part. Save as 'Cylindrical Cam'. 223
  • 46. Beginner’s Guide to SolidWorks 2013 – Level I Exercises: Build the following parts using the knowledge acquired in this lesson. Try to use the most efficient method to complete the model. Eccentric Coupler Notes: • Both circles are centered horizontally (Right view.) • Add a guide sketch at the bottom. • Set the Start and End Conditions for the loft to “Normal to Profile." • Make as Thin Feature or Shell it after making the loft feature. HINTS: • Draw the 1" circle in the "Right Plane." • Make an Auxiliary Plane 6" parallel to 224 the "Right Plane." • Draw a 2" circle in the Auxiliary Plane. • Draw a sketch in the "Front Plane" to make the guide curve. • Select the guide sketch in the "Guide Curves" selection box. Guide sketch
  • 47. Special Features: Sweep, Loft and Wrap Bent Coupler Build the following part using a Loft feature and a shell. The part is 0.15″ thick. Notes: • Add a guide sketch along the right side of the part. • Start and End Conditions “Normal to Profile." • Make as Thin Feature or Shell after loft. HINTS: • Make Rectangular sketch first. • Make Guide sketch. • Make Auxiliary Plane perpendicular 225 to Guide sketch at the end point. • Make circular sketch in Auxiliary Plane. • Make Loft using Guide sketch as a guide curve. • Shell the part. Guide sketch
  • 48. Beginner’s Guide to SolidWorks 2013 – Level I Challenge Exercises: Build the 'Worm Gear' and 'Offset Shaft' complete gears using the knowledge learned so far with the information given. High resolution images at mechanicad.com. DISCLOSURE: The gears modeled in this tutorial are not intended for manufacturing, nor is this tutorial meant to be a gear design guide. Its sole purpose is to show the reader how to apply the learned knowledge using a simplified version of the gears. • Offset Shaft: Add the following sketch in the "Front Plane", Exit the sketch. Rename it "Gear Width." This is be the length of the full size helix. • Build two reference planes parallel to the "Right Plane", one at each end 226 of the "Gear Width" sketch.
  • 49. Special Features: Sweep, Loft and Wrap • Add the gear's profile sketch in the "Front Plane", at the left side of the "Gear Width" sketch. Exit the sketch and rename "Thread Profile." • In the plane located at the left of the "Gear Width" sketch add a new sketch, use the "Convert Entities" drop down icon to select "Intersection Curve", this command will create sketch entities at the intersection of the selected surface(s) and the current sketch plane. This tool is particularly useful when we have irregular surfaces intersecting the sketch plane. In this case it works the same as "Convert Entities", but for oblique surfaces it’s the best option to obtain the intersection of the surface and the sketch plane. 227
  • 50. Beginner’s Guide to SolidWorks 2013 – Level I • Make the Helix 1" Height with a 0.25" Pitch • Make the first sweep using the profile and the first helix. • In the plane at the right of the "Gear Width" sketch add a sketch to start a second Helix using "Convert Entities", and make the helix activating the "Taper Helix" option with a 7deg taper. 228
  • 51. Special Features: Sweep, Loft and Wrap • Add a sketch at the flat end of the thread using "Convert Entities" to use as the profile for the tapered helix (Rear view), and make the sweep. 229
  • 52. Beginner’s Guide to SolidWorks 2013 – Level I • Repeat a helix and sweep for the other side • Add a 0.015" fillet to round the edges of the thread. Save as 'Offset Shaft 230 Gear' and close.
  • 53. Special Features: Sweep, Loft and Wrap • Worm Gear: Create a parallel plane 0.95" above to the "Top Plane." • Add the following sketch in the plane made in the previous step, exit the 231 sketch and rename it "Path."
  • 54. Beginner’s Guide to SolidWorks 2013 – Level I • Add a new auxiliary plane perpendicular to the "Path" sketch. Rename it 232 "Profile Plane." • Add this sketch in the "Right Plane" and make a revolved cut.
  • 55. Special Features: Sweep, Loft and Wrap • In the "Profile Plane" add the following sketch. This will be the gear cut profile. Locate the sketch using the "Path" sketch at the indicated point. Exit the sketch and rename "Gear Profile" • Make a "Cut Sweep" using the "Path" and "Gear Profile" sketches (We can also make a "Cut Extrude" in this case works the same.) • Add a 0.015" fillet at the bottom of the sweep cut. 233
  • 56. Beginner’s Guide to SolidWorks 2013 – Level I • Make 22 copies of the Cut-Sweep and the previous fillet. Add a 0.015" fillet to the "Cut-Revolve1" and "Cut-Revolve3" to finish the gear. Save as 'Worm Gear Complete' and close. 234
  • 57. Special Features: Sweep, Loft and Wrap Engine Project Parts: Make the following components to build the engine. Save the parts using the name provided. High resolution images at mechanicad.com. Hint: Make a revolved boss with the option "Thin Feature." 235
  • 58. Beginner’s Guide to SolidWorks 2013 – Level I Final Parts for the Engine Project: The following components are the last required to complete the engine. Save the parts using the name provided. A help sheet with a sequence of features is located in the Appendix for each of the last three parts. High resolution images at mechanicad.com. Crank Case Top (2 Pages) 236
  • 59. Special Features: Sweep, Loft and Wrap 237
  • 60. Beginner’s Guide to SolidWorks 2013 – Level I 238
  • 61. Special Features: Sweep, Loft and Wrap 239
  • 62. Beginner’s Guide to SolidWorks 2013 – Level I Extra Credit: Visit our web site to download details for the Gas Grill project as well as the finished parts for this book, higher resolution images of the exercises and some extra topics not covered in the book. Build these components and after the Assembly lesson make the Gas Grill assembly. http://mechanicad.com/download.html 240