1. BASIC Injection Molding
Practical Injection Molding: with SkillBuilder
Train production personnel, supervisors and managers to understand the
molding process at their appropriate “need to know” level. Your new
process-capable production team will:
N Exercise greater control over the molding process
N Reduce rejects and scrap
N Improve part quality
N Increase productivity
Step “inside” the mold to visualize the process as graphic animation reveals
the machine and plastic behavior during the molding process.
Learn the “what”, “why” and “how” of injection molding technology.
Module 1 - Basic Injection Molding
Fundamentals of injection molding technology, including basic knowledge that all
personnel involved with the molding process must understand in order to make
informed decisions on the production floor. Recommended for Machine Operators,
Material Handlers, Set-up Personnel, and Production Supervisors.
Module 1 – Basic Injection Molding Lessons
1 Lesson 1: Inside the Molding Machine
Shows and describes all major components of the molding machine.
2 Lesson 2: Inside the Mold
Construction and operation of two-plate, three-plate and runnerless molds.
3 Lesson 3: The Nature of Plastics
Lessons
Characteristics, types, structure, size and processing behavior.
4
Lesson 4: Machine Operating Controls – Part 1
Purpose, operation and effects of the pressure and fill rate controls.
Lesson 5: Machine Operating Controls – Part 2
5 Purpose, operation and effects of machine and mold temperatures, timers,
screw and clamp controls.
SkillBuilder Lab Lessons for Injection Moldinging Basic Module
Lesson 1: Understanding the Injection Molding Process
1 A review of the sequence of the standard injection molding cycle with emphasis
on timer operation.
Lesson 2: Setting Machine Controls
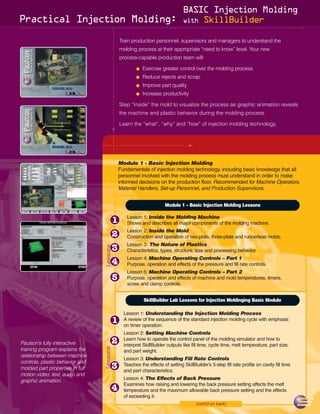
Paulson’s fully interactive 2 Learn how to operate the control panel of the molding simulator and how to
interpret SkillBuilder outputs like fill time, cycle time, melt temperature, part size,
Lessons
training program explains the and part weight.
relationship between machine
Lesson 3: Understanding Fill Rate Controls
controls, plastic behavior and
molded part properties in full 3 Teaches the effects of setting SkillBuilder’s 5-step fill rate profile on cavity fill time
and part characteristics.
motion video, text, audio and
graphic animation. Lesson 4: The Effects of Back Pressure
4
Examines how raising and lowering the back pressure setting affects the melt
temperature and the maximum allowable back pressure setting and the effects
of exceeding it.
(cont'd on back)
2. Practical Injection Molding: Basic Injection Molding with SkillBuilder
SkillBuilder Lab Lessons for Injection Moldinging Basic Module (cont’d)
5 Lesson 5: Setting the Injection Limit Timer
Learn the proper setting for the injection limit timer, which shuts off the injection
pressure if the VPT setpoint is not reached.
Lesson 6: The Maximum Injection Pressure Settings
6 Discusses how to set the maximum injection pressure setting so the fill rate control
never lacks the pressure it needs to fill the cavity according to the fill rate profile.
Lesson 7: Setting the Holding Timer
Examines how the holding timer determines the length of time the holding (second
7 stage) pressure stays on. Lesson 7 also examines the effects of the holding time on
gate sealing and molded part weight and dimensions.
Lesson 8: Setting the Holding Pressure
8 Focuses on how to set various holding pressures to determine the effect on the
molded part weight and length.
Lesson 9: Mold Closed Time and Mold Open Time vs Melt Temperature
9 Learn the effects of mold closed and open time on the melt temperature. Set the
mold closed time to the minimum required to make a good part.
Lesson 10: The Effects of Barrel Zone Temperatures on the Melt Temperature
Vary the temperature setting of each barrel zone temperature, one at a time, to
10 determine how each zone affects the melt temperature. Learn how to match the
actual melt temperature to the front zone barrel setting; a good molding practice.
Lesson
Lesson 11: Some Effects of the Mold Temperature
11 Set different core and cavity mold temperatures to determine the effect on peak
cavity pressure and part dimensions.
Lesson 12: The Effects of Screw RPM
Learn by setting various screw rpms, the effects on the melt temperature and
12 the plasticating time (the time required to convey the next shot of plastic ahead
of the screw).
Lesson 13: The Effect of the Screw Back Position
Examines the effects of the screw back setting on the cushion size and on the melt
13 temperature. Students can change the screw back position to increase and decrease
the cushion size.
Lesson 14: Effects of Clamp Force
14 Learn how the molding conditions affect the amount of clamp force required and
how to set the clamp force to the minimum required to produce a good part.
Lesson 15: Achieving and Controlling the Melt Temperature
Use knowledge gained in previous lessons to accurately achieve a desired melt
15 temperature. Learn that front zone barrel temperature and the melt temperature
often don’t match and examine the various machine controls available to alter the
melt temperature.
To sign up for a
hands-on-I-T
system demonstration
in your plant,
call Paulson Training Programs, Inc.
1-800-826-1901. 15 N. Main Street, PO Box 366, Chester, CT 06412
Phone: (860) 526-3099 e-mail: sales@paulsontraining.com www.paulsontraining.com