1. Supplied accessories TROUBLESHOOTING
PANNARELLO (optional)
CLEAN use a mild, non-scouring cleaning agent
- Clean the machine only after disconnecting plug from mains power socket
Use the frothing nozzle like the steam nozzle No indication - Switch on mains switch - Never use an ordinary or a microwave oven to dry the machine after rinsing
1 Using to make superiour quality hot and creamy No power to the machine - Check plug and power connection
Cappuccinos Frame
Rub with a soft, damp cloth
Only water instead of coffee comes
Proceed as with preparation «STEAM / when «Powder coffee» is selected - Fill up a measure of powder coffee Coffee dregs drawer
CAPPUCINO», immerse nozzle approx. 3-4 Drip tray Rinse under running water
cm in the milk
Coffee is not hot enough - Pre-heat cups
Key for brewing unit Cleaning brush - Possibly clean brewing unit
Water tank Rinse under running water
dismantling/assembly - Descale if necessary TYPE SUP 021R
Remove the filter that is in the water tank TYPE SUP 021YR
1. Loosen the knurling screw, remove nozzle and rinse thoroughly. Replace by turning
2 Cleaning No hot water/steam - Clean nozzle with needle and lightly presssing into place
(when the machine is switched
After preparation off and tap is closed)
Hot water / steam nozzle blocked
Coffee outlet 1. Extend coffee outlet nozzles totally
2. Clean with damp cloth
Heating time too long Clean weekly.
Not enough water - Descale machine
2.1 Press with thumb on center of coffee
1. Close service door outlet ...
3. Disassemble nozzle Brewing unit cannot be removed 2. Switch on machine
Coffee measure Test strip for water 3. Brewing unit is unlocked
2.2 ... and pull away coffee outlet forward
4. Place nozzle parts under running hardness 4. Continue with
water and remove milk residue.
Dry separate parts, reassemble, 3. Disassemble coffee outlet
and mount on machine Technical data Brewing unit cannot
1.
- Type SUP 021 R - SUP 021 YR 4. Clean parts of the coffee outlet under
be inserted running water
Every 3-4 months or - Nominal voltage see type plate on the machine Restore brewing unit 2
if lamp - Nominal output see type plate on the machine to original position
DESCALE (automatic) is lit -
-
Power
Frame
see type plate on the machine
metal - plastic
(see illustrations -->)
1 2.
- To descale, make sure that the mains cable is plugged in - Dimensions (L x W x D) approx. 27,5 x 35 x 42 cm / 11 x 14 x 17’’ Brewing group 1. Open service door.
and the machine switched on. - Weight (net) approx. 10 kg / 22 lbs remove drip tray/
dregs drawer
- Length of mains cable 1.2 m / 1,30 vards Clean weekly.
cod. 1.6.589.15.02 Rev. 01 del 04/04/02
- Use a non-poisonous, harmless, commercial decalcifying agent.
- Place for extra cable yes Never wash the brewing
- NEVER use VINEGAR (possible damage to device!) - Control panel on the front Preparation does not start Display: unit in the dishtwasher
- When the machine has cooled down, note manufacturer’s instructions! - Water tank removable
- If the machine is turned off during the descaling procedure, it will continue - Capacity water tank approx. 1.8 l / 60 oz
again where it left off when the machine is turned on again. bean container approx. 180 g beans / 60 oz beans Descale: see instructions «Descale» 2.1 Loosen strainer with the key … 2. Press PUSH position and withdraw the
- Heating unit aluminum brewing unit. If necessary, unscrew
bl k
- During the entire descaling process the machine keeps interrupting
k
in
in
bl
the distribution of the descaling solution in periodical intervals. - Pump pressure approx. 15 bar Refill with fresh water upper strainer of the brewing unit
- Safety devices pressure-sensitive safety release valve
1 Preparation 1. Place large receptacle under hot water/ steam nozzle Clean everything under warm
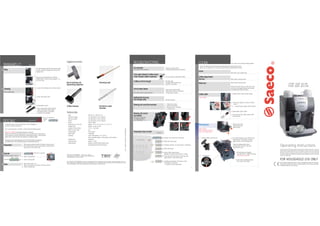
Operating instructions
bl k
for heating and safety thermostat Ventilate machine: see instructions «Ventilate»
k
in
in
bl
2. Fill decalcification solution according to manufacturer’s running water and let it dry well.
instructions in the water tank Clean service area
Refill with beans
Please read these TSM® operating instructions before operating the device. In order to
obtain drinks of good quality and to avoid damage or injury, follow the instructions
bl k precisely. Ensure that these instructions are given to any other users of the device and
k Empty coffee dregs drawer 3. Put brewing unit together
in
close in
2 Descale 3. Press for 5 seconds that they are kept in a safe place so that they can be referred to at any time. The device
bl
TSM SUCCESS MANUAL® - safe to use - easy to
(operate only when the machine is «ON») and slide back in. While inserting, has been conscientiously checked for safety and correct operation. It left the factory in
Duration: approx. 45 min. understand due to TSM® - Total Security Management Correctly insert brewing unit, dip tray, and 2.2 … and remove do not press on PUSH! fault-free working order.
4. Open turning knob and ergonomic communication®
…blink…blink… dregs drawer. Close service door
as soon as 5. Close turning knob 4. Insert drip tray / dregs drawer,
open Grinding unit blocked. The motor of the then close service door
bl k
This TSM SUCCESS MANUAL® has been examined by SEV for conformity with the safety-relevant standards, and has
k
in
in
The enclosed 'Safety Instructions' form an integral part of this user manual.
bl
been analysed by an application-oriented risk analysis for the completeness and correctness of the instructions for a safe brewing unit is blocked
3 Rinse 6. Rinse water tank + fill
7. Open turning knob and draw off tank contents
use of the appliance. We have thereby assumed use based on common-sense. -> Contact a service technician Read 'Safety Instructions' prior to initial operation of the device and keep
it together with the user manual.
8. Close turning knob
6 7 8 9