1. RRRRRRRRRRRRRRRRRRRRRRRRRRR
projectlibrary
The Perfect Finish
by Kathleen Pierce
Tips and tricks to finish Viking Knit.
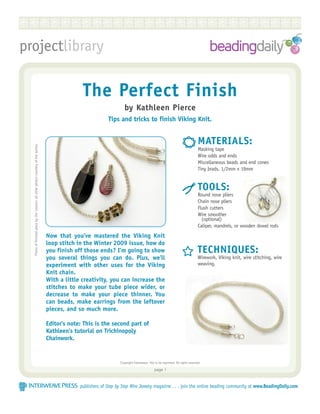
MATERIALS:
Photo of finished piece by Jim Lawson; all other photos courtesy of the author.
Masking tape
Wire odds and ends
Miscellaneous beads and end cones
Tiny brads, 1/2mm x 19mm
TOOLS:
Round nose pliers
Chain nose pliers
Flush cutters
Wire smoother
(optional)
Caliper, mandrels, or wooden dowel rods
Now that you've mastered the Viking Knit
loop stitch in the Winter 2009 issue, how do
you finish off those ends? I'm going to show TECHNIQUES:
you several things you can do. Plus, we'll Wirework, Viking knit, wire stitching, wire
experiment with other uses for the Viking weaving.
Knit chain.
With a little creativity, you can increase the
stitches to make your tube piece wider, or
decrease to make your piece thinner. You
can beads, make earrings from the leftover
pieces, and so much more.
Editor's note: This is the second part of
Kathleen's tutorial on Trichinopoly
Chainwork.
Copyright Interweave Not to be reprinted. All rights reserved.
page 1
publishers of Step by Step Wire Jewelry magazine . . . join the online beading community at www.BeadingDaily.com
2. The Perfect Finish
Adding Cone Ends Step 4: Start a spiral by leaving
Step 1: One of the easiest ways to finish the ends is a slight hole in the
by adding a bead that has a large enough hole middle, so that your
to hide the end of the weave. You can also use Viking Knit wire end will
cone ends. fit through it.
Cones come in a variety of sizes and shapes. Step 4
Simply tie up the ends with a piece of 20g
wire, slip a cone on the end of the wire, and Step 5: Once you have
pull it down as far as it will go. Make a completely spiraled
wrapped loop at the end to secure it. the top, coil it down
and over the coiled
tube, to form the top
on the end cap. The
bottom wire end can
be crimped underneath
the tube, so there is no Step 5
sharp end sticking out.
Make the piece longer.
Step 6: Sometimes it's difficult to judge how long your
Viking Knit tube is going to be before you pull
it through the drawplate. Should you end up
short, lengthen your piece by adding a chain,
Step 1
or doing some simple chain maille.
Making coiled end caps
Step 2: Use a caliper to measure the Viking Knit weave
to get the precise size of the outside diameter
of the weave. Use this measurement to make
the coiled end.
Step 6
Adding Beads
Step 7: Add beads, stones, or crystals to the Viking
Knit weave to add a focal point. In this
example, tiger eye chips were added to every
other loop. When using the drawplate, draw
Step 2 each side separately.
Step 3: Using a mandrel or a
wooden dowel rod,
in a size a little
larger than what you
just measured, wrap
the wire around it
about 10 times.
Leave a 2" length at
the end. Step 7
Step 3
Copyright Interweave. Not to be reprinted. All rights reserved.
page 2
publishers of Step by Step Wire Jewelry magazine . . . join the online beading community at www.BeadingDaily.com
3. The Perfect Finish
Increasing the size - making a cage
Step 8: Easily add a dramatic Viking Knit cover to a Step 12: Depending on how the
teardrop focal. Weave about three or four rows weave fits the top of
of Viking Knit with the good wire to get the the teardrop, you may
weave started. have to remove a
round or two of loops.
At this point, you can
add a good piece of
wire through the
teardrop hole, and
create the bail. Step 12
Step 13: Finish the bail by
weaving the two
Step 8 wires together.
Step 9: Remove the weave Bring the wire ends
from the starter tube, to the front, and
and secure it to the add a spiral to each
teardrop with a scrap end for an added
piece of wire. Make decoration. Step 13
sure the loops are
evenly spaced. If there Step 14: You can make an entire cage for the bead, if
isn't a hole at the top you choose. This technique makes a beautiful
of your bead, tape the pendant, and can also be used for earrings.
Step 9
weave to the bead.
Step 10: Continue the weave
as normal, but
increase the amount
of space in between
the weaves. The wire
swags will get longer
with each round.
Step 10 Step 14
Step 11: When the weave is at the desired length, cut
the wire to about 1/4". Remove the tube from Decreasing the size – making a dream catcher.
the teardrop and fold the wire end under so Step 15: Using 16g wire,
there isn't a sharp edge. make a circle in
the size you want,
leaving 2" of wire
extending at the
top. Hammer the
circle only so that
it keeps its shape.
Step 15
Step 11
Copyright Interweave. Not to be reprinted. All rights reserved.
page 3
publishers of Step by Step Wire Jewelry magazine . . . join the online beading community at www.BeadingDaily.com
4. The Perfect Finish
Step 16: Wrap the entire Step 19: Add beads or a focal, and finish off the bail.
circle with 26g
wire. During this
process, make a
woven bail, which
will be finished
later.
Step 16
Step 17: Start the web by simply looping the 26g wire
evenly around the circle frame.
Step 19
Keeping the loops straight
Step 20: This example uses
a 16mm dowel rod.
Make eight loops
around this rod, or
make however
many you want,
just make even
marks around the
Step 17
dowel rod. Step 20
Step 18: Continue the Viking knit in the usual manner,
until you get to the center. Step 21: After making even
marks on the top
of the dowel rod,
take your ruler and
draw the lines
down the rod.
Make sure each
line is spaced
evenly, and
matches the marks
at the top of the
Step 21
rod.
Step 18
Copyright Interweave. Not to be reprinted. All rights reserved.
page 4
publishers of Step by Step Wire Jewelry magazine . . . join the online beading community at www.BeadingDaily.com
5. The Perfect Finish
Step 22: Pick up some wire brads, and hammer one on
each line - about 1/4" from the top of the KATHLEEN PIERCE
dowel rod. You don't have to hammer them in is a graphic artist and a
very far for them to stay. Or, you can use a self-taught jewelry
staple gun to add one staple to each line, designer. She lives in
instead of using brads. The staple should be Appleton, Wisc. with her
going in the same direction as the line. son, daughter-in-law, and
grandson. Kathy has been
into arts and crafts her
entire life, and although
she's only been working
with wire jewelry for two
years, she became addicted as soon as she put the
wire in her hands. Kathy loves to use a variety of
techniques in her work, which she sells on her Web
site at enchantedwire.com.
Step 22
Step 23: Make a loop around each brad, leaving a slight
loop in between. When you get all the way
around, begin the Viking Knit as you normally
would. The brads serve as a guide to keep the
chain loops straight. Keep weaving down the
dowel rod until you're finished. When you get
to the length you want, simply remove the
brads to slide the tube off, or cut the top loop,
and slide the tube downward.
Step 23
Copyright Interweave Press LLC. Not to be reprinted. All rights reserved.
page 5