Customizing Your Document in PerfectForms
•Als PPTX, PDF herunterladen•
1 gefällt mir•732 views

This tutorial teaches how to customize forms in PerfectForms by: 1. Creating and naming a new form, then setting its size, borders, and background color in the Form Properties panel. 2. Adding images to the form by selecting them from the assets menu in the toolbar and adjusting their size and position. 3. Creating accent borders using horizontal and vertical separators from the toolbar, then customizing their color, width, and position on the form. 4. Saving and previewing the customized form.

Empfohlen
Weitere ähnliche Inhalte
Was ist angesagt?
Was ist angesagt? (20)
Andere mochten auch
Andere mochten auch (20)
Ähnlich wie Customizing Your Document in PerfectForms
Ähnlich wie Customizing Your Document in PerfectForms (20)
Kürzlich hochgeladen
Kürzlich hochgeladen (20)
Customizing Your Document in PerfectForms
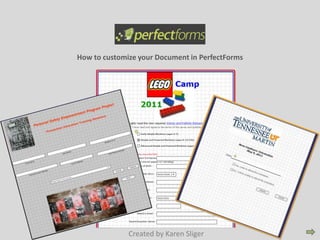
- 1. How to customize your Document in PerfectForms Created by Karen Sliger
- 2. In this tutorial, we will be covering: -How to create and name a new form. -How to customize your PerfectForms forms using sizing, borders, background color, and images. -How to save and preview it as a web form. It is designed to be self-paced and could take as long as needed to complete the tutorial, if you plan to work along. If you go through without working along, the tutorial will take 10-15 minutes. You can use the navigation arrows at the bottom right corner to go through the tutorial or you can pick a specific topic: Creating and Setting up a New Form Sizing, Borders, & Backgrounds Adding an Image to the Form Creating an Accent Border You can come back to this page by clicking the HOME button at the bottom of the page.
- 3. Creating and Setting up a New Form First, open a new form by going to New and selecting Form.
- 4. Then you will be given the option to name your form. I named this one “Training Registration.” Select Apply Changes once you have named the form.
- 5. Once you have applied the changes, you will be brought to this screen. You will notice several different buttons at the bottom of the page. For this tutorial, we will only use the Design button. Select the Design button now.
- 6. You should now have a screen showing something similar to this. Form Properties Panel Toolbox Panel Your screen may not show you The Toolbox or Form Properties Panels. That’s ok, we’ll open those on the next page…
- 7. To make sure your Toolbox Panel and Form Property Panels are showing, Go to View. Look for Toolbar and Property Bar and make sure each have a checkmark beside them. If they do not, select them now.
- 8. Sizing, Borders, & Backgrounds Now we want to take a look at our Form Properties Panel. This is where you can change different aspects of the form. You can change The size as well as the grid structure color, etc. Let’s change the dimensions of the form itself. For this example, I chose 12 x 15 inches. You may need to change your units in the drop down menu beside the width. The default on most forms is set to pixels. Unless you are very familiar with pixels, it is better to change to inches. Next, let’s give our form a border. To do this, select the Show a Frame option. We can also change the color of this border. Beside the color option, you will notice a black box with a little black triangle in the corner. If you select this corner, it will pull out a large color chart. You can select colors from this or if you know the code of color you would like to use, you can plug it in beside the black box. For the sake of this tutorial and our design, I am leaving this at the default Black. You can also choose how big you want the border and if you want rounded corners or not. Take a minute and play with your form to see the difference in the sizes, colors and look of the rounded corners.
- 9. Next, we will click inside the grid. You will notice that the Form Properties panel has now been changed to Page Properties. Here we can give each page of the form its own title or leave it as page 1, page 2, etc. This will not show up on the form but rather is used for organization. On this panel, you also have the option to change the Background color of the form. For this example, I chose a light gray color. Again, you will notice the black box with the black triangle. If you select the triangle, it will give you a color chart in which you can choose the color you like. Go ahead and take some time to work with the background colors on your form.
- 10. Now your form should look something like this. But we’re not done yet!!
- 11. Adding an Image to the Form Now we are going to look at adding a graphic to the form. To do this, we will now going begin using our Toolbar Panel located on the left-side of the screen. Notice at the top there is an icon of a wrench and a page with an arrow. The wrench icon takes you to the Tools panel that will be used to give life to your form. The Arrow allows you to add and select different pages of the form, change permissions of certain viewers that enables them to see hidden areas, etc, and also to add images. Click the Arrow. To add your image, make sure it is saved on your computer or on a connected drive and select the + beside Assets. You will then be given a box to browse for your file. Once you find your image, select it and click next. You will then be given the option to Name your image then click ok.
- 12. Next, click the wrench. Go down to Picture. Click and hold down your mouse and drag it the form. You should see an icon like this on your form. Go ahead and try this now.
- 13. Now, you will switch back over to the Properties Panel and notice that now that you have the picture selected, we are given Picture Properties. Click the drop-down menu next to Asset. Find your image there. You can see the name of the image used for this tutorial in the example. Select the image. From the Properties panel, you can also tell it to Maintain the image ratio, stretch, etc.
- 14. Your image should now be on the form. You can use the double-sided arrow to resize your image as needed. Go ahead a take a few minutes to place your image and resize it. Notice that you can also move the location of your image on the form by clicking and dragging it. Find the right placement and then we’ll go to the next step.
- 15. Creating an Accent Border Now I am going to show you how to create a second border. Click somewhere inside the form. Go back to your Toolbar panel. Make sure the wrench is selected at the top. Find the Horizontal Separator, click and drag it onto the form.
- 16. With separator selected, go to the Properties Panel. Here you can name the separator if you would like. For this tutorial, we will just leave it at its default. Under Style, you can change the color and size of the line. Again, you will find the black box with the black triangle. Clicking on the triangle will give you the color chart. For this form, I chose an orange to match the orange in my image and selected the size to be a 2. Take some time to customize your separator’s color and size.
- 17. Make sure the separator is selected and drag it up right below the frame. Once you have it positioned, place your cursor at the end of the line to get the double arrow and click and drag the mouse to stretch the separator to measure the width of the form. Once it is the size you need, right click and select copy item. Click inside the form, right-click and select paste item. Now you have the bottom of your border. Click and drag this separator to the bottom of the form.
- 18. Click inside the form and go to your Toolbox Panel. This time select the Vertical Separator. Go through the same steps we followed to customize and position the Horizontal Separator. Spend some time now getting your Vertical Separators set.
- 19. Your form should now be customized and look similar to this (but with the bottom border…my computer cut it off when downloading the image.)
- 20. Don’t forget to save all your hard work. Save is found under Form at the top right corner of the screen. Under Form, you also have the option to Preview what your form will look like on the web. Use this to see if it looks right or if there is anything you need to change. You have now successfully customized your form!!!
- 21. References -PerfectForms http://www.perfectforms.com/ -Mike Abney, an example of his work in PerfectForms: http://app.perfectforms.com/player.htm?f=H8zAggCn -Some examples of Karen Sliger’s forms and surveys can be viewed at: http://app.perfectforms.com/player.htm?f=VEmggAcD http://app.perfectforms.com/player.htm?f=jMVgAgQE http://app.perfectforms.com/player.htm?f=J03AggQm http://app.perfectforms.com/player.htm?f=oe5AgA8H