3. DMXzone Photoshop CS2 e-Book Introduction Page
Introduction
Whether you have boarded the Photoshop train already or not, without guidance
you’ll probably miss a lot. With this e-Book, award winning writer Linda Goin, takes you
on the Photoshop train to show you how to create the best the software has to offer.
She uses hands-on tutorials that are not only informative but also incredibly fun to
follow due to Linda’s unique writing style and creative examples.
What this book does and who it's for
This e-Book is best suited for beginning or intermediate Photoshop users. Linda Goin shows you how to get the most
out of Photoshop using step-by-step tutorials. .
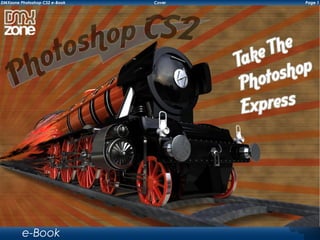
Photoshop CS2: Take the Photoshop Express
The book is devided into four major Parts. In the first part you jump aboard the Photoshop ��press. This train takes
board Express.
you into the world of Photoshop CS2 to show you how to alter reality. After that you move on and learn more
about the common Photoshop CS2 tools. In the next part the scenery around the Photoshop Express changes with
the use of fantastic filters! Finally the Photoshop Express reaches his destination, time to put your theory in practice.
�inally ��press destination��
Happy Photoshopping!
On Board: How Photoshop Alters Reality
Linda begins to offer some infamous and not-so-famous photographic alterations that have been seen in the past
century. Accordingly, she’ll lead you through the methods that were used to create these images.
After that Linda explains why Photoshop CS2’s adjustment layers are important to use when altering images, and
she begins to illustrate how these layers work with the use of the levels and curves.
In the previous chapter, Linda explained how you could alter your images with levels and curves through
adjustment layers. In this chapter, she shows you how to retouch your colour images through colour channels. This
option allows users to change values�� tones�� and colour through channel modifications. An additional benefit is
that artefacts, or blemishes, can be reduced through the colour channel option as well.
Next up Linda will show you how to use the Extraction tool, which helps to eliminate a background, and is found
as early as Photoshop 6. Healing, Patch, Smudge and Blur tools are also found in earlier Photoshop versions. In
this chapter, Linda illustrates when and how to use all these tools and more as a means to either retouch or alter
photographs.
In the former chapters about Photoshop CS2, Linda has illustrated how to use several tools in the program to
e-Book
4. DMXzone Photoshop CS2 e-Book Introduction Page
brighten up old images. In the last chapter of this section, she begins to work with several recently-taken photos
at once to create one new image. This process�� called compositing�� may seem simple at first glance�� but several
factors – including tricks with selection tools – can help to save time and can also help to create a more believable
image.
Moving On: Photoshop Tools
Linda begins to build a fantasy landscape with images extracted from several photographs. Not only will you learn
inda
about some Photoshop CS2 tricks, but you’ll also learn to use some composition guidelines to build this fantasy
land.
The next chapter continues to build on the topic of building a fantasy landscape from several seemingly disparate
objects. But this chapter focuses on how to use several filters and blending modes to achieve the final result�� a
layout based upon the Rule of Thirds.
After creating the fantasy landscape, Linda moves on to creating a jewel case insert for an imaginary client. This
jewel case insert illustrates how to merge images and type. In a step-by-step process she includes information
about how to create paths with the pen tool, how to use these paths for text, and shows how to create a burned
edge effect around an image by creating, saving and loading a selected area.
Linda moves on to create a graphic design problem that shows how to create artwork for iron-on transfers,
including a means to create a spot colour. The problem also illustrates how to save that colour in a spot colour
channel. Furthermore Linda uses a rough logo and artwork that must be merged and shows how this can be done
in ten easy steps, including how to layout the artwork for the transfer sheet.
In the final chapter of this section�� Linda shows you how to successfully convert your colour images into
monochromatic legends. The tools that you’ll use include adjustments, histograms, Colour channels, Channel Mixer,
and Calculations. In addition, once you have that perfect black and white image, Linda shows you two different
methods to add a sepia tone to that image.
The Scenery Changes: Fantastic Filters
ters
ers
To illustrate the use of templates and Photoshop’s Filter Gallery, Colour Range options, and the Layers Style Palette
Linda creates a self-promotional postcard in this chapter. Throughout the chapter, she explains how you can push
these Photoshop tools to the limit to achieve a wide number of effects – in one case, as a neon-like effect that
turns a simple photograph into an abstract representation.
After learning about the basics of filters it’s time to move to a more advanced subject. The ��ther�� filter included
e-Book
5. DMXzone Photoshop CS2 e-Book Introduction Page
at the bottom of Photoshop’s �ilter list presents a mystery – just what is this �ther filter�� and what does it do�� In this
chapter�� Linda demystifies the �ther �ilter through a series of steps that show you how to brighten pi�els in relation
�� pixels
to surrounding values, how to sharpen images without noise, how to mask quickly, and how to relocate and shift a
selection – all through the �ther filter.
�ne of the filter features unique to Photoshop CS2 is the alteration of distortion created by a camera lens with
the Lens Correction filter. In this chapter�� Linda shows you how to get the most out of this filter. She illustrates how
to correct images that appear distorted, but she also shows you how to create some special effects through the
options contained within this filter.
In the last chapter of this section you learn how about the problems regarding the creation artistic images from your
photographs with Photoshop �ilters. Your images may seem too simplistic or �digital�� for your taste. Linda e�plains
that the reason behind this problem often lies in the background, or in the canvas or paper that you choose to use
for your artistic adventures. You’ll receive artistic canvas and paper backgrounds for your use with this chapter, as
well as steps on how to create more realistic pastel and watercolour renderings from your photographic images
with these backgrounds.
Your destination: Put the theory into practice
In the last section, Linda passes on some of her tips and tricks that will enhance your Photoshop experience,
including a short tutorial on Smart Objects and Shapes. This is a veritable potpourri of tips and tricks along with links
to online resources for FREE tutorials, brushes, and photographs that you can’t afford to miss, and that weren’t
covered in her previous chapters!
About The Author
Linda Goin carries a B.F.A. in visual communications with a minor
in business and marketing, and an M.A. in American History with a
minor in the Reformation. While the latter degree doesn’t seem to
fit with the first two educational e�periences�� Linda uses her 25-
year design expertise on site at archeaological digs and in the
study of material culture. Accolades for her work include fifteen
first-place Colorado Press Association awards�� numerous fine art
and graphic design awards, and interviews about content
development with The Wall St. Journal, Chicago Tribune,
Psychology Today, and L.A. Times. Linda is the author of Design for
Web Developers: Colour and Layout for the Artistically
Overwhelmed for DMXZone, and she writes on Web Design.
Table of Contents: Page
e-Book
6. DMXzone Photoshop CS2 e-Book Table of Contents Page
- On Board: How Photoshop Alters Reality 7
How to Recognize Deceptive Photographs 8
Adjustment Layers, Levels and Curves 16
Retouching in Channels 28
Extraction, Smudge, Heal, and More 37
Mix It Up – Three Images into One 45
- Moving On: Photoshop Tools
How To Build a Fantasy Landscape I 55
How To Build a Fantasy Landscape II 66
Jewel Case Cover Art 78
Creating Spot Colour Channels 91
Beyond Colour - Black And White And Sepia 104
- The Scenery Changes: Fantastic Filters
The Filter Gallery as a Starting Point I 116
The Filter Gallery as a Starting Point II 126
Vanishing Point Filter 138
Creating and Eliminating Optical Distortion 149
Artistic Effects with Canvases, Filters, and Layers 159
- Your Destination: Put Theory into Practice 7
Optimize Your Photoshop Experience 172
Create an Easy Web Gallery 180
e-Book
8. DMXzone Photoshop CS2 e-Book Photoshop CS2: How to Recognize Deceptive Photographs Page
Photoshop CS2: The Bad and the Ugly other’s picture with the wee creatures, and photo
experts who were consulted said that the images were
Photographers, graphic designers, and artists now have not double exposures nor had the negatives been
access to one of the most powerful tools that Adobe’s altered. The simple fact is that the girls had just posed
offered through their Photoshop CS2 software. Digital with very obvious cutouts of fairy drawings to make the
artists can alter landscapes, touch up faces, and �authentic�� pictures.��
create fantasy images that boggle the mind. Altered
images, however, have pervaded the news media
through deceptive photojournalism. In this article, Linda
offers some infamous and not-so-famous photographic
alterations that have been detected over the past
century. Accordingly, she’ll lead you through the
methods that were used to create these images.
Staged Photographs: A Media Problem
Since the mid-1800s, photographers and graphic artists
alike have altered their camera’s output. Wartime
images seem particularly prone to distortion, as
propaganda demands drama to win hearts and minds.
Thankfully, blogs have investigated recent images that
seem too good (or too awful) to be true and these
writers have shown the world that we need to keep
a sharp eye trained on what the media offers to an
international viewing audience. Very few people owned cameras in 1917, and just as
few people owned radios or could read a newspaper
Staging photos and videos is one problem within the at that time. People trusted images, because they
realm of altered images that has existed for decades. looked to newspapers and magazines to express
Take�� for instance�� the notorious �Case of the Cottingley their stories through photographs and drawings. This
�airies�� as told by the James Randi �ducational atmosphere allowed photos like the one above to gain
Foundation: credence. Another example includes the Civil War
photos produced by Alexander Gardner. One historian
�In 1917 two innocent-seeming �nglish schoolgirls�� has revealed that Gardner used one dead soldier to
16-year-old Elsie Wright and her 10-year-old cousin create several heart-wrenching wartime scenes. Since
�rances Griffiths�� launched a deception that somehow the photographs produced such against among their
managed to fool many people over the following viewers, no one bothered to notice that the soldier
years, including the creator of Sherlock Holmes, Sir included within these various images was the same
Arthur Conan Doyle. While playing in Cottingley Glen, mortally wounded man.
just behind the Wright home, the girls took what they
claimed were close-up photographs of winged fairies This disturbing form of staging, where a dead person
dancing amid the foliage. The girls then took each is moved from one place to another for dramatic
e-Book
9. DMXzone Photoshop CS2 e-Book Photoshop CS2: Adjustment layers, Levels and Curves Page
Photoshop CS2: Adjustment Layers, Levels,
and Curves
In this tutorial, Linda explains why Photoshop CS2’s
adjustment layers are important to use when altering
images, and she begins to illustrate how these layers
work with the use of the levels and curves. These two
tools can help you to adjust tonal ranges and colour
balances within your images manually so that you
maintain more control over the outcome rather than
using the �automatic�� levels and curves adjustments.
Adjustment Layers: A Foolproof Way to Edit
Images
You may already be familiar with Photoshop’s
adjustment layers, as the CS2 version carries many of The adjustment layers icon is located in your layers panel
the same features as its ancestors, CS1 and Photoshop (or choose Layer New Adjustment Layer ). When you
7. If so, then you know that the use of adjustment layers click on that icon, a drop-down menu will appear that
is a foolproof means to edit images. If you’re unfamiliar offers alteration choices. Your choices include solid
with adjustment layers, you’ll learn quickly why they’re colour�� gradient�� and pattern fill layers along with the
important: They help you to save the pixels within the adjustment layers. The latter choices which are located
original image while you muck around with alterations. beneath the three fill layer options.
While adjustment layers will increase your file size�� the
The most important reason to use adjustment layers objective is to find the choices you need and then
rather than mess with the original image is to avoid merge the adjustment layers together or with the
loss of image data during alterations. The next most original image.
important reason to use adjustment layers is that you
can hide, delete, and modify those layers as you move As I move along with this tutorial, you might want to
along to your final results. Adjustment layers also allow open an image in Photoshop to play along as well. The
you to alter portions of your images through masks and, nice thing about adjustment layers is that you can’t
finally�� you can copy and paste those layers onto other make a mistake. Oh sure, you can screw something up,
images to save time with multiple edits. but you also have the option to delete that layer and
start over again. For this reason, you can play all day
long with the various adjustment layers so that you can
The most important reason to use learn how they alter images. Once you spend a few
adjustment layers rather than mess with hours with these tools, you’ll gain a huge repertoire of
the original image is to avoid loss of image means to salvage somewhat mediocre camera shots.
data during alterations
The image that I’ve chosen to work with for this article
was one that I shot in London on a visit in July 2005. The
e-Book
10. DMXzone Photoshop CS2 e-Book Photoshop CS2: Retouching in Channels Page
channel shows the couple in the rear very well, but You can see the difference among the thumbnail
the couple in front are washed out. The Green level is channels here – the Red and Blue are lighter, and the
almost right, but – again – the couple in the back are Green is unchanged. I discovered, despite the fact
still too dark. The Blue channel is definitely the culprit that the Red channel seemed too light, that it needed
in the shadows, but the couple in front are almost to be darkened for the full range of values within all
perfect. faces to become visible. But now I have two other
problems – the red overtones are a bit too strong, and
Given this information, then, I want to lighten the Blue the contrast has diminished. I can fi� both problems
channel, darken the Red channel, and see how the with simple brute force…
Green channel fares after I make those adjustments –
at least that’s how the process seems at the moment.
For this process, I’ll click on each channel, and go to Colour and Contrast Adjustment at All Levels
�Images Adjustment Variations�� for each channel.
Realize here that you can click on �lighter�� or �darker��
numerous times to achieve a certain degree of
lightness or darkness within each channel. And, if you For colour adjustment, I went to “Layer
move the ��ine�� and �Course�� slider back and forth��
you’ll see a narrower or wider range of value options. New Adjustment Layer Colour Balance��
lance��
and this dialogue box appeared:
Every time I alter a channel, I check how the result
altered the RGB image in both the thumbnail in the
Channels Palette and in the original by clicking on
the eyeball by the RGB Channel. The image changes
colours as I alter the image�� but the final result shows a
good range of values in all faces:
Since Red and/or Magenta are prevalent, and since
those colours are prominent in the mid-tones and
shadows areas, I move the slides toward Cyan and
Green in both levels. I only needed to move them a bit
to see a more pleasing result:
e-Book
11. DMXzone Photoshop CS2 e-Book Photoshop CS2: Extraction Smudge Heal And More Page 7
Photoshop CS2: Extraction, Smudge, Heal,
and More
Although Photoshop CS2 offers a few perks more than
Photoshop 7, some of the same tools to retouch photos
are unchanged. The Extraction tool, which helps to
eliminate a background, is found as early as Photoshop
6. Healing, Patch, Smudge and Blur tools are also
found in earlier Photoshop versions. In this tutorial, Linda
illustrates when and how to use all these tools and more
as a means to either retouch or to alter photographs.
Photoshop Tools That Can Change History
When photographers wanted to change or retouch The first problem: Sometimes you can’t scan the image
photographs in the past, the process was painfully slow yourself, as clients sometimes don’t want to part with
and tedious. With Photoshop, the process is almost the original image. If I had the image, I would scan it at
instantaneous, provided the user knows which tools to 300 dpi so that I could work within a large size and so
use and when to use them. Extraction can eliminate that any blemishes could be reduced when the image
backgrounds, and the Healing and Patch tools can was also reduced (to no less than 150 DPI for print). And
eliminate hours of work. Other tools, like gradients, noise although the photo is black and white, I would scan it
reduction, and the Smudge and Blur tools can help to in RGB so that I could work within the colour channel
speed up the process as well. layers if needed (see previous article). Since this client
wanted to scan the image herself, I managed to talk
But, sometimes a photo does require more work, her through some of the processes. However, instead
because fast fi�es don’t provide the results that you of 300 DPI, I ended up with a 72 DPI image – a mighty
might want. While I use an old photograph to illustrate problem indeed, as you’ll see shortly.
some of these processes, the same tools and methods
can be used on any photograph or image.
Extracting the background
Old Locket Photo
While I could spend an hour or two replacing the
The photograph below left was a little tough to deal scratches with the healing brush, I decided to extract
with, as it was a miniature contained within an old the boy from the background and eliminate more than
locket that measured 19 � 38 mm (roughly .75�� � 1.5��). half that work.
But, I managed to arrive at the image on the right with
the help of Photoshop, a little extra time, and some The first step is to make a copy of the image so that I
patience. I’ll walk you through the steps below, with can save the original for a backup. I then went to ��ilter
some preparation on the front end on how to make this ��traction�� and a window popped up that contained
job simpler for yourself. the image along with various tools:
e-Book
12. DMXzone Photoshop CS2 e-Book Photoshop CS2: Mix it up, Three Images into One Page
Photoshop CS2: Simple compositing
Within the past few articles about Photoshop CS2,
Linda has illustrated how to use several tools in this
program to brighten up old images. In this article, she
begins to work with several recently-taken photos
at once to create one new image. This process,
called compositing�� may seem simple at first glance��
but several factors – including tricks with selection
tools – can help to save time and can also help to
create a more believable image. Linda covers these
compositing tools and more in this article…
Bring Out Those Boring Photographs
The photo at top left was taken in Wales, the photo
In the first article about Photoshop�� I talked about how of the horses was taken in Colorado, and the bottom
to spot fake photographs�� or �fau�tography.�� If you’re photo was taken in Nassau. I want to use the horses,
interested in photojournalism, the practice of altering the mountains, and the Bahamian sky to create a new
photographs or creating composites is unethical, illegal image. But, as you can see, the lighting and colours
in some situations, and just plain wrong. However, if are all a little off from each other. So�� this �simple��
you want to create photographic or artistic images composition will take some work.
for postcards or greeting cards�� as �illustrations�� for
fictional works�� or as digital artwork for sale or just for Most importantly, this composite presents a chance to
personal enjoyment, then you can create composites practice a few tricks with Photoshop’s selection tools. I
for fun and/or profit. illustrated how to use the Extraction Tool in the previous
article. With this composite, I’ll use a variety of other
Compositing practice is perfect for those less-than- tools to eliminate, move, and alter objects in all three
wonderful images that you have stashed on your hard photos and in various layers to create a single image.
drive. Yes, I know the reason why you haven’t tossed
those photos – at least one or two features within those
images are valuable to you. Even the dark, blurry, and First Step: Making Selections
otherwise defective images can work if you know how
to fi� those features. Photoshop CS2’s selection tools vary little from previous
versions, but a little refresher in how to use these tools
The first project is a simple one�� where I chose to your best advantage can help you save time.
three rather boring vacation photos to create one When you make a selection within an image, a space
composite: outlined by crawling dashes will appear (sometimes
called �marching ants��):
e-Book
14. DMXzone Photoshop CS2 e-Book Photoshop CS2: How To Build A Fantasy Landscape Part I Page
Photoshop CS2: How to Build a Fantasy
Landscape
In previous Photoshop CS2 chapters, Linda illustrated
how to use a variety of selection tools to select portions
of images to remove them, to move them, or to alter
them with filters. In this first of a two-part series�� Linda
begins to build a fantasy landscape with images
extracted from several photographs. She then alters
the resultant layers with filters and blending modes. Not
only will you learn about some Photoshop CS2 tricks,
but you’ll use some composition guidelines to build this
fantasy land. The photographs with the images already
extracted are included at the end of this article so that
you can play along. The composite shown above doesn’t carry a theme, as
I created it for this tutorial – one that will illustrate how
How to Select Images for Fantasy Landscapes to use several Photoshop CS2 tools, ordinary tools that
will complete extraordinary tasks. Still, I want to choose
If I were commissioned to design a book cover or a photos for this image that contain interesting textures,
poster�� I would need to select images to fit a theme. perspectives, and contrasts to create a compelling
Book covers, posters, and the like all are designed as visual composition. The photos that I chose for this
composites – �collages�� of type and images – intended article contain ideal conditions for extraction, because
to entice a viewer to read a book or to learn about their outlines are clear, the lighting is interesting, and
an event. Other images, such as artistic collages, the details – for the most part – are fairly crisp.
might focus on the theme like �se�uality�� or �war��
to pull various components together. And, still other
composites are designed simply for impact or shock
value, as the juxtaposition is geared to jar viewers’
senses (re: Surrealism, Dada).
The photos that I chose for this article
contain ideal conditions for extraction
The beach scene above contains interesting lighting, as
I was standing under a sunlit sky while a storm brewed
in the distance. The contrast of colours between the
e-Book
15. DMXzone Photoshop CS2 e-Book Photoshop CS2: How To Build A Fantasy Landscape Part II Page
Photoshop CS2: Finalizing the Fantasy The Dog and the Lens Correction Filter
Landscape
I don’t like the perspective on the dog, nor do I like his
In the previous chapter, Linda began to demonstrate values, or lightness and darkness. I want him to fade a
how to build a fantasy landscape from several bit into that corner so that he isn’t so prominent. I can
seemingly disparate objects. In this article, she wraps accomplish both steps with the Lens Correction Filter.
up that landscape with demonstrations in how to use The Lens Correction filter is usually used to correct barrel
several filters and blending modes to achieve the final or pincushion distortion. Both problems are caused
result, a layout based upon the Rule of Thirds. Some by camera lens defects, where straight lines appear
of the other tools that you’ll use in this tutorial include curved outward or inward, respectively. But, the Lens
the �Highlight/Shadow�� adjustment and healing tools�� Correction filter can also help you to remove dark
Colour Channels, and the Lens Correction Filter. edges on an object with the Vignette option, or distort
an image rather than remove the distortion.
Back to the Rule of Thirds
�irst�� I select the �Dog�� layer�� then I go to ��ilter Distort
In the previous article, I left you with a composition Lens Correction.�� A dialogue bo� that contains a grid
based on the Rule of Thirds that looked like this: opens, and the dog is located in the lower left corner.
Since I want to see him a little better for this job, I use
the magnifying glass on the left menu in this dialogue
box to draw a square around the dog and to pull him
in closer for inspection:
Now I want to refine this layout�� as I push some
elements into the design and pull others out to make
this composition work. To do this, I’ll use various tools
contained within Photoshop CS2�� including filters and
blending modes. Since I have my layout divided into
thirds both horizontally and vertically, I can work within
one third at a time to alter various elements. Then, as I was looking down at the dog when I took this photo,
I do this, I can step back to visualize how the image but I want to alter that perspective a bit and distort him
works as a whole. As I do this, I’ll walk you through so that he looks more cowardly than he already does.
several steps that I took to alter the above image. I moved the �Remove Distortion�� slider to -10�� changed
e-Book
16. DMXzone Photoshop CS2 e-Book Photoshop CS2: Type and Images Page 7
Photoshop CS2: Jewel Case Cover Art Normally, your job would include the following:
In this article, Linda illustrates how to merge images 1. To learn more about the area and about
and type to create a jewel case insert for an genealogy either through the client or through
imaginary client. In a step-by-step process she includes research so that you can choose appropriate
information about how to create paths with the pen images and colours for this project;
tool, how to use these paths for text, and shows how 2. Learn more about the target audience for this
to create a burned edge effect around an image project from the client and through additional
by creating, saving and loading a selected area. research, so that you can narrow the focus on the
Along the way she includes tips on how to make your images and colours;
workflow proceed faster as you begin to create this 3. Present at least three different schemes to that
project or other projects that include type and images. client for approval, and;
4. To develop the artwork so that it’s presentable for
Assessing the Project a full-colour print job.
Someone just handed you a project for a client who Since this is an imaginary project�� I’ll commit to the first
owns a company called�� �James River Genealogy.�� three steps so that you can move on immediately to
He wants to promote his genealogical work along the develop the artwork for press. And, while the client has
James River area in Virginia, USA through a DVD, and approved one idea for the end project (shown above),
he needs to have a cover designed for the jewel case. you’ll need to create the prepress image shown below
for final approval before it goes to press. Therefore��
you’ll need a template to create this project, a way
Since this is an imaginary project, I’ll to create the Virginia state map outline with burned
commit to the first three steps so that you edges and background image, and a means to create
can move on immediately to develop the the type that flows along the �river.�� Those issues are
artwork for press. covered in the steps below.
e-Book
17. DMXzone Photoshop CS2 e-Book Photoshop CS2: Creating Spot Colour Channels Page
Photoshop CS2: Creating Spot Colour
Channels
In this article, Linda creates a graphic design problem
to show how to create artwork for iron-on transfers,
including a means to create a spot colour and how
to save that colour in a spot colour channel. She also
uses a rough logo and artwork that must be merged,
and shows how to convert those two images into one
in ten easy steps, including how to layout that artwork
for the transfer sheet. Tools used in this process include Your final image will look like this (you say in your head):
scaling and layout options covered in previous articles,
the Unsharp �ilter�� the Warp tool�� Create �utlines filter��
and the use of Pantone Colour swatches, among many
others.
T-Shirt Transfer
Your graphic design boss has a friend who owns a small
record label called�� ��arthBeat!�� His friend called one
day with the bright idea to create a series of T-Shirt
transfers to give away with their new CD series. Your
boss agrees to do the job for free, and you volunteer to The boss and the record company didn’t leave any
help in a misguided effort to climb the career ladder. information about size, colour, or how they want you
But, after you hear about the complete job, you make to merge the artwork, other than the fact that you
a note to yourself not to volunteer ever again. need to lay out six images per page. Otherwise, you’ll
have to take on this task with trepidation. Never fear.
�arthBeat! has a logo�� but they don’t have the original Photoshop contains all the tools that you need to solve
artwork. So the logo was snatched from a piece of this problem.
letterhead and scanned in at 72 dpi and in CMYK
colour mode. The accompanying art is pixelated Step One: Learn About the T-Shirt Transfer
beyond belief as well, as it was saved at the same Process
resolution and colour mode. You receive the images
below in two separate files: Before you begin to create the artwork, you need to
learn about the materials that the record company
wants to use to create the transfers so that you know
what size to create the final artwork. Before your
boss leaves for the day, you discover that the record
company will use �Iron �n InkJet �� Laser Heat Transfer
Iron
Papers�� sold by BestBlanks.com�� specifically the TJ-8�� or
8.5���11�� TransferJet Heat Transfer Paper.
e-Book
18. DMXzone Photoshop CS2 e-Book Photoshop CS2: Beyound Colour - Black And White And Sepia Page 0
Photoshop CS2: Beyond Colour – Black and But, colour photography really didn’t catch on with
the general public until 1936, when the development
White and Sepia of Kodachrome�� the first colour multi-layered colour
film and the development of ��akta�� pioneering 35mm
What if you need a Black and White image to enter
single-lens refle� (SLR) camera were made available.
into a contest�� �r�� what if you shot a historic photo
and the newspaper only prints black and white�� In this
In fact, colour photography evolved rapidly during
article, Linda shows how to successfully convert your
my lifetime. I remember when C-41 colour negative
colour images into monochromatic legends. The tools
process was introduced in 1973, replacing C-22 in
that you’ll use include adjustments, histograms, Colour
the darkroom. My fellow art students and I were
channels, Channel Mixer, and Calculations. In addition,
mesmerized with the new process, a feeling that you
once you have that perfect black and white image,
might equate today with the introduction of any new
Linda shows two different methods to add a sepia tone
technological product that makes life just a little bit
to that image.
easier.
Some History
But, as beginning photography students, we often
were steered away from colour in our studies. B��W
It wasn’t until 1861 when Scottish physicist James Clerk-
images, instead, became the vehicle to study depth
Maxwell demonstrated a colour photography system
of field and tonal values�� and it was – in the long run –
involving three black and white (B��W) photographs��
less expensive to develop in the darkroom. In addition,
each taken through a red�� green�� or blue filter. His first
most magazines used B��W photographs until just
photo of a tartan ribbon was turned into lantern slides
ten years before this new colour development. Yes,
and projected in registration with the same colour
hand-colouring negatives and prints was part of our
filters. This was the beginning of the photographic
education at that time.
colour separation method.
Colour, despite its beauty, can cover up a poorly
composed photograph and can distract from or
enhance a mood. Think Kill Bill I, where one scene was
produced in B��W in some American versions because
the scene was considered too graphic and bloody.
In addition, many newspapers and magazines still use
B��W photography�� and some photographic contests
offer or demand B��W categories.
This is why many digital SLR cameras today provide
options to shoot photographs in black and white or
sepia tone (we used coffee or tea to add sepia tones
In 1906�� panchromatic black and white film and to our prints in college!). But�� there are many other ways
therefore high quality colour separation colour to produce a B��W or a sepia tone print from a colour
photography were made available; and, in 1907, the photograph. So, if you want to shoot your photographs
first commercial colour film�� the Autochrome plates�� in colour, you have the options available in Photoshop
were manufactured by the Lumiere brothers in France. to make that colour print serve several purposes.
e-Book
20. DMXzone Photoshop CS2 e-Book Photoshop CS2: The Filter Gallery As A Starting Point Page
Photoshop CS2: The Filter Gallery as a Say that the above image was chosen by a client
to use as a silkscreen image for a T-Shirt. The process
Starting Point won’t be digital, so you’ll need to eliminate some of
the detail within this picture and create �flat�� areas
In this article, Linda creates a self-promotional postcard
that can be made into screens that represent spot
with the use of templates and Photoshop’s Filter Gallery,
colour. Photoshop contains a number of filters that can
Colour Range options, and the Layers Style Palette.
make that work simple – with a flick of a wrist and a
Throughout, she explains how you can push these
click of the mouse you can change the image above
Photoshop tools to the limit to achieve a wide number
so that the details are changed into areas filled with
of effects – in one case, as a neon-like effect that turns
flat colour. Several e�amples are shown below:
a simple photograph into an abstract representation.
Further, she explains what you might want to include
on a self-promotional mailer to advertise your business.
Filters: From So-So Images to Artistic Print
Projects
I’m an advocate for saving images even when those
images are far from perfect in resolution or in subject
matter. My reasoning behind this obsession is supported
by Photoshop’s filters. Photoshop filters can help you The filters used at the previous page were Dry Brush to
alter images for specific projects�� such as changing a the left and Dark Stroke to the right.
low-resolution photograph into a successful silkscreen
image (see below). Additionally�� filters can enhance
subject matter, a change that can help the viewer
perceive your image in a more positive light. If you sell
your images, this change could mean more revenue.
The filters used above were Sponge to the left and
Cutout to the right.
As you can see from the examples above, the simple
application of one Photoshop filter can make your
work easy. Now, you just need to explain to the client
why you needed to alter that image and possibly help
her to pick just one out of four possibilities.
Even when you know that you can accomplish a
simple task with one filter�� that filter cannot mask poor
e-Book
21. DMXzone Photoshop CS2 e-Book Photoshop CS2: The Filter Gallery as a starting point Page 2
Photoshop CS2: That “Other�� Filter NOTE: All the equations within this article were used
on 300 ppi images. When you open the downloaded
The ��ther�� filter included at the bottom of Photoshop’s
files�� change the resolution from 72 ppi to 300 ppi
�ilter list presents a mystery – just what is ��ther���� and
to follow along (Image Image Size Change
what does it do�� In this tutorial�� Linda demystifies the
Resolution from 72 to 300 click OK).
Other Filter through a series of steps that show how to
brighten pixels in relation to surrounding values, how
to sharpen images without noise, how to mask quickly, Open the image above (or any other image that you
and how to relocate and shift a selection – all through choose) and go to ��ilter �ther�� to view your options.
the ��ther�� filter. As you can seem in the image below, you have
choices between adding Custom, High-Pass, Maximum,
“Other�� Filter Possibilities Minimum, and Offset alterations to this image:
The ��ther�� filter is an odd name for a filter�� as it
doesn’t describe the full capabilities hidden within this
tool. You can create special effects, save time on tasks
that might be accomplished through other Photoshop
tools, and alter your images quickly with some surprising
special effects. In other words, if you have an image
that you think is dull or unsalvageable, put it through
some of the Other Filter options to see what happens.
You might develop an image that is suitable for any
number of projects.
�or the first part of this tutorial on the ��ther�� filter��
I’ll use the rather boring image below, which is also
included as a download with this article (�flowers.psd��): I’ll take you through each option to show you the
possibilities provided by these choices, and I’ll also
show you how to combine some options. The first step
to facing the intricacies provided by the ��ther�� filter is
to walk you through the Custom filter first.
The Custom Filter
When you go to ��ilter �ther Custom���� a Custom
dialog box opens to display a grid of text boxes into
which you can enter numerical values:
e-Book
22. DMXzone Photoshop CS2 e-Book Photoshop CS2: Vanishing Point Filter Page
Photoshop CS2: Vanishing Point Filter NOTE: You will want to resize the downloaded image to
300 ppi before you begin the tutorial (Image Image
Photoshop CS2’s Vanishing Point Filter allows you Size change Resolution from 72 to 300).
to preserve correct perspective in image edits that
contain perspective planes, such as the side of a The tools that you’ll use for this lesson include the
building or any other rectangular object. In this tutorial, Vanishing Point Filter, the Liquefy Filter, and the Text
Linda takes you through Vanishing Point �gymnastics�� tool�� among other filters and layer options.
to show you how to utilize this tool to your advantage.
The Marquee, Stamp, and Text tools will be used, as Starting Points for the Vanishing Point Filter
well as the Liquefy Filter and other options to create a
new image from an original photograph. I learned to create a copy of the background image
and to create new layers for each Vanishing Point Filter
Vanishing Point Gymnastics effect. This practice helped me to preserve the original
image, no matter how many times I goofed up.
I put off using the Vanishing Point Filter for a few months
when I first began to use Photoshop CS2�� as it seemed So�� when you open the image above�� the first thing
too complicated to learn at the time. Each time I tried to do is to create another layer with the same image
to use it according to the handbook, I felt as though I by dragging the lower layer into the �Create a New
was practicing back flips. But�� since I’ve learned how to Layer�� icon located at the bottom of the layers palette
use that filter�� a world of possibilities opened up to me near the trash can. Then, with that top layer selected,
and I want to share these tips with you in this tutorial. just click on that �Create a New Layer�� icon and a new
blank layer will appear above that second layer:
The best way to learn how to use this filter is to begin
with a simple landscape that carries some flat planes��
like the Bahamian fish shacks that I chose for this
lesson (included in the download). The image to
the left below is the original image. The image to the
right shows that the middle shack has lost a door and
now sports some type�� and the reflection in the water
mimics those changes – and they’re all in perspective,
thanks to the Vanishing Point Filter. That’s the goal for
this lesson:
e-Book
23. DMXzone Photoshop CS2 e-Book Phoyoshop CS2: Creating and Eliminating Optical Distortion Page
Photoshop CS2: Creating and Eliminating
Optical Distortion
Only in Photoshop CS2 can you alter the distortion
created by a camera lens with the Lens Correction
filter. In this article�� Linda shows how to get the most out
of this filter. She illustrates how to correct images that
appear distorted, but she also shows how to create
some special effects through the options contained
within this filter. Additionally�� she compares this filter’s
options to other Photoshop tools that may create the
same effect.
Lens Correction: Exciting New Option
The image above, taken in Chicago, contains every
Most of you are already familiar with the Warp problem that the Lens Correction filter can fi� – but
transformation tool, the Perspective tool, and the when a photograph contains all of those problems in
distortion filters like Pinch and Spherize that are one image�� the �fi�ing�� is stymied. Instead�� I’ll use this
contained in Photoshop CS2 as well as in previous shot to explain various photo distortions and – at the
Photoshop versions. The Lens Correction filter�� same time – to introduce you to the Lens Correction
introduced for the first time in Photoshop CS2�� mimics filter.
many of the attributes contained in all the previously
mentioned tools and filters; but�� the Lens Correction Photo Distortions
tool can take your creativity a touch further, because
you can control many options at the same time. When The image above was shot with an off-brand camera
you combine this tool with other options, you often can that maxed out at 2 megapixels. In addition, I was in a
correct what you thought were unsalvageable images. boat on the Chicago River when I took this photo, so
the movement from that boat added to the distortions.
However, there’s only so much that the Lens Correction If I take that image apart, I can show you every
filter can accomplish. If you have a photograph like the distortion that the Lens Filter corrects. You can follow
one shown below�� there’s not much you can do to fi� it along if you’d like – just open the �distortion_party�� PSD
with the Lens Correction filter (or with any other tool for file and increase the size or resolution in that image if
that matter): you want.
Barrel Distortion, Horizontal and Vertical
Perspective
I’ll cover three problems with just one section in this
photograph. Barrel distortion occurs when the lens
makes straight lines bow out toward the edges of
e-Book
24. DMXzone Photoshop CS2 e-Book Phoyoshop CS2: Artistic Effect with Canvases,Filters, and Layers Page
Photoshop CS2: Artistic Effects with
Canvases, Filters, and Layers
You may want to create artistic images from your
photographs with Photoshop Filters, but you soon
discover that your images seem too simplistic or
�digital�� for your taste. In this tutorial�� Linda e�plains
that the reason behind this problem often lies in the
background, or in the canvas or paper that you
choose to use for your artistic adventures. You’ll receive
artistic canvas and paper backgrounds for your use
with this article, as well as steps on how to create more
realistic pastel and watercolour renderings from your
photographic images with these backgrounds. You can, like the art student, begin to study the masters.
The image at left above is one of Mary Cassatt’s
Study the Masters pastels. She is known for this medium, especially in her
portrayals of women and children. When this piece,
If you attended an art school (not a graphic design which was created on paper, is compared to a
school)�� you probably spent most of your first year singular Photoshop filter result�� you can see how pitiful
replicating masters’ works in a museum setting. These the filtered result is in comparison (�ilter: Rough Pastel��
lessons were necessary to help you learn how the stroke length: 30; stroke detail: 10). A close-up reveals
�pros�� created their drawings and paintings. �rom this the real differences between the two images:
point, you could then develop your own style.
While Photoshop filters provide the digital artist
with a variety of tools to create a ‘painting’ from a
photograph�� these filters are either simplistic or they
overdo the obvious. �ven the addition of �just one
more filtered layer�� often falls short from your goal. So
how do you know what looks �right�� as you begin to
add filtered layers to achieve an artistic effect��
If you look closely at Cassatt’s pastel painting, you
see broad areas of colour and strokes that move in
These lessons were necessary to help different directions. The Photoshop filter�� however��
you learn how the “pros�� created their doesn’t allow you to move your strokes around. You
drawings and paintings. can alter the light direction, the canvas, the stroke, and
even the detail, but you’re far from replicating a true
�pastel�� look that would mimic Mary Cassatt’s style.
e-Book
25. DMXzone Photoshop CS2 e-Book Photoshop CS2: Your Destination: Put the theory into practice Page 7
e-Book
26. DMXzone Photoshop CS2 e-Book Photoshop CS2: Optimize Your Photoshop Experience Page 72
Photoshop CS2: Optimize Your Photoshop when I hit the �Alt�� key. This action turns the Brush tool
into the Eyedropper tool so that I can resample and
Experience then continue with the Brush. When you let go of the
�Alt�� key�� the �yedropper resumes as a Brush.
Photoshop CS2 is filled with little mysteries�� and
sometimes the best tools for completing a Photoshop
Want a Brush in a Hurry? – Right-click on your image
job are hidden right under your nose. In this article,
with a PC�� or use �Control + click�� with a Mac. Voila!
Linda passes on some of her tips and tricks that will
The Brush Picker will appear. Need new brushes�� I have
make your experiences with Photoshop a bit more
links to free brushes at the end of this article.
fantastic, including a short tutorial on Smart Objects
and Shapes. This is a veritable potpourri of tips and tricks
Type Colour – You may be in the habit of changing text
along with links to online resources for FREE tutorials,
colour by highlighting the text and then picking a new
brushes, and photographs that you can’t afford to miss,
colour when you double-click the Foreground Square
and that weren’t covered in her previous articles!
and choosing the Colour Picker. But when you highlight
Outsmarting the Photoshop Manual the te�t it’s difficult to note the colour change. To avoid
this hassle, simply click the colour square in the Options
bar. While this action also opens the Colour picker,
You could spend years learning all the nuances
when you change colours with this option you’ll see the
contained within Photoshop CS2. My suggestion is to
type colour change without the banding over the type
learn everything you can from the Adobe Photoshop
that you normally have to deal with:
CS2 manual, and then pick up a Photoshop magazine
every once in a while to learn from the folks who play
with this software all day long. After you sample one or
two of the many magazines out there, you might pick
a favourite and subscribe to learn more.
I wish that I could somehow sort the tips and tricks
below a bit better so that they’ll be easier to access,
but so many of these tools fall into more than one
category – I did�� however�� try to file them under vague
headings to make it a bit easier for you to skim through.
Just sit back, read, enjoy, and note the tools that will
provide you with the most satisfaction when you work
in Photoshop.
Rotate it Precisely – You probably never noticed the
TOOL SHORTCUTS Measure tool contained in the �yedropper tool’s fly out
menu in the Toolbox. You can use this tool to rotate a
Use a Brush to Remove Objects – I’m a huge fan of the layer quickly and to a specific angle. With the Measure
clone tool, but I discovered that I could remove items tool chosen, click and drag a line to the angle you
from an image just as quickly with a brush. I sample want�� then go to ��dit Transform Rotate���� and the
an area with the Eyedropper tool, and then I use the layer will rotate to the angle that you’ve drawn.
Brush tool to paint over that area. Not all areas are flat
colour, however; but, I can resample with the Brush tool
e-Book
27. DMXzone Photoshop CS2 e-Book Photoshop CS2: Create an Easy Web Gallery Page 0
Photoshop CS2: the ��avourites�� or ��olders�� tab at top left or through
the drop down menu in that same location. Bridge will
Create an Easy Web Gallery show your photos in the display window:
Photoshop CS2 provides the option to create a web
photo gallery along with many layout options through
their Photo Gallery wizard. In this tutorial, Linda walks
you through the steps to create a gallery, and she
points out the benefits and disadvantages to this
WYSIWYG tool along the way. You’ll need a folder filled
with several images (up to ten or more) to play with this
tool and to learn how to utilize Photoshop CS2’s Bridge.
Yes, it’s WYSIWYG, but it works – mostly…
Photoshop CS2 provides a means for people who don’t
know the ins and outs of HTML to set up a personalized
photo gallery online. But, if you do know HTML and
CSS, you have the advantage. You can tweak the
final project so that your site is a bit more clean�� clever��
personal, usable and accessible. Remember – this is
WYSIWYG after all… Click on one photo, and you’ll see that image show up
in the preview window located in the left panel. You’ll
The first thing you’ll need is some photos – up to ten is also see Metadata information located below that
fine for this project contained in a folder. I’m sure that preview window (You can slide the frames to enlarge
you’re SO organized that you have your own photos the work area around the Metadata window):
to use for this project�� right�� To be honest – I’m the
worst at organization, but over the weekend I used
PhotoShop Bridge to help me sort out all my files (not
just photographs). You’ll see how easy this will be for
you as well as you go along.
The Bridge is also necessary for you to build this gallery,
because it helps you to define the photos and to
create the gallery’s structure. So, choose your photos,
open Photoshop CS2, and away you go…
Open Bridge, Select Photos
With Photoshop CS2 open�� go to ��ile Browse���� and
the Bridge will open in a new window. Just travel to
where you’ve stored your photos for this tutorial through
e-Book
28. DMXzone Photoshop CS2 e-Book About DMXzone Page
Other e-Books from DMXzone:
ISBN: 978-90-77397-09-1
ISBN: 978-90-77397-11-4
ISBN: 90-77397-12-1978
ISBN: 978-90-77397-07-7
e-Book
29. DMXzone Photoshop CS2 e-Book About DMXzone Page 0
About DMXzone
The History of DMXzone
DMXzone was founded in Feb 2001 by George Petrov. It was then called UDzone after the
Macromedia product UltraDev that preceded Dreamweaver MX. By April 2001 we’d already
been asked by Macromedia to speak at the Macromedia UCON 2001 conference in New
York. Since then, we’ve grown to over 300,000 registered members of all levels and locations,
who come together to share knowledge and learn from each other. We are an independent
community and are in no way connected with Macromedia, the makers of Dreamweaver MX.
In May 2003, we launched our very successful Premium Tutorials track, publishing professionally
written tutorials by a team of authors for an affordable price every day, as we ourselves
were tired of shelling out lots of money for computer books full of redundancy and newbie’s
explanation. This premium track runs alongside the free content submitted by members.
What do we do
Membership of the community is free. You can view most content on the site without registering,
but when you become a member you can add your own articles, tutorials, news items,
extensions, opinion polls and participate in the forums. To purchase extensions or download free
extensions, you need to become a member.
The DMXzone Team and Manager Team consists of professionals and volunteers who work hard
to bring you the extensions that you are asking for, give you the support that you need when
you have questions and to bring you the latest information pertaining to web development. We
like to encourage our visitors to actively participate, that is why we organize competitions, run
opinion polls, let you rate articles, extensions and tutorials and let you add your own articles.
e-Book