
Empfohlen
Weitere ähnliche Inhalte
Was ist angesagt?
Was ist angesagt? (19)
Ähnlich wie Using inkscape for portraits
Ähnlich wie Using inkscape for portraits (20)
Mehr von johnhouliart
Mehr von johnhouliart (20)
Kürzlich hochgeladen
Kürzlich hochgeladen (20)
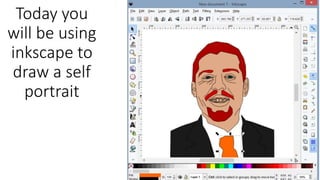
Using inkscape for portraits
- 1. Today you will be using inkscape to draw a self portrait
- 2. First find the picture of yourself that you are going to draw
- 3. Step 1 Use the Bezier Line Tool to trace the large shapes of your picture. If you click the mouse and hold it down it makes curved lines, if you click once and move your mouse it makes straight lines. These shapes should be Your head and neck Your shirt Your arms if they are in the picture (Bezier line tool)
- 4. Step 2 Use the nodes editor tool to fix lines that you did not draw correctly the first time. If you click the dots on the line it lets you change the direction of the line. If you click and move the line itself, it allows you to change the curve or shape of the line. Nodes editor
- 5. Step 3 Use the + and – keys on your keyboard to zoom in and out. You can also use to magnifying glass tool to do this. Zoom in to see the shapes of things and start tracing other smaller details. Start with the things on the outside and work your way in. For example draw the outside of the eye first before drawing the retina (round part) and pupil (dot) Draw the shape of the nose before drawing the nostrils.
- 6. Make sure that you trace all of the details, if you don’t it will look weird. Use the nodes tool to fix your lines so that they match up.
- 7. Select the photo with the pointer tool. Press delete to get rid of the photo, it will just be your drawing.
- 8. Use the pointer tool to select the different shapes that you drew, and than select what color you would like them to be at the bottom.
- 9. • Finished!