Mastering MySQL Database Architecture: Deep Dive into MySQL Shell and MySQL R...
Lower School Smart Board Training/Refresher
1. July 31, 2013
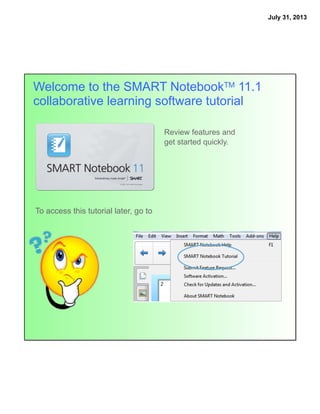
Welcome to the SMART NotebookTM 11.1
collaborative learning software tutorial
To access this tutorial later, go to
Review features and
get started quickly.
2. July 31, 2013
Write and draw
Pick up a pen and write
Press a pen color button on the pen tray to change the pen color.
Right-click
On-screen keyboard
Press the Keyboard button to launch the
on-screen keyboard.
To make your next touch a right click, press
the Right-Click button on the pen tray.
Writing on your SMART Board® interactive whiteboard
3. July 31, 2013
SMART Notebook
software menus
have been
reorganized to
make them easier
to use and more
consistent across
operating systems.
The toolbar provides shortcuts to
commonly used actions, tools and
properties. When you use the Select
tool to select an object in the work
area, its properties appear to the
right of the tools group.
You can still find additional
properties in the Properties
tab and in the object’s
drop-down menu.
Adaptive toolbar Press to reveal
Remember
Actions
Tools
Properties
4. July 31, 2013
Customize the toolbar so that the buttons you use frequently are only one click away.
Improved toolbar customization
Drag to add
5. July 31, 2013
Pages
See and sort your pages
Use the Page Sorter tab to jump to a page by
selecting its thumbnail, or reorganize your pages
by dragging them into a different order.
Reset Page
Easily reset your page to its last saved state, without
reopening your lesson file.
6. July 31, 2013
Move objects
Resize and rotate
Press the leaf to select.
To rotate, use the green handle.
To resize, use the white handle.
Press the leaf and drag it to
move it around the page.
To select an object, switch back to Select mode by
putting down the pen and then pressing the Select icon.
Objects
Remember
7. July 31, 2013
Text objects
Edit text
Double-click the text box to edit text.
Resizing the text box
Add text
Click the Text button on the toolbar,
and then click the work area to create
a text box. Start typing.
You can format text using the buttons
in the toolbar or the options in the
Properties tab or the Format menu.
• Text boxes resize automatically
when you open .notebook files
created with SMART Notebook
Publisher Tools.
• Improved compatibility with older
files and those created with SMART
Notebook Publisher Tools.
Press to reveal
Drag the white handle to adjust the
length of the text box and reflow the
text inside.
Try it here! Double-click the text
to the left and use the white
handle to adjust the text box.
8. July 31, 2013
Find content in the Gallery
Find images, videos, sound files, interactive activities, backgrounds
and SMART Notebook pages in the Gallery. Just drag and drop to
add them to your page.
Add interactivity with the Lesson Activity Toolkit
The Gallery tab also contains templates to help
you create your own activities and engage your
students with interaction.
Gallery content
9. July 31, 2013
Test-drive the Notebook Gallery 2.0 Beta and search both online and offline Gallery
resources with ease.
Click the link in the Gallery to visit the
Notebook Gallery 2.0 Beta channel,
where you can learn more about the
beta program and how to participate.
Notebook Gallery 2.0 Beta
Click here
to download
Preview
10. July 31, 2013
Record a short sound clip to attach to an object on the page.
Sound recorder
11. July 31, 2013
Create interactive lesson activities easily by using the Activity Builder. To
start, click the Add-ons tab, and then click the Activity Builder thumbnail.
What do horses eat?
Drag and drop foods over the horse to feed it.
Activity Builder
Need some inspiration? There are many
more activity examples in the Gallery.
Try it
Use it in your class today
12. July 31, 2013
Browse the Internet without leaving
your SMART Notebook file.
Browser
Web pages are now automatically
scaled to fit the SMART Notebook
Internet browser.
No need to scroll horizontally!
Press to reveal
13. July 31, 2013
SMART Notebook Preferences gives you detailed
control over your use experience.
The customizable settings include the following:
• Enable or disable the shake gesture
and the press-and-hold gesture.
• Enable or disable hardware
acceleration (disable it if your content
doesn’t display correctly and SMART
Notebook software isn’t responding).
• Change the measurement tools’ color.
• Add or remove cell padding to tables.
Preferences
Access the Preferences dialog box from Edit > Preferences (Windows)
and Notebook > Preferences (Mac).
Now more
preferences to
customize!
Press to reveal
14. July 31, 2013
Download lessons
Download teacher-created lessons from the SMART ExchangeTM website
exchange.smarttech.com
Open the SMART Exchange website
in your web browser or click the
toolbar icon to go there directly.
Search by subject and grade. See what other teachers are trying and
loving. Download and modify lessons to suit your teaching style.