Aragaw Gebremedhin auto cad lecture notes
•
36 gefällt mir•2,649 views

This course material is designed for Engineers and other interested personals who want to work specially mechanical drawings using AutoCad software. it is prepared just like a manual or guide line that can help the individuals learn autocad without any assistance. so enjoy it and if you have any question you can ask in my email: jerryhenok2016@gmail.com

Empfohlen
Weitere ähnliche Inhalte
Was ist angesagt?
Was ist angesagt? (20)
Ähnlich wie Aragaw Gebremedhin auto cad lecture notes
Ähnlich wie Aragaw Gebremedhin auto cad lecture notes (20)
Mehr von Defence University, Maj.Gen.Mulugeta Buli Poly-Technic College
Mehr von Defence University, Maj.Gen.Mulugeta Buli Poly-Technic College (6)
Kürzlich hochgeladen
Kürzlich hochgeladen (20)
Aragaw Gebremedhin auto cad lecture notes
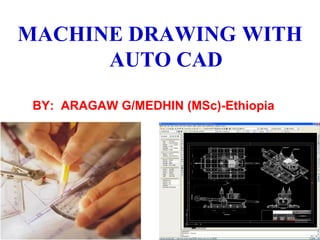
- 1. MACHINE DRAWING WITH AUTO CAD 1 BY: ARAGAW G/MEDHIN (MSc)-Ethiopia
- 2. What is your expectation from the course ??? 2
- 3. COURSE CONTENT 1. Introduction to Basic CAD software 2. Basic Drawing & Editing Commands 3. Drawing Precision in CAD 4. Text Annotation and Dimensioning: 5. Introduction to 3D Drawings 6. Introduction to parametric design (Pro Engineer 3
- 4. Content: Basic principles of auto CAD Introduction to AutoCAD CAD window; Setting up of a new drawing; Working with an existing CAD files; Hardware and Software tips 4 1. Introduction to Basic CAD software
- 5. Introduction to AutoCAD The role of computer in mechanical engineering may be broadly classified in to two groups 1. Monitoring and controlling the mechanical process. E.g. CNC, PLC, Robotics etc. 2. Support mechanical process applications. Which deals essentially with the preparation for actual manufacturing and post manufacturing operations. All the support functions that computers can provide for the successful completion of manufacturing operations. The types of support can be CAD, CADD, CAE, CAM, CAPP, CATD, CAP. 5
- 6. Introduction to AutoCAD What is Auto CAD? AutoCAD is a software package used for Drafting and designing almost anything you wish. Design software developed by Auto-Desk. First released in 1982 under the name ‘MicroCAD’. Revolutionary drafting and design tool. Translated into more than 18 different languages. 6
- 7. CAD: Computer Aided Design Use of computer methods to develop the geometric model of the product(2D-3D) It involves basically developing, analyzing and modifying designs using computers. CADD: Computer Aided Design and Drafting Combine the CAD function with drafting Used to generate the production drawing of the part(detail drawings) CAE: Computer Aided Engineering The use of computer method to support basic error checking, analysing, optimization, manufacturability, etc of a product design. Like ANSIS-used to analyze mechanical forces. Terminology related to AutoCAD 7
- 8. CAM: Computer Aided Manufacturing Refers to computer software used to develop the CNC- part programs for machining and other process applications. CAPP: Computer Aided Process Planning Use of computer to generate the process plans for complete manufacture of products and parts. CATD: Computer Aided Tool Design Used for developing the tools for manufacture such as jigs and fixtures, dies and moulds. CAP: Computer Aided Planning Involves the planning functions such as material requirement planning, computer aided scheduling etc. Cont’d 8
- 9. Application of CAD CAD may be applied in the field of both social and natural sciences as far as they need to sketch or draw some thing with the help of computers. Specifically it can be applied in: Mechanical engineering Civil engineering Electrical engineering etc 9
- 10. Design Examples LeMans Race Car Paintball Mask Dentist Chair
- 11. Design Examples John Deere Combine Automatic Bus Transmission
- 12. Advantages of CAD 1. Faster rate of producing drawing 2. Greater accuracy of drawing 3. Neat and clear drawing 4. No reputation of design/drawing is just copy and past with in a second 5. Special drafting techniques like zoom, rotate, move, copy, mirror etc 6. Quickly and accurately dimensioning of various components. 7. Superior design forms like finite element analysis 8. Integrating design department with other department. Like CAM. 12
- 13. Now let us see how to start CAD? 13
- 14. I. Starting Auto CAD There are three methods of starting auto CAD 1. Opening Auto CAD from All programs Start all programs Auto desk AutoCAD2008 AutoCAD2008 2. Opening Auto CAD from desktop Right-click on the shortcut icon on desk top the drop-down menu appear then click on Open On the screen /desktop/ double click on the AutoCAD2008 shortcut icon. 3. Opening Auto CAD from program file My comp C program file autocad2008 acad double click on it or Right-click and open 14
- 15. 15 II. Graphic window(user interface)
- 16. Basic Toolbars (AutoCAD Environment) Menu ToolBars Command Window Drawing Area Status Bar standard toolbars
- 17. Basic components of CAD windows 1. Title bar 2. Menu bar 3. Drawing Area 4. Command pallet (area) 5. Status bar: 6. Toolbars Standard toolbar Object property toolbar Drawing toolbar Modifying toolbar Style toolbar Layer toolbar etc 17
- 18. The Auto CAD Interface cont’d 1. Title bar: This is found at the top of the window and it is by default with blue color. It shows: The auto cad version The file location The file name with its extension. 18
- 19. 2. Menu bar: It is found at the top of the window immediately below the title bar. It contains File, Edit, View, Insert, Format, Tools, Draw, Dimension, Modify, Express, Window and Help. These menus are sometimes called pull down menus. The Auto CAD Interface cont’d 19
- 20. 3. Drawing Area: It is the area that we can draw and edit our drawings. It also contains : the UCS (user coordinate system), cross hair There are two types of drawing areas: Model window, Layout window, The Auto CAD Interface cont’d 20
- 21. 4. Command line: Is used to insert necessary instruction to the software. It is used to Displays and prompts messages. The default position of the command line is the bottom of the window immediately above the status bar. To display/hide the command line press ctrl+9 on the keyboard 21 The Auto CAD Interface cont’d
- 22. 5. Status bar: This part of auto cad window is found at the bottom of the window. It contains: SNAP GRID ORTHO POLAR OSNAP MODEL / PAPER We can display or hide elements of status bar by the status bar menu icon. Also display x, y and z coordinate of the cursor. A click on a button turns that function on, if it is off, a click on a button when it is off turns the function back on. The Auto CAD Interface cont’d 22
- 23. 6. Tool bars: It Contains many icons of a particular category to access a command position without using menu system. There are above 30 toolbars Some of them are for 2D window tasks and some are for only 3D window tasks and the others are for both 2D and 3D window tasks. The toolbars that we frequently use are: Standard toolbar, Draw toolbar, Modify toolbar, Layers toolbar, Properties toolbar, Dimension toolbar, Styles toolbar, Inquiry toolbar, Visual styles or Shade, View port, View, Modeling toolbar, Orbit, Text, and etc The Auto CAD Interface cont’d 23
- 24. A. Standard toolbar Standard toolbar is docked at the top of the AutoCAD window under the Menu bar. It contains basic commands like open, save, print, etc 24 cont’d
- 25. B. Object properties You can use the controls in the Properties toolbar to view, set, and modify the properties. The Properties toolbar provides convenient access to the most important object properties, Such as; Color, Line type, Line weight, and Plot style, 25 cont’d
- 26. C. Layers Layers are a way of managing, tidying and also controlling the visual layout of a drawing. Layers are used to group information in a drawing by function and to enforce linetype, color, line weight and other standards. This makes working with very complicated drawings much more easier and efficient. Layers are effective way of ordering your drawings. 26 cont’d
- 27. 27 In Auto CAD, we make individual layers For things like: Part drawing Dimensions Hidden lines Center lines Section lines Break lines cont’d
- 28. Other terms used in ACAD Dialog box: is a menu(command box) which appears after selecting a command like point style, insert, color etc. In dialog box their may be one/both of the following options A. Tabs: a way/guide to bring a sub-dialog on screen. B. Check boxes: guide to on off the indicated functions C. Radio button: to indicate the feature description. D. Slider: have pointer can be dragged to change size of the feature controlled. 28
- 29. III. Setting of paper (Drawing area) 1. UNIT STYLE Used to select any unit system (metric or inch) and precision which can be displayed on a coordinates or dimensions. To promote the unit basically there are two methods a. METHOD-I: using command window Type units and enter in a command window b. METHOD-II: using menu bar Menu – Format – Units then select the units and precisions 29
- 30. Setting of paper……….. 2. DRAWING LIMIT Is the invisible boundary to fit the drawing It should be large enough to contain the drawing and other related parts of it To promote there are two methods a. METHOD-I: using command window Type Limits and enter in a command window b. METHOD-II: using menu bar Menu – Format – drawing limit then specify the size of paper (use 0,0 and 420,297 as default) To activate the selected limit in command window type Z enter and A enter 30
- 31. 3. Drafting setting Is used to set Snap, Grid, Polar, Object Snap Dynamic inputs etc To promote there are two methods a. METHOD-I: using command window Type ds and enter in a command window b. METHOD-II: using menu bar Menu – tools – draft settings then specify Snap and Grid, Polar, Object Snap Dynamic inputs etc Setting of paper……….. 31
- 32. Saving files Saving files: To save a file we have to consider; file location file name file type like .dwg: AutoCAD drawing .dws: AutoCAD Drawing Standard .dwt: AutoCAD Template Drawing template file .dxf: AutoCAD Data Exchange Format Remember: after you set the paper size units and other necessary thing it is better to save the file as your template this can save a lot of time 32
- 33. Executing toolbars It is known as calling toolbars If there is no tool bars except menu bar, command window and title bar on CAD-window there are two methods of calling tool bars: 1. Using commanding window follows steps: Write CUI enter (customize user interface) Cui dialog box appears on the first area: Select ACAD Right click on it Select Reset ACAD warning dialog box come click yes then click apply then ok Then go to Tool work space check Autocad classical then standard tool bars will appear. 33
- 34. Cont’d 2. To add or call other necessary tool bar other than the standard one use the following steps: Right click in any toolbar Dropdown menu will come then Select the toolbars you want to see on ACAD graphic window. 34
- 35. Now every preparation is made so next it is time to play games with CAD 35
- 36. 36 2. Basic Drawing & Editing Commands
- 37. 2. Basic Drawing & Editing Commands CONTENTS Drawing Lines; Drawing circles and circular arcs; Drawing ellipse and elliptical arcs; Drawing polygons; Drawing Curves (Sketch); Creating regions; Hatching areas 37
- 38. I. Basic Geometrical objects and Tools CONTENTS 1. Line 2. Polyline 3. Multi line 4. Polygons 5. Rectangle 6. Arc 7. Circle 8. Ellipse 38
- 39. 1. Drawing of lines There are d/t methods of drawing a line METHOD-I: using Grids and Snap command Set grid and snap (10 and 5 as default) Turn on grid and snap others off Move the cursor until the following coordinates are shown in the status bar 1. 60,140 2. 80,140 3. 80,120 4. 100,120 5. 100,100 6. 80,100 7. 80,50 8. 85,50 9. 85,40 10. 55,40 11. 55,50 12. 60,50 13. 60,100 14. 40,100 15. 40,120 16. 60,120 17. 60,140 1 39
- 40. METHOD-II: using Ortho command(direct entry method) Turn ‘on’ ORTHO and off others Menu – Draw-Line First point: pick on any point or specify x, y Second point: drag to right/left enter the dimension and enter/right-click Practice this:- Drawing of lines…. 40
- 41. METHOD-III: using coordinate entry methods (CEM) Basically there are Four CEM A. Cartesion coordinate system(x,y,z) Is used to explain a point by giving the x, y and z axis coordinates Eg. Draw an object using the following x,y & z 1. St.(20,10,0) 2. 30,10,0 3. 30,20,0 4. 40,20,0 5. 40,30,0 6. 10,30,0 7.10,20,0 8. 20,20,0 9. 20,10,0(or type C and enter) Drawing of lines….. 41
- 42. B. Absolute coordinate systems(x , y) Is used to draw the object only by feeding the x & y coordinates from the origin. Eg. Draw an object using the following x & y 42 1. St.(20,10) 2. 30,10 3. 30,20 4. 40,20 5. 40,30 6. 10,30 7.10,20 8. 20,20 9. 20,10(or type C and enter) Drawing of lines…..
- 43. C. Relative coordinate system(@x , y) Is a method used to draw a line relative to the current position of a cursor OR the point which drawn previously. Eg. Draw an object using the following x & y coordinates:- draw- line- then enter below 1. 10,10 2. @40,0 3. @0,10 4.@-30,0 5.@0,10 6.@30,0 7.@0,10 8.@-30,0 9.@0,10 10.@30,0 11.@0,10 12.@-40,0 13.@0,-50 or type C and press enter Drawing of lines….. 43
- 44. D. Polar coordinate system(D<θ) A method used to draw an object if the distance D and the angle θ b/n the coordinates are given Eg. Draw an object using the following D&θcoordinates:- draw- line- then enter below Drawing of lines….. 1. 50,50 2.@20<0 3.@20<60 4.@20<120 5.@-20<0 6.@20<240 7.@20<300 or type C and press enter 44
- 45. Multiline: Are composed of one or more parallel line called elements It is basically used to draw building and factory layout drawings. To promote multiline Using menu bar: draw-multiline 2. Drawing of Multi line 45
- 46. Polyline: is a continuous line used to construct continuous polygons like triangles, rectangle etc. It is a series of connected line and arc segments created as one object. Width of the object can also be controlled. To promote Polyline Using menu bar: draw-Polyline Using command window: type pl or pline then enter- specify points 3. Drawing of Polyline 46
- 47. The Polyline cont’d The Polyline Command is found at: Toolbar : Draw Dashboard: Steps to create Polyline a. To draw a Polyline with straight segments 1. Take a Polyline command, 2. Specify the first point of the polyline, 3. Specify the endpoint of the first Polyline segment, 4. Continue specifying segment endpoints as needed, 5. Press ENTER to end, or enter c to close the Polyline. 47
- 48. b. To draw a line and arc combination Polyline 1. Take a Polyline command, 2. Specify the start point of the polyline segment, 3. Specify the endpoint of the Polyline segment, Switch to Arc mode by entering a (Arc) on the command line, Return to Line mode by entering L (line), 4. Specify additional polyline segments as needed, 5. Press ENTER to end, or enter C to close the Polyline. Steps to create Polyline 48
- 49. c. To create a wide Polyline 1. Take a Polyline command, 2. Specify the start point of the line segment, 3. Enter w (Width, 4. Enter the starting width of the line segment, 5. Specify the ending width of the line segment using one of the following methods: To create a line segment of equal width, press ENTER, To create a tapering line segment, enter a different width, 5. Specify the endpoint of the polyline segment, 6. Continue specifying segment endpoints as needed, 7. Press ENTER to end, or enter c to close the polyline, Steps to create Polyline 49
- 50. Polygons: Is a plane figure with at least three straight sides and angles, and typically five or more. The Polygon command is the simplest method for creating equilateral triangles, squares, pentagons, hexagons, and so on. Use polygon to create closed polylines with between 3 and 1,024 equal-length sides. The Polygon Command is found at: Toolbar: Draw Dashboard: Pull-down: Draw Polygon Keyboard: POLYGON shortcut POL 4. Drawing of Regular Polygons 50
- 51. I. Inscribed in a Circle Steps: 1. Take a Polygon command, 2. Enter the number of sides, for example, 6, 3. Specifies the center to location for the center of the polygon 4. Specify the Inscribed type I and enter. This determines how the distance that you enter in the next prompt is measured 51 Drawing of Polygons…… There are three ways of constructing a polygon
- 52. II. Circumscribed about Circle Steps: 1. Take a Polygon command, 2. Enter the number of sides, for example, 6, 3. Specifies the center to location for the center of the polygon 4. Specify the Circumscribed. type C and enter, This determines how the distance that you enter in the next prompt is measured Regular Polygons……….. 52
- 53. III. Edge Steps to draw a polygon by specifying one edge: 1. Take a Polygon command, 2. On the command line, enter the number of sides, 3. Select (Edge): type e and Enter 4. Specify the start point for one polygon segment. 5. Specify the endpoint of the polygon segment. 6. Click to define orientation for the polygon. Regular Polygons……….. 53
- 54. 5. Drawing of Rectangle The Use of Rectangle is to create closed polylines in a rectangular shape. The Rectangle Command is found at: Toolbar: Draw Dashboard: Pull-down: Draw Rectangle Keyboard: RECTANGLE shortcuts REC This command is promoted: Specify first corner point or [Chamfer/ Elevation/ Fillet/ Thickness/ Width]: The Rectangle command 54
- 55. The Rectangle cont’d Notice that; instead of picking a second point to draw the rectangle ,you have option of entering dimensions. You can specify the length, width, area, and rotation parameters. Steps: 1. Take a Rectangle command, 2. Specify the first corner of the rectangle, 3. Specify the other corner of the rectangle, or 4. Enter ‘D’ for dimension, 5. Give length value, 6. Give width value, 7. Click for orientation. 55
- 56. The Arc Command is found at: Toolbar: Draw Dashboard: Pull-down menu: Draw Arc Keyboard: Arc shortcut A Steps: To draw an arc by specifying three points 1. Take the arc command, 2. Specify the start point, 3. Specify a point on the arc, 4. Specify the endpoint. 6. Drawing of Arcs 56
- 57. There are 11- methods used to draw an arc To call go to menu bar-Draw-Arc-the following drop-down menu is appear then select the method you want. Drawing of Arcs….. 57
- 58. The circle Command is found at: Toolbar: Draw Dashboard: Pull-down menu: Draw Circle Keyboard: Circle shortcut C Steps: 1. Take the circle command, 2. Specify the center point, 3. Specify the radius or diameter. 7. Drawing of circle 58
- 59. There are 6-d/t methods used to draw a circles. These are: 1. Center , Radius 2. Center , Diameter 3. 2 point method 4. 3 point method 5. Tan , Tan, Radius and 6. Tan, Tan, Tan Drawing of circle…. 59
- 60. Donuts are filled rings or solid-filled circles that actually are closed Polyline with width. To create a donut, you specify its inside and outside diameters and its center. You can continue creating multiple copies with the same diameter by specifying different center points. To create solid-filled circles, specify an inside diameter of 0. 8. The Donut Command 60
- 61. The Donut cont’d The Donut Command is found at: Pull-down menu: Draw Donut Keyboard: DONUT shortcut DO Steps: 1. Take the command, 2. Specify the inside diameter, 3. Specify the outside diameter, 4. Specify the center of the donut, 5. Specify the center point for another donut, or press ENTER to complete the command. 61
- 62. There are 3- methods used to draw an arc To call go to menu bar-Draw-Ellipse-the following drop-down menu is appear then select the method you want. 9. Drawing of Ellipse 62
- 63. You can hatch an enclosed area or hatch within a specified boundary using HATCH. By default, HATCH creates associative hatches that are updated when the boundary is changed. You create a hatch by selecting an object to hatch or by defining a boundary and then specifying an internal point. A hatch boundary can be any combination of objects, such as lines, arcs, circles, and Polyline, that forms an enclosed area. The Hatch and Gradient Command is found at: Toolbar: Draw Dashboard: Pull-down menu: Draw Hatch/gradient Keyboard: Hatch shortcut H 63 10. Hatch and Gradient
- 64. Hatch and Gradient Cont’d To hatch areas 1. Take the Hatch or Gradient command, 2. In the Hatch and Gradient dialog box, click Add: Pick points 3. In your drawing, specify a point inside each area that you want hatched, and then press ENTER. This point is known as the internal point. 4. In the Hatch and Gradient dialog box, Hatch tab, in the swatch box, verify that the sample pattern is the pattern you want to use. To change patterns, select another pattern from the Pattern list. 5. Click OK. 64
- 65. 11. Layer What is a Layer? A layer can be thought of as a large piece of clear plastic, as infinitely large as the drawing area in Autocad. When drawing in Autocad, everything is drawn on the default layer which is set current. Only the objects you are drawing are visible on the layer, the layer itself can never be seen - it is invisible.
- 66. Layers In Auto CAD, we make individual layers… For things like Hidden lines Center lines Section lines Break lines Layers are a way of managing, tidying and also controlling the visual layout of a drawing. A whole section of a drawing can be turned on or off, or simply one aspect can be controlled - text for example.
- 67. Layers This is all done by using layers within Autocad. Layers are controlled by the layer properties manager button which is located on the object properties toolbar: Each new layer is created by you, the user. Normally, it is acceptable to have a layer for each different part of a drawing.
- 69. In Layer Property manger Add a New Layer - Press the New button to create a new layer. Delete a Layer - Press the delete button to delete the selected layer. Set Current layer - Press the current button to set the selected layer current. All objects drawn will then be drawn on this current layer. Show Details - Press the show details button to see more detailed information about the selected layer. Each layer also has the following options against it:
- 70. Layer property Manger Name - Displays the layer name. On - Controls if the layer is on or off. Select the light bulb to turn the layer off on the drawing. Freeze in all VP - Pressing this will freeze the layer in all viewports as well as the current model view (see lesson 10 to learn about viewports) Lock - This handy feature locks a layer preventing any content of the layer from being modified. Colour - Change this to whichever colour you like. All objects drawn on the layer will display the chosen colour provided that the objects colour setting in the object properties toolbar (shown above) is set to 'By Layer'. Linetype - Set the default linetype for all objects drawn on the layer. i.e continuous, dashed, dotted etc. Lineweight - Set the thickness a line appears .Default is no thickness. This option can be toggled on/off on the display by the LWT button above the command console. Plot - Select if the layer will be shown when the drawing is plotted (printed). The current layer, layer colour, linetype and lineweight can all be controlled outside of the layer properties manager via the object properties toolbar.
- 71. Exercise-1 *** Additional 1. Draw polygon having 3, 5, 6, 7, 8 sides inscribed and circumscribed about a circles of diameter 40. 2. Draw a two different rectangle and practice create Hatch and Gradient. 71
- 72. 72 3. Drawing Precision in CAD
- 73. 3. Drawing Precision in CAD CONTENTS Advanced editing commands Using Object Snap; Making changes in a drawing; Changing an object's length; Blocks and Attributes. 73
- 74. Modifying Tools Are the tools used to modify the existing/current drawings to change their shapes or some parts of it. To call go to menu bar-modify-the following drop-down menu is appear then select the method you want. Some of the basic modifying tools are: Erase, Copy, Mirror, Offset, Array, Move, Rotate, Scale, Trim. Most of Modify tools can be accessed in one of the following four ways; 1. By Keyboard, 2. By Dashboard, 3. By Modify Pull-down menu, 4. By Modify Tool bar, 74
- 75. 1. The Erase Command The Erase Command is found at: Toolbar: Modify Dashboard: Pull down menu: Modify Erase Keyboard: ERASE; Shortcut: E Steps: 1. Take Erase command, 2. Select Objects to erase, 3. Enter. 75
- 76. 2. The Copy Command The Copy Command is found at: Toolbar: Modify Dashboard: Pull down menu: Modify Copy Keyboard: COPY; Shortcut: Co Steps: 1. Take Copy command, 2. Select Objects to copy, 3. Specify the base point, 4. Specify the destination point, or points 5. Enter to end. 76
- 77. 3. The Mirror Command The Mirror Command is found at: Toolbar: Modify Dashboard: Pull down menu: Modify Mirror Keyboard: Mirror; Shortcut: Mi Steps: 1. Take Mirror command, 2. Select Objects to mirror, 3. Specify the first and the second point of the mirroring line 4. Enter Y or N for erasing the original object or not. 77
- 78. 4. The Offset Command The Offset Command is found at: Toolbar: Modify Dashboard: Pull down menu: Modify Offset Keyboard: OFFSET; Shortcut: O Steps: 1. Take Offset command, 2. Select Objects to offset, 3. Specify offset distance or the through point, 4. Specify the direction or the through point, 5. Enter to end. 78
- 79. Array command is used to Creates multiple copies of objects in a pattern. Use the Rectangular Array option to create an array of rows and columns of copies of the selected object. Use the Polar Array option to create an array by copying the selected objects around a center point. Menus Toolbar: Modify Menu: Modify Array...At the Command prompt, enter array. Command entry: array 79 5. The Array Command
- 80. I. To create a Rectangular array 1. Click Modify menu Array....At the Command prompt, enter array. 2. In the Array dialog box, select Rectangular Array. 3. Click Select Objects. The Array dialog box closes. You are prompted for object selection. 4. Select the objects to be arrayed and press ENTER. 5. In the Rows and Columns boxes, enter the number of rows and columns in the array. 6. Specify the horizontal and vertical spacing (offsets) between objects by using one of the following methods: In the Row Offset and Column Offset boxes, enter the distance between rows and between columns. Adding a plus sign (+) or a minus sign (-) determines direction. Click the Pick Both Offsets button to use the pointing device to specify the diagonal corners of a cell in the array. The cell determines the vertical and horizontal spacing of the rows and columns. Click the Pick Row Offset or Pick Column Offset button to use the pointing device to specify the horizontal and vertical spacing. 80
- 81. 7. The example box displays the result. 8. To change the rotation angle of the array, enter the new angle next to Angle of Array. 9. The default angle 0 direction setting can also be changed in UNITS. 10. Click OK to create the array. 81 To create a Rectangular array…..
- 82. 1. Click Modify menu Array....At the Command prompt, enter array. 2. In the Array dialog box, select Polar Array. 3. Next to Center Point, do one of the following: Enter an X value and a Y value for the center point of the polar array. Click the Pick Center Point button. The Array dialog box closes and you are prompted for object selection. Use the pointing device to specify the center point of the polar array. 4. Click Select Objects. The Array dialog box closes and you are prompted for object selection. 5. Select the objects to be arrayed. 6. In the Method box, select one of the following methods: Total Number of Items & Angle to Fill Total Number of Items & Angle Between Items Angle to Fill & Angle Between Items 82 II. To create a Polar array
- 83. 7. Enter the number of items (including the original object), if available. 8. Use one of the following methods: Enter the angle to fill and angle between items, if available. Angle to Fill specifies the distance to fill around the circumference of the array. Angle Between Items specifies the distance between each item. Click the Pick Angle to Fill button and the Pick Angle Between Items button. Use the pointing device to specify the angle to fill and the angle between items. The example box displays the result. 9. You can set any of the following options: 7. To rotate the objects as they are arrayed, select Rotate Items As Copied. The example area displays the result. 8. To specify the X,Y base point, select More, clear the Set to Object's Default option and enter values in the X and Y boxes, or click the Pick Base Point button and use the pointing device to specify the point. 10. Click OK to create the array. 83 To create a Polar array …..
- 84. Polar array 84
- 85. 6. The Move Command The Move Command is found at: Toolbar: Modify Dashboard: Pull down menu: Modify Move Keyboard: Move; Shortcut: M Steps: 1. Take Move command, 2. Select Objects to move, 3. Specify a base point for the move. 4. Specify the destination point, The objects you selected can be moved to a new location determined by the distance and direction between the first and second (destination) points. 85
- 86. 7. The Rotate Command The Rotate Command is found at: Toolbar: Modify Dashboard: Pull down menu: Modify Rotate Keyboard: ROTATE; Shortcut: Ro Steps: 1. Take Rotate command, 2. Select Objects to rotate, 3. Specify the base point for the rotation, 4. Do one of the following: 86
- 87. The Rotate Cont’d a. Enter the angle of rotation. b. Drag the object around its base point and specify a point location to which you want to rotate the object. c. Enter c to create a copy of the selected objects. d. Enter r to rotate the selected objects from a specified reference angle to an absolute angle 87
- 88. 8. The Scale Command The Scale Command is found at: Toolbar: Modify Dashboard: Pull down menu: Modify Scale Keyboard: SCALE; Shortcut: Sc Steps: 1. Take Scale command, 2. Select Objects to scale, 3. Specify the base point, 4. Do one of the following: a. Enter the scale factor, or b. Drag and click to specify a new scale, or c. Enter r (Reference); then Select the first and second reference points, or enter a value for the reference length. 88
- 89. 9. The Stretch Command The Stretch Command is found at: Toolbar: Modify Dashboard: Pull down menu: Modify Stretch Keyboard: STRETCH; Shortcut: S Steps: 1. Take Stretch command, 2. Select Objects with cross window selection, The crossing window must include at least one vertex or endpoint. 3. Specify the base point for the stretch, and then specify a second point, to determine the distance and direction. 89
- 90. 10. The Trim Command The Trim Command is found at: Toolbar: Modify Dashboard: Pull down menu: Modify Trim Keyboard: TRIM; Shortcut: Tr Steps: 1. Take Trim command, 2. Select the objects to serve as cutting edges, To select all displayed objects as potential cutting edges, press ENTER without selecting any objects. 3. Select the Objects to trim. 90
- 91. 11. The Extend Command The Extend Command is found at: Toolbar: Modify Dashboard: Pull down menu: Modify Extend Keyboard: EXTEND; Shortcut: Ex Steps: 1. Take Extend command, 2. Select the objects to serve as boundary edges, To select all displayed objects as potential boundary edges, press ENTER without selecting any objects. 3. Select the Objects to extend. 91
- 92. 12. The Join Command The Join Command is found at: Toolbar: Modify Dashboard: Pull down menu: Modify Join Keyboard: JOIN; Shortcut: J Steps: 1. Take Join command, 2. Select the source object to which you want to join objects. 3. Select one or more objects to join to the source object. (Valid objects include arcs, elliptical arcs, lines, Polyline, and spines) 4. Enter. 92
- 93. 13. The Chamfer Command The Chamfer Command is found at: Toolbar: Modify Dashboard: Pull down menu: Modify Chamfer Keyboard: CHAMFER; Shortcut: Cha The Chamfer command enables you to create a chamfer between any two non-parallel lines. Usually, the Chamfer command is used to set the chamfer distances before drawing the chamfer. 93
- 94. The Chamfer Cont’d Steps: 1. Take Chamfer command, 2. Select the first line, 3. Select the second line. To set chamfer distances: 1.Take Chamfer command, 2.Enter d (Distances), 3.Enter the first chamfer distance, 4.Enter the second chamfer distance, 5.Select the lines for chamfering. 94
- 95. 14. The Explode Command The Explode Command is found at: Toolbar: Modify Dashboard: Pull down menu: Modify Explode Keyboard: EXPLODE; Shortcut: Xp Steps: 1. Take Explode command, 2. Select Objects to explode, and Enter. If you need to modify one or more objects within a block separately, you can disassemble, or explode, the block reference into its component objects. 95
- 96. Block and attributes 96 Blocks are drawings which can be inserted into other drawings. Blocks are contained in the data of the drawing in which they have been constructed. Wblocks (written blocks) are saved as drawings in their own right, but can be inserted into other drawings if required. To creat a block first draw the component you need and follow the steps:
- 97. Block and attributes 97 To Make a Block of previously drawn object follow the steps: Go to Menu bar – draw – block – make then block definition dialog box appears. Then do the following: A. Enter name of the block in the Name field. B. Click the Select objects button. The dialog disappears. On drawing Window select the object. The dialog reappears. OR Click the Pick Point button. The dialog disappears. Click a point on the drawing to determine its insertion point. The dialog reappears. C. If thought necessary enter a description in the Description field of the dialog. D. Click the OK button. The drawing is now saved as a block in the drawing
- 98. Insert Block 98 To insert a Block which is previously created follow the steps: Go to Menu bar – insert – block then insert dialog box appears. Then do the following: A. Enter name of the block in the Name field. B. Specify insertion point select on screen if you want to show the point on screen OR specify X,Y & Z coordinate of the insertion point. The dialog reappears. C. Show the point where you want to insert the block D. Click the OK button. The block is now inserted.
- 99. 99 4. Text Annotation and Dimensioning in Auto CAD
- 100. 4. Text Annotation and Dimensioning in Auto CAD CONTENTS Adding text to drawing; Adding Dimensions Setting preconditions for dimensioning Dimension style Primary units Dimensioning different features 100
- 101. Adding text to drawing 101 Text Command To create single-line text 1. Click Draw menu » Text » Single Line Text. 2. Specify the insertion point for the first character. 3. Specify the height of the text. 4. Specify the text style and text font and color. 5. Specify a text rotation angle. You can enter an angle value or use your pointing device. 6. Enter the text. At the end of each line, press ENTER. 7. Click Ok to end the command.
- 102. 102 Dimensioning/Measurement is used to tell us: * How tall? * How heavy? * How many? * How much?
- 103. 1. Inch System 2. Metric (ISO) 3. Military (diverse) 4. Associations (also diverse) 103 Standards of Measurement: Measurement unit: click [U.S. military] Full name: click [U.S. military] Plural form: clicks means kilometer Category type: length Scale factor: 1000 ›› SI unit: meter The SI base unit for length is the meter. 1 meter is equal to 0.001 click [U.S. military]. 1 click = 1000 meters Measurement set by an international associations like: AMEC: The International Association for Measurement and Evaluation of Communication (also known as)
- 104. Dimensions are applied to objects in a variety of styles: 1. Chain i. Aligned ii. Unidirectional 2. Tabular 3. Coordinate/Baseline 4. Ordinate Dimensions styles 104
- 106. 1. Overall: Width Depth Height 2. The actual size of features (rounds, fillets, holes, arcs, etc.) 3. And where features are located such as centers, angles, etc. Dimensions are used to show an object’s:- 106
- 107. 107 There are several ways in which the dimensions tools can be called. 1.From the Dimensions control panel in the DASHBOARD 2.Click Dimension in the menu bar. Tools can be selected from the drop-down menu which appears. 3.From the Dimension toolbar. The toolbar can be called to screen with a right-click in any toolbar on screen followed by a click on Dimension in the popup menu which appears. 4.By entering an abbreviation for a dimension tool at the command line. Any one of these methods can be used when dimensioning a drawing, but some operators may well decide to use a combination of the four methods. The Dimension tools
- 108. 108 The Dimensioning Toolbar The dimensioning commands can be easily accessed by: Right Click on an existing toolbar and activate the dimensioning toolbar; Or, From the “pull down” menu View Toolbars
- 109. Creates linear dimensions. Linear Dimensioning Aligned Dimensioning Creates an aligned linear dimensions.
- 110. Radius dimensions measure the radii of arcs and circles with optional centerlines or a center mark. If Text Placement is set to Over the Dimension Line, with a leader, the dimension is applied with a leader line. Radius Dimensioning
- 111. Diameter dimensions measure the diameters of arcs and circles with optional centerlines or a center mark. If Text Placement is set to Over the Dimension Line, with a leader, the dimension is applied with a leader line. Diameter Dimensioning DIMCENTER command creates the center mark or the centerlines of circles and arcs. Center Marks
- 112. Arc Length allows you to create length dimensions (see Figure 7–23) for an arc. Arc Length Dimensioning
- 113. ANGULAR DIMENSION command allows to draw angular dimensions using three points (vertex, point, point), between two nonparallel lines, on an arc (between the two endpoints of the arc, with the center as the vertex), and on a circle (between two points on the circle, with the center as the vertex). Angular Dimensioning
- 114. Baseline dimensioning is used to draw dimensions to multiple points from a single datum baseline. The first extension line origin of the initial dimension (it can be a linear, angular, or ordinate dimension) establishes the base from which the baseline dimensions are drawn. AutoCAD automatically draws a dimension line/arc beyond the initial (or previous baseline) dimension line/arc. Baseline Dimensioning
- 115. Continue dimensioning is used for drawing a string of dimensions, each of whose second extension line origin coincides with the next dimension’s first extension line origin. Continue Dimensioning
- 116. The DIMSPACE command allows you to specify the space between the dimension lines of parallel linear or concentric arc dimensions. Dimension Space Dimension Break The DIMBREAK commnad allows you to create a break in a dimension extension line where it crosses another line.
- 117. Quick Dimensioning is used to draw a string of dimensions between all of the end and center points of the selected object(s). Quick Dimensioning MLEADER Command is used to to connect annotation to objects or other features in the drawing. Options include Leader Type, Leader Landing, Content Type, Maxpoints, First Angle, and Second Angle. Multileader
- 118. Add Leader Command is used to add leader line and arrow combinations to an existing multileader. Mutlileader Style Command is used to create or modify multileader style. With a multileader style, you can specify formatting for landing lines, leader lines, arrowheads, and content. Multileader
- 119. AutoCAD provides a special set of subcommands for the two major methods of specifying tolerances: Lateral Tolerance and Geometric Tolerance. Lateral tolerance draws the traditional symbols and text for Limit, Plus or Minus (unilateral and bilateral), Single Limit, and Angular tolerance dimensioning. Lateral tolerance is the range from the smallest to the greatest that a dimension is allowed to deviate and still be acceptable. Lateral tolerance and its related settings are set in the Dimension Style Manager dialog box (Tolerances tab). Tolerances
- 120. Dimension Style Manager dialog box (Tolerance tab selection)
- 121. Geometric tolerance draws a Feature Control Frame for use in describing standard tolerances according to the geometric tolerance conventions. Geometric tolerancing is applied to forms, profiles, orientations, locations, and runouts. Forms include squares, polygons, planes, cylinders, and cones.
- 122. Geometric Tolerance dialog box
- 123. Oblique Dimensioning OBLIQUE command allows to slant the extension lines of a linear dimension to a specified angle. The dimension line will follow the extension lines, retaining its original direction. This is useful for having the dimension stay clear of other dimensions or objects in your drawing. It is also a conventional method of dimensioning isometric drawings. AutoCAD allows to edit dimensions with MODIFY commands and grip editing modes. Also, AutoCAD provides two additional MODIFY commands specifically designed to work on dimension text objects: Dimedit Dimtedit Editing Dimension Text
- 124. DIMEDIT DIMEDIT command allows to replace the dimension text with new text, rotate the existing text, move the text to a new location, and if necessary, restore the text back to its home position, which is the position defined by the current style. In addition, you also change the angle of the extension lines (normally perpendicular) relative to the direction of the dimension line. Available options include: Home selection returns the dimension text to its default position. New selection change the original dimension text to the new text. Rotate selection change the angle of the dimension text. Oblique selection adjusts the obliquing angle of the extension lines for linear dimensions.
- 125. DIMTEDIT DIMTEDIT command is used to change the location of dimension text (with the Left/Right/Home options) along the dimension line and its angle (with the Rotate option). Available options include: Left selection cause the text to be drawn toward the left extension line. Right selection cause the text to be drawn toward the right extension line. Home selection returns the dimension text to its default position. Angle selection changes the angle of the dimension text.
- 126. Dimension style Manager allows to create new styles, sets the current style, modifies styles, sets overrides on the current style, and compares styles. Each time a dimension is drawn it conforms to the settings of the Dimensioning System Variables in effect at the time. The entire set of Dimensioning System Variable settings can be saved in their respective states as a Dimension Style. Dimension Styles Dimension Style Manager
- 127. Create New Dimension Style dialog box Modify Dimension Style dialog box – Lines selection
- 128. Various examples with Dimension and Extension Lines settings
- 129. Modify Dimension Style dialog box – Symbols and Arrows selection Arrowhead types
- 130. Modify Dimension Style dialog box – Text selection Dimensioning Text with various Text appearance selections Dimensioning Text with various Text placement (horizontal) selection
- 131. Modify Dimension Style dialog box – Fit selection Dimensioning examples with various Fit options Dimensioning example with various Text placement options
- 132. Modify Dimension Style dialog box – Primary Units selection Dimensioning example with various dimensioning unit formats Dimensioning example with prefix, suffix, and alternate units
- 133. Modify Dimension Style dialog box – Alternate Units selection Modify Dimension Style dialog box – Tolerances selection
- 134. DIMOVERRIDE command change one of the features in a dimension without having to change its dimension style or create a new dimension style. Overriding the Dimension Feature DIMENSION UPDATE command permits to make selected existing dimension(s) conform to the settings of the current dimension style. Updating Dimensions
- 135. The DIMINSPECT dimension adds or removes inspection information for a selected dimension. Inspection dimensions specify how frequently manufactured parts should be checked to ensure that the dimension value and tolerances of the parts are within the specified range. Inspecting Dimensions
- 136. 136 EXERCISES
- 137. 137 5. Construct Isometric and Introduction to 3D Drawings
- 138. 5. Construct Isometric and Introduction to 3D Drawings CONTENTS Construct isometric drawing Working in 3D; Solid modeling; Revolve tool bar, Extruded toolbar Applying Boolean functions: Union , subtract, intersection…etc Visualization techniques (Rendering Concepts) 138
- 139. I. ISOMETRIC DRAWING IN AUTOCAD 139
- 140. Isometric means equal measure All planes are equally or proportionately shortened and tilted All the major axes (X, Y, Z) are 120 degrees apart 140 CUBE I. ISOMETRIC DRAWING IN AUTOCAD
- 141. Cont… • Making an Isometric Drawing 141 30o 30o 60o60o Isometric Axis
- 142. I. Setting up isometric grid/snap • The grid/snap style should be changed to isometric snap – Right click on grid button on status bar, choose ‘Settings…’ – Drafting setting window displaying Snap and Grid tab is displayed Isometric Drawing using Auto CAD
- 143. Setting up isometric grid/snap Rectangular Isometric
- 144. II. Changing isoplane • Changing the isoplane – left, top, right – Cycle by pressing CTRL+E or F5 or – Command: isoplane {enter} Right Top Left
- 145. III. Drawing lines, circles and arc • Isometric lines and non-isometric lines can be drawn using line or polyline command • Isometric circle can be drawn using ellipse command – Draw ellipse > isocircle • Isometric quarter circle and semi circle can be drawn using ellipse arc command – Draw ellipse arc > isocircle
- 146. Creating round corner Before After Draw ellipse arc Draw another ellipse arc Draw straight line from midpoint of top arc to midpoint of bottom arc Trim Trim Trim
- 147. IV. Dimensioning • Use aligned dimension for linear dimensioning • Use quick leader for isocircle Aligned dimension Quick leader
- 148. To make dimension aligned with isometric axes, follow few steps as: - Type DIMEDIT - Type O for Oblique - Select the dimension to be aligned, then Enter - Specify the obliquing angle For example, using the object above, for clockwise alignment such as 90, type 30 for the angle, whereas for 100, type -30 for the angle since anti-clockwise alignment.
- 149. Dimensioning for Isocircle 1. Select Quick leader icon 2. Select the circle, then extend the leader line to appropriate direction, click, then make short extension in horizontal direction, click, then type corresponding value (example: R20) for the dimension.
- 150. Other useful tips • Use COPY command with polar relative coordinate system or OSNAP. • Do not use OFFSET command. • Set up LAYER before drawing. • Use construction line as a guide (recommended to use different colour)
- 152. What is Modeling a process of constructing a virtual 3D graphics object Modeling tools: creating and constructing complex 3D models fast and easy. Rendering is a process of creating images from graphics models. 152
- 153. A graphics model geometrical descriptions (particles, vertices, polygons) and associated attributes (colors, shadings, transparencies, materials) can be saved in a file using a standard (3D model) file format. 153
- 154. 3D Modeling Basics 1. Wireframe models 2. Surface models 3. Solid models 154
- 155. 1. Wireframe Model Represents edge of actual object Surfaces of object are not defined Transparency and no volume 2D objects in 3D space Use Line, Circle, Arc 155
- 156. 2. Surface Model Edges and surfaces are defined Object has volume but no mass Each surface is constructed individually Each surface is created / move to the correct orientation w.r.t other surfaces Easier to visualize than wireframe Can be displayed in wireframe or hidden view Draw / Surfaces… Command: _hide 156
- 157. 3. Solid Model A complete computerized replica of the actual object Complete surfaces, edges, interior features of the object Object has volume and mass Can be displayed in wireframe or hidden view Constructing primitive shapes Using Boolean operations to create composite solid 157
- 158. Creating solid models. A solid model is defined by volumes. Hierarchy of entities from low to high: keypoints lines areas volumes. You cannot delete an entity if a higher- order entity is attached to it. 158 Volumes Areas Lines & KeypointsKeypoints Lines Areas Volumes
- 159. Simple 3D Half-Spaces Sphere Cylinder Cone Torus Box Plane it splits space into two infinite half-spaces you can use an infinite cylinder and two planes to make a capped cylinder You can also get a box from 6 planes… 159
- 160. Modeling Approaches Two approaches to creating a solid model: 1. Top-down 2. Bottom-up 160
- 161. 1. Top-Down Modeling Approaches Top-down modeling starts with a definition of volumes (or areas), which are then combined in some fashion to create the final shape. The volumes or areas that you initially define are called primitives. Primitives are located and oriented with the help of the working plane. The combinations used to produce the final shape are called Boolean operations. 161 add
- 162. Primitives 2-D primitives: include rectangles, circles, triangles, and other polygons. When you create a 2-D primitive, a modeling tool usually defines an area, along with its underlying lines and key points. 162
- 163. Primitives 3-D primitives: blocks, cylinders, prisms, spheres, and cones. When you create a 3-D primitive, a modeling tool usually defines a volume, along with its underlying areas, lines and key points. 163
- 164. 2. Bottom-up modeling Approaches 2. Bottom-up modeling starts with keypoints, from which you “build up” lines, areas, etc. You may combine both methods. 164
- 165. Constructive Solid Geometry (CSG) Techniques Primitive Solids Draw / Solids… Box Cone Cylinder Extrude Revolve Sphere Torus Wedge Boolean Operations Modify / Solid Editing … Union Joins selected solids Subtract Subtract one set of solids from another Intersect Create a solid of intersection (common volume) from the selected solids 165 +
- 166. Common Operations Drawing Environments Metric unit orientation Set the drawing limit Set isometric viewpoint Primitive Solids and 2D Object Solid boxes Cylinders Rectangular Object Modification Fillet Extrude Subtract Union Move Dimensioning 166
- 167. Boolean Operations Boolean operations: combinations of geometric entities: add, subtract, intersect, divide, glue, and overlap, etc. The “input” to Boolean operations: geometric entities, simple primitives or complicated volumes imported from a CAD system. 167 add Input entities Boolean operation Output entity(ies)
- 168. Boolean CSG Operations Union Addition, A Ú B Intersection A Ù B Difference Subtraction, A – B, A Ù not B Difference is not commutative 168
- 169. A more complicated example Difference of: Intersection of Sphere and Cube Union of 3 Cylinders 169 - =
- 170. Part Sample (to be used in CAM section) 170 SW Isometric View
- 171. Part Sample (to be used in CAM section) 171 Top View
- 172. Step 0: Setup the environment Set the environment at start up Metric setting Viewing in 3D View / 3D Views / SW Isometric Select common operations from Toolbar View / Toolbars … Select Solid Editing, View Point, Object Snap, Modify, 172
- 173. Step 1: Solid box Create solid box at 0,0,0 Define size of the box: 50,50,15 x, y, z coordinate 173
- 174. Step 2: Solid from 2D object 174 •Create separate object (2D rectangular with the size 44, 44 •Round one corner: Fillet (radius of 22) •Create a solid object using Extrude feature •Draw / Solid / Extrude •Height: 5; Taper: 0)
- 175. Step 3: Solid cylinders 175 •Create separate solid objects: 2 Cylinders: • Diameter1 = 20; Diameter2 = 10; Height = 5 •Use Subtract command to create a hole (Modify / Solid editing…)
- 176. Step 4: Move Objects Move rounded square object to the base part Use object snap to help locate the positions Subtract small box from the bigger box 176
- 177. Step 5: Move objects 177 • Move a cylinder object to an appropriate position Move at the base of the cylinder to 22,22,10 • Combine (Union) 2 objects
- 178. Step 6: Round Corners 178 • Round the edges using Fillet (radius of 2)
- 179. EXERCISES 179
- 180. WHAT DID U SEE
- 181. Fig. 2.2 181