SlideShare ist ein Scribd-Unternehmen logo
1 von 11
Downloaden Sie, um offline zu lesen
Production Skills
7 Video Production Page 60
8 Audio Production Page 70
9 Print Production Page 85
10 Advertising Production Page 92
11 Interactive Media Page 100
Production
12 Web Authoring Page 107
13 Reviewing Computer Page 115
Games
14 2D Computer Games Page 131
15 Digital Graphics Page 143
16 Writing for the Media Page 148
17 Photography Page 155
Techniques
18 Animation Techniques Page 165
This section covers the specialist units that deal with each sector of the
media industry. Chapters 7 to 15 will introduce you to the specialist
production skills you will use when you make your products. In Chapters 7 to
10 you will meet the video, audio, print and advertising sectors. Chapters 11
and 12 cover the interactive media sector, and Chapters 13 to 15 cover the
computer games sector.
The final three chapters introduce you to skills and techniques that are used
across several sectors of the media industry. These include photography
techniques used in the print, advertising, web authoring and video sectors,
animation techniques used in the computer games, web authoring and video
sectors, and writing techniques used in the video, audio, web authoring and
print sectors. You can choose for yourself which chapters will be most useful
to you, depending on your future career plans.
7Video Production
What is video production?
The term ‘video production’ covers a whole range of
moving image products. These include programmes
produced as sales aids for large companies,
educational programmes for schools or colleges or
wedding videos produced by a local wedding
videographer. Video production is also an integral part
of the broadcast television industry.
There is a wide range of roles that you could
undertake in a video production. You could be the
cameraperson, for example, the production assistant
or the video editor. There are also many other
technical, creative and administrative roles in video
production. You will be able to put these roles into
practice by working in a team to produce a video
product.
61.
PRODUCTIONSKILLSVIDEOPRODUCTION
The production process for video
production
Look at Chapter 4, The Production Process, so that you can follow the
production process to make your video product.
Pre-production
‘Pre-production’ is the term used for the preparation stage of the production
of a media product. You must know about the equipment you will be using
and the people you will need to make your product. You will decide what
materials, locations and resources are needed for a successful production.
Equipment
There are a variety of recording formats in video:
• VHS: a consumer format that is rapidly being phased out in favour of
digital consumer formats.
• Hi-8 video: an analogue recording system (consumer format) with a
professional digital sound recording track.
• DV format: a professional digital format using digital video recording
on to tape or on to a DVD disk.
• DVCAM: a professional digital video format recorded on to tape.
• HD (High Definition): the latest format that records digitally at a higher
resolution to increase the quality of video pictures. Many people can’t
view this HD image yet as their televisions don’t support the higher
resolution picture.
You will need the following equipment to make your video product:
• camera support: tripod or mono-pod.
• microphones: rifle mics or radio mics.
• lights: hand-held, stand-mounted or ceiling-mounted.
During the pre-production stage you should make sure that all the
equipment you will need for your production will be available for you to use
at the time that you will need it. You should do an audit of equipment, using
a chart like this one:
Equipment needed Where to find it
Video camera – miniDV Technician’s store – must be
booked out at least three days
in advance.
Try this ...
Make a list of all the video
equipment available in your
school or college. Do not
forget the lighting and
microphones that might be
kept in a different
department.
62. BTEC First in Media: A Practical Handbook
Documentation
An important part of pre-production is preparing the documentation you will
need for the production process. For video production you will need to
create the following documents:
• A production schedule: lists all the requirements for production and a
timescale.
• An initial script: the basis of your video product. It includes dialogue for
actors and suggestions for the location of each shot.
• A storyboard: the visual representation of your ideas. It also includes
suggestions for sound and effects.
• A shooting script: a development of the initial script, and includes camera
positions, stage directions, lighting and sound requirements.
• A risk assessment: a document that highlights any potential health and
safety issues with your studio or location work.
It is important to understand what each of these documents is for before you
start to plan your own production.
Production
This is the content acquisition stage. For this stage, you will need to choose
how you will be shooting your production. You must consider camera set-up,
white balance, shooting techniques, lighting and sound. These are all
explained below.
Camera set-up
There are important choices to be made:
• Will the camera be hand-held or on a tripod?
• Will you be shooting all the material on one camera (single camera shoot)
or using two or more cameras (multi-camera shoot)?
If you use more than one camera you will have to ensure that they have
been set up to produce the same colour balance – otherwise, every time you
change the shot from one camera to another, the colours will change. A
camera does not automatically know which colour is which, however, so you
will need to give it some point of reference. The cameras have to be set up
by pointing them all at the same image and then adjusting each one so that
they all look the same. They will then have the same colour balance. In a
studio, all the cameras are set up using a colour chart and then left in
operation mode so that the colours do not change.
Look at the examples of
professional pre-production
documentation on the
CD-Rom.
Look at …
63.
PRODUCTIONSKILLSVIDEOPRODUCTION
White balance
White balance is the system the camera uses to recognise the ‘colour’ white
and then to recognise other colours. This is achieved by pointing the
camera at a white source and telling the camera to use this as its white
reference signal. White balance is one way of making sure a camera is
correctly colour balanced.
Shooting techniques
• Framing: this involves framing the image in a viewfinder to produce the
most pleasing image.
• Shot type: there are a variety of shot types, for example:
Long shot Mid-shot
Close-up Extreme close-up
• Shot length: the time that the shot you have chosen to use will last.
Generally, this is determined by the action taking place in the scene. If it
is a scene of someone running through a doorway it may last just a few
seconds. If it is a shot of someone running along a pathway and past the
camera it may last a minute or more.
• Camera movements: the way that the camera moves during a shot. It
might pan left to right to follow the action. It might zoom in to focus on
the action or zoom out to give a larger picture of what is happening in the
scene.
64. BTEC First in Media: A Practical Handbook
Lighting
You can use natural light (daylight) to shoot your video or, when shooting
indoors or when the natural light is poor, you can use artificial lighting. There
are two kinds of artificial lights available:
• 800 watt (‘redheads’)
• 2000 watt (‘blondes’)
Both of these lights produce artificial light with a colour temperature of
around 3200 degrees K (Kelvin). This is the measurement of the light source
that the camera will respond to when filming. Natural daylight is
approximately 5600 degrees K. You simply have to ensure that the camera is
set up to film using the correct degree K setting. If you film outdoors, using
the artificial setting on a camera, your pictures will appear to be yellow. If
you film indoors in artificial lighting and use the outdoor setting on the
camera, your pictures will appear to be blue. Although this can be adjusted
in the edit suite, it is wise to get it right in the first place to save you time in
the edit suite.
Sound
A video programme is nothing without a soundtrack, so you must make
sure that the microphone is turned on when you record. The sound might
be recorded using:
• the camera’s onboard microphone (in-camera sound). If the camera is
a long way from the subject being filmed, only limited sound will be
recorded. The microphone might also pick up unnecessary sounds,
such as traffic noise and wind.
• a boom microphone. This is a microphone, usually a rifle microphone,
that is mounted on a pole. This means that it can be positioned nearer
the subject (but out of camera shot).
• a hand-held microphone, which a presenter or interviewer can hold in
front of the interviewee to capture what they say.
• a radio microphone, which can be attached to an actor or interviewee,
usually on their lapel or other inconspicuous part of their clothing. The
microphone is attached by a wire to a transmitter, worn out of camera
shot. The radio signal from this transmitter is picked up by a receiver
and fed into the camera. Multiple radio microphones can be used to
ensure that all the actors or interviewees can be heard.
Sound effects, such as music or voice-over, can be added at the post-
production stage.
Try this ...
Set up a camera and tripod.
Plug in a rifle microphone
and record an interview with
one of your friends. Think
about the way you position
them in the viewfinder. Have
you checked the camera for
white balance? Is the sound
being recorded? Play back
the footage you have
recorded and see how you
could improve it.
Timecode Length Shot Audio Suitability of
of shot description recorded material
00.10–00.50 40 seconds Interior of office Office sounds Camera shot a little
unsteady
65.
PRODUCTIONSKILLSVIDEOPRODUCTION
Post-production
You will need to be aware of the processes involved in shaping and editing
your recorded material. You should keep a footage log, which is a list of
the scenes that have been shot. You should include:
• Timecode: where each shot starts and finishes, recorded by a digital
video camera on to the tape. The timecode is used by digital editing
systems to find scenes. You can enter the timecode and the editing
system will find the right place for you. This speeds up the editing
process.
• Length of shots: how long each shot or scene lasts.
• Shot description: a brief description of each shot or scene. This will aid
you when you are trying to find a particular scene for your programme.
• Audio: a brief description of the audio that has been recorded at the
same time as the visuals.
• Suitability of recorded material: your comments on whether or not the
particular scene or shot is suitable for your programme.
Here is an example of a tape footage log.
Before you start the editing process it is good practice to do a paper edit.
This process, sometimes called an ‘edit decision list’, provides an
opportunity to look through the footage log and make decisions about
which scenes should go together. This will save time (and money) when
you get into an edit suite.
You must always ensure that your tapes or disks are clearly labelled with
the name of the production, the name of the crew and the date the material
was shot. If the tape has a recording tab, a small removable button, this
should be removed to ensure that no one can record over your work. Store
your tapes or disks in a secure place.
Look at the examples of
professional post-production
documentation on the
CD-Rom.
Look at …
66. BTEC First in Media: A Practical Handbook
Editing techniques
You may have access to a variety of editing equipment to edit your video
programme. There are two editing systems – linear and non-linear:
• The linear system uses two (or more) tape-based video recorders to
transfer video material. You have to synchronise the two machines to
ensure that the material is transferred from one to the other at just the
right place. This is the way that analogue footage has traditionally been
edited.
• The non-linear system uses digital technology to convert video footage
into a form that can be saved as a file on a computer. The computer then
uses software to edit together the video footage and output it as a video
signal.
In the linear system you have to edit material together in the order in which
you want it to appear in the end. The non-linear system allows you to move
footage around as you edit it, making it easier to change the order of
footage at any time. The development of digital technology has meant that
the whole editing process is now more sophisticated.
Video transitions can be used to add pace and rhythm to the edited video
footage. An editor may use a ‘slow fade’ to slow down the action or a ‘fast
fade’ to speed up the action. A fade to black followed by a fade up from
black is generally used to signify that time has passed. However, overuse of
these video effects can make a programme look too flashy and can detract
from its message. Sometimes it is better to simply cut between scenes.
You can add new soundtracks to a video using dubbing – adding a music
track, a voice-over or sound effects, for example, without altering the visual
image.
You will have to decide which delivery format to use for your finished
product. Traditionally this would have been on VHS videotape, as this was
the format many people had access to. Now this format is dying out and
the DVD format has taken over. In order to deliver your finished video on
DVD you will have to change the format of the video and audio files and
make them compatible with the DVD format. This will involve the use of
software, such as DVD Studio Pro, to compress your video footage to an
appropriate file size and convert it to MPEG 4 files. You can then use the
software to create a DVD menu that allows the viewer to choose how to
view your video footage. They might want to see only a part of the video.
You can set chapter points on the DVD to allow the viewer to choose what
they see.
Try this ...
Use the footage you shot of
the interview with your friend.
Try editing out some of your
questions to make the
interview shorter.
67.
PRODUCTIONSKILLSVIDEOPRODUCTION
Contributing to every stage of the
production
You must demonstrate that you can make a contribution to the pre-
production, production and post-production stages of a finished video. It is
useful to keep a production diary that shows just what you have done in
this project.
This is a sample of a production diary.
Generating ideas
You should undertake a mind-mapping exercise to decide what video
product you are going to make. If you are working in a group, then
everyone should have an input into the mapping exercise.
Here is an example of a mind map for a professional video product.
Student Art & Design
Training Video 2007
Date Activity Roles undertaken and skills
developed
21 January Producing the initial script and storyboard.
This will be discussed by the group, who will
choose a version to be used in the production.
I have written my version of the script and
drawn a simple storyboard, based on the idea
that the group decided on. (Hopefully, my
version will be chosen for the production.)
Teacher and students
working at Selby Abbey
Students collecting
materials
Interview with a professional
artist in a studio
Students sticking images
down
Students on a field
trip to the USA
Teacher
demonstrating
techniques
68. BTEC First in Media: A Practical Handbook
You will need to consider:
• Genre: what genre do you intend to use for your video product? Will it be
a documentary, a drama, a horror video, a thriller, a music video or a
comedy?
• Content: what do you intend to put into your finished product? Will it be all
your own material or do you intend to use found footage? Will it be in
colour or black and white? Will there be dialogue and/or music?
• Title: what will be the title of your video product? You should think of a
working title as soon as you can, so that you can put it on all your pre-
production documentation.
• Scope: will this be for one particular audience or for general release?
What will be the length of your video product?
Contributing to the pre-production
process
You will need to plan carefully for your video product. It can sometimes
take more time to plan a production than it does to film and edit it. You
must ensure that you provide evidence of your contribution to the
planning phase of the production. You should:
• undertake effective research
• devise an appropriate timescale for production
• ensure that any locations and studios have been booked
• book equipment and materials
• communicate effectively with your team
• provide a creative input into the development of the product
• work within the agreed budget.
Contributing to the production process
You must demonstrate your technical competence by using equipment
effectively. You should also have a creative input into the production process.
For instance, you might suggest what camera angles to use or what sound
to record. You should take on one of the roles within the production team –
as the location manager, for example, or the camera operator or the sound
recordist.
You should carefully record all of the work you do in your production diary,
and say how you well think you worked as a team member.
69.
PRODUCTIONSKILLSVIDEOPRODUCTION
Contributing to the post-production
process
You should demonstrate your technical competence in using editing
techniques and technology. Editing is not just about storing files and joining
them together. It is a creative process, involving the pace and timing of your
shots and making the story flow. Your input should be about using the post-
production process creatively to produce a good finished video product.
Remember that you must carefully record all the work you undertake in
post-production.
Summary
In this chapter you have covered what you need to
know to achieve two of the three Learning Outcomes
relating to Unit 4 of your course. You should now:
•understand pre-production, production and
post-production techniques
•be able to contribute to each stage of the creation
of a finished video product.
When you have finished your video product you
will need to review it to achieve the final Learning
Outcome. To find out how to do this, turn to Chapter
19, Reviewing Your Work.

Weitere ähnliche Inhalte

Was ist angesagt? (12)

Jarrod Crawford's "Basic Editing Concepts" Lecture.
Jarrod Crawford's "Basic Editing Concepts" Lecture.Jarrod Crawford's "Basic Editing Concepts" Lecture.
Jarrod Crawford's "Basic Editing Concepts" Lecture.
 
How to make a movie (The Basics)
How to make a movie (The Basics)How to make a movie (The Basics)
How to make a movie (The Basics)
 
Edtc 5340 sound basics
Edtc 5340 sound basicsEdtc 5340 sound basics
Edtc 5340 sound basics
 
Dslr workshop camera audit
Dslr workshop camera audit Dslr workshop camera audit
Dslr workshop camera audit
 
Unit 1 Lesson 03
Unit 1 Lesson 03Unit 1 Lesson 03
Unit 1 Lesson 03
 
Sony HXR-NX70E Operation Manual
Sony HXR-NX70E Operation ManualSony HXR-NX70E Operation Manual
Sony HXR-NX70E Operation Manual
 
Producing Quality How-To Videos for Social Media Publication
Producing Quality How-To Videos for Social Media PublicationProducing Quality How-To Videos for Social Media Publication
Producing Quality How-To Videos for Social Media Publication
 
Creating a Timelapse
Creating a Timelapse Creating a Timelapse
Creating a Timelapse
 
Equipment list
Equipment listEquipment list
Equipment list
 
Directors cut
Directors cutDirectors cut
Directors cut
 
Kit
KitKit
Kit
 
Annotation1
Annotation1Annotation1
Annotation1
 

Ähnlich wie Production skills

Vidyard's Complete Guide to Video Production
Vidyard's Complete Guide to Video ProductionVidyard's Complete Guide to Video Production
Vidyard's Complete Guide to Video ProductionVidyard
 
Classroom video production
Classroom video productionClassroom video production
Classroom video productionBrendanob
 
Video Tips and Techniques for the Web and Social Media
Video Tips and Techniques for the Web and Social MediaVideo Tips and Techniques for the Web and Social Media
Video Tips and Techniques for the Web and Social MediaJames Richardson
 
Live Streaming Checklist
Live Streaming ChecklistLive Streaming Checklist
Live Streaming ChecklistPaul Richards
 
Training Videovigilancia IP: What, Why, When and How
Training Videovigilancia IP: What, Why, When and HowTraining Videovigilancia IP: What, Why, When and How
Training Videovigilancia IP: What, Why, When and HowNestor Carralero
 
Video editing cheat_sheet_2_2_compressed
Video editing cheat_sheet_2_2_compressedVideo editing cheat_sheet_2_2_compressed
Video editing cheat_sheet_2_2_compressedCJ Joiner
 
Intro to Web Video
Intro to Web VideoIntro to Web Video
Intro to Web Videorfoxogg
 
Terminologies of script writing
Terminologies of script writingTerminologies of script writing
Terminologies of script writingArzoo Sahni
 
Video Production: Manual Camera Controls
Video Production: Manual Camera ControlsVideo Production: Manual Camera Controls
Video Production: Manual Camera ControlsRob Nyland
 
Mastering Video Recording_ A Comprehensive Guide.pdf
Mastering Video Recording_ A Comprehensive Guide.pdfMastering Video Recording_ A Comprehensive Guide.pdf
Mastering Video Recording_ A Comprehensive Guide.pdfkhalidshairadvocat36
 
UF/IFAS Interactive Videoconferencing Network Handbook
UF/IFAS Interactive Videoconferencing Network HandbookUF/IFAS Interactive Videoconferencing Network Handbook
UF/IFAS Interactive Videoconferencing Network HandbookVideoguy
 
Ministry and Media Technologies - Pro Tips
Ministry and Media Technologies - Pro TipsMinistry and Media Technologies - Pro Tips
Ministry and Media Technologies - Pro TipsJamie Bass
 

Ähnlich wie Production skills (20)

Video Production Equipment
Video Production EquipmentVideo Production Equipment
Video Production Equipment
 
Vidyard's Complete Guide to Video Production
Vidyard's Complete Guide to Video ProductionVidyard's Complete Guide to Video Production
Vidyard's Complete Guide to Video Production
 
TV PRODUCTION
TV PRODUCTION TV PRODUCTION
TV PRODUCTION
 
Classroom video production
Classroom video productionClassroom video production
Classroom video production
 
videographyppt.pptx
videographyppt.pptxvideographyppt.pptx
videographyppt.pptx
 
Video Mastery
Video MasteryVideo Mastery
Video Mastery
 
Video Tips and Techniques for the Web and Social Media
Video Tips and Techniques for the Web and Social MediaVideo Tips and Techniques for the Web and Social Media
Video Tips and Techniques for the Web and Social Media
 
Live Streaming Checklist
Live Streaming ChecklistLive Streaming Checklist
Live Streaming Checklist
 
Training Videovigilancia IP: What, Why, When and How
Training Videovigilancia IP: What, Why, When and HowTraining Videovigilancia IP: What, Why, When and How
Training Videovigilancia IP: What, Why, When and How
 
Video editing cheat_sheet_2_2_compressed
Video editing cheat_sheet_2_2_compressedVideo editing cheat_sheet_2_2_compressed
Video editing cheat_sheet_2_2_compressed
 
Intro to Web Video
Intro to Web VideoIntro to Web Video
Intro to Web Video
 
Terminologies of script writing
Terminologies of script writingTerminologies of script writing
Terminologies of script writing
 
Video Production: Manual Camera Controls
Video Production: Manual Camera ControlsVideo Production: Manual Camera Controls
Video Production: Manual Camera Controls
 
Mastering Video Recording_ A Comprehensive Guide.pdf
Mastering Video Recording_ A Comprehensive Guide.pdfMastering Video Recording_ A Comprehensive Guide.pdf
Mastering Video Recording_ A Comprehensive Guide.pdf
 
Frame project
Frame projectFrame project
Frame project
 
Video production
Video productionVideo production
Video production
 
Cameras
CamerasCameras
Cameras
 
Question 1(a) use of technology
Question 1(a) use of technologyQuestion 1(a) use of technology
Question 1(a) use of technology
 
UF/IFAS Interactive Videoconferencing Network Handbook
UF/IFAS Interactive Videoconferencing Network HandbookUF/IFAS Interactive Videoconferencing Network Handbook
UF/IFAS Interactive Videoconferencing Network Handbook
 
Ministry and Media Technologies - Pro Tips
Ministry and Media Technologies - Pro TipsMinistry and Media Technologies - Pro Tips
Ministry and Media Technologies - Pro Tips
 

Mehr von Rachel Heyes

Mehr von Rachel Heyes (20)

Podcast timeline
Podcast timelinePodcast timeline
Podcast timeline
 
Guide cribsheet
Guide cribsheetGuide cribsheet
Guide cribsheet
 
Presentation Techniques
Presentation TechniquesPresentation Techniques
Presentation Techniques
 
Persuasion Techniques
Persuasion TechniquesPersuasion Techniques
Persuasion Techniques
 
Storyboard Guide
Storyboard GuideStoryboard Guide
Storyboard Guide
 
Storyboard Example
Storyboard ExampleStoryboard Example
Storyboard Example
 
Script Layout Handout
Script Layout HandoutScript Layout Handout
Script Layout Handout
 
Shooting Schedule
Shooting ScheduleShooting Schedule
Shooting Schedule
 
Shot List
Shot ListShot List
Shot List
 
Call Sheet
Call SheetCall Sheet
Call Sheet
 
Production Schedule
Production ScheduleProduction Schedule
Production Schedule
 
Location release form
Location release formLocation release form
Location release form
 
Release form
Release formRelease form
Release form
 
Scripts
ScriptsScripts
Scripts
 
A lesson in scriptwriting
A lesson in scriptwritingA lesson in scriptwriting
A lesson in scriptwriting
 
Screenplays
ScreenplaysScreenplays
Screenplays
 
Screenwriting by Syd Field
Screenwriting by Syd FieldScreenwriting by Syd Field
Screenwriting by Syd Field
 
Treatment Template
Treatment TemplateTreatment Template
Treatment Template
 
Constraints & Contingency Worksheet
Constraints & Contingency WorksheetConstraints & Contingency Worksheet
Constraints & Contingency Worksheet
 
Example Treatment
Example TreatmentExample Treatment
Example Treatment
 

Production skills

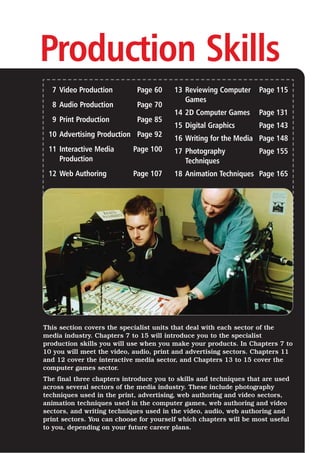
  • 1. Production Skills 7 Video Production Page 60 8 Audio Production Page 70 9 Print Production Page 85 10 Advertising Production Page 92 11 Interactive Media Page 100 Production 12 Web Authoring Page 107 13 Reviewing Computer Page 115 Games 14 2D Computer Games Page 131 15 Digital Graphics Page 143 16 Writing for the Media Page 148 17 Photography Page 155 Techniques 18 Animation Techniques Page 165 This section covers the specialist units that deal with each sector of the media industry. Chapters 7 to 15 will introduce you to the specialist production skills you will use when you make your products. In Chapters 7 to 10 you will meet the video, audio, print and advertising sectors. Chapters 11 and 12 cover the interactive media sector, and Chapters 13 to 15 cover the computer games sector. The final three chapters introduce you to skills and techniques that are used across several sectors of the media industry. These include photography techniques used in the print, advertising, web authoring and video sectors, animation techniques used in the computer games, web authoring and video sectors, and writing techniques used in the video, audio, web authoring and print sectors. You can choose for yourself which chapters will be most useful to you, depending on your future career plans.
  • 2. 7Video Production What is video production? The term ‘video production’ covers a whole range of moving image products. These include programmes produced as sales aids for large companies, educational programmes for schools or colleges or wedding videos produced by a local wedding videographer. Video production is also an integral part of the broadcast television industry. There is a wide range of roles that you could undertake in a video production. You could be the cameraperson, for example, the production assistant or the video editor. There are also many other technical, creative and administrative roles in video production. You will be able to put these roles into practice by working in a team to produce a video product.
  • 3. 61. PRODUCTIONSKILLSVIDEOPRODUCTION The production process for video production Look at Chapter 4, The Production Process, so that you can follow the production process to make your video product. Pre-production ‘Pre-production’ is the term used for the preparation stage of the production of a media product. You must know about the equipment you will be using and the people you will need to make your product. You will decide what materials, locations and resources are needed for a successful production. Equipment There are a variety of recording formats in video: • VHS: a consumer format that is rapidly being phased out in favour of digital consumer formats. • Hi-8 video: an analogue recording system (consumer format) with a professional digital sound recording track. • DV format: a professional digital format using digital video recording on to tape or on to a DVD disk. • DVCAM: a professional digital video format recorded on to tape. • HD (High Definition): the latest format that records digitally at a higher resolution to increase the quality of video pictures. Many people can’t view this HD image yet as their televisions don’t support the higher resolution picture. You will need the following equipment to make your video product: • camera support: tripod or mono-pod. • microphones: rifle mics or radio mics. • lights: hand-held, stand-mounted or ceiling-mounted. During the pre-production stage you should make sure that all the equipment you will need for your production will be available for you to use at the time that you will need it. You should do an audit of equipment, using a chart like this one: Equipment needed Where to find it Video camera – miniDV Technician’s store – must be booked out at least three days in advance. Try this ... Make a list of all the video equipment available in your school or college. Do not forget the lighting and microphones that might be kept in a different department.
  • 4. 62. BTEC First in Media: A Practical Handbook Documentation An important part of pre-production is preparing the documentation you will need for the production process. For video production you will need to create the following documents: • A production schedule: lists all the requirements for production and a timescale. • An initial script: the basis of your video product. It includes dialogue for actors and suggestions for the location of each shot. • A storyboard: the visual representation of your ideas. It also includes suggestions for sound and effects. • A shooting script: a development of the initial script, and includes camera positions, stage directions, lighting and sound requirements. • A risk assessment: a document that highlights any potential health and safety issues with your studio or location work. It is important to understand what each of these documents is for before you start to plan your own production. Production This is the content acquisition stage. For this stage, you will need to choose how you will be shooting your production. You must consider camera set-up, white balance, shooting techniques, lighting and sound. These are all explained below. Camera set-up There are important choices to be made: • Will the camera be hand-held or on a tripod? • Will you be shooting all the material on one camera (single camera shoot) or using two or more cameras (multi-camera shoot)? If you use more than one camera you will have to ensure that they have been set up to produce the same colour balance – otherwise, every time you change the shot from one camera to another, the colours will change. A camera does not automatically know which colour is which, however, so you will need to give it some point of reference. The cameras have to be set up by pointing them all at the same image and then adjusting each one so that they all look the same. They will then have the same colour balance. In a studio, all the cameras are set up using a colour chart and then left in operation mode so that the colours do not change. Look at the examples of professional pre-production documentation on the CD-Rom. Look at …
  • 5. 63. PRODUCTIONSKILLSVIDEOPRODUCTION White balance White balance is the system the camera uses to recognise the ‘colour’ white and then to recognise other colours. This is achieved by pointing the camera at a white source and telling the camera to use this as its white reference signal. White balance is one way of making sure a camera is correctly colour balanced. Shooting techniques • Framing: this involves framing the image in a viewfinder to produce the most pleasing image. • Shot type: there are a variety of shot types, for example: Long shot Mid-shot Close-up Extreme close-up • Shot length: the time that the shot you have chosen to use will last. Generally, this is determined by the action taking place in the scene. If it is a scene of someone running through a doorway it may last just a few seconds. If it is a shot of someone running along a pathway and past the camera it may last a minute or more. • Camera movements: the way that the camera moves during a shot. It might pan left to right to follow the action. It might zoom in to focus on the action or zoom out to give a larger picture of what is happening in the scene.
  • 6. 64. BTEC First in Media: A Practical Handbook Lighting You can use natural light (daylight) to shoot your video or, when shooting indoors or when the natural light is poor, you can use artificial lighting. There are two kinds of artificial lights available: • 800 watt (‘redheads’) • 2000 watt (‘blondes’) Both of these lights produce artificial light with a colour temperature of around 3200 degrees K (Kelvin). This is the measurement of the light source that the camera will respond to when filming. Natural daylight is approximately 5600 degrees K. You simply have to ensure that the camera is set up to film using the correct degree K setting. If you film outdoors, using the artificial setting on a camera, your pictures will appear to be yellow. If you film indoors in artificial lighting and use the outdoor setting on the camera, your pictures will appear to be blue. Although this can be adjusted in the edit suite, it is wise to get it right in the first place to save you time in the edit suite. Sound A video programme is nothing without a soundtrack, so you must make sure that the microphone is turned on when you record. The sound might be recorded using: • the camera’s onboard microphone (in-camera sound). If the camera is a long way from the subject being filmed, only limited sound will be recorded. The microphone might also pick up unnecessary sounds, such as traffic noise and wind. • a boom microphone. This is a microphone, usually a rifle microphone, that is mounted on a pole. This means that it can be positioned nearer the subject (but out of camera shot). • a hand-held microphone, which a presenter or interviewer can hold in front of the interviewee to capture what they say. • a radio microphone, which can be attached to an actor or interviewee, usually on their lapel or other inconspicuous part of their clothing. The microphone is attached by a wire to a transmitter, worn out of camera shot. The radio signal from this transmitter is picked up by a receiver and fed into the camera. Multiple radio microphones can be used to ensure that all the actors or interviewees can be heard. Sound effects, such as music or voice-over, can be added at the post- production stage. Try this ... Set up a camera and tripod. Plug in a rifle microphone and record an interview with one of your friends. Think about the way you position them in the viewfinder. Have you checked the camera for white balance? Is the sound being recorded? Play back the footage you have recorded and see how you could improve it.
  • 7. Timecode Length Shot Audio Suitability of of shot description recorded material 00.10–00.50 40 seconds Interior of office Office sounds Camera shot a little unsteady 65. PRODUCTIONSKILLSVIDEOPRODUCTION Post-production You will need to be aware of the processes involved in shaping and editing your recorded material. You should keep a footage log, which is a list of the scenes that have been shot. You should include: • Timecode: where each shot starts and finishes, recorded by a digital video camera on to the tape. The timecode is used by digital editing systems to find scenes. You can enter the timecode and the editing system will find the right place for you. This speeds up the editing process. • Length of shots: how long each shot or scene lasts. • Shot description: a brief description of each shot or scene. This will aid you when you are trying to find a particular scene for your programme. • Audio: a brief description of the audio that has been recorded at the same time as the visuals. • Suitability of recorded material: your comments on whether or not the particular scene or shot is suitable for your programme. Here is an example of a tape footage log. Before you start the editing process it is good practice to do a paper edit. This process, sometimes called an ‘edit decision list’, provides an opportunity to look through the footage log and make decisions about which scenes should go together. This will save time (and money) when you get into an edit suite. You must always ensure that your tapes or disks are clearly labelled with the name of the production, the name of the crew and the date the material was shot. If the tape has a recording tab, a small removable button, this should be removed to ensure that no one can record over your work. Store your tapes or disks in a secure place. Look at the examples of professional post-production documentation on the CD-Rom. Look at …
  • 8. 66. BTEC First in Media: A Practical Handbook Editing techniques You may have access to a variety of editing equipment to edit your video programme. There are two editing systems – linear and non-linear: • The linear system uses two (or more) tape-based video recorders to transfer video material. You have to synchronise the two machines to ensure that the material is transferred from one to the other at just the right place. This is the way that analogue footage has traditionally been edited. • The non-linear system uses digital technology to convert video footage into a form that can be saved as a file on a computer. The computer then uses software to edit together the video footage and output it as a video signal. In the linear system you have to edit material together in the order in which you want it to appear in the end. The non-linear system allows you to move footage around as you edit it, making it easier to change the order of footage at any time. The development of digital technology has meant that the whole editing process is now more sophisticated. Video transitions can be used to add pace and rhythm to the edited video footage. An editor may use a ‘slow fade’ to slow down the action or a ‘fast fade’ to speed up the action. A fade to black followed by a fade up from black is generally used to signify that time has passed. However, overuse of these video effects can make a programme look too flashy and can detract from its message. Sometimes it is better to simply cut between scenes. You can add new soundtracks to a video using dubbing – adding a music track, a voice-over or sound effects, for example, without altering the visual image. You will have to decide which delivery format to use for your finished product. Traditionally this would have been on VHS videotape, as this was the format many people had access to. Now this format is dying out and the DVD format has taken over. In order to deliver your finished video on DVD you will have to change the format of the video and audio files and make them compatible with the DVD format. This will involve the use of software, such as DVD Studio Pro, to compress your video footage to an appropriate file size and convert it to MPEG 4 files. You can then use the software to create a DVD menu that allows the viewer to choose how to view your video footage. They might want to see only a part of the video. You can set chapter points on the DVD to allow the viewer to choose what they see. Try this ... Use the footage you shot of the interview with your friend. Try editing out some of your questions to make the interview shorter.
  • 9. 67. PRODUCTIONSKILLSVIDEOPRODUCTION Contributing to every stage of the production You must demonstrate that you can make a contribution to the pre- production, production and post-production stages of a finished video. It is useful to keep a production diary that shows just what you have done in this project. This is a sample of a production diary. Generating ideas You should undertake a mind-mapping exercise to decide what video product you are going to make. If you are working in a group, then everyone should have an input into the mapping exercise. Here is an example of a mind map for a professional video product. Student Art & Design Training Video 2007 Date Activity Roles undertaken and skills developed 21 January Producing the initial script and storyboard. This will be discussed by the group, who will choose a version to be used in the production. I have written my version of the script and drawn a simple storyboard, based on the idea that the group decided on. (Hopefully, my version will be chosen for the production.) Teacher and students working at Selby Abbey Students collecting materials Interview with a professional artist in a studio Students sticking images down Students on a field trip to the USA Teacher demonstrating techniques
  • 10. 68. BTEC First in Media: A Practical Handbook You will need to consider: • Genre: what genre do you intend to use for your video product? Will it be a documentary, a drama, a horror video, a thriller, a music video or a comedy? • Content: what do you intend to put into your finished product? Will it be all your own material or do you intend to use found footage? Will it be in colour or black and white? Will there be dialogue and/or music? • Title: what will be the title of your video product? You should think of a working title as soon as you can, so that you can put it on all your pre- production documentation. • Scope: will this be for one particular audience or for general release? What will be the length of your video product? Contributing to the pre-production process You will need to plan carefully for your video product. It can sometimes take more time to plan a production than it does to film and edit it. You must ensure that you provide evidence of your contribution to the planning phase of the production. You should: • undertake effective research • devise an appropriate timescale for production • ensure that any locations and studios have been booked • book equipment and materials • communicate effectively with your team • provide a creative input into the development of the product • work within the agreed budget. Contributing to the production process You must demonstrate your technical competence by using equipment effectively. You should also have a creative input into the production process. For instance, you might suggest what camera angles to use or what sound to record. You should take on one of the roles within the production team – as the location manager, for example, or the camera operator or the sound recordist. You should carefully record all of the work you do in your production diary, and say how you well think you worked as a team member.
  • 11. 69. PRODUCTIONSKILLSVIDEOPRODUCTION Contributing to the post-production process You should demonstrate your technical competence in using editing techniques and technology. Editing is not just about storing files and joining them together. It is a creative process, involving the pace and timing of your shots and making the story flow. Your input should be about using the post- production process creatively to produce a good finished video product. Remember that you must carefully record all the work you undertake in post-production. Summary In this chapter you have covered what you need to know to achieve two of the three Learning Outcomes relating to Unit 4 of your course. You should now: •understand pre-production, production and post-production techniques •be able to contribute to each stage of the creation of a finished video product. When you have finished your video product you will need to review it to achieve the final Learning Outcome. To find out how to do this, turn to Chapter 19, Reviewing Your Work.