Dubai Call Girl Number # 0522916705 # Call Girl Number In Dubai # (UAE)
Getting Started With Studio 3.0
1. Getting Started With Heritage Studio 3.0
A Guide to the Heritage Studio 3.0 Drag and Drop Publishing System presented by Heritage Makers
This guide is for use with Heritage Studio 3.0 Drag and Drop
Heritage Makers products. For additional resources, please
contact
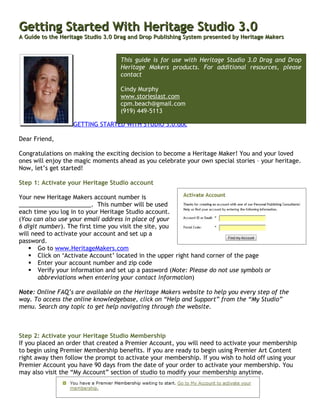
Cindy Murphy
www.storieslast.com
cpm.beach@gmail.com
(919) 449-5113
GETTING STARTED WITH STUDIO 3.0.doc
Dear Friend,
Congratulations on making the exciting decision to become a Heritage Maker! You and your loved
ones will enjoy the magic moments ahead as you celebrate your own special stories – your heritage.
Now, let’s get started!
Step 1: Activate your Heritage Studio account
Your new Heritage Makers account number is
______________________. This number will be used
each time you log in to your Heritage Studio account.
(You can also use your email address in place of your
6 digit number). The first time you visit the site, you
will need to activate your account and set up a
password.
Go to www.HeritageMakers.com
Click on ‘Activate Account’ located in the upper right hand corner of the page
Enter your account number and zip code
Verify your information and set up a password (Note: Please do not use symbols or
abbreviations when entering your contact information)
Note: Online FAQ’s are available on the Heritage Makers website to help you every step of the
way. To access the online knowledgebase, click on “Help and Support” from the “My Studio”
menu. Search any topic to get help navigating through the website.
Step 2: Activate your Heritage Studio Membership
If you placed an order that created a Premier Account, you will need to activate your membership
to begin using Premier Membership benefits. If you are ready to begin using Premier Art Content
right away then follow the prompt to activate your membership. If you wish to hold off using your
Premier Account you have 90 days from the date of your order to activate your membership. You
may also visit the “My Account” section of studio to modify your membership anytime.
2. Step 3: Log in to your Heritage Studio
After your Heritage Studio account is activated, you will receive a message that lets you know your
activation was successful. At this time, it is recommended that you click to view the “First Time
User” overview. You may also just continue into your new Heritage Studio account. Each time you
log in, you will enter your account number (or use your email address) and password. If you ever
forget your password, click (forgot?) and your password will be emailed to you at the e-mail
address on file in your Studio Account.
Heritage Makers offers beginning,
intermediate, and master Studio classes to
learn the basics of Studio 3.0. These online
webinars are helpful as you learn to navigate
the system and create beautiful custom
digital products. To view the class schedule
and register for the webinars, click on
“Online Classes” located on the “My Studio”
tab. After you attend the online classes, you
will see how the system works and learn some
From the “My Studio” tab you can: amazing design techniques, as well as get
Start a new project project ideas. Many of the more popular
Access your recent projects classes are recorded and can be viewed as
View all credits many times as you need them. Visit that
Access the Story Center; the Story section soon!
Center is designed to help you use
Studio 3.0 every step of the way.
Download “Story Steps” to write
your story in 3 easy steps; “Story
Maps” help you organize the
information you need to tell your
story; visit the “Tips and Tricks”
section to learn secrets that
professional storybook authors use
to create fantastic, heritage-
building projects. The “Studio Art Don’t forget to view the art collections!
Catalog” features the art content Each month brand new art content is added to your
available to Premier Members. Studio Account . . .
Modify your Studio Membership
(Click ‘modify’ and be directed to Check this
your account settings. Here, you section each time
can switch your membership from you log in!
Basic to Premier and change
renewal preferences)
Step 4: Upload photos
Heritage Makers uses online photo albums for storing your photos to enable easy access when you
are creating your projects. All photos need to be in a digital format before you can upload them into
your Heritage Studio account. The process of uploading your photos will be smoother if you have
organized your photos into documents/folders on your hard drive. If you have photos on a disc or
memory card, you can upload photos directly from the disc/card as well.
1) Click “Add Photos” in the upper right hand corner of the screen in the main menu of your Studio
Account.
3. 2) Select an existing album by clicking the
drop down arrow or create a new album by
typing a name, then click “Create”. There is
no limit to the number of photo albums you
can have on your Heritage Studio account.
3) Click “Choose Files” to upload files.
Important note: Al photos must be in JPEG
format and no greater than 4800 X 4800 pixels
large and 10 MB (megabytes) in size. To locate
format and file size, browse your hard drive
for a photo. When you’ve located the photo,
right click on your mouse and select
properties.
4) Browse your computer’s picture files to locate the
photos you wish to upload. Select the photos you
want, and click the “OPEN” button.
Tip: By holding down the Ctrl key on your keyboard,
you can select individual photos. By holding down the
Shift key on your keyboard, you can select all photos.
The progress of your upload is shown as each
photo uploads to the album chosen. After all
photos have completed uploading, you will
have the option to upload more if you choose.
Or you can go back to the “My Studio” tab to
begin your project.
Basic Account holders are allowed 2
gigabytes of photo storage space.
Premier Account holders enjoy
unlimited photo storage.
At any time, you can view your photos in
your albums. From the “My Albums” tab,
select the album you would like to view by
clicking on the drop-down menu. From this
section, you can also add more photos to
the album, rename the album, delete the
album, or delete individual photos from the
album. Premier members can download
their high-resolution photos back to their
hard drive by clicking on the photo, right
click on the photo then choose “Save Target
As”.
4. Sometimes, it is necessary to scan photos in order to get them into a digital
format. Follow these tips for successful scanning:
Make sure the glass and inside cover of your scanner are clean. Refer to the
Use your scanning software’s cropping tool to select only the image “help and
area you wish to scan. support”
If cropping a photo, remember your finished image size needs to be section of your
300 dpi at 100%. For example: if the image area you are scanning Heritage Studio
measures 2X2 inches, but will print in your finished project at 4X4 account. Our
inches, you must set your scanner resolution to 300 dpi and the scale knowledgebase
to 200%. This option is often found in the “advanced” settings of your has helpful
scanner. information on
Save your images as RGB jpeg files. uploading and
Be careful when scanning photographer’s photos with a matte finish. working with
Often, these print blurry. photos!
Preview scan your image to ensure you are scanning properly.
Step 5: Choose your Heritage Makers product
If you are not sure which type of Heritage Makers product you would like to start with, go to the
“Home” page ( ) found in the upper left hand corner of the website and select
“Products” to review the variety
of products Heritage Makers
offers. You are sure to find
something that meets your
needs. Review each product’s
features and decide which
type of product you wish to
use to publish your story or
other heritage-building ideas.
From the “My Studio” tab click to start a new
project. There are two ways to get started. 1)
Start with a blank project.
Build your project from scratch. Add your own
photos, text, and choose from thousands of the products page, you can view a brief tutorial that
From
shows the basics of your Heritage Studio 2.0 account. Refer to
pieces of artwork to add to your project.
this tutorial for a quick reference any time!
2) Start with a template. Templates are a great
way to start a project while still providing you
the flexibility to change things. These are not
your typical templates! Each of our templates
allows you to unlock and move elements around
as well as add your own photos, text, and
artwork.
(*Some templates may require a Premier
membership)
In this guide, we will illustrate how to start
with a blank project.
5. Select your
project type by
clicking
“Select”.
Choose your
project size by
clicking on the
icon next to the
size desired.
Click “Select”. Name your project and click “Continue”. (Note: you can rename your project at any time
during project creation. However, whatever project size you select will be the size you have to keep. For
example: If you choose an 8x8 orientation and after you’ve started the project you decide you wish to
have it be a 12x12, you will have to start from scratch in the new size.)
The system will ask if you’d like to upload photos now or later. Choose
accordingly, then access your new project from the “My Projects” tab.
NOTE: The first time you use our publishing system, you may be required to
install Adobe Flash Player and allow Flash Player to use up to 10 MB of storage on
your computer. If you see this warning, please click “Allow” to continue.
At any time, you can view all
of your projects from the
“My Projects & templates”
tab. This section will list the
project name, size, and last
edit date. This section also
allows you to view the
project, make a copy,
rename it, or delete it
altogether.
6. Step 6: Layout your project using Heritage Studio tools
1. Windows Page Tools 2. Finishing Tools 3. Zoom Page Tool 4. Project Description
5. Cut, Copy, and Paste Tools 6. Tool Box 7. Project Canvas 8. Pages Tab
9. My Photos Tab 10. Text Box Tab 11. Premier Art Tab 12. My Projects Tab
13. Quotes Tab 14. My Favorites Tab 15. Photo Upload tool 16. Picture thumbnail size
NOW LET’S SEE WHAT EACH TOOL WILL DO!
1. Windows Page Tools
FILE Tab:
Save & Quit your project; Save your project; Preview your project;
Publish your project; Empty Trash can
7. EDIT tab:
Undo formatting; redo; select images on your canvas and
Paste Special formats; lock photos and embellishments in
place; delete items
VIEW tab:
Set up the preferences of how you wish to view your
Studio screen. Turn the tool box on and off; turn on
specific content views; set up page navigation
preferences; turn on rulers; show print marks; zoom in
and out and empty trash
ARRANGE tab:
Layer photos and embellishments from front to back as desired
TOOLS tab:
Spell Check
HELP tab:
Open the Heritage Makers Knowledgebase for FAQ’s and answers to
any question you have about the Heritage Makers publishing system
2. Finishing Tools
Save & Quit project
Save
Preview Project
Publish Project
3. Zoom Page Tool
Zoom in on your pages by dragging the zoom tool from left to right
HELP tab:
By clicking on StudioARRANGE tab: access the Heritage Makers
Help you can
Knowledgebase where you can find quick answers forfrom front to back and back to
Layer photos and embellishments help in
front as desired. Heritage Studio 2.0
8. 4. Project Description
Itemizes title, project size, and number of
pages.
5. Cut, Copy and Paste Tools
Select the Cut tool to delete the image your cursor is highlighted on. To Copy and Paste any
image, select the Copy tool, then the Paste tool to create a duplicate image.
Rotate the image by left
clicking on the blue circle
and dragging the square left
to right until your image is a
the angle you desire.
Resize the image by left
clicking any corner and
dragging in and out.
Tools Tab:
Crop your image down by selecting
6. Tool Box “Crop” then adjusting the image as
desired.
Select the Cut tool to delete the image your cursor is highlighted on. To Copy and Paste any
image, select the Copy tool, then the Paste tool to create a duplicate image.
Layer your photos and
embellishments by sending
individual images from front to back
or back to front.
Lock your images so that the effects
you have chosen will not be altered
accidentally.
9. Effects Tab:
Use the effects to give
personality and a unique
appearance to your photos by
using the scroll bar on each
effect. Left click on the scroll
bar and drag left to right to
increase or decrease the
effect.
Don’t forget to use the “Lock”
feature to lock your effects!
Layout Tab:
Set the exact position and size that
you wish your photos to be. Lock or
unlock proportions for custom sizing.
Flip your objects vertically or
horizontally and rotate as desired.
Rotate photos will scroll bar or
7. Project Canvas entering exact degree of rotation.
In the drag and drop Align, distribute and space photos as
system, your project desired.
canvas is always blank
when you begin. You add
photos, effects and
embellishments in layers
one image at a time.
8. Pages
Jump through your
project quickly by
clicking on individual
page tabs.
10. To move pages within your project,
use the Page Management Window.
The covers (FC and BC), and the
blank first page cannot be moved,
but any numbered page can be
moved anywhere in the project.
In the Page Management Window,
click on the page you wish to move,
and drop it between the pages you
want it to go between. The other
pages will shuffle into place and fall
back into two-page spreads, so you
can see which pages will be side by side in the finished book.
To delete a page, select that page in the Page Management Window and click “Delete” at the top
left. To add a page, click “Add” at the top left. The new blank page will be inserted before the
page that is selected. To duplicate a page, click “Duplicate” at the top left. The page that is
selected will be duplicated, and the new copy will be placed right before the original.
If you accidentally move a page to the wrong place or delete a page that you did not mean to,
you can click Cancel to exit the Page Manager without saving your changes.
9. My Photos
The My Photos Tab shows all images that you have uploaded to the website, organized in
folders. To use an image in your project, simply click and drag it onto the page. By clicking
once on a photo, you will see a box pop up showing a larger view of that photo, and the
recommended size for printing.
10. Text Boxes
To create a text box, click on the
Text Boxes Tab, then select the
type of text box you want to
create. Drag the icon up to the
page to create the text box.
11. Double click on the new text box to delete the words
“Double click here to edit” and type your own text.
11. Premier Art
If you are a Studio Premier
member, you’ll have access to
thousands of scrapbooking
embellishments in this folder.
You can browse through the
collections or search for search
specific objects. To browse the available collections, simply click on thumbnail or artwork that
interests you. To search for a specific type of embellishment (button, brad, stitch, etc.) simply
type in the description or keyword and click “search”. To view all collections once again click on
the “home” button.
Basic Art
There is an entire section
dedicated to Basic Art objects
available to all users.
To browse the collection,
enter a search keyword or
select a category.
12. My Projects
This folder contains all images and text that you have
used in any of your projects. If you have an image in
a different project that you’d like to use in your
current one, you can find the image here.
Click on the plus sign next to “My Unfinished Projects” or “My Completed Projects”.
Click on the name of the project to see all images and text boxes used in that project, or click
on a specific page number to see elements used on that page. You can then drag the images or
text boxes onto your page to use in your current project.
13. Quotes
Here, you’ll find a list of quotes that you
may use in your projects. You can search
for a quote by keyword or by theme.
Once you’ve found the quote you want to
use, just click and drag it up onto your
page. You can then change the font and
format using the “Tool Box” that appears
when the text box is selected.
12. 14. Favorites
In this folder, you can collect photos, text, and art to use in your projects. Click on the
diagonal arrow on the “My Favorites” tab to edit the contents of your Favorites. You can
create folders and subfolders to organize your content.
To add something to your new folder, find the object in its original location (My Photos,
Premier Art, Basic Art, My Projects, or Quotes). Then click and drag the object to the “My
Favorites” window.
15. Photo Upload Tool
Photos can be added to your existing photo albums while you are creating a project in the
Studio editor. Highlight the album you wish to add photos to and click “Upload Photos” .
16. Icon Size tool - View photos larger or smaller by dragging the icon sizing tool left to right.
Special features
Use the color match
feature to select the
exact color you wish
for your backgrounds.
Select “Fill Color”
then run the dropper
tool across the exact
color you wish to
match.
13. Use the filter tool to give your photos a black and
white or sepia effect.
Find the inspiration you're
looking for in hundreds of
pre-designed templates!
Use the “Preview” tab to create a preview of your
At Heritage Makers, we believe in
entire project. Download each individual page or email
the importance and power of the
individual and project (usingOur preview link in your web
the entire family stories. the
browser) for previewing outside of Studio.
updated Cornerstone Template
series was designed to help you
record the most important stories
in your life. We have
hundreds of user-submitted
templates available in our gallery.
Click on the “Help and Support” tab to open the Heritage Makers Knowledgebase. This section
All will feature FAQ’s and answers to any question you have about the Heritage Makers drag and
templates in the Template
drop publishing system. Simply type in a topic in the white bar and click “Search”.
Gallery are free to use. You will
however, need a Premier
membership to access some
templates as they contain Premier
artwork. (If a Premier
membership is needed, you will
be notified when you select the
template.)
14. To use a template:
-Choose a template and click
'Get This Template'
-Choose whether you will start
your project now or continue
shopping for more templates to
add to your Studio. If you
continue shopping, you can find
the template later under the
'My Templates' section of your
Studio.
-Follow the prompts to begin
working on your project. It's
that simple!
You will discover even MORE FEATURES and benefits as you become familiar with our
“first of its kind” drag-and-drop system. Have fun and ENJOY!
Questions? I am here to help you every step of the way! Please do not hesitate to contact me at
any time!
Cindy Murphy
Independent Publishing Consultant
Phone: 919-449-5113
E-mail: cpm.beach@gmail.com
Web: www.storieslast.com