DualEM LOG software manual 1.8
•
0 gefällt mir•146 views

DualEM LOG software - User manual release 1.8

Empfohlen
Weitere ähnliche Inhalte
Was ist angesagt?
Was ist angesagt? (17)
Ähnlich wie DualEM LOG software manual 1.8
Ähnlich wie DualEM LOG software manual 1.8 (20)
Kürzlich hochgeladen
Kürzlich hochgeladen (20)
DualEM LOG software manual 1.8
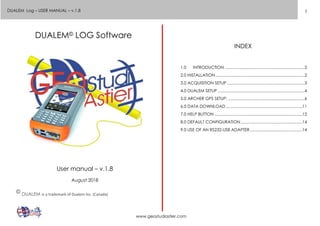
- 1. 1 www.geostudiastier.com DUALEM Log – USER MANUAL – v.1.8 DUALEM© LOG Software User manual – v.1.8 August 2018 © DUALEM is a trademark of Dualem Inc. (Canada) INDEX 1.0 INTRODUCTION ......................................................................2 2.0 INSTALLATION ..............................................................................2 3.0 ACQUISITION SETUP ....................................................................3 4.0 DUALEM SETUP ............................................................................4 5.0 ARCHER GPS SETUP: ...................................................................6 6.0 DATA DOWNLOAD...................................................................11 7.0 HELP BUTTON .............................................................................12 8.0 DEFAULT CONFIGURATION......................................................14 9.0 USE OF AN RS232-USB ADAPTER..............................................14
- 2. 2 www.geostudiastier.com DUALEM Log – USER MANUAL – v.1.8 1.0 INTRODUCTION DUALEM Log is a software dedicated to data acquisition and configuration with DUALEM equipment. DUALEM Log allows the user to: 1. Collect full data coming from DualEM sensors (measurements, internal GPS, pitch, roll, temperature, battery voltage, etc.); 2. Collect data from a GPS embedded inside a handheld PC (if available) like Juniper Archer 2, DAS-70 and similar; 3. Plot data and positioning in real-time (sensors values and graphs, GPS path, GPS quality signal, pitch-roll- temperature-battery tension); 4. Communicate with a DualEM sensor for proper setup (survey and instruments parameters, etc…) through its own internal menu; 5. Transfer data from the internal logger of a DUALEM sensor to a Windows computer. 2.0 INSTALLATION To install DUALEM Log simply double click on the DUALEMLog.cab file from an external drive connected to Field PC (DAS-70, Archer 2 and similar with Microsoft Windows Embedded O.S.); the installation process will start and a shortcut will be added to the program list. (If you are using an Archer 2, or similar, with internal GPS, please uncheck the “Automatic manage of GPS” option from SettingsSystemExternal GPS GNSSAccess). At the end of this procedure, launch the software the first time and the demo version (fully functional) will be installed: the user will be allowed to launch the software not more than 25 times with 3 minutes limit of use for each recorded file. To make the installation permanent on device, it is requested to send the file id.id located into DualEM Installation folder (default is C:Program FilesGeostudiDUALEMLOG) by e- mail to info@geostudiastier.com. The user will be answered with a new file (id.lic) to be copied in the same directory. After this operation will be executed, DualEM Log will be permanently installed on device. We recommend also to setup the DualEM instrument with a “Start mode” option as “NMEA OUTPUT WITH AUX” (please refer to the manual of DualEM) or refer to page 6 of this manual.
- 3. 3 www.geostudiastier.com DUALEM Log – USER MANUAL – v.1.8 3.0 ACQUISITION SETUP After launching DUALEM_Log, the following main screen will appear (only LOG button is active): The other buttons will be enabled (ON) only after the acquisition setup is performed by pressing the LOG button (see chapter 3.0). Tap on LOG button to select file name, destination folder, output format and location: In the case the user wants to transfer data from the internal memory of a DUALEM sensor, the related .raw file will be automatically saved into the same selected folder (see chapter 6.0).
- 4. 4 www.geostudiastier.com DUALEM Log – USER MANUAL – v.1.8 Then press Save to exit to main menu: Note that all buttons (Dual, ExGPS and COM) are active (enabled) now. 4.0 DUALEM SETUP Tap on Dual button to enter the setup for DUALEM and adjust the communication parameters (COM port and Baud rate) as below: Press the Connect button to connect to the equipment; the data flow should start:
- 5. 5 www.geostudiastier.com DUALEM Log – USER MANUAL – v.1.8 In the case the data flow doesn’t start, type a “$” into the text bar and press Send button or press the Wake ($) button. To access the DUALEM internal menu (look at the DUALEM manual for proper commands to navigate the menu) type in or press “4” button to get the following main menu: From this window you can type in the shown commands into the text bar using the Archer’s virtual keyboard followed by Send button or just press the 1, 2, 3, 4 for an immediate response:
- 6. 6 www.geostudiastier.com DUALEM Log – USER MANUAL – v.1.8 In the case you have to setup the output string format, press “3” button to enter the Instrument Setup menu, then, press the Next command (“2”) until you reach the “Start Mode” menu; change the start setting mode using the “3” (change) button and select “NMEA OUTPUT WITH AUX” option. When you have finished with your changes, press the OK button to exit and return to main menu screen. 5.0 ARCHER GPS SETUP: To use the Archer 2 without its integrated GPS, press the Ex GPS (external GPS) button and set up the page as follow: To use the Archer 2 with its integrated GPS, first of all go OUTSIDE (where a GPS signal is present) and press the Ex GPS (external GPS) button and set up the page as follow:
- 7. 7 www.geostudiastier.com DUALEM Log – USER MANUAL – v.1.8 Press “Connect” button to verify that the GPS data are correctly flowing and that the coordinates values (latitude and Longitude) are not equal to zero (see numbers in GPGLL string in picture below): Good GPS coordinates Then press OK to return to main menu and you are ready to start the survey. In the case you see zero Latitude and Longitude coordinates as in the following picture you are requested to enter the GNSS Windows setup to restart the GPS; in this case, exit the DualEMLog Program, go to Windows settings System GNSS:
- 8. 8 www.geostudiastier.com DUALEM Log – USER MANUAL – v.1.8 Scroll on the top of the windows until you reach the GNSS System Tab and press the “Restart GNSS” button: Exit the Window Setting page and restart DualEMLog again following the same procedure explained from Chapter 3.0. Now, external GPS coordinates should be ok and it is possible to start the survey. Regarding the meaning of colored led, please refers to chapter 7.0.
- 9. 9 www.geostudiastier.com DUALEM Log – USER MANUAL – v.1.8 Press Start button to launch the acquisition: the bottom left message toggle repeatedly from “Acquiring” and the name of file in use for data logging: You can pause the acquisition anytime pressing Pause button and answering “yes” at the confirming message: Press the Continue button to continue the acquisition or “Stop” button when finished. Regarding the meaning of colors of led, please refer to chapter 7.0.
- 10. 10 www.geostudiastier.com DUALEM Log – USER MANUAL – v.1.8 During acquisition you can see different information coming from the equipment simply by tapping on the screen; the display changes in the following order: 1. EM full HCP and PRP data (mS/m) + battery tension + Internal Temperature + Pitch and roll, ……; 2. Graphical display of HCP EM data; 3. Graphical display of PRP EM data; 4. Internal (DUALEM) GPS condition (position and number of satellites); 5. Internal GPS track (two lines are represented: the red one is related to saved file while the blue one is related to points captured before saving data); 6. External (Archer 2) GPS condition (position and number of satellites); 7. External GPS track (two lines are represented: the red one is related to saved file while the blue one is related to points captured before saving data); 8. …….Again from point 1. The Marker button allows yuu to insert several markers labeled as “$MARKER 1, $MARKER 2” etc… in the saved file. Dual EM data HCP graphical view
- 11. 11 www.geostudiastier.com DUALEM Log – USER MANUAL – v.1.8 External GPS condition External GPS track 6.0 DATA DOWNLOAD The collected data can be easily transferred to data processing PC by means of a common USB drive connected to a USB port of an Archer 2. Data conversion and matching with external GPS are carried out using ConvertResampleNMEA external software (Geostudi Astier). If you want to transfer data from the internal memory of a DUALEM sensor(.raw file), this can be easily done as follows: 1. From main window tap on LOG button:
- 12. 12 www.geostudiastier.com DUALEM Log – USER MANUAL – v.1.8 2. From the Log window, tap on Download Data button: the systems will connect to DualEM internal memory and automatically start to download the data (the following messages will appear in sequence: Log….Downloading…..): 3. The downloading process could take a while and it will terminate at stop of data flow. The system automatically saves the downloaded .raw file in the same folder previously specified on chapter 3.0. 7.0 HELP BUTTON The colored leds provide important real time information regarding the status of the system during setup and acquisition. Pressing the Help button will display the description of led status; as a general rule, the first led (from the left) refers to communication status, second led (central) refers to GPS status, third led (on the right) refers to data logging status: (The COM button on the right doesn’t show a GPS led as it is intended as auxiliary channel usually not used).
- 13. 13 www.geostudiastier.com DUALEM Log – USER MANUAL – v.1.8 See following examples of led communication: Dual and ExtGPS serial ports are open; GPS signals are absent; the software is waiting for acquisition Dual and ExtGPS serial ports are open; GPS signals are absent; the software is writing data to Archer 2 The data have been flowing and storing correctly but both GPS are receiving less than 7 satellites All led are green: best survey conditions (GPS are receiving more than 7 satellites).
- 14. 14 www.geostudiastier.com DUALEM Log – USER MANUAL – v.1.8 8.0 DEFAULT CONFIGURATION The default configuration of the software are the following: • DualEM communications: COM1 @ 38400 baud rate • Archer’s GPS: COM8 @ 115200 baud rate • COM channel: 1, 3, 4 or 8. 9.0 USE OF AN RS232-USB ADAPTER To setup the configuration of an RS232-USB adapter, launch the DualEM Software; • Enter the COM setting: • Open the pop-up COM Port menu to see which port numbers are available; • Exit the window and connect the RS232-USB adapter to the USB port; • Enter into the COM settings once again; • Open the pop-up COM Port menu to see the new port number related to the adapter; • Choose (select) this new port number to validate the connection through the adapter and press Connect button to verify the flow of data.