
Empfohlen
Weitere ähnliche Inhalte
Was ist angesagt?
Was ist angesagt? (20)
Ähnlich wie Web pams teachers' users guide
Ähnlich wie Web pams teachers' users guide (20)
Web pams teachers' users guide
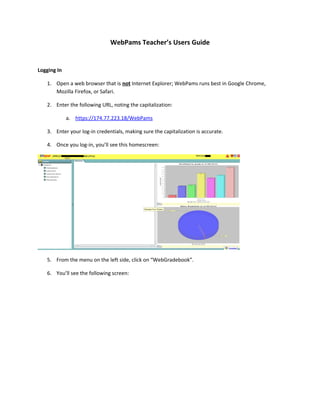
- 1. WebPams Teacher’s Users Guide Logging In 1. Open a web browser that is not Internet Explorer; WebPams runs best in Google Chrome, Mozilla Firefox, or Safari. 2. Enter the following URL, noting the capitalization: a. https://174.77.223.18/WebPams 3. Enter your log-in credentials, making sure the capitalization is accurate. 4. Once you log-in, you’ll see this homescreen: 5. From the menu on the left side, click on “WebGradebook”. 6. You’ll see the following screen:
- 2. 7. Along the bottom of this screen, you’ll see three drop down menus. In the first should be your name. In the second menu, choose the class section for which you want to enter attendance or grades. Lastly, choose the current marking period. 8. A list of the students in this class should show up in the middle of the screen. From here, you can enter attendance and grades. Student Information 1. In your main WebGradebook, you can access some information on each of your students. 2. If you move your cursor over a student’s name, a gear symbol will appear:
- 3. 3. Clicking on this gear will cause a drop-down menu to appear. From here, you can view several records for that student, including attendance, grades, schedule, demographics, special education status, and health concerns. Entering Attendance 1. Attendance must be reported during every class period. It is very important to enter attendance for a class period while the period is happening and the students are in your classroom. 2. After following the steps above, click on “Attendance” in the WebGradebook Tool Bar. 3. A new window will open up, showing your students in a new list. 4. Attendance for your FIRST PERIOD/HOMEROOM CLASS ONLY: a. If a student is present in your class when the bell rings, you do not have to do anything. The default position is “present”. b. If a student is absent, you must click in the BLUE column labeled “1st”. c. Choose the absence code “05 U Dr/Parent Note Needed”. The student will then be marked absent for the day. 5. Attendance for all classes other than first period: a. If a student is present in your class when the bell rings, you do not have to do anything. The default position is “present”. b. If a student is not present in your class when the bell rings, click in the second column labeled “OUT”. A menu of options will pop up, from which you can choose the reason the student is out (“Skipped”, “Dr/Parent Note Needed”, “Tardy”, etc.). 6. Once you are done entering attendance for that class period, click on the large red button at the top of the screen, “Sign Off Roll Call”. Creating Assignments and Entering Grades
- 4. 1. Click on the arrow immediately next to “Assignments” in the WebGradebook Tool Bar. 2. From the drop down menu, click on “New”. 3. The following box will pop up, which must be filled out: 4. Enter a title for the Assignment. 5. Choose a category from the drop down menu. These pre-selected categories have automatically-assigned weights. You must choose an appropriate category for every assignment. 6. Choose the grade type from the drop down menu. 7. The Maximum Points box defaults to 100. Change this if the assignment you gave is worth less than 100 points. (Please note: maximum points is not a designation of an assignment’s weight. That was determined by the category selected above.)
- 5. 8. Change the taught from, taught to, and due dates only as you see fit. 9. Enter a description in the large space provided only if you see fit, for your own notes. 10. If you teach multiple sections of the same class (for example: you teach English III at 1 st, 3rd, and 5th periods) and you give the same tests or assignments in all those sections, you can copy the assignment you’ve just created to the gradebooks for those classes. Choose the option, “Copy to Other Sections”. A list of your other sections will appear. Choose the ones you want to copy the assignment to, and click “ok”. 11. Click “Save”. 12. A new column will appear in your gradebook, with a space next to each student’s name to enter a grade. 13. Each time you enter grades for any assignment you’ve created, you must click the “Save” button on the far right of the WebGradebook Tool Bar. 14. The last column in your WebGradebook will always be the students’ current final grades, calculated automatically based on the assignments you’ve previously assigned, the weighted category of each, and the grades you’ve previously entered for them.