3. Me and Rachel devised a video talking about the idea's
we had for our music video. This was filmed around a
few weeks before we had came up with our initial idea
for the video therefore most of the idea's in this video
will not have been progressed further. This helped us
get our idea's out to others which also lead to feedback
from them as to whether the idea's we had were suitable
or not.
For this video we used a Canon HD camera, one of
the ones used in our filming. After we had filmed we
uploaded the video to our computers and went to
Premiere Pro to edit the bits out that weren't
necessarily needed. After this it was then converted
to YouTube and put publicly which enabled us to
embed it to our blogs and other resources.
4. Before we had chosen our track we had to listen through around 20
songs on SoundCloud, which is a music streaming website. This allows
you to listen to which ever track you like for how long you want. This was
useful as you could scroll past the songs you didn’t like allowing you to
listen to the ones you wanted to. When we had chosen our track we
embedded the link onto our blog’s to let people who read our blog know
which track we had chosen.
We had then created a shooting schedule to
prepare us for when we was going to film
this allowed us to stick to this schedule so
we knew we would get the filming
completed before the deadline. We made
the schedule on Microsoft Excel as it is easy
to read and use. Once we had done that
piece of filming we would tick it off allowing
us to not get mixed up with what we have
and haven’t done.
5. When it came to planning our music video we had
taken inspiration from other video’s which we then
planned that we would attempt to film similar shots
to these. To get the part of the video we wanted I
went onto YouTube to find the clips then because I
didn’t want the whole video I went on a website
called TubeChop which allows you to cut the
section of a music video you want.
We also had taken planning seriously that
we downloaded the weather forecast from
the internet for the days we were meant to
go out and film. We thought by doing this it
will help us to figure out what the weather
will be like when we do actually film so we
know what the video will look like.
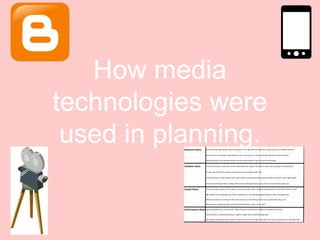
6. Blogger was a main part of planning as that is where I
put most information as it was simple and if I was in a
rush it would be easy for me to write up what I wanted
and publish it. I used blogger to plan the equipment and
location, and what our actors looked like. Even though I
only mainly used blogger I still made it look effective
and better to read rather than writing in big paragraphs.
Also on Microsoft Excel I devised up a
risk assessment, telling us all the risks
we had. when it came to actually filming.
This allowed us to be aware of the
dangers which may happen, also like
before Excel is very clear to read
therefore I thought that would be the
best tool to use to explain the risks.
7. To aid us with our filming and so we knew which shots to film and the
angles of them we devised up a storyboard which we then later made into
an anamatic. We drew our storyboard onto Post-It notes and the times that
they would come up in the music video we then took picture using the
DSLR camera as this camera makes the writing and images come up a lot
clearer than the others. Once we had taken the photo’s for the storyboard
we had to make an anamatic, which we did on MoviePlus, as this was
before we had used Premiere Pro, and we had to put the images on the
screen for as long as they lasted in the video. After we had completed that
we had to upload it to YouTube to enable us to embed it to our blogs for
others to see.
9. For our website we used wix.com, we found this was a very popular website
maker as well as easy. It took us a few attempts to pick the right template and
format for our artist as we had to try and get it to be as similar as possible to
the genre we was working with. Wix is a free site you can make your own
websites on, this is one of many sites which is free therefore this is the one
we decided to choose. Wix allows you to choose from a range of different
templates and backgrounds, we had to try and choose the one which related
well with our artist. As most other artists websites were in black and white we
thought to continue with this theme and make ours black and white also. This
narrowed it down a lot for us, making it easier for us to choose a template. We
used Wix.com to get across all information about our artist, including
information about the video. We also used it for personal use of the artist
which let the audience view pictures of the artist and read all about her.
10. Each day we would plan what we would put onto our
website via devising up another schedule on Microsoft
Excel. This way it made it easier for us to understand
what we have included and what we haven’t.
We planned our whole website on Wix.com and microsoft
word. We copy and pasted the text we had planned on
word into text boxes on Wix, this way we knew that we
had made no mistakes as we proofread if beforehand.
We also planned through filming video’s for the website.
Instead of using lots of text we filmed video’s onto the DSLR,
this helped with planning as things that were said on the
camera we also wrote in text to make it more clearer and vice
versa.
13. Planning for the digipak we ensured that we knew what
we wanted our digipak to look like by saving images of
other artists digipaks to our H drive, for this we used
Google, where we looked up artists in similar genres to
ours. Again with planning our digipak I used blogger to
write about what we was going to do before going ahead
with our digipak.
To allow us to get on with our digipak we had to plan
when we was going to do our photo shoot. We had to
get a time which both us and the actor could do in the
photography studio. To do this we used Facebook
and texting to set a date and time which was
appropriate for both. This media technology is useful
as it allows you to easily communicate with people
and helped us a lot when it came to planning.