Sample Detailed Lesson Plan in Digital Electronics - PCB Designing
•Als DOCX, PDF herunterladen•
33 gefällt mir•24,401 views

Sample Detailed Lesson Plan in Digital Electronics - PCB Designing

Empfohlen
Empfohlen
Weitere ähnliche Inhalte
Was ist angesagt?
Was ist angesagt? (20)
Ähnlich wie Sample Detailed Lesson Plan in Digital Electronics - PCB Designing
Ähnlich wie Sample Detailed Lesson Plan in Digital Electronics - PCB Designing (20)
Mehr von Manila Central University
Kürzlich hochgeladen
Kürzlich hochgeladen (20)
Sample Detailed Lesson Plan in Digital Electronics - PCB Designing
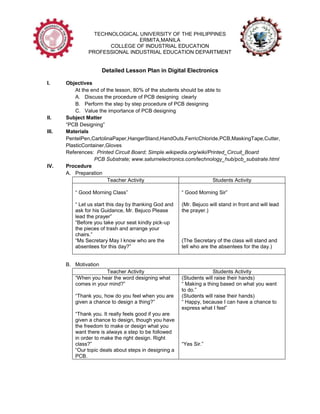
- 1. Detailed Lesson Plan in Digital Electronics I. II. III. IV. Objectives At the end of the lesson, 80% of the students should be able to A. Discuss the procedure of PCB designing clearly B. Perform the step by step procedure of PCB designing C. Value the importance of PCB designing Subject Matter “PCB Designing” Materials PentelPen,CartolinaPaper,HangerStand,HandOuts,FerricChloride,PCB,MaskingTape,Cutter, PlasticContainer,Gloves References: Printed Circuit Board; Simple.wikipedia.org/wiki/Printed_Circuit_Board PCB Substrate; www.saturnelectronics.com/technology_hub/pcb_substrate.html Procedure A. Preparation Teacher Activity Students Activity “ Good Morning Class” “ Good Morning Sir” “ Let us start this day by thanking God and ask for his Guidance, Mr. Bejuco Please lead the prayer” “Before you take your seat kindly pick-up the pieces of trash and arrange your chairs.” “Ms Secretary May I know who are the absentees for this day?” (Mr. Bejuco will stand in front and will lead the prayer.) (The Secretary of the class will stand and tell who are the absentees for the day.) B. Motivation Teacher Activity “When you hear the word designing what comes in your mind?” “Thank you, how do you feel when you are given a chance to design a thing?” “Thank you. It really feels good if you are given a chance to design, though you have the freedom to make or design what you want there is always a step to be followed in order to make the right design. Right class?” “Our topic deals about steps in designing a PCB. C. Lesson Proper Teacher Activity Students Activity (Students will raise their hands) “ Making a thing based on what you want to do.” (Students will raise their hands) “ Happy, because I can have a chance to express what I feel” “Yes Sir.” Students Activity
- 2. “Now we are going to study The process of PCB Designing, but before knowing the process of designing, lets define first what a PCB is, Anyone who has an idea? (Pick 2 students from each group) “Thank You, Please be noted that those students who are participating will get extra points for recitation. Going back to the lesson, the Printed Circuit Board or PCB is a card made specifically for attaching electronic components. PCB serves two purpose 1. It is a place to Mount Components 2. It Provides the means of electrical Component The PCB has two sides, the Substrate and the Copper Trace. The Substrate physically holds the circuit components and printed wires in place and provides electrical insulation between conductive parts. While the Copper Trace is for connecting the electricity between the electronic components. (Students will raise their hands) “ PCB is a electronic tool used in every electronic devices”
- 3. D. Activity Teacher Activity Students Activity Safety Precaution 1. Remove all jewelry when performing the activity. 2. Eating and Drinking is prohibited. 3. Avoid Horseplaying . 4. Be familiar with the tools and chemical to be used. 5. Do not perform the activity unless the instructor told you to do so. 6. If accident happens, report immediately to the instructor. Please Refer to the handouts for the Steps in PCB Designing. What is the First Step anyone? (Students Raise their hands) 1. Prepare the materials Needed, we will be using Masking tape, cutter, Pentel Pen, PCB, Ferric Chloride Plastic Container. What is the second Step? 2. Cover the PCB with Masking Tape The Third Step Class? 3. Draw up the Layout 4. Carefully trace the design using cutter and remove the excess Masking Tape. th What is the 6 step Class? 5. Subject to Etching Process. For the etching process, Put enough amount of ferric chloride to the container to submerge the PCB. Usually the Etching process takes 15-20 mins. 6. Rinse the PCB with water. 7. Remove the masking tape with the design. “Prepare the materials Needed” (Student Raise their hands) “Cover the PCB with Masking Tape” (Student Raise their hands) “Draw up the Layout” (Students will draw their own Design) th (Students Will Follow the 4 Step) (Students will Raise their hand) “Subject to Etching Process. For the etching process, Put enough amount of ferric chloride to the container to submerge the PCB.” th (Students Will Follow the 5 Step)
- 4. E. Generalization Based on what you have learned in this topic, who can now share their learnings? “Thank You. How about the steps in PCB Designing, anyone?” (Students will raise their hands) “I have learned that PCB is very important in every device we use. It is said that PCB is the Back bone of every Device.” (Students will raise their hands) “ I have learned that there are 7 steps in PCB designing 1. Prepare the materials Needed, 2. Cover the PCB with Masking Tape 3. Draw up the Layout 4. Carefully trace the design using cutter and remove the excess Masking Tape. 5. Subject to Etching Process. For the etching process, Put enough amount of ferric chloride to the container to submerge the PCB. 6. Rinse the PCB with water. 7. Remove the masking tape with the design. “Very Good!, It is very important to know what is a PCB and how to do the designing. V. VI. References: Evaluation Direction: Read the following questions and write the answer to the space provided. I. Identification ________1. It is the backbone of electronic devices. ________2. It provides the electrical needs of the electronic components. ________3. It holds and provide insulation to the electronic components. II. Enumeration 4-10 7 steps in PCB Designing Assignment A. Follow up assignment 1. Research about different PBC design. 2. Per group, Submit each PCB with holes already drilled. B. Advance Assignment 1. Read about Soldering a Component. Printed Circuit Board; Simple.wikipedia.org/wiki/Printed_Circuit_Board PCB Substrate; www.saturnelectronics.com/technology_hub/pcb_substrate.html Prepared By: ErmanG.Silagan