MASONRY NC II - CBLM
•
7 gefällt mir•3,785 views

Competency Based Learning Materials (CBL) modules for MASONRY NC II

Empfohlen
Empfohlen
Weitere ähnliche Inhalte
Was ist angesagt?
Was ist angesagt? (20)
Ähnlich wie MASONRY NC II - CBLM
Ähnlich wie MASONRY NC II - CBLM (20)
Mehr von Eric Talamisan
Mehr von Eric Talamisan (8)
Kürzlich hochgeladen
Kürzlich hochgeladen (20)
MASONRY NC II - CBLM
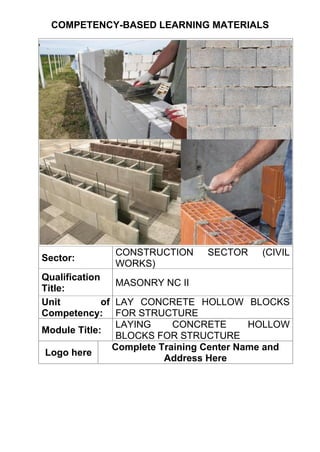
- 1. COMPETENCY-BASED LEARNING MATERIALS Sector: CONSTRUCTION SECTOR (CIVIL WORKS) Qualification Title: MASONRY NC II Unit of Competency: LAY CONCRETE HOLLOW BLOCKS FOR STRUCTURE Module Title: LAYING CONCRETE HOLLOW BLOCKS FOR STRUCTURE Logo here Complete Training Center Name and Address Here
- 2. HOW TO USE THIS COMPETENCY-BASED LEARNING MATERIAL MODULE TITLE: LAY CONCRETE HOLLOW BLOCKS FOR STRUCTURE. This is a Competency-Based Learning Material for the Module: LAYING CONCRETE HOLLOW BLOCKS FOR STRUCTURE. This learning material contains activities for you to complete. It covers the Knowledge, Skills and Attitudes required to complete the competency. You are required to go through a series of learning activities in order to complete each of the learning outcomes of this module. In each learning outcome, Learning Elements and Reference Materials are available for your further reading to assist you in the required activities. You are expected to accomplish all the required activities and to answer the self-check after each learning element. Please note that you need to have 100% correct answers to each self-check to pass the activity. You are required to obtain answer sheets, which are available from your trainer or at the end of each learning element, to reflect answers for each self-check. If you have questions, please do not hesitate to ask your facilitator for assistance. Recognition of Prior Learning (RPL) You may have acquired some or most of the knowledge and skills covered in this learning material because you have: • Actual experience on the job; • Already completed training in this area. BENEFITS OF RPL • Gives credit for knowledge and experience. • Reduces duplication of learning. • Reduces costs of obtaining formal credentials. • Gives immediate feedback and determines which competencies need verification and testing. • Identifies training gaps. • Training (is individualized and results in a recognized certificate). • Assists in professional development. • Allows for better use of time and resources. • Potentially saves on training costs. So, if you can demonstrate to your trainer that you are competent in a particular skill, you do not have to do the same training again. Or, if you feel you have the skills, talk to your trainer about having them formally recognized. You may also show your Certificates of Competence from previous training. And if your acquired skills are still updated / relevant to the module, they may become part of the evidence you can present for RPL.
- 3. A Record of Achievement is also provided for your trainer to fill-in upon completion of this module. This module was prepared to help you achieve the required competencies in Establishing Vertical and Horizontal Guides, Performing Laying of Concrete Hollow Blocks, Performing Jointing Process. It will serve as a source of information for you to acquire the required knowledge, skills, attitude, and inherent behaviour for the UNIT OF COMPETENCY: LAY CONCRETE HOLLOW BLOCKS FOR STRUCTURE for the MASONRY NC II qualification, with minimum supervision or help from your trainer. This material will aid you in acquiring the competency at your own pace, independently. To achieve the full benefit of this module: • Talk to your trainer and agree on how you will both organize your training on this unit. Read through the Competency Based Learning Material carefully. It is divided into sections which cover all the skills and knowledge you need to successfully complete this module. • Most probably, your trainer will also be your supervisor. He / She will be there to support and show you the correct way to do things. Ask for help if you need one. • Your trainer will tell you about the important things you need to consider when doing the activities. It is important you listen and take notes. • You will have plenty of opportunities to ask questions and undergo rigid practice. This will help you in achieving competency in your new skill. Ample practice will improve your speed, memory and confidence. • Talk with more experienced colleagues and ask for guidance. • Answer self-checks at the end of each section to test your own progress. • When you finished each element and feel that you are ready, demonstrate the activities outlined in the learning material to your trainer. • As your work through the activities, your trainer will be taking note of your performance. He / She will be providing feedback on your progress. Your readiness for assessment will be reflected in his/her report, if and when you have successfully completed each element.
- 4. INTRODUCTION TO THE MODULE UNIT OF COMPETENCY : LAY CONCRETE HOLLOW BLOCKS FOR STRUCTURE MODULE TITLE : LAYING CONCRETE HOLLOW BLOCKS FOR STRUCTURE MODULE DESCRIPTOR : This module covers the knowledge, skills and attitude required in productively establishing vertical and horizontal guides, laying concrete hollow block and performing jointing process. Introduction: This module contains information and learning activities in Laying Concrete Hollow Blocks for Structure. Upon completion of this module and you feel confident that you have had sufficient practice, you may request your Trainer to arrange an appointment with a registered Assessor for your assessment. The results of the assessment will be recorded in your Competency Achievement Record. SUMMARY OF LEARNING OUTCOMES: At the end of this Competency-Based Learning Material, the learners are expected to meet the following learning outcomes: LO 1. Establish a Vertical and Horizontal Guides LO 2. Perform Laying of Concrete Hollow Blocks LO 3. Perform Jointing Process ASSESSMENT CRITERIA Critical Aspects of Assessment Evidence of the following is critical: LO 1. Establish a Vertical and Horizontal Guides: 1.1 Personal Protective Equipment (PPE) is used in accordance with Rule 1080 of Occupational Safety and Health Standards. 1.2 Drawings and specifications are read and interpreted. 1.3 Materials, tools and equipment are selected and prepared consistent with the job requirements. 1.4 Location of concrete hollow block wall is established based on reference building/wall lines. 1.5 Horizontal / vertical guide for hollow block is installed and marked according to specifications. 1.6 Work area is cleaned according to safety and environmental regulations (e.g. PD 1152 Section 6, 8 & 42). 1.7 Required output is completed as specified by the immediate supervisor based on work schedule.
- 5. LO 2. Perform Laying of Concrete Hollow Blocks: 2.1 Personal Protective Equipment (PPE) is used in accordance with Rule 1080 of Occupational Safety and Health Standards. 2.2 Reinforcing bar / dowel are installed according to required job specifications. 2.3 Mortars are spread on the base /edge of hollow block according to job specifications. 2.4 Hollow block is laid on the line according to job specifications. 2.5 Constant checking of plumbness and alignment is done during hollow block laying. 2.6 Excess mortars on joints are scraped. 2.7 Work area is cleaned according to safety and environmental regulations (e.g. PD 1152 Section 6, 8 & 42); 2.8 Required output is completed as specified by the immediate supervisor based on work schedule. LO 3. Perform Jointing Process: 3.1 Personal Protective Equipment (PPE) is used in accordance with Rule 1080 of Occupational Safety and Health Standards. 3.2 Jointing is done in accordance with job specifications. 3.3 Finishing touches is done according to job specifications. 3.4 Work area is cleaned according to safety and environmental regulations (e.g. PD 1152 Section 6, 8 & 42). 3.5 Required output is completed as specified by the immediate supervisor based on work schedule. Resources Implications: Resource Implications must ensure that: • This competency is to be assessed using standard and authorized work practices, safety requirements and environmental constraints. • This unit of competency could be assessed in an off-site context, in the workplace or a close simulation of the workplace environment, provided that simulated or project-based assessment techniques fully replicate construction workplace conditions, materials, activities, responsibilities and procedures. Assessment Methods: The following methods may be used to assess competency for this module: • Demonstration / Observation with oral questioning. • Observation of practical candidate performance. • Simulated practical exercises. • Role plays. • Oral and written questions.
- 6. Program/ Course : MASONRY NC II Unit of Competency : Lay Concrete Hollow Blocks for Structure Module : Laying Concrete Hollow Blocks for Structure Learning Outcome No. 1: Establish a Vertical and Horizontal Guides Assessment Criteria: 1.1 Personal protective equipment (PPE) is used in accordance with Rule 1080 of Occupational Safety and Health Standards. 1.2 Drawings and specifications are read and interpreted. 1.3 Materials, tools and equipment are selected and prepared consistent with the job requirements. 1.4 Location of concrete hollow block wall is established based on reference building/wall lines. 1.5 Horizontal / vertical guide for hollow block is installed and marked according to specifications. 1.6 Work area is cleaned according to safety and environmental regulations (e.g. PD 1152 Section 6, 8 & 42). 1.7 Required output is completed as specified by the immediate supervisor based on work schedule. References: • Carlevaro, Nadia, Roux-Fouillet, Guillaume, Schacher, Tom. How to Build Safer Houses with Confined Masonry 2018. Practical Action Publishing, Ltd. • Provey, Joe, Ross, John, Editors. Tauton’s Masonry Complete 2012. The Tauton Press, Inc. • Black & Decker. The Complete guide to Masonry & Stonework New 3rd Edition 2010. Creative Publishing International, Inc. • Zilch, Conrad, Schatz, Martin. Masonry Construction Manual 2001. Institut fur internationale Architektur-Dokumentation GmbH, Munich. • Beall, Christine. Complete Construction – Masonry and Concrete for Residential Construction 2004. McGraw-Hill Publisher, Inc. • The U. S. Department of Housing and Urban Development. Building Concrete Masonry Homes, Design Construction Issues, 1998. NAHB Research Center, Inc. • Field Manual No. 5-428 Concrete and Masonry 1998. Headquarters Department of the Army. • Curtin, W.G., Shaw, G., Beck, J. K., Bray, W.A. Structural Masonry Designer’s Manual 2nd Edition (Revised) 1995. Blackwell Science, Ltd. • Websites: o https://liferayprod.cemex.com/web/guest o https://www.constructionknowledge.net/construction_knowledge.php o https://bessconcreteblockmachine.com/what-is-hollow-block.html o https://contractorsinsurance.org/masonry-contractors-safety-tips/ o https://www.ilo.org/wcmsp5/groups/public/---ed_emp/--- emp_ent/documents/instructionalmaterial/wcms_650136.pdf
- 7. INFORMATION SHEET NO.: 1 / UC NO.: 1 ESTABLISH A VERTICAL AND HORIZONTAL GUIDES Introduction Masonry is the structural construction of component parts laid in and bound together by a material called mortar. These individual materials which are introduced in any structure for various purposes and patterns may be tile, brick, granite, limestone, glass and concrete block, stucco, marble, stone, and travertine. The production of masonry units should generally conform to the requirements in the 2003 International Building Code (IBC) Section 2103. Aside from mortar, assembling these units can be reinforced appropriately by steel (rebar) that offers much strength to structures. Recommended Safety Precautions for Masonry Workers Masonry is also an integral part of the construction of both commercial and residential structures. Although the process has several major advantages, the work can be very labor intensive. Masonry workers may risk illness and injury as they work on homes, buildings, bridges and public works projects. Over the years, experienced masons have learned how to stay safe in dangerous conditions by following a list of recommended safety precautions. Common Ways Masonry Workers get Injured Masons use bricks, concrete blocks, concrete and natural and man-made stones to build walls, walkways, fences and other structures. As they build with these heavy substances, workers may deal with dangerous conditions, like exposure to chemicals. In fact, masonry workers have a higher rate of injuries and illnesses than the national average, according to the Bureau of Labor Statistics. The most common masonry injuries are: • Slips, trips and falls. • Falling objects. • Collapsing or cave-in of excavations or walls. • Sharp or protruding objects. • Exposure to noxious chemicals. • Moving, lifting or carrying heavy objects • Overexposure to dust Many of these injuries can result in Workers Compensation Insurance claims, which can cost employers in increased insurance rates and lost productivity.
- 8. Safety Precautions Every Mason Worker Should Follow Despite the dangers of the job, masonry workers can stay safe if they take safety precautions. Experienced masons take the preventative actions outlined in these eight tips on a daily basis: 1. Avoid all contact with unhardened masonry cement. 2. Always use proper Personal Protective Equipments (PPE’s). 3. Wear impervious clothing and gloves to eliminate the possibility of skin contact. 4. Always double-check the safety of portable electric tools. 5. Install sturdy work surfaces. 6. Wear sturdy safety shoes with anti-skid soles. 7. Wash hands thoroughly at the end of every work shift. 8. Use respiratory protection equipment, like air masks and respirators. These safety precautions are easy for both employers and employees to follow. With simple changes in work behavior, like being more prepared, masons can significantly cut down on the risk of injury and illness. From brick masons to cement masons to stone masons, daily safety checks are a crucial part of a workplace safety program. Employees who learn to follow recommended work guidelines become more valuable assets to their employers, which can help solidify the success of a contracting company. Accurate Setting Out Accurate setting out is a fundamental part of the construction works, and errors can be very expensive and time consuming to correct. It should only be undertaken by competent persons, and all work should be thoroughly checked, preferably by different personnel. Setting out is usually undertaken once the site has been subject to a condition survey and desk study, and has been cleared of any debris, unwanted vegetation or obstructions. Works necessary to create required levels may also have been completed before the layout process begins. The position and orientation of the structure is generally described in architects’ or engineer’s drawings and defining precisely how the layout should be arranged. Controlling dimensions and references on the plans will determine the positioning of the building and in particular its foundations. These include; overall length and width, the distances to road center-lines and to other structures situated on the site, and other internal structural measurements, approaches and rights-of-way and so on.
- 9. The controlling points of the structure can then be marked so that the construction team is able to easily identify them. This usually consists of marking the building’s corners, horizontal and vertical positions, using stakes, and batter boards with string lines, drill holes, cut-and-fill notations, and other methods. Temporary Bench Mark (TBM) A Temporary Bench Mark is a fixed point with a known elevation, usually at a ground floor level. Establishing it should be undertaken at an early stage. It is the fixed point which kicks- off the setting out and to which all levels are related. Where possible the TBM should relate to an ordnance bench mark. On the site, it could relate to any permanent fixture, such as a manhole cover or firmly-driven post. Typically, it is signified by a peg or steel angle that is conveniently located (e.g. near the site office) and concreted in or fenced off with low-level timberwork. As minus signs are easily misread, the TBM position should enable all other levels to be positive. The TBM should be clearly indicated on all drawings, with all levels and vertical dimensions expressed in meters to three decimal places in relation to it. Baseline Typically the first layout task is establishing a baseline to which all the setting out can be related. The baseline is a straight reference line in respect to which the building’s corners are located on the ground. It often coincides with the ‘building line’, which is the boundary of the area, or the outer boundary of a road or curb, often demarcated by the local authority. Horizontal Controls These are the points that have known coordinates with respect to a specific point. Other points such as layout corners can then be located. Numerous control points should be used so that each point of the plan can be precisely located on the ground. Vertical Controls These enable design points to be positioned at their correct levels. The vertical control points are established relative to specified vertical datum – often a timber post set in concrete. But it can also be a specific height from a nearby road or land feature. Horizontal and vertical controls are generally established during the leveling phase using a theodolite or similar instrument. Levels on site-layout plans should be denoted in meters to three decimal places, e.g. 32.350. Also, intended levels should be written in a box, while existing levels can be written normally. An 'x' or '+' should be used on plans to denote the exact point to which a level applies.
- 10. Building Layout For a simple building layout, such as a rectangle, the outline of the building is marked by a line tied to corner posts - a nail in the top of the post can be used to attach the line to. A theodolite, site square or builder’s square is used to turn off 90- degree angles for the remaining corners. Ranging rods may be required to establish a straight line between corner posts. Corner posts are usually 50 x 50mm timber posts driven firmly into the ground, with a nail in the post’s centre. The outline may be marked on the ground with dry lime or similar powder. Timber profile boards can be used at the corners. Profile boards are typically between 0.6-1m in height and comprise two 50 x 50mm posts driven at least 600mm into the ground, with a 150 x 38mm cross board. Where the outline of a building is more complex than a simple rectangle, it may be necessary to establish a range of points in the same way as for laying out a simple rectangle. However, great care is required, as small errors are more likely to be introduced as more points are positioned. Often the easiest way of laying out an irregular building shape is to first lay out a large rectangle which will enclose the entire building or the greater part of it. Once this is done, deductions and alterations can be made to obtain the precise layout required. Trenches The layout of trenches establishes the excavation size, shape and direction, as well as the width and position of walls. Trenches are excavated once the building outline has been set out. The width is often marked with a line of dots of dry lime powder for accurate excavation by hand by, whereas the centre line is marked for accurate machine or manual excavation. Outline profile boards are often used to control trench positioning, width and depth. In order that they do not obstruct the excavation work, profile boards should be set up at least 2m clear of the trench positions. The level of the profile cross board should be related to the site datum and fixed at a convenient height above ground level, often with cords strung between two profiles at either end of the trench. Bands can be painted on the cross board for identification purposes. Pegs are often driven into the bottom of the trench to mark the top of the concrete strip that is subsequently poured. The corners of walls are transferred from intersecting cord lines to mortar spots on the concrete foundations, using a spirit level for accuracy. The cutting of trenches needs to be undertaken with great care, especially if they are to be left open for an extended period as there is the possibility of the sides caving in.
- 11. Reduced Level Excavations The overall outline of a reduced level area can be set out working form a baseline. Corner posts are fixed to the outline of the excavation area and the outline marked with dry sand or similar material. To control the depth of the excavation, sight rails are set up at a convenient height and at positions which will enable a traveler to be used. A traveler is a profile boards with a fixed height, used for controlling excavated levels between profile boards. By placing the traveler in the sightline between two level boards, it is possible to see whether or not the excavation has been carried out to correct levels. The height of the traveler is the desired level of the sight rail minus the formation level of the excavated area. Framed Building Framed buildings are usually related to a grid, often set out from a baseline. The intersections of the grid lines mark the centre points for isolated or pad foundations. The layout of the grid is established using a theodolite and the grid intersections marked using pegs. Once the grid has been set out, offset pegs or profiles can be fixed clear of any subsequent excavation work. Control of excavation depth can be by means of a traveler sighted between sight rails or by level and staff related to a site datum.
- 12. SELF-CHECK NO.: 1 / UC NO.: 1 ESTABLISH A VERTICAL AND HORIZONTAL GUIDES Instruction: Choose the correct answer and encircle the letter of your choice. 1. A fixed point with a known elevation, usually ground floor level. A. Temporary Bench Mark. B. Fixed Bench Mark. C. Standard Bench Mark. D. Elevation Bench Mark. 2. This is a crucial part of a workplace safety program. A. Standard Safety Checks. B. Daily Safety Checks. C. Duty Safety Checks. D. Company Safety Checks. 3. This is a fundamental part of the construction works, and errors can be very expensive and time consuming to correct. A. Dimension Setting. B. Elevation Setting. C. Accurate Setting. D. Mason’s Setting. 4. __________ and references on the plans will determine the positioning of the building and in particular its foundations. A. Additional Dimensions. B. Controlling Dimensions. C. Elevated Dimensions. D. Structured Dimensions. 5. This is the structural construction of component parts laid in and bound together by a material called mortar. A. Cement. B. Groundwork. C. Sluice. D. Masonry.
- 14. ANSWER KEY NO.: 1 / UC NO.: 1 REMOVE HAIR AND HOOVES 1. A. Temporary Bench Mark. 2. B. Daily Safety Checks. 3. C. Accurate Settings. 4. B. Controlling Dimensions. 5. D. Masonry.
- 15. Program/ Course : MASONRY NC II Unit of Competency : Lay Concrete Hollow Blocks for Structure Module : Laying Concrete Hollow Blocks for Structure Learning Outcome No. 2: Perform Laying of Concrete Hollow Blocks Assessment Criteria: 2.1 Personal protective equipment (PPE) is used in accordance with Rule 1080 of Occupational Safety and Health Standards. 2.2 Reinforcing bar / dowel are installed according to required job specifications. 2.3 Mortars are spread on the base / edge of hollow block according to job specifications. 2.4 Hollow block is laid on the line according to job specifications. 2.5 Constant checking of plumbness and alignment is done during hollow block laying. 2.6 Excess mortars on joints are scraped. 2.7 Work area is cleaned according to safety and environmental regulations (e.g. PD 1152 Section 6, 8 & 42); 2.8 Required output is completed as specified by the immediate supervisor based on work schedule. References: • Carlevaro, Nadia, Roux-Fouillet, Guillaume, Schacher, Tom. How to Build Safer Houses with Confined Masonry 2018. Practical Action Publishing, Ltd. • Provey, Joe, Ross, John, Editors. Tauton’s Masonry Complete 2012. The Tauton Press, Inc. • Black & Decker. The Complete guide to Masonry & Stonework New 3rd Edition 2010. Creative Publishing International, Inc. • Zilch, Conrad, Schatz, Martin. Masonry Construction Manual 2001. Institut fur internationale Architektur-Dokumentation GmbH, Munich. • Beall, Christine. Complete Construction – Masonry and Concrete for Residential Construction 2004. McGraw-Hill Publisher, Inc. • The U. S. Department of Housing and Urban Development. Building Concrete Masonry Homes, Design Construction Issues, 1998. NAHB Research Center, Inc. • Field Manual No. 5-428 Concrete and Masonry 1998. Headquarters Department of the Army. • Curtin, W.G., Shaw, G., Beck, J. K., Bray, W.A. Structural Masonry Designer’s Manual 2nd Edition (Revised) 1995. Blackwell Science, Ltd. • Websites: o https://www.sheltercluster.org/sites/default/files/docs/Key%20Message s%20CHB%20V1.1.pdf o https://www.wikihow.com/Lay-Concrete-Blocks o https://archiandesigns.wordpress.com/2015/07/29/masonry-concrete- hollow-block-laying/ o https://www.bhg.com/home-improvement/outdoor/retaining-walls/how- to-lay-concrete-block/ o https://medium.com/@buboyvirata/chb-laying-all-you-need-to-know- within-15-minutes-part-1-50e3642271c8
- 17. INFORMATION SHEET NO.: 2 / UC NO.: 1 PERFORM LAYING OF CONCRETE HOLLOW BLOCKS Introduction Concrete Hollow Blocks (CHB), are one of the most extensively used walling materials locally. Some of the reasons for this are their relative low cost when compared to other materials and speed of installation by semi-skilled labourers or masons. CHB walls are very weak against lateral loads (pushing or pulling forces from typhoon or earthquake). Adding steel reinforcing bars vertically and horizontally inside the CHBs can increase their resistance to lateral loads. What is a Hollow Block? In general, Hollow Block is a type of concrete block used for building internal and external walls. Hollow concrete block saves time in building walls due to its large dimensions. Due to the load-carrying capacity; the hollow block is playing an important role in the construction industry. Hollow blocks are made using molds and a suitable additive depending on your location and your project. It is believed that concrete blocks are one of the most popular construction materials which are used in the construction industry almost everywhere. Cement is used to bond components in order to produce stronger and longer life hollow blocks. Hollow Block Composition As an additive any of the below materials can be used: 1. Volcanic ash. 2. Granite rubble. 3. Sand. 4. Broken glass, brick, concrete, hardened cement. 5. Expanded clay. 6. River gravel; or crushed stone. 7. Sawdust. Some combustion products: boiler slag, ash. Concrete Block Types and Description Concrete block is considered as inexpensive material, therefore, used by builders quite often. Regarding the properties and appearance of concrete blocks, they are presented in the following varieties: Solid Concrete Block: Solid concrete blocks are used for laying the foundation, columns, supporting structures of buildings, and basements. The leading role is played by their durability.
- 18. Hollow Blocks Concrete hollow block with emptiness inside is used as a building material in the construction of walls and partitions of a building. They are lighter, so they do not add to the total weight of the structure too much. Usually, these hollow blocks are produced in a way to interlock each other and the machine that produces these blocks are called an interlocking brick machine, so don't get confused if you hear this name. Decorative Facing Concrete Hollow Block: Appeared on the building materials market not so long ago. Their distinctive feature is the presence of a decorative coating on one or two sides. This layer of the concrete hollow block not only duplicates various textures (stone, plaster) but also performs a protective function - makes it resistant to moisture. Due to this, there is no need for complex finishing work. Partition Concrete Hollow Block: They are used in the laying of partitions and have some advantages: accurate wall geometry is observed, solution saving, low weight compared to brick, and quick installation. These blocks are produced in both hollow and solid types. Choosing the right type depends on your project. Colored Concrete Hollow Block: Used in construction as conventional materials, hollow blocks are most often used in the construction of fences, gables, decorative pillars. They achieve the desired shade already at the stage of the hollow block manufacturing process. To do this, crushed red brick or colored chalk is added to the mixture. Base Concrete Hollow Block: Their other name is an artificial wall stone. It differs in durability and durability in use, does not shrink, and does not crumble. A prerequisite for laying the foundation of concrete hollow blocks is the presence of reinforced concrete tape, which must have a layer of at least 1.5 centimeters. The walls of the foundation blocks are necessarily covered with hydro and heat insulation.
- 19. Rough Surface Hollow Concrete Block: This building material has a decorative surface under the "ragged" and crushed concrete hollow block. It is used most often as a cladding for fences and decoration of buildings or structures. Hollow Block Dimensions and Standards The hollow block is also known as a hollow cement block or hollow concrete block as well. It is sometimes called a concrete masonry unit as well. The shapes and sizes of most of the common concrete blocks have been standardized to ensure uniform building construction. Hollow block machines are also manufactured with the same standard. The machine has the feature of working for 24 hours. It has different Automation levels and capacities. The machine is very fast and has a high production capacity. Except for product drying and curing rooms, there is no extra equipment needed in the plant. Bess designs different options, manual hollow block machine, Semi-Automatic concrete block machine, and fully automatic block making machine. Normally the size of a standard hollow block is 20cm x (width) x 40cm (length) x 20 cm (height) this is a worldwide standard and the manufacturers produce their hollow blocks considering this standard. There are also other standards but this is the standard that the machine capacity is calculated with. Hollow Block Advantages Hollow blocks are important masonry units in construction. Here I am sharing some advantages of using the hollow block in buildings and construction: 1. Rapid Execution of Work in Construction. Hollow cement blocks are produced by the hollow block machine also known as the concrete block machine in different shapes, sizes, and weights. It is easy to deploy hollow blocks in construction works, all that is needed is to fit the right block to the right place. Using the same shape and sizes helps to easily assemble them to form any particular shape that is required in the construction area. 2. Extremely Durable. The hollow block produced by high pressure and vibration make the blocks very strong, resilient hardened to severe load, and weight. 3. Better Insulation. As hollow blocks have holes and because of the air in the hole of the block, it does not allow heat or cold in or out of the building. Hollow blocks are insulated against heat, wetness, and sound. Hollow blocks keep the house cool in summer and warm in winter. 4. Environmentally Friendly. It does not infect or have any known environment frustration it constitutes to the system.
- 20. 5. Cost-Efficient. Hollow block helps in reducing construction materials used at a construction site, though reducing the cost of construction 6. Low Maintenance. Maintenance of hollow block structures is not expensive, compared to other construction materials that are available in the market. 7. Reduce Consuming Space. The construction of thin walls with hollow blocks is very common. So, it helps to reduce the space used in construction and increases the floor area. 8. Bonding of Mortar and Plaster As the surfaces of hollow blocks are rough, this provides a good bonding between mortar and plaster. Hollow Block Disadvantages There is nothing in the whole world that has only advantages and not one single disadvantage, let's talk about the possible disadvantages of the hollow block: 1. Appearance: Unfortunately, many people still have the impression that a hollow block is unsightly and utilitarian, but technology has advanced significantly and now these hollow blocks can be treated with various render products and techniques, allowing you to create impressive finishes that look a lot more expensive than they actually are. Even different colors are added to the mortar these days to produce different colors of blocks. This way you can have the exact color of the hollow concrete blocks you have in mind for the facing of your building and interior walls as well. 2. Water Absorption: Another problem with the hollow block is its ability to absorb water. We are all familiar with the expansion strength of water when it freezes, so we can understand that a retaining wall, one that is in constant contact with the earth behind it, would be wet most of the time.
- 21. This cannot be said for the wall of a building that is protected from the rain on the outside and is open to the air on the inside. When the temperature goes below freezing for a long period of time, it freezes the ground; it will also freeze the water in the hollow block supporting your retaining wall. Though it may take a few years, depending on the number of freezes you have each year, eventually, cracks will begin to form in both the hollow block and the mortar used to hold them together. Guide to Laying Bricks and Blocks Over recent years there has been a lot of talk about the growth of alternative construction methods. However, bricks and mortar continue to be the method of choice for most builders. With this in mind we have gone back to basics with some tips on how to ensure your walls are built to last and highlighted some examples of when things go wrong. Construction of Walls • Set out walls using securely marked profiles with reference lines and datum levels. • Wall lengths should be checked for squareness. • Cross check against diagonal measurements from the Architect’s plans. • The position of openings must be anticipated to ensure correct and even bonding occurs: both horizontally and vertically. • Avoid overstressing mortar by building rises of no more than 1.5m per day. • Both leaves of a cavity wall should be built at the same time to avoid incorrect coursing and potential. weakening of an individual leaf (if left unsupported for any length of time). Laying Bricks and Blocks Follow this best practice guide for laying bricks and blocks to ensure your walls comply with our technical standards: • Bricks and blocks should be laid level (use the table below as a guide). • Use a regular bond with a nominal 10mm horizontal bed joint (unless otherwise specified by the designer). • Fill cross joints. • Perpends should be kept vertically aligned as the work proceeds. • Lay “frog” bricks with the frog uppermost, which then must be filled with mortar to ensure the wall is stronger and more resistant to sound transmission. • Lay hollow blocks on shell bedding with the vertical joints filled. • Ensure a consistent bond, especially at corners. • Set each wall tie a minimum of 50mm into both masonry leaves. • Keep the cavity and insulation clear of any mortar droppings. Guide for Horizontal and Vertical Alignment of Masonry Walls The dimensions in the table below represent the level that can be reasonably achieved for general brick and block work masonry.
- 22. Dimension Permissible Deviation Straightness in any 5m length + / - 10 mm Verticality up to 2.5 m height + / - 10 mm Verticality up to 7 m height + / - 20 mm How Not to Vertically Align Your Wall The vertical alignment of the load bearing inner leaf of block work exceeds the above recommendations. What’s wrong with the picture below? 1. The bonding is inconsistent causing vertical joints to coincide on consecutive courses. 2. The correct length and type of wall ties have not been used to ensure they are properly bedded into each leaf of masonry. Typical Applications of Concrete Hollow Blocks (CHB) • As non-load-bearing infill between reinforced concrete columns and beams (frames). Often, CHBs are installed between reinforced concrete columns up to the window sill level, and then lightweight walling materials such as timber framing cladded with amakan, plywood or bamboo are installed above. • As load-bearing infill between reinforced concrete columns and beams in confined masonry buildings. The CHBs are reinforced with vertical and horizontal steel bars connected to the reinforced concrete columns and beams, increasing their resistance to lateral loads. • As load bearing reinforced CHB in reinforced masonry buildings. The CHBs are reinforced with vertical and horizontal steel bars increasing their resistance to lateral loads.
- 23. Proportion of Concrete for the Manufacture of CHB’s This is done in two different ways: By weight or volume. The most common method is by volume (e.g. using a bucket) Mixture For CHBs: Mix Proportion 1:7, as per structural engineer’s specification. Water Clean water should be used. Shall not exceed 28 litres per 40 kilograms per bag of cement, slump test (as per ASTM C-143) shall not exceed 10cm, unless specified by a structural engineer. Common CHB Mix ½ bucket water 1 bucket cement 7 buckets sand Common Mortar Mix 1 bucket water 1 bucket cement 3 buckets sand Mixing Time If batch mixer is used, use accurate timing and measuring devices to operate as per manufacturer’s instructions. Revolutions should be between 14 and 20 per minute. Curing After being removed from the mould, the CHBs should be covered with a plastic sheet or tarpaulin and kept damp and shaded for at least 7 days in order to effectively cure. This can be achieved by continually spraying them with water or keeping them under water in tanks. A good curing process leads to less cracking and a stronger, harder, denser and more durable concrete. CHB Tips ✓ Selection of raw materials for the manufacture of CHBs: It is recommended to use good quality, clean ingredients. Avoid using beach sand as it contains salt which significantly compromises the quality of concrete. ✓ Proportions of materials in mixture: Mix concrete well, using the proportions specified by a structural engineer. Ensure that an adequate amount of cement is added and avoid adding excessive water as it weakens the mixture. Concrete should stand up when mixed, not flow away due to excessive water. ✓ Mixing: Use a mixing board otherwise water used for mixing will percolate into the ground and impurities such as dirt and grass could become incorporated into the mixture. If concrete is mixed in batches, maintain consistent proportions for all batches.
- 24. ✓ Pouring and compaction: Ensure the formwork is clean before pouring and vibrate uniformly. The concrete should be well compacted in order to make sure that any air which is trapped in the concrete (weak points) is removed. ✓ Curing: Avoid using freshly made, uncured CHBs as they are still in a state of shrinkage. ✓ Storage: Store CHBs for at least 14 days after curing before using them. Protect them from rain and ground water, stacking them in a way which allows air to circulate around and between them. ✓ Transportation: Minimize excessive handling and transportation of CHBs to avoid damage. ✓ Selection and quality control of CHBs: It is recommended to test the compressive strength of CHBs produced/purchased in order to ensure they meet the required strength. Select only strong CHBs. Blocks with cracks and corners crumbling away when handled; suggests poor quality. If the CHB breaks when dropped from head height, don’t use it or other blocks in the same batch. ✓ Construction: Dampen CHBs before laying as dry masonry absorbs water from the cement, weakening the joint. CHBs should always be laid on a full bed of mortar and vertical joints should always be filled. ✓ Earthquake and typhoon resistance: In order to increase the building’s resistance against lateral loads (pushing or pulling forces from typhoon or earthquake), connect CHB walls to the reinforced concrete columns and beams with vertical and horizontal steel reinforcing bars, in accordance with structural engineer’s details. ✓ Maintenance: Consider plastering/rendering the surface of CHB walls in order to avoid excess absorption of moisture into the wall and to facilitate periodic cleaning. HOW TO LAY CONCRETE BLOCK Once you understand the basics of laying concrete block, the possibilities for walls, grill houses, and other structures are endless. Get started by planning and snapping chalk lines. Then, spread mortar, place the blocks, and check for level. This module explains how to lay concrete block in just six steps. What You Need: • Hard Hat. • Safety Goggles. • Ear Protection. • Work Gloves. • Safety Shoes. • Mortar. • Trowel. • Concrete Blocks. • Story Pole. • Level.
- 25. Step 1: Start First Course. Start first course by laying a mortar bed on the footing. Make it 1 to 1-½ inches thick and about three blocks long. Step 2: Push In the Corner Block. Carefully push the corner block into the mortar bed, lining it up with the ends of the chalk lines on the footing. Step 3: Check Height. Check the height of the block with your story pole, and push the block down until the top is even with the mark. If the block is low, pull it out, place more mortar on the bed, and replace the block. Then place a level on top of the block and level it along its length and width.
- 26. Step 4: Prep the Second Block. To prepare the second block, set it on end and butter its ears with a downward swiping motion of the trowel. Then press down on the mortar; on the inside edge of the ear. This will keep the mortar from falling off when you set the block. If the mortar does fall off, start over with fresh mortar. Step 5: Set Second Block. Set the second block in place, pushing it against the first block, making sure you leave a ⅜-inch joint space. Using the same techniques, butter the third block and set it. Don't remove the excess mortar on the footing until it has set up a bit. Step 6: Tap and Continue Building. With three blocks laid, set a level on top and tap the blocks into place with the end of the trowel handle. Repeat the process on the width of the block. Check for plumb by holding the level against the side of each block. Then build the other corner and the leads.
- 27. How to Cut a Concrete Block Concrete block is made in so many configurations that you may not need to cut it at all. But if you do need to cut a block, place the block on sand or loose soil and use a brick set and small sledgehammer to score both sides of the block. Then set the block with its web up and place the brick set on the scored line. Strike the brick set until the block breaks cleanly. Wear eye and ear protection. You can also cut block with a circular saw equipped with a masonry blade. Wear eye and ear protection. How to Reinforce the Concrete Block Retaining walls and other walls subject to substantial lateral pressure (sideways pressure pushing against the face of the wall) require reinforcement. Embed reinforcing wire in the mortar of every other course, overlapping the ends by at least 6 inches. At a corner, cut and bend the wire 90 degrees. To tie intersecting walls together, bend rebar into an S shape and embed it into the mortar as shown. How to Tie Walls Together. Walls built perpendicular to each other must be tied together, and if you're putting up a new wall next to one that's there already, you can't place metal ties between the courses. Knock a hole in the core of the existing wall, stuff newspaper into the cavities, and place an S-shape piece of rebar in the hole. Then fill the holes with mortar and lay the next course.
- 28. SELF-CHECK NO.: 2 / UC NO.: 1 PERFORM LAYING OF CONCRETE HOLLOW BLOCKS Instruction: Choose the correct answer and encircle the letter of your choice. 1. This is a common CHB Mix. A. ½ Bucket Water, 1 Bucket Cement, 7 Buckets Sand. B. 1 Bucket Water, ½ Bucket Cement, 5 Buckets Sand. C. ½ Bucket Water, ½ Bucket Cement. 4 Buckets Sand. D. ½ Bucket Water, 1 Bucket Cement, 5 Bucket Sand. 2. These are used for laying the foundation, columns, supporting structures of buildings, and basements. A. Spatial Concrete Blocks B. Composite Concrete Blocks. C. Standard Column Blocks. D. Solid Concrete Blocks. 3. This is the First Course in laying a mortar bed. A. Setting. B. Footing. C. Routing. D. Tying. 4. These are one of the most extensively used walling materials locally. A. Concrete Hollow Blocks. B. Standard Hollow Blocks. C. Standard Concrete Blocks. D. Composite Hollow Blocks. 5. _________ and other walls subject to substantial lateral pressure (sideways pressure pushing against the face of the wall) require reinforcement. A. Retaining Floors. B. Retaining Walls. C. Retaining Frames. D. Retaining Corners.
- 29. ANSWER KEY NO.: 2 / UC NO.: 1 PERFORM LAYING OF CONCRETE HOLLOW BLOCKS 1. A. ½ Bucket Water, 1 Bucket Cement, 7 Buckets Sand. 2. D. Solid Concrete Blocks. 3. B. Footing. 4. A. CHB 5. B. Retaining Walls.
- 30. Program/ Course : MASONRY NC II Unit of Competency : Lay Concrete Hollow Blocks for Structure Module : Laying Concrete Hollow Blocks for Structure Learning Outcome No. 3: Perform Jointing Process Assessment Criteria: 3.1 Personal protective equipment (PPE) is used in accordance with Rule 1080 of Occupational Safety and Health Standards. 3.2 Jointing is done in accordance with job specifications. 3.3 Finishing touches is done according to job specifications. 3.4 Work area is cleaned according to safety and environmental regulations (e.g. PD 1152 Section 6, 8 & 42). 3.5 Required output is completed as specified by the immediate supervisor based on work schedule. References: • Carlevaro, Nadia, Roux-Fouillet, Guillaume, Schacher, Tom. How to Build Safer Houses with Confined Masonry 2018. Practical Action Publishing, Ltd. • Provey, Joe, Ross, John, Editors. Tauton’s Masonry Complete 2012. The Tauton Press, Inc. • Black & Decker. The Complete guide to Masonry & Stonework New 3rd Edition 2010. Creative Publishing International, Inc. • Zilch, Conrad, Schatz, Martin. Masonry Construction Manual 2001. Institut fur internationale Architektur-Dokumentation GmbH, Munich. • Beall, Christine. Complete Construction – Masonry and Concrete for Residential Construction 2004. McGraw-Hill Publisher, Inc. • The U. S. Department of Housing and Urban Development. Building Concrete Masonry Homes, Design Construction Issues, 1998. NAHB Research Center, Inc. • Field Manual No. 5-428 Concrete and Masonry 1998. Headquarters Department of the Army. • Curtin, W.G., Shaw, G., Beck, J. K., Bray, W.A. Structural Masonry Designer’s Manual 2nd Edition (Revised) 1995. Blackwell Science, Ltd. • Websites: o https://ncma.org/resource/concrete-masonry-construction/ o https://www.concretenetwork.com/concrete/concrete_tools/groovers.ht m o https://www.cement.org/learn/concrete-technology/concrete- construction/contraction-control-joints-in-concrete-flatwork o https://ncma.org/resource/control-joints-for-concrete-masonry- empirical-method/ o https://theconstructor.org/practical-guide/concrete-wall- construction/25959/ o https://theconstructor.org/concrete/joints-in-concrete-structures/970/ o https://www.concretenetwork.com/concrete-joints/
- 31. INFORMATION SHEET NO.: 3 / UC NO. 1 PERFORM JOINTING PROCESS Introduction Volume changes caused by changes in moisture and temperature should be accounted for in the design of reinforced concrete buildings. The magnitude of the forces developed and the amount of movement caused by these volume changes is directly related to building length. Contraction and expansion joints limit the magnitude of forces and movements and cracking induced by moisture or temperature change by dividing buildings into individual segments. Joints can be planes of weakness to control the location of cracks (contraction joints), or lines of total separation between segments (expansion joints). Although widely used, rules of thumb have the drawback that they do not account for the many variables which control volume changes in reinforced concrete buildings. For example, variables which affect the amount of thermally induced movement include the percentage of reinforcement, which limits the amount of movement and cracking in the concrete; the restraint provided at the foundation, which limits the movement of the lower stories; the geometry of the structure, which can cause stress concentrations to develop, especially at abrupt changes in plan or elevation; and provisions for insulation, cooling, and heating, which affect the ability of a building to dampen the severity of outside temperature changes. In addition to these variables, the amount of movement in a building is directly related to the type of aggregate, cement, mix proportions, admixtures, humidity, construction sequence, and curing procedures used. The Need for Joints Due to the low tensile capacity of concrete, some cracking in reinforced concrete is unavoidable. Contraction joints provide a weakened plane for cracks to form. Through the use of architectural details, these joints can be located so that cracks will occur in less conspicuous locations within a building and possibly be eliminated from view. Expansion joints allow thermally induced movements to occur with a minimum build-up of stress. The greater the spacing; between joints the greater the stresses. Typically, these joints isolate a frame into a series of segments with enough joint width to allow the building to expand with increasing temperature. By isolating the segments, expansion joints also provide relief from cracking due to contraction, and therefore act in a dual role.
- 32. Crack control in reinforced concrete buildings is needed for two reasons. The obvious reason is aesthetics. Where cast-in-place concrete is to be the finished product, cracks are unsightly. Cracks in major framing elements such as girders and columns tend to promote questions concerning the structural adequacy of the structure. They may, in fact, pose no structural problems, but to the average person without structural knowledge, they can be cause for alarm. Secondly, cracks of substantial width invite air and moisture into the framework of the structure, possibly having deleterious effects. Contraction/Control Joints Contraction/control joints are placed in concrete slabs to control random cracking. A fresh concrete mixture is a fluid, plastic mass that can be molded into virtually any shape, but as the material hardens there is a reduction in volume or shrinkage. When shrinkage is restrained by contact with supporting soils, granular fill, adjoining structures, or reinforcement within the concrete, tensile stresses develop within the concrete section. While concrete is very strong in compression the tensile strength is only 8 to 12 percent of the compressive strength. In effect, tensile stresses act against the weakest property of the concrete material. The result is cracking of the concrete. There are two basic strategies to control cracking for good overall structural behaviour. One method is to provide steel reinforcement in the slab which holds random cracks tightly. When cracks are held tightly or remain small, the aggregate particles on the faces of a crack interlock thus providing load transfer across the crack. It is important to recognize that using steel reinforcement in a concrete slab actually increases the potential for the occurrence of random hairline cracks in the exposed surface of the concrete. The most widely used method to control random cracking in concrete slabs is to place contraction/control joints in the concrete surface at predetermined locations to create weakened planes where the concrete can crack in a straight line. This produces an aesthetically pleasing appearance since the crack takes place below the finished concrete surface. The concrete has still cracked which is normal behaviour, but the absence of random cracks at the concrete surface gives the appearance of an un-cracked section. Concrete slabs-on-ground have consistently performed very well when the following considerations are addressed. The soils or granular fill supporting the slab in service must be either undisturbed soil or well compacted. In addition, contraction joints should be placed to produce panels that are as square as possible and never exceeding a length to width ratio of 1.5 to 1 (Figure 1). Joints are commonly spaced at distances equal to 24 to New tool for slab joints reduces concrete cracking.
- 33. 30 times the slab thickness. Joint spacing that is greater than 15 feet require the use of load transfer devices (dowels or diamond plates). Slab Thickness, mm Maximum-size Aggregate Less than 19 mm Maximum-size Aggregate 19mm and Larger 100 2.4 3.0 125 3.0 3.75 150 3.75 4.5 175 4.25 5.25 200 5.0 6.0 225 5.5 6.75 250 6.0 7.5 Figure 1a: Joint Spacing in Meters Slab Thickness, mm Maximum-size Aggregate Less than 19 mm Maximum-size Aggregate 19mm and Larger 4 8 10 5 10 13 6 12 15 7 14 18 8 16 20 9 18 23 10 20 25 Figure 1b: Joint Spacing in Feet Contraction joints may be tooled into the concrete surface at the time of placement. Joints may be tooled into the surface (first pass) prior to the onset of bleeding or immediately with the first pass of the floating operation. The longer the first pass for jointing is delayed the more difficult it will be to shape clean straight line joints. Tooled joints should be re-established with each successive pass of finishing operations. Joints may also be sawed into the hardened concrete surface. It is important to understand that the longer sawing is delayed the higher the potential for cracks to establish themselves before sawing is complete. This means that any cracks that occur before the concrete is sawed will render the sawed joint ineffective. Timing is very important. Joints should be sawed as soon as the concrete will withstand the energy of sawing without raveling or dislodging aggregate particles. For most concrete mixtures, this means sawing should be completed within the first six to 18 hours and never delayed more than 24 hours. Early-entry saws are available which may allow cutting to begin within a few hours after placement.
- 34. Contraction/control joints must be established to a depth of ¼ the slab thickness (Figure 2). Proper joint spacing and depth are essential to effective control of random cracking. Figure 2: Minimum Depth of Contraction Joints CONCRETE GROOVERS & JOINTERS Jointing the concrete is accomplished by grooving tools (unless the slab will be saw- cut later). The purpose is to control the location of cracks that may form when the slab "contracts" due to drying shrinkage or temperature changes. Look inside tooled joints or saw-cuts and you will see the concrete is cracked—the joint did its job and controlled where the concrete cracked. Joints are most often hand-tooled into sidewalks, driveways and patios and saw-cut into floors, highways, and city streets. Materials, Sizes and Bit Dimensions for Groovers Groovers are usually made of bronze or stainless steel and have a V-shaped bit that cuts the joint. Like edgers, they come with wood or comfort-grip handles. The most common groover size is 6 inches long and 4 ½ inches wide, but many other sizes are available, ranging from 2 to 8 inches wide and 3 to 10 inches long. However, more important is the dimension of the bit, which can be anywhere from 1/2 inch to 2 inches deep and 1/8 to 1 inch wide. Bi-directional groovers are also available and have double-end bits that give you the flexibility to cut forward or backward. Other Groover Products Available Missile Groover Aluminium Missile Groover available in 24”, 36” 48”, and 60” sloped front and rear so it won’t dig an edge front and rear eye sights Wagman Metal Products
- 35. Stainless Steel Groover Marshalltown 180D Concrete Groover 6 x 3 ½ x ½ Groove. Blade made of stainless steel with a sturdy steel mounting. Properly shaped bit and leading edge cuts a sharp groove. Smooth comfortable handle is securely attached. Cuts ½” x ½” groove. Concrete Float Kraft Tool CC814 Walking Magnesium Concrete Float 24" x 3.25". Concrete Jointer Buying Tips • As with edgers, bronze or heavy-gauge stainless steel groovers will often deliver the best durability and performance. Some stainless steel tools come with highly polished finishes so they glide more easily through the concrete. • The bit depth of the groover should be at least one-fourth the slab thickness to create a sufficient plane of weakness along which the slab can crack. So if you plan to groove a 4-inch-thick sidewalk, be sure to buy a tool with a 1-inch bit depth. • For stand-up use, walking groovers are available with features similar to those of walking edgers. Or you can simply buy a special groover attachment that secures to your metal bull float or Fresno trowel with thumb screws. Using more than one of these attachments on a float or Fresno lets you cut multiple grooves in one pass. CONTROL JOINTS IN CONCRETE When to cut, control joints; and proper spacing requirements. It is important to be active in deciding where control joints are placed. Often, jointing is not taken seriously enough and the "saw-cutter" comes to your job and puts the cuts where he feels they belong or where it is convenient for him. And, most plans don't have joint spacing marked on them. So don't leave this important part of concrete construction to chance. What are Control Joints? Control joints are planned cracks which allow for movements caused by temperature changes and drying shrinkage. In other words, if the concrete does crack-you want to have an active role in deciding where it will crack and that it will crack in a straight line instead of randomly. When to Cut Control Joints Make sure you are cutting joints soon enough. In hot weather, concrete might crack if joints are not cut within 6-12 hours after finishing concrete. In this condition, if you don't want to use a grooving tool to cut joints, there are early-entry dry-cut lightweight saws that can be used almost immediately after finishing. These saws cut 1" to 3" deep, depending on the model. Correctly laid out joints. Note: Inside corners, where cracks would typically occur, have correctly placed joints.
- 36. Control Joint Spacing Space joints (in feet) no more than 2-3 times the slab thickness (in inches). A 4" slab should have joints 8-12 feet apart. When arranging joints, skilled contractors will often use them to create an attractive diamond pattern. If your concrete will be stamped, ask about the best ways to avoid interrupting the pattern with control joints. More Jointing Tips • Cut Joints Deep Enough. Cut joints 25% of the depth of the slab. A 4" thick slab should have joints 1" deep. • How to Cut Joints. Groover tools cut joints in fresh concrete. Saw cutting cuts joints as soon as the concrete is hard enough that the edges abutting the cut don't chip from the saw blade. • Place Joints Under Walls or Under Carpet Areas. Under walls they won't be seen. Under carpet areas the joints won't have a chance to telegraph through vinyl areas. • Avoid Re-Entrant Corners. Planning the joint pattern can sometimes eliminate re-entrant corners. Control Joint vs. Expansion Joint Control joints are meant to control cracking, while expansion joints are meant to allow for movement. Expansion joints, or isolation joints, are used between two different concrete pours, or where concrete meets with another material or even a structure. Expansion joints are more common on big commercial projects and often aren’t required when pouring residential slabs. These joints usually require filling, especially if the concrete is going to be polished or finished with a coating. ISOLATION JOINTS Joints that isolate the slab from a wall, column or drainpipe Isolation joints have one very simple purpose—they completely isolate the slab from something else. That something else can be a wall or a column or a drain pipe. Here are a few things to consider with isolation joints: • Walls and columns, which are on their own footings that are deeper than the slab sub- grade, are not going to move the same way a slab does as it shrinks or expands from drying or temperature changes or as the sub-grade compresses a little. Concrete Groover (Placing Control Joints in Fresh Concrete) Even wooden columns should be isolated from the slab.
- 37. • If slabs are connected to walls or columns or pipes, as they contract or settle there will be restraint, which usually cracks the slab— although it could also damage pipes (standpipes or floor drains). • Expansion joints are virtually never needed with interior slabs, because the concrete doesn't expand that much—it never gets that hot. • Expansion joints in concrete pavement are also seldom needed, since the contraction joints open enough (from drying shrinkage) to account for temperature expansion. The exception might be where a pavement or parking lot are next to a bridge or building—then we simply use a slightly wider isolation joint (maybe ¾ inch instead of ½ inch). • Blowups, from expansion of concrete due to hot weather and sun, are more commonly caused by contraction joints that are not sealed and that then fill up with non-compressible materials (rocks, dirt). They can also be due to very long un-jointed sections. • Isolation joints are formed by placing preformed joint material next to the column or wall or standpipe prior to pouring the slab. Isolation joint material is typically asphalt-impregnated fiber-board, although plastic, cork, rubber, and neoprene are also available. • Isolation joint material should go all the way through the slab, starting at the sub-base, but should not extend above the top. • For a cleaner looking isolation joint, the top part of the preformed filler can be cut off and the space filled with elastomeric sealant. Some proprietary joints come with removable caps to form this sealant reservoir. • Joint materials range from inexpensive asphalt- impregnated fiber-board to cork to closed cell neoprene. Cork can expand and contract with the joint, does not extrude, and seals out water. It’s been said that the required performance is what determines the choice of joint materials. How much motion is expected, exposure to salts or chemicals, and the value of the structure would all come into play—and of course the cost. • At columns, contraction joints should approach from all four directions ending at the isolation joint, which should have a circular or a diamond shaped configuration around the column. For an I-beam type steel column, a pinwheel configuration can work. Always place the slab concrete first and do not install the isolation joint material and fill around the column until the column is carrying its full dead load. Very long un-jointed sections can expand enough from the hot sun to cause blowups, but this is rare. Polyethylene foam isolation joint material comes in various colors. C2 Products.
- 38. SEALING JOINTS Things to consider: when sealing, or filling concrete joints on floors. Sealers and fillers for concrete joints are not the same thing and have very different purposes. While it's not always necessary to seal or fill a joint, here are a few things to think about: • A sealer is soft and able to accommodate the concrete slab's expansion and contraction. The sealer's purpose is to prevent water, ice, and dirt from getting into the joint (and into the sub-grade) and to prevent intrusion from below the slab--including of radon. Sealers can also improve the appearance of floors and slabs. • A filler is a rigid material that supports the edge of the joint when heavy traffic crosses, like this polyurea joint filler from Specguard. This type of material is only effective with saw-cut joints; rounded tooled edges can't support the filler. • Both sealers and fillers should only be installed after the slab has had a chance to shrink as much as possible. Fillers are only effective if installed after the concrete has gone through most of its shrinkage, although that can take a year or more. Fillers and sealers should be checked at the end of the first year of service and repaired or replaced as needed. • Effective sealant materials must bond to the concrete, be impermeable, and be able to handle the expansion and contraction. • Before installing a sealant, the joint must be dry and free of dust and debris. Vacuum it thoroughly before sealing. Carefully follow the sealant manufacturer's installation instructions. • For sealers, use a bond breaker or backer rod in the bottom of the joint. This prevents the sealer from sagging into the joint and from adhering to the bottom of the joint, which allows the sealant to stretch on both the top and the bottom. • A backer rod in the joint also keeps the sealer plug thinner, reducing the amount of sealant needed. • Although the best theoretical shape of the sealant plug would be 1:2 (depth-to-width ratio), ACI 504R-90, Guide to Sealing Joints in Concrete Structures, recommends that a better ratio is 3:2, since this allows the sealant to adhere better to the sides of the joint. Newer sealers, however, may work at lower ratios. Sealers must bond to the concrete and be impermeable. Courts and Cracks Sealed joints should have a backer rod or bond breaker in the bottom.
- 39. SELF-CHECK NO.: 3 / UC NO.: 1 PERFORM JOINTING PROCESS Instruction: Choose the correct answer and encircle the letter of your choice. 1. These are planned cracks which allow for movements caused by temperature changes and drying shrinkage. A. Control Joints. B. Crack Joints. C. Conjunction Joints. D. Standard Clip Joints. 2. __________ can be planes of weakness to control the location of cracks. A. Groovers. B. Joints. C. Fasteners. D. Ties. 3. _________ in reinforced concrete is needed for aesthetic reasons and structural adequacy of the structure. A. Joint Control. B. Elevation Control. C. Crack Control. D. Movement Control. 4. These mason tools are usually made of bronze or stainless steel and have a V-shaped bit that cuts the joint. A. Smoothers. B. Groovers. C. Dividing Tool. D. Standard Tool. 5. They provide a weakened plane for cracks to form. Through the use of architectural details, these joints can be located so that cracks will occur in less conspicuous locations within a building and possibly be eliminated from view. A. Crack Joints. B. Control Joints. C. Stability Joints. D. Contraction Joints.
- 40. ANSWER KEY NO.: 3 / UC NO.: 1 PERFORM JOINTING PROCESS 1. A. Control Joints. 2. B. Joints. 3. C. Crack Control. 4. B. Groovers. 5. D. Contraction Joints.
- 41. TASK SHEET NO.: 1.1 Title: How to Lay Concrete Blocks? Standard Guidelines: • Laying concrete blocks down requires time, effort and a good bit of supplies, always plan you tasks to avoid unnecessary delays. • Different construction companies have different standards in Laying Concrete Blocks. Performance Objective: The Trainee should be able to effectively and efficiently Lay Concrete Blocks. Tools / Equipment: • Trowel. • Garden Hose. • ⅜" and ⅝" Plywood. • Work Gloves. • Level. • Wheelbarrow. • 100' of Cord. • Mortar. • Masonry Chisel. • 2x4 for Framing. • Tie-in-Bars. • Mortar Boards. Steps / Procedures: Steps in Laying Down Concrete Blocks. • Gather the Basic Tools. • Prepare or Purchase Footing. • Understand Available Blocks. • Prepare the Footing. • Understand the Importance of Footing. • Prepare the 2 x 4’s. • Prepare Concrete. • Be Aware of the Area. • Pour the Base Concrete. • Wait for the Footing to Dry. • Prepare to Lay Concrete Blocks. • Plan the Section of the Corners. • Determine the Number of Blocks. • Prepare Cement Mortar. • Start Laying the Concrete Blocks. • Spread the Mortar Along the Corner. • Set the Corner Block. • Apply Mortar to the Side. • Continue to Lay the Concrete Blocks. • Check the Alignment. • Apply Mortar to the Top. • Stack the Blocks. • Add the Reinforcement. Assessment Methods: • Demonstration with Oral Questioning. • Actual Demonstration. • Role-plays.
- 42. TO ACCESS MORE ABOUT THE MODULE PLS CONTACT: