SlideShare ist ein Scribd-Unternehmen logo
1 von 52
Downloaden Sie, um offline zu lesen
COMPETENCY-BASED LEARNING MATERIALS
Sector:
CIVIL WORKS
(CONSTRUCTION SECTOR)
Qualification
Title:
CARPENTRY NC II
Unit of
Competency:
PREPARE AND STAKE-OUT
BUILDING LINES
Module Title:
PREPARING AND STAKING-OUT
BUILDING LINES
Logo here
Complete Training Center Name and
Address Here
HOW TO USE THIS COMPETENCY-BASED LEARNING MATERIAL
MODULE TITLE: PREPARE AND STAKE-OUT BUILDING LINES.
This is a Competency-Based Learning Material for the Module: PREPARING AND
STAKING-OUT BUILDING LINES.
This learning material contains activities for you to complete. It covers the
Knowledge, Skills and Attitudes required to complete the competency.
You are required to go through a series of learning activities in order to complete
each of the learning outcomes of this module. In each learning outcome, Learning
Elements and Reference Materials are available for your further reading to assist you
in the required activities. You are expected to accomplish all the required activities
and to answer the self-check after each learning element. Please note that you need
to have 100% correct answers to each self-check to pass the activity. You are
required to obtain answer sheets, which are available from your trainer or at the end
of each learning element, to reflect answers for each self-check. If you have
questions, please do not hesitate to ask your facilitator for assistance.
Recognition of Prior Learning (RPL)
You may have acquired some or most of the knowledge and skills covered in this
learning material because you have:
• Actual experience on the job;
• Already completed training in this area.
BENEFITS OF RPL
• Gives credit for knowledge and experience.
• Reduces duplication of learning.
• Reduces costs of obtaining formal credentials.
• Gives immediate feedback and determines which competencies need
verification and testing.
• Identifies training gaps.
• Training (is individualized and results in a recognized certificate).
• Assists in professional development.
• Allows for better use of time and resources.
• Potentially saves on training costs.
So, if you can demonstrate to your trainer that you are competent in a particular skill,
you do not have to do the same training again. Or, if you feel you have the skills, talk
to your trainer about having them formally recognized. You may also show your
Certificates of Competence from previous training. And if your acquired skills are still
updated / relevant to the module, they may become part of the evidence you can
present for RPL.
A Record of Achievement is also provided for your trainer to fill-in upon completion of
this module.
This module was prepared to help you achieve the required Competencies and
Learning Outcomes in Preparing Materials for Stake-Out Building Lines, Setting
Batterboards, and Fixing Stake-Out Building Lines. It will serve as a source of
information for you to acquire the required knowledge, skills, attitude, and inherent
behaviour for UNIT OF COMPETENCY NO. 1: PREPARE AND STAKE-OUT
BUILDING LINES in the CARPENTRY NC II qualification, with minimum supervision
or help from your trainer. This material will aid you in acquiring the competency at
your own pace, independently. To achieve the full benefit of this module:
• Talk to your trainer and agree on how you will both organize your training on
this unit. Read through the Competency Based Learning Material carefully. It
is divided into sections which cover all the skills and knowledge you need to
successfully complete this module.
• Most probably, your trainer will also be your supervisor. He / She will be there
to support and show you the correct way to do things. Ask for help if you need
one.
• Your trainer will tell you about the important things you need to consider when
doing the activities. It is important you listen and take notes.
• You will have plenty of opportunities to ask questions and undergo rigid
practice. This will help you in achieving competency in your new skill. Ample
practice will improve your speed, memory and confidence.
• Talk with more experienced colleagues and ask for guidance.
• Answer self-checks at the end of each section to test your own progress.
• When you finished each element and feel that you are ready, demonstrate the
activities outlined in the learning material to your trainer.
• As your work through the activities, your trainer will be taking note of your
performance. He / She will be providing feedback on your progress. Your
readiness for assessment will be reflected in his/her report, if and when you
have successfully completed each element.
INTRODUCTION TO THE MODULE
UNIT OF COMPETENCY : PREPARE AND STAKE-OUT BUILDING LINES
MODULE TITLE : PREPARING AND STAKING-OUT BUILDING LINES
MODULE DESCRIPTOR : This module covers the knowledge, skills, and attitude
for preparing stake-out materials and fixing stake-out
building lines.
Introduction:
This module contains information and learning activities in Preparing and Staking-
Out Building Lines.
Upon completion of this module and you feel confident that you have had sufficient
practice, you may request your Trainer to arrange an appointment with a registered
Assessor for your assessment. The results of the assessment will be recorded in
your Competency Achievement Record.
SUMMARY OF LEARNING OUTCOMES:
At the end of this Competency-Based Learning Material, the learners are expected to
meet the following learning outcomes:
LO 1. Prepare Materials for Stake-Out Building Lines
LO 2. Set Batterboards
LO 3. Fix Stake-Out Building Lines
ASSESSMENT CRITERIA
Critical Aspects of Assessment
Evidence of the following is critical:
LO 1. Prepare Materials for Stake-Out Building Lines:
1.1 Appropriate PPE is selected and used according to job requirements and
OSHC standards.
1.2 Related plans and details are correctly interpreted according to job
requirements.
1.3 Materials, hand tools and equipments are prepared consistent with job
requirements.
1.4 Materials are properly staged and freed from defects.
1.5 Unexpected situations are responded to in line with company rules and
regulations.
1.6 Housekeeping is performed according to safety regulations.
LO 2. Set Batterboards:
2.1 Batterboards are set away from the building line excavation.
2.2 Batterboards are properly secured with tolerances for dimensions at ± 5 mm,
and levelness of ± 3 mm.
2.3 Unexpected situations are responded to in line with company rules and
regulations.
2.4 Housekeeping is performed according to safety regulations.
LO 3. Fix Stake-Out Building Lines:
3.1 Stake-out building lines are properly secured for reference in excavating
building foundation.
3.2 Marking lines are squared and plumbed from the batterboard lines with
tolerance of ± 3 mm on all measurement, plumbness, squareness and rigid.
3.3 Worksite is cleaned and kept in safe state according to OSHC regulations.
3.4 Daily work report is accomplished in accordance with company rules and
regulations.
Context of Assessment and Resources Implications:
Context of Assessment must ensure that:
• Assessment should include practical demonstration either in the workplace or
through a simulation activity, supported by a range of methods to assess
underpinning knowledge.
• Assessment must relate to the individual’s work area or area of responsibility.
• Demonstration of skills on more than one occasion.
• The construction industry strongly affirms that training and assessment
leading to recognition of skills must be undertaken in a real or very closely
simulated workplace environment and this qualification requires all units of
competency to be delivered in this context.
Resource Implications must ensure that:
• This unit of competency could be assessed in the workplace or a close
simulation of the workplace environment, provided that simulated or project-
based assessment techniques fully replicate construction workplace
conditions, materials, activities, responsibilities and procedures.
Critical Aspects of the Qualification:
Evidence of the following is essential:
A person who demonstrates competency in this unit must be able to provide
evidence of the ability to:
• Locate, interpret and apply relevant information, standards and specifications.
• Comply with site safety plan, OHS regulations and state and territory
legislation applicable to workplace operations.
• Comply with organisational policies and procedures, including quality
requirements.
• Safely and effectively use tools and equipment.
• Communicate and work effectively and safely with others.
• Set out a full size l shape building on a relatively level site to specifications.
Assessment Methods:
• This competency is to be assessed using standard and authorized work
practices, safety requirements and environmental constraints.
• Assessment of essential underpinning knowledge will usually be conducted in
an off-site context.
• The following methods may be used to assess competency for this module:
o Observation of practical candidate performance.
o Simulated practical exercises.
o Role plays.
o Oral and written questions.
Program/ Course : Carpentry NC II
Unit of Competency : Prepare and Stake-Out Building Lines
Module : Preparing and Staking-Out Building Lines
Learning Outcome No. 1: Prepare Materials for Stake-Out Building Lines
Assessment Criteria:
1.1 Appropriate PPE is selected and used according to job requirements and
OSHC standards.
1.2 Related plans and details are correctly interpreted according to job
requirements.
1.3 Materials, hand tools and equipments are prepared consistent with job
requirements.
1.4 Materials are properly staged and freed from defects.
1.5 Unexpected situations are responded to in line with company rules and
regulations.
1.6 Housekeeping is performed according to safety regulations.
References:
• Pan-Canadian Innovations. Trade Essentials. Carpenter Essential Skills
Manual NOC 7271 (2019).
• Carpentry Level 1: Trainee Guide 5th Edition (2013). Pearson Education, Inc.
• ITA Youth Explore Trade Skills Learning Resources Development Project.
Carpenter Activity Plans (2013). Open School B.C / B.C. Ministry of
Education.
• TM 3-34.47 Carpentry (2013). Headquarters, Department of the Army.
• Goring, Les. Manual of First and Second Fixing Carpentry 2nd
Edition (2007).
Butterworth-Heinemann, Elsevier Ltd.
• BUCS John Buza. Non-Resident Training Course. Builders 3 & 2, Volume 1
NAVEDTRA 14043 (1993). Naval Education and Training Professional
Development and Technology Center.
• Lewis, Gaspar J. Carpentry (1984). Sterling Press, Co, Inc.
INFORMATION SHEET NO.: 1 / UC NO.: 1
PREPARE MATERIALS FOR STAKE-OUT BUILDING LINES
Introduction
Planning and Preparing for Work Tasks
As a carpenter on a construction site or in a joinery workshop, you’ll be required to
use a large variety of tools and equipment to complete your work tasks. Every job
you do requires planning and preparation before you even pick up a tool.
You will need to consider:
• The task and the work environment.
• The tools and equipment you’ll be using.
• The materials you’ll need.
• The safety and environmental requirements.
Finding Out What To Do
Before undertaking any construction project or task, it’s important you know exactly
what you’re required to do and how to do it effectively and safely.
There are many sources of information that you’ll use to identify work tasks,
including:
• Instructions from your supervisor.
• Plans, working drawings and specifications for the project.
• Manufacturers’ recommendations or instructions.
• Legislation, regulations and standards.
• Toolbox meetings (safety information meetings).
• Safety signs.
• Memos, bulletins and schedules.
When you receive information or instructions, you must make sure you’ve interpreted
everything correctly and then confirmed the details, because misunderstandings can
lead to serious and costly consequences. You can clarify and confirm your
understanding of what you’re meant to do on a
construction task by:
• Asking for more information.
• Asking the speaker to repeat what they said.
• Researching in trade publications or the internet.
• Asking a more experienced workmate or
supervisor.
• Checking documentation including legislation,
standards, policies and procedures,
manufacturers’ specifications and safety data
sheets (sdss).
Special Requirements
Before you start work, you need to be aware of any company policies, procedures or
requirements that you must comply with when you’re using tools, plant or equipment
in a workshop or on a worksite.
While these policies and procedures may vary from company to company, they will
commonly cover the quality of work required, the tools to be used, how they should
be maintained and stored, and the safety procedures to be followed.
Laws and Regulations
Many aspects of building and construction are governed
by laws and Regulations. For example, the times that
power tools, plant and equipment can be used on a
worksite are restricted in some circumstances and there
are penalties if these restrictions are not adhered to.
You must also take into consideration the WHS
Regulations in the locality that states that all electrical
equipment used in construction work must be regularly
inspected, tested and maintained by a competent person
to ensure it’s safe for use.
Industry Note:
Most power tools, plant and equipment must also comply with international quality
and safety standards, and tools should be inspected before use to check that they
comply with International and National Standards®
.
Assessing Site Conditions
Construction site conditions should be inspected and assessed before any work is
started. This process can include:
• Identifying potential hazards.
• Locating site sheds for the safe
storage of materials and equipment.
• Determining the position of power
supplies.
• Identifying a water supply and sanitary
arrangements.
• Identifying waste disposal procedures
and facilities.
• Locating suitable access (entry) and
egress (exit) points.
You’ll need this information to determine what tools and equipment are available,
where and how they’ll be used and the supporting facilities like power sources that
are available so you can complete your tasks. It’s also essential that you plan and
prepare carefully so that you ensure your own health and safety and that of your
workmates.
Organizing Tools, Plant and Equipment
Once you’ve determined what work task you’re going to do (the job) and where
you’re going to do it (the site), you have to make sure you’ve got the right tools, plant
and equipment.
All equipment needs to be assessed before it’s used to make sure it’s suitable for the
job. For example, the tools used to work with timber, metal or masonry can be quite
different. For instance, you wouldn’t use a large sledgehammer to drive in small
nails.
Some plant and equipment is expensive and used
only rarely so it may be hired when needed. Part of
the planning process may also involve contacting
hire companies to check availability or organize
delivery.
It’s particularly important that tools and equipment are inspected for defects or faults
before you start work. You must report any problems you find immediately to a
storeperson or supervisor.
Organizing Materials
Establishing the materials needed for a task and making sure they’re located where
they’re needed are vital aspects of all construction tasks.
Information about the materials needed, details of the preferred type or brand,
required characteristics, eg size, quality, fire resistance, colour and quantity needed
is generally found in the plans and specifications for the building project.
The materials must meet certain standards, particularly in relation to safety and
application, ie how and where materials can be used. These are called quality
requirements and details of these can be found in:
• Legislation and codes of practice.
• International and National Standards®
.
• Company Policies And Procedures.
• Manufacturers’ Specifications.
Materials should be available where they’re needed and when they’re needed, eg
just before the tradesperson who needs them is ready to start, to make sure they’re
not in the way, stolen or damaged. Storage of materials when they arrive and how
they’ll be safely handled must also be considered.
Working Safely
Whenever you’re using any tools, plant or equipment, it’s vital that you do so safely
and in accordance with WHS legislation, Regulations and codes of practice.
All sites will have a site safety plan that
outlines safe work practices and the actions
that need to be taken in certain situations,
including who to contact in an emergency,
evacuation procedures and details of first aid
personnel.
It’s important that you familiarize yourself
with this document and know exactly what
you have to do to work safely and respond
appropriately in emergencies.
Hazards and Risks
Construction sites contain many dangers or hazardous situations which need to be
identified and eliminated where possible. You can achieve this by making an
inspection of the site and completing or referring to safety documentation.
These documents are often mandatory on construction sites to ensure the safety of
all workers, site visitors or members of the public.
Most construction sites have policies and procedures that tell you how to report
hazards, accidents or incidents (near‑misses). If you have an accident, near‑miss or
spot any potential hazards on site, you should contact your employer or supervisor
immediately and let them know.
Personal Protective Equipment
Personal Protective Equipment (PPE) is anything that’s used or
worn by construction workers to minimize risks to their health or
safety.
PPE must be seen as the last line of defence for protection
against workplace hazards and should be used only where there
are no other control measures available or in addition to other
control measures.
When you choose PPE, it’s important that it complies with the relevant Internaitonal
and National Standards®
, is suitable for the work to be carried out and the workplace
conditions. It’s the employer’s responsibility to provide employees with appropriate
PPE (free of charge) and it’s the worker’s responsibility to use the equipment and
look after it.
Signs and Barricades
When you’re working with tools, plant and equipment, it’s important that
safety signage and barricades are put in place to warn other workers,
site visitors or members of the public about any potential hazard.
Barricades may be required to restrict access to areas where cutting
tools or tools like nail guns that fire projectiles are used.
Environmental Issues
All construction projects have the potential to negatively affect the environment by
consuming natural resources and producing waste.
In most countries, there are laws to make sure that damage to the
environment is controlled and minimised. Most large worksites
will have an Environmental Management Plan (EMP) to ensure
that appropriate management strategies and practices are
followed during a project.
You must be aware of the impact of your tasks and work
practices and your responsibilities with regard to the site EMP.
When you use tools, plant and equipment, the potential
environmental hazards include:
• Noise pollution created by power tools and power generation plant.
• Dust from cutting, planing and shaping tools.
• Soil contamination from leaks or spills of fuel, oil or lubricants.
• Toxic substances including asbestos, timber treatments, insecticides, solvents
and cleaning products.
Lay-Out and Planning
The details of lay-out and planning are essential to proper construction of a building.
Layout prepares the site for the foundation which must be planned and completed for
each building being constructed. This section introduces the carpenter to the tools,
materials, and techniques used in the effective accomplishment of these vital layout
and planning functions.
LAYOUT TECHNIQUES
Layout techniques are described in the following paragraphs. The following are the
most commonly used layout tools and materials.
A string line is used to distinguish the dimensions of the
building layout.
A sledgehammer is used to sink corner stakes or batter
boards and posts.
A posthole auger is used to dig the holes required to set
posts properly in some soils.
A handsaw is used to cut batter boards and posts.
An ax or a hatchet is used to sharpen batter-board posts
and stakes.
A hammer is used for building batter boards.
A chalk line is used to deposit chalk on the surface in order
to make a straight guideline.
A 100-foot/30-meter tape is used for measuring diagonally
(usually in a 100 foot length) and for laying ou excavation or
foundation lines.
Tracing tape is used for laying out excavation or foundation
lines. The tape is made of cotton cloth approximately 1 inch
wide. It usually comes in a 200 foot length.
A carpenter's level is used to level a surface and to sight
level lines. It may be used directly on the surface or with a
straightedge.
A line level has a spirit bubble to show levelness. The level
is hung from a taut line. It gives the greatest accuracy when
it is placed halfway between the points to be leveled.
An automatic level measures approximate differences in
elevation and can establish grades over limited distances.
The landscape, level bubble, and index line are seen in the
tube.
8d nails are used to secure string line to batter boards.
A plumbing bob is used to locate the corners of the building
dimensions.
A framing square is used to check the squareness of lines.
STANDARDS/GUIDELINES: LAY-OUT A RECTANGULAR BUIDLING SITE
Working from an established line, such as a road or a property line (line AB in Figure
4-1) that is parallel to construction, establish the maximum outer perimeter (AB, CD,
AC, BD) of the building area.
Measure away from the front line (AB) along the side lines (AC and BD) the
distances (AO and BO) desired to the dimension of the project that is to run parallel
to the front line.
Stretch a line tightly from point O to O. This line will
mark the project's frontage.
Measure in from lines AC and BD along line OO one-
half the difference between the length of line OO and
the desired length of the project. The points (X and X)
will constitute the front corners of the project.
The two distances OX and XO establish the distances
E and F. Extend lines from the two front corners, X and X, parallel to AC and BD at
the distances established as E and F for the required depth of the project. This
provides the side lines of the project (XG and XH).
Joining the extreme ends of side 111 XH will provide the rear line (GH) of the project.
After the four corners (X, X, G. and H) have been located, drive stakes at each
corner. Batter boards may be erected at these points either after the stakes have
been set or while they are being set. Dimensions are determined accurately during
each step.
STANDARDS/GUIDELINES: LAYING-OUT AN IRREGULAR BUILDING SITE
Where the outline of the building is other than a
rectangle, the procedure in establishing each
point is the same as described for laying out a
simple rectangle. However, more points have to
be located, and the final proving of the work is
more likely to reveal a small error. When the
building is an irregular shape, it is advisable to
first lay out a large rectangle which will
comprise the entire building or the greater part
of it. This is shown in the figure at the right as
HOPQ When this is established, the remaining
portion of the layout will consist of small rectangles, each of which can be laid out
and proved separately. These rectangles are shown as LMNP ABCQ, DEFG, and
IJKO in the figure at the right.
Laying-Out a Rectangle.
Laying-Out Irregular Projects.
STANDARDS/GUIDELINES: SQUARING YOUR BUILDING LINES
First locate the four corners of your building, using a measuring tape or line, to make
sure the corners are spaced out exactly the distance specified in the drawings.
Use temporary stakes and don't hammer them too deep. Start with one corner as
your permanent stake.
Site Preparation
After you select your site, and have a plan and design for your building, then you are
ready for site preparation. The first thing to do is make sure you clear the site where
the building will be located. This means removal of trees, shrubs, large rocks,
stumps, or anything that may be in the way of the construction. If there is a lot of
plant life, you may choose to transplant it, or if it’s just grasses you may just mow it
down or weed whack it. If you are planning on having a living roof, you could use
the top soil and the plants on your roof, as long as they don’t require lots of space for
deep roots.
Laying Out Building Lines
For the purpose of keeping things simple, let’s look at two options, a round structure
and rectangular structure.
The trench for a round sauna.
For a round structure; First, pound a stake deep in the ground where you want the
center of your building to be. Make sure it’s deep enough that it won’t move easily if
it gets hit on accident. Then, nail or screw a string on the stake that is the length of
the radius of your building. Pull the string tight and walk around the building marking
the circumference of the building with sticks or marking paint.
Then remove the top soil and set aside for future use. At this point repeat the above
process to get the circumference of your inside wall. Make sure to use the same
central stake.
Try not to remove the stake until the foundation has been completed. You may want
to leave it until the roof is done, so that you know where the center of the roof should
be.
If you are leaving your stake in for the duration of the building construction, make
sure to build a cover for it, so it doesn’t get knocked around.
For the thickness of your inside wall, measure the size of your straw bales first.
Next, add the thickness of your cob, scratch coat plastering, and finish plastering.
For the cob class room, we made the foundation 18 inches wide, because we used
12″ bales (half bales), and added 2 inches of cob on the inside and outside walls,
plus 1 inch for plastering.
Batter Board Diagram for your Natural Building.
For a Rectangular Buildings; First you need to make sure that your building lines
are squared. The best way to do this is to start out by setting up some Batter
Boards. These are usually made from 2×4 stakes and 1×6 ledgers that get screwed
between the stakes. Locate the batter boards 4 feet or more away from the building
lines. In most cases you want to make sure your batter boards have enough room
for you to move your lines while you try to square the building. So, place your stakes
at least 4 feet apart from each other and use batter boards that are at least 5 feet
long.
The other important thing to remember is that you can also use the batter boards to
help you level the tops of your stem wall. So build all the batter boards at the same
height as you want your stem wall to be. Since we don’t have a transit or a laser
level we used a water level to make sure all of our batter boards where at the same
height.
Water levels are easy to use and inexpensive to buy. All you need is a clear tube at
any diameter that is long enough to reach all your batter boards. The reason water
levels work is because water always finds its own level. You can test it yourself; fill
the tube with water making sure there is at least 6 inches of space at each end. Set
the two ends next to each other and move one of them up then watch the water level
clime on the other end. It works like magic.
A Water Level Illustration.
Squaring Your Building Lines; Locate the four corners of your building, using a
measuring tape or line, to make sure the corners are spaced out exactly the distance
specified in the drawings. Use temporary stakes and don’t hammer them too deep.
Start with one corner as your permanent stake. We usually start with the northeast
corner, but you can start with any corner that makes sense to your site.
The other three corners can be moved or
adjusted to help make the building square.
Using your permanent stake as your bench
mark, pick the next stake to make permanent.
In our case we choose the northwest corner, to
make sure we have a true south facing building.
If the site allows, use a compass to help you
locate the northwest corner.
Now that you have a straight line, the next step
is to make sure the 3rd stake is at 90 degrees
from your permanent stake. To do this we use the Pythagorean Theorem.
The Pythagorean Theorem is something we learned in school, you may remember it.
If you don’t have a calculator handy, and the distances are not easy to square, then
you can use the “3” “4” “5” rule. First you need to find a common unit.
For example say your building was 12 feet long on side A, and 24 feet on side B, the
common denominator is 6, because 3×6 =12 and 4×6=24, which mean that 5×6=30
which should be the distance of side C.
For our building we wanted side A to be 12 feet, and our side B to be 17 feet. No
common denominator there, so we used the Pythagorean Theorem.
Once you know what the distance of line “C” is (or your diagonal line), then you can
move your third stake to make sure both distance “A” and distance “B” are still right,
and that your diagonal line (line “C”) is also right.
In our case we knew that the north line (which was our B line), was correct and all
we needed to do was find our C line and make sure that the distance was 12 feet.
Squaring Your Natural Building with Batter Boards.
Then you repeat the process on the other side and get your building lines squared.
Check your diagonal lines to make sure they are both the same.
Once you have the corners set on the ground, then you build the batter boards.
Others use the batter board to find their corner stakes. Try it both ways, and see
what works best for you.
Now that you have your building lines, mark it with marking paint or sticks and
remove the top soil from your building site and set it aside for later use. At this point
you can mark your inside walls using the same processed mentioned above, or use
the batter boards to mark them. Again make sure your wall thickness is correct
before you move on to the next step. You don’t want to dig out your foundation
trench the wrong size, and have to do it again.
You can see the two yellow sting
lines, which is the thickness of
your walls.
In our case, we knew that we were going to use 12″ straw bales, (half bales) and 1″
cob plaster on the inside and outside. Plus we wanted to have some extra room in
case we wanted to make a thicker plaster coat. So we went 16″ wide for our wall
thickness.
SELF-CHECK NO.: 1 / UC NO.: 1
PREPARE MATERIALS FOR STAKE-OUT BUILDING LINES
Instruction: Choose the correct answer and encircle the letter of your choice.
1. This is used to deposit chalk on the surface, in order to make a straight
guideline.
A. Marking Line.
B. Chalk Line.
C. Guideline.
D. Forming Line.
2. You will need this to determine what tools and equipment are available, where
and how they’ll be used and the supporting facilities like power sources that
are available so you can complete your tasks.
A. Information.
B. Sequence.
C. Work Load.
D. Access.
3. _______________ may be required to restrict access to areas where cutting
tools or tools like nail guns that fire projectiles are used.
A. Notice.
B. Obstacles.
C. Barricades.
D. Barrier.
4. This refers to establishing the materials needed for a task and making sure
they’re located where they’re needed and are vital aspects of all construction
tasks.
A. Organizing Work Load.
B. Organizing Materials.
C. Organizing Tasks.
D. Organizing Information.
5. These must be seen as the last line of defence for protection against
workplace hazards and should be used only where there are no other control
measures available or in addition to other control measures.
A. Workers.
B. Standards.
C. PPE’s.
D. Policies.
ANSWER KEY NO.: 1 / UC NO.: 1
PREPARE MATERIALS STAKE-OUT BUILDING LINES
1. B. Chalk Line.
2. A. Information.
3. C. Barricades.
4. B. Organizing Materials.
5. C. PPE’s.
Program/ Course : Carpentry NC II
Unit of Competency : Prepare and Stake-Out Building Lines
Module : Preparing and Staking-Out Building Lines
Learning Outcome No. 2: Set Batterboards
Assessment Criteria:
2.1 Batterboards are set away from the building line excavation.
2.2 Batterboards are properly secured with tolerances for dimensions at ± 5 mm,
and levelness of ± 3 mm.
2.3 Unexpected situations are responded to in line with company rules and
regulations.
2.4 Housekeeping is performed according to safety regulations.
References:
• Pan-Canadian Innovations. Trade Essentials. Carpenter Essential Skills
Manual NOC 7271 (2019).
• Carpentry Level 1: Trainee Guide 5th Edition (2013). Pearson Education, Inc.
• ITA Youth Explore Trade Skills Learning Resources Development Project.
Carpenter Activity Plans (2013). Open School B.C / B.C. Ministry of
Education.
• TM 3-34.47 Carpentry (2013). Headquarters, Department of the Army.
• Goring, Les. Manual of First and Second Fixing Carpentry 2nd
Edition (2007).
Butterworth-Heinemann, Elsevier Ltd.
• BUCS John Buza. Non-Resident Training Course. Builders 3 & 2, Volume 1
NAVEDTRA 14043 (1993). Naval Education and Training Professional
Development and Technology Center.
• Lewis, Gaspar J. Carpentry (1984). Sterling Press, Co, Inc.
INFORMATION SHEET NO.: 2 / UC NO.: 1
SET BATTER BOARDS
Introduction
Every building has to start somewhere. After clearing and leveling the building site,
Batter boards are the first step of most construction projects with rectangular
foundations. Batter boards and string lines are a great technique to use in building a
foundation that is square and level.
The idea is to have strings intersecting at each corner of the foundation. This is
accomplished by setting batter boards a few feet outside the foundation corners and
attaching strings to the top of them that will run along the outer edge of the
foundation. A batter board is a simple structure with stakes driven vertically into the
ground with a horizontal board across them.
Standards/Guidelines: Setting Batter Boards
Batter boards are a temporary framework used to assist in locating corners when
laying out a foundation. Batter-board posts are made from 2 x 4 or 4 x 4 material;
corner stakes are made from 2 x 2s. Batter boards are made from 1 x 4 or 1 x 6
pieces.
Staking Procedures
Corner stakes are driven to mark the exact corners of the project.
Excavating for a foundation will disturb the stakes, so batter
boards are set up outside the boundary established by the stakes
to preserve definite and accurate building lines. Heavy cord or
fine wire is stretched from one batter board to another to mark
these lines.
Location of Batter Boards
Figure at the right shows how to locate batter boards. Right-angle
batter boards are erected 3 or 4 feet outside of each corner stake.
Straight batter boards are erected 3 or 4 feet outside of the line
stakes.
Construction of Batter Boards
Right-angle batter boards should be fastened to the posts after
the posts are sunk. Since the boards should be at the exact
height of the top of the foundation, it may be desirable to adjust
the height by nailing the boards to the stakes after the stakes
have been sunk.
Right-angle batter boards may be nailed close to perpendicular by using a framing
square and should be leveled by means of a carpenter's level before they are
secured. Then, angle saw cuts may be made or nails driven into the tops of the
boards to hold the lines in place. Separate cuts or nails may be used for the building
line, the foundation line, the footing line, and excavation lines. These grooves permit
the removal and replacement of the lines in the correct position.
EXTENDING LINES
The following procedure applies to a simple layout as shown in the figure below
and must be amended to apply to different or more complex layout problems:
• Step 1. After locating and sinking stakes A and B. erect batter boards 1, 2, 3,
and 4. Extend a chalk line (X) from batter board 1 to batter board 3, over
stakes A and B.
• Step 2. After locating and sinking stake C, erect batter boards 5 and 6.
Extend chalk line Y from batter board 2 over stakes A and C to batter board
6.
• Step 3. After locating and sinking stake D, erect batter boards 7 and 8.
Extend chalk line Z from batter board 5 to batter board 7, over stakes C and
D.
• Step 4. Extend line O from batter board 8 to batter board 4, over stakes D
and B.
Where foundation walls are wide at the bottom and extend beyond the outside
dimensions of the building, the excavation must be larger than the laid-out size. To
lay out dimensions of this excavation, measure out as far as required from the
building line on each batter board and stretch lines between these points, outside
the first layout.
The lines may be at a right angle where they cross the corner layout stakes, found
by holding a plumb bob over the corner layout stakes and adjusting the lines until
they touch the plumb-bob line. All lines should be checked with a line level or a
carpenter's level.
Squaring Lines
The two methods commonly used for squaring extended lines are the 6-8-10
method and the diagonal method.
The 6-8-10 Method
After extended lines are in place, measure line EF for a distance of 6 feet (Figure
above). Measure line EG for a distance of 8 feet. Adjust the lines (Y and X) until FG
equals 10 feet. Multiples of 6-8-10 may be used for large layouts; for example, 12-
16-20 for a layout 50 feet by 100 feet. For accuracy, never start with a
measurement of less than 6 feet.
The Diagonal Method
If the layout is rectangular, lines H and I, cutting the rectangle from opposing
corners, will form two triangles as shown in figure above. If the rectangle is perfect,
these lines will be equal in length and the corners perfectly square. If lines H and I
are not equal in length, just adjust the corners by moving the lines right or left until
H and are equal.
STANDARDS/GUIDELINES: THE FOUNDATION
Merriam-Webster defines the word “foundation” in several ways, including “an
underlying base of support.” The importance of a solid foundation cannot be
overstated. Laying out a foundation for a house follows this line of thought closely,
as this initial step influences how the rest of the structure is built and supported.
Creating a foundation requires careful planning, the right materials, proper
construction and adherence to safety protocols.
Industry Note:
Batter boards support string lines that lay out where a foundation will go.
The Basic of Foundations
There are some basic guidelines for building residential home foundations. It all
starts with a site plan that shows where the house will be built on the property.
Measurements are then taken, and the outline for the house is staked out using
tape measures and levels.
Surveyors can then set their stakes off the building’s corner points; excavators use
those as reference points for digging foundations. For rectangular foundations,
most constructions will use string lines and batter boards to ensure that the corners
are square and the dimensions correct. This is necessary to ensure that the
foundation is level.
Industry experts explain that solid, level foundations are required for several
reasons. First and foremost, they must support the weight, or load, of a structure.
Foundations also prevent moisture from coming in and help keep the building
stable in the face of strong winds, floods, earthquakes and hurricanes. A
foundation is certainly not a place for a builder to be cutting corners.
What Are Batter Boards?
Batter boards are temporary structures made from stakes and horizontal boards
that are attached to them. They are used to support the string lines that lay out the
foundation. Batter boards are set out a few feet from each corner, and the strings
are attached to them.
The horizontal parts of batter boards are usually made from wood and must be
level with one another. The vertical stakes can also be made from wood and do not
need to be exactly plumb because they only function to support the horizontal
boards. After batter boards are placed, workers can drill in and place pilings in the
correct locations to support the home’s weight.
Industry experts recommend using a “three-four-five” method to ensure that a
foundation is square. After the batter boards and string lines are set up, go to an
outside corner and measure 3 feet along one of the string lines and mark it. Then,
measure 4 feet down the other line and mark it. Measure the diagonal distances
that is between those two marks and moves the stakes until the distance is exactly
5 feet. Repeat this process for the remaining three corners.
Why Are Solid Foundations Important?
Foundations must be solid in order to ensure the home is structurally sound;
there’s no way around this. Experts also agree that foundations have to be sturdy
enough to handle “dead” and “live” loads. The dead load is the actual weight of the
building, and it remains a constant. The live load varies and can include people
who are inside, furniture and anything else that carries weight.
If a foundation is to be built on a slope instead of flat property, getting it level will be
more complicated. It can be done in different ways. The ground can be evened out
by removing soil, adding soil or both. The excavated soil can be repurposed as
retaining walls, or soil can be brought in to fill in areas to make the foundation level.
This can be time-consuming and costly, but in the end, that foundation absolutely
must be level no matter what.
Standards/Guidelines: How to Lay-Out Using Batter Boards and String?
The sketch below summarizes the procedure for using batter boards and string to
lay out any structure on the ground and to get the structure square, level, and exactly
where you want it.
Here we will provide the details on how to use this easy method to lay-out a
foundation, footing, or just about any structure properly located, level, and square
on the site.
Industry Note:
Watch out: building a structure that's out of square is more than an aesthetic
problem or an eyesore.
If by accident your structure is out of square or level (or both) then cutting and filling
in the studs (if it's a wall), floor joists, ceiling joists, or rafters if it's a roof is going to
be hell as every cut will have to be different, the plywood (sold in 4x8 ft. squares) you
might use for sheathing isn't going to fit without trimming, and installing siding or
roofing is also going to get really ugly.
Here we will describe the steps in laying out a simple building, deck, or foundation
layout.
The procedure uses little more than stakes, boards, string, a carpenter's level, and a
measuring tape, and ok, and maybe a mallet or sledge or hammer to drive stakes
and to tap in a couple of nails.
Question: How to build and use batter boards and strings to do a lay-out?
Answer: Use some drawings of the batter boards, and strings lay-out for the deck
project.
Standards/Guidelines: How to Assemble and Use Batter Boards
Industry Note:
Watch out: This batter-board and string procedure assumes that you have already
done the following:
1. Reviewed property zoning and setback restrictions to be sure that your
structure is within lot lines and meets required set-backs.
2. Obtained the necessary building permits and approvals to proceed.
3. Set the general location for your deck – or see deck location.
4. Made a rough and then as needed, a more-refined drawing of the end-
product: deck, building, or whatever it is you're going to build – or see deck
plan & sketch – and deck layout.
Step 1: Rough Deck Lay-Out.
Now we're ready to place the deck on the ground.
Start with setting the approximate deck location (sketch below) , paying careful
attention to the front edge or to whichever side of the structure has a most-critical
location, such as back from a property line or parallel to a building (or attached to it
in which case your work will be simpler.
But even for an attached deck you will need to make accurate square and level and
plumb measurements of the three sides of the deck that are to be built to the
building.
Our sketch shows how to lay out the deck, building, or foundation location using
string-lines, posts, and batter boards. Though the first stake locations are just
approximate (the green stakes in the sketch), you might want a tack in the top of
each stake so that later they can be placed more-precisely according to string lines.
Industry Note:
Watch out: take care to make all layout measurements from a single common
point. Choose one corner, mark that "home" and take all tape measurements from
there. Otherwise your measurements will contain errors.
Here we're laying out a new structure on open ground. If you're building a deck
attached to a building, one end of the ledger board, bolted to the existing structure,
will be your home base measurement point. In our sketch the two green stakes along
the line indicating the planned front of the structure are our first rough line. These are
driven in a line parallel to the desired front face of the structure - from here on we'll
call it a deck, though as I've said it could be a foundation for a home, or something
else.
Step 2: Build the Batter Boards.
Using 1x3 or 1x4 or similar lumber make three or four pointed stakes that are long-
enough to drive into the soil securely and that will be tall enough that you can level
your string lines over the ground. For very steep sites see "Referencing a high deck"
found in deck layout.
Above is a photo of worker assembling one of the four sets of batter boards needed
to lay out a project. For this project instead of building a single 90° batter board with
three stakes, we used two independent batter boards each with its own pair of
stakes.
Still the two batterboard halves need to be set into the ground at approximately a 90°
angle to one another.
The batter boards do not need to be a precise 90° angle (though you can use a
framing square to accomplish that quite easily). That's because we're going to be
moving our string lines along the top of the batter boards to get our 90° angles for
the structure's corner posts. This project involved building a large, free-standing deck
over gently-sloped terrain.
We first put out batter boards - stakes and horizontal wood strips - to mark the
locations of the corners of the stage (not shown in this photo).
Step 3: Place the Batter Boards in the Right Location
We started by locating the front of the stage, picking one corner as the "home base"
from which ALL other measurements are taken.
Choosing and making measurements from a single point avoids ugly errors creeping
into a deck or porch or foundation layout. Those errors can result in a structure that
is not square.
After choosing the home base corner from which the rest of the stage would be
located, we chose the front line of the stage to fit as wanted on the terrain which was
certainly not level or smooth.
Choosing the line of the front line of the stage plus its outer dimension, combined
with our stage drawing plan (posts are set a bit in from the actual deck or stage final
outer perimeter, we then set the spots for the second post, the sides, and the back
line of the same rectangle by measuring in from the original layout string (pink in our
photo).
All four of those locations are defined by driving the stakes and batter boards some
distance outside of the actual perimeter of the final structure. Typically we set the
batter boards 3-4 feet back from the corners of the planned outside dimensions of
the finished structure.
Industry Note:
Watch out: the batter boards have to be large enough or long enough that when
set back 3-4 ft. from the actual dimensions of the structure your string lines, laid
across the tops of the batter boards, can be placed directly over the intended outer
edge of the finished structure.
Then nails driven into the top edge of the batter boards, and some string; let us set
the exact locations of the perimeter and of the posts. The key is to locate the stake-
and-batter-boards a few feet outside the actual desired post locations of the deck or
stage corners.
Otherwise the batter board set-up will be in the way when you go to dig or drill the
post holes. Moving the batter boards to drill the post hole would lose the entire initial
layout. For this project, we use a tractor and auger that have access to drill our post
holes, the batter boards were set well back from the actual post locations.
Step 4: Attach String Lines to the Batter Board Top Edges
Some builders hang the strings over the batter boards with weights to make
adjustment easy. Others saw a notch in the top edge of the batter boards to mark the
final string location. To hold our strings in a temporary and later (after adjustment) in
their final position we might also use finishing nails or even drywall screws that are
easy to move and that don't split the boards.
Step 5: Adjust Batter Board String Lines to Form a Perfect Rectangle of
Proper Size
Assuming that we want a rectangle and not an odd shape, after securing the front
and right side string lines to our home base batter boards (the front right batter-
boards in our sketch), we adjust the string positions on the remaining three batter
boards until the strings are:
• Place the front string: The front string is over the intended or planned
outside front edge of the finished structure (or of its supporting frame).
• Level the rectangle: check that the string lines are all level.
Industry Note:
Watch out: If the string lines are not level then all of your measurement lengths will
be in error - making them too long for the actual framed structure when it's
assembled. Well not always. For the stage-deck being constructed in some of these
photos, the contractor wanted the deck to slope from its rear edge towards the front
for theatrical reasons.
Similarly, for improved drainage you might want to slope a deck away from a building
to which it is attached.
Still the right ways to build a deliberately-sloped deck or porch is to first measure and
lay it out level, plumb, and square, and then calculate and measure the desired slope
or drop.
For example, if you want your deck to slope 1/8" per foot over an 8-foot distance
from high to low side, you would calculate (1/8" / ft. slope) x (8 ft distance) = 1" total
fall. Then once your "low" end of the deck has been set square, and level you'll drop
the elevation of the low side by 1" from that point.
Industry Note:
Watch out: Over a small deck or over a span between deck girders that is itself
short, 8 ft. or less, that drop will be barely noticeable in cutting the joists to fit but for
a large joist span you should double-check the length measurements before cutting
your joists.
• Square up the string rectangle: Using the 6-8010 rule and make sure that
each string pair that meet forms a 90° angle
• Place the side strings front ends: The side string front ends are brought in
or out along the top edge of the front sets of batter boards until we have the
correct width of the front line.
Measuring the lengths of the sides and adjusting the strings over the batter
boards, properly locate the sides over the planned outside dimension of the
structure
• Place the side string back ends: The side string back ends are brought in or
out along the top edge of the rear sets of batter boards until we have the
correct width of the rear line.
• Place the rear string line: The rearmost string is set across the top edge of
the rear batter boards until it marks the proper width of the final structure.
• Check the side, front and rear measurements: We check again with our
tape measure to assure that parallel sides are of equal length
• Check the square: We check squareness again by measuring the diagonals -
equal lengths assures us that the four sides form a rectangle, not a trapezoid
or other weird shape.
Below is a photo showing our layout strings during construction of the Summerblue
Arts Camp. This was basically a large free-standing deck.
Step 6: Set Corner Post Holes According to the String Lines.
• Mark the post hole: Using a plumb line held at the intersecting string corners
we place a stake at the center of where each corner post hole should be dug.
• Dig the post hole: We dig the post holes to the proper depth and prepare the
hole with a solid block, pier, or other details according to the construction plan
and local codes
• Each post hole, starting with the key corner posts, was centered on its desired
spot - the hole center can be within a few inches of exact because we can
adjust the post within the hole to its exact location along the string lines:
Industry Note:
Watch out: Remember to put the bottom of your post below the frost line if you're in
a freezing climate. Remember to get engineering help if you're building on a steep
slope or in un-stable soils.
• Place the posts: The post holes were large enough that we could set each
intermediate stage (or deck) post to its exact location by aligning it with the
string now wrapped around our corner posts and pulled tight.
• You can see one of the workers (A) setting post #2 dead plumb by using the
level on two sides of the post (and taking into account if a post is not dead
straight).
• For this project, each post was set on a solid concrete block that was level in
the hole bottom.
• Backfill the posts: When worker (A) has the post in the exact position with its
outer face flush with the string she holds it in place while the second worker
(J) pours in our ready-mix Quickcrete (we were using holes without form tubes
in this project).
• After the Quickcrete was in place worker (J) back-filled with soil and tamped it
down.
Step 7: Set Intermediate Post Holes Along the String Line.
If the structure requires intermediate posts, string lines between the corner posts are
used to line up the intermediate ones.
Drop a plumb bob from the correct locations along the string line, always measuring
from the same home base point, and then have your helper drive a small stake into
the ground.
Continue measuring along the string line to find the remaining post hole locations.
In our photo we had set the first post at our home base - the stage front right corner
in this case - and backfilled so that the post was absolutely solid and plumb.
Once the four corner posts were set, backfilled, and solid, correctly in place, then
using the batter boards, the orange layout strings, and a measuring tape (and the
deck plans) we used a second set of strings (red in the photo shown here and white
in the earlier photo above) to give the exact location of the face of each post.
The horizontal resistance for the intermediate posts was set always by measuring
with the dumb-end (starting point) of our measuring tape at the deck/stage home
base corner.
At that point we drilled holes for the remaining posts. You can see the soil was dense
clay so digging was out of the question. So we hired a local post hole driller who had
a huge auger mounted to his tractor.
The photo below shows our posts were set in approximate location and rough-
trimmed to a few inches above their anticipated finish-height (to allow space for
accurate cutting to level the structure), each post was held in exact position both
from the corner as well as plumb. In that position the post-hole was back-filled with
ready-mix concrete and then atop that, soil.
Because this structure was being built in a freezing climate, the buried portion of
each post was wrapped in two layers of 6-mil poly - a measure to prevent frost lift of
the posts by ice lensing.
Step 8: Secure Ledgers or Beams to the Posts
The sooner we can get framing attached to our rows of posts the more-securely
they'll stay in line.
Below is a photo later in the construction of the Summerblue project – once the posts
were all in place we attached the three main deck beams.
In the photo above workers are also tacking a few of our heavy 2" T&G treated wood
deck board in place as a temporary brace to keep the three post and beam
structures rigidly in place until the intermediate deck joists could be installed.
Standards/Guidelines: Details: Using the 6-8-10 Rule to Square-Up Corners.
Details of procedures to square up string lines, framing, a deck or a foundation or
even a roof are given in a practical example at deck level plumb square-up and in
more technical and mathematical detail at framing square-up 6-8-10 rule.
Standards/Details: Details: Checking the Diagonals for Square.
If lengths B and A are NOT the same, then if B is too long, you would push the two
ends of B closer together, deforming your trapezoid back towards being a perfect
rectangle.
Keep adjusting until the two diagonals are the same length.
Industry Note:
Watch out: if your diagonal measurements are not level your measurement
distances will be in error.
SELF-CHECK NO.: 2 / UC NO.: 1
SET BATTER BOARDS
Instruction: Choose the correct answer and encircle the letter of your choice.
1. This is intended or planned over the outside front edge of the finished
structure (or its supporting frame).
A. Front String.
B. Back String.
C. Over String.
D. Under String.
2. These are driven to mark the exact corners of the project.
A. Middle Stakes.
B. Side Stakes.
C. Center Stakes.
D. Corner Stakes.
3. These a temporary framework used to assist in locating corners when laying
out a foundation.
A. Batter Ground.
B. Batter Boards.
C. Batter Stakes.
D. Batter Shapes.
4. Creating a _______________ requires careful planning, the right materials,
proper construction, and adherence to safety protocols.
A. Groundwork.
B. Corner Stakes..
C. Batter Board.
D. Foundation.
5. If the structure requires intermediate posts, _______________ between the
corner posts are used to line up the intermediate ones.
A. Middle Lines.
B. String Lines.
C. Corner Lines.
D. Batter Boards.
ANSWER KEY NO.: 2 / UC NO.: 1
SET BATTERBOARDS
1. A. Front String.
2. D. Corner Stakes.
3. B. Batter Boards.
4. D. Foundation.
5. B. String Lines.
Program/ Course : Carpentry NC II
Unit of Competency : Prepare and Stake-Out Building Lines
Module : Preparing and Staking-Out Building Lines
Learning Outcome No. 3: Fix Stake-Out Building Lines
Assessment Criteria:
3.1 Stake-out building lines are properly secured for reference in excavating
building foundation.
3.2 Marking lines are squared and plumbed from the batterboard lines with
tolerance of ± 3 mm on all measurement, plumbness, squareness and rigid.
3.3 Worksite is cleaned and kept in safe state according to OSHC regulations.
3.4 Daily work report is accomplished in accordance with company rules and
regulations.
References:
• Pan-Canadian Innovations. Trade Essentials. Carpenter Essential Skills
Manual NOC 7271 (2019).
• Carpentry Level 1: Trainee Guide 5th
Edition (2013). Pearson Education, Inc.
• ITA Youth Explore Trade Skills Learning Resources Development Project.
Carpenter Activity Plans (2013). Open School B.C / B.C. Ministry of
Education.
• TM 3-34.47 Carpentry (2013). Headquarters, Department of the Army.
• Goring, Les. Manual of First and Second Fixing Carpentry 2nd
Edition (2007).
Butterworth-Heinemann, Elsevier Ltd.
• BUCS John Buza. Non-Resident Training Course. Builders 3 & 2, Volume 1
NAVEDTRA 14043 (1993). Naval Education and Training Professional
Development and Technology Center.
• Lewis, Gaspar J. Carpentry (1984). Sterling Press, Co, Inc.
INFORMATION SHEET NO.: 3 / UC NO. 1
FIX STAKE-OUT BUILDING LINES
Introduction
Setting out the position of new buildings in relation to the required levels is a very
responsible job and it must be borne in mind that mistakes can be costly. Apart from
the upset to client and contractor, the local authorities can be unforgiving. Disputes
over this can hold up a contract indefinitely and it is not unheard of for a partly-
formed structure to be demolished and re-sited in the correct position. On large sites
– especially those that involve a complexity of detail and the layout of roads and
buildings – site engineers or surveyors are usually responsible for setting out and
establishing the various levels. However, on small to medium-sized projects, such as
the building of a few dwellings or a detached garage, the site levelling and setting out
is usually done by the builder. This section covers the basic information required to
set out the foundations, walls, drain-levels and site levels of a detached dwelling.
Establishing a Datum Level
Ordinance Bench Mark (OBM)
It is essential in all site-levelling operations that the various levels required should
have reference to a fixed datum. Wherever possible this should be the Ordnance
Bench Mark (OBM), which is a chiselled-out arrow head with a horizontal recess
above it, as illustrated above. OBMs are carved in stone blocks, usually found set in
the walls of public buildings and churches. The inverted horizontal centre line over
the arrow is a reference height set above the Ordnance datum by the Ordnance
surveyors. The original Ordnance datum was established as the mean sea-level at
Newlyn in Cornwall.
The value of OBM readings are recorded on Ordnance Survey maps related to block
plans of built-up areas and can usually be viewed or obtained from a local authority’s
Building Control Department. Where there are no OBMs in the vicinity of a building
site, an alternative, reliable datum – such as a stone step, plinth of a nearby building,
or a manhole cover in the road – must be used.
Levelling Equipment Required – The Level
There are a variety of levelling instruments available and ranking high among these
are the modified and improved versions of the popular traditional dumpy level. These
instruments include the quickset, precise, and automatic levels. The automatic level
represented below, operates by means of integral self-levelling glass prisms. Once
the instrument has been attached to the tripod and levelled by means of a circular
centre bubble, it is ready to be used.
A typical automatic level.
The principle upon which it works is that the observer’s view of the horizontal hairline
– that bisects the vertical hairline – across the lens establishes a theoretical
horizontal plane, encompassing the whole site when the head of the instrument is
pivoted through a 360° circle. This theoretical plane is referred to as the height of
collimation, from which various levels can be measured and/or established. These
levels are taken from a measuring rod known as a levelling staff.
The Levelling Staff
The “E”
Staff.
Metric staffs with five telescopic sections for easy carrying and use; are now
available in aluminium, or fibreglass. They can be extended to 5m from a closed
length of 1.265 m. The British Standard model indicated here is often referred to as
the “E” staff, for obvious reasons.
Each graduated metre is marked with alternating black and red printing on a white
background. Basically, the letters “E” and the entire staff are divided into centimetres
by virtue of each red or black square and each white space between the coloured
squares equalling 10 mm. Thereby each “E” has a vertical-value of 50 mm and the
coloured squares and white spaces between each “E” also equal 50 mm. A
numbered value is printed at the bottom of each ‘E’, which is thereby expressing
incremental readings of a decimetre (100 mm). Readings of less than 10 mm are
estimated and can be quite accurate after a little practice. Clip-on staff-plumbing
bubbles are available and advisable.
The Terms Used in Levelling
Collimation Height: The height of a level’s theoretical viewing plane above the
original Ordnance datum established at Newlyn in Cornwall.
Graphic example of terms used in levelling.
Backsight (B.S.): The first staff-reading taken from an instrument, usually on the
datum.
Datum: A solid and reliable fixed point of initial reference, such as an OBM or a
manhole-cover in the road.
Foresight (F.S.): The last staff-reading before an instrument is repositioned.
Intermediate Sight (I.S.): All readings taken other than Backsight and Foresight.
Ordnance Bench Mark (OBM): As described above.
Temporary Bench Mark (TBM): This is a temporary datum transferred from the
OBM and set up on site at a reduced level – or to the same level as any alternative
datum used, such as a manhole-cover in the road – from which the various site
levels are set up more conveniently. The datum peg, either a 20 mm Ø steel bar, or
a 50 x 50 mm wooden stake, is usually set in the ground, encased in concrete. For
protection, it should be strategically positioned to the front-side boundary of the site
and have a confined fence-like guard built around it.
Reduced Level (R.L): Any calculated level position above the original Ordnance
datum, as illustrated in the figure above.
SETTING-OUT THE SHAPE AND POSITION OF THE BUILDING
Setting-Out Equipment Required – Setting-Out Pegs
Setting-out pegs are usually of 600mm length and made from 50 x 50 mm sawn
softwood, pointed at one end to enable them to be driven into the ground. The upper
third should be painted with white emulsion for easy recognition. If preferred, pegs
can be bought ready-made nowadays, with pyramidal or conical points.
(a) Setting-out peg; (b) profile-stake; (c) profile
board set up to give lateral position of
foundation-trench and brickwork; (d) a boning
rods.
Stakes
These are similar to setting-out pegs, but they are not painted and are about 900 mm
long. They are driven into the ground in pairs and a profile board is nailed to their
upper faces.
Profiles
These consist of ex 150 or 100 mm 25 mm boards nailed horizontally across a pair
of stakes driven into the ground. (Corner profiles with three stakes were used
originally for hand-digging, but unless using unreasonably long profile boards, come
too near to the trenches and inhibit the mechanical digger.)
There are two uses for profiles. 1) They can be set up – well clear of the intended
trench lines – without any regard to being perfectly level and used for setting out the
lateral position of the brick walls and the foundations. This involves marking the wall
thickness and the foundation width on the board’s face, as illustrated, and
highlighting these marks with nails or saw cuts; Or, 2) if the tops of the profile boards
(of which there may be at least eight) are set up level in themselves and in relation to
each other, they can be used with a boning rod for sighting the levels of trench- and-
foundation-depths.
Boning Rods
As illustrated above, these resemble a “T” shape and are made to varying calculated
lengths according to the reduced level required. The simple but effective technique
requires one person to hold the boning rod at any position along the trench, whilst
another person sights across the two relevant profiles to see whether the top of the
rod indicates that the trench levels or foundation pegs are too high, too low or
correct. Traditionally, the rod was made from good quality prepared softwood of
about ex 75 25 mm section. The cross piece was usually jointed to the rod with a tee
halving.
Surveying/Measuring Tapes
Fibreglass tape rules for setting out are now very popular, although traditional steel
tapes with an improved finish are still available. The steel is either coated with white
polyester and the printing protected with an additional top coat, or – for heavy-duty
work – the steel is coated with yellow nylon and the printing protected with an
additional coat. Tapes of 10, 20, 30 or 50 m are available, all with loop and claw
ends and a fold-away rewinding handle. A sturdy, pocket tape-rule, such as the
Stanley Powerlock®
rule, 8 m long with a 25 mm wide blade, will also be required in
the setting out.
Optical Squaring Instruments
Optical instruments such as digital theodolites, with an integral laser-plummet
facility that emits a vertical beam from its tripod position, down onto the corner
setting-out peg, can be used to establish 90° right angles required at foundation level
– but they are extremely expensive for use on small to medium-sized sites. However,
less expensive laser squares are available. Also, when the longest side of a right-
angle in the setting out does not exceed about 20 m, the angle can be set out by
using either a simple method of geometry or a method of calculation. Practical
techniques for setting out right angles reliably by these methods are given
elsewhere.
Ranging Lines
Ranging lines for initial setting out can be obtained in 50 m and 100 m reels of 2.5
mm Ø braided nylon, coloured orange or yellow for high visibility.
Establishing the Building Line
The first essential operation in setting out the position of the building is to establish
the building line (sometimes referred to as the frontage line). As the term suggests,
this line determines the outer wall-face of the building and is usually given on the site
plan as a parallel measurement from the theoretical centre line of an existing or
proposed road in front of the property.
Building-line positions are determined initially by the local authority, so it is
imperative that they are adhered to. When a property is being built in between two
existing dwellings, as illustrated, the building line can often be established by simply
fixing a taut line to the wall-face on each side.
Building line related to existing properties and/or
to the centre line of the road.
Alternatively, two setting-out pegs – numbered (1) and (2) in the figure above – are
used to fix the position. They are driven into the ground and left protruding by about
100 mm on each side of the site, well clear of the flank-wall positions. Their centres
are set to the given dimension of the building line from the centre of the road. After
finally checking the embedded position of the pegs to the centre of the road again,
65 or 75 mm round-head wire nails are driven-in to correct any slight lateral
deviation, with their heads left protruding by about 25 mm to hold a ranging line.
Setting-Out from the Building Line
Two methods of establishing a right
angle from the building line.
After straining and tying a ranging line to the nail-heads of pegs (1) and (2), peg
number (3) is measured in from the left-hand side boundary and driven-in centrally to
the line to establish the corner (quoin) of the flank wall. The overall width of the
building is then measured from this and peg number (4), illustrated, is driven-in. As
before, wire nails are driven into the peg to determine exact positioning and are left
protruding to hols a ranging line. The next step is to set out a right angle.
Forming a Right Angle
(a) 42
+ 32
= 52
; (b) 122
+ 52
= 132
The right angle to form the first flank wall can be made by using either a method of
calculation, illustrated in the figure (c) and described below; a simple method of
geometry such as the 3:4:5 method illustrated above at (a), or the equally simple
5:12:13 method illustrated at (b). These two ancient geometric formulas that
preceded Pythagoras’ theorem, enable right-angled triangles to be formed with
integral sides, i.e, sides which can be measured in whole numbers or equal units.
Providing the units remain equal and are set to the prescribed ratio, right angles of
various sizes can be formed easily by changing the value of the unit.
When using either of these methods, choose a size of unit that will form as large a
triangle as possible in relation to the setting out. For example, a 1.5 m unit to a 3:4:5
ratio = 3 x 1.5 = 4.5 m base line, 4 x 1.5 = 6 m side line and 5 x 1.5 = 7.5 m
hypotenuse. This is indicated in figures above, where peg (B) is set up to a 3:4:5
triangle from pegs (3) and (A). Alternatively, the whole base line between pegs (3)
and (4) the figures above can be divided to provide equal units. The result of such a
method is indicated between pegs (3), (4) and (5). The advantage with this is that the
ranging line between pegs (3) and (5) is long enough to set up the rear of the
building at peg (6). The setting up of peg (7), to complete the outline of the building,
can either be set up in a similar way to peg (6), or its position can be determined by
parallel measurements. Either way, once the four main pegs are established,
diagonals (3) to (7) and (4) to (6) should be measured for equality to confirm that the
setting out is truly square.
Method of Calculation
(c) Pythagoras theorem: a2 + b2 = c2
(c): Finally, if preferred, the right angle can be formed by treating pegs (3), (4) and
(6) as a triangle and using a method of calculation known as Pythagoras’ theorem,
where the square on the hypotenuse c of a right-angled triangle is equal to the sum
of the squares on the other two sides a and b, i.e.
a2
+ b2
= c2
Thereby it is possible to find the length of the hypotenuse if the length of sides a and
b are known. Once the sum of the square on the hypotenuse (represented by the
superscript “2” after the number, meaning that the number is to be multiplied by
itself) has been worked out, the square root of that sum will give the length of the
hypotenuse c, i.e.
With reference to the figures above again, if the width of the building was 8.750 m
between pegs (3) and (4) and the depth was, say 12.500 m between pegs (3) and
(6), to find the length of the hypotenuse, c thus enabling peg (6) to be squared to peg
(3), and the following sum would be used:
c2
= 8.7502
+ 12.5002
(c2
= 8.750 x 8.750 + 12.500 x 12.500)
c2
= 76.562 + 156.25
c2
= 232.812
c2
=  232.182 (c = the square root of 232.812)
c = 15.258m
The Squaring Technique
Whatever method of triangulation is used from the three variations given above, the
precise pin-point positioning of peg (5), peg (6), or peg (B) is critical. It is usually
done with two tape rules, each looped over the nails in the two relevant building-lines
pegs and strained over the site to meet at their intersecting apex point, as in the
figures above (a). Initially, this will be done to establish the position for the peg, then
repeated to pin-point the nail position.
Intermediate support, such as bricks-on-edge (if the pegs are about 100 mm above
ground), should be used under the tape if there is too much sagging. If only one tape
rule is available, a brick-on-edge can be set up at the apex point and adjusted for
position after separate measurements are made to the base pegs and marked on the
brick. The apex peg is then related to this mark and driven-in.
(a) Squaring technique with
tape rules.
To pin-point the apex with a single rule, bisecting arcs can be made on the peg, as
indicated in the figure above. If ever a peg is found to be slightly out of position when
pin-pointing, rather than move it, drive another peg in alongside.
The (b) in the figure above: When looping the end of a tape rule over the centralized
nail in a peg, it should be realized that about three or four millimetres are gained or
lost every time you read or set a measurement. This is partly due to the inaccuracy
of most end-loops and to the fact that half the nail’s shank-diameter is over-sailing
the centre point.
(b) Tape rule
looped over RH
wire mail.
With this in mind, the allowance that needs to be added to every looped
measurement – or taken off of every looped reading can be worked out. 75 mm
round-head wire nails have a 3.75 mm Ø, so nearly 2 mm is lost or gained here.
Now check the tape with another rule and add any loop inaccuracy to this and you
have your + or - allowance.
Positioning and Marking the Profile Boards
(a) Positioning of profiles, showing
additional setting-out pegs (8) to
(12).
Figure (a) above: As mentioned previously and illustrated above, the profiles for
lateral positioning of the walls and foundation-trenches must be kept well back to
allow access for the mechanical digger.
The 900 mm stakes are driven-in to about half their length and the boards are fixed
reasonably level with 50 or 65 mm round head wire nails. The boards should be fixed
on the side of the stakes that takes the strain when the ranging lines are stretched
out.
(b) Levelling up to profiles from setting-
out lines.
Figure (b) above: Bearing in mind the relative heights of the profile boards (about
450mm) above the setting-out pegs and lines (about 100 mm), as illustrated, it can
be seen how the face-of-brickwork lines are transferred to the profiles. However, it is
a delicate task and care should be taken in steadying a spirit level against the face of
the board and adjusting it until a plumb position coincides with the ranging line
below.
Once marked with a sharp carpenter’s pencil and squared onto the top edge, this
acts as a datum from which the wall thickness and foundation width are marked.
These are established by shallow saw cuts or by fixing wire nails into the top edge.
Note that as indicated in the figure above (a) and (b), additional setting-out pegs are
required at points (8) to (12) to allow the ranging lines to be extended for marking the
profile boards.
Sloping Sites
Figures (a) and (b) above: Finally, sloping sites
must be mentioned. Although these will not
affect the triangulation methods of setting out a
right angle, they can affect the horizontal
measurements of walls.
As illustrated on the right, the given dimension of
a wall (X) can be considerably reduced
geometrically to produce (Y) if measured down a
slope.
To combat this, stepped measurements would
be required at ground level, as indicated.
(a) Horizontal measurements on
a sloping site; (b) stepped
measurements via setting-out
pegs and a spirit level.
SELF-CHECK NO.: 3 / UC NO.: 1
FIX STAKE-OUT BUILDING LINES
Instruction: Choose the correct answer and encircle the letter of your choice.
1. A solid and reliable fixed point of initial reference, such as an OBM or a
manhole-cover in the road.
A. Datum.
B. Profiles.
C. Ranging Lines.
D. Backsight.
2. This is a chiselled-out arrow head with a horizontal recess above it.
A. TBM.
B. OBM.
C. OPM.
D. MGM.
3. This is referred to as the height of collimation.
A. Salient Plane.
B. Significant Plane.
C. Theoretical Plane.
D. Ordnance Plane.
4. They resemble a “T” shape and are made of varying calculated lengths
according the reduced level required.
A. Stakes.
B. Boning Rods.
C. Profiles.
D. Ranging Lines.
5. This type of tape rules for setting out are now very popular, although
traditional steel tapes with an improved finish are still available.
A. Fibreglass.
B. Plastic.
C. Wood..
D. Stainless.
ANSWER KEY NO.: 3 / UC NO.: 1
FIX STAKE-OUT BUILDING LINES
1. A. Datum.
2. B. OBM.
3. C. Theoretical Plane.
4. B. Boning Rods.
5. A. Fibreglass.
TASK SHEET NO.: 1.1
Title: How to Install Batter Boards
Standard
Guidelines:
• Batter boards are temporary framework used to assist in
locating corners when laying out a foundation.
Performance
Objective:
• The Trainee should be able to effectively and efficiently Install
Batter Boards.
Supplies /
Materials:
• Working Drawing or Plan.
• Lumber.
• Plywood.
• Fasteners.
Tools /
Equipment:
• Hammer.
• Marking Tools.
• Measuring Tools.
• Nylon String.
• Steel Square.
• Tri-Square.
• Hand Saw.
• Chalk Line.
• Water Hose Level.
• Plumb Bob.
• Hand Saw.
• PPE.
• Circular Saw.
Steps /
Procedures:
• Lay-out the site:
o Establish the maximum outer perimeter.
o Establish the desired distance at which the project will
parallel the established front line.
o Establish the rear line.
o Establish the sidelines.
• Set and stake batter boards:
o Drive the corner stakes to mark the exact corners of the
project.
• Locate and construct batter boards:
o Drive the posts into the ground.
o Fasten the right-angle batter boards with a framing
square to ensure that the boards are perpendicular.
o Use a carpenter's level to level the batter board before
nailing.
o Saw grooves or notches and run the string lines.
• Extend and square the lines:
o Use the plumb bob over the corner layout stake and
adjust the lines until the lines intersect or touch the
plumb bob line.
o Check all the lines for levelness by using a line level or
carpenter’s level.
o Square the lines by using both the 6-8-10 and the
diagonal method.
Assessment
Methods:
• Demonstration with Oral Questioning.
• Role-plays.
• Portfolio.
TO ACCESS MORE
ABOUT THE MODULE
PLS CONTACT:
09610392852

Weitere ähnliche Inhalte

Was ist angesagt?

Grade 7 TLE Detailed Lesson Plan
Grade 7 TLE Detailed Lesson PlanGrade 7 TLE Detailed Lesson Plan
Grade 7 TLE Detailed Lesson Plan
Jurix Cabuyao
 
7_8. TLE Agricultural Crop Production Quarter 1 Module 1_ Farm Tools, Equipme...
7_8. TLE Agricultural Crop Production Quarter 1 Module 1_ Farm Tools, Equipme...7_8. TLE Agricultural Crop Production Quarter 1 Module 1_ Farm Tools, Equipme...
7_8. TLE Agricultural Crop Production Quarter 1 Module 1_ Farm Tools, Equipme...
JENNYROSEMOJICA
 

Was ist angesagt? (20)

PLUMBING NC II - CBLM
PLUMBING NC II - CBLMPLUMBING NC II - CBLM
PLUMBING NC II - CBLM
 
K to 12 TLE Curriculum Guide for Bread and Pastry Production
K to 12 TLE Curriculum Guide for Bread and Pastry ProductionK to 12 TLE Curriculum Guide for Bread and Pastry Production
K to 12 TLE Curriculum Guide for Bread and Pastry Production
 
K to 12 Welding Learning Module
K to 12 Welding Learning ModuleK to 12 Welding Learning Module
K to 12 Welding Learning Module
 
EIM 7/8 Lesson 2: Perform Mensuration and Calculation
EIM 7/8 Lesson 2: Perform Mensuration and CalculationEIM 7/8 Lesson 2: Perform Mensuration and Calculation
EIM 7/8 Lesson 2: Perform Mensuration and Calculation
 
1st cot bread and pastry
1st cot bread and pastry1st cot bread and pastry
1st cot bread and pastry
 
Carpentry Learning Module Grade 7 and Grade 8 Explanatory Course
Carpentry Learning Module Grade 7 and Grade 8 Explanatory CourseCarpentry Learning Module Grade 7 and Grade 8 Explanatory Course
Carpentry Learning Module Grade 7 and Grade 8 Explanatory Course
 
Grade 7 TLE Detailed Lesson Plan
Grade 7 TLE Detailed Lesson PlanGrade 7 TLE Detailed Lesson Plan
Grade 7 TLE Detailed Lesson Plan
 
K to 12 Carpentry Learning Modules
K to 12 Carpentry Learning ModulesK to 12 Carpentry Learning Modules
K to 12 Carpentry Learning Modules
 
7_8. TLE Agricultural Crop Production Quarter 1 Module 1_ Farm Tools, Equipme...
7_8. TLE Agricultural Crop Production Quarter 1 Module 1_ Farm Tools, Equipme...7_8. TLE Agricultural Crop Production Quarter 1 Module 1_ Farm Tools, Equipme...
7_8. TLE Agricultural Crop Production Quarter 1 Module 1_ Farm Tools, Equipme...
 
K to 12 animal production learning module
K to 12 animal production learning moduleK to 12 animal production learning module
K to 12 animal production learning module
 
K to 12 commercial cooking learning module
K to 12 commercial cooking learning moduleK to 12 commercial cooking learning module
K to 12 commercial cooking learning module
 
TILE SETTING NC II
TILE SETTING NC IITILE SETTING NC II
TILE SETTING NC II
 
orientation in compentency based training CBT
orientation in compentency based training CBTorientation in compentency based training CBT
orientation in compentency based training CBT
 
K to 12 TLE Curriculum Guide
K to 12 TLE Curriculum GuideK to 12 TLE Curriculum Guide
K to 12 TLE Curriculum Guide
 
K to 12 Electrical Learning Module
K to 12 Electrical Learning ModuleK to 12 Electrical Learning Module
K to 12 Electrical Learning Module
 
COMPETENCY-BASED LEARNING MATERIALS CARPENTRY-fabricating-formworks
COMPETENCY-BASED LEARNING MATERIALS CARPENTRY-fabricating-formworksCOMPETENCY-BASED LEARNING MATERIALS CARPENTRY-fabricating-formworks
COMPETENCY-BASED LEARNING MATERIALS CARPENTRY-fabricating-formworks
 
K to 12 TLE Curriculum Guide for Animal Production
K to 12 TLE Curriculum Guide for Animal ProductionK to 12 TLE Curriculum Guide for Animal Production
K to 12 TLE Curriculum Guide for Animal Production
 
K to 12 TLE Curriculum Guide for Agricultural Crop Production
K to 12 TLE Curriculum Guide for Agricultural Crop ProductionK to 12 TLE Curriculum Guide for Agricultural Crop Production
K to 12 TLE Curriculum Guide for Agricultural Crop Production
 
Agri-Crop Production - Lesson 2 perform estimation and basic calculation
Agri-Crop Production - Lesson 2 perform estimation and basic calculationAgri-Crop Production - Lesson 2 perform estimation and basic calculation
Agri-Crop Production - Lesson 2 perform estimation and basic calculation
 
Mechanical Drafting
Mechanical DraftingMechanical Drafting
Mechanical Drafting
 

Ähnlich wie CARPENTRY NC II - CBLM

Competency based learning material assembling and disassembling
Competency based learning material assembling and disassemblingCompetency based learning material assembling and disassembling
Competency based learning material assembling and disassembling
Bless Tajale
 
Denmark introduction to hnd course
Denmark introduction to hnd courseDenmark introduction to hnd course
Denmark introduction to hnd course
Andy Epps
 
Executive Summary and Design Document
Executive Summary and Design DocumentExecutive Summary and Design Document
Executive Summary and Design Document
Theresa Cline
 
Cbc presentation (1)
Cbc presentation (1)Cbc presentation (1)
Cbc presentation (1)
ItsJuvy
 

Ähnlich wie CARPENTRY NC II - CBLM (20)

HOUSEKEEPING NC III - CBLM
HOUSEKEEPING NC III - CBLM HOUSEKEEPING NC III - CBLM
HOUSEKEEPING NC III - CBLM
 
HEAVY EQUIPMENT NC II - CBLM
HEAVY EQUIPMENT NC II - CBLMHEAVY EQUIPMENT NC II - CBLM
HEAVY EQUIPMENT NC II - CBLM
 
COMPETENCY-BASED CURRICULUM DEVELOPMENT - Method & Teaching
COMPETENCY-BASED CURRICULUM DEVELOPMENT - Method & TeachingCOMPETENCY-BASED CURRICULUM DEVELOPMENT - Method & Teaching
COMPETENCY-BASED CURRICULUM DEVELOPMENT - Method & Teaching
 
HOUSEKEEPING NC II - CBLM
HOUSEKEEPING NC II - CBLMHOUSEKEEPING NC II - CBLM
HOUSEKEEPING NC II - CBLM
 
ECICT-2-Syllabus-Final-Copy.docx.pdf
ECICT-2-Syllabus-Final-Copy.docx.pdfECICT-2-Syllabus-Final-Copy.docx.pdf
ECICT-2-Syllabus-Final-Copy.docx.pdf
 
Applying quality-standard (css)
Applying quality-standard (css)Applying quality-standard (css)
Applying quality-standard (css)
 
COMPETENCY-BASED-CURRICULUM-REPORT (1).pptx
COMPETENCY-BASED-CURRICULUM-REPORT (1).pptxCOMPETENCY-BASED-CURRICULUM-REPORT (1).pptx
COMPETENCY-BASED-CURRICULUM-REPORT (1).pptx
 
Competency based learning material assembling and disassembling
Competency based learning material assembling and disassemblingCompetency based learning material assembling and disassembling
Competency based learning material assembling and disassembling
 
ELECTRICAL INSTALLATION AND MAINTENANCE NC II - CBLM
ELECTRICAL INSTALLATION AND MAINTENANCE NC II - CBLMELECTRICAL INSTALLATION AND MAINTENANCE NC II - CBLM
ELECTRICAL INSTALLATION AND MAINTENANCE NC II - CBLM
 
02 cpcccm1013 a
02 cpcccm1013 a02 cpcccm1013 a
02 cpcccm1013 a
 
CSS-week-11-12 (1).docx
CSS-week-11-12 (1).docxCSS-week-11-12 (1).docx
CSS-week-11-12 (1).docx
 
SLAUGHTER OPERATIONS NC II - CBLM
SLAUGHTER OPERATIONS NC II - CBLMSLAUGHTER OPERATIONS NC II - CBLM
SLAUGHTER OPERATIONS NC II - CBLM
 
Instructional Design System
Instructional Design SystemInstructional Design System
Instructional Design System
 
05 professional practice
05 professional practice05 professional practice
05 professional practice
 
competency-based curriculum presentation.ppt
competency-based curriculum presentation.pptcompetency-based curriculum presentation.ppt
competency-based curriculum presentation.ppt
 
CO and PO presentation.pptx
CO and PO presentation.pptxCO and PO presentation.pptx
CO and PO presentation.pptx
 
Cbc presentation 3
Cbc presentation 3Cbc presentation 3
Cbc presentation 3
 
Denmark introduction to hnd course
Denmark introduction to hnd courseDenmark introduction to hnd course
Denmark introduction to hnd course
 
Executive Summary and Design Document
Executive Summary and Design DocumentExecutive Summary and Design Document
Executive Summary and Design Document
 
Cbc presentation (1)
Cbc presentation (1)Cbc presentation (1)
Cbc presentation (1)
 

Mehr von Eric Talamisan (6)

EVENTS MANAGEMENT SERVICES NC III - CBLM
EVENTS MANAGEMENT SERVICES NC III - CBLMEVENTS MANAGEMENT SERVICES NC III - CBLM
EVENTS MANAGEMENT SERVICES NC III - CBLM
 
BREAD AND PASTRY PRODUCTION - CBLM
BREAD AND PASTRY PRODUCTION - CBLMBREAD AND PASTRY PRODUCTION - CBLM
BREAD AND PASTRY PRODUCTION - CBLM
 
BARISTA NC II - CBLM
BARISTA NC II - CBLMBARISTA NC II - CBLM
BARISTA NC II - CBLM
 
CSS CORE 1 - INSTALL & CONFIGURE COMPUTER SYSTEMS AND NETWORKS
CSS CORE 1 - INSTALL & CONFIGURE COMPUTER SYSTEMS AND NETWORKSCSS CORE 1 - INSTALL & CONFIGURE COMPUTER SYSTEMS AND NETWORKS
CSS CORE 1 - INSTALL & CONFIGURE COMPUTER SYSTEMS AND NETWORKS
 
Ecommerce bitcoin
Ecommerce bitcoin Ecommerce bitcoin
Ecommerce bitcoin
 
CSS NC II Module : Set-up Computer Networks
CSS NC II Module : Set-up Computer NetworksCSS NC II Module : Set-up Computer Networks
CSS NC II Module : Set-up Computer Networks
 

Kürzlich hochgeladen

Jual Obat Aborsi Hongkong ( Asli No.1 ) 085657271886 Obat Penggugur Kandungan...
Jual Obat Aborsi Hongkong ( Asli No.1 ) 085657271886 Obat Penggugur Kandungan...Jual Obat Aborsi Hongkong ( Asli No.1 ) 085657271886 Obat Penggugur Kandungan...
Jual Obat Aborsi Hongkong ( Asli No.1 ) 085657271886 Obat Penggugur Kandungan...
ZurliaSoop
 
Salient Features of India constitution especially power and functions
Salient Features of India constitution especially power and functionsSalient Features of India constitution especially power and functions
Salient Features of India constitution especially power and functions
KarakKing
 

Kürzlich hochgeladen (20)

Exploring_the_Narrative_Style_of_Amitav_Ghoshs_Gun_Island.pptx
Exploring_the_Narrative_Style_of_Amitav_Ghoshs_Gun_Island.pptxExploring_the_Narrative_Style_of_Amitav_Ghoshs_Gun_Island.pptx
Exploring_the_Narrative_Style_of_Amitav_Ghoshs_Gun_Island.pptx
 
Application orientated numerical on hev.ppt
Application orientated numerical on hev.pptApplication orientated numerical on hev.ppt
Application orientated numerical on hev.ppt
 
HMCS Vancouver Pre-Deployment Brief - May 2024 (Web Version).pptx
HMCS Vancouver Pre-Deployment Brief - May 2024 (Web Version).pptxHMCS Vancouver Pre-Deployment Brief - May 2024 (Web Version).pptx
HMCS Vancouver Pre-Deployment Brief - May 2024 (Web Version).pptx
 
Graduate Outcomes Presentation Slides - English
Graduate Outcomes Presentation Slides - EnglishGraduate Outcomes Presentation Slides - English
Graduate Outcomes Presentation Slides - English
 
Google Gemini An AI Revolution in Education.pptx
Google Gemini An AI Revolution in Education.pptxGoogle Gemini An AI Revolution in Education.pptx
Google Gemini An AI Revolution in Education.pptx
 
Mehran University Newsletter Vol-X, Issue-I, 2024
Mehran University Newsletter Vol-X, Issue-I, 2024Mehran University Newsletter Vol-X, Issue-I, 2024
Mehran University Newsletter Vol-X, Issue-I, 2024
 
Wellbeing inclusion and digital dystopias.pptx
Wellbeing inclusion and digital dystopias.pptxWellbeing inclusion and digital dystopias.pptx
Wellbeing inclusion and digital dystopias.pptx
 
TỔNG ÔN TẬP THI VÀO LỚP 10 MÔN TIẾNG ANH NĂM HỌC 2023 - 2024 CÓ ĐÁP ÁN (NGỮ Â...
TỔNG ÔN TẬP THI VÀO LỚP 10 MÔN TIẾNG ANH NĂM HỌC 2023 - 2024 CÓ ĐÁP ÁN (NGỮ Â...TỔNG ÔN TẬP THI VÀO LỚP 10 MÔN TIẾNG ANH NĂM HỌC 2023 - 2024 CÓ ĐÁP ÁN (NGỮ Â...
TỔNG ÔN TẬP THI VÀO LỚP 10 MÔN TIẾNG ANH NĂM HỌC 2023 - 2024 CÓ ĐÁP ÁN (NGỮ Â...
 
Beyond_Borders_Understanding_Anime_and_Manga_Fandom_A_Comprehensive_Audience_...
Beyond_Borders_Understanding_Anime_and_Manga_Fandom_A_Comprehensive_Audience_...Beyond_Borders_Understanding_Anime_and_Manga_Fandom_A_Comprehensive_Audience_...
Beyond_Borders_Understanding_Anime_and_Manga_Fandom_A_Comprehensive_Audience_...
 
This PowerPoint helps students to consider the concept of infinity.
This PowerPoint helps students to consider the concept of infinity.This PowerPoint helps students to consider the concept of infinity.
This PowerPoint helps students to consider the concept of infinity.
 
Kodo Millet PPT made by Ghanshyam bairwa college of Agriculture kumher bhara...
Kodo Millet  PPT made by Ghanshyam bairwa college of Agriculture kumher bhara...Kodo Millet  PPT made by Ghanshyam bairwa college of Agriculture kumher bhara...
Kodo Millet PPT made by Ghanshyam bairwa college of Agriculture kumher bhara...
 
Jamworks pilot and AI at Jisc (20/03/2024)
Jamworks pilot and AI at Jisc (20/03/2024)Jamworks pilot and AI at Jisc (20/03/2024)
Jamworks pilot and AI at Jisc (20/03/2024)
 
Jual Obat Aborsi Hongkong ( Asli No.1 ) 085657271886 Obat Penggugur Kandungan...
Jual Obat Aborsi Hongkong ( Asli No.1 ) 085657271886 Obat Penggugur Kandungan...Jual Obat Aborsi Hongkong ( Asli No.1 ) 085657271886 Obat Penggugur Kandungan...
Jual Obat Aborsi Hongkong ( Asli No.1 ) 085657271886 Obat Penggugur Kandungan...
 
Sensory_Experience_and_Emotional_Resonance_in_Gabriel_Okaras_The_Piano_and_Th...
Sensory_Experience_and_Emotional_Resonance_in_Gabriel_Okaras_The_Piano_and_Th...Sensory_Experience_and_Emotional_Resonance_in_Gabriel_Okaras_The_Piano_and_Th...
Sensory_Experience_and_Emotional_Resonance_in_Gabriel_Okaras_The_Piano_and_Th...
 
How to Give a Domain for a Field in Odoo 17
How to Give a Domain for a Field in Odoo 17How to Give a Domain for a Field in Odoo 17
How to Give a Domain for a Field in Odoo 17
 
Holdier Curriculum Vitae (April 2024).pdf
Holdier Curriculum Vitae (April 2024).pdfHoldier Curriculum Vitae (April 2024).pdf
Holdier Curriculum Vitae (April 2024).pdf
 
Salient Features of India constitution especially power and functions
Salient Features of India constitution especially power and functionsSalient Features of India constitution especially power and functions
Salient Features of India constitution especially power and functions
 
Sociology 101 Demonstration of Learning Exhibit
Sociology 101 Demonstration of Learning ExhibitSociology 101 Demonstration of Learning Exhibit
Sociology 101 Demonstration of Learning Exhibit
 
Unit 3 Emotional Intelligence and Spiritual Intelligence.pdf
Unit 3 Emotional Intelligence and Spiritual Intelligence.pdfUnit 3 Emotional Intelligence and Spiritual Intelligence.pdf
Unit 3 Emotional Intelligence and Spiritual Intelligence.pdf
 
Accessible Digital Futures project (20/03/2024)
Accessible Digital Futures project (20/03/2024)Accessible Digital Futures project (20/03/2024)
Accessible Digital Futures project (20/03/2024)
 

CARPENTRY NC II - CBLM

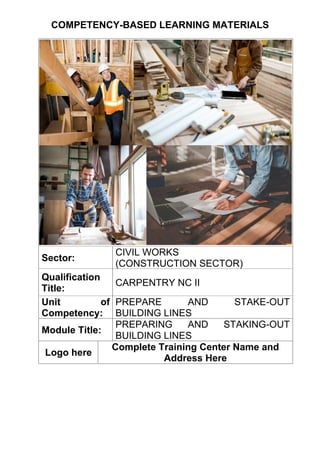
  • 1. COMPETENCY-BASED LEARNING MATERIALS Sector: CIVIL WORKS (CONSTRUCTION SECTOR) Qualification Title: CARPENTRY NC II Unit of Competency: PREPARE AND STAKE-OUT BUILDING LINES Module Title: PREPARING AND STAKING-OUT BUILDING LINES Logo here Complete Training Center Name and Address Here
  • 2. HOW TO USE THIS COMPETENCY-BASED LEARNING MATERIAL MODULE TITLE: PREPARE AND STAKE-OUT BUILDING LINES. This is a Competency-Based Learning Material for the Module: PREPARING AND STAKING-OUT BUILDING LINES. This learning material contains activities for you to complete. It covers the Knowledge, Skills and Attitudes required to complete the competency. You are required to go through a series of learning activities in order to complete each of the learning outcomes of this module. In each learning outcome, Learning Elements and Reference Materials are available for your further reading to assist you in the required activities. You are expected to accomplish all the required activities and to answer the self-check after each learning element. Please note that you need to have 100% correct answers to each self-check to pass the activity. You are required to obtain answer sheets, which are available from your trainer or at the end of each learning element, to reflect answers for each self-check. If you have questions, please do not hesitate to ask your facilitator for assistance. Recognition of Prior Learning (RPL) You may have acquired some or most of the knowledge and skills covered in this learning material because you have: • Actual experience on the job; • Already completed training in this area. BENEFITS OF RPL • Gives credit for knowledge and experience. • Reduces duplication of learning. • Reduces costs of obtaining formal credentials. • Gives immediate feedback and determines which competencies need verification and testing. • Identifies training gaps. • Training (is individualized and results in a recognized certificate). • Assists in professional development. • Allows for better use of time and resources. • Potentially saves on training costs. So, if you can demonstrate to your trainer that you are competent in a particular skill, you do not have to do the same training again. Or, if you feel you have the skills, talk to your trainer about having them formally recognized. You may also show your Certificates of Competence from previous training. And if your acquired skills are still updated / relevant to the module, they may become part of the evidence you can present for RPL.
  • 3. A Record of Achievement is also provided for your trainer to fill-in upon completion of this module. This module was prepared to help you achieve the required Competencies and Learning Outcomes in Preparing Materials for Stake-Out Building Lines, Setting Batterboards, and Fixing Stake-Out Building Lines. It will serve as a source of information for you to acquire the required knowledge, skills, attitude, and inherent behaviour for UNIT OF COMPETENCY NO. 1: PREPARE AND STAKE-OUT BUILDING LINES in the CARPENTRY NC II qualification, with minimum supervision or help from your trainer. This material will aid you in acquiring the competency at your own pace, independently. To achieve the full benefit of this module: • Talk to your trainer and agree on how you will both organize your training on this unit. Read through the Competency Based Learning Material carefully. It is divided into sections which cover all the skills and knowledge you need to successfully complete this module. • Most probably, your trainer will also be your supervisor. He / She will be there to support and show you the correct way to do things. Ask for help if you need one. • Your trainer will tell you about the important things you need to consider when doing the activities. It is important you listen and take notes. • You will have plenty of opportunities to ask questions and undergo rigid practice. This will help you in achieving competency in your new skill. Ample practice will improve your speed, memory and confidence. • Talk with more experienced colleagues and ask for guidance. • Answer self-checks at the end of each section to test your own progress. • When you finished each element and feel that you are ready, demonstrate the activities outlined in the learning material to your trainer. • As your work through the activities, your trainer will be taking note of your performance. He / She will be providing feedback on your progress. Your readiness for assessment will be reflected in his/her report, if and when you have successfully completed each element.
  • 4. INTRODUCTION TO THE MODULE UNIT OF COMPETENCY : PREPARE AND STAKE-OUT BUILDING LINES MODULE TITLE : PREPARING AND STAKING-OUT BUILDING LINES MODULE DESCRIPTOR : This module covers the knowledge, skills, and attitude for preparing stake-out materials and fixing stake-out building lines. Introduction: This module contains information and learning activities in Preparing and Staking- Out Building Lines. Upon completion of this module and you feel confident that you have had sufficient practice, you may request your Trainer to arrange an appointment with a registered Assessor for your assessment. The results of the assessment will be recorded in your Competency Achievement Record. SUMMARY OF LEARNING OUTCOMES: At the end of this Competency-Based Learning Material, the learners are expected to meet the following learning outcomes: LO 1. Prepare Materials for Stake-Out Building Lines LO 2. Set Batterboards LO 3. Fix Stake-Out Building Lines ASSESSMENT CRITERIA Critical Aspects of Assessment Evidence of the following is critical: LO 1. Prepare Materials for Stake-Out Building Lines: 1.1 Appropriate PPE is selected and used according to job requirements and OSHC standards. 1.2 Related plans and details are correctly interpreted according to job requirements. 1.3 Materials, hand tools and equipments are prepared consistent with job requirements. 1.4 Materials are properly staged and freed from defects. 1.5 Unexpected situations are responded to in line with company rules and regulations. 1.6 Housekeeping is performed according to safety regulations.
  • 5. LO 2. Set Batterboards: 2.1 Batterboards are set away from the building line excavation. 2.2 Batterboards are properly secured with tolerances for dimensions at ± 5 mm, and levelness of ± 3 mm. 2.3 Unexpected situations are responded to in line with company rules and regulations. 2.4 Housekeeping is performed according to safety regulations. LO 3. Fix Stake-Out Building Lines: 3.1 Stake-out building lines are properly secured for reference in excavating building foundation. 3.2 Marking lines are squared and plumbed from the batterboard lines with tolerance of ± 3 mm on all measurement, plumbness, squareness and rigid. 3.3 Worksite is cleaned and kept in safe state according to OSHC regulations. 3.4 Daily work report is accomplished in accordance with company rules and regulations. Context of Assessment and Resources Implications: Context of Assessment must ensure that: • Assessment should include practical demonstration either in the workplace or through a simulation activity, supported by a range of methods to assess underpinning knowledge. • Assessment must relate to the individual’s work area or area of responsibility. • Demonstration of skills on more than one occasion. • The construction industry strongly affirms that training and assessment leading to recognition of skills must be undertaken in a real or very closely simulated workplace environment and this qualification requires all units of competency to be delivered in this context. Resource Implications must ensure that: • This unit of competency could be assessed in the workplace or a close simulation of the workplace environment, provided that simulated or project- based assessment techniques fully replicate construction workplace conditions, materials, activities, responsibilities and procedures. Critical Aspects of the Qualification: Evidence of the following is essential: A person who demonstrates competency in this unit must be able to provide evidence of the ability to: • Locate, interpret and apply relevant information, standards and specifications. • Comply with site safety plan, OHS regulations and state and territory legislation applicable to workplace operations. • Comply with organisational policies and procedures, including quality requirements. • Safely and effectively use tools and equipment. • Communicate and work effectively and safely with others. • Set out a full size l shape building on a relatively level site to specifications.
  • 6. Assessment Methods: • This competency is to be assessed using standard and authorized work practices, safety requirements and environmental constraints. • Assessment of essential underpinning knowledge will usually be conducted in an off-site context. • The following methods may be used to assess competency for this module: o Observation of practical candidate performance. o Simulated practical exercises. o Role plays. o Oral and written questions.
  • 7. Program/ Course : Carpentry NC II Unit of Competency : Prepare and Stake-Out Building Lines Module : Preparing and Staking-Out Building Lines Learning Outcome No. 1: Prepare Materials for Stake-Out Building Lines Assessment Criteria: 1.1 Appropriate PPE is selected and used according to job requirements and OSHC standards. 1.2 Related plans and details are correctly interpreted according to job requirements. 1.3 Materials, hand tools and equipments are prepared consistent with job requirements. 1.4 Materials are properly staged and freed from defects. 1.5 Unexpected situations are responded to in line with company rules and regulations. 1.6 Housekeeping is performed according to safety regulations. References: • Pan-Canadian Innovations. Trade Essentials. Carpenter Essential Skills Manual NOC 7271 (2019). • Carpentry Level 1: Trainee Guide 5th Edition (2013). Pearson Education, Inc. • ITA Youth Explore Trade Skills Learning Resources Development Project. Carpenter Activity Plans (2013). Open School B.C / B.C. Ministry of Education. • TM 3-34.47 Carpentry (2013). Headquarters, Department of the Army. • Goring, Les. Manual of First and Second Fixing Carpentry 2nd Edition (2007). Butterworth-Heinemann, Elsevier Ltd. • BUCS John Buza. Non-Resident Training Course. Builders 3 & 2, Volume 1 NAVEDTRA 14043 (1993). Naval Education and Training Professional Development and Technology Center. • Lewis, Gaspar J. Carpentry (1984). Sterling Press, Co, Inc.
  • 8. INFORMATION SHEET NO.: 1 / UC NO.: 1 PREPARE MATERIALS FOR STAKE-OUT BUILDING LINES Introduction Planning and Preparing for Work Tasks As a carpenter on a construction site or in a joinery workshop, you’ll be required to use a large variety of tools and equipment to complete your work tasks. Every job you do requires planning and preparation before you even pick up a tool. You will need to consider: • The task and the work environment. • The tools and equipment you’ll be using. • The materials you’ll need. • The safety and environmental requirements. Finding Out What To Do Before undertaking any construction project or task, it’s important you know exactly what you’re required to do and how to do it effectively and safely. There are many sources of information that you’ll use to identify work tasks, including: • Instructions from your supervisor. • Plans, working drawings and specifications for the project. • Manufacturers’ recommendations or instructions. • Legislation, regulations and standards. • Toolbox meetings (safety information meetings). • Safety signs. • Memos, bulletins and schedules. When you receive information or instructions, you must make sure you’ve interpreted everything correctly and then confirmed the details, because misunderstandings can lead to serious and costly consequences. You can clarify and confirm your understanding of what you’re meant to do on a construction task by: • Asking for more information. • Asking the speaker to repeat what they said. • Researching in trade publications or the internet. • Asking a more experienced workmate or supervisor. • Checking documentation including legislation, standards, policies and procedures, manufacturers’ specifications and safety data sheets (sdss). Special Requirements Before you start work, you need to be aware of any company policies, procedures or requirements that you must comply with when you’re using tools, plant or equipment in a workshop or on a worksite.
  • 9. While these policies and procedures may vary from company to company, they will commonly cover the quality of work required, the tools to be used, how they should be maintained and stored, and the safety procedures to be followed. Laws and Regulations Many aspects of building and construction are governed by laws and Regulations. For example, the times that power tools, plant and equipment can be used on a worksite are restricted in some circumstances and there are penalties if these restrictions are not adhered to. You must also take into consideration the WHS Regulations in the locality that states that all electrical equipment used in construction work must be regularly inspected, tested and maintained by a competent person to ensure it’s safe for use. Industry Note: Most power tools, plant and equipment must also comply with international quality and safety standards, and tools should be inspected before use to check that they comply with International and National Standards® . Assessing Site Conditions Construction site conditions should be inspected and assessed before any work is started. This process can include: • Identifying potential hazards. • Locating site sheds for the safe storage of materials and equipment. • Determining the position of power supplies. • Identifying a water supply and sanitary arrangements. • Identifying waste disposal procedures and facilities. • Locating suitable access (entry) and egress (exit) points. You’ll need this information to determine what tools and equipment are available, where and how they’ll be used and the supporting facilities like power sources that are available so you can complete your tasks. It’s also essential that you plan and prepare carefully so that you ensure your own health and safety and that of your workmates. Organizing Tools, Plant and Equipment Once you’ve determined what work task you’re going to do (the job) and where you’re going to do it (the site), you have to make sure you’ve got the right tools, plant and equipment.
  • 10. All equipment needs to be assessed before it’s used to make sure it’s suitable for the job. For example, the tools used to work with timber, metal or masonry can be quite different. For instance, you wouldn’t use a large sledgehammer to drive in small nails. Some plant and equipment is expensive and used only rarely so it may be hired when needed. Part of the planning process may also involve contacting hire companies to check availability or organize delivery. It’s particularly important that tools and equipment are inspected for defects or faults before you start work. You must report any problems you find immediately to a storeperson or supervisor. Organizing Materials Establishing the materials needed for a task and making sure they’re located where they’re needed are vital aspects of all construction tasks. Information about the materials needed, details of the preferred type or brand, required characteristics, eg size, quality, fire resistance, colour and quantity needed is generally found in the plans and specifications for the building project. The materials must meet certain standards, particularly in relation to safety and application, ie how and where materials can be used. These are called quality requirements and details of these can be found in: • Legislation and codes of practice. • International and National Standards® . • Company Policies And Procedures. • Manufacturers’ Specifications. Materials should be available where they’re needed and when they’re needed, eg just before the tradesperson who needs them is ready to start, to make sure they’re not in the way, stolen or damaged. Storage of materials when they arrive and how they’ll be safely handled must also be considered. Working Safely Whenever you’re using any tools, plant or equipment, it’s vital that you do so safely and in accordance with WHS legislation, Regulations and codes of practice.
  • 11. All sites will have a site safety plan that outlines safe work practices and the actions that need to be taken in certain situations, including who to contact in an emergency, evacuation procedures and details of first aid personnel. It’s important that you familiarize yourself with this document and know exactly what you have to do to work safely and respond appropriately in emergencies. Hazards and Risks Construction sites contain many dangers or hazardous situations which need to be identified and eliminated where possible. You can achieve this by making an inspection of the site and completing or referring to safety documentation. These documents are often mandatory on construction sites to ensure the safety of all workers, site visitors or members of the public. Most construction sites have policies and procedures that tell you how to report hazards, accidents or incidents (near‑misses). If you have an accident, near‑miss or spot any potential hazards on site, you should contact your employer or supervisor immediately and let them know. Personal Protective Equipment Personal Protective Equipment (PPE) is anything that’s used or worn by construction workers to minimize risks to their health or safety. PPE must be seen as the last line of defence for protection against workplace hazards and should be used only where there are no other control measures available or in addition to other control measures. When you choose PPE, it’s important that it complies with the relevant Internaitonal and National Standards® , is suitable for the work to be carried out and the workplace conditions. It’s the employer’s responsibility to provide employees with appropriate PPE (free of charge) and it’s the worker’s responsibility to use the equipment and look after it. Signs and Barricades When you’re working with tools, plant and equipment, it’s important that safety signage and barricades are put in place to warn other workers, site visitors or members of the public about any potential hazard. Barricades may be required to restrict access to areas where cutting tools or tools like nail guns that fire projectiles are used.
  • 12. Environmental Issues All construction projects have the potential to negatively affect the environment by consuming natural resources and producing waste. In most countries, there are laws to make sure that damage to the environment is controlled and minimised. Most large worksites will have an Environmental Management Plan (EMP) to ensure that appropriate management strategies and practices are followed during a project. You must be aware of the impact of your tasks and work practices and your responsibilities with regard to the site EMP. When you use tools, plant and equipment, the potential environmental hazards include: • Noise pollution created by power tools and power generation plant. • Dust from cutting, planing and shaping tools. • Soil contamination from leaks or spills of fuel, oil or lubricants. • Toxic substances including asbestos, timber treatments, insecticides, solvents and cleaning products. Lay-Out and Planning The details of lay-out and planning are essential to proper construction of a building. Layout prepares the site for the foundation which must be planned and completed for each building being constructed. This section introduces the carpenter to the tools, materials, and techniques used in the effective accomplishment of these vital layout and planning functions. LAYOUT TECHNIQUES Layout techniques are described in the following paragraphs. The following are the most commonly used layout tools and materials. A string line is used to distinguish the dimensions of the building layout. A sledgehammer is used to sink corner stakes or batter boards and posts. A posthole auger is used to dig the holes required to set posts properly in some soils. A handsaw is used to cut batter boards and posts.
  • 13. An ax or a hatchet is used to sharpen batter-board posts and stakes. A hammer is used for building batter boards. A chalk line is used to deposit chalk on the surface in order to make a straight guideline. A 100-foot/30-meter tape is used for measuring diagonally (usually in a 100 foot length) and for laying ou excavation or foundation lines. Tracing tape is used for laying out excavation or foundation lines. The tape is made of cotton cloth approximately 1 inch wide. It usually comes in a 200 foot length. A carpenter's level is used to level a surface and to sight level lines. It may be used directly on the surface or with a straightedge. A line level has a spirit bubble to show levelness. The level is hung from a taut line. It gives the greatest accuracy when it is placed halfway between the points to be leveled. An automatic level measures approximate differences in elevation and can establish grades over limited distances. The landscape, level bubble, and index line are seen in the tube. 8d nails are used to secure string line to batter boards. A plumbing bob is used to locate the corners of the building dimensions.
  • 14. A framing square is used to check the squareness of lines. STANDARDS/GUIDELINES: LAY-OUT A RECTANGULAR BUIDLING SITE Working from an established line, such as a road or a property line (line AB in Figure 4-1) that is parallel to construction, establish the maximum outer perimeter (AB, CD, AC, BD) of the building area. Measure away from the front line (AB) along the side lines (AC and BD) the distances (AO and BO) desired to the dimension of the project that is to run parallel to the front line. Stretch a line tightly from point O to O. This line will mark the project's frontage. Measure in from lines AC and BD along line OO one- half the difference between the length of line OO and the desired length of the project. The points (X and X) will constitute the front corners of the project. The two distances OX and XO establish the distances E and F. Extend lines from the two front corners, X and X, parallel to AC and BD at the distances established as E and F for the required depth of the project. This provides the side lines of the project (XG and XH). Joining the extreme ends of side 111 XH will provide the rear line (GH) of the project. After the four corners (X, X, G. and H) have been located, drive stakes at each corner. Batter boards may be erected at these points either after the stakes have been set or while they are being set. Dimensions are determined accurately during each step. STANDARDS/GUIDELINES: LAYING-OUT AN IRREGULAR BUILDING SITE Where the outline of the building is other than a rectangle, the procedure in establishing each point is the same as described for laying out a simple rectangle. However, more points have to be located, and the final proving of the work is more likely to reveal a small error. When the building is an irregular shape, it is advisable to first lay out a large rectangle which will comprise the entire building or the greater part of it. This is shown in the figure at the right as HOPQ When this is established, the remaining portion of the layout will consist of small rectangles, each of which can be laid out and proved separately. These rectangles are shown as LMNP ABCQ, DEFG, and IJKO in the figure at the right. Laying-Out a Rectangle. Laying-Out Irregular Projects.
  • 15. STANDARDS/GUIDELINES: SQUARING YOUR BUILDING LINES First locate the four corners of your building, using a measuring tape or line, to make sure the corners are spaced out exactly the distance specified in the drawings. Use temporary stakes and don't hammer them too deep. Start with one corner as your permanent stake. Site Preparation After you select your site, and have a plan and design for your building, then you are ready for site preparation. The first thing to do is make sure you clear the site where the building will be located. This means removal of trees, shrubs, large rocks, stumps, or anything that may be in the way of the construction. If there is a lot of plant life, you may choose to transplant it, or if it’s just grasses you may just mow it down or weed whack it. If you are planning on having a living roof, you could use the top soil and the plants on your roof, as long as they don’t require lots of space for deep roots. Laying Out Building Lines For the purpose of keeping things simple, let’s look at two options, a round structure and rectangular structure. The trench for a round sauna.
  • 16. For a round structure; First, pound a stake deep in the ground where you want the center of your building to be. Make sure it’s deep enough that it won’t move easily if it gets hit on accident. Then, nail or screw a string on the stake that is the length of the radius of your building. Pull the string tight and walk around the building marking the circumference of the building with sticks or marking paint. Then remove the top soil and set aside for future use. At this point repeat the above process to get the circumference of your inside wall. Make sure to use the same central stake. Try not to remove the stake until the foundation has been completed. You may want to leave it until the roof is done, so that you know where the center of the roof should be. If you are leaving your stake in for the duration of the building construction, make sure to build a cover for it, so it doesn’t get knocked around. For the thickness of your inside wall, measure the size of your straw bales first. Next, add the thickness of your cob, scratch coat plastering, and finish plastering. For the cob class room, we made the foundation 18 inches wide, because we used 12″ bales (half bales), and added 2 inches of cob on the inside and outside walls, plus 1 inch for plastering. Batter Board Diagram for your Natural Building. For a Rectangular Buildings; First you need to make sure that your building lines are squared. The best way to do this is to start out by setting up some Batter Boards. These are usually made from 2×4 stakes and 1×6 ledgers that get screwed between the stakes. Locate the batter boards 4 feet or more away from the building lines. In most cases you want to make sure your batter boards have enough room for you to move your lines while you try to square the building. So, place your stakes at least 4 feet apart from each other and use batter boards that are at least 5 feet long. The other important thing to remember is that you can also use the batter boards to help you level the tops of your stem wall. So build all the batter boards at the same height as you want your stem wall to be. Since we don’t have a transit or a laser
  • 17. level we used a water level to make sure all of our batter boards where at the same height. Water levels are easy to use and inexpensive to buy. All you need is a clear tube at any diameter that is long enough to reach all your batter boards. The reason water levels work is because water always finds its own level. You can test it yourself; fill the tube with water making sure there is at least 6 inches of space at each end. Set the two ends next to each other and move one of them up then watch the water level clime on the other end. It works like magic. A Water Level Illustration. Squaring Your Building Lines; Locate the four corners of your building, using a measuring tape or line, to make sure the corners are spaced out exactly the distance specified in the drawings. Use temporary stakes and don’t hammer them too deep. Start with one corner as your permanent stake. We usually start with the northeast corner, but you can start with any corner that makes sense to your site. The other three corners can be moved or adjusted to help make the building square. Using your permanent stake as your bench mark, pick the next stake to make permanent. In our case we choose the northwest corner, to make sure we have a true south facing building. If the site allows, use a compass to help you locate the northwest corner. Now that you have a straight line, the next step is to make sure the 3rd stake is at 90 degrees from your permanent stake. To do this we use the Pythagorean Theorem.
  • 18. The Pythagorean Theorem is something we learned in school, you may remember it. If you don’t have a calculator handy, and the distances are not easy to square, then you can use the “3” “4” “5” rule. First you need to find a common unit. For example say your building was 12 feet long on side A, and 24 feet on side B, the common denominator is 6, because 3×6 =12 and 4×6=24, which mean that 5×6=30 which should be the distance of side C. For our building we wanted side A to be 12 feet, and our side B to be 17 feet. No common denominator there, so we used the Pythagorean Theorem. Once you know what the distance of line “C” is (or your diagonal line), then you can move your third stake to make sure both distance “A” and distance “B” are still right, and that your diagonal line (line “C”) is also right. In our case we knew that the north line (which was our B line), was correct and all we needed to do was find our C line and make sure that the distance was 12 feet. Squaring Your Natural Building with Batter Boards. Then you repeat the process on the other side and get your building lines squared. Check your diagonal lines to make sure they are both the same. Once you have the corners set on the ground, then you build the batter boards. Others use the batter board to find their corner stakes. Try it both ways, and see what works best for you.
  • 19. Now that you have your building lines, mark it with marking paint or sticks and remove the top soil from your building site and set it aside for later use. At this point you can mark your inside walls using the same processed mentioned above, or use the batter boards to mark them. Again make sure your wall thickness is correct before you move on to the next step. You don’t want to dig out your foundation trench the wrong size, and have to do it again. You can see the two yellow sting lines, which is the thickness of your walls. In our case, we knew that we were going to use 12″ straw bales, (half bales) and 1″ cob plaster on the inside and outside. Plus we wanted to have some extra room in case we wanted to make a thicker plaster coat. So we went 16″ wide for our wall thickness.
  • 20. SELF-CHECK NO.: 1 / UC NO.: 1 PREPARE MATERIALS FOR STAKE-OUT BUILDING LINES Instruction: Choose the correct answer and encircle the letter of your choice. 1. This is used to deposit chalk on the surface, in order to make a straight guideline. A. Marking Line. B. Chalk Line. C. Guideline. D. Forming Line. 2. You will need this to determine what tools and equipment are available, where and how they’ll be used and the supporting facilities like power sources that are available so you can complete your tasks. A. Information. B. Sequence. C. Work Load. D. Access. 3. _______________ may be required to restrict access to areas where cutting tools or tools like nail guns that fire projectiles are used. A. Notice. B. Obstacles. C. Barricades. D. Barrier. 4. This refers to establishing the materials needed for a task and making sure they’re located where they’re needed and are vital aspects of all construction tasks. A. Organizing Work Load. B. Organizing Materials. C. Organizing Tasks. D. Organizing Information. 5. These must be seen as the last line of defence for protection against workplace hazards and should be used only where there are no other control measures available or in addition to other control measures. A. Workers. B. Standards. C. PPE’s. D. Policies.
  • 21. ANSWER KEY NO.: 1 / UC NO.: 1 PREPARE MATERIALS STAKE-OUT BUILDING LINES 1. B. Chalk Line. 2. A. Information. 3. C. Barricades. 4. B. Organizing Materials. 5. C. PPE’s.
  • 22. Program/ Course : Carpentry NC II Unit of Competency : Prepare and Stake-Out Building Lines Module : Preparing and Staking-Out Building Lines Learning Outcome No. 2: Set Batterboards Assessment Criteria: 2.1 Batterboards are set away from the building line excavation. 2.2 Batterboards are properly secured with tolerances for dimensions at ± 5 mm, and levelness of ± 3 mm. 2.3 Unexpected situations are responded to in line with company rules and regulations. 2.4 Housekeeping is performed according to safety regulations. References: • Pan-Canadian Innovations. Trade Essentials. Carpenter Essential Skills Manual NOC 7271 (2019). • Carpentry Level 1: Trainee Guide 5th Edition (2013). Pearson Education, Inc. • ITA Youth Explore Trade Skills Learning Resources Development Project. Carpenter Activity Plans (2013). Open School B.C / B.C. Ministry of Education. • TM 3-34.47 Carpentry (2013). Headquarters, Department of the Army. • Goring, Les. Manual of First and Second Fixing Carpentry 2nd Edition (2007). Butterworth-Heinemann, Elsevier Ltd. • BUCS John Buza. Non-Resident Training Course. Builders 3 & 2, Volume 1 NAVEDTRA 14043 (1993). Naval Education and Training Professional Development and Technology Center. • Lewis, Gaspar J. Carpentry (1984). Sterling Press, Co, Inc.
  • 23. INFORMATION SHEET NO.: 2 / UC NO.: 1 SET BATTER BOARDS Introduction Every building has to start somewhere. After clearing and leveling the building site, Batter boards are the first step of most construction projects with rectangular foundations. Batter boards and string lines are a great technique to use in building a foundation that is square and level. The idea is to have strings intersecting at each corner of the foundation. This is accomplished by setting batter boards a few feet outside the foundation corners and attaching strings to the top of them that will run along the outer edge of the foundation. A batter board is a simple structure with stakes driven vertically into the ground with a horizontal board across them. Standards/Guidelines: Setting Batter Boards Batter boards are a temporary framework used to assist in locating corners when laying out a foundation. Batter-board posts are made from 2 x 4 or 4 x 4 material; corner stakes are made from 2 x 2s. Batter boards are made from 1 x 4 or 1 x 6 pieces. Staking Procedures Corner stakes are driven to mark the exact corners of the project. Excavating for a foundation will disturb the stakes, so batter boards are set up outside the boundary established by the stakes to preserve definite and accurate building lines. Heavy cord or fine wire is stretched from one batter board to another to mark these lines. Location of Batter Boards Figure at the right shows how to locate batter boards. Right-angle batter boards are erected 3 or 4 feet outside of each corner stake. Straight batter boards are erected 3 or 4 feet outside of the line stakes. Construction of Batter Boards Right-angle batter boards should be fastened to the posts after the posts are sunk. Since the boards should be at the exact height of the top of the foundation, it may be desirable to adjust the height by nailing the boards to the stakes after the stakes have been sunk. Right-angle batter boards may be nailed close to perpendicular by using a framing square and should be leveled by means of a carpenter's level before they are secured. Then, angle saw cuts may be made or nails driven into the tops of the boards to hold the lines in place. Separate cuts or nails may be used for the building line, the foundation line, the footing line, and excavation lines. These grooves permit the removal and replacement of the lines in the correct position.
  • 24. EXTENDING LINES The following procedure applies to a simple layout as shown in the figure below and must be amended to apply to different or more complex layout problems: • Step 1. After locating and sinking stakes A and B. erect batter boards 1, 2, 3, and 4. Extend a chalk line (X) from batter board 1 to batter board 3, over stakes A and B. • Step 2. After locating and sinking stake C, erect batter boards 5 and 6. Extend chalk line Y from batter board 2 over stakes A and C to batter board 6. • Step 3. After locating and sinking stake D, erect batter boards 7 and 8. Extend chalk line Z from batter board 5 to batter board 7, over stakes C and D. • Step 4. Extend line O from batter board 8 to batter board 4, over stakes D and B. Where foundation walls are wide at the bottom and extend beyond the outside dimensions of the building, the excavation must be larger than the laid-out size. To lay out dimensions of this excavation, measure out as far as required from the building line on each batter board and stretch lines between these points, outside the first layout. The lines may be at a right angle where they cross the corner layout stakes, found by holding a plumb bob over the corner layout stakes and adjusting the lines until
  • 25. they touch the plumb-bob line. All lines should be checked with a line level or a carpenter's level. Squaring Lines The two methods commonly used for squaring extended lines are the 6-8-10 method and the diagonal method. The 6-8-10 Method After extended lines are in place, measure line EF for a distance of 6 feet (Figure above). Measure line EG for a distance of 8 feet. Adjust the lines (Y and X) until FG equals 10 feet. Multiples of 6-8-10 may be used for large layouts; for example, 12- 16-20 for a layout 50 feet by 100 feet. For accuracy, never start with a measurement of less than 6 feet. The Diagonal Method If the layout is rectangular, lines H and I, cutting the rectangle from opposing corners, will form two triangles as shown in figure above. If the rectangle is perfect, these lines will be equal in length and the corners perfectly square. If lines H and I are not equal in length, just adjust the corners by moving the lines right or left until H and are equal. STANDARDS/GUIDELINES: THE FOUNDATION Merriam-Webster defines the word “foundation” in several ways, including “an underlying base of support.” The importance of a solid foundation cannot be overstated. Laying out a foundation for a house follows this line of thought closely, as this initial step influences how the rest of the structure is built and supported. Creating a foundation requires careful planning, the right materials, proper construction and adherence to safety protocols. Industry Note: Batter boards support string lines that lay out where a foundation will go. The Basic of Foundations There are some basic guidelines for building residential home foundations. It all starts with a site plan that shows where the house will be built on the property. Measurements are then taken, and the outline for the house is staked out using tape measures and levels. Surveyors can then set their stakes off the building’s corner points; excavators use those as reference points for digging foundations. For rectangular foundations, most constructions will use string lines and batter boards to ensure that the corners are square and the dimensions correct. This is necessary to ensure that the foundation is level. Industry experts explain that solid, level foundations are required for several reasons. First and foremost, they must support the weight, or load, of a structure. Foundations also prevent moisture from coming in and help keep the building stable in the face of strong winds, floods, earthquakes and hurricanes. A foundation is certainly not a place for a builder to be cutting corners.
  • 26. What Are Batter Boards? Batter boards are temporary structures made from stakes and horizontal boards that are attached to them. They are used to support the string lines that lay out the foundation. Batter boards are set out a few feet from each corner, and the strings are attached to them. The horizontal parts of batter boards are usually made from wood and must be level with one another. The vertical stakes can also be made from wood and do not need to be exactly plumb because they only function to support the horizontal boards. After batter boards are placed, workers can drill in and place pilings in the correct locations to support the home’s weight. Industry experts recommend using a “three-four-five” method to ensure that a foundation is square. After the batter boards and string lines are set up, go to an outside corner and measure 3 feet along one of the string lines and mark it. Then, measure 4 feet down the other line and mark it. Measure the diagonal distances that is between those two marks and moves the stakes until the distance is exactly 5 feet. Repeat this process for the remaining three corners. Why Are Solid Foundations Important? Foundations must be solid in order to ensure the home is structurally sound; there’s no way around this. Experts also agree that foundations have to be sturdy enough to handle “dead” and “live” loads. The dead load is the actual weight of the building, and it remains a constant. The live load varies and can include people who are inside, furniture and anything else that carries weight. If a foundation is to be built on a slope instead of flat property, getting it level will be more complicated. It can be done in different ways. The ground can be evened out by removing soil, adding soil or both. The excavated soil can be repurposed as retaining walls, or soil can be brought in to fill in areas to make the foundation level. This can be time-consuming and costly, but in the end, that foundation absolutely must be level no matter what. Standards/Guidelines: How to Lay-Out Using Batter Boards and String? The sketch below summarizes the procedure for using batter boards and string to lay out any structure on the ground and to get the structure square, level, and exactly where you want it.
  • 27. Here we will provide the details on how to use this easy method to lay-out a foundation, footing, or just about any structure properly located, level, and square on the site. Industry Note: Watch out: building a structure that's out of square is more than an aesthetic problem or an eyesore. If by accident your structure is out of square or level (or both) then cutting and filling in the studs (if it's a wall), floor joists, ceiling joists, or rafters if it's a roof is going to be hell as every cut will have to be different, the plywood (sold in 4x8 ft. squares) you might use for sheathing isn't going to fit without trimming, and installing siding or roofing is also going to get really ugly. Here we will describe the steps in laying out a simple building, deck, or foundation layout. The procedure uses little more than stakes, boards, string, a carpenter's level, and a measuring tape, and ok, and maybe a mallet or sledge or hammer to drive stakes and to tap in a couple of nails. Question: How to build and use batter boards and strings to do a lay-out? Answer: Use some drawings of the batter boards, and strings lay-out for the deck project. Standards/Guidelines: How to Assemble and Use Batter Boards Industry Note: Watch out: This batter-board and string procedure assumes that you have already done the following: 1. Reviewed property zoning and setback restrictions to be sure that your structure is within lot lines and meets required set-backs. 2. Obtained the necessary building permits and approvals to proceed. 3. Set the general location for your deck – or see deck location. 4. Made a rough and then as needed, a more-refined drawing of the end- product: deck, building, or whatever it is you're going to build – or see deck plan & sketch – and deck layout. Step 1: Rough Deck Lay-Out. Now we're ready to place the deck on the ground. Start with setting the approximate deck location (sketch below) , paying careful attention to the front edge or to whichever side of the structure has a most-critical location, such as back from a property line or parallel to a building (or attached to it in which case your work will be simpler.
  • 28. But even for an attached deck you will need to make accurate square and level and plumb measurements of the three sides of the deck that are to be built to the building. Our sketch shows how to lay out the deck, building, or foundation location using string-lines, posts, and batter boards. Though the first stake locations are just approximate (the green stakes in the sketch), you might want a tack in the top of each stake so that later they can be placed more-precisely according to string lines. Industry Note: Watch out: take care to make all layout measurements from a single common point. Choose one corner, mark that "home" and take all tape measurements from there. Otherwise your measurements will contain errors. Here we're laying out a new structure on open ground. If you're building a deck attached to a building, one end of the ledger board, bolted to the existing structure, will be your home base measurement point. In our sketch the two green stakes along the line indicating the planned front of the structure are our first rough line. These are driven in a line parallel to the desired front face of the structure - from here on we'll call it a deck, though as I've said it could be a foundation for a home, or something else. Step 2: Build the Batter Boards.
  • 29. Using 1x3 or 1x4 or similar lumber make three or four pointed stakes that are long- enough to drive into the soil securely and that will be tall enough that you can level your string lines over the ground. For very steep sites see "Referencing a high deck" found in deck layout. Above is a photo of worker assembling one of the four sets of batter boards needed to lay out a project. For this project instead of building a single 90° batter board with three stakes, we used two independent batter boards each with its own pair of stakes. Still the two batterboard halves need to be set into the ground at approximately a 90° angle to one another. The batter boards do not need to be a precise 90° angle (though you can use a framing square to accomplish that quite easily). That's because we're going to be moving our string lines along the top of the batter boards to get our 90° angles for the structure's corner posts. This project involved building a large, free-standing deck over gently-sloped terrain. We first put out batter boards - stakes and horizontal wood strips - to mark the locations of the corners of the stage (not shown in this photo). Step 3: Place the Batter Boards in the Right Location We started by locating the front of the stage, picking one corner as the "home base" from which ALL other measurements are taken. Choosing and making measurements from a single point avoids ugly errors creeping into a deck or porch or foundation layout. Those errors can result in a structure that is not square. After choosing the home base corner from which the rest of the stage would be located, we chose the front line of the stage to fit as wanted on the terrain which was certainly not level or smooth. Choosing the line of the front line of the stage plus its outer dimension, combined with our stage drawing plan (posts are set a bit in from the actual deck or stage final outer perimeter, we then set the spots for the second post, the sides, and the back
  • 30. line of the same rectangle by measuring in from the original layout string (pink in our photo). All four of those locations are defined by driving the stakes and batter boards some distance outside of the actual perimeter of the final structure. Typically we set the batter boards 3-4 feet back from the corners of the planned outside dimensions of the finished structure. Industry Note: Watch out: the batter boards have to be large enough or long enough that when set back 3-4 ft. from the actual dimensions of the structure your string lines, laid across the tops of the batter boards, can be placed directly over the intended outer edge of the finished structure. Then nails driven into the top edge of the batter boards, and some string; let us set the exact locations of the perimeter and of the posts. The key is to locate the stake- and-batter-boards a few feet outside the actual desired post locations of the deck or stage corners. Otherwise the batter board set-up will be in the way when you go to dig or drill the post holes. Moving the batter boards to drill the post hole would lose the entire initial layout. For this project, we use a tractor and auger that have access to drill our post holes, the batter boards were set well back from the actual post locations. Step 4: Attach String Lines to the Batter Board Top Edges Some builders hang the strings over the batter boards with weights to make adjustment easy. Others saw a notch in the top edge of the batter boards to mark the final string location. To hold our strings in a temporary and later (after adjustment) in their final position we might also use finishing nails or even drywall screws that are easy to move and that don't split the boards. Step 5: Adjust Batter Board String Lines to Form a Perfect Rectangle of Proper Size Assuming that we want a rectangle and not an odd shape, after securing the front and right side string lines to our home base batter boards (the front right batter- boards in our sketch), we adjust the string positions on the remaining three batter boards until the strings are:
  • 31. • Place the front string: The front string is over the intended or planned outside front edge of the finished structure (or of its supporting frame). • Level the rectangle: check that the string lines are all level. Industry Note: Watch out: If the string lines are not level then all of your measurement lengths will be in error - making them too long for the actual framed structure when it's assembled. Well not always. For the stage-deck being constructed in some of these photos, the contractor wanted the deck to slope from its rear edge towards the front for theatrical reasons. Similarly, for improved drainage you might want to slope a deck away from a building to which it is attached. Still the right ways to build a deliberately-sloped deck or porch is to first measure and lay it out level, plumb, and square, and then calculate and measure the desired slope or drop. For example, if you want your deck to slope 1/8" per foot over an 8-foot distance from high to low side, you would calculate (1/8" / ft. slope) x (8 ft distance) = 1" total fall. Then once your "low" end of the deck has been set square, and level you'll drop the elevation of the low side by 1" from that point. Industry Note: Watch out: Over a small deck or over a span between deck girders that is itself short, 8 ft. or less, that drop will be barely noticeable in cutting the joists to fit but for a large joist span you should double-check the length measurements before cutting your joists. • Square up the string rectangle: Using the 6-8010 rule and make sure that each string pair that meet forms a 90° angle • Place the side strings front ends: The side string front ends are brought in or out along the top edge of the front sets of batter boards until we have the correct width of the front line. Measuring the lengths of the sides and adjusting the strings over the batter boards, properly locate the sides over the planned outside dimension of the structure • Place the side string back ends: The side string back ends are brought in or out along the top edge of the rear sets of batter boards until we have the correct width of the rear line. • Place the rear string line: The rearmost string is set across the top edge of the rear batter boards until it marks the proper width of the final structure. • Check the side, front and rear measurements: We check again with our tape measure to assure that parallel sides are of equal length • Check the square: We check squareness again by measuring the diagonals - equal lengths assures us that the four sides form a rectangle, not a trapezoid or other weird shape.
  • 32. Below is a photo showing our layout strings during construction of the Summerblue Arts Camp. This was basically a large free-standing deck. Step 6: Set Corner Post Holes According to the String Lines. • Mark the post hole: Using a plumb line held at the intersecting string corners we place a stake at the center of where each corner post hole should be dug. • Dig the post hole: We dig the post holes to the proper depth and prepare the hole with a solid block, pier, or other details according to the construction plan and local codes • Each post hole, starting with the key corner posts, was centered on its desired spot - the hole center can be within a few inches of exact because we can adjust the post within the hole to its exact location along the string lines: Industry Note: Watch out: Remember to put the bottom of your post below the frost line if you're in a freezing climate. Remember to get engineering help if you're building on a steep slope or in un-stable soils. • Place the posts: The post holes were large enough that we could set each intermediate stage (or deck) post to its exact location by aligning it with the string now wrapped around our corner posts and pulled tight. • You can see one of the workers (A) setting post #2 dead plumb by using the level on two sides of the post (and taking into account if a post is not dead straight). • For this project, each post was set on a solid concrete block that was level in the hole bottom. • Backfill the posts: When worker (A) has the post in the exact position with its outer face flush with the string she holds it in place while the second worker (J) pours in our ready-mix Quickcrete (we were using holes without form tubes in this project). • After the Quickcrete was in place worker (J) back-filled with soil and tamped it down.
  • 33. Step 7: Set Intermediate Post Holes Along the String Line. If the structure requires intermediate posts, string lines between the corner posts are used to line up the intermediate ones. Drop a plumb bob from the correct locations along the string line, always measuring from the same home base point, and then have your helper drive a small stake into the ground. Continue measuring along the string line to find the remaining post hole locations. In our photo we had set the first post at our home base - the stage front right corner in this case - and backfilled so that the post was absolutely solid and plumb. Once the four corner posts were set, backfilled, and solid, correctly in place, then using the batter boards, the orange layout strings, and a measuring tape (and the deck plans) we used a second set of strings (red in the photo shown here and white in the earlier photo above) to give the exact location of the face of each post. The horizontal resistance for the intermediate posts was set always by measuring with the dumb-end (starting point) of our measuring tape at the deck/stage home base corner. At that point we drilled holes for the remaining posts. You can see the soil was dense clay so digging was out of the question. So we hired a local post hole driller who had a huge auger mounted to his tractor. The photo below shows our posts were set in approximate location and rough- trimmed to a few inches above their anticipated finish-height (to allow space for accurate cutting to level the structure), each post was held in exact position both from the corner as well as plumb. In that position the post-hole was back-filled with ready-mix concrete and then atop that, soil.
  • 34. Because this structure was being built in a freezing climate, the buried portion of each post was wrapped in two layers of 6-mil poly - a measure to prevent frost lift of the posts by ice lensing. Step 8: Secure Ledgers or Beams to the Posts The sooner we can get framing attached to our rows of posts the more-securely they'll stay in line. Below is a photo later in the construction of the Summerblue project – once the posts were all in place we attached the three main deck beams. In the photo above workers are also tacking a few of our heavy 2" T&G treated wood deck board in place as a temporary brace to keep the three post and beam structures rigidly in place until the intermediate deck joists could be installed.
  • 35. Standards/Guidelines: Details: Using the 6-8-10 Rule to Square-Up Corners. Details of procedures to square up string lines, framing, a deck or a foundation or even a roof are given in a practical example at deck level plumb square-up and in more technical and mathematical detail at framing square-up 6-8-10 rule. Standards/Details: Details: Checking the Diagonals for Square. If lengths B and A are NOT the same, then if B is too long, you would push the two ends of B closer together, deforming your trapezoid back towards being a perfect rectangle. Keep adjusting until the two diagonals are the same length. Industry Note: Watch out: if your diagonal measurements are not level your measurement distances will be in error.
  • 36. SELF-CHECK NO.: 2 / UC NO.: 1 SET BATTER BOARDS Instruction: Choose the correct answer and encircle the letter of your choice. 1. This is intended or planned over the outside front edge of the finished structure (or its supporting frame). A. Front String. B. Back String. C. Over String. D. Under String. 2. These are driven to mark the exact corners of the project. A. Middle Stakes. B. Side Stakes. C. Center Stakes. D. Corner Stakes. 3. These a temporary framework used to assist in locating corners when laying out a foundation. A. Batter Ground. B. Batter Boards. C. Batter Stakes. D. Batter Shapes. 4. Creating a _______________ requires careful planning, the right materials, proper construction, and adherence to safety protocols. A. Groundwork. B. Corner Stakes.. C. Batter Board. D. Foundation. 5. If the structure requires intermediate posts, _______________ between the corner posts are used to line up the intermediate ones. A. Middle Lines. B. String Lines. C. Corner Lines. D. Batter Boards.
  • 37. ANSWER KEY NO.: 2 / UC NO.: 1 SET BATTERBOARDS 1. A. Front String. 2. D. Corner Stakes. 3. B. Batter Boards. 4. D. Foundation. 5. B. String Lines.
  • 38. Program/ Course : Carpentry NC II Unit of Competency : Prepare and Stake-Out Building Lines Module : Preparing and Staking-Out Building Lines Learning Outcome No. 3: Fix Stake-Out Building Lines Assessment Criteria: 3.1 Stake-out building lines are properly secured for reference in excavating building foundation. 3.2 Marking lines are squared and plumbed from the batterboard lines with tolerance of ± 3 mm on all measurement, plumbness, squareness and rigid. 3.3 Worksite is cleaned and kept in safe state according to OSHC regulations. 3.4 Daily work report is accomplished in accordance with company rules and regulations. References: • Pan-Canadian Innovations. Trade Essentials. Carpenter Essential Skills Manual NOC 7271 (2019). • Carpentry Level 1: Trainee Guide 5th Edition (2013). Pearson Education, Inc. • ITA Youth Explore Trade Skills Learning Resources Development Project. Carpenter Activity Plans (2013). Open School B.C / B.C. Ministry of Education. • TM 3-34.47 Carpentry (2013). Headquarters, Department of the Army. • Goring, Les. Manual of First and Second Fixing Carpentry 2nd Edition (2007). Butterworth-Heinemann, Elsevier Ltd. • BUCS John Buza. Non-Resident Training Course. Builders 3 & 2, Volume 1 NAVEDTRA 14043 (1993). Naval Education and Training Professional Development and Technology Center. • Lewis, Gaspar J. Carpentry (1984). Sterling Press, Co, Inc.
  • 39. INFORMATION SHEET NO.: 3 / UC NO. 1 FIX STAKE-OUT BUILDING LINES Introduction Setting out the position of new buildings in relation to the required levels is a very responsible job and it must be borne in mind that mistakes can be costly. Apart from the upset to client and contractor, the local authorities can be unforgiving. Disputes over this can hold up a contract indefinitely and it is not unheard of for a partly- formed structure to be demolished and re-sited in the correct position. On large sites – especially those that involve a complexity of detail and the layout of roads and buildings – site engineers or surveyors are usually responsible for setting out and establishing the various levels. However, on small to medium-sized projects, such as the building of a few dwellings or a detached garage, the site levelling and setting out is usually done by the builder. This section covers the basic information required to set out the foundations, walls, drain-levels and site levels of a detached dwelling. Establishing a Datum Level Ordinance Bench Mark (OBM) It is essential in all site-levelling operations that the various levels required should have reference to a fixed datum. Wherever possible this should be the Ordnance Bench Mark (OBM), which is a chiselled-out arrow head with a horizontal recess above it, as illustrated above. OBMs are carved in stone blocks, usually found set in the walls of public buildings and churches. The inverted horizontal centre line over the arrow is a reference height set above the Ordnance datum by the Ordnance surveyors. The original Ordnance datum was established as the mean sea-level at Newlyn in Cornwall. The value of OBM readings are recorded on Ordnance Survey maps related to block plans of built-up areas and can usually be viewed or obtained from a local authority’s Building Control Department. Where there are no OBMs in the vicinity of a building site, an alternative, reliable datum – such as a stone step, plinth of a nearby building, or a manhole cover in the road – must be used. Levelling Equipment Required – The Level There are a variety of levelling instruments available and ranking high among these are the modified and improved versions of the popular traditional dumpy level. These instruments include the quickset, precise, and automatic levels. The automatic level represented below, operates by means of integral self-levelling glass prisms. Once the instrument has been attached to the tripod and levelled by means of a circular centre bubble, it is ready to be used.
  • 40. A typical automatic level. The principle upon which it works is that the observer’s view of the horizontal hairline – that bisects the vertical hairline – across the lens establishes a theoretical horizontal plane, encompassing the whole site when the head of the instrument is pivoted through a 360° circle. This theoretical plane is referred to as the height of collimation, from which various levels can be measured and/or established. These levels are taken from a measuring rod known as a levelling staff. The Levelling Staff The “E” Staff. Metric staffs with five telescopic sections for easy carrying and use; are now available in aluminium, or fibreglass. They can be extended to 5m from a closed length of 1.265 m. The British Standard model indicated here is often referred to as the “E” staff, for obvious reasons. Each graduated metre is marked with alternating black and red printing on a white background. Basically, the letters “E” and the entire staff are divided into centimetres by virtue of each red or black square and each white space between the coloured
  • 41. squares equalling 10 mm. Thereby each “E” has a vertical-value of 50 mm and the coloured squares and white spaces between each “E” also equal 50 mm. A numbered value is printed at the bottom of each ‘E’, which is thereby expressing incremental readings of a decimetre (100 mm). Readings of less than 10 mm are estimated and can be quite accurate after a little practice. Clip-on staff-plumbing bubbles are available and advisable. The Terms Used in Levelling Collimation Height: The height of a level’s theoretical viewing plane above the original Ordnance datum established at Newlyn in Cornwall. Graphic example of terms used in levelling. Backsight (B.S.): The first staff-reading taken from an instrument, usually on the datum. Datum: A solid and reliable fixed point of initial reference, such as an OBM or a manhole-cover in the road. Foresight (F.S.): The last staff-reading before an instrument is repositioned. Intermediate Sight (I.S.): All readings taken other than Backsight and Foresight. Ordnance Bench Mark (OBM): As described above. Temporary Bench Mark (TBM): This is a temporary datum transferred from the OBM and set up on site at a reduced level – or to the same level as any alternative datum used, such as a manhole-cover in the road – from which the various site levels are set up more conveniently. The datum peg, either a 20 mm Ø steel bar, or a 50 x 50 mm wooden stake, is usually set in the ground, encased in concrete. For protection, it should be strategically positioned to the front-side boundary of the site and have a confined fence-like guard built around it. Reduced Level (R.L): Any calculated level position above the original Ordnance datum, as illustrated in the figure above.
  • 42. SETTING-OUT THE SHAPE AND POSITION OF THE BUILDING Setting-Out Equipment Required – Setting-Out Pegs Setting-out pegs are usually of 600mm length and made from 50 x 50 mm sawn softwood, pointed at one end to enable them to be driven into the ground. The upper third should be painted with white emulsion for easy recognition. If preferred, pegs can be bought ready-made nowadays, with pyramidal or conical points. (a) Setting-out peg; (b) profile-stake; (c) profile board set up to give lateral position of foundation-trench and brickwork; (d) a boning rods. Stakes These are similar to setting-out pegs, but they are not painted and are about 900 mm long. They are driven into the ground in pairs and a profile board is nailed to their upper faces. Profiles These consist of ex 150 or 100 mm 25 mm boards nailed horizontally across a pair of stakes driven into the ground. (Corner profiles with three stakes were used originally for hand-digging, but unless using unreasonably long profile boards, come too near to the trenches and inhibit the mechanical digger.) There are two uses for profiles. 1) They can be set up – well clear of the intended trench lines – without any regard to being perfectly level and used for setting out the lateral position of the brick walls and the foundations. This involves marking the wall thickness and the foundation width on the board’s face, as illustrated, and highlighting these marks with nails or saw cuts; Or, 2) if the tops of the profile boards (of which there may be at least eight) are set up level in themselves and in relation to each other, they can be used with a boning rod for sighting the levels of trench- and- foundation-depths. Boning Rods As illustrated above, these resemble a “T” shape and are made to varying calculated lengths according to the reduced level required. The simple but effective technique requires one person to hold the boning rod at any position along the trench, whilst another person sights across the two relevant profiles to see whether the top of the rod indicates that the trench levels or foundation pegs are too high, too low or correct. Traditionally, the rod was made from good quality prepared softwood of about ex 75 25 mm section. The cross piece was usually jointed to the rod with a tee halving.
  • 43. Surveying/Measuring Tapes Fibreglass tape rules for setting out are now very popular, although traditional steel tapes with an improved finish are still available. The steel is either coated with white polyester and the printing protected with an additional top coat, or – for heavy-duty work – the steel is coated with yellow nylon and the printing protected with an additional coat. Tapes of 10, 20, 30 or 50 m are available, all with loop and claw ends and a fold-away rewinding handle. A sturdy, pocket tape-rule, such as the Stanley Powerlock® rule, 8 m long with a 25 mm wide blade, will also be required in the setting out. Optical Squaring Instruments Optical instruments such as digital theodolites, with an integral laser-plummet facility that emits a vertical beam from its tripod position, down onto the corner setting-out peg, can be used to establish 90° right angles required at foundation level – but they are extremely expensive for use on small to medium-sized sites. However, less expensive laser squares are available. Also, when the longest side of a right- angle in the setting out does not exceed about 20 m, the angle can be set out by using either a simple method of geometry or a method of calculation. Practical techniques for setting out right angles reliably by these methods are given elsewhere. Ranging Lines Ranging lines for initial setting out can be obtained in 50 m and 100 m reels of 2.5 mm Ø braided nylon, coloured orange or yellow for high visibility. Establishing the Building Line The first essential operation in setting out the position of the building is to establish the building line (sometimes referred to as the frontage line). As the term suggests, this line determines the outer wall-face of the building and is usually given on the site plan as a parallel measurement from the theoretical centre line of an existing or proposed road in front of the property. Building-line positions are determined initially by the local authority, so it is imperative that they are adhered to. When a property is being built in between two existing dwellings, as illustrated, the building line can often be established by simply fixing a taut line to the wall-face on each side. Building line related to existing properties and/or to the centre line of the road.
  • 44. Alternatively, two setting-out pegs – numbered (1) and (2) in the figure above – are used to fix the position. They are driven into the ground and left protruding by about 100 mm on each side of the site, well clear of the flank-wall positions. Their centres are set to the given dimension of the building line from the centre of the road. After finally checking the embedded position of the pegs to the centre of the road again, 65 or 75 mm round-head wire nails are driven-in to correct any slight lateral deviation, with their heads left protruding by about 25 mm to hold a ranging line. Setting-Out from the Building Line Two methods of establishing a right angle from the building line. After straining and tying a ranging line to the nail-heads of pegs (1) and (2), peg number (3) is measured in from the left-hand side boundary and driven-in centrally to the line to establish the corner (quoin) of the flank wall. The overall width of the building is then measured from this and peg number (4), illustrated, is driven-in. As before, wire nails are driven into the peg to determine exact positioning and are left protruding to hols a ranging line. The next step is to set out a right angle. Forming a Right Angle (a) 42 + 32 = 52 ; (b) 122 + 52 = 132
  • 45. The right angle to form the first flank wall can be made by using either a method of calculation, illustrated in the figure (c) and described below; a simple method of geometry such as the 3:4:5 method illustrated above at (a), or the equally simple 5:12:13 method illustrated at (b). These two ancient geometric formulas that preceded Pythagoras’ theorem, enable right-angled triangles to be formed with integral sides, i.e, sides which can be measured in whole numbers or equal units. Providing the units remain equal and are set to the prescribed ratio, right angles of various sizes can be formed easily by changing the value of the unit. When using either of these methods, choose a size of unit that will form as large a triangle as possible in relation to the setting out. For example, a 1.5 m unit to a 3:4:5 ratio = 3 x 1.5 = 4.5 m base line, 4 x 1.5 = 6 m side line and 5 x 1.5 = 7.5 m hypotenuse. This is indicated in figures above, where peg (B) is set up to a 3:4:5 triangle from pegs (3) and (A). Alternatively, the whole base line between pegs (3) and (4) the figures above can be divided to provide equal units. The result of such a method is indicated between pegs (3), (4) and (5). The advantage with this is that the ranging line between pegs (3) and (5) is long enough to set up the rear of the building at peg (6). The setting up of peg (7), to complete the outline of the building, can either be set up in a similar way to peg (6), or its position can be determined by parallel measurements. Either way, once the four main pegs are established, diagonals (3) to (7) and (4) to (6) should be measured for equality to confirm that the setting out is truly square. Method of Calculation (c) Pythagoras theorem: a2 + b2 = c2 (c): Finally, if preferred, the right angle can be formed by treating pegs (3), (4) and (6) as a triangle and using a method of calculation known as Pythagoras’ theorem, where the square on the hypotenuse c of a right-angled triangle is equal to the sum of the squares on the other two sides a and b, i.e. a2 + b2 = c2 Thereby it is possible to find the length of the hypotenuse if the length of sides a and b are known. Once the sum of the square on the hypotenuse (represented by the superscript “2” after the number, meaning that the number is to be multiplied by
  • 46. itself) has been worked out, the square root of that sum will give the length of the hypotenuse c, i.e. With reference to the figures above again, if the width of the building was 8.750 m between pegs (3) and (4) and the depth was, say 12.500 m between pegs (3) and (6), to find the length of the hypotenuse, c thus enabling peg (6) to be squared to peg (3), and the following sum would be used: c2 = 8.7502 + 12.5002 (c2 = 8.750 x 8.750 + 12.500 x 12.500) c2 = 76.562 + 156.25 c2 = 232.812 c2 =  232.182 (c = the square root of 232.812) c = 15.258m The Squaring Technique Whatever method of triangulation is used from the three variations given above, the precise pin-point positioning of peg (5), peg (6), or peg (B) is critical. It is usually done with two tape rules, each looped over the nails in the two relevant building-lines pegs and strained over the site to meet at their intersecting apex point, as in the figures above (a). Initially, this will be done to establish the position for the peg, then repeated to pin-point the nail position. Intermediate support, such as bricks-on-edge (if the pegs are about 100 mm above ground), should be used under the tape if there is too much sagging. If only one tape rule is available, a brick-on-edge can be set up at the apex point and adjusted for position after separate measurements are made to the base pegs and marked on the brick. The apex peg is then related to this mark and driven-in. (a) Squaring technique with tape rules. To pin-point the apex with a single rule, bisecting arcs can be made on the peg, as indicated in the figure above. If ever a peg is found to be slightly out of position when pin-pointing, rather than move it, drive another peg in alongside.
  • 47. The (b) in the figure above: When looping the end of a tape rule over the centralized nail in a peg, it should be realized that about three or four millimetres are gained or lost every time you read or set a measurement. This is partly due to the inaccuracy of most end-loops and to the fact that half the nail’s shank-diameter is over-sailing the centre point. (b) Tape rule looped over RH wire mail. With this in mind, the allowance that needs to be added to every looped measurement – or taken off of every looped reading can be worked out. 75 mm round-head wire nails have a 3.75 mm Ø, so nearly 2 mm is lost or gained here. Now check the tape with another rule and add any loop inaccuracy to this and you have your + or - allowance. Positioning and Marking the Profile Boards (a) Positioning of profiles, showing additional setting-out pegs (8) to (12). Figure (a) above: As mentioned previously and illustrated above, the profiles for lateral positioning of the walls and foundation-trenches must be kept well back to allow access for the mechanical digger. The 900 mm stakes are driven-in to about half their length and the boards are fixed reasonably level with 50 or 65 mm round head wire nails. The boards should be fixed on the side of the stakes that takes the strain when the ranging lines are stretched out.
  • 48. (b) Levelling up to profiles from setting- out lines. Figure (b) above: Bearing in mind the relative heights of the profile boards (about 450mm) above the setting-out pegs and lines (about 100 mm), as illustrated, it can be seen how the face-of-brickwork lines are transferred to the profiles. However, it is a delicate task and care should be taken in steadying a spirit level against the face of the board and adjusting it until a plumb position coincides with the ranging line below. Once marked with a sharp carpenter’s pencil and squared onto the top edge, this acts as a datum from which the wall thickness and foundation width are marked. These are established by shallow saw cuts or by fixing wire nails into the top edge. Note that as indicated in the figure above (a) and (b), additional setting-out pegs are required at points (8) to (12) to allow the ranging lines to be extended for marking the profile boards. Sloping Sites Figures (a) and (b) above: Finally, sloping sites must be mentioned. Although these will not affect the triangulation methods of setting out a right angle, they can affect the horizontal measurements of walls. As illustrated on the right, the given dimension of a wall (X) can be considerably reduced geometrically to produce (Y) if measured down a slope. To combat this, stepped measurements would be required at ground level, as indicated. (a) Horizontal measurements on a sloping site; (b) stepped measurements via setting-out pegs and a spirit level.
  • 49. SELF-CHECK NO.: 3 / UC NO.: 1 FIX STAKE-OUT BUILDING LINES Instruction: Choose the correct answer and encircle the letter of your choice. 1. A solid and reliable fixed point of initial reference, such as an OBM or a manhole-cover in the road. A. Datum. B. Profiles. C. Ranging Lines. D. Backsight. 2. This is a chiselled-out arrow head with a horizontal recess above it. A. TBM. B. OBM. C. OPM. D. MGM. 3. This is referred to as the height of collimation. A. Salient Plane. B. Significant Plane. C. Theoretical Plane. D. Ordnance Plane. 4. They resemble a “T” shape and are made of varying calculated lengths according the reduced level required. A. Stakes. B. Boning Rods. C. Profiles. D. Ranging Lines. 5. This type of tape rules for setting out are now very popular, although traditional steel tapes with an improved finish are still available. A. Fibreglass. B. Plastic. C. Wood.. D. Stainless.
  • 50. ANSWER KEY NO.: 3 / UC NO.: 1 FIX STAKE-OUT BUILDING LINES 1. A. Datum. 2. B. OBM. 3. C. Theoretical Plane. 4. B. Boning Rods. 5. A. Fibreglass.
  • 51. TASK SHEET NO.: 1.1 Title: How to Install Batter Boards Standard Guidelines: • Batter boards are temporary framework used to assist in locating corners when laying out a foundation. Performance Objective: • The Trainee should be able to effectively and efficiently Install Batter Boards. Supplies / Materials: • Working Drawing or Plan. • Lumber. • Plywood. • Fasteners. Tools / Equipment: • Hammer. • Marking Tools. • Measuring Tools. • Nylon String. • Steel Square. • Tri-Square. • Hand Saw. • Chalk Line. • Water Hose Level. • Plumb Bob. • Hand Saw. • PPE. • Circular Saw. Steps / Procedures: • Lay-out the site: o Establish the maximum outer perimeter. o Establish the desired distance at which the project will parallel the established front line. o Establish the rear line. o Establish the sidelines. • Set and stake batter boards: o Drive the corner stakes to mark the exact corners of the project. • Locate and construct batter boards: o Drive the posts into the ground. o Fasten the right-angle batter boards with a framing square to ensure that the boards are perpendicular. o Use a carpenter's level to level the batter board before nailing. o Saw grooves or notches and run the string lines. • Extend and square the lines: o Use the plumb bob over the corner layout stake and adjust the lines until the lines intersect or touch the plumb bob line. o Check all the lines for levelness by using a line level or carpenter’s level. o Square the lines by using both the 6-8-10 and the diagonal method. Assessment Methods: • Demonstration with Oral Questioning. • Role-plays. • Portfolio.
  • 52. TO ACCESS MORE ABOUT THE MODULE PLS CONTACT: 09610392852