Drywall Finishing Tips
•Als PPTX, PDF herunterladen•
5 gefällt mir•1,392 views

Get to know about drywall finishing and their detailed work on the below slides.

Empfohlen
Weitere ähnliche Inhalte
Was ist angesagt?
Was ist angesagt? (20)
Andere mochten auch
Andere mochten auch (14)
Ähnlich wie Drywall Finishing Tips
Ähnlich wie Drywall Finishing Tips (20)
Mehr von Daniel Henny
Mehr von Daniel Henny (20)
Kürzlich hochgeladen
Kürzlich hochgeladen (20)
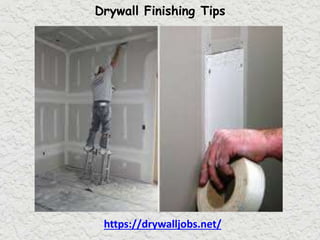
Drywall Finishing Tips
- 2. Dry-wall finishing • Drywall finishing requires a hand-eye coordination to get a professional finish. • Finishing drywall (https://drywalljobs.net/steps-drywall- finishing-taping-coat/)refers to the process of smoothing the joints between the drywall panels and getting them ready for painting. • The following slide will shows some of the useful tips in drywall finishing.
- 4. Make Drywall Ready • Great drywall finishes begin with superior hanging jobs. • The drywall must be tight against the wall studs or the ceiling joists. • All screws need to be countersunk just enough to where they do not tear the paper. • Tapered seams should be tight. Corner joints or other joints should have a gap of approximately 1/4 inch. A tight seam is best but a slight gap is acceptable.
- 6. Mix the Mud • Most of the people use pre-mixed mud in a bucket or box . • This would be very stiff to use so you need to pour little water and the wipe the mud up to the consistency of creamy cake icing. • Sometimes you get tiny air bubbles in your seams as you apply and finish the mud. Just try to mix the mud slowly. Do NOT add too much water.
- 8. Paper or mesh tape • You use either one or both . prefer to use the paper tape in corners and self adhesive mesh tape is superb for tapered seams. • If you have a lot of tapings(https://drywalljobs.net/descriptive-note-different- types-drywall-work/) to do fabricate a belt holder using a coat hanger that holds the roll of tape. • You can buy a handy holder at a drywall supply house.
- 10. Right Tools • Prefer stainless steel broad knives for finishing. I have 10 and 12 inch knives. For taping, use a flexible steel blade that is about 5 inches wide. • It is important to use a file to slightly round off the corners of your taping knife. • This type of knife would be very sharp and tear the paper tape.
- 12. Finishing steps • Flat seams first and run the tape to within one half inch of the corners. • Then do the inside corners last so that this tape overlaps the flat seam tape. • Before you start to tape, all metal and curved corner bead should be nailed in place.
- 14. Work area when taping • Press the tape in place and start to scrape the seam to remove excess mud. • Stop about six inches from the end of the excess mud and then apply more mud to the drywall to proceed. • Start the second coat immediately after you have finished the first coating. • The tape does not have to be dry. It will dry out as the second coat dries.
- 15. • Everyone tries to get a second coat perfect. • The drywall paper begins must be clean with no excess and the mud must build up from there to a high point at the center of wall and ceiling seams. • Once the mud dries you will quickly sand these off before applying the third coat of mud. • If its become practice then drywall jobs(https://drywalljobs.net/) would be easy for you.
- 17. Use the right sealer • After you have third coated and final sanded the seams, corners and nails, you must apply a superb sealer/primer to the walls before you paint. • The primer sealer is applied like any other paint and looks milky as you roll it. • But somehow an hour later the wall is snow white! Failure to apply a primer/sealer before painting will negate all of your hard work.
- 18. Thank you!!!