Practical assessment 3 - Install horizontal and vertical sheet panels
•Als DOC, PDF herunterladen•
0 gefällt mir•31 views

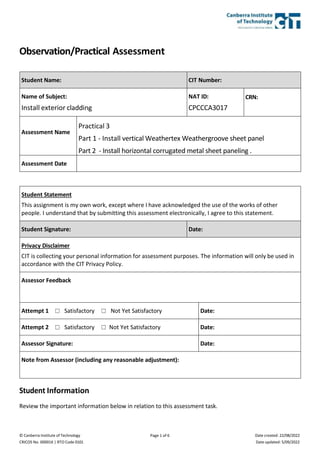
Practical assessment 3 - Install horizontal and vertical sheet panels. CPCCCA3017 - Install exterior cladding

Empfohlen
Empfohlen
Weitere ähnliche Inhalte
Mehr von Canberra Institute of technology
Mehr von Canberra Institute of technology (20)
Kürzlich hochgeladen
Kürzlich hochgeladen (20)
Practical assessment 3 - Install horizontal and vertical sheet panels
- 1. © Canberra Institute of Technology CRICOS No. 00001K | RTO Code 0101 Page 1 of 6 Date created: 22/08/2022 Date updated: 5/09/2022 Observation/Practical Assessment Student Name: CIT Number: Name of Subject: Install exterior cladding NAT ID: CPCCCA3017 CRN: Assessment Name Practical 3 Part 1 - Install vertical Weathertex Weathergroove sheet panel Part 2 - Install horizontal corrugated metal sheet paneling . Assessment Date Student Statement This assignment is my own work, except where I have acknowledged the use of the works of other people. I understand that by submitting this assessment electronically, I agree to this statement. Student Signature: Date: Privacy Disclaimer CIT is collecting your personal information for assessment purposes. The information will only be used in accordance with the CIT Privacy Policy. Assessor Feedback Attempt 1 ☐ Satisfactory ☐ Not Yet Satisfactory Date: Attempt 2 ☐ Satisfactory ☐ Not Yet Satisfactory Date: Assessor Signature: Date: Note from Assessor (including any reasonable adjustment): Student Information Review the important information below in relation to this assessment task.
- 2. © Canberra Institute of Technology CRICOS No. 00001K | RTO Code 0101 Page 2 of 6 Date created: 22/08/2022 Date updated: 5/09/2022 Instructions On timber frames built on the storage shed you will install 2 types of sheet cladding, one type vertical and the other horizontal. You are required to install sheet cladding to comply with manufacturer’s specifications, the national construction code, and any relevant Australian standards. You must complete the following tasks. Install vapour barrier, weatherproofing and appropriate flashings. Set out the sheet with effective cover to a finished eave height and transfer marks to the corner stops. Fit sheet cladding to: - a) An internal corner b) Around a door c) To a corner stop d) Install manufacturers ancillary products and flashings. Time Allowed 4 hours Assessment Conditions Assessment will be undertaken under teacher supervision. Assessment will be undertaken in a simulated work environment. You must ensure all PPE is worn correctly throughout the entire assessment. If you are not found to be working safely at any time your assessment will be stopped and an unsatisfactory attempt may be given. Materials Provided by CIT Assessment paper, all tools, equipment, and materials will be made available for each student. Materials You Need Full PPE, a nail belt, and a devise to access Ready skills Attempts You may have at least two (2) attempts for this assessment. If your first attempt is not successful, your teacher will discuss your results with you and will arrange a second attempt. If your second attempt is not successful, you may be required to re-enrol in this unit. Please refer to the CIT Assessment Policy if you have any questions.
- 3. © Canberra Institute of Technology CRICOS No. 00001K | RTO Code 0101 Page 3 of 6 Date created: 22/08/2022 Date updated: 5/09/2022 Instructions Part 1 Using the instructions for Weathertex Weathergroove sheet cladding install the cladding to a designated wall frame with the manufacturers ancillary products to manufacturers specifications. Read and interpret plans, specifications, manufacturer’s instructions, and NCC requirements. Understand the verbal instructions given in the class presentation prior to the practical assessment. Identify, select, and use the tools and equipment safely and correctly. Select the correct materials and calculate quantities required for the assessment. Follow any control measures identified in the toolbox talk and all assessor instructions, including correctly using PPE during this task and implementing site safety requirements prior to practical assessment. Check the frame for plumb and straight, and pre sheet where required. Install noggings and blocks where required to fix the Weathergroove cladding. Install vapour barriers in correct position on frame. (simulated) Install flashings to internal corner and doors as required Install the cavity closer and battens to the correct position and spacings as per manufacturers specifications. Identify the location, prepare wall, and fix ancillary items as per manufacturer’s instructions. Set out the sheets to maintain an equal size pattern against the door and rendered wall. Install “Weathertex “ Weathergroove as per manufacturers specifications. Install manufacturers ancillary items to corners and doors as per manufacturers specifications. Once your assessor has inspected your work, dismantle, clean up and recycle or dispose of waste as per legislative and workplace requirements. Check tools for faults and store them correctly on completion.
- 4. © Canberra Institute of Technology CRICOS No. 00001K | RTO Code 0101 Page 4 of 6 Date created: 22/08/2022 Date updated: 5/09/2022 Instructions Part 2 From the class presentation of the plans and specifications you will install Colorbond corrugated sheet cladding and flashings horizontally to a designated wall. Read and interpret plans, specifications, manufacturer’s instructions, and NCC requirements. Understand the verbal instructions given in the class presentation prior to the practical assessment. Identify, select, and use the tools and equipment safely and correctly. Select the correct materials and calculate quantities of each that are required for the assessment. Follow any control measures identified in the toolbox talk and all assessor instructions, including correctly use PPE during this task and site safety requirements prior to practical assessment. Check frame for plumb and straight, and pre sheet where required. Install noggings and blocks where required to fix Colorbond cladding and flashings and cavity battens. Install the vapor barriers in the correct position on the frame. Install flashings to an internal corner and doors as required Install a cavity closer and battens to the correct position and spacings, as per plans and specifications. Identify the location, prepare the wall, and fix ancillary items as per manufacturer’s instructions. . Install Colorbond corrugated sheet cladding to the wall frame. Install flashings to the corners and doors as per manufacturers specifications. Once your assessor has inspected your work, dismantle, clean up, and recycle or dispose of waste as per legislative and workplace requirements. Check tools for faults and store them correctly on completion.
- 5. © Canberra Institute of Technology CRICOS No. 00001K | RTO Code 0101 Page 5 of 6 Date created: 22/08/2022 Date updated: 5/09/2022 Observation/Practical Checklist You must successfully complete the following skills in the Observation/Practical checklist. (Please Note: Students only need to complete grey boxes. Your teacher will provide you with feedback and advise whether your work is Satisfactory or Not Yet Satisfactory). Student Name: CIT Number: During the task the following skills were demonstrated satisfactorily: Attempt 1 Attempt 2 Date (Optional) Date (Optional) Observation/Practical Checklist Items S* NYS* S* NYS* T1, Plan and Prepare 1. The student read and interpreted the plans , specifications, and work instructions, and used these to plan their sequence of work. ☐ ☐ ☐ ☐ 2. The student planned all work to comply with laws and regulations, the National Construction Code (NCC), Australian Standards, work health and safety (WHS) and environmental requirements, manufacturers’ specifications, workplace requirements, drawings, and specifications. ☐ ☐ ☐ ☐ 3. The student actively participated in the production of a Job Safety Analysis (JSA) and Toolbox Talk, prior to commencing work. ☐ ☐ ☐ ☐ 4. The student selected the appropriate tools and equipment and checked them for serviceability and reported any faults or damaged tools. ☐ ☐ ☐ ☐ 5. The student selected and used personal protective equipment at the appropriate times during the practical. ☐ ☐ ☐ ☐ 6. The student did a visual check for any service s or hazards in the wall frame to be clad and applied appropriate risk controls, including required signage and barricades. ☐ ☐ ☐ ☐ 7. The student selected the correct materials required for task, calculated adequate quantities, handled the material safely when preparing ready for use. ☐ ☐ ☐ ☐ T2, Prepare exterior wall frames for cladding 8. The student straightened and checked the wall for plumb, prior to sheeting. ☐ ☐ ☐ ☐
- 6. © Canberra Institute of Technology CRICOS No. 00001K | RTO Code 0101 Page 6 of 6 Date created: 22/08/2022 Date updated: 5/09/2022 9. The student pre sheeted the wall to a straight plane by trimming or packing studs to provide an even surface across studs and noggins and prepared wall frame to suit cladding manufacturers specifications. ☐ ☐ ☐ ☐ T3, Fix thermal and moisture management. 10. The student cut and fixed weatherproofing, vapour barriers and flashings to correct position as per manufacturer’s instructions and NCC requirements. ☐ ☐ ☐ ☐ 11. The student identified ancillary material requirements and locations then prepared them to required lengths, and position as per manufacturers installation instructions. ☐ ☐ ☐ ☐ 12. The student installed cavity battens, cavity closer, and product specific ancillaries in the correct position and direction to suit cladding styles. ☐ ☐ ☐ ☐ T4, Set out and fix horizontal and vertical sheet cladding 13. The student determined the most effective and visually acceptable start and finish point for the sheet paneling taking into consideration the doors, windows, and corners. ☐ ☐ ☐ ☐ 14. The student determined the correct height and width of the vertical and horizontal panel and took into consideration the direction of laps and joins when determining the width and finished height to install sheet cladding ☐ ☐ ☐ ☐ 15. The student fitted the vertical panel plumb and finished the horizontal sheet cladding level. ☐ ☐ ☐ ☐ T5, Clean Up 16. The student cleaned up, the worksite meeting all legislative and workplace requirements for safety, waste disposal and materials handling. ☐ ☐ ☐ ☐ 17. The student checked all used tools and equipment for faults or damage and reported any to the assessor for rectification. ☐ ☐ ☐ ☐ *S – Satisfactory, NYS – Not Yet Satisfactory