

Empfohlen
Weitere ähnliche Inhalte
Was ist angesagt?
Was ist angesagt? (20)
Andere mochten auch
Andere mochten auch (20)
Ähnlich wie Health and Safety in the Laboratory by OSHA
Ähnlich wie Health and Safety in the Laboratory by OSHA (20)
Mehr von Atlantic Training, LLC.
Mehr von Atlantic Training, LLC. (20)
Kürzlich hochgeladen
Kürzlich hochgeladen (20)
Health and Safety in the Laboratory by OSHA
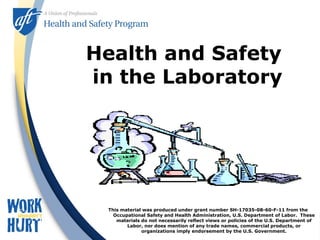
- 1. Health and Safety in the Laboratory This material was produced under grant number SH-17035-08-60-F-11 from the Occupational Safety and Health Administration, U.S. Department of Labor. These materials do not necessarily reflect views or policies of the U.S. Department of Labor, nor does mention of any trade names, commercial products, or organizations imply endorsement by the U.S. Government.
- 2. 2 Objectives After this session, you will know: • How to identify health and safety hazards of school laboratory work • Health and safety measures your lab should have in place • How best to protect yourself from hazardous exposures • The requirements of OSHA’s Laboratory Standard
- 3. 3 Laboratories in the News Two dozen fire departments responded yesterday to Rocky Point High School after a science teacher was burned when a chemical reaction in a science lab touched off a small explosion. The teacher, Anthony Nobre, 26, of Medford, suffered burns over his arm, neck and face. He was taken to University Hospital in Stony Brook, where he was listed in satisfactory condition, according to a spokeswoman. The blast erupted as Nobre put crystallized sodium into a container holding a small amount of water. The Brookhaven fire marshal was conducting an investigation and recommended that the building be closed today. Detroit’s Miller Middle School will be closed today and possibly Wednesday while health and environmental officials finish cleaning up a small amount of mercury that students spilled in a science class just before school was dismissed Monday. Students apparently were playing with about an ounce of the toxic substance in a sealed vial when it spilled, said a district spokesman Stan Childress. About 30 students and a teacher were present, he said. There is a possibility that students may have tracked through the mercury because some beads of the substance were found in the hallway, Childress said.
- 4. 4 Why All the Fuss? Exposure to Hazardous Chemicals Can Result in acute or chronic health effects Acute – occurring within hours or days of exposure Chronic – occur after exposure over many years
- 5. 5 Engineering: Removes or Separates Hazard from Person i.e.: • Local Ventilation (Fume Hoods) • Chemical Substitutions Administrative: Procedures that Limit Contact with Hazard i.e.: • Job Rotation • School Staff Training • Good Housekeeping
- 6. 6 Personal Protective Equipment (PPE) PPE Should Be Considered Only After Administrative and Engineering Controls Have Been Applied. Minimum Recommended PPE: Chemical Resistant Gloves, Splash Proof Goggles, Lab Coat, Face Shield, and Rubber Apron when Necessary
- 7. 7 PPE: Glove Selection Should be based upon: • the chemical composition of the substance you are working with • the properties of the glove material. Find Out More about Glove Selection by Reviewing Material Safety Data Sheets (MSDS) or from Glove Supply Companies.
- 8. 8 OSHA’s Laboratory Standard • Protects staff who use and handle hazardous chemicals in laboratories • Requires your School to: – Determine staff exposure to any substances regulated by the standard – Conduct initial training & additional training if a new hazard is introduced into the lab – Develop a Chemical Hygiene Plan
- 9. 9 Training Requirements Labs are required to supplement course material with site- specific information & training including: •Specific Work Practices •Chemical hygiene plan/lab manual •Location & availability of MSDSs •Specific lab safety work practices or SOPs •Training whenever new hazards are used in the lab •Personal Protective Equipment •Instruction on appropriate PPE & how to use it •Location & availability of PPE & maintenance of reusable PPE •Lab Equipment •Location & operation of eyewash &/or shower stations •Use of fume hoods, storage cabinets, refrigerators & other engineering controls •Waste Handling and Spill Response •Chemical waste handling & disposal procedures •Location & availability of spill kits & emergency checklists •Spill response procedures
- 10. 10 Chemical Hygiene Plan • Must Include: • Designation of a Chemical Hygiene Officer • Exposure control measures • Measures to ensure properly functioning fume hoods & equipment • Staff training on hazard awareness & measures available to protect themselves • Provisions for medical consultation & examination • Respiratory protection program • Recordkeeping procedure • Hazard identification system
- 11. 11 Safe Practice: Maintain a Chemical Inventory! Conduct a yearly inventory of chemicals and update the file of material safety data sheets (MSDS) to prevent the accumulation of orphaned chemicals Some of these chemicals become unstable, react with the container, slowly degrade or evaporate
- 12. 12 You Have the Right to Know! OSHA’s Hazard Communication Standard requires that ALL Containers Must be Labeled With: Chemical Name & Physical/ Health Hazards Name & Address of the Manufacturer & Emergency Contact Numbers 100 Main St., Philadelphia, PA 1-800-555-1212
- 13. 13 Types of Labels NFPA Diamonds and HMIS Bars are Color & Number Coded with Hazard Information DOT Symbols Are Usually Found on Shipping Cartons
- 14. 14 Material Safety Data Sheets (MSDS) • An MSDS Must Be on File & Available for Each Chemical in the Lab. • An MSDS lists: – Product Identity – Hazardous Ingredients – Physical Data – Fire & Explosion Hazard Data – Reactivity Data – Health Hazard Data – Precautions for Safe Handling & Use – Control Measures
- 15. 15 What Should the Ideal Laboratory Look Like? • Practices • Equipment & Ventilation
- 16. 16 Supply Air Diffusers & Room Air Exhausts Should be Located So As to Avoid Intake of Contaminated Air Windows Should be Operable General VentilationGeneral Ventilation
- 17. 17 Local Ventilation Fume Hoods Used For Operations that Give Off: • Noxious Odors • Flammable or Poisonous Vapors HOW DOES YOUR VENTILATION MEASURE UP?
- 18. 18 Safety Showers and Eyewashes Must Be Available in All Lab Areas That Use or Store Chemicals Which Are Corrosive or an Irritant to the Eyes or Skin Combination Eye Wash & Drench Hose Units at the Sink are Now Available
- 19. 19 Match the Extinguisher to the Risk! Fire Extinguishers Must Be: Clearly labeled to indicate the types of fire they are designed to extinguish. Visibly inspected monthly and maintained annually. Class ABC Extinguishers Should Be Located: –At the Laboratory Exit –Within 50 Feet of Any Point in the Lab. Class D Extinguishers Are Required for Combustible Metals.
- 20. 20 Means of Egress/Exit Two or more well- marked & unobstructed evacuation exits are recommended in a lab.
- 21. 21 It’s Shocking! There should be no accessible live, exposed electrical wiring. Consideration should be given to installing ground-fault circuit interrupters on electrical circuits within 6 feet of water sources. Electrical Safety in the High School Lab
- 22. 22 Chemical Storage Safe Storage of Chemicals is a Necessity in Every School Laboratory! Minimizes Exposure to Students and Staff to Corrosive and Toxic Chemicals Lessens the Risk of Fire Prevents the Mixing of Incompatibles & the Creation of an Emergency Situation
- 23. 23 The “Don’ts” of Chemical Storage! Avoid storing any chemical above eye level Don’t store incompatible chemicals together Don’t store chemicals near sources of heat or sunlight Don’t store chemicals in the hoods or acids on metal shelves Avoid storing anything on the floor, especially glass bottles
- 25. 25 So, You’re in Charge! • How would you organize and store chemicals in your perfect lab?
- 26. 26 Ideal Storage Area Set- Up AcidsNA, LI Oxidizers Bases Flammables Cabinet Metal Salts Nitrates Spill Materials Room Should Have: •Eye Wash •Safety Shower •Emergency Phone •Fire Extinguisher Dry Chemicals
- 27. 27 – Organic Solvents – Acids – Alkalis (Bases) – Mercury Be Prepared for Small Incidental Spills Proper Incidental Spill Control Equipment Includes: Spill Control Materials Such As Spill Control Pillows, Pads, Booms, etc. Scoops, Brooms, Pails & Bags Absorbent – such as Diatomaceous Earth Neutralizers – for Acids & Alkalis Mercury Spill Control Kit Chemical Categories Found in Most Secondary Schools Include:
- 28. 28 Certain Spills Aren’t for Quick Clean-up • As a science teacher or lab specialist, you should only respond to incidental chemical releases, or small spills. • For large or especially hazardous spills: – Quickly assess whether there are any injured persons and attend to any person who may have been contaminated. – Follow the notification, evacuation and emergency medical treatment procedures for your school. – Evacuate the immediate area until the hazardous release has been characterized and controlled.
- 29. 29 Waste Chemical Disposal • Requires: – Proper storage– same rules apply – make sure waste chemicals are compatible – Proper labeling – tags should be placed on bottles name of chemical – Pre-planning – know what waste you’re creating prior to carrying out experiments; minimize purchases – Record-keeping – of all waste chemicals on hand and those already picked up for disposal
- 30. 30 How to Assess Your Classroom for Hazards • Using the Checklist • Working with Your Union
Hinweis der Redaktion
- Welcome to the AFT training on health and safety in the school laboratory. For those of you who don’t know me, my name is __________________ and I’m a ____________________ at _______________________ School. Before we get started, let’s go over a few logistics and agree on some ground rules for the day. Logistics Ground Rules So, we’re here today to talk about health and safety in your school labs. Do any of you have any stories related to health and safety in your lab that you’d like to share? Allow a few minutes for discussion. If no one shares a story with you, be prepared to share one of your stories with them as an ice breaker.
- Let’s review what the objectives are for today’s workshop. After this session, you will know: How to identify health and safety hazards of school laboratory work Health and safety measures your lab should have in place How best to protect yourself from hazardous exposures The requirements of OSHA’s Laboratory Standard As I’m sure you know, working in a laboratory can be a dangerous occupation! Let’s look at some stories that have been in the news related to health and safety accidents in school labs.
- Site examples
- The reason to be concerned about the exposures we face in our labs is because exposure to hazardous chemicals can result in acute or chronic health effects. Acute effects could occur within hours or days of the time of exposure to a hazardous chemical. An example would be hydrochloric acid vapors, which cause immediate upper respiratory irritation. You can suffer acute health effects from almost any contaminant if you are exposed to extraordinarily high levels (as in the case of a spill). Exposure may also cause burns, chafing of the skin or dermatitis. Chronic effects may occur after exposure to a hazardous chemical over many years. A chronic effect could be cancer, liver or kidney problems, or reproductive difficulties. For example, formaldehyde is a carcinogen and organic solvents cause liver damage. The skin can also become sensitized to the chemical (reactions to lesser quantities). So, I’m sure you can appreciate that working in a laboratory can be a dangerous job. We’re here today to learn how to best protect ourselves from those dangers.
- There are ways that we can protect ourselves from these types of exposures and some ways are preferred over others. For example, engineering and administrative controls should be the first choice for worker protection. An engineering control removes the hazard or separates it from the person, and helps prevent exposure. Examples include: substitution isolation or enclosure of a process, such as local exhaust ventilation, such as fume hoods; a glove box; general ventilation; and safety cans for flammable storage rather than glass bottles. An administrative control generally involves a procedure that limits worker contact with the hazard. This includes limiting the time allowed for certain tasks, job rotation, and good housekeeping procedures. Training is also an administrative control and should be used in combination with engineering controls. What engineering or administrative controls are practiced in your lab? Allow for a few minutes discussion before moving on to the next slide.
- Personal Protective Equipment, or PPE, is the control of last resort because it puts the burden of protection on the worker. PPE should be used only after conditions are made as safe as possible through engineering or administrative controls. However OSHA’s PPE standard requires that the School District: conduct a hazard assessment to determine if hazards are present which require the use of PPE, and certify in writing that it was conducted. select PPE on the basis of hazard assessment and communicate need to each affected employee. fit the PPE properly for each affected employee. make sure defective or damaged PPE is not used. provide training for employees using PPE. certify in writing that training programs were provided and understood. At the very minimum, you should have access to chemical resistant gloves, splash proof goggles, a lab coat, a face shield and a rubber apron. How many of you have all of the minimum PPE?
- No one type or brand of glove is resistant to all kinds of chemicals. Butyl rubber gloves are commonly used in many secondary chemistry labs as they provide the most all around protection against acids and alcohols. Biology labs likewise use butyl rubber gloves for some manipulations and latex for less hazardous ones. Some people have allergic reactions to latex gloves and there is a fact sheet in your packet to refer to for more information on latex allergies. Gloves come in a variety of sizes so make sure you have a pair that fits properly. Gloves Should Be: Inspected Before Each Use for Any Obvious Tears, Punctures or Discoloration. Cleaned According to the Manufacturer’s Instructions and Allowed to Dry Thoroughly. Removed Before Leaving the Lab to Prevent Contamination of Door Knobs, Light Switches, Telephones, Etc. Rubber and plastic gloves may be checked by inflating with air and submersing them in water to check for air bubbles. When handling hot objects, gloves made of heat-resistant materials (leather or Nomex) should be available and kept near the vicinity of ovens or muffle furnaces. A hot object should never be picked up with rubber or plastic gloves. Special insulated gloves should be worn when handling very cold objects such as liquid N2 or CO2.
- OSHA has a standard specifically for laboratories. It’s designed to protect staff who use and handle hazardous chemicals in the course of their job duties. The standard requires that school districts determine if staff are being exposed to any substances regulated by the standard, which includes monitoring. The school must notify staff of the results of any monitoring within 15 working days after receipt of the monitoring results. The school must also conduct initial staff training and additional training when and if new hazards are introduced into the lab. The school is also required to develop a chemical hygiene plan, which is the core of the standard. We’ll get to that in a moment but first, let’s look a bit closer at the training requirements of the standard.
- The school must provide staff with information and training to ensure that they are aware of the hazards of the chemicals present in their work area including signs and symptoms associated with exposures to those chemicals. The school is also required to supplement course material with site-specific information & training including: Specific Work Practices Contents of the chemical hygiene plan/lab manual Location & availability of Material Safety Data Sheets Specific lab safety work practices or SOPs Personal Protective Equipment Instruction on appropriate PPE & how to use it Location & availability of PPE & Maintenance of reusable PPE Lab Equipment Location & operation of eyewash &/or shower stations Use of fume hoods, storage cabinets, refrigerators & other engineering controls Waste Handling and Spill Response Chemical waste handling & disposal procedures Location & availability of spill kits & emergency checklists Spill response procedures
- Let’s now look at the details of a good CHP. First, the location of the CHP must be known by all staff and must be available to staff and union representatives. The CHP is a detailed document and must include the following components: Designation of a person responsible for the implementation of the CHP including the assignment of a Chemical Hygiene Officer and, if appropriate, establishment of a Chemical Hygiene Committee. Criteria to determine and implement employee exposure control measures, including engineering and administrative controls and personal protective equipment similar to what we just discussed. Components of the staff training on hazard awareness. Provisions for medical consultation and examination. A respiratory protection program, if the use of respirators is necessary. Establishment of a recordkeeping procedure. An hazard identification system, which will talk more about in a few minutes. Have any of you ever been trained on the OSHA lab standard or reviewed the CHP for your labs? Limited Discussion If you were setting up a CHP in your lab, what would be the first thing you might do? Have a limited discussion – hopefully someone will hit upon creating a chemical inventory. Acknowledge their suggestions and if someone offers an inventory, move quickly onto the next slide. If no one comes up with it after a few minutes, ask them “What about creating an inventory of chemicals in the lab?” and go from there.
- One of the best starting places for developing safe lab practices is conducting an inventory of the chemicals actually in the lab! Discontinued experiments, purchasing practices, or lack of personnel or time may result in the storage of large quantities of chemicals. This frequently results in long-term storage of chemicals that are no longer needed. We have seen laboratory storage rooms and prep rooms with chemical containers going back to the 1950’s. How many of you can relate to that! Limited discussion. Maintaining an accurate chemical inventory will prevent storage of excessive volumes of some chemicals and storage of dangerous unstable chemicals. For example, picric acid is normally stored in water that evaporates during storage. Picric acid becomes unstable and shock sensitive when it dries out. Ethyl ether will produce dangerous shock-sensitive organic peroxides after exposure to air and left in storage for as little as 12 months. Unstable, explosive chemicals like picric acid and ethyl ether should not be used or stored in secondary school labs, but you’ll be surprised with what you might find! Do we have any stories like that here? Limited discussion.
- Once you have an inventory of all the chemicals in your lab, the next step is to make sure you have information on them. Another OSHA standard that guarantees you this information is the Hazard Communication Standard, also referred to as the Right-to-Know. This standard requires that all containers must be labeled with specific information, including: The chemical name & physical/health hazards associated with the product The name & address of the manufacturer & emergency contact numbers Many times, secondary containers are left unlabeled, which results in disposal problems. The composition of the unknown waste must be identified usually through the services of an outside analytical laboratory. Such services are often quite expensive so labeling all containers is a good practice. How’s your lab stack up? Are all of your containers labeled with the required information? Limited discussion.
- There are a variety of ways to label containers. What matters is that the required information is on the label. Do any of these labels look familiar? Limited discussion. NFPA: Labeling system of the National Fire Protection Association (NFPA). The labels are diamond-shaped and color coded.Blue indicates the health hazard. Red indicates the fire hazard. Yellow indicates the reactivity hazard. White gives special information such as water or oxidizer incompatibility.In each field, the degree of the hazard is rated from 0 to 4, with 4 being the greatest hazard and 0 indicating no significant hazard. HMIS: Another labeling system that is similar to the NFPA system but in bar graph format. Same colors and numbers, except the white area is generally reserved for listing any PPE that may be needed when working with that chemical. DOT: Labeling system of the Department of Transportation. These labels are typically found on the outside of shipping cartons and are color-coded with the hazards depicted by readily identifiable symbols. These universal symbols are sometimes found on a container's label as well.
- OSHAs hazard communication standard also requires that every chemical have an MSDS, which must be available to ALL employees. New hire training must be provided, and also when new substances are introduced, and must include how to read an MSDS. EVERY MSDS MUST HAVE THE FOLLOWING SECTIONS: Product Information, often a common or trade name (like Solvent 460 or Trichlor), and includes the manufacturer’s name, address, phone number, emergency contact information and the date of the MSDS. Hazardous Ingredients of the product, including legal exposure limits. The lower the exposure limit - the more hazardous the material. Physical and Chemical Characteristics of the product. In other words, how the chemical “behaves” at room temperature. It includes information like vapor pressure, vapor density, boiling point and evaporation rate. Fire & Explosion Data, and how to proceed in case of a fire or that no fire & explosion hazard exists. Other key sections include: The Reactivity Data tells us whether or not the chemical is likely to break down or react with other substances to cause fires, explosions, or the release of different, even more hazardous substances. Health hazards section explains how the chemical enters the body, whether it causes cancer and its short-term and long-term health effects. Most of what you see on an MSDS will be about short-term reactions to high exposures rather than long-term health consequences from working with the chemical every day. Precautions for Safe Handling and Use, gives you information to plan for emergencies – like type or emergency respirators, exit routes, ways to deal with small spills. It also provides procedures for proper waste disposal and precautions for storage and handling. Control Measures section lists information such as personal protective equipment and proper ventilation requirements when working with the substance. The information usually represents the bare minimum in protection and tends to emphasize protective gear and respirators over engineering controls that could eliminate the problem at the source of exposure. All MSDS are not created equal. Some manufacturers don’t do a good job, they give incomplete or inaccurate information. MSDS ACTIVITY – Ask the group to take the MSDS and MSDS activity sheet out of their packet. Ask them to work in pairs or small groups. Give them about 5 minutes to complete the activity sheet. Then call on people to answer the questions and also indicate where on the MSDS the information was found.
- If you were setting up a laboratory, what would it look like? What equipment would you have? What type of ventilation would you have? What safety practices would you implement? Spend about 5 minutes in your groups thinking about these questions and then we’ll generate a list of what the ideal laboratory might look like. Have the groups give you one of their recommendations in a round robin fashion (one from each group and then back to the first group for their next recommendation) and write their comments on a flipchart (t-chart with practices on one side and equipment and ventilation on the other). Spend about 5 minutes on report backs before moving on to the next slide. Keep this flipchart posted and as you go through the following slides, check off the things that they’ve mentioned on their list.
- OK, you’ve come up with some great suggestions. Let’s review what a laboratory in a school should look like. First off, let’s talk about ventilation. Many secondary school labs do not have mechanical ventilation and rely on windows. Although windows provide adequate fresh air to dilute chemical vapors, mechanical ventilation is preferred. How many of you have only windows to open? How many of you have mechanical ventilation? What issues do you encounter with both? Limited discussion. If windows are the only source of ventilation, experiments should utilize chemicals of low volatility and low toxicity and, of course, when chemicals are used the windows should be opened. Air exhausted from the laboratory should always be vented to the out-of-doors and never be re-circulated, to prevent laboratory air from being drawn back into the school building. The OSHA lab standard recommends general ventilation for all laboratories that provides air by mechanical means sufficient to provide four to twelve room air changes per hour. This can be accomplished either through supply or exhaust ventilation. It is important to verify that the ventilation system is operating when chemicals are used. The flow of air can be quickly verified by using tissue paper attached to the ventilation grill.
- Laboratory hoods should be used when concentrated acids or bases are used to make stock dilutions. The hood should also be used when toxic volatile organic chemicals are handled or when highly reactive chemicals are used. How would you assess the ventilation in your lab? Have the participants offer their suggestions as to how they would determine if their ventilation system was operating properly. Limit the discussion to a few minutes and then continue with the script below. For General Ventilation: Try taping streamers on air vents to monitor how often air is circulated into your lab. If you don’t have mechanical ventilation, make sure your windows are operable. For Fume Hoods: You could use a velometer, or air flow monitor, to measure the amount of air flowing across the front of the hood. A properly functioning hood should have a face velocity of 80–120 feet per minute (fpm). You should test the hood before each time you use it. Some new hoods have velometers built right into the hood. Velometers are relatively inexpensive and available from a variety of lab supply companies. They are useful to get an idea on how well your hood is operating. If it is not drawing the appropriate air flow, you can then contact the facilities person to have the hood adjusted. Your packet has some further information on hood design elements and lab hood safety tips for you to review when you get a chance. OK, let’s move on.
- OSHA requires that all laboratories have safety showers and eye washes that actually work! Emergency flushing equipment must be stationed in all lab areas that use or store chemicals that are corrosive or may irritate the eyes or skin. The safety shower and eyewash should provide hands-free operation and an adequate supply of water to permit 15 minutes of flushing. Bottled eyewash units do not provide adequate water flow and are not a primary means of protection. Generally, you should be able to reach a safety shower or eyewash within 10 seconds of an accident and the pathway to the eyewash or shower should be clear and level. The location of the shower and eyewash should be indicated by signs and accessible at all times and should be visually inspected weekly and should receive a maintenance check annually. Oftentimes, the safety showers are turned off because of student misuse and mechanical reasons. A solution to this problem might be to have the safety shower located within the chemical supply/prep room, where students don’t have access, and a combination eyewash/drench hose unit installed by the teacher’s demonstration bench in the lab. These are sink-mounted hoses with a special nozzle and fitting that permits hands-free operation.
- Laboratories must also have appropriate fire extinguishers available. Fire extinguishers are labeled as Class ABC and D, by the National Fire Protection Association. Ask the group if they know what Class A fire extinguishers are used for. Then ask about Class B, C and D fire extinguishers one at a time. Ask if most of their labs have the class ABC combination extinguishers or individual extinguishers. Class A- for fires of ordinary combustible materials such as wood, cloth, paper, rubber, and many plastics. Class B-for fires of flammable liquids, oils, greases, tars, oil-base paints, lacquers and flammable gases. Class C-for fires that involve energized electrical equipment where the electrical conductivity of the extinguishing medium is of importance; when electrical equipment is de-energized, extinguishers for class A or B fires may be safely used. A combination ABC extinguisher, as shown above, can be used. Class D –for fires involving water-reactive and/or flammable metals like sodium or lithium metals. OSHA requires that the school district visually inspect all fire extinguishers monthly and through an annual maintenance check. The extinguishers must have an inspection tag and the school district must record the annual maintenance date and retain this record for one year.
- National Fire Protection Agency recommendations call for two or more exits from a laboratory, however, it is not an OSHA requirement. You need to check your local building code for specifics on means of egress for your lab. In this picture, you see the main corridor which represents the main egress route. The double doors are also fire rated and self-closing. They are held open by electromagnetic locks that will release the doors if the fire alarm system activates. The fire alarm system can be activated manually (pull stations) or by smoke detectors. How can you make sure that exits remain clear in case of an emergency? Limited discussion. Provide them with the following information if it wasn’t raised in the discussion. Don’t lock the exit doors leading from your lab from the inside in a way that requires a key to open them. Don’t block the doors with equipment or other items that would impede exit. Don’t stack items along the immediate path to your exit doors with items that narrow the pathway or with items that are unstable and could fall into the egress pathway. Don’t store items near an exit door. Don’t store or handle chemicals in any egress pathway. Special consideration should be given to ensure accessibility to safety equipment by, as well as ease of evacuation of, physically disabled individuals.
- Another requirement by OSHA is that there should be no accessible exposed electrical wiring in a laboratory. It’s also recommended by the NFPA that ground-fault circuit interrupters are installed on all outlets within six feet of water sources. Your packet contains a fact sheet on electrical safety in the high school lab for you to review when you get a chance.
- One of the most important safety practices in a school lab is proper chemical storage. Safe chemical storage in the lab is a necessity! There isn’t much training on the proper storage requirements of chemicals, which can lead to accidents. Be especially aware of old chemicals. Remember we talked about that all important chemical inventory? Well, a 1999 survey of a secondary school systems laboratories found dangerous storage practices that posed a real risk to the lives of students and staff. For example: 18% of the schools stored known or probable carcinogens such as benzene or chloroform. 52% of schools stored chemicals that are highly flammable and can become unstable upon aging. 10% contained carbon disulfide, which like gasoline, has a very low flashpoint and is considered a dangerous fire and explosion risk. 18% of the schools stored combustible chemicals exceeding the quantities specified by the Fire Department. 58% of the schools did not have flammable storage cabinets. How do you think your lab would fair in that survey? Limited discussion.
- There are lots of points to make about safe chemical storage. Some include to: Make sure all chemical containers are labeled properly & have an MSDS on file. Mark the date of new chemicals & only order what you need! Make sure shelving units are non-reactive and have raised edges. Eliminate and dispose of carcinogens & highly reactive materials, such as phosphorous & picric acid properly. Store gas cylinders upright - securely & chained. Unfortunately, we also see lots of bad examples of how to store chemicals. Aside from this list of “don’ts” (you can read them from the slide or just let the participants read for themselves), we have pictures of two common practices. Can anyone see what’s wrong in this top picture? Limited discussion. Answer: Bottles of acids stored on the floor in an acid storage room. The label has peeled off the nitric acid bottle. Other bottles have no label. If a bottle is knocked over, it is likely to break on the floor creating heat and releasing acid gases into the air. What about in the bottom picture? Limited discussion. Answer: The storage shelf has been alphabetized. Notice the top shelf is all B chemicals, and the middle and bottom shelves are C items. This will result in storing incompatible chemicals next to each other such as a strong oxidizer next to a reducing agent. Do not alphabetize your chemicals!!
- This slide shows a common problem in many high school labs. These are old specimen jars containing samples of preserved animals and insects. The jars are filled with formalin (10 % formaldehyde in water). Notice the frog specimen. The level of formalin is about 3/4's full. The formalin does evaporate over time and that is why the level of liquid is low. When you have a room or cabinet with 100's of specimens, formaldehyde will be released slowly into the air. Formaldehyde is a carcinogen. A classroom outside Binghamton NY was evacuated when a number of containers of specimens in formalin broke releasing a hazardous plume of formaldehyde vapor through the school. One teacher required an emergency room visit and suffered from seizures for months after the accident. How would you respond to the following scenario? (Have the participants work in small groups and outline how they would respond to the following scenario, which you can read to the group or have pre-printed on a flipchart paper. Give them about 5 minutes to discuss and then have each group report one thing that they would do.) A lab specialist was asked to reorganize a storage closet in the biology department. Three five-gallon pails, each containing preserved frogs, had been in the back of the closet for over 20 years. It was agreed they probably contain formalin and arrangements were made to dispose of them. The pails were stacked on top of each other back in the closet. A short time later a strong, irritating odor of formaldehyde was emanating from the closet and liquid was flowing out under the door. A teacher opened the closet door and noticed the bottom pail had collapsed and the contents were leaking. The teacher attempted to clean up the spill but was overcome in minutes. He left the room coughing, with tearing eyes, and was complaining of chest pains. The odor had spread to the hallway and the teacher and students in the adjacent classroom were complaining of eye irritation.
- Exercise on how a chemical storage room should be set up – need to get list of commonly used chemicals from Catherine and then ask the group to arrange their virtual storage room and report why they stored stuff in that manner. Next slide is the review.
- Acids: should be stored in separate acid resistant plastic trays that separate them and will catch any spills and on shelves at two or three feet and never above eye level. Flammable acids need to be stored in a flammables cabinet. Sometimes acids are stored in dedicated acid cabinets. Bases: Ammonium, Sodium, Potassium Hydroxides should be stored at two or three feet and never above eye level. Flammables: such as solvents, oils and combustible liquids should be stored in a flammable storage cabinet. Store only compatible materials inside a cabinet. Don’t store paper, cardboard or other combustible packaging materials inside the cabinet. Make sure not to overload cabinet. Safety cans can be used for small quantities of flammables, but they are not a replacement for a flammable storage cabinet if you have large quantities of flammables. Oxidizers: are highly reactive and should be stored separately from other chemicals. Oxidizers such as h2o2, permanganates, chlorates including bleach need to be stored together and away from flammables. Nitrates and metal salts that are not oxidizers should be stored in this area but on a different shelf from those listed above or in a separate area. Na, Li: Water reactive metals, such as Sodium and Lithium, should be stored in a separate cabinet because of their reactivity. Dry Chemicals: can be stored together. Spill Materials: Spill materials should be stored in one area and include spill control pillows, pads, booms, etc.; scoops, brooms, pails & bags; absorbent – such as diatomaceous earth; neutralizers – for acids & alkalis and mercury spill control kits.
- Accidents always happen so you need to be prepared with the proper spill response procedures for the type of small spill you may have. Laboratories should have chemical spill kits tailored to deal with the potential risks associated with chemicals used in the lab. Chemical spill kits are used to confine and limit the spill. The school administration should be responsible for providing these kits. The spill kits should be located in an identifiable location near the exit from the lab. Ask the participants to get back in their groups and assign each of the groups one of these scenarios which are in their packets. Ask them to discuss how they would respond to the spill and have them report back their plan. Give them around 5 minutes for their discussion before starting report backs. Acids: A one-liter bottle of hydrochloric acid was dropped and shattered on the acid storeroom floor. The bottle was less than half full. You have been asked to clean the spill. Mercury: A student was attempting to insert a thermometer through a rubber stopper when the thermometer broke. The broken thermometer punctured the student’s skin and when the thermometer fell to the floor, a few beads of mercury leaked onto the floor. The student was bleeding and some blood had dripped onto the floor and table. Silica Gel: A five pound box of silica gel has been in the storeroom for years. The box is deteriorated and some of the white power has leaked out. The box falls from a shelf and breaks on the floor, releasing a cloud of dust. There is a fine layer of white dust on most of the shelves and bottles in the room. You are asked to clean up the material.
- As a science teacher or lab specialist, you should only respond to incidental chemical releases, or small spills. Incidental or non-emergency releases are defined under the OSHA Hazardous Waste Operations and Emergency Response standard as those releases that have no potential safety or health hazards. Non-emergency spills or leaks can be absorbed, neutralized or otherwise controlled at the time of the release by staff in the immediate area or by maintenance personnel who are not considered emergency responders. Large or Hazardous Spills are emergency releases and/or uncontrolled releases that require a response effort by staff from outside the immediate release area or by other designated responders, such as local fire departments. A spill of a hazardous chemical can produce a very dangerous situation or can be fairly minor, depending on many factors, such as chemical toxicity, physical state, vapor pressure, reactivity, temperature, location of the spill (small storeroom versus large classroom, whether there is adequate ventilation, etc). In the event of a flammable spill, extinguish ignition sources on your exit path and remotely shut off electrical power to the laboratory (circuit panel or fuse box) to prevent sparks setting off a fire or explosion. For example, turning light switches on or off can create sparks. Shut the laboratory doors after everyone has safely exited in order to control the potential spread of the release.
- Chemicals must be disposed of in ways that avoid harm to people and the environment. The methods of disposal must comply with local, state, and federal laws. The temporary storage of chemical wastes are no different than those that you use for the storage of your usual lab chemicals. The most important rule is to make sure that any chemicals or wastes that are stored together are compatible with each other. Labels should be dated and attached to bottles as soon as you begin to collect waste and list the complete name of the chemical. Make sure to completely remove or deface old labels to avoid any confusion over the contents. If there isn’t a label on a chemical container, the composition of the unknown waste must be identified, usually through the services of an outside analytical lab. Such services are often quite expensive. Consideration of the means of disposal of chemical wastes should be part of the planning of all experiments before they are carried out. The cost of disposing of excess and waste chemicals has become extremely expensive and can even exceed the original cost of purchasing the chemical by 5 to 10 times! Also, whenever practical, order the minimum amount of material possible in order to avoid the accumulation of large stocks of “excess chemicals”, which frequently end up becoming safety hazards due to decomposition or damage. Records of waste chemicals on hand must be maintained. In addition, records must also be kept of those chemicals that have been picked up for disposal. At a minimum, the name of the person responsible, the chemical identity or description of the waste, the amount, the date designated as waste, and the date of pick up must be included in the records.
- So, now it’s your turn. In your packet is a laboratory checklist for you to evaluate the health and safety practices within your lab.