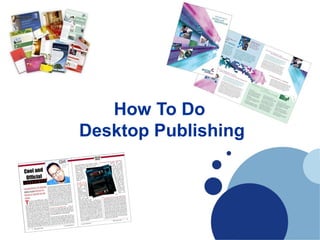
How To Do Desktop Publishing
•Als PPT, PDF herunterladen•
2 gefällt mir•20,072 views

The document provides tips for desktop publishing including having a plan, choosing a template, setting up the document, placing and formatting text and graphics, tweaking graphic placement, applying design rules, proofreading a draft, and finally printing the project. Key steps are to have an initial sketch, select a template or start from scratch, import or type text and graphics, align and style text, move graphics for proper wrapping, and proof before final printing.

Empfohlen
Weitere ähnliche Inhalte
Was ist angesagt?
Was ist angesagt? (18)
Ähnlich wie How To Do Desktop Publishing
Ähnlich wie How To Do Desktop Publishing (20)
Mehr von Eastern New Mexico University
Mehr von Eastern New Mexico University (20)
Kürzlich hochgeladen
Kürzlich hochgeladen (20)
How To Do Desktop Publishing
- 1. How To Do Desktop Publishing
- 2. Have a Plan, Make a Sketch • Have an idea of where you are going with your design • Even the roughest sketches can be useful
- 3. Choose a Template • Take a look at the templates provided by your software to see if they will work as-is or with a little tweaking for your project.
- 4. Set Up Your Document • If using a template, you may need to tweak some of the template settings. • If starting from scratch, set the size and orientation of your document. • Set the margins. • If you’ll be doing text in columns, set up text columns.
- 5. Place Text in Your Document • If your document is mostly text, place it in your layout by: • Importing it from a file, • Copying it from another program, or • Typing it directly in your program (not the best choice if it is a substantial amount of text.
- 6. Format Your Text • Align your text. • Apply the desired typeface, style, size, and spacing to your text. • Apply embellishments such as plain or fancy drop caps
- 7. Place Graphics in Your Document • If your document is mostly graphics-based, you may want to place the images before adding bits of text. • Import your graphics from a file, copy them from another program, or create them directly in your page layout software (simple boxes, rules, etc.)
- 8. Tweak Your Graphics Placement • Move your graphics around so that they line up the way you want them. • Set up your graphics so that text wraps around them. • Crop or resize graphics, if necessary.
- 9. Apply the Rules of Desktop Publishing • Drop typewritten conventions such as two spaces after periods and double hard returns between paragraphs; • Use fewer fonts; • Less clip art; • Leave white space in the layout; and • Avoid most centered and justified text.
- 10. Print a Draft and Proofread It • Proof your printout not only for colors, typographical errors, and placement of elements, but if it is to be folded or trimmed, make sure it folds properly and that trim marks print correctly.
- 11. Print Your Project! • Once you're happy with your layout and your proofs are printing properly, print your creation on your printer.