Polycom Kirk 4080 user guide
•
1 gefällt mir•1,181 views

Polycom Kirk 4080 user guide http://www.best4systems.co.uk/polycom/polycom-kirk

Empfohlen
Weitere ähnliche Inhalte
Was ist angesagt?
Was ist angesagt? (17)
Ähnlich wie Polycom Kirk 4080 user guide
Ähnlich wie Polycom Kirk 4080 user guide (20)
Mehr von best4systems
Mehr von best4systems (20)
Kürzlich hochgeladen
Kürzlich hochgeladen (20)
Polycom Kirk 4080 user guide
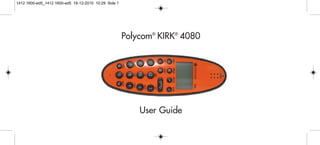
- 1. Polycom® KIRK® 4080 User Guide 1412 1600-ed5_1412 1600-ed5 16-12-2010 10:29 Side 1
- 2. Congratulations on your new KIRK handset Your new handset from Polycom will provide you with the greatest possible degree of flexibility and mobility due to high battery capacity, low weight, practical size and design. 1412 1600-ed5_1412 1600-ed5 16-12-2010 10:29 Side 2
- 3. Contents: 1. Warnings ............................................................................... 4 2. Label information.................................................................. 5 3. Construction .......................................................................... 6 4. Battery information............................................................... 7 5. Charging................................................................................. 8 6. Key functions......................................................................... 9 7. Turning the handset ON/OFF............................................ 11 8. Making a call.......................................................................... 12 8.1 Receiving calls ................................................................. 14 8.2 During conversation ...................................................... 15 8.2.1 Volume regulation................................................. 15 8.2.2 Microphone mute .................................................. 15 8.2.3 Transferring the call to another handset............ 15 9. Menu structure ...................................................................... 16 9.1 Using the alphanumeric keyboard............................... 17 9.2 The key functions............................................................ 18 9.3 Handset set-up ................................................................ 19 9.4 Handset functions........................................................... 21 9.5 Menu subscription and login ........................................ 22 9.5.1 Create subscription ............................................... 23 9.5.2 Login........................................................................ 24 9.5.3 Auto login............................................................... 25 9.5.4 Remove subscription............................................. 28 9.5.5 Change startup text............................................... 28 9.6 Battery............................................................................... 29 9.7 Redial ............................................................................... 30 9.8 Book................................................................................... 32 9.9 External services.............................................................. 34 9.10 MSF Functions............................................................... 35 9.11 Mail/Textmessages....................................................... 36 9.12 Menu language.............................................................. 40 10. Shortcuts................................................................................. 41 11. Speed dial............................................................................... 42 12. Date and Time Function....................................................... 43 13. Advanced settings................................................................. 44 14. Information ............................................................................ 47 14.1 Error tree ........................................................................ 47 14.2 Error information.......................................................... 48 14.3 Warranty......................................................................... 48 14.4 Technical information................................................... 49 15. EC Declaration of Conformity ............................................ 50 1412 1600-ed5_1412 1600-ed5 16-12-2010 10:29 Side 3
- 4. 1. Warnings The KIRK 4080 is developed for use in potentially explosive working environments, as defined by local fire protection authorities. The handset complies with the ATEX directive 94/9/EC as well as IEC standards, please refer to Declaration of Conformity at the end of this user guide for more details. For safe use of KIRK 4080, please remind the following: • Please consult your system manager for instruction before using KIRK 4080 • Do not open KIRK 4080 in a potentially explosive atmosphere • Battery may only be charged outside the hazardous area and the handset may only be charged with dedicated char- ger, part number 8464 2458. • The AC power adaptor used in connection with the charger must not be connected to a higher voltage than 250V AC. • Only battery part-number 8474 3416 may be used. • When an additional headset is needed, only part-number 0231 9517 is allowed. • When the handset is used in hazardous area, the handset must be used with leather pouch part-number 0231 9543 if relative umidity <60%, or when the user wears clothes that could cause electrostatic charging. 4 1412 1600-ed5_1412 1600-ed5 16-12-2010 10:29 Side 4
- 5. • If defects occur, remove KIRK 4080 immediately from the potentially explosive atmosphere • Only Polycom may repair and service KIRK 4080 • Relevant data concerning repairs must be logged • For traceability it is advisable to keep a record of type- and serial numbers of the handsets, as well as the name of users of the handset 2. Label information SN: 00077 0612630 4 Serial number 00W36 Production date (year 2000, week 36) HW PCS: 4 Hardware version SW PIE: 1 Software version 5 1412 1600-ed5_1412 1600-ed5 16-12-2010 10:29 Side 5
- 6. 6 Key for internal calls (not used on KIRK system 1500) Loud speaking Keyboard LOCK (Menu*) MENU key Display with backlight Recall key (MAIL key) SILENT (Menu#) ON/OFF HOOK key- also used as turn on key CONFIRMATION key - MUTE microphone. MUTE ringer when ringing. Long key press turns off. Right arrow key, save number. Telephone book menu from standby text Left arrow key, Redial menu from standby text Volume up/down LED Alarm key Headset Connector 3. Construction 1412 1600-ed5_1412 1600-ed5 16-12-2010 10:29 Side 6
- 7. 4. Battery information The battery is connected to the handset from factory and must not be removed. To replace the battery, please contact your local distributor. 7 1412 1600-ed5_1412 1600-ed5 16-12-2010 10:29 Side 7
- 8. 5. Charging Do not charge KIRK 4080 in a potentially explosive atmosphere. Use only the dedicated charger 8464 2458 (orange) for char- ging KIRK 4080. It takes approximately 3 1/2 hours to charge the handset from fully discharged to its full capacity. Place the handset in the charger. When the handset is turned on, the display shows the charging status in line 3. For correct charging the room tempera- ture has to be between 0°C and 25°C and the handset must therefore not be placed in direct sunshine. The battery has a built-in heat sensor which will stop charging if the battery temperature is too high. It is necessary to recharge the battery when the display shows “BATTERY LOW”, or if it can not be turned on. The LED flashes at a low frequency while charging and lights constantly when the charging is finished. The display goes back to normal mode when fully charged. When the handset is placed in the charger it will not vibrate, and B-answer is inactive. If the battery is fully discharged, up to 10 min. may pass before charging begins and the handset can be turned on. When charging begins the charging status is shown in the 3rd line of the display and the LED flashes slowly. 8 Polycom zzzzzzzzz. . . . 1412 1600-ed5_1412 1600-ed5 16-12-2010 10:29 Side 8
- 9. 9 6. Key Functions The handset has 21 keys: Two keys are placed at the right side for volume control. Press upper or lower key to change the volume. Each key-press turns volume one step up/down. “MENU” - Go to menu structure or exits the menu structure. (Escape or »NO«) ” < ”, “REDIAL” - Menu: left, Cursor left, after a digit: delete last digit. Long press: delete all From standby text: Redial menu ” > ”, “BOOK” - Menu: right, Cursor right, After a digit: Store number in telephone book From standby text: Telephone book read “3”, “MUTE” - Confirmation (»YES«) or jump to next level in the menu. In off hook: Mute microphone In on hook: Mute ringer. Long key press turns the handset OFF 1412 1600-ed5_1412 1600-ed5 16-12-2010 10:29 Side 9
- 10. 10 “INT” - If residential systems: Internal calls off hook (not used on KIRK systems 1500 and 500) Turns loudspeaking on and off “R” - If off hook: Recall. If on hook: Read or write message “ ” - On hook/off hook and turn ON ” ✱ ” - ✱ (Change from pulse to DTMF on KIRK CCFP), Long = pause (-), extra long: change from pul- se to DTMF (a ”T” appears in the display, GAP standard) “0-9” - Digits or letters in alphanumeric mode (names and messages) “ ✱ “ - ✱, Choose uppercase or lowercase letters in alphanumeric mode 1412 1600-ed5_1412 1600-ed5 16-12-2010 10:29 Side 10
- 11. 11 7. Turning the handset ON/OFF ON: Press -key for 1/2 second. When the handset is turned on the symbol is shown in the lower left corner of the display, if the handset is subscribed to a system. (For subscription, see 9.5.1) OFF: Press the “3” (MUTE) key for 3 seconds Please note: When the handset has been outside the coverage area, it can take up to 30 seconds before the handset is back on the system after re-entering the coverage area. 1412 1600-ed5_1412 1600-ed5 16-12-2010 10:29 Side 11
- 12. 12 8. Making a call For making or receiving calls the handset has to be subscribed to a system ( shown in display) (see chap. 9.5.1) Press the -key, the -icon in the display will flash until connection is established Dial the number Pre-dial: Press the number to dial (long press on »✱« will make a pause, if necessary) Press the -key, the -icon will flash until the connection is established Telephone book: Press the > -key (book-key) to enter the telephone book Search for the number either by using the < -key or the > -key or by pressing the first letter in the name by using the digits 1 – 9 (see chap. 9.2) Press the -key, the -icon will flash until the connection is established 1412 1600-ed5_1412 1600-ed5 16-12-2010 10:29 Side 12
- 13. 13 Redial: Redial / CLIP (CLIP = Calling Line Identification Presentation) stack: Press the < -key (redial-key) to enter the redial/CLIP stack Search for the number by using the < -key or the > -key, redial numbers are marked with REDIAL or name and clip numbers are marked either with CLIP or the name of the person who called and the LED is on Press the -key, the -icon will flash until the connection is established Using the handset in residential systems: (not in KIRK systems 1500 and 500) Internal call post-dial: Press the INT-key, the -icon in the display will flash Dial the number of another handset on the base station, the -icon will flash until the connection is established Internal call pre-dial: (not in KIRK systems 1500 and 500) Press the number of another handset on the base station Press the INT-key, the -icon will flash until the connection is established 1412 1600-ed5_1412 1600-ed5 16-12-2010 10:29 Side 13
- 14. Please note: If the Date and Time function is supported, then date and time of the incoming or outgoing call is shown in the CLIP/Redial stack on the 4th line of the display. See Chap. 12 for more information. Speed dial: See Chap. 10 and Chap. 11 for more information about speed dialing. 8.1. Receiving calls If the phone rings, the call can be answered by pressing the -key. When ringing the LED flashes fast, and the display shows the CLIP (if presented). If it is an external call (or if no CLIP) the display shows “INCOMING CALL”. It is possible to stop the ring signal without answering the call. Press MUTE (3) and the ring signal is muted. Display shows: »RINGER MUTED«. 14 1412 1600-ed5_1412 1600-ed5 16-12-2010 10:29 Side 14
- 15. 8.2 During conversation 8.2.1 Volume regulation: Use the two keys placed at the right side of the handset for volume control 8.2.2 Microphone mute: Press the 3-key (mute-key), MIC. MUTED is showed in the display Press the 3-key (mute-key) to enable the microphone again 8.2.3 Transferring the call to another handset: Press R, and dial new number Press the -key and the call is transferred to the other handset 15 1412 1600-ed5_1412 1600-ed5 16-12-2010 10:29 Side 15
- 16. 16 9. Menu structure Pressing the MENU-key, enters or exits the menu structure. It has to be used if a “NO” or “CLEAR” is wanted in the menu structure. Pressing the 3-key, jumps to a lower level in the menu. When the lowest menu level is reached, it will store the set- ting and jump to a higher level. It has to be used if a “YES” is wanted. The phonebook and redial menu can be accessed directly. The phone book by pressing the > -key (book-key) and the redial menu by pressing the < -key (redial-key). MENU LOGIN MENU MSF FUNCTION PROFILE SET-UP MENU EXT. SERVICE MENU BATTERY MENU PHONE BOOK MENU REDIAL MENU MAIL Polycom MENU 1412 1600-ed5_1412 1600-ed5 16-12-2010 10:29 Side 16
- 17. 17 9.1 Using the alphanumeric keyboard The normal dialling keys (0-9) are used for writing the name to be placed in the telephone book. By pressing the keys a certain number of times the related letters or digits will appear in the display. Spaces are made by using the 0-key. Key ✱ changes between uppercase and lowercase letters. The arrows will move the cursor. Left arrow is also used for deleting (hold for 1 sec.) = delete. New letters can be inserted. Change of key press and pauses lasting more than 1 second automatically moves the cursor to next position. Please note: 4th line of the display shows the possible alphanumeric keys. 1412 1600-ed5_1412 1600-ed5 16-12-2010 10:29 Side 17
- 18. 18 9.2 The key functions Key Capital letter Small letter 1 ? ! 1 - + * / = & ( ) % ¿ ¡ ? ! 1 - + * / = & ( ) % ¿ ¡ 2 A B C 2 Ä Å À Á Ã Æ Ç a b c 2 ä å à á ã æ ç 3 D E F 3 È É Ê Ë d e f 3 è é ê ë 4 G H I 4 Ì Í Î Ï g h i 4 ì í î ï 5 J K L 5 j k l 5 6 M N O 6 Ñ Ö Ò Ó Ô Õ Ø m n o 6 ñ ö ò ó ô õ ø 7 P Q R S 7 ß p q r s 7 ß 8 T U V 8 Ü Ù Ú Û t u v 8 ü ù ú û 9 W X Y Z 9 w x y z 9 0 [Space] , . 0 : ; _ “ ‘ ˆ ˜ [Space] , . 0 : ; _ “ ‘ ˆ ˜ ✱ A➞a A➞a # # @ E $ £ ¥ § < > { | } [ ] # @ E $ £ ¥ § < > { | } [ ] 1412 1600-ed5_1412 1600-ed5 16-12-2010 10:29 Side 18
- 19. 19 9.3 Handset set-up To set-up the handset press “MENU”. You are now able to switch between the different settings. Press “3” when you find the setting you wish to change (or see). Change the setting according to your needs, confirm with “3” and you automatically go to the next setting. Press “Menu” to finalize the setup. 1412 1600-ed5_1412 1600-ed5 16-12-2010 10:29 Side 19
- 20. 20 Profile set-up (fig) Polycom SET PROFILE ADVANCED SET PROFILE RINGER TONE SET PROFILE RINGER VOL SET PROFILE KEY CLICK SET PROFILE VIBRATOR SET PROFILE B-ANSWER SET PROFILE START VOLUME SET PROFILE OUT OF RANGE ADVANCED RINGER TONE 1,2......... RINGER VOL zzzzz KEY CLICK zzzzz- - - VIBRATOR ON/OFF B-ANSWER ON/OFF START VOLUME zzzzz OUT OF RANGE TONE ON/OFF PROFILE SET UP SET PROFILE AUTO KEYLOCK AUTO KEYLOCK ON/OFF SET PROFILE LANGUAGE LANGUAGE ENGLISH SET PROFILE BACKLIGHT BACKLIGHT ON/OFF 1412 1600-ed5_1412 1600-ed5 16-12-2010 10:29 Side 20
- 21. 21 9.4 Handset functions RINGERTONE: Scroll through the 9 different ringertones using < and >. Confirm with 3. RINGER VOL: Turn the volume up and down using < and >. Confirm with 3. KEY CLICK: Turn the volume up and down using < and >. Confirm with 3. VIBRATOR: Can be turned on/off using < and >. Confirm with 3 (vibrator only works on KIRK 4040). B-ANSWER: Can be turned on/off using < and >. Confirm with 3. When turned on, the telephone automatically goes off hook when ringing. If subscribed to a KIRK solution it automatically goes on hook when calls are termina- ted. B-answer is inactive when handset is placed in the charger. REMARK: Automatic on-hook is only reliable under defined conditions related to the interface settings between the KIRK Wireless Server and the PBX. START VOL: Start volume can be adjusted using < and >. Confirm with 3. OUT OF RANGE: The out of range indication can be turned on/off using < and >. Confirm with 3. With the out of range indicator turned on, a beep will appear when the telephone is moving out of range of the base station, and “OUT OF RANGE” will appear in the display. AUTO KEYLOCK: The auto keylock function can be turned on/off using < and >. Confirm with 3. With auto keylock turned on the handset will automatically lock the keys after 30 seconds. Press MENU ✱ to activate the keys again. LANGUAGE: see page 40 BACKLIGHT: Can be turned on/off using < and >. Confirm with 3. ADVANCED: see Chap. 13. 1412 1600-ed5_1412 1600-ed5 16-12-2010 10:29 Side 21
- 22. 22 9.5 Menu subscription and login Password is factory set ➞ 0000 LOGIN SYSTEM1* CREATE SEARCH ID: 123456789012 REMOVE SYSTEM 4 123456789015 REMOVE SYSTEM 1* 123456789012 REMOVE SYSTEM 2 123456789013 REMOVE SYSTEM 3 123456789014 MENU LOGIN MENU SELECT LOGIN SUBSCRIPTION CREATE SUBSCRIPTION REMOVE REMOVE? PASSWORD _ _ _ _ _ SUBSCRIPTION REMOVE REMOVE SYSTEM 1 SUBSCRIPTION REMOVE 1412 1600-ed5_1412 1600-ed5 16-12-2010 10:29 Side 22
- 23. 23 9.5.1 Create subscription To make subscriptions, the system must allow subscriptions to be made. Some systems also require an Access Code (AC). If more than one system currently permits subscription, you will need to know the ID of the system to which you wish to subscribe. Access Codes and system ID’s will be provided by the system administrator. Choose the SUBSCRIPTION CREATE menu to subscribe to a new system. (see 9.5.3/9.5.4) Use the < and > keys to scroll between the ID’s of the different systems available During subscription the handset will search for free positions and perform subscription on the first free position An alternative position can be choosen using < or >. Give in the AC (if required) using the keyboard, and press (3) If the subscription was successful, the startup text will be replaced by the standby text given into the system by the system administrator and is shown in the display. If not, the subscription has failed and the procedure must be retried. If the handset is already subscribed to 10 systems, you will have to remove a subscription before creating a new subscription (see 9.5.4). 1412 1600-ed5_1412 1600-ed5 16-12-2010 10:29 Side 23
- 24. 24 9.5.2 Login The handset can be subscribed to 10 different systems enabling you to use the same handset on 10 different sys- tems. If you would like to change to another system, use the login menu to connect to another system number. The actual chosen system is marked with a ✱ or an A (if Autologin is selected). To change to another system use < or > and press 3 to confirm To be able to log on to a system, subscription to the system has to be established (See 9.5.1). Under LOGIN/SELECT LOGIN only subscriptions will be shown. Free positions will not be shown. 1412 1600-ed5_1412 1600-ed5 16-12-2010 10:29 Side 24
- 25. 25 9.5.3 Auto login The handset can be subscribed to 10 different systems. If Auto login is chosen from the menu, the handset automa- tically selects a system. The selected system is marked with an “A”. MENU SELECT LOGIN SUBSCRIPTION CREATE SUBSCRIPTION REMOVE SELECT LOGIN SYSTEM 1 123456789015 SELECT LOGIN SYSTEM 2A 123456789012 SELECT LOGIN SYSTEM 3 123456789013 SELECT LOGIN SYSTEM 4 123456789014 SELECT LOGIN AUTO 1412 1600-ed5_1412 1600-ed5 16-12-2010 10:29 Side 25
- 26. Please note: Auto login A should only be used in separate systems without overlaps. If a handset looses signal from the system (the display showing “OUT OF RANGE”), then after 20 seconds the handset will start searching for an alternative system available from the Login list and automatically change to this system. Changing between systems can only take place while on hook. Any call will be dropped when changing to an alternative system. 26 1412 1600-ed5_1412 1600-ed5 16-12-2010 10:29 Side 26
- 27. If a handset is subscribed to two systems only, you can use Auto login B to change between the two systems auto- matically. The selected system is marked with a “B”. Please note: Auto login B can be used in separate systems which are overlapping each other. As soon as the hand- set has measured a low radio signal 5 times in succession, it will start up the Auto login B procedure and change to an alternative system if available. Changing between two systems can only take place while on hook. Any call will be dropped when changing to an alternative system. 27 1412 1600-ed5_1412 1600-ed5 16-12-2010 10:29 Side 27
- 28. 9.5.4 Remove subscription Subscriptions can be removed from the system in use and from the 9 other systems (if connected). Removing a sub- scription requires a password. Password is factory set at 0000. If the system in use is removed, it is necessary either to select one of the remaining systems or to subscribe to a new one. If one of the systems not chosen is removed, the handset remains connected to the system in use. 9.5.5 Change startup text The startup text is predefined as e.g. ”Polycom” as factory default. This can be changed by using the following pro- cedure: Press ✱✱✱✱, BOOK, (3) and give in the new startup text by the keyboard followed by (3). It is possible to insert 24 characters. 28 1412 1600-ed5_1412 1600-ed5 16-12-2010 10:29 Side 28
- 29. 29 9.6 Battery capacity In the battery menu it is possible to see the remaining battery capacity. For reading the correct capacity, the hand- set has to be removed from the charger for at least one hour. Press “Menu” and use the < or > keys to reach the Battery Menu. Press “3” to enter the menu, and you can see the current status of the battery capacity. Press “3” to return to the menu system or press “Menu” to quit. The indication on the display is not necessarily an exact reflection on the remaining speech time, but only an indi- cation of the voltage on the battery. Polycom MENU BATTERY BATTERY CAPACITY zzzzz 1412 1600-ed5_1412 1600-ed5 16-12-2010 10:29 Side 29
- 30. 30 9.7 Redial The handset has maximum 10 redial numbers and 10 Caller ID’s placed in the same stack. Each number is only represented once. Enter the redial menu by pressing ”< ”(Redial) from the standby text. Repeated presses at the “<” button turn backward through the dialled numbers and CLIP numbers (from newest to the oldest). Right arrow moves in the opposite direction. It is also possible to reach the redial menu in the main menu. Numbers are named “REDIAL”, ”CLIP” or with the name. The LED will flash slowly if a new number (Missed call) has arrived in the CLIP stack. If no number (no clip) is represented by a call only the LED will flash slow afterwards. If you want to delete a ”CLIP” or a ”REDIAL” you scroll to the name/number and press »3« twice. The name/number is now deleted. If number is stored, it is moved to the telephone book. You can also delete all name/numbers using the “delete all?” function. It is possible to edit the CLIP or redial numbers. Find the number you wish to edit and press the digits you want to add to the number, e.g. prefix = O. 1412 1600-ed5_1412 1600-ed5 16-12-2010 10:29 Side 30
- 31. 31 The Redial and CLIP stack Menu (fig) Polycom REDIAL 75602850 CLIP 898 DELETE? 899 STORE NO.? 899 DELETE ALL? NAME: James Smith 899 < 1412 1600-ed5_1412 1600-ed5 16-12-2010 10:29 Side 31
- 32. 32 9.8 Book Storing a number (max. 24 digits) in the telephone book is done by pressing the number to be stored (in on hook), then press the “>”- key followed by the “3” key. The book can store up to 200 numbers with name. Typing of the name and a confirmation is required. After storing the telephone will go back to standby mode. If the display shows “MEMORY FULL”, it is necessary to delete one or more numbers from the telephone book. (See menu structure page 31) NAME: POLYCOM STORE NO.? 75602850 75602850 Polycom > 75602850 BOOK 1412 1600-ed5_1412 1600-ed5 16-12-2010 10:29 Side 32
- 33. 33 Read BOOK numbers: The telephone book is entered by pressing ”>”(book). For quick-search: press the first letter of the name (using 1-9)(see chap. 9.2). Call the displayed person by pressing the key. It is also possible to reach the telephone book menu in the main menu. Viewing and editing the telephone book can also be done while in conversation. Polycom bILL JENSEN 899 CARL NIELSEN 7561XXXX PHILIP HANSEN 8614XXXX CLAUS PEDERSEN 134 DELETE? 7561XXXX EDIT NO.? 7561XXXX EDIT NAME? CARL NIELSEN > BOOK 1412 1600-ed5_1412 1600-ed5 16-12-2010 10:29 Side 33
- 34. 34 9.9 External services External services are facilities placed in the main system, and only available if the handset is subscribed to a KIRK system. Under External services can be found; Clip stack, Delete clip stack and local Phone book. The Local Phone book is a common Phone book for all handsets subscribed to the actual system, and all handsets subscribed to the system are listed in the Phone book. Additional numbers can be added to the Phone book by the system admini- strator. 1412 1600-ed5_1412 1600-ed5 16-12-2010 10:29 Side 34
- 35. 35 9.10 MSF Functions MSF Functions are special functions, which are based on MSF (Message Service Function). The functions require special software in the main system. 1412 1600-ed5_1412 1600-ed5 16-12-2010 10:29 Side 35
- 36. 36 9.11 Mail/Text Messages Available in systems configured with the possibility of sending text messages At the reception of a text message the envelope icon appears in the display. The envelope icon is indicating one or more unread messages. The text message is shown in the display, and when the message is read the envelope icon will disappear. If the message contains a call-back number, this will be displayed on the bottom line of the display. As long as the call-back number is in the display, it is possible to activate the number by pressing the -key. 1st letter in the display, in front of the timestamp, shows the message status: read (R), unread (N) or locked (L). Mails include a maximum of 72 letters or digits (2 display screens of 36 each). Call-back no. is max. 24 digits (or let- ters for E-mail). 14 messages can be ”stored” in the handset. When receiving a new message, the oldest unlocked will be deleted. Locked messages will not automatically be overwritten, but can manually be deleted. Maximum 7 messages can be locked. 1412 1600-ed5_1412 1600-ed5 16-12-2010 10:29 Side 36
- 37. 37 Read a mail Press the ”R”- (MAIL) key followed by the 3-key or enter the mail menu (in on hook condition) If the message includes more than 36 letters or digits, the message will run over 2 display screens Use the > -key to scroll. To see the sender of the mail, press the 3-key. To leave the mail, press the MENU-key Reply a mail Open the mail by pressing the R-key followed by the 3-key, press the 3-key again and use the < >-keys to find the reply feature, press the 3-key and you are then able to reply the mail. After writing your reply press the 3-key to confirm Forward a mail Open the mail by pressing the R-key followed by the 3-key, press the 3-key again and use the < >-keys to find the for- ward feature, press the 3-key twice and you are then able to write the number on the receiver. Confirm with the 3-key Delete all mail Open the mail stack by pressing the R-key followed by the 3-key, press the 3-key again and use the < >-keys to find the delete feature, press the 3-key and all mails are deleted 1412 1600-ed5_1412 1600-ed5 16-12-2010 10:29 Side 37
- 38. 38 Delete a mail Open the mail by pressing the R-key followed by the 3-key, press the 3-key again and use the < >-keys to find the delete feature, press the 3-key and the mail is deleted Lock/unlock a mail Open the mail by pressing the R-key followed by the 3-key, press the 3-key again and use the < >-keys to find the lock/unlock feature, press the 3-key and the mail is locked/unlocked Write a mail To write a new mail press the R (mail)-key, confirm with the 3-key and write your message. To send the mail press the 3-key, type the number of the receiver and confirm with the 3-key If one or more mails are stored do as followed: Press the R (mail)-key followed by the >-key confirm with the 3-key and write your message. Press the 3-key, type the number of the receiver and confirm with the 3-key. The message is sent. Note In case a sent message is not received, the sender will get a message in the display. 1412 1600-ed5_1412 1600-ed5 16-12-2010 10:29 Side 38
- 39. 39 N25-01 04.38 308 Temp 45° .. L26-01 14.32 319 Hello, its me.. N28-01 15.46 236 FIRE ALARM.. WRITE NEW MAIL? √19-01 09.56 htj@kirktelec I am working.. √20-01 10.13 319 Call me.. N 206 Meet me at 9 .. Hello it’s me. Yo can meet me at 15 o’clock if you want to. DELETE MAIL? SENDER: 319 (UN)LOCK MAIL? REPLY MAIL? FORWARD MAIL? - - - - PHONENO: 236 E-MAIL: htj@kirktelecom.dk Polycom MAILMenu structure 1412 1600-ed5_1412 1600-ed5 16-12-2010 10:29 Side 39
- 40. 40 9.12 Menu language There are 10 predefined languages in the handset: English, German, French, Italian, Spanish, Dutch, Portuguese, Swedish, Danish and Norwegian. Select the required language by pressing the 3-key. If an 11th language is present this will be shown. This language is a specific dealer language and is factory programmed. 1412 1600-ed5_1412 1600-ed5 16-12-2010 10:29 Side 40
- 41. 41 10. Shortcuts ”KEY LOCKED”: Press: MENU ✱. (Display shows ) ”SILENT”: Press: MENU #. (No sounds) (Display shows ) “PHONE BOOK”: Press >(BOOK) key in standby Name search in telephone book: Press the first letter in name and > (book) afterwards Store a number: Press >(BOOK) after the number (in on hook) “REDIAL ”and “CLIP”: Press <(REDIAL) key in standby “MAIL”: Press R(MAIL) key in on hook MUTE temporarily the ringer: Press “3”(MUTE) when the telephone is ringing MUTE the microphone: Press “3”(MUTE) when the telephone is off hook RECALL: Press the INT key if residential system, else press the “R”-key Pause(-): Hold * for one second Change from pulse to DTMF(T): Hold ✱ for 2 seconds 1412 1600-ed5_1412 1600-ed5 16-12-2010 10:29 Side 41
- 42. 11. Speed dial Please note: To use the speed dial function it is necessary to set “LONG KEY” to “SPEED DIAL”. The speed dial list has maximum 11 speed dial numbers. Calling a number from the speed dial list is done by pres- sing the 0,1,2...9 key with a long key press or by pressing the alarm button key. If no number is assigned to the key it is possible to enter a new number. The number is added to the speed dial list automatically. To store a number (max. 23 digits) in the speed dial list press MENU and use the < or > keys to reach the Speed dial Menu. Press 3 to enter the menu. Use the < or > keys to scroll between the list numbers, enter the number and then confirm with 3. After storing, the telephone will go back to standby mode. To delete or change a number in the speed dial list press MENU and use the < or > keys to reach the Speed dial Menu. Press 3 to enter the menu. Use the < or > keys to scroll between the list numbers, press 3 to select the num- ber in question and then use the < key to delete the existing number. Confirm with 3 or enter a new number and then confirm with 3. 42 1412 1600-ed5_1412 1600-ed5 16-12-2010 10:29 Side 42
- 43. 12. Date and Time Function The Date and Time function requires the use of a KIRK Wireless Server and special software in the main system. If the Date and Time function is supported, a clock is shown in the 1st line of the display. The clock shows the time with an accuracy of +/- 1 minute. If the Date and Time function is supported, then date and time of the incoming or outgoing call is also shown in the CLIP/Redial stack on the 4th line of the display. An icon + date and time shows the status of the call. If the call is missed, the date and time is displayed: 29/03 20:28 If the incoming call is received, the date and time is displayed: 29/03 20:28 If the outgoing call is made, the date and time is displayed: 29/03 20:28 Date and time is only displayed if CLIP feature is supported by the PBX. 43 1412 1600-ed5_1412 1600-ed5 16-12-2010 10:29 Side 43
- 44. 13. Advanced settings AUTO HOOK: Can be turned on/off using < and >. Confirm with 3. When turned on, the handset automatically goes off hook when removed from the charger and a call is present. When placing the handset in the charger, the hand- set automatically goes on hook. ANY KEY ANSW: Can be turned on/off using < and >. Confirm with 3. When turned on, all keys work as a Hook key when receiving an incoming call. LONG KEY: Can be set to “SEND MSF” or “SPEED DIAL” using < and >. Confirm with 3. When choosing “SEND MSF” an MSF is sent to the KIRK Wireless Server when pressing 0,1,2...9 with a long key press or when pressing the alarm key with a long key press. When choosing “SPEED DIAL” a call is made to the assigned number when pressing 0,1,2...9 with a long key press or when pressing the alarm key with a long key press. If no number is assi- gned the alarm key it is possible to enter a new number. This number is automacally added to the speed dial list. For more information, see Chap 7.12. LONG KEY TIM: Used to define the time for how long a key (0,1,2...9) should be pressed before it is detected as a long key press. 44 1412 1600-ed5_1412 1600-ed5 16-12-2010 10:29 Side 44
- 45. A. KEY DELAY: Used to define the time for how long the alarm key should be pressed before the alarm key function is executed. LS ON B-ANSWER: Can be turned on/off using < and >. Confirm with 3. When turned on and “B-ANSWER ON” (hands-free) is selected, the handset turns on the loudspeaker automatically (see Chap. 7.4). STANDBY TEXT: Can be turned on/off using < and >. Confirm with 3. When turned off the display shows a local standby text. HEADS. ALERT: The ringer volume in headset can be set to either “OFF” or 1, 2, 3, 4, 5 (indicated by a bar) using < and >. Confirm with 3. HEADSET VOL: The volume in headset can be set to either 1, 2, 3, 4 or 5 (indicated by a bar) using < and >. Confirm with 3. OFF HOOK MSF: Can be set to either “NORMAL”, “KEY CLICK” or “KEY BEEP” using < and >. Confirm with 3. The “OFF HOOK MSF” setting only applies to the behaviour of the handset when an MSF is received and the handset is off hook. When set to “NORMAL” the alert type used is the one defined in the MSF. When set to “KEY CLICK” a key click is produced when receiving an MSF. When set to “KEY BEEP” a key beep is produced when receiving an MSF. 45 1412 1600-ed5_1412 1600-ed5 16-12-2010 10:29 Side 45
- 46. 46 Advanced settings (fig) ADVANCED AUTO HOOK ADVANCED ANY KEY ANSW ADVANCED LONG KEY ADVANCED LONG KEY TIM ADVANCED A. KEY DELAY ADVANCED LS ON B-ANSW ADVANCED STANDBY TEXT ADVANCED HEADS. ALERT AUTO HOOK ON/OFF ANY KEY ANSW ON/OFF LONG KEY SEND MSF/ SPEED DIAL LONG KEY TIM 1,2...9 A. KEY DELAY 0,1,2...9 LS ON B-ANSW ON/OFF STANDBY TEXT ON/OFF HEADS. ALERT ON/OFF SET PROFILE ADVANCED ADVANCED HEADSET VOL HEADSET VOL zzzzz ADVANCED OFF HOOK MSF OFF HOOK MSF NORMAL/KEY CLICK/KEY BEEP PROFILE SET UP 1412 1600-ed5_1412 1600-ed5 16-12-2010 10:29 Side 46
- 47. 47 14. Information 14.1 Error tree Problem Check The telephone freezes Remove and replace the battery pack. Press to turn on the telephone The telephone does not ring Check whether the ringer is SILENT or RINGER VOL. is OFF The telephone cannot find a system ID at Check whether the system is set to allow subscriptions “SUBSCRIPTION CREATE” The telephone cannot subscribe even if Check if Access Code is necessary system ID has been found Not possible to turn on the telephone Check if battery is connected. If yes, charge the battery The telephone turn off when recieving a call Charge the battery. If still a problem change the battery as it might and going off-hook be defective 1412 1600-ed5_1412 1600-ed5 16-12-2010 10:29 Side 47
- 48. 48 14.2 Error information Improper function of the handset might be related to the installation of the DECT system or failures related to the main system. Before declaring a handset for repair be sure that the main system is operating properly. 14.3 Warranty The handset is covered by a normal warranty-solution, except the battery. The lifetime of the battery depends on the general use of the handset. The handset is not covered by a general warranty if: • The handset is exposed to water or metal dust • The handset is mistreated • The handset is exposed to unauthorised break-in 1412 1600-ed5_1412 1600-ed5 16-12-2010 10:29 Side 48
- 49. 49 14.4. Technical information Approvals Acoustics: TBR 10 Access profile: TBR 22 (GAP) Size and weight Size: 148 x 50 x 28 mm Weight: 130 g including battery ± 10 g Capacity Active talking time 16 hours Stand-by time 150 hours Temperature and air pressure Operating temperature: 0-40°C Air pressure: Normal atmosphere condition Charger (orange) The AC power adapter used in connection with the handset charger 8464 2458 must not be connected to a voltage higher than 250V AC. 1412 1600-ed5_1412 1600-ed5 16-12-2010 10:29 Side 49
- 50. 50 15. EC Declaration of Conformity Manufacturer: This KIRK product has been marked with the CE mark. This mark indicates compliance with EEC Directives 94/9 EC and 1999/5/EC. A full copy of the Declaration of Conformity can be obtained from Polycom Ltd, 270 Bath Road, Slough, Berkshire, SL1 4DX, UK. The WEEE Marking on this equipment indicates that the product must not be disposed of with unsorted waste, but must be collected separately. Polycom Denmark Langmarksvej 34 8700 Horsens Denmark 1412 1600-ed5_1412 1600-ed5 16-12-2010 10:29 Side 50
- 51. 51 Product Type KIRK 4080 0238 02XX Type number XX may vary (numbers and letters) depending on software and design. Telecom requirements The transceivers described above comply with the essential requirements of the R&TTE directive 99/5/EC if used for the intended purpose. 1412 1600-ed5_1412 1600-ed5 16-12-2010 10:29 Side 51
- 52. 52 Applied standards Standard Date TBR 22 Generic Access Profile (GAP) 1997 TBR 10 General Terminal Attachment requirements 1999 Application, Intended purpose The KIRK 4080 is a DECT based handset, designed to be used in connection with KIRK wireless communication solutions in potentially explosive environments. The DECT transmitter frequencies of the apparatus are harmoni- zed for these services in the European Community. 1412 1600-ed5_1412 1600-ed5 16-12-2010 10:29 Side 52
- 53. 53 Meaning of Conformity For the application of the equipment in areas which have a potentially explosive atmosphere, the manufacturer declares on his own responsibility that under the claimed type of protection the equipment is in conformance with the relevantEuropean harmonized standards. The equipment may only be used under conditions that are mentio- ned in the ATEX and IEC Type Examination Certificate. Electrical apparatus for potentially explosive atmospheres The KIRK 4080 is in conformance with the requirements of the ATEX Directive 94/9/EC. 1412 1600-ed5_1412 1600-ed5 16-12-2010 10:29 Side 53
- 54. Quality Assurance The product is designed and produced by a manufacturing organisation, which is certified on ISO 9001: 2008 and ISO 14001: 1996 standards. These products are in conformance with the full quality assurance procedures as men- tioned in annex III, IV and VII of the ATEX directive 94/9/EC and annex V of the R&TTE directive 99/5/EC and bears the marking 0539. The number 0539 is the identification number of UL International, Demko A/S. Compliance with the requirements of ISO 9001: 2008 and ATEX directive are assessed and certified by the following Noti- fied Bodies: ATEX directive: UL International ISO 9001: Bureau Veritas Demko A/S Oldenborggade 1b Lyskaer 8 DK-7000 Fredericia P. O. Box 514 DK-2730 Herlev 54 1412 1600-ed5_1412 1600-ed5 16-12-2010 10:29 Side 54
- 55. Special conditions for safe use of the KIRK 4080 The KIRK 4080 is developed for use in potentially explosive working environments, as defined by local fire protection authorities. The handset complies with the ATEX directive 94/9/EC as well as IEC standards. For safe use of KIRK 4080, please remind the following: • Please consult your system manager for instruction before using KIRK 4080 • Do not open KIRK 4080 in a potentially explosive atmosphere • Battery may only be charged outside the hazardous area and the handset may only be charged with dedicated charger, part num ber 8464 2458 • The AC power adaptor used in connection with the charger must not be connected to a higher voltage than 250V AC. • Only battery part-number 8474 3416 may be used. • When an additional headset is needed, only part-number 0231 9517 is allowed. • When the handset is used in hazardous area, the handset must be used with leather pouch part-number 0231 9543 if relative humidity < 60%, or when the user wears clothes that could cause electrostatic charging. Polycom recommends always using the leather pouch. • If defects occur, remove KIRK 4080 immediately from the potentially explosive atmosphere • Only Polycom (Denmark) may repair and service KIRK 4080 • Relevant data concerning repairs must be logged • For traceability it is advisable to keep a record of type- and serial numbers of the handsets, as well as the name of users of the handset 55 1412 1600-ed5_1412 1600-ed5 16-12-2010 10:29 Side 55
- 56. Name and address of manufacturer KIRK Z-4080 Product name IP64 IP 64 classification Ex KIRK 4080 is approved according to International standards ib Intrinsic safe, ib category IIC Equipment group II, ib gas group C T3 Temperature group T3 (relevant for gas) IECEx ULD 04.0001 International country code for notified body/year/certification number X Special warnings concerning the use of KIRK 4080 exist, please refer to the certificate: IECEx ULD 04.0001X 56 1412 1600-ed5_1412 1600-ed5 16-12-2010 10:29 Side 56
- 57. II 2G Equipment group II, zone 1 (gas) EEx KIRK 4080 is approved according to European standards ib Intrinsic safe, ib category IIC Equipment group II, gas group C T3 Temperature group T3 (relevant for gas) II 3D Equipment group II, zone 2 (dust) T60ºC Max. surface temperature of KIRK 4080 in use Ex logo Specific marking of explosion protection Demko 04 ATEX 136204 Name of notified body/year/certification number X Special warnings concerning the use of KIRK 4080 exist, please refer to the certificate: Demko 04 ATEX 136204X CE 0539 CE marking and identification number of Notified Body 57 1412 1600-ed5_1412 1600-ed5 16-12-2010 10:29 Side 57
- 58. If in doubt about installation, configuration or the correct functioning of the product please consult the manufacturer: Polycom Denmark Customer Support Langmarksvej 34 8700 Horsens Denmark Tel: +45 75602850 emeadksupport@polycom.com 58 1412 1600-ed5_1412 1600-ed5 16-12-2010 10:29 Side 58
- 59. 1412 1600-ed5_1412 1600-ed5 16-12-2010 10:29 Side 59