SlideShare ist ein Scribd-Unternehmen logo
1 von 19
Downloaden Sie, um offline zu lesen
Viking Knit
                                                                                  Judy Larson


                                                                Stories abound concerning the origins of
                                                                Viking Knit. Woven silver wire chains were
                                                                used to decorate clothing of the Vikings and
                                                                bits of this type of silverwork have been
                                                                recovered from many different archeological
                                                                sites throughout Scandinavia, thus the name.
                                                           There is also a possibility that since silver is a
                                                           precious metal, the ornamentation could have
                                                           served a purpose as currency. Imagine “wearing
                                                           your bank account” on your clothing and snipping
                                                           off sections as you needed them!

                                                           The first part of this tutorial gives you basic Viking
                                                           Knit directions. The second part gives directions
                                                           for making coiled end caps in case you can not
                                                           them. The third part of this tutorial gives
                                                           directions for making a basic bracelet or necklace.
                                                           Read through all three sections before you start.
                                                           You will then have a better understanding of what
                                                           you are doing and why you are doing it.


Materials:                                                 others. For that reason, 24 gauge round wire is
22 gauge dead soft round wire                              good to start with.
24 gauge dead soft round wire       Note: As you
become more accomplished, you will want to use a           Tools:
finer gauge wire. Each wire has different weaving          11-12” long 3/8” dowel
nuances which you will understand as you use them.         Flush cutter
Some are harder to work in this technique than             T-pin     Rubber band Drawplate

Directions:     Prepare the dowel:

Step 1: Most dowels come in 3-4 foot lengths. Cut a 11-12:” piece of 3/8” dowel and sand the ends so they
are slightly rounded. Center the dowel end on the circle divided into 5 sections. You can do a 6 sectioned
knit for your next project, but to begin with, a 5 section mandrel is appropriate. Mark the sections in pencil.
Step 2: Hold the dowel stable on a flat surface. Hold a pencil stable on the surface with the pencil lead on one
of the lines. Slide the pencil across the flat surface making a line parallel to the surface the dowel is resting
on. Repeat with the other marks. Hint: If you make a mistake, using pencil allows you to erase it and start over.
Prepare the dowel: This step is not necessary but the lines do help beginners to keep the knit ribs straight.


Step 3: A credit card or drivers license can be used for this step. Hint: The next time you get one of those fake
plastic credit cards in the mail, keep it with your wire supplies to use when making Viking Knit. The flower you
will be making in the next steps can be reused several times before you feel you need to make a new one. The
size wire you use here can be the same size as the knit wire but one size larger seems to work best.

Working from the spool, wrap the 22 gauge round wire around the credit card five times. Carefully slide the
wire wraps off the card. Wrap the wire from the spool four times around all the wires about ½” in from one
end. Trim the excess wires even with the looped ends.


                                             Step 4:    Spread the long loops out to form a flower with five
                                             petals.


                                                       2
Step 5: Place the flower on top of the dowel and pull the petals down. Press the petals to the dowel. Secure
the flower petals in place tightly with a rubber band.


Step 6: Make sure that the lower loops of the flower petals are even all the way around the dowel. To do this,
you may need to use your chain nose pliers to bend the wires above the dowel. After the petals are even,
center each petal on a line.


                                                    Step 7: Use the tips of your flat nose pliers to slightly
                                                    bend up the lower 1/8” of each petal. This will make
                                                    weaving the first row easier. When this is done, push the
                                                    rubber band down closer to the lower ends of the flower.


                                                    Note: The rubber band will not keep the petals tightly in
                                                    place but it is a tremendous help. You could use tape, but
                                                    this will not keep the petals tightly in place either and it is
                                                    more difficult to remove than the rubber band. After you
                                                    have made a few Viking Knit items, you will find the first
                                                    row (in the next steps) much easier to do.


                                                      3
Step 8: Single Knit: When you first learn the Viking Knit technique, it is best to do the single knit. When you
have mastered this, you can go on to double, or even triple knit. Steps 15-16 shows how to do a Double Knit.
Also, when you first being, it is best to use shorter pieces of wire because they will kink less and are easier to
use. When you become more accomplished, you may find that you will use 7, 8, or even 9 foot sections. For
the purposes of this tutorial, you will be using three 3 foot sections of 24 gauge wire to make the Viking Knit
chain which you will then make into a bracelet. The single knit will draw down to approximately twice the
original length.

The Viking Knit “stitch” is almost like sewing. Thread the wire through a flower petal from the outside to the
inside, from the right to the left. Pull the wire through until there is about 1” of wire tail left. Pull the wire
down on both sides of the loop.


Step 9: Holding the short wire tail down to the dowel with your left hand, pull the long wire down and over
the top of the tail wire and to the right.


                                                        4
Step 10: Hold the crossed over loop stitch created in Step 9 down with your thumb. Move to the loop to the
right of that stitch and thread the wire through a flower petal from the outside to the inside, from the right to
the left. Pull the wire to the left and then down.


Wire Hints: When pulling the long wire through a loop, you may end up with tangle wires. Be aware of this
before it causes a problem. If the wires twist over each other, just twist them back (photo 1 and 2). If you did not
catch the crossed wires in time, you may end up with a tight kink in the wire (photo 3). It is imperative that you
“back the kink out” or unbend the wire (photo 4). Do not try to pull it straight or the kink will just get tighter.

When you have knit 1/3 of the way down the dowel, you will need to push the knit chain up a few inches to make
it easier to finish.


                                                         5
1.


2.


3.       4.


     6
Step 11: Hold the new stitch down with your thumb. Pull the wire to the right. Repeat Step 10 and the
beginning of this step until you reach the first stitch you did. Try to keep the tips of the petals on the lines.
This first row will not be very neat, but do not worry.


Step 12: For the next row, you will stitch behind the “X” formed at the lower end of each loop in the previous
row. If you can not slide the wire under the crossed wires, you may need to use the T-pin to lift them up.
Each stitch is done in the same manner as the first row- while holding the previous stitch down, stitch from
right to left, pull the wire down and then to the right. Do not worry about the beginning wire tail. Just move
it out of the way between the lines.


                                                       7
Step 13: Continue to stitch around the
                                                                 dowel. When you first start, your stitches
                                                                 will not be even. Do not worry. The
                                                                 drawplate takes care of all inconsistencies.
                                                                 You will find that by the time you are done
                                                                 with the second 3 foot length of wire, there
                                                                 will be a rhythm to your stitches.

                                                                 If you find that one of your knit ribs is
                                                                 moving away from the line, use the T-pin to
                                                                 bend it back into place.


Step 14: When you have 1½”-2” of wire left, it is time to attach a new wire. There are several ways to do this.
Each wire artisan has their favorite method. Two will be shown here.

Using another 3 foot section of wire, move on to the next crossed loop and make another stitch, pulling the
wire through until the wire tail is the same length as the wire you had left on the previous stitch. You will
notice that the new stitch is loose. Moving around the dowel, make another stitch or two to stabilize the wire.
At this point, you can twist the wire tails tightly together until the wire “swag” between the crossed wire
stitches is similar in size to the other “swags” you have been making between stitches. Trim the twisted wire
tail to 3/8” in length.


                                                                 Continue around the dowel. When you
                                                                 reach the connected wires, pull the wire
                                                                 over them and continue around the dowel,
                                                                 always going over the twisted wires.


                                                      8
For the other
                                            method, pull the
                                            wire tails down
                                            onto the line.
                                            Trim the tails to
                                            ¾”.         When
                                            making a stitch,
                                            slide the long
                                            wire under the
                                            tail, make the
stitch under the crossed wires, and then pull the wire over
the tail. Continue around the dowel in the manner, going
under and over the wire tail, encapsulating it, when you
make a stitch, until there is no more tail. You will be doing
this with both wire tails each time you add a new wire.

Step 15: Double Knit: If you would like to make a more dense, less airy chain, you can do a double instead
of a single knit. To do this, instead of going up to the previous row, go up two rows and stitch under the
crossed over wires. Constructing the stitch is the same, just two rows up.


                                                           Step 16: After completing one round, you still go
                                                           up two rows to make the next stitch. Continue in
                                                           this manner until you have reached the desired
                                                           length. A double knit does not draw down to
                                                           double length, but just a little over 1.5 times the
                                                           original length.


                                                      9
Step 17: Remove the knit from the dowel. You may have to grasp the knit on the dowel with your hand,
slightly twist it back and forth, and “worry” it up and off the dowel. Remove the rubber band. Use flat nosed
pliers to flatten the bent portions of the flower.


Step 18: Push the flower section through the largest hole the chain will fit through. Pull the petal section and
chain through the hole. Do this twice in each successive hole until the chain is the desired size. You will
notice that any imperfections in the chain are no longer noticeable. You will also find that the chain will bend
more easily in one direction than another. Keep this in mind when constructing your bracelet.


                                                                      Step 19: Measure up from the finished
                                                                      end and cut the length you need.

                                                                      If you want to reuse the flower
                                                                      constructed in Steps 3-4, cut the wires
                                                                      just below the petal tips. You will need
                                                                      to remove small wire bits from both the
                                                                      flower and the chain.


                                                      10
Coiled End Caps
                                            Judy Larson

                                 Not having end caps to finish a
                                 project should not stop you. Try
                                 these versatile and easy to make
                                 end caps.


Materials:                                                  Tools:
24 gauge dead soft round wire                               Flat and round nose pliers
20 gauge dead soft round wire                               Soft jaw pliers
Hint: Work from the wire spool because the sizes of         Flush cutter
mandrel you use makes a difference in the amount            000, 00, or 0 knitting needle
of wire you need for the end cap.                           Mandrel a bit smaller than the diameter of the
                                                            Viking Knit Chain
Directions:

                                                                          Step 1: Using 24 gauge wire, make
                                                                          two coils 2½” long each on a
                                                                          mandrel no smaller than a 000
                                                                          knitting needle (shown) but not a
                                                                          mandrel larger than a 0 knitting
                                                                          needle. Hint: Starting with a 1” wire
                                                                          tail keeps the wire coil stable when
                                                                          wrapping. Make the coil a bit longer
                                                                          than needed and then cut it to length.

Step 2: For a tight fitting end cap, the mandrel you choose for the next step should be slightly smaller than
the final hole you pulled the chain through since the wrapping will spring out a bit. For instance, if your chain
was drawn down to 13/64”, the mandrel could be 3/16”. If your chain was drawn down to ¼”, the mandrel
could be 7/32”. Of course, you could use the same size mandrel as the hole and the end cap would have a
loose fit.


                                                       11
Step 3: For this step, you must work from the spool of the 20 gauge wire.
                                   Pull off and straighten about 12” of wire. Slide one of the coils on the
                                   wire. Flush cut the wire end and spiral it until it is the size of the
                                   diameter of the mandrel.


Step 4: Hold the spiral on the mandrel. Wind the wire around the mandrel
four times, keeping the wraps as close together as possible.


Step 5: Push the 2½” coil tightly against the mandrel and continue coiling, keeping the coiled wire wraps as
close together as possible.


                                                                          Step 6: Cut the 20 gauge wire off
                                                                          ¾” from the wire coil. Spiral this
                                                                          wire up tightly to the wire coil.


Step 7: Push the end cap to the end of the mandrel. Push the top end spiral down over the top of the
mandrel. You may need to push the mandrel down on the table to get the coil to nestle inside the coil.


                                                     12
Step 8: Repeat for the other end cap.


                                                            Step 9: Check the fit on the Viking Knit chain.
                                                            If it is too loose, you can slide the cap on a
                                                            smaller mandrel and gently tighten the lower
                                                            coiled section.


Step 10: You can leave the end caps plain or use your imagination and dress them up with beads.


                                                    13
Viking Knit Bracelet
                                                        This tutorial is not for making Viking Knit but for
                                                        constructing a bracelet after the knit has been
                                                        constructed.

                                                        Hint: Follow these directions but make a longer
                                                        chain to make a necklace. A Viking Knit necklace
                                                        can be any length, but 18”-22” seems to be standard
                                                        for adding pendants.


Materials:                                               Tools:
Up to 7” of Viking Knit chain                            Round, chain and flat nose pliers
4 ½” of 18 gauge round wire                              Soft jaw pliers
8” of 20 gauge round wire                                Flush cutters
Two 10x7mm cone end caps (fits 5-7mm bead)               3/8” mandrel
Two 4mm round beads


Directions:

Construct The Hook:

                                Step 1: Straighten and cut a 4½” piece of 18 gauge round wire.

                                Step 2: On one end of the wire, make a slightly more than full circle with
                                the tip of a round nose pliers. Hint: You may find it easier to use a chain
                                nose pliers to start the center of the spiral.

                                Step 3: Using soft jaw pliers, tightly scroll the wire until the scroll is 2”
                                from the end of the wire.


Step 4: Place the tips of the round nose pliers as close to the scroll as possible, as shown. Bend the
wire over the plier tips and up the side of the scroll.

                                                   14
Step 5: Switch back to the soft
                                                                       jaw pliers and finish bending
                                                                       the wire up over the top of the
                                                                       scroll as shown, left.


                      Step 6: Bend the wire tail around the 3/8” mandrel as
                      shown, right


Step 7: Use the tip of round or chain nose pliers and make half a curl. Use flat nose pliers to press
the curl flat down to the wire.


Step 8: Construct a length of Viking knit and draw it down to fit inside the cone end cap you have chosen.
For this tutorial the wire was drawn down to 7/32”-13/64”. Hint:: If you make your own drawplate, you can
get more holes, and therefore more sizes, than if you purchase one.


                                                   15
Step 9: Refer to the following measurements and cut the knit chain the desired length. You might want to
make the bracelet a bit longer (between sizes) if your chain is larger than ¼”. When you determine where to
cut the chain, go one knit row beyond the length chosen, otherwise the wire loops you need to use will have
been cut off and the length will be a bit shorter than desired.

                      Finished Bracelet Length            Cut Knit Chain This Long

                                7”                               5-1/8”

                                7½”                              5-5/8”

                                8”                               6-1/8”

                                8¾”                               6¾”


Step 10: Remove all the small pieces of wire from the cut ends of the knit chain. Using chain nose pliers,
position as many of the knit loops as possible directly in front of each other, creating a “channel through
them.


                                                    16
Step 11: Cut two 4” pieces of 20 gauge wire.
                                                       Make a bend with flat nose pliers 1 ½” from the
                                                       end of each wire. Slide the hook through the loop
                                                       channel created in Step 10.


Step 12: Grasp the bend with a chain nose pliers. Wrap the short wire end tightly around the long wire,
trying to stay as close to the knit as possible. Trim off the short wire tail.


                                                                                     Step 13: Slide a
                                                                                     cone bead cap on
                                                                                     the wire. Pull the
                                                                                     wire will pushing
                                                                                     the    bead      cap
                                                                                     down. This will
                                                                                     seat the knit into
                                                                                     the bead cap.
                                                                                     Slide on a bead.


                                                  17
Step 14: Make a wire wrapped loop on the end of the
                                                 wire. Make sure that the eye is large enough to fit the
                                                 end of the hook through.

                                                 Step 15: Repeat Steps 12-14 on the other end of the
                                                 Viking Knit chain. Make sure that the eye loop on the
                                                 second end is the same size as the eye on the first end.

                                                 Step 16: Slide the hook onto one of the eyes. The
                                                 bracelet needs to curve easily around your wrist. Hold
                                                 the bracelet in you hand. You will notice that it bends
                                                 more easily in one direction than another. Hook the
bracelet. Bend the eyes perpendicular to your wrist. Curve the cone and wire ends of the bracelet into a
slight curve.


                                                  18
Make A Viking Knit Drawplate
                                            Judy Larson

Purchased wooden drawplates for Viking Knit are great and not very expensive. Since many of us
have or have access to wood scraps and a power drill and assorted drill bits, why not make your
own!

Shown here is a 1x2 piece of oak drilled with bits ranging in size from 5/8” down to 1/8”. Any size
board will do, but it should be solid, not plywood, and it should be a hardwood. Searching the
internet will produce several different shapes for your drawplate.

Another tip is to countersink the holes on both sides. This makes the knit slide smoother over the
rounded edge of the holes instead of snagging on the sharp edge of the opening.

Make sure to mark the hole sizes with a fine point sharpie.

Do not stain or finish the wood as this could rub off on the chains as you pull them through.


Tips about drawing the knit chain through the holes:

   1. Pull the knit through each hole twice. It will make the chain easier to pull through the next
      size down as well as keep the chain round.
   2. It will be much more difficult to draw the chain through the smaller holes.
   3. Holding the board down and pulling toward you is not a good idea. You may end up hitting
      yourself in the face. (see the next step-you could break teeth or need stitches)
   4. When you find it difficult to pull the chain through the hole, push the flower base through
      the hole and pull with a pliers from your workbench, not the ones you use for your jewelry
      making.
   5. Your chain can be drawn up to two times the original length. Hint: Make note on your
      tutorial of the items you have made, the original knit length, length it was drawn down to in
      what size hole.


                                                 19

Weitere ähnliche Inhalte

Was ist angesagt?

Ceramic slab building techniques
Ceramic slab building techniquesCeramic slab building techniques
Ceramic slab building techniquesmichelehart1
 
Introduction to clay
Introduction to clayIntroduction to clay
Introduction to clayNatalie Hurd
 
บทที่ 3cxแป้นหมุน
บทที่ 3cxแป้นหมุนบทที่ 3cxแป้นหมุน
บทที่ 3cxแป้นหมุนSmile Suputtra
 
Text Messages to Send to Your Ex Girlfriend to Get Her Back
Text Messages to Send to Your Ex Girlfriend to Get Her BackText Messages to Send to Your Ex Girlfriend to Get Her Back
Text Messages to Send to Your Ex Girlfriend to Get Her BackExbackExpertFrankie
 
Maquina Vertical De Colchar Cabos
Maquina Vertical De Colchar CabosMaquina Vertical De Colchar Cabos
Maquina Vertical De Colchar Cabosnolo493
 
Industrial Sewing Machine Parts and Their Functions
Industrial Sewing Machine Parts and Their FunctionsIndustrial Sewing Machine Parts and Their Functions
Industrial Sewing Machine Parts and Their FunctionsCandCSewing
 
งานโลหะแผ่น4 2
งานโลหะแผ่น4 2งานโลหะแผ่น4 2
งานโลหะแผ่น4 2Pannathat Champakul
 
Seams and Sewing Machine
Seams and Sewing MachineSeams and Sewing Machine
Seams and Sewing MachineBiniya Arakkal
 
[บทที่10]ภาวะผู้นำ
[บทที่10]ภาวะผู้นำ[บทที่10]ภาวะผู้นำ
[บทที่10]ภาวะผู้นำguest817d3d
 
Design and sketching workshop
Design and sketching workshopDesign and sketching workshop
Design and sketching workshopRakesh Kumar Das
 
Machine Maintenance and Simple Troubleshooting
Machine Maintenance and Simple TroubleshootingMachine Maintenance and Simple Troubleshooting
Machine Maintenance and Simple TroubleshootingCJ F.
 
Hand Sewing Stitches PPT with videos.pdf
Hand Sewing Stitches PPT with videos.pdfHand Sewing Stitches PPT with videos.pdf
Hand Sewing Stitches PPT with videos.pdfjmarce1
 

Was ist angesagt? (20)

Ceramic slab building techniques
Ceramic slab building techniquesCeramic slab building techniques
Ceramic slab building techniques
 
Introduction to clay
Introduction to clayIntroduction to clay
Introduction to clay
 
บทที่ 3cxแป้นหมุน
บทที่ 3cxแป้นหมุนบทที่ 3cxแป้นหมุน
บทที่ 3cxแป้นหมุน
 
503
503503
503
 
401
401401
401
 
Text Messages to Send to Your Ex Girlfriend to Get Her Back
Text Messages to Send to Your Ex Girlfriend to Get Her BackText Messages to Send to Your Ex Girlfriend to Get Her Back
Text Messages to Send to Your Ex Girlfriend to Get Her Back
 
Maquina Vertical De Colchar Cabos
Maquina Vertical De Colchar CabosMaquina Vertical De Colchar Cabos
Maquina Vertical De Colchar Cabos
 
Industrial Sewing Machine Parts and Their Functions
Industrial Sewing Machine Parts and Their FunctionsIndustrial Sewing Machine Parts and Their Functions
Industrial Sewing Machine Parts and Their Functions
 
2 5
2 52 5
2 5
 
Basic Hand Stitches
Basic Hand StitchesBasic Hand Stitches
Basic Hand Stitches
 
402
402402
402
 
Lathe Machine
Lathe Machine Lathe Machine
Lathe Machine
 
Garments sewing machine
Garments sewing machineGarments sewing machine
Garments sewing machine
 
งานโลหะแผ่น4 2
งานโลหะแผ่น4 2งานโลหะแผ่น4 2
งานโลหะแผ่น4 2
 
Seams and Sewing Machine
Seams and Sewing MachineSeams and Sewing Machine
Seams and Sewing Machine
 
505
505505
505
 
[บทที่10]ภาวะผู้นำ
[บทที่10]ภาวะผู้นำ[บทที่10]ภาวะผู้นำ
[บทที่10]ภาวะผู้นำ
 
Design and sketching workshop
Design and sketching workshopDesign and sketching workshop
Design and sketching workshop
 
Machine Maintenance and Simple Troubleshooting
Machine Maintenance and Simple TroubleshootingMachine Maintenance and Simple Troubleshooting
Machine Maintenance and Simple Troubleshooting
 
Hand Sewing Stitches PPT with videos.pdf
Hand Sewing Stitches PPT with videos.pdfHand Sewing Stitches PPT with videos.pdf
Hand Sewing Stitches PPT with videos.pdf
 

Ähnlich wie Viking Knit Tutorial

Rough Draft Lanyard Instructions
Rough Draft Lanyard InstructionsRough Draft Lanyard Instructions
Rough Draft Lanyard InstructionsVickie Buenger
 
Imaginative Spring Butterfly Pendant Tutorial
Imaginative Spring Butterfly Pendant Tutorial Imaginative Spring Butterfly Pendant Tutorial
Imaginative Spring Butterfly Pendant Tutorial HouseofGems.com
 
Wire Wrapped Sweetheart Round Cabochon Pendant
Wire Wrapped Sweetheart Round Cabochon PendantWire Wrapped Sweetheart Round Cabochon Pendant
Wire Wrapped Sweetheart Round Cabochon PendantThe Beading Gem's Journal
 
How to make friendship bracelets
How to make friendship braceletsHow to make friendship bracelets
How to make friendship braceletscubbypanda1234
 
Arcadian Legends Pendant Woven Wire Tutorial
Arcadian Legends Pendant Woven Wire TutorialArcadian Legends Pendant Woven Wire Tutorial
Arcadian Legends Pendant Woven Wire TutorialHouseofGems.com
 
Exquisite Copper Wire Earrings With Crystal Beads
Exquisite Copper Wire Earrings With Crystal BeadsExquisite Copper Wire Earrings With Crystal Beads
Exquisite Copper Wire Earrings With Crystal BeadsHouseofGems.com
 
How to make_friendship_bracelets_1_[1]
How to make_friendship_bracelets_1_[1]How to make_friendship_bracelets_1_[1]
How to make_friendship_bracelets_1_[1]cubbypanda1234
 
Erin's Dream Lanyards--Instructions
Erin's Dream Lanyards--InstructionsErin's Dream Lanyards--Instructions
Erin's Dream Lanyards--InstructionsVickie Buenger
 
How To Make Twisted Cord
How To Make Twisted CordHow To Make Twisted Cord
How To Make Twisted Cordkootoyoo
 
Knitting_and_Crocheting.ppt
Knitting_and_Crocheting.pptKnitting_and_Crocheting.ppt
Knitting_and_Crocheting.pptMarkEdwardOlango
 
How to Make Snowflake Pearl Pendant DIY Jewelry Making Tutorial
How to Make Snowflake Pearl Pendant DIY Jewelry Making TutorialHow to Make Snowflake Pearl Pendant DIY Jewelry Making Tutorial
How to Make Snowflake Pearl Pendant DIY Jewelry Making TutorialHouseofGems.com
 
How To Make A Duct Tape Rose
How To Make A Duct Tape RoseHow To Make A Duct Tape Rose
How To Make A Duct Tape Rosedarebear
 
How to-make-beaded-clasp
How to-make-beaded-claspHow to-make-beaded-clasp
How to-make-beaded-claspcrazyleo74
 

Ähnlich wie Viking Knit Tutorial (20)

Rough Draft Lanyard Instructions
Rough Draft Lanyard InstructionsRough Draft Lanyard Instructions
Rough Draft Lanyard Instructions
 
Imaginative Spring Butterfly Pendant Tutorial
Imaginative Spring Butterfly Pendant Tutorial Imaginative Spring Butterfly Pendant Tutorial
Imaginative Spring Butterfly Pendant Tutorial
 
Wire Wrapped Sweetheart Round Cabochon Pendant
Wire Wrapped Sweetheart Round Cabochon PendantWire Wrapped Sweetheart Round Cabochon Pendant
Wire Wrapped Sweetheart Round Cabochon Pendant
 
How to make friendship bracelets
How to make friendship braceletsHow to make friendship bracelets
How to make friendship bracelets
 
Arcadian Legends Pendant Woven Wire Tutorial
Arcadian Legends Pendant Woven Wire TutorialArcadian Legends Pendant Woven Wire Tutorial
Arcadian Legends Pendant Woven Wire Tutorial
 
Hope Wire Woven Necklace Tutorial
Hope  Wire Woven Necklace Tutorial Hope  Wire Woven Necklace Tutorial
Hope Wire Woven Necklace Tutorial
 
Exquisite Copper Wire Earrings With Crystal Beads
Exquisite Copper Wire Earrings With Crystal BeadsExquisite Copper Wire Earrings With Crystal Beads
Exquisite Copper Wire Earrings With Crystal Beads
 
How to make_friendship_bracelets_1_[1]
How to make_friendship_bracelets_1_[1]How to make_friendship_bracelets_1_[1]
How to make_friendship_bracelets_1_[1]
 
Erin's Dream Lanyards--Instructions
Erin's Dream Lanyards--InstructionsErin's Dream Lanyards--Instructions
Erin's Dream Lanyards--Instructions
 
Cardboard Loom
Cardboard LoomCardboard Loom
Cardboard Loom
 
Leftover madness bead necklace
Leftover madness bead necklaceLeftover madness bead necklace
Leftover madness bead necklace
 
How To Make Twisted Cord
How To Make Twisted CordHow To Make Twisted Cord
How To Make Twisted Cord
 
1010 bbj5 wire
1010 bbj5 wire1010 bbj5 wire
1010 bbj5 wire
 
Knitting_and_Crocheting.ppt
Knitting_and_Crocheting.pptKnitting_and_Crocheting.ppt
Knitting_and_Crocheting.ppt
 
Pdf flower loopbow
Pdf flower loopbowPdf flower loopbow
Pdf flower loopbow
 
Gemstone Tassel Earrings tutorial
Gemstone Tassel Earrings tutorialGemstone Tassel Earrings tutorial
Gemstone Tassel Earrings tutorial
 
How to Make Snowflake Pearl Pendant DIY Jewelry Making Tutorial
How to Make Snowflake Pearl Pendant DIY Jewelry Making TutorialHow to Make Snowflake Pearl Pendant DIY Jewelry Making Tutorial
How to Make Snowflake Pearl Pendant DIY Jewelry Making Tutorial
 
How To Make A Duct Tape Rose
How To Make A Duct Tape RoseHow To Make A Duct Tape Rose
How To Make A Duct Tape Rose
 
How to-make-beaded-clasp
How to-make-beaded-claspHow to-make-beaded-clasp
How to-make-beaded-clasp
 
Tatting1
Tatting1Tatting1
Tatting1
 

Mehr von The Beading Gem's Journal (15)

Beaded Bead Tutorial
Beaded Bead TutorialBeaded Bead Tutorial
Beaded Bead Tutorial
 
Chaton Montee Beaded Bracelet Tutorial
Chaton Montee Beaded Bracelet TutorialChaton Montee Beaded Bracelet Tutorial
Chaton Montee Beaded Bracelet Tutorial
 
Beaded Snowflake Necklace Tutorial
Beaded Snowflake Necklace Tutorial Beaded Snowflake Necklace Tutorial
Beaded Snowflake Necklace Tutorial
 
Sea Grass Woven Wire Pendant
Sea Grass Woven Wire PendantSea Grass Woven Wire Pendant
Sea Grass Woven Wire Pendant
 
How to Make Pearl Snap FastenerJewelry
How to Make Pearl Snap FastenerJewelryHow to Make Pearl Snap FastenerJewelry
How to Make Pearl Snap FastenerJewelry
 
Mega Collection of Southwest Inspired Metal Work Jewelry Tutorials
Mega Collection of Southwest Inspired Metal Work Jewelry TutorialsMega Collection of Southwest Inspired Metal Work Jewelry Tutorials
Mega Collection of Southwest Inspired Metal Work Jewelry Tutorials
 
Summer Fun Earrings Tutorial
Summer Fun Earrings TutorialSummer Fun Earrings Tutorial
Summer Fun Earrings Tutorial
 
Orbital Earrings Tutorial
Orbital Earrings TutorialOrbital Earrings Tutorial
Orbital Earrings Tutorial
 
Egyptian Coil Earrings Tutorial
Egyptian Coil Earrings TutorialEgyptian Coil Earrings Tutorial
Egyptian Coil Earrings Tutorial
 
Tree of life Neckpiece Pictorial
Tree of life Neckpiece PictorialTree of life Neckpiece Pictorial
Tree of life Neckpiece Pictorial
 
Bell Flower Earrings Tutorial
Bell Flower Earrings TutorialBell Flower Earrings Tutorial
Bell Flower Earrings Tutorial
 
How to Wire Wrap a Multi Gemstone Necklace
How to Wire Wrap a Multi Gemstone NecklaceHow to Wire Wrap a Multi Gemstone Necklace
How to Wire Wrap a Multi Gemstone Necklace
 
Easy Beaded Bangle Tutorial
Easy Beaded Bangle TutorialEasy Beaded Bangle Tutorial
Easy Beaded Bangle Tutorial
 
Skulla Rulla Beaded Skull Earrings
Skulla Rulla Beaded Skull Earrings Skulla Rulla Beaded Skull Earrings
Skulla Rulla Beaded Skull Earrings
 
Designer Wire Wrapped Clasp Hooks
Designer Wire Wrapped Clasp HooksDesigner Wire Wrapped Clasp Hooks
Designer Wire Wrapped Clasp Hooks
 

Kürzlich hochgeladen

Call Girls In Andheri East Call US Pooja📞 9892124323 Book Hot And
Call Girls In Andheri East Call US Pooja📞 9892124323 Book Hot AndCall Girls In Andheri East Call US Pooja📞 9892124323 Book Hot And
Call Girls In Andheri East Call US Pooja📞 9892124323 Book Hot AndPooja Nehwal
 
办理国外毕业证学位证《原版美国montana文凭》蒙大拿州立大学毕业证制作成绩单修改
办理国外毕业证学位证《原版美国montana文凭》蒙大拿州立大学毕业证制作成绩单修改办理国外毕业证学位证《原版美国montana文凭》蒙大拿州立大学毕业证制作成绩单修改
办理国外毕业证学位证《原版美国montana文凭》蒙大拿州立大学毕业证制作成绩单修改atducpo
 
Cheap Rate ➥8448380779 ▻Call Girls In Mg Road Gurgaon
Cheap Rate ➥8448380779 ▻Call Girls In Mg Road GurgaonCheap Rate ➥8448380779 ▻Call Girls In Mg Road Gurgaon
Cheap Rate ➥8448380779 ▻Call Girls In Mg Road GurgaonDelhi Call girls
 
Breath, Brain & Beyond_A Holistic Approach to Peak Performance.pdf
Breath, Brain & Beyond_A Holistic Approach to Peak Performance.pdfBreath, Brain & Beyond_A Holistic Approach to Peak Performance.pdf
Breath, Brain & Beyond_A Holistic Approach to Peak Performance.pdfJess Walker
 
Lilac Illustrated Social Psychology Presentation.pptx
Lilac Illustrated Social Psychology Presentation.pptxLilac Illustrated Social Psychology Presentation.pptx
Lilac Illustrated Social Psychology Presentation.pptxABMWeaklings
 
Reinventing Corporate Philanthropy_ Strategies for Meaningful Impact by Leko ...
Reinventing Corporate Philanthropy_ Strategies for Meaningful Impact by Leko ...Reinventing Corporate Philanthropy_ Strategies for Meaningful Impact by Leko ...
Reinventing Corporate Philanthropy_ Strategies for Meaningful Impact by Leko ...Leko Durda
 
call girls in candolim beach 9870370636] NORTH GOA ..
call girls in candolim beach 9870370636] NORTH GOA ..call girls in candolim beach 9870370636] NORTH GOA ..
call girls in candolim beach 9870370636] NORTH GOA ..nishakur201
 
CALL ON ➥8923113531 🔝Call Girls Mahanagar Lucknow best sexual service
CALL ON ➥8923113531 🔝Call Girls Mahanagar Lucknow best sexual serviceCALL ON ➥8923113531 🔝Call Girls Mahanagar Lucknow best sexual service
CALL ON ➥8923113531 🔝Call Girls Mahanagar Lucknow best sexual serviceanilsa9823
 
Call Girls in Kalyan Vihar Delhi 💯 Call Us 🔝8264348440🔝
Call Girls in Kalyan Vihar Delhi 💯 Call Us 🔝8264348440🔝Call Girls in Kalyan Vihar Delhi 💯 Call Us 🔝8264348440🔝
Call Girls in Kalyan Vihar Delhi 💯 Call Us 🔝8264348440🔝soniya singh
 
文凭办理《原版美国USU学位证书》犹他州立大学毕业证制作成绩单修改
文凭办理《原版美国USU学位证书》犹他州立大学毕业证制作成绩单修改文凭办理《原版美国USU学位证书》犹他州立大学毕业证制作成绩单修改
文凭办理《原版美国USU学位证书》犹他州立大学毕业证制作成绩单修改atducpo
 
CALL ON ➥8923113531 🔝Call Girls Aliganj Lucknow best sexual service
CALL ON ➥8923113531 🔝Call Girls Aliganj Lucknow best sexual serviceCALL ON ➥8923113531 🔝Call Girls Aliganj Lucknow best sexual service
CALL ON ➥8923113531 🔝Call Girls Aliganj Lucknow best sexual serviceanilsa9823
 
Postal Ballot procedure for employees to utilise
Postal Ballot procedure for employees to utilisePostal Ballot procedure for employees to utilise
Postal Ballot procedure for employees to utiliseccsubcollector
 
Lucknow 💋 High Class Call Girls Lucknow 10k @ I'm VIP Independent Escorts Gir...
Lucknow 💋 High Class Call Girls Lucknow 10k @ I'm VIP Independent Escorts Gir...Lucknow 💋 High Class Call Girls Lucknow 10k @ I'm VIP Independent Escorts Gir...
Lucknow 💋 High Class Call Girls Lucknow 10k @ I'm VIP Independent Escorts Gir...anilsa9823
 
Call Girls Anjuna beach Mariott Resort ₰8588052666
Call Girls Anjuna beach Mariott Resort ₰8588052666Call Girls Anjuna beach Mariott Resort ₰8588052666
Call Girls Anjuna beach Mariott Resort ₰8588052666nishakur201
 
The Selfspace Journal Preview by Mindbrush
The Selfspace Journal Preview by MindbrushThe Selfspace Journal Preview by Mindbrush
The Selfspace Journal Preview by MindbrushShivain97
 
Dhule Call Girls #9907093804 Contact Number Escorts Service Dhule
Dhule Call Girls #9907093804 Contact Number Escorts Service DhuleDhule Call Girls #9907093804 Contact Number Escorts Service Dhule
Dhule Call Girls #9907093804 Contact Number Escorts Service Dhulesrsj9000
 
《塔夫斯大学毕业证成绩单购买》做Tufts文凭毕业证成绩单/伪造美国假文凭假毕业证书图片Q微信741003700《塔夫斯大学毕业证购买》《Tufts毕业文...
《塔夫斯大学毕业证成绩单购买》做Tufts文凭毕业证成绩单/伪造美国假文凭假毕业证书图片Q微信741003700《塔夫斯大学毕业证购买》《Tufts毕业文...《塔夫斯大学毕业证成绩单购买》做Tufts文凭毕业证成绩单/伪造美国假文凭假毕业证书图片Q微信741003700《塔夫斯大学毕业证购买》《Tufts毕业文...
《塔夫斯大学毕业证成绩单购买》做Tufts文凭毕业证成绩单/伪造美国假文凭假毕业证书图片Q微信741003700《塔夫斯大学毕业证购买》《Tufts毕业文...ur8mqw8e
 
REFLECTIONS Newsletter Jan-Jul 2024.pdf.pdf
REFLECTIONS Newsletter Jan-Jul 2024.pdf.pdfREFLECTIONS Newsletter Jan-Jul 2024.pdf.pdf
REFLECTIONS Newsletter Jan-Jul 2024.pdf.pdfssusere8ea60
 

Kürzlich hochgeladen (20)

Call Girls In Andheri East Call US Pooja📞 9892124323 Book Hot And
Call Girls In Andheri East Call US Pooja📞 9892124323 Book Hot AndCall Girls In Andheri East Call US Pooja📞 9892124323 Book Hot And
Call Girls In Andheri East Call US Pooja📞 9892124323 Book Hot And
 
办理国外毕业证学位证《原版美国montana文凭》蒙大拿州立大学毕业证制作成绩单修改
办理国外毕业证学位证《原版美国montana文凭》蒙大拿州立大学毕业证制作成绩单修改办理国外毕业证学位证《原版美国montana文凭》蒙大拿州立大学毕业证制作成绩单修改
办理国外毕业证学位证《原版美国montana文凭》蒙大拿州立大学毕业证制作成绩单修改
 
Cheap Rate ➥8448380779 ▻Call Girls In Mg Road Gurgaon
Cheap Rate ➥8448380779 ▻Call Girls In Mg Road GurgaonCheap Rate ➥8448380779 ▻Call Girls In Mg Road Gurgaon
Cheap Rate ➥8448380779 ▻Call Girls In Mg Road Gurgaon
 
Breath, Brain & Beyond_A Holistic Approach to Peak Performance.pdf
Breath, Brain & Beyond_A Holistic Approach to Peak Performance.pdfBreath, Brain & Beyond_A Holistic Approach to Peak Performance.pdf
Breath, Brain & Beyond_A Holistic Approach to Peak Performance.pdf
 
Lilac Illustrated Social Psychology Presentation.pptx
Lilac Illustrated Social Psychology Presentation.pptxLilac Illustrated Social Psychology Presentation.pptx
Lilac Illustrated Social Psychology Presentation.pptx
 
Reinventing Corporate Philanthropy_ Strategies for Meaningful Impact by Leko ...
Reinventing Corporate Philanthropy_ Strategies for Meaningful Impact by Leko ...Reinventing Corporate Philanthropy_ Strategies for Meaningful Impact by Leko ...
Reinventing Corporate Philanthropy_ Strategies for Meaningful Impact by Leko ...
 
call girls in candolim beach 9870370636] NORTH GOA ..
call girls in candolim beach 9870370636] NORTH GOA ..call girls in candolim beach 9870370636] NORTH GOA ..
call girls in candolim beach 9870370636] NORTH GOA ..
 
CALL ON ➥8923113531 🔝Call Girls Mahanagar Lucknow best sexual service
CALL ON ➥8923113531 🔝Call Girls Mahanagar Lucknow best sexual serviceCALL ON ➥8923113531 🔝Call Girls Mahanagar Lucknow best sexual service
CALL ON ➥8923113531 🔝Call Girls Mahanagar Lucknow best sexual service
 
Call Girls in Kalyan Vihar Delhi 💯 Call Us 🔝8264348440🔝
Call Girls in Kalyan Vihar Delhi 💯 Call Us 🔝8264348440🔝Call Girls in Kalyan Vihar Delhi 💯 Call Us 🔝8264348440🔝
Call Girls in Kalyan Vihar Delhi 💯 Call Us 🔝8264348440🔝
 
文凭办理《原版美国USU学位证书》犹他州立大学毕业证制作成绩单修改
文凭办理《原版美国USU学位证书》犹他州立大学毕业证制作成绩单修改文凭办理《原版美国USU学位证书》犹他州立大学毕业证制作成绩单修改
文凭办理《原版美国USU学位证书》犹他州立大学毕业证制作成绩单修改
 
CALL ON ➥8923113531 🔝Call Girls Aliganj Lucknow best sexual service
CALL ON ➥8923113531 🔝Call Girls Aliganj Lucknow best sexual serviceCALL ON ➥8923113531 🔝Call Girls Aliganj Lucknow best sexual service
CALL ON ➥8923113531 🔝Call Girls Aliganj Lucknow best sexual service
 
Postal Ballot procedure for employees to utilise
Postal Ballot procedure for employees to utilisePostal Ballot procedure for employees to utilise
Postal Ballot procedure for employees to utilise
 
escort service sasti (*~Call Girls in Paschim Vihar Metro❤️9953056974
escort service  sasti (*~Call Girls in Paschim Vihar Metro❤️9953056974escort service  sasti (*~Call Girls in Paschim Vihar Metro❤️9953056974
escort service sasti (*~Call Girls in Paschim Vihar Metro❤️9953056974
 
Lucknow 💋 High Class Call Girls Lucknow 10k @ I'm VIP Independent Escorts Gir...
Lucknow 💋 High Class Call Girls Lucknow 10k @ I'm VIP Independent Escorts Gir...Lucknow 💋 High Class Call Girls Lucknow 10k @ I'm VIP Independent Escorts Gir...
Lucknow 💋 High Class Call Girls Lucknow 10k @ I'm VIP Independent Escorts Gir...
 
Call Girls Anjuna beach Mariott Resort ₰8588052666
Call Girls Anjuna beach Mariott Resort ₰8588052666Call Girls Anjuna beach Mariott Resort ₰8588052666
Call Girls Anjuna beach Mariott Resort ₰8588052666
 
The Selfspace Journal Preview by Mindbrush
The Selfspace Journal Preview by MindbrushThe Selfspace Journal Preview by Mindbrush
The Selfspace Journal Preview by Mindbrush
 
Model Call Girl in Lado Sarai Delhi reach out to us at 🔝9953056974🔝
Model Call Girl in Lado Sarai Delhi reach out to us at 🔝9953056974🔝Model Call Girl in Lado Sarai Delhi reach out to us at 🔝9953056974🔝
Model Call Girl in Lado Sarai Delhi reach out to us at 🔝9953056974🔝
 
Dhule Call Girls #9907093804 Contact Number Escorts Service Dhule
Dhule Call Girls #9907093804 Contact Number Escorts Service DhuleDhule Call Girls #9907093804 Contact Number Escorts Service Dhule
Dhule Call Girls #9907093804 Contact Number Escorts Service Dhule
 
《塔夫斯大学毕业证成绩单购买》做Tufts文凭毕业证成绩单/伪造美国假文凭假毕业证书图片Q微信741003700《塔夫斯大学毕业证购买》《Tufts毕业文...
《塔夫斯大学毕业证成绩单购买》做Tufts文凭毕业证成绩单/伪造美国假文凭假毕业证书图片Q微信741003700《塔夫斯大学毕业证购买》《Tufts毕业文...《塔夫斯大学毕业证成绩单购买》做Tufts文凭毕业证成绩单/伪造美国假文凭假毕业证书图片Q微信741003700《塔夫斯大学毕业证购买》《Tufts毕业文...
《塔夫斯大学毕业证成绩单购买》做Tufts文凭毕业证成绩单/伪造美国假文凭假毕业证书图片Q微信741003700《塔夫斯大学毕业证购买》《Tufts毕业文...
 
REFLECTIONS Newsletter Jan-Jul 2024.pdf.pdf
REFLECTIONS Newsletter Jan-Jul 2024.pdf.pdfREFLECTIONS Newsletter Jan-Jul 2024.pdf.pdf
REFLECTIONS Newsletter Jan-Jul 2024.pdf.pdf
 

Viking Knit Tutorial

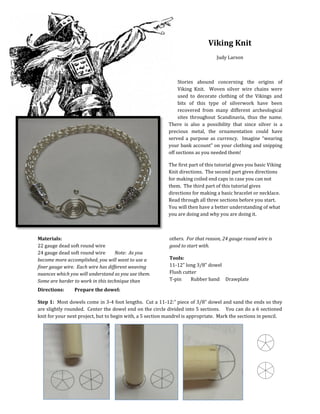
  • 1. Viking Knit Judy Larson Stories abound concerning the origins of Viking Knit. Woven silver wire chains were used to decorate clothing of the Vikings and bits of this type of silverwork have been recovered from many different archeological sites throughout Scandinavia, thus the name. There is also a possibility that since silver is a precious metal, the ornamentation could have served a purpose as currency. Imagine “wearing your bank account” on your clothing and snipping off sections as you needed them! The first part of this tutorial gives you basic Viking Knit directions. The second part gives directions for making coiled end caps in case you can not them. The third part of this tutorial gives directions for making a basic bracelet or necklace. Read through all three sections before you start. You will then have a better understanding of what you are doing and why you are doing it. Materials: others. For that reason, 24 gauge round wire is 22 gauge dead soft round wire good to start with. 24 gauge dead soft round wire Note: As you become more accomplished, you will want to use a Tools: finer gauge wire. Each wire has different weaving 11-12” long 3/8” dowel nuances which you will understand as you use them. Flush cutter Some are harder to work in this technique than T-pin Rubber band Drawplate Directions: Prepare the dowel: Step 1: Most dowels come in 3-4 foot lengths. Cut a 11-12:” piece of 3/8” dowel and sand the ends so they are slightly rounded. Center the dowel end on the circle divided into 5 sections. You can do a 6 sectioned knit for your next project, but to begin with, a 5 section mandrel is appropriate. Mark the sections in pencil.
  • 2. Step 2: Hold the dowel stable on a flat surface. Hold a pencil stable on the surface with the pencil lead on one of the lines. Slide the pencil across the flat surface making a line parallel to the surface the dowel is resting on. Repeat with the other marks. Hint: If you make a mistake, using pencil allows you to erase it and start over. Prepare the dowel: This step is not necessary but the lines do help beginners to keep the knit ribs straight. Step 3: A credit card or drivers license can be used for this step. Hint: The next time you get one of those fake plastic credit cards in the mail, keep it with your wire supplies to use when making Viking Knit. The flower you will be making in the next steps can be reused several times before you feel you need to make a new one. The size wire you use here can be the same size as the knit wire but one size larger seems to work best. Working from the spool, wrap the 22 gauge round wire around the credit card five times. Carefully slide the wire wraps off the card. Wrap the wire from the spool four times around all the wires about ½” in from one end. Trim the excess wires even with the looped ends. Step 4: Spread the long loops out to form a flower with five petals. 2
  • 3. Step 5: Place the flower on top of the dowel and pull the petals down. Press the petals to the dowel. Secure the flower petals in place tightly with a rubber band. Step 6: Make sure that the lower loops of the flower petals are even all the way around the dowel. To do this, you may need to use your chain nose pliers to bend the wires above the dowel. After the petals are even, center each petal on a line. Step 7: Use the tips of your flat nose pliers to slightly bend up the lower 1/8” of each petal. This will make weaving the first row easier. When this is done, push the rubber band down closer to the lower ends of the flower. Note: The rubber band will not keep the petals tightly in place but it is a tremendous help. You could use tape, but this will not keep the petals tightly in place either and it is more difficult to remove than the rubber band. After you have made a few Viking Knit items, you will find the first row (in the next steps) much easier to do. 3
  • 4. Step 8: Single Knit: When you first learn the Viking Knit technique, it is best to do the single knit. When you have mastered this, you can go on to double, or even triple knit. Steps 15-16 shows how to do a Double Knit. Also, when you first being, it is best to use shorter pieces of wire because they will kink less and are easier to use. When you become more accomplished, you may find that you will use 7, 8, or even 9 foot sections. For the purposes of this tutorial, you will be using three 3 foot sections of 24 gauge wire to make the Viking Knit chain which you will then make into a bracelet. The single knit will draw down to approximately twice the original length. The Viking Knit “stitch” is almost like sewing. Thread the wire through a flower petal from the outside to the inside, from the right to the left. Pull the wire through until there is about 1” of wire tail left. Pull the wire down on both sides of the loop. Step 9: Holding the short wire tail down to the dowel with your left hand, pull the long wire down and over the top of the tail wire and to the right. 4
  • 5. Step 10: Hold the crossed over loop stitch created in Step 9 down with your thumb. Move to the loop to the right of that stitch and thread the wire through a flower petal from the outside to the inside, from the right to the left. Pull the wire to the left and then down. Wire Hints: When pulling the long wire through a loop, you may end up with tangle wires. Be aware of this before it causes a problem. If the wires twist over each other, just twist them back (photo 1 and 2). If you did not catch the crossed wires in time, you may end up with a tight kink in the wire (photo 3). It is imperative that you “back the kink out” or unbend the wire (photo 4). Do not try to pull it straight or the kink will just get tighter. When you have knit 1/3 of the way down the dowel, you will need to push the knit chain up a few inches to make it easier to finish. 5
  • 6. 1. 2. 3. 4. 6
  • 7. Step 11: Hold the new stitch down with your thumb. Pull the wire to the right. Repeat Step 10 and the beginning of this step until you reach the first stitch you did. Try to keep the tips of the petals on the lines. This first row will not be very neat, but do not worry. Step 12: For the next row, you will stitch behind the “X” formed at the lower end of each loop in the previous row. If you can not slide the wire under the crossed wires, you may need to use the T-pin to lift them up. Each stitch is done in the same manner as the first row- while holding the previous stitch down, stitch from right to left, pull the wire down and then to the right. Do not worry about the beginning wire tail. Just move it out of the way between the lines. 7
  • 8. Step 13: Continue to stitch around the dowel. When you first start, your stitches will not be even. Do not worry. The drawplate takes care of all inconsistencies. You will find that by the time you are done with the second 3 foot length of wire, there will be a rhythm to your stitches. If you find that one of your knit ribs is moving away from the line, use the T-pin to bend it back into place. Step 14: When you have 1½”-2” of wire left, it is time to attach a new wire. There are several ways to do this. Each wire artisan has their favorite method. Two will be shown here. Using another 3 foot section of wire, move on to the next crossed loop and make another stitch, pulling the wire through until the wire tail is the same length as the wire you had left on the previous stitch. You will notice that the new stitch is loose. Moving around the dowel, make another stitch or two to stabilize the wire. At this point, you can twist the wire tails tightly together until the wire “swag” between the crossed wire stitches is similar in size to the other “swags” you have been making between stitches. Trim the twisted wire tail to 3/8” in length. Continue around the dowel. When you reach the connected wires, pull the wire over them and continue around the dowel, always going over the twisted wires. 8
  • 9. For the other method, pull the wire tails down onto the line. Trim the tails to ¾”. When making a stitch, slide the long wire under the tail, make the stitch under the crossed wires, and then pull the wire over the tail. Continue around the dowel in the manner, going under and over the wire tail, encapsulating it, when you make a stitch, until there is no more tail. You will be doing this with both wire tails each time you add a new wire. Step 15: Double Knit: If you would like to make a more dense, less airy chain, you can do a double instead of a single knit. To do this, instead of going up to the previous row, go up two rows and stitch under the crossed over wires. Constructing the stitch is the same, just two rows up. Step 16: After completing one round, you still go up two rows to make the next stitch. Continue in this manner until you have reached the desired length. A double knit does not draw down to double length, but just a little over 1.5 times the original length. 9
  • 10. Step 17: Remove the knit from the dowel. You may have to grasp the knit on the dowel with your hand, slightly twist it back and forth, and “worry” it up and off the dowel. Remove the rubber band. Use flat nosed pliers to flatten the bent portions of the flower. Step 18: Push the flower section through the largest hole the chain will fit through. Pull the petal section and chain through the hole. Do this twice in each successive hole until the chain is the desired size. You will notice that any imperfections in the chain are no longer noticeable. You will also find that the chain will bend more easily in one direction than another. Keep this in mind when constructing your bracelet. Step 19: Measure up from the finished end and cut the length you need. If you want to reuse the flower constructed in Steps 3-4, cut the wires just below the petal tips. You will need to remove small wire bits from both the flower and the chain. 10
  • 11. Coiled End Caps Judy Larson Not having end caps to finish a project should not stop you. Try these versatile and easy to make end caps. Materials: Tools: 24 gauge dead soft round wire Flat and round nose pliers 20 gauge dead soft round wire Soft jaw pliers Hint: Work from the wire spool because the sizes of Flush cutter mandrel you use makes a difference in the amount 000, 00, or 0 knitting needle of wire you need for the end cap. Mandrel a bit smaller than the diameter of the Viking Knit Chain Directions: Step 1: Using 24 gauge wire, make two coils 2½” long each on a mandrel no smaller than a 000 knitting needle (shown) but not a mandrel larger than a 0 knitting needle. Hint: Starting with a 1” wire tail keeps the wire coil stable when wrapping. Make the coil a bit longer than needed and then cut it to length. Step 2: For a tight fitting end cap, the mandrel you choose for the next step should be slightly smaller than the final hole you pulled the chain through since the wrapping will spring out a bit. For instance, if your chain was drawn down to 13/64”, the mandrel could be 3/16”. If your chain was drawn down to ¼”, the mandrel could be 7/32”. Of course, you could use the same size mandrel as the hole and the end cap would have a loose fit. 11
  • 12. Step 3: For this step, you must work from the spool of the 20 gauge wire. Pull off and straighten about 12” of wire. Slide one of the coils on the wire. Flush cut the wire end and spiral it until it is the size of the diameter of the mandrel. Step 4: Hold the spiral on the mandrel. Wind the wire around the mandrel four times, keeping the wraps as close together as possible. Step 5: Push the 2½” coil tightly against the mandrel and continue coiling, keeping the coiled wire wraps as close together as possible. Step 6: Cut the 20 gauge wire off ¾” from the wire coil. Spiral this wire up tightly to the wire coil. Step 7: Push the end cap to the end of the mandrel. Push the top end spiral down over the top of the mandrel. You may need to push the mandrel down on the table to get the coil to nestle inside the coil. 12
  • 13. Step 8: Repeat for the other end cap. Step 9: Check the fit on the Viking Knit chain. If it is too loose, you can slide the cap on a smaller mandrel and gently tighten the lower coiled section. Step 10: You can leave the end caps plain or use your imagination and dress them up with beads. 13
  • 14. Viking Knit Bracelet This tutorial is not for making Viking Knit but for constructing a bracelet after the knit has been constructed. Hint: Follow these directions but make a longer chain to make a necklace. A Viking Knit necklace can be any length, but 18”-22” seems to be standard for adding pendants. Materials: Tools: Up to 7” of Viking Knit chain Round, chain and flat nose pliers 4 ½” of 18 gauge round wire Soft jaw pliers 8” of 20 gauge round wire Flush cutters Two 10x7mm cone end caps (fits 5-7mm bead) 3/8” mandrel Two 4mm round beads Directions: Construct The Hook: Step 1: Straighten and cut a 4½” piece of 18 gauge round wire. Step 2: On one end of the wire, make a slightly more than full circle with the tip of a round nose pliers. Hint: You may find it easier to use a chain nose pliers to start the center of the spiral. Step 3: Using soft jaw pliers, tightly scroll the wire until the scroll is 2” from the end of the wire. Step 4: Place the tips of the round nose pliers as close to the scroll as possible, as shown. Bend the wire over the plier tips and up the side of the scroll. 14
  • 15. Step 5: Switch back to the soft jaw pliers and finish bending the wire up over the top of the scroll as shown, left. Step 6: Bend the wire tail around the 3/8” mandrel as shown, right Step 7: Use the tip of round or chain nose pliers and make half a curl. Use flat nose pliers to press the curl flat down to the wire. Step 8: Construct a length of Viking knit and draw it down to fit inside the cone end cap you have chosen. For this tutorial the wire was drawn down to 7/32”-13/64”. Hint:: If you make your own drawplate, you can get more holes, and therefore more sizes, than if you purchase one. 15
  • 16. Step 9: Refer to the following measurements and cut the knit chain the desired length. You might want to make the bracelet a bit longer (between sizes) if your chain is larger than ¼”. When you determine where to cut the chain, go one knit row beyond the length chosen, otherwise the wire loops you need to use will have been cut off and the length will be a bit shorter than desired. Finished Bracelet Length Cut Knit Chain This Long 7” 5-1/8” 7½” 5-5/8” 8” 6-1/8” 8¾” 6¾” Step 10: Remove all the small pieces of wire from the cut ends of the knit chain. Using chain nose pliers, position as many of the knit loops as possible directly in front of each other, creating a “channel through them. 16
  • 17. Step 11: Cut two 4” pieces of 20 gauge wire. Make a bend with flat nose pliers 1 ½” from the end of each wire. Slide the hook through the loop channel created in Step 10. Step 12: Grasp the bend with a chain nose pliers. Wrap the short wire end tightly around the long wire, trying to stay as close to the knit as possible. Trim off the short wire tail. Step 13: Slide a cone bead cap on the wire. Pull the wire will pushing the bead cap down. This will seat the knit into the bead cap. Slide on a bead. 17
  • 18. Step 14: Make a wire wrapped loop on the end of the wire. Make sure that the eye is large enough to fit the end of the hook through. Step 15: Repeat Steps 12-14 on the other end of the Viking Knit chain. Make sure that the eye loop on the second end is the same size as the eye on the first end. Step 16: Slide the hook onto one of the eyes. The bracelet needs to curve easily around your wrist. Hold the bracelet in you hand. You will notice that it bends more easily in one direction than another. Hook the bracelet. Bend the eyes perpendicular to your wrist. Curve the cone and wire ends of the bracelet into a slight curve. 18
  • 19. Make A Viking Knit Drawplate Judy Larson Purchased wooden drawplates for Viking Knit are great and not very expensive. Since many of us have or have access to wood scraps and a power drill and assorted drill bits, why not make your own! Shown here is a 1x2 piece of oak drilled with bits ranging in size from 5/8” down to 1/8”. Any size board will do, but it should be solid, not plywood, and it should be a hardwood. Searching the internet will produce several different shapes for your drawplate. Another tip is to countersink the holes on both sides. This makes the knit slide smoother over the rounded edge of the holes instead of snagging on the sharp edge of the opening. Make sure to mark the hole sizes with a fine point sharpie. Do not stain or finish the wood as this could rub off on the chains as you pull them through. Tips about drawing the knit chain through the holes: 1. Pull the knit through each hole twice. It will make the chain easier to pull through the next size down as well as keep the chain round. 2. It will be much more difficult to draw the chain through the smaller holes. 3. Holding the board down and pulling toward you is not a good idea. You may end up hitting yourself in the face. (see the next step-you could break teeth or need stitches) 4. When you find it difficult to pull the chain through the hole, push the flower base through the hole and pull with a pliers from your workbench, not the ones you use for your jewelry making. 5. Your chain can be drawn up to two times the original length. Hint: Make note on your tutorial of the items you have made, the original knit length, length it was drawn down to in what size hole. 19